# Sketch Documentation
# Docs
--------------------------------------------------------------------------------
title: "Getting started"
description: "Find out how to get started in Sketch with the help of our step-by-step guides and video tutorials."
last_modified: "2026-01-23"
url: "https://www.sketch.com/docs/getting-started/"
--------------------------------------------------------------------------------
## Getting started
Welcome to Sketch. In our Getting Started guides, we’ll show you how to set up your Workspace, the Mac and iOS apps, and make the most of everything Sketch has to offer.
--------------------------------------------------------------------------------
title: "What is Sketch?"
description: "Learn about how Sketch can help you create beautiful products at scale, whether you’re working alone or collaboratively."
last_modified: "2026-05-19"
url: "https://www.sketch.com/docs/getting-started/what-is-sketch/"
--------------------------------------------------------------------------------
## What is Sketch?
Sketch is a design tool that covers the full product design process — building interfaces, creating design systems, prototyping interactions, and handing off to developers — for solo designers and teams alike.
It comes as three apps, each built for a different part of the process.
- **The Mac app** is where you design. Build interfaces, create reusable components and [Libraries](/docs/libraries/), set up design systems, and [prototype interactions](/docs/prototyping/) — all in one place.
- **The web app** is for everyone else on your team. Developers, managers, and stakeholders can view, [inspect](/docs/developer-handoff/inspect/), and [comment](/docs/sharing-and-collaborating/commenting/) on your work from any browser, on any platform. No Mac needed.
- **The [iOS app](/docs/getting-started/sketch-for-ios/)** lets you preview documents and prototypes on iPhone or iPad, and mirror designs in real-time as you edit them in the Mac app.
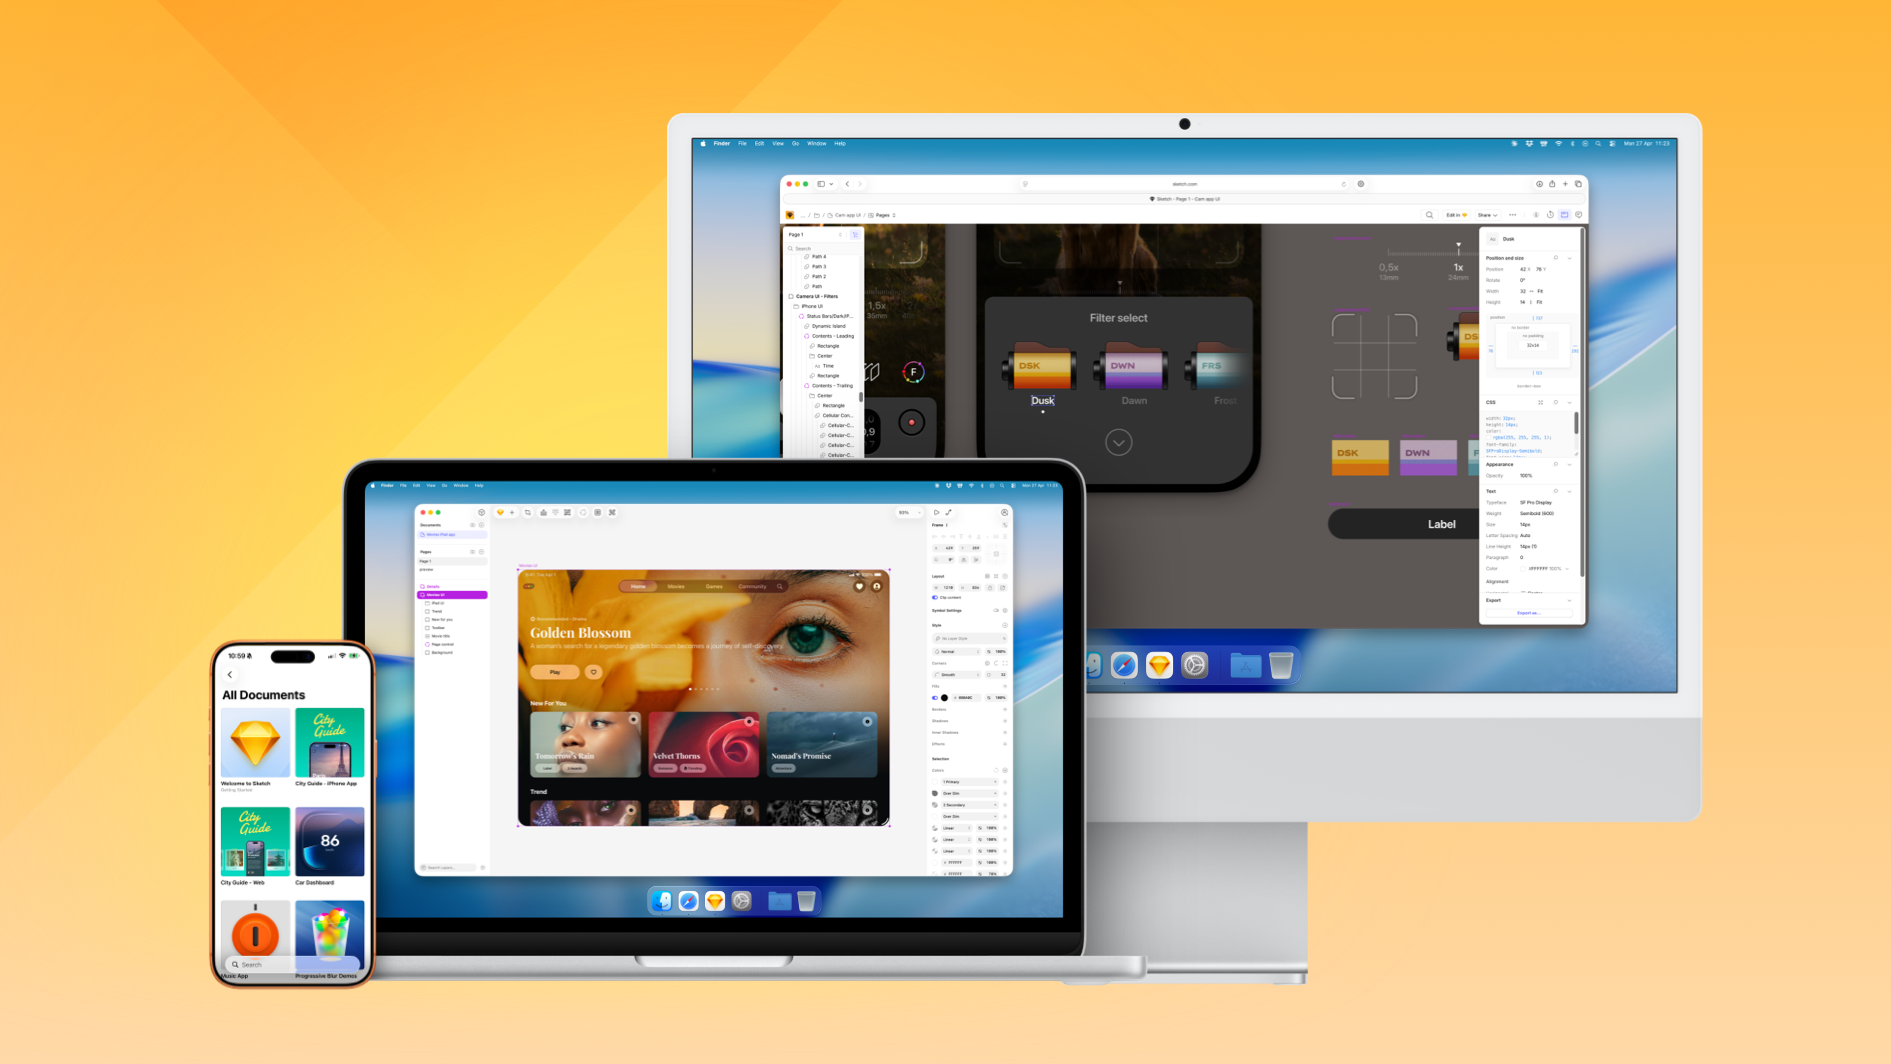
*The Mac app for designing, the web app for viewing and collaborating, and the iOS app for previewing on device*
## Where to start
- [Set up Sketch](/docs/getting-started/setting-up-sketch/) — create an account and start your 30-day free trial
- [Create your first document](/docs/getting-started/creating-opening-and-viewing-documents/) in the [Mac app](sketch://)
- Browse [tutorials and guides](/design-resources/) to get up to speed
- [Join the Community Discord](https://discord.gg/ascPpfDSSV) to ask questions and connect with other designers
## System requirements
Designing in Sketch requires a Mac running %latest_stable_requirements%. If you’re on an older version of macOS, check [previous releases](/releases/mac/) for a compatible version.
The web app is browser-based and works on any major operating system, so developers, managers and stakeholders can view, inspect and comment on documents from Windows, Linux or any other platform without a Mac.
--------------------------------------------------------------------------------
title: "Setting up Sketch"
description: "Learn how to set up Sketch with the help of our step-by-step guides."
last_modified: "2026-05-19"
url: "https://www.sketch.com/docs/getting-started/setting-up-sketch/"
--------------------------------------------------------------------------------
## Setting up Sketch
Welcome to Sketch! Here’s everything you need to get up and running, starting with a 30-day free trial.
## System requirements
Sketch runs on macOS only and is not supported in virtual machines (VM). Check the [releases page](/releases/mac/) to find the macOS version required for a specific version of Sketch — and to download a version that works with your system.
Although there are no specific requirements for RAM or processor speed, the more complex your documents, the more you’ll benefit from extra memory, CPU, and GPU power.
Some features have additional requirements:
- **Signing in as an Editor**: Sketch 65 or later
- **Real-time collaboration**: Sketch 71 or later, plus an active subscription
- **Single Sign-On (SSO)**: Professional plan, macOS 10.15, and Sketch 70.2 or later
## Starting your Sketch trial
> **Note:** Are you a student, teacher, or part of an academic institution? Sketch is free for education. [Verify your status](/education/) before starting a trial.
Every Sketch trial starts with creating an account and Workspace so you can explore the Mac app and web collaboration tools. [Learn more about our 30-day trial](/support/subscriptions/getting-started/free-trial/).
1. [Download](/downloads/mac/) and install the Mac app. If you’re unsure whether your Mac is supported, check [system requirements](/releases/mac/).
2. Create your account by signing in with Apple, Google, or your email address. If you sign up with email, enter your name and create a password on the next screen.
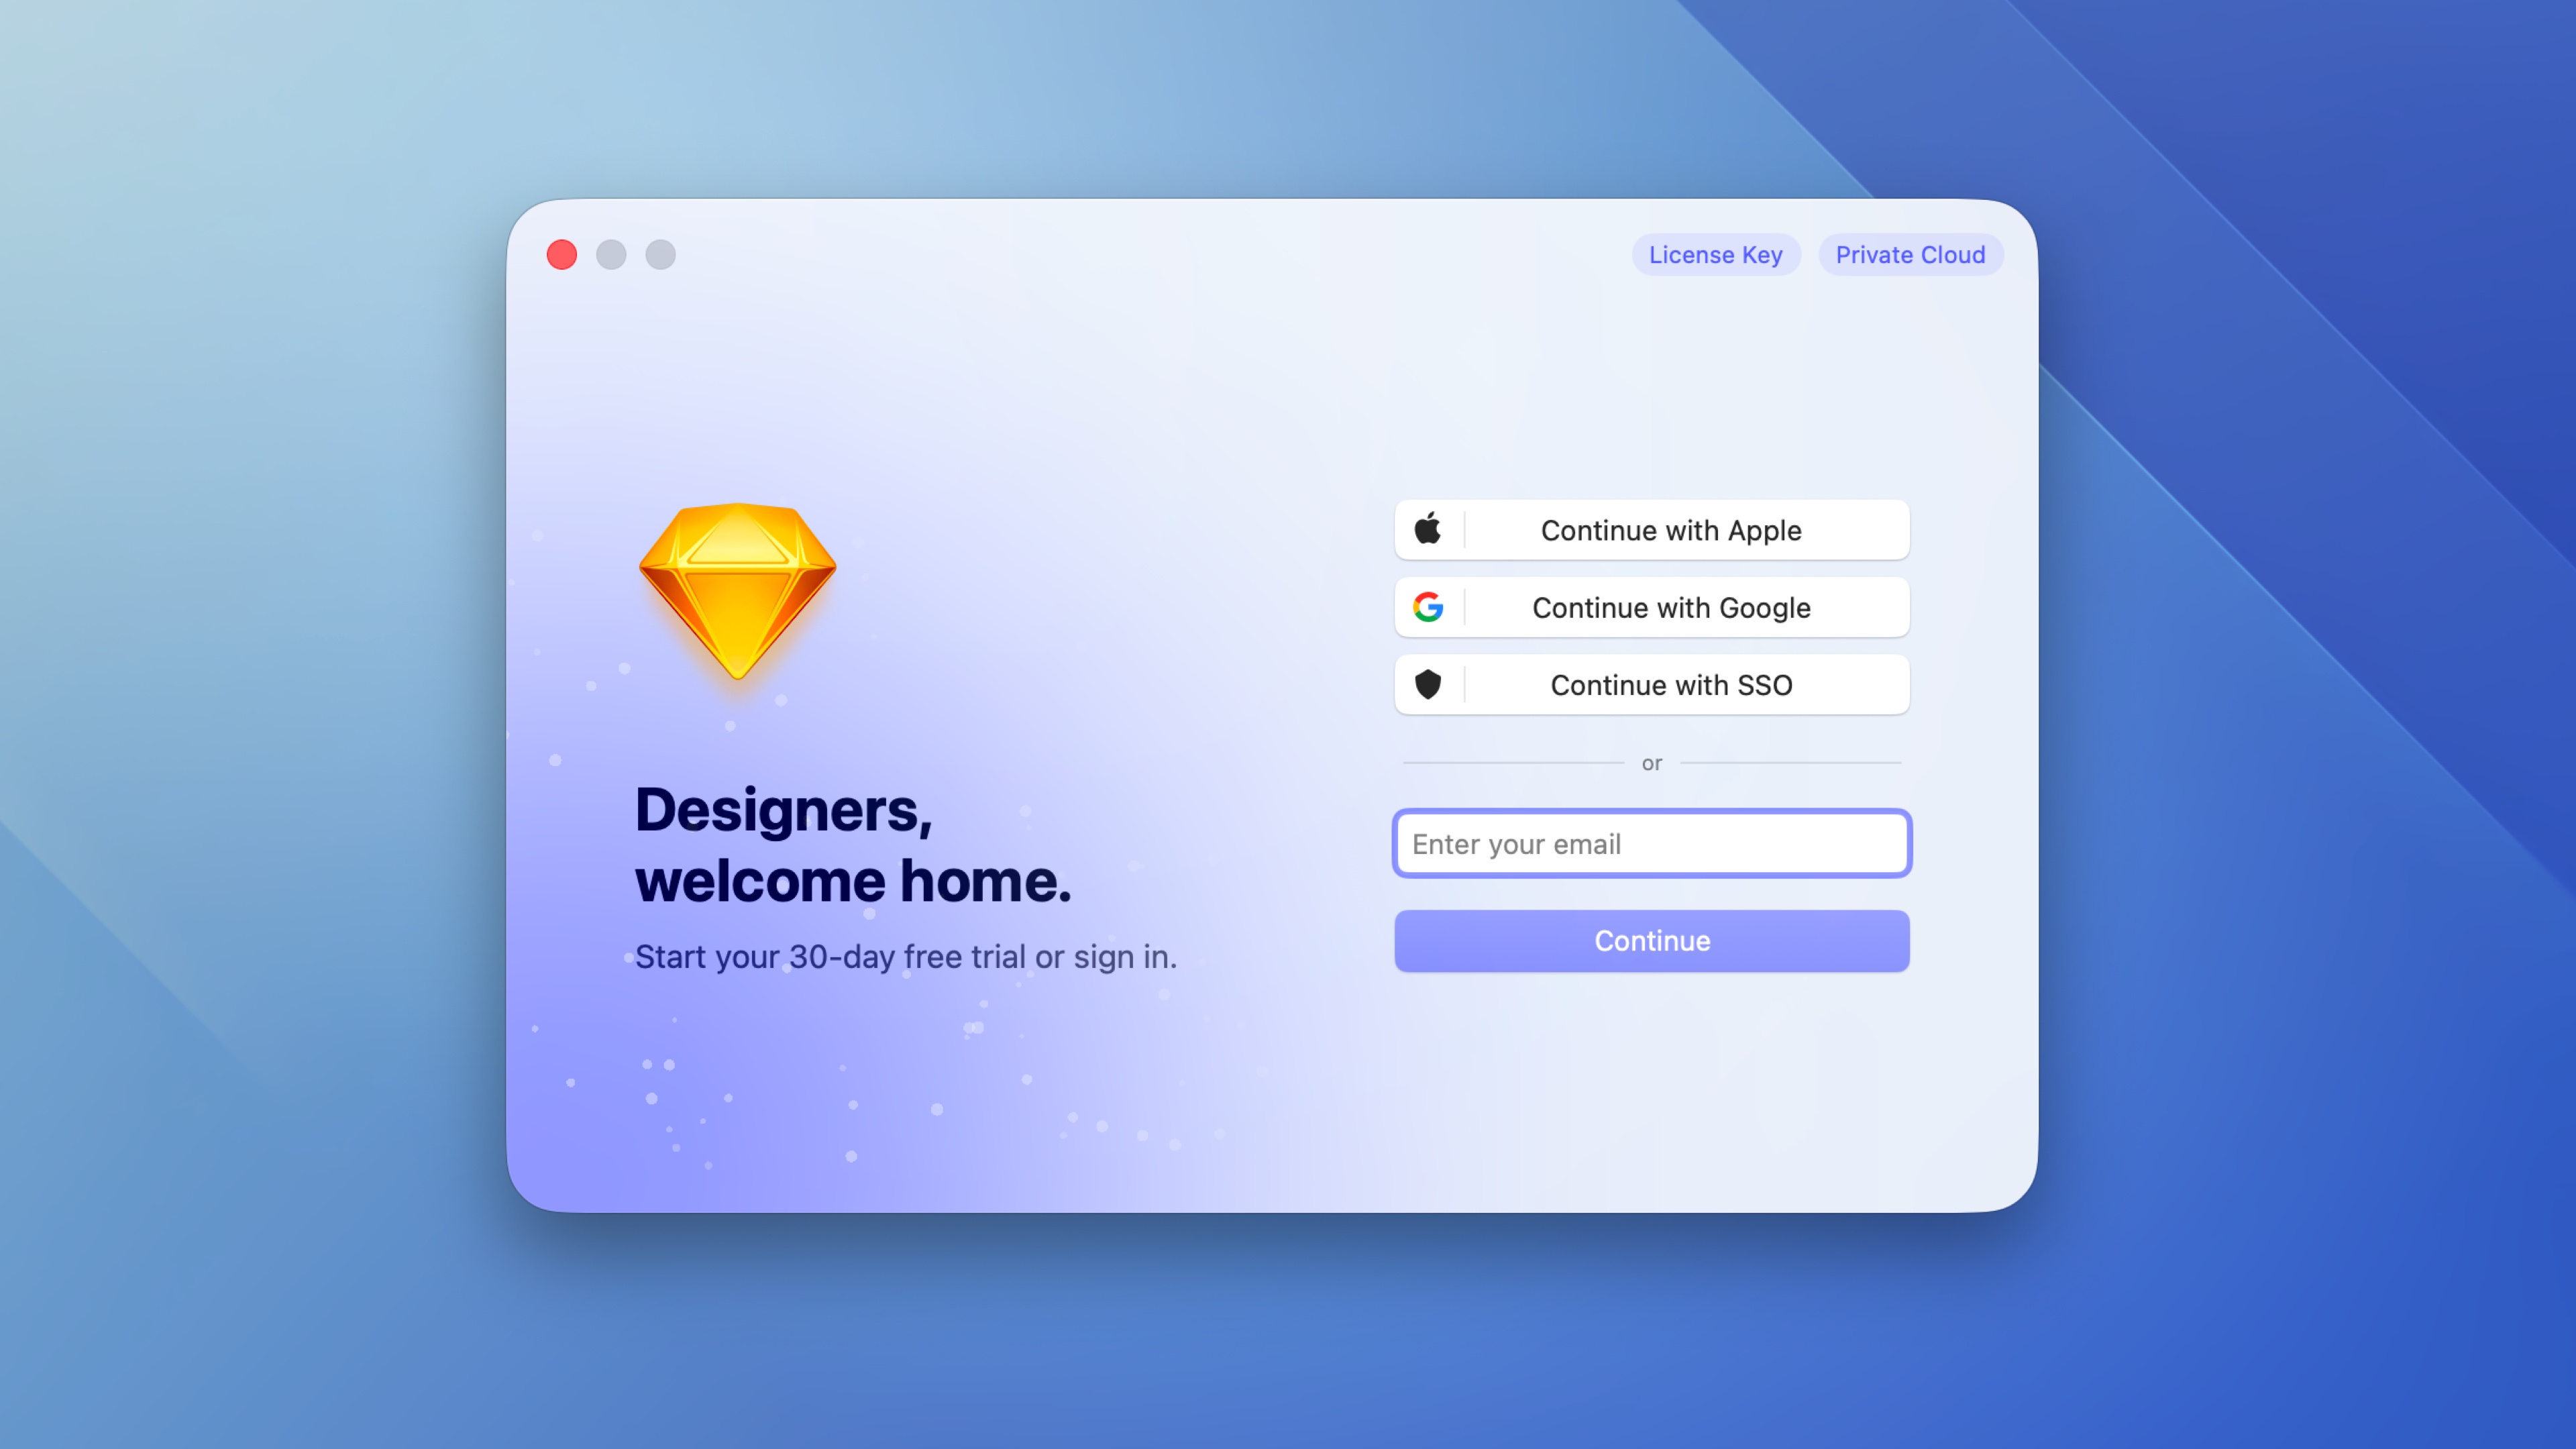
*Create your account by signing in with Apple, Google, or your email address*
3. Verify your email address to start using Sketch. We’ll automatically create a [Workspace](/docs/sharing-and-collaborating/using-your-workspace/) for you — a shared space for your documents and team — that you can manage through the web app. You’ll be assigned as an Admin and as an [Editor](/docs/interface-and-settings/workspace-and-account-settings/editors-viewers-and-guests/). You can change your role at any point.
4. And you’re done! You’ll have 30 days to try Sketch for free without adding payment details. To keep using your Workspace after the 30-day trial, choose a [monthly or yearly subscription](/pricing/) — or even a Mac-only license (in case you don’t want a Workspace). If you cancel your subscription before the trial ends, we won’t charge you anything.
> **Note:** Already have an account? Sign in with Apple, Google, or your email and password. If your Workspace uses [SSO](/docs/getting-started/single-sign-on/), select **Continue with SSO** instead. To sign out or switch accounts, click your avatar at the top of the sidebar and choose **Sign Out**.
## Getting started
With your account ready, here are some good places to start.
- [Create or open your first document](/docs/getting-started/creating-opening-and-viewing-documents/) in the Mac app
- [Import a Figma file](/docs/designing/importing-and-exporting/#importing-figma-files) to bring your existing work across
- Browse [tutorials and guides](/design-resources/) to get up to speed with Sketch
- Manage your Workspace and account settings via [the web app](/signin/)
- [Join the Community Discord](https://discord.gg/ascPpfDSSV) to ask questions, connect with other designers, and chat with the Sketch team
## Installing the iOS app
With a subscription, you also get access to [Sketch — View & Mirror](https://apps.apple.com/app/sketch-view-and-mirror/id1609224699), our iOS app. Use it on your iPhone or iPad to browse Workspaces, view documents, test prototypes, and mirror designs as you edit them in the Mac app. See the [iOS app docs](/docs/getting-started/sketch-for-ios/) for how to install it, requirements, and what you can do with it.

*Browse your documents and open them on iPhone or iPad with the Sketch iOS app*
## Using Sketch in another language
The Mac app is available in English, Simplified Chinese, and Spanish. It will automatically follow your system language if set to one of these — or you can change the language for Sketch only without affecting the rest of your system. The web app and documentation are only available in English.
To change the system language, follow [Apple’s instructions](https://support.apple.com/en-gb/guide/mac-help/mh26684/14.0/mac/14.0) for your macOS version. To change the language for Sketch only, without affecting the rest of your system:
1. Quit the Mac app.
2. Go to **Apple menu** > **System Settings** > **General** > **Language & Region**.
3. Under **Applications**, click **+**, select Sketch, and choose your preferred language.
4. Restart Sketch.
> **Note:** When a document is created with the language set to Spanish or Chinese, default layer and page names are written in that language. Other collaborators using English won’t see these names translated.
## Subscription or license?
Once your trial ends, there are two ways to keep going.
A [subscription](/pricing/) gives you everything — the Mac app, web app, iOS app, and a Workspace to share documents with your team. You can pay monthly or yearly, and a yearly plan saves you [price] a year. Need SSO, invoice billing, or advanced permissions? We also offer a [Professional plan](/support/subscriptions/plans/professional/).
If you just need the Mac app, a [Mac-only license](/pricing/) gives you a full year of access without a Workspace — documents are saved locally and real-time collaboration isn’t included.
See the [pricing page](/pricing/) for a full comparison.
## Community and beta
Join our [Community Discord](https://discord.gg/ascPpfDSSV) to ask questions, share your work, report bugs, get news firsthand, and chat with the Sketch team.
If you want to test new features before they ship, download the [Sketch beta app](/beta/). You’ll need an active subscription or license to use it. Each release goes through a beta period before shipping — the Discord is the best place to share feedback. Check the [changelog](/changelog/) to see what’s new in every release.
--------------------------------------------------------------------------------
title: "Sketch for iOS"
description: "Use the Sketch — View & Mirror app to browse your Workspace, view documents, add comments, and mirror designs on your iPhone or iPad."
last_modified: "2026-06-22"
url: "https://www.sketch.com/docs/getting-started/sketch-for-ios/"
--------------------------------------------------------------------------------
## Sketch for iOS
With [Sketch — View & Mirror](https://apps.apple.com/app/sketch-view-and-mirror/id1609224699), you can use your iPhone or iPad to browse your Workspace, view documents and prototypes, add comments, and mirror designs in real time as you edit them in the Mac app. You can also open documents by scanning a QR code from the Mac app, and access previously downloaded documents when you’re offline.
[YouTube video]
## What do I need to use the iOS app?
You’ll need an iPhone running iOS 15.0 or later, or an iPad running iPadOS 16.0 or later, plus a Sketch account with access to one or more Workspaces and an internet connection. Because the app relies on Workspaces, Mac-only licenses aren’t supported on iPhone or iPad.
## How mirroring works in the iOS app
All mirroring in the iOS app happens through your Workspace. Save your document to a Workspace, open it in the Mac app, then open the same document on your iPhone or iPad and tap the mirror icon to start previewing it live.
Unlike the legacy Mirror app, your iPhone or iPad doesn’t need to be on the same network as your Mac. You just need to sign in with the same Sketch account on both devices.
## Do I need a subscription to use the iOS app?
Yes. To mirror designs on your iPhone or iPad, you’ll need an active [subscription](/pricing/).
## iPad support
The iOS app works on iPad too, with features like offline viewing, real-time updates, and support for opening local files through AirDrop or file sharing services like Google Drive and Dropbox. On iPad you get a full Canvas view, while iPhone focuses on individual frames.
--------------------------------------------------------------------------------
title: "Browsing in the iOS app"
description: "Learn how to browse Sketch documents using the iOS app with the help of our step-by-step guides and video tutorials."
last_modified: "2026-05-19"
url: "https://www.sketch.com/docs/getting-started/sketch-for-ios/browsing-the-ios-app/"
--------------------------------------------------------------------------------
## Browsing in the iOS app
Once you’ve signed in, you’ll see all documents and [projects](/docs/getting-started/folders/) in your Workspace. If you have multiple Workspaces associated with your Sketch account, tap on the Workspace icon in the top-right corner to switch between them.
To open a document, tap on its thumbnail. Larger documents may take a moment to open while they download. To cancel opening a document, tap the thumbnail again.
In the Workspace view, you’ll see some or all of the following rows of document thumbnails:
- **From My Mac** if you’re currently editing a document from the same Workspace on your Mac
- **All Documents**
- **Shared with Me** if anyone has shared a document directly with you
- **My Drafts** if you have saved any drafts
You can scroll through these thumbnails horizontally, or tap **See All** to view the documents as a grid.
Scroll below the horizontal document rows to see any folders you’ve created in your Workspace. Tap on a folder’s name to view all the documents it contains.
If a folder you’re viewing has any nested folders, tap on them to view the documents inside. Tap **Back** to return to the folder view or the Workspace view.
Scroll slightly upward to find the search bar at the top of the screen, to help you find documents in a folder. Search results are filtered based on the view you’re currently browsing in. For example, if you’re viewing a specific folder, searching here will only give you results from that folder.
> **Note:** If you lose your internet connection, you’ll see a row of documents you’ve previously downloaded — you can still open and browse these offline.
Once you’ve signed in, you’ll see all documents and [projects](/docs/getting-started/folders/) in your Workspace. If you have multiple Workspaces associated with your Sketch account, tap on the Workspace icon at the top of the sidebar to switch between them.
In the sidebar on the left, you can switch between All Documents, My Drafts, Shared With Me, and any Workspace projects.
To open a document, tap on its thumbnail. Larger documents may take a moment to open while they download. To cancel opening a document, tap the thumbnail again.
Tap on a folder’s name in the sidebar to view all documents it contains. If you’re viewing a nested folder, tap the folder name above it to return to the parent folder view.
To search for a specific document, use the search bar in the top-right corner.
> **Note:** If you lose your internet connection, you’ll see a row of documents you’ve previously downloaded — you can still open and browse these offline.
--------------------------------------------------------------------------------
title: "Viewing documents in the iOS app"
description: "Learn how to view Sketch documents using the iOS app with the help of our step-by-step guides and video tutorials."
last_modified: "2026-06-22"
url: "https://www.sketch.com/docs/getting-started/sketch-for-ios/viewing-documents-in-the-ios-app/"
--------------------------------------------------------------------------------
## Viewing documents in the iOS app
When you open a document, you can swipe horizontally to move between the different top-level frames on the current page. You can also tap on the frame previews in the sheet at the bottom of the document. Tap once anywhere on your screen if you don’t see the sheet.
In the sheet at the bottom of the screen, you can tap on page names to navigate between the different pages in your document and see the frames within them.
> **Note:** Want to see the bigger picture? Switch to Canvas view to explore the entire document Canvas, just as you would on your Mac.
Swipe up on the sheet to see more of the document’s contents. Prototypes live below the frame thumbnails in the sheet — swipe up to find them, then tap to play. Scrolling a frame won’t trigger any interactions. Swipe down on the sheet to minimize it. To hide the sheet along with any other UI, tap once on the screen — and tap again to bring it back.
You can view, add and reply to comments. To add a comment, tap on the comment button on the upper right, then tap anywhere on the Canvas to place it.
To share a document’s link with others, tap the Share button in the bottom sheet.
When you’ve finished viewing a document, tap the **X** in the top-left corner to close it.
> **Note:** When you’re viewing a Workspace document that others are editing, you’ll see updates as soon as they make them — there’s no need to refresh or reopen the document.
When you open a document, you’ll see a full Canvas view, much like you’d see in the Mac app. Drag around the screen to pan, and pinch to zoom in or out. In Canvas view you’ll see all top-level frames, as well as any other content outside of them.
You can view, create and reply to comments. To create a comment, simply tap on the comment button on the upper right, then place it anywhere on the Canvas.
To switch between pages in your document, tap the drop down menu at the bottom left of your screen and then tap on the name of the page you want to switch to.
To share a document’s link with others, tap the Share button in the button bar on the top right corner of the screen.
When you’ve finished viewing a document, tap the **X** in the top-left corner to return to close it.
> **Note:** When you’re viewing a Workspace document that others are editing, you’ll see updates as soon as they make them — there’s no need to refresh or reopen the document.
## Viewing older documents in the iOS app
If you open a document that was created using an earlier version of the Mac app, you’ll need to choose from one of the following options:
1. **Update and Open** updates the document in the Workspace for everyone. They’ll need to use the most recent version of the Mac app to open and edit it. You’ll see updates in real-time as other Editors work on the document.
1. **Update as Local Copy** updates the document and opens it locally. This will only update the document for your current session in the iOS app. You won’t see any real-time updates by other Editors.
1. **Cancel** stops opening the document.
## Open document using QR code
To open a document using your iOS app, do the following:
1. Open a Workspace document in the Mac app
2. Click the Share Link button in the toolbar
3. Scan the QR code with your mobile device, where the iOS app is installed.
4. The iOS app will load and open your document.
> **Note:** Make sure you‘re running the latest version of the iOS app. You can find it [here](https://apps.apple.com/us/app/sketch-view-and-mirror/id1609224699).
--------------------------------------------------------------------------------
title: "Creating, opening & viewing documents"
description: "Learn how to create, open and view documents in Sketch with the help of our step-by-step guides and video tutorials."
last_modified: "2026-06-22"
url: "https://www.sketch.com/docs/getting-started/creating-opening-and-viewing-documents/"
--------------------------------------------------------------------------------
## Creating, opening & viewing documents
Create your first document, open it in the Mac app or web app, and learn your way around your Workspace.
## Creating a new document
To create a new document in the Mac app, click the plus icon at the top of the sidebar in the Workspace window, choose **File** > **New**, or press ⌘N.
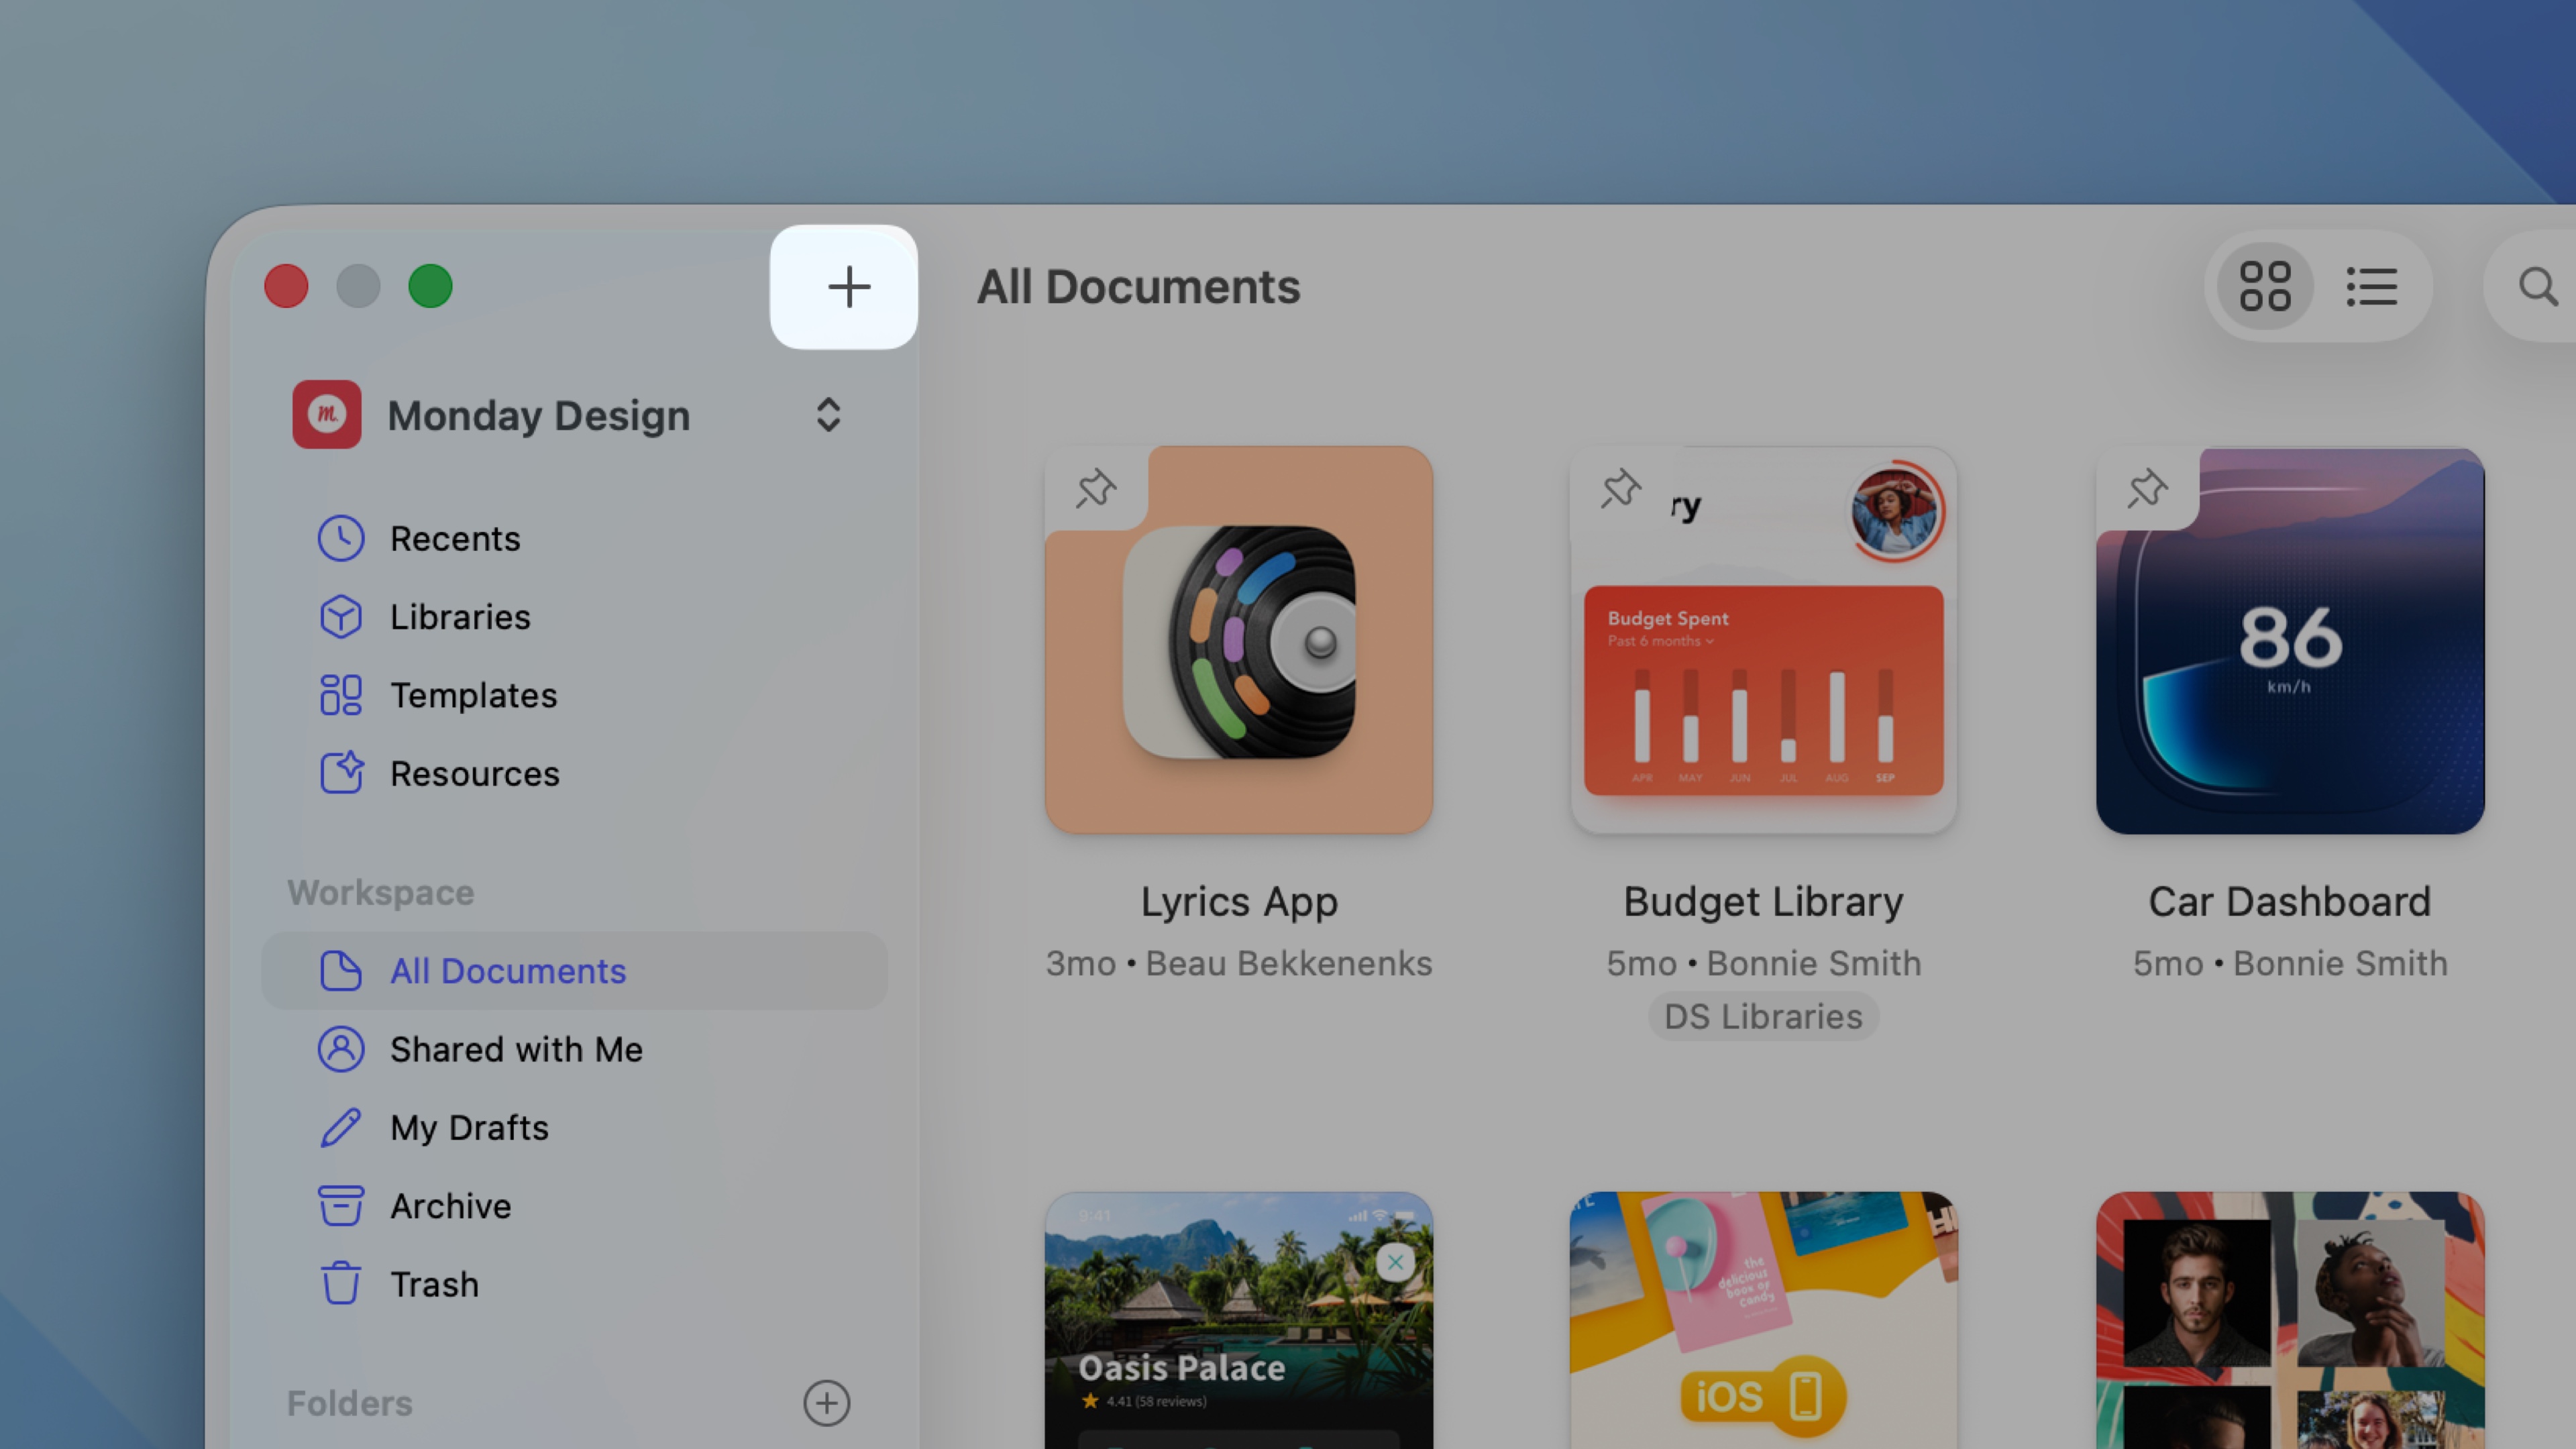
*Create a new document from the Workspace window using the plus icon, File > New, or ⌘N*
## Opening Workspace documents in the Mac app
### The Workspace window
The Workspace window will pop up every time you open the Mac app. Double-click any document to open it, or choose **File** > **Open from Workspace**, or press ⌘O. You can also switch between Workspaces (top-left), browse recent documents, [Libraries](/docs/libraries/) and Resources, choose a [template](/docs/symbols-and-styles/templates/), or create [new folders](/docs/getting-started/folders/).
If you want to open a document you already saved locally to your Mac, click **Open from Your Mac** at the bottom left of the Workspace window.
> **Note:** You can set the default location to open documents via **Sketch** > **Settings** > **General** > **Open & Save To**, or use ⌘,.
You can browse documents in your Workspace either as a list or a grid view. To switch between these two views, use the buttons next to the search bar.
You can select multiple documents at the same time using the ⌘ or ⇧ keys, making it easier for you to open, move and delete them in bulk.
If you’re part of a team or have created [folders](/docs/getting-started/folders/) , you’ll see these in the sidebar. Clicking on a Workspace or folder name will show only the documents that belong to it.
You’ll find the name of the project that a document belongs to under its thumbnail, along with the document name, when it was last updated and by whom. You can also see the [different levels of access](/docs/sharing-and-collaborating/sharing-and-viewing-documents/sharing-a-document/) to that document with the following icons:
- : Anyone with the document’s link can access
- : Only certain Guests can access
- : Only you can access
## Opening and viewing documents in the web app
You can open any document in the Mac app directly from your browser by clicking on the **Edit in** button of an open document’s Nav Bar. If you’re viewing a specific frame, Sketch will open it in the Mac app. Depending on your browser, you may need to confirm this action before your document opens in the Mac app.
You can also open documents in the Mac app from the All Documents view in your Workspace. Hover over any document’s thumbnail, click the icon and choose **Edit in Mac app**.
When you open a document in the web app, you’ll see the entire Canvas which you can zoom and pan freely. You can explore all the document’s pages, version history, comments and frame specifications — for more detail, see [Sharing and Collaborating](/docs/sharing-and-collaborating/) and [Developer Handoff](/docs/developer-handoff/).
To open the document you’re editing on the Mac app in the browser, choose **File** > **View in browser** or ⌃-click anywhere on the Canvas and select **View in browser**.
## Sorting and filtering documents in the web app
If your Workspace has lots of documents, you may want to try some sorting and filtering options to help you find what you’re looking for.
### Filtering documents
Click the **Filter** button next to the search bar to display and select the filtering options:
* All Documents
* [With Prototypes](/docs/prototyping/)
* You can edit
If you use the **Filter** button while browsing the **All Documents** view you’ll see an option to include documents that are inside project folders. Professional plan users will also see an option to include archived documents.
To remove all filters, click **Reset** at the top right of the filter dropdown.
### Sorting documents
You can sort documents by **Name**, **Date Created** and **Last Updated** — and view any of them in ascending or descending order by clicking the up or down arrows respectively.
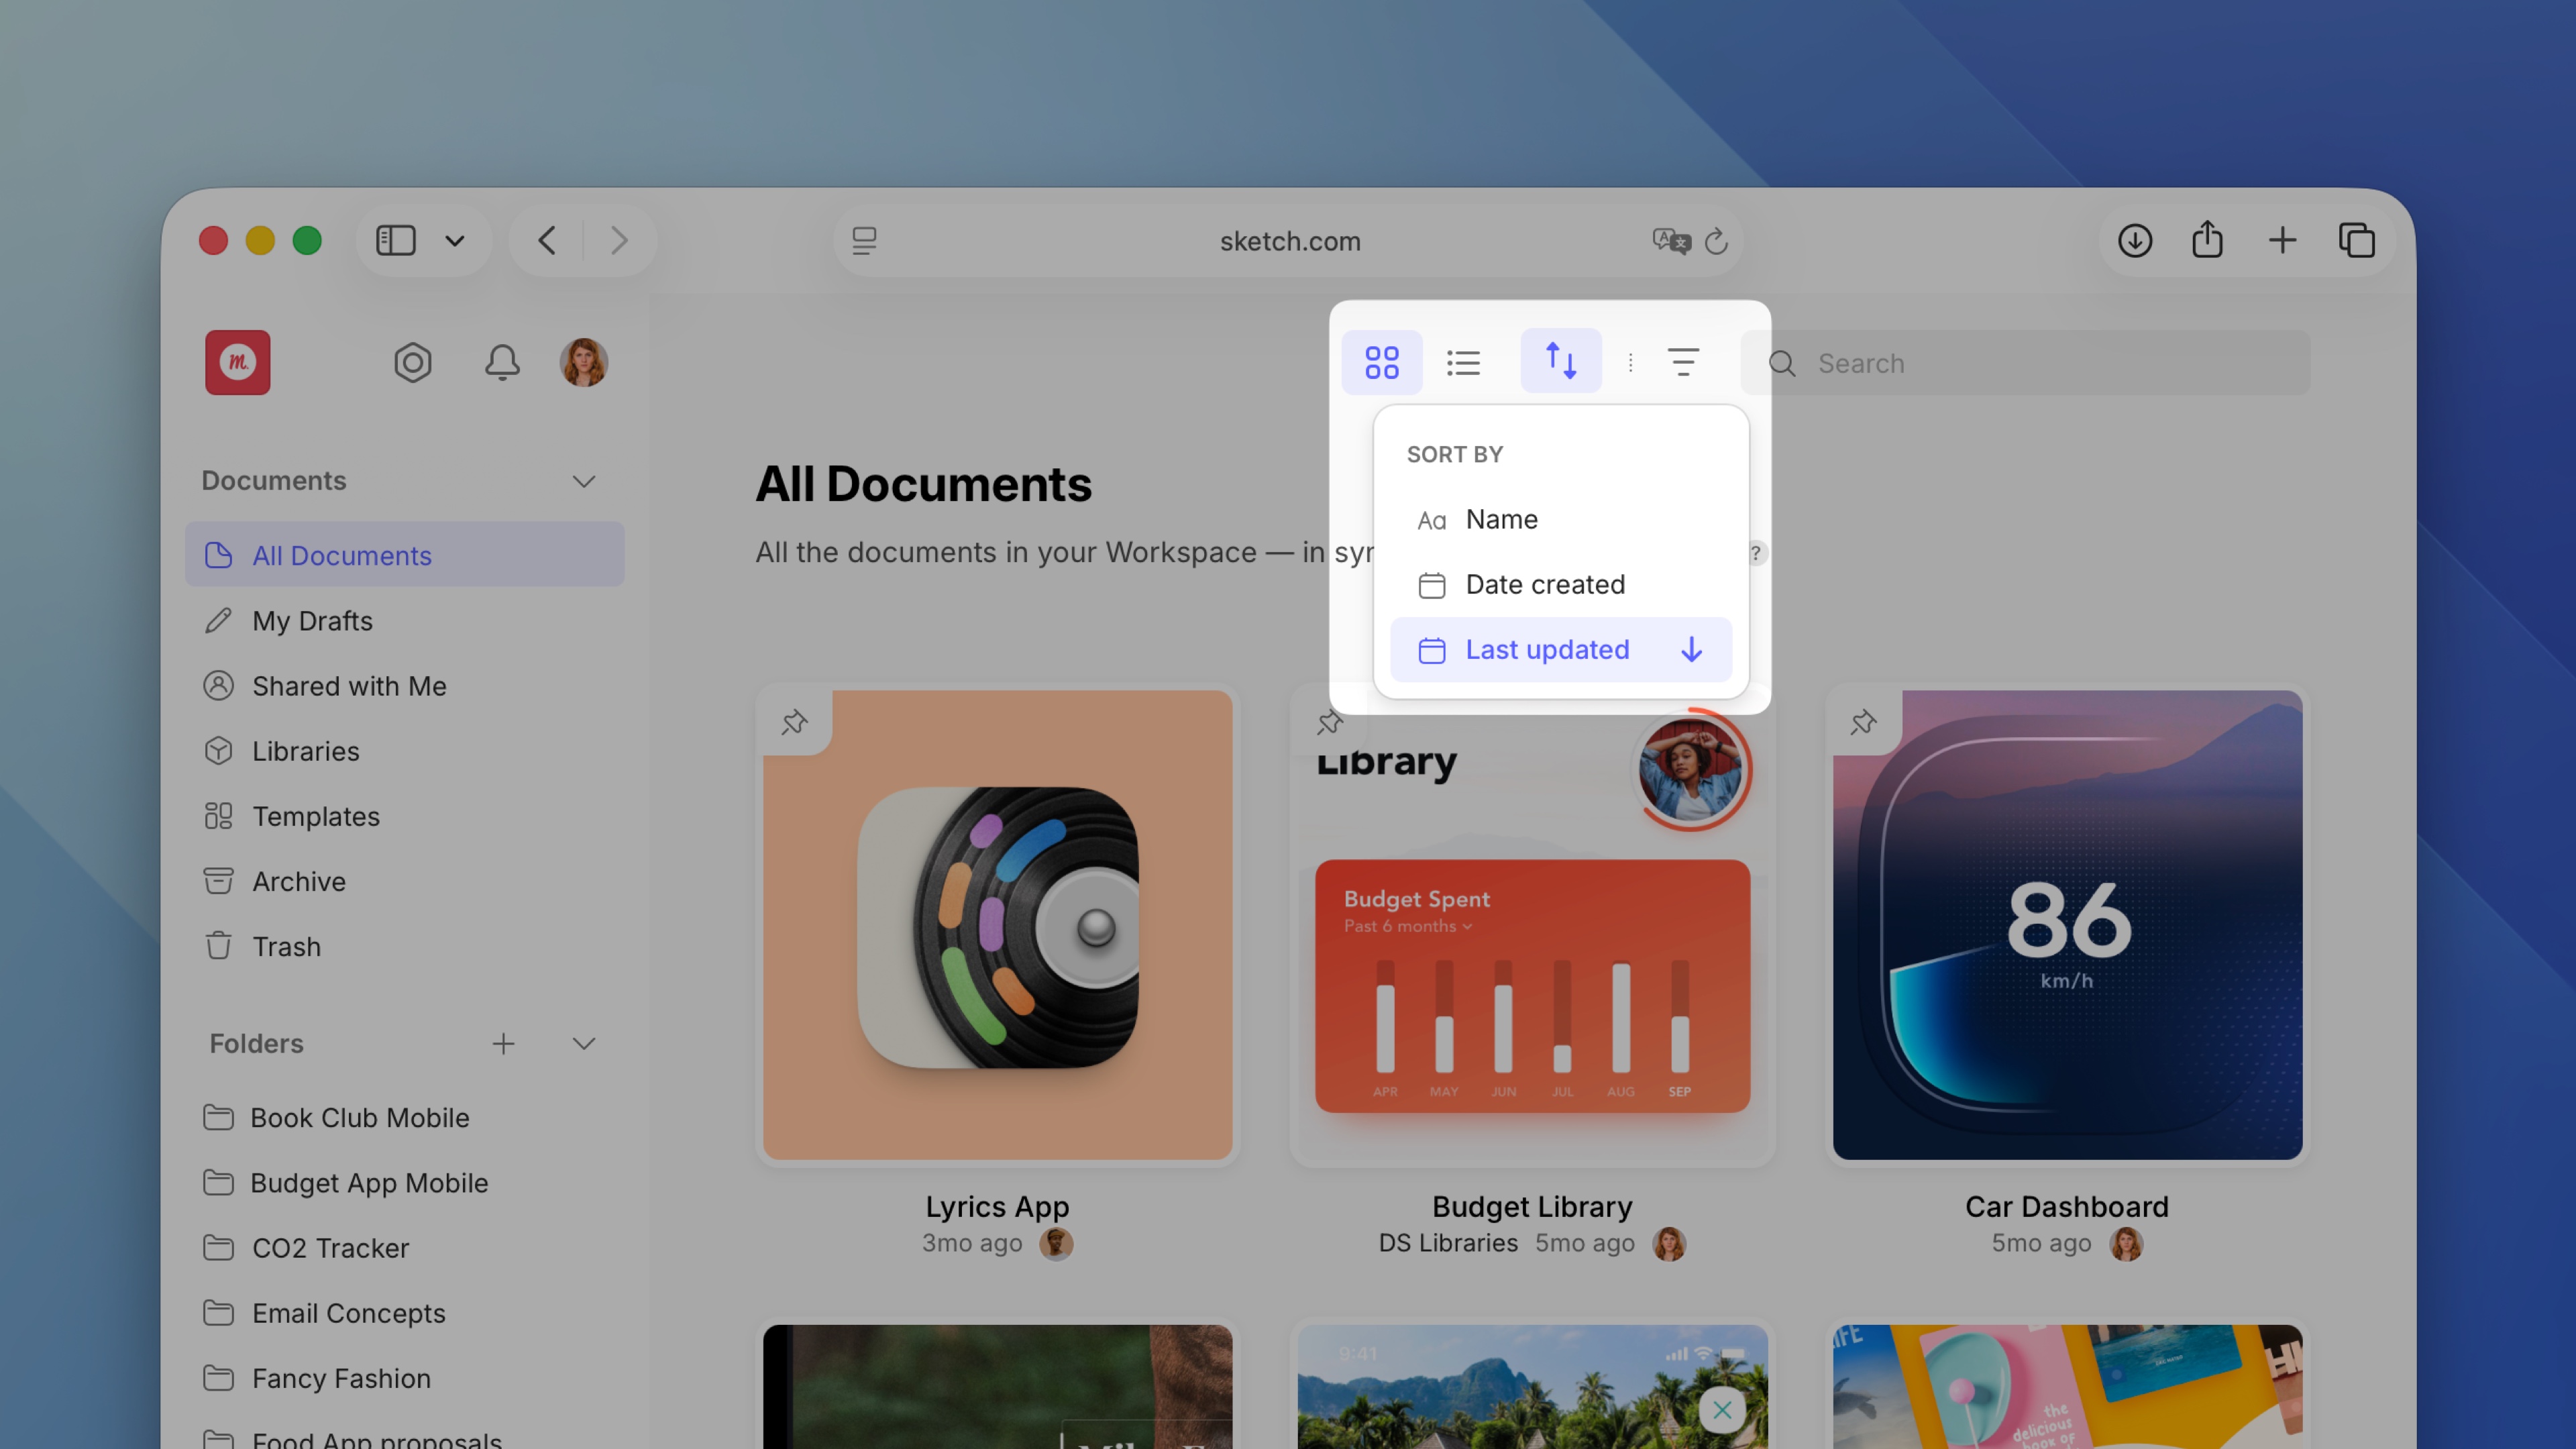
*Sort documents by name, date created, or last updated — in ascending or descending order*
## Opening and viewing documents in the iOS app
You can open local Sketch documents via the [Files app](https://support.apple.com/en-za/HT206481) on your device, or from another app such as Google Drive or Dropbox. In the Files app, you can also press on a Sketch document’s thumbnail to use [Quick Look](https://support.apple.com/en-za/guide/mac-help/mh14119/mac) to preview it.
> **Note:** Keep in mind that local documents won’t update in real-time and you won’t be able to use mirroring with them.
### Opening documents via Handoff in the iOS app
You can use Apple’s [Handoff](https://support.apple.com/en-us/HT209455) feature to quickly open a document you’re editing on your Mac on your iPhone/iPad, or vice versa.
To do this, you’ll need to be running Sketch on all of your devices and they’ll need to follow Apple’s requirements for Handoff (such as being signed into the same iCloud account).
### Mirroring documents in the iOS app
If you’re working on a document in the Mac app, you’ll see it listed under **From Your Mac** in the Workspace view. Tap on the document’s thumbnail to open it, then tap on the (Mirror) icon to start mirroring.
When you switch between frames and make edits in the Mac app, those changes will reflect in real-time in the iOS app.
> **Note:** Mirroring requires an internet connection on both your Mac and iPhone, but they do not have to be physically tethered via USB or even share the same Wi-Fi network.
### Real-time updates in the iOS app
When you’re viewing a Workspace document in the iOS app that someone else is editing in the Mac app, you’ll see any changes they make as updates in real-time. As the iOS app is for viewing documents and prototypes only, you won’t be able to edit or collaborate in real-time. To edit documents in real-time, open them in the Mac app.
--------------------------------------------------------------------------------
title: "Saving and managing documents"
description: "Learn how to save and manage documents in Sketch with the help of our step-by-step guides and video tutorials."
last_modified: "2026-06-22"
url: "https://www.sketch.com/docs/getting-started/saving-and-managing-documents/"
--------------------------------------------------------------------------------
## Saving and managing documents
Once you’ve created a document, here’s how to save, organize, and manage it over time.
## Saving new documents
### To your Workspace
To save a new document to your Workspace, choose **File** > **Save** (⌘S) to open the Workspace window. Give your document a name and click **Save**. You can also save it to a specific [folder](/docs/getting-started/folders/) — click the **+** next to the folder list to create a new one.
Once you’ve saved your document, it automatically saves your progress in the background as you work — no need to manually save again.
> **Note:** You can also use ⌃⌘S to [add a star](/docs/sharing-and-collaborating/sharing-and-viewing-documents/creating-starred-versions/#how-to-unstar-a-version) or a [version description](/docs/getting-started/saving-and-managing-documents/#adding-descriptions-to-versions) to a Workspace document.
If you close a document while it’s saving to your Workspace, we’ll ask you whether you want to wait for the save to complete or cancel it. If you select Close and Cancel, the update will not upload to your Workspace.
**Other ways to save to your Workspace**
You can also save a document to your Workspace by clicking the **Collaborate** button in the toolbar , choosing a Workspace and a folder (if you’ve created one), then clicking **Save**.
Or drag one or more local documents onto the Workspace window — you’ll be able to choose a Workspace and folder to save them to.
### Saving documents locally
To save locally, click **Save to Your Mac** in the bottom left corner of the Workspace window, or select **File** > **Save to Your Mac** in the menu bar.
> **Note:** You can set Sketch to save documents locally by default using the **Open & Save To** preference in Settings.
If you’re using a Mac-only license, you’ll see the native macOS saving dialog instead of the Workspace window when you save.
## My Drafts
In **My Drafts**, you can store documents and [Libraries](/docs/libraries/) that aren’t ready to share with the rest of your Workspace yet. By default, only you can access what you save here.
> **Note:** If you leave a Workspace, are removed from one, or delete your account, your drafts become accessible to Workspace admins.
In the Mac app, you’ll see **My Drafts** in the sidebar of the Workspace window. You can also access it from the sidebar in the web app.
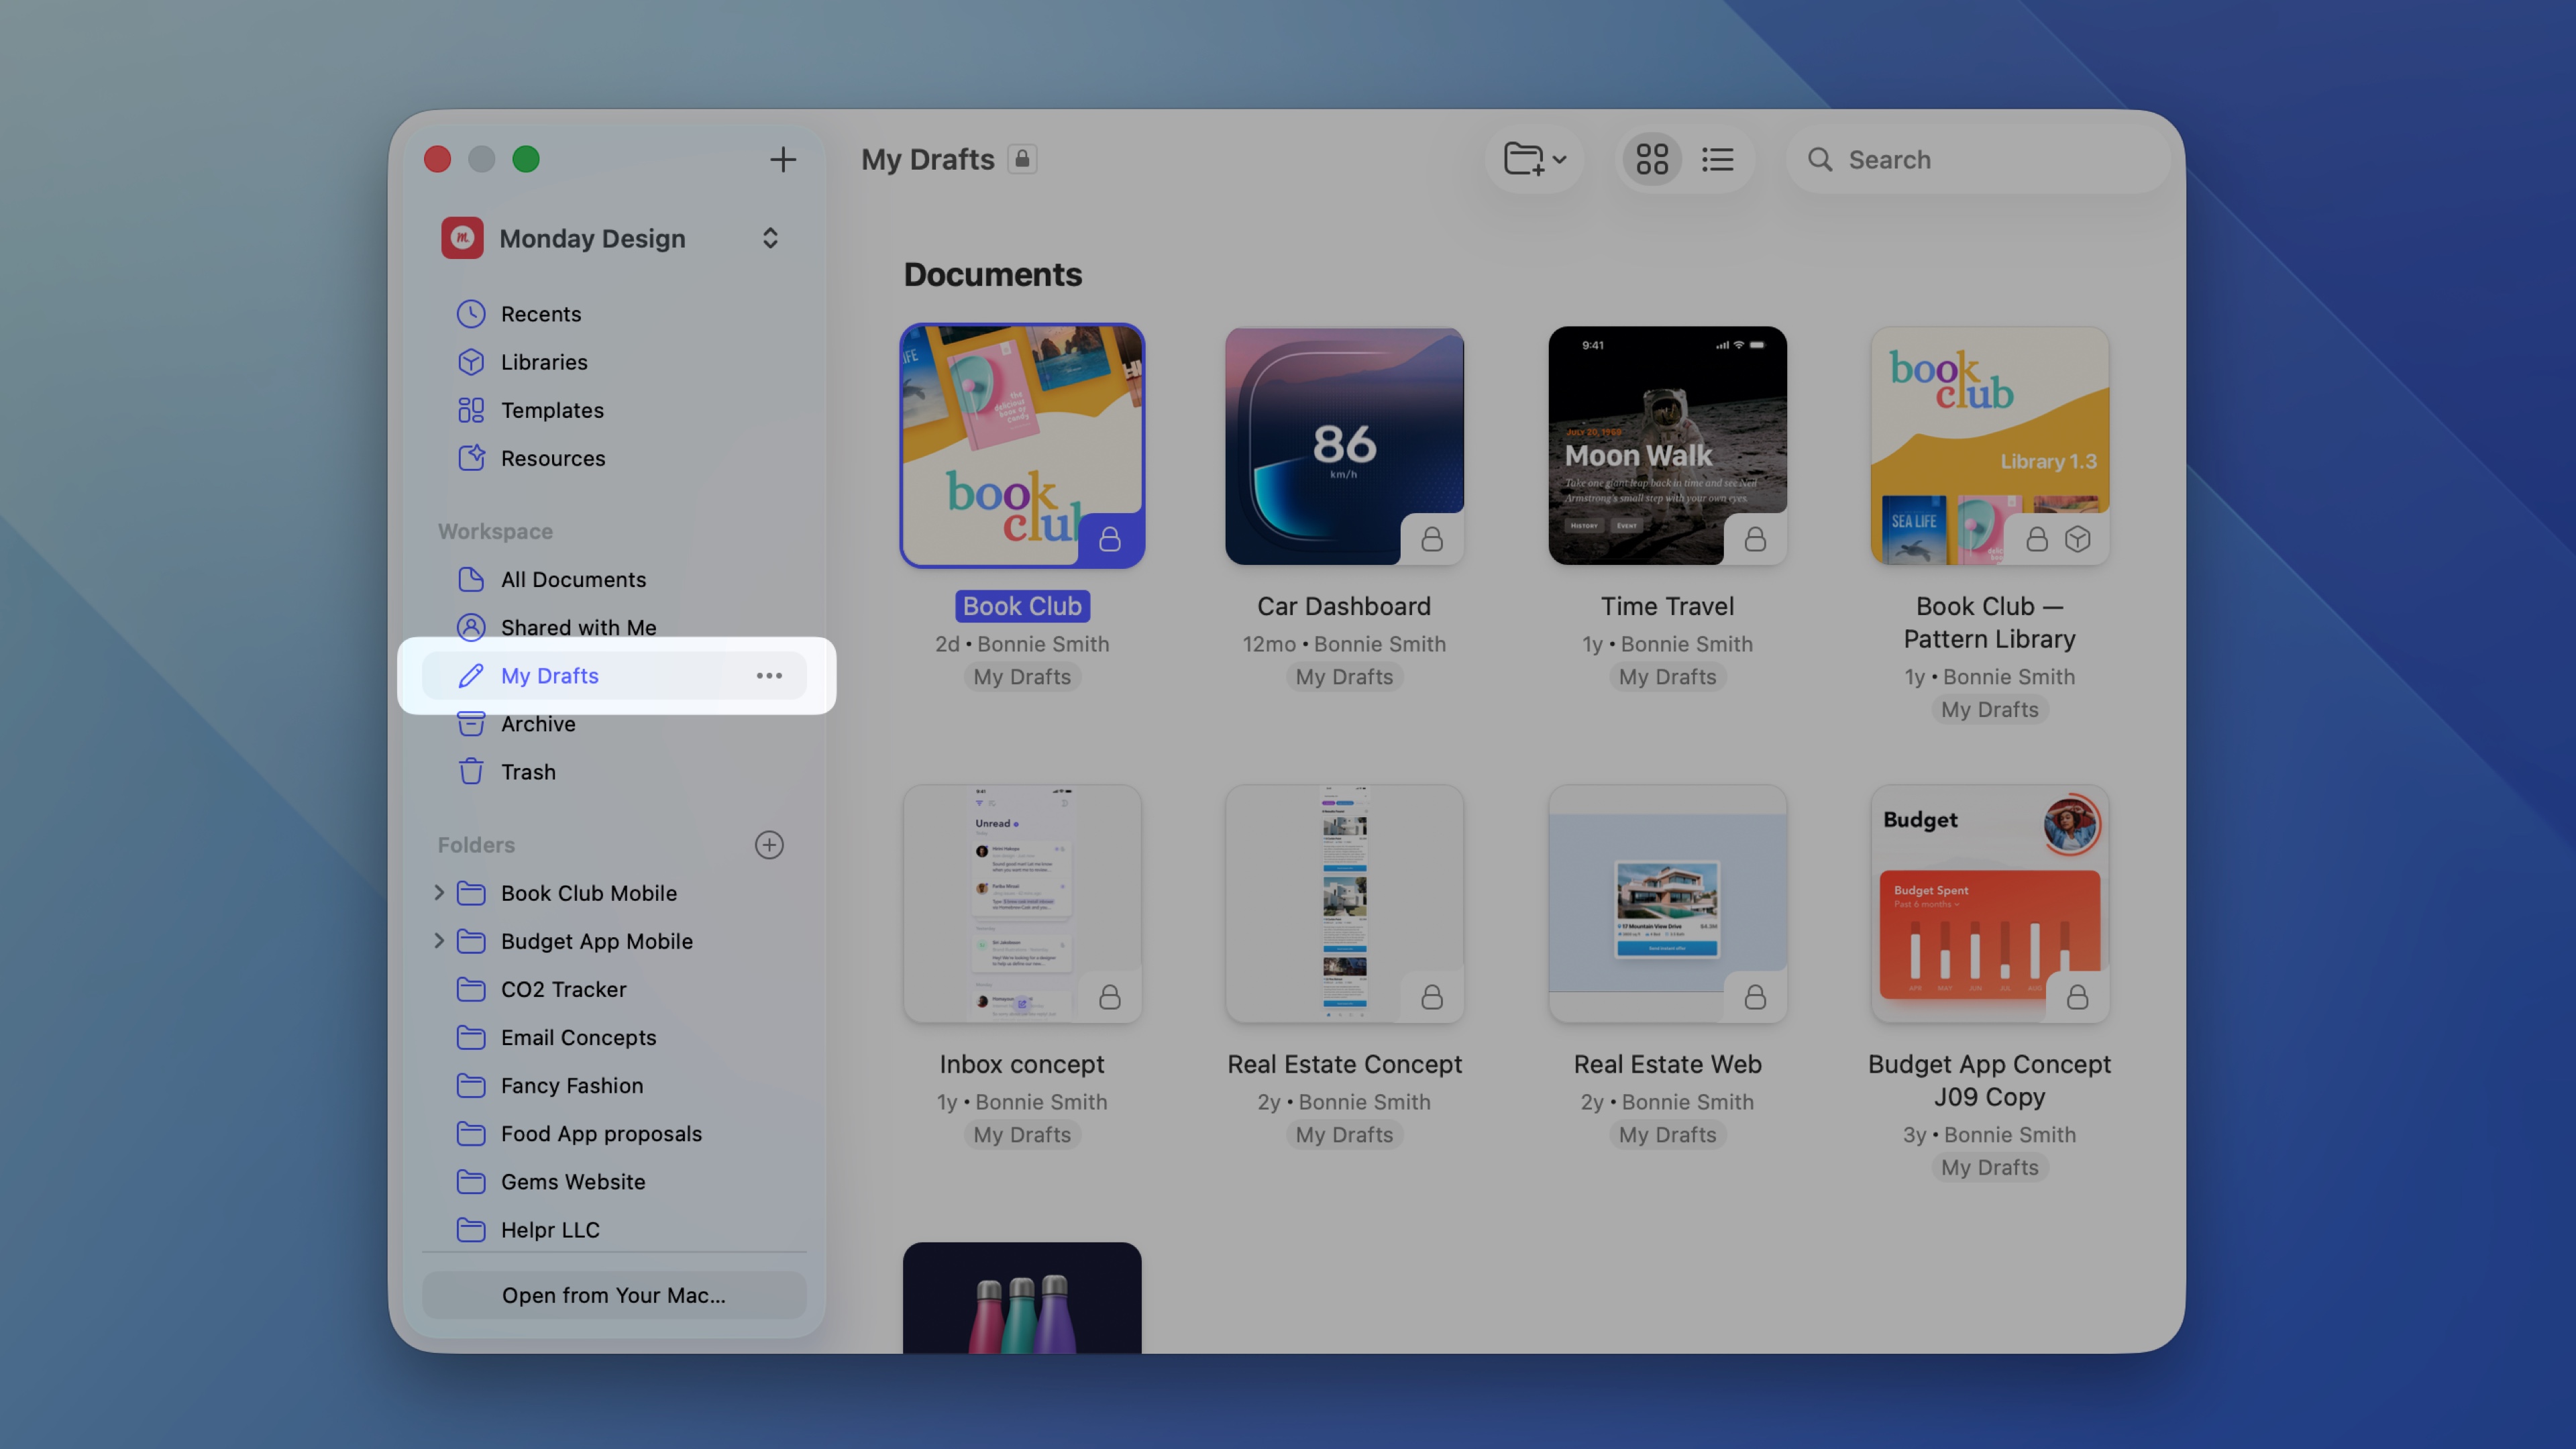
*Where to find the My Drafts folder in the web app*
You can save a new draft document to My Drafts just as you would [save any other document to a Workspace](/docs/getting-started/saving-and-managing-documents/#saving-new-documents). In the Mac app, select **File** > **Save** or press ⌘S. In the menu that appears, select Workspace, choose the Workspace in which you want to save your document, and select **My Drafts** from the dropdown menu.
Alternatively, drag and drop documents from your desktop into My Drafts in the Workspace window of the Mac app.
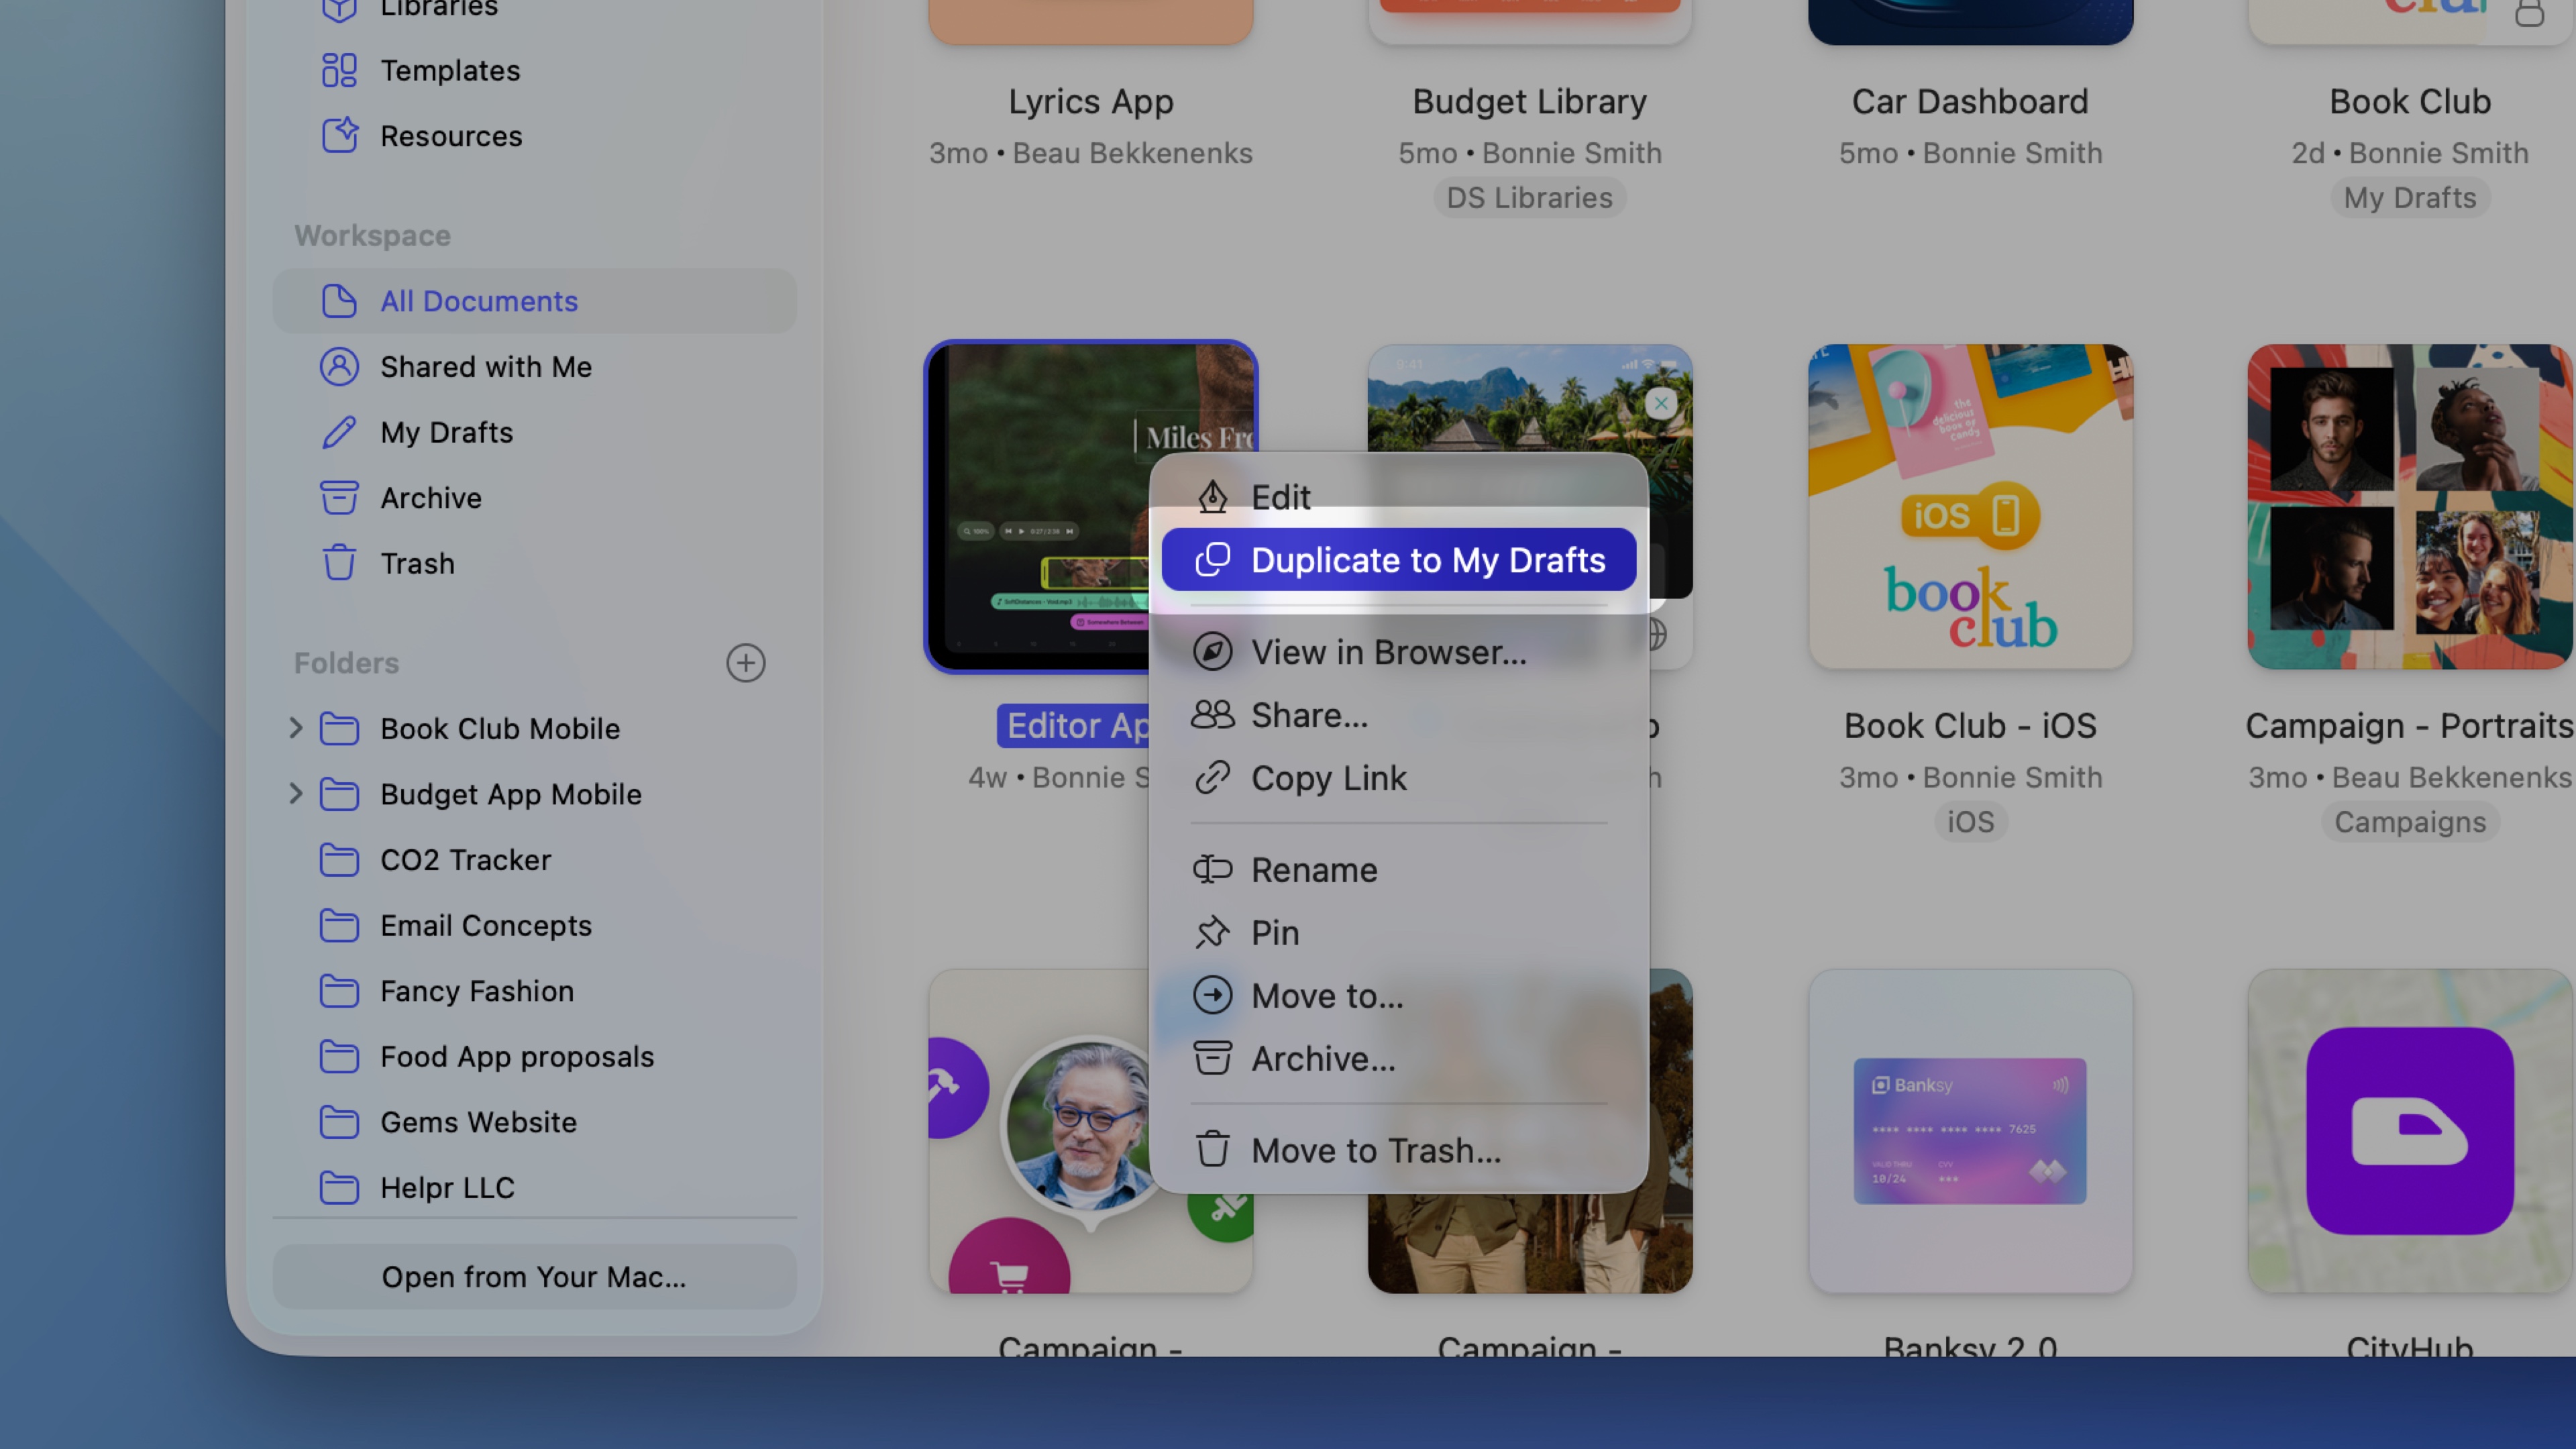
*How to save a document to the My Drafts folder from the Mac app*
### Sharing and moving drafts
To share a document in **My Drafts**, you can invite people in that document’s [individual share settings](/docs/sharing-and-collaborating/sharing-and-viewing-documents/managing-share-settings/), or move it to another location in your shared Workspace. People you invite will see your document in their [Shared with Me tab](/docs/sharing-and-collaborating/sharing-and-viewing-documents/shared-with-me/).
In the web app, you can move documents from **My Drafts** by hovering over the document’s thumbnail, clicking the icon and choosing **Move**. From there, you can move the document to a folder in the same Drafts, a shared folder in the same Workspace, or the **My Drafts** folder of any other Workspaces where you are also an Editor.
If you move a document out of **My Drafts**, everyone in your Workspace will be able to view it and Editors will be able to open it in the Mac app.
You can delete a draft in the same way that you [delete any other document](/docs/getting-started/saving-and-managing-documents/#deleting-documents). When you delete a draft it will remain in your Workspace’s Trash for 90 days, but only you will be able to see it there.
## Managing documents
### Renaming documents
Choose **File** > **Rename**, enter the document’s new name in the Title Bar, then press Enter to save.
You can also rename documents from the Workspace window. Right-click or ⌃-click over a document’s thumbnail and select **Rename**.
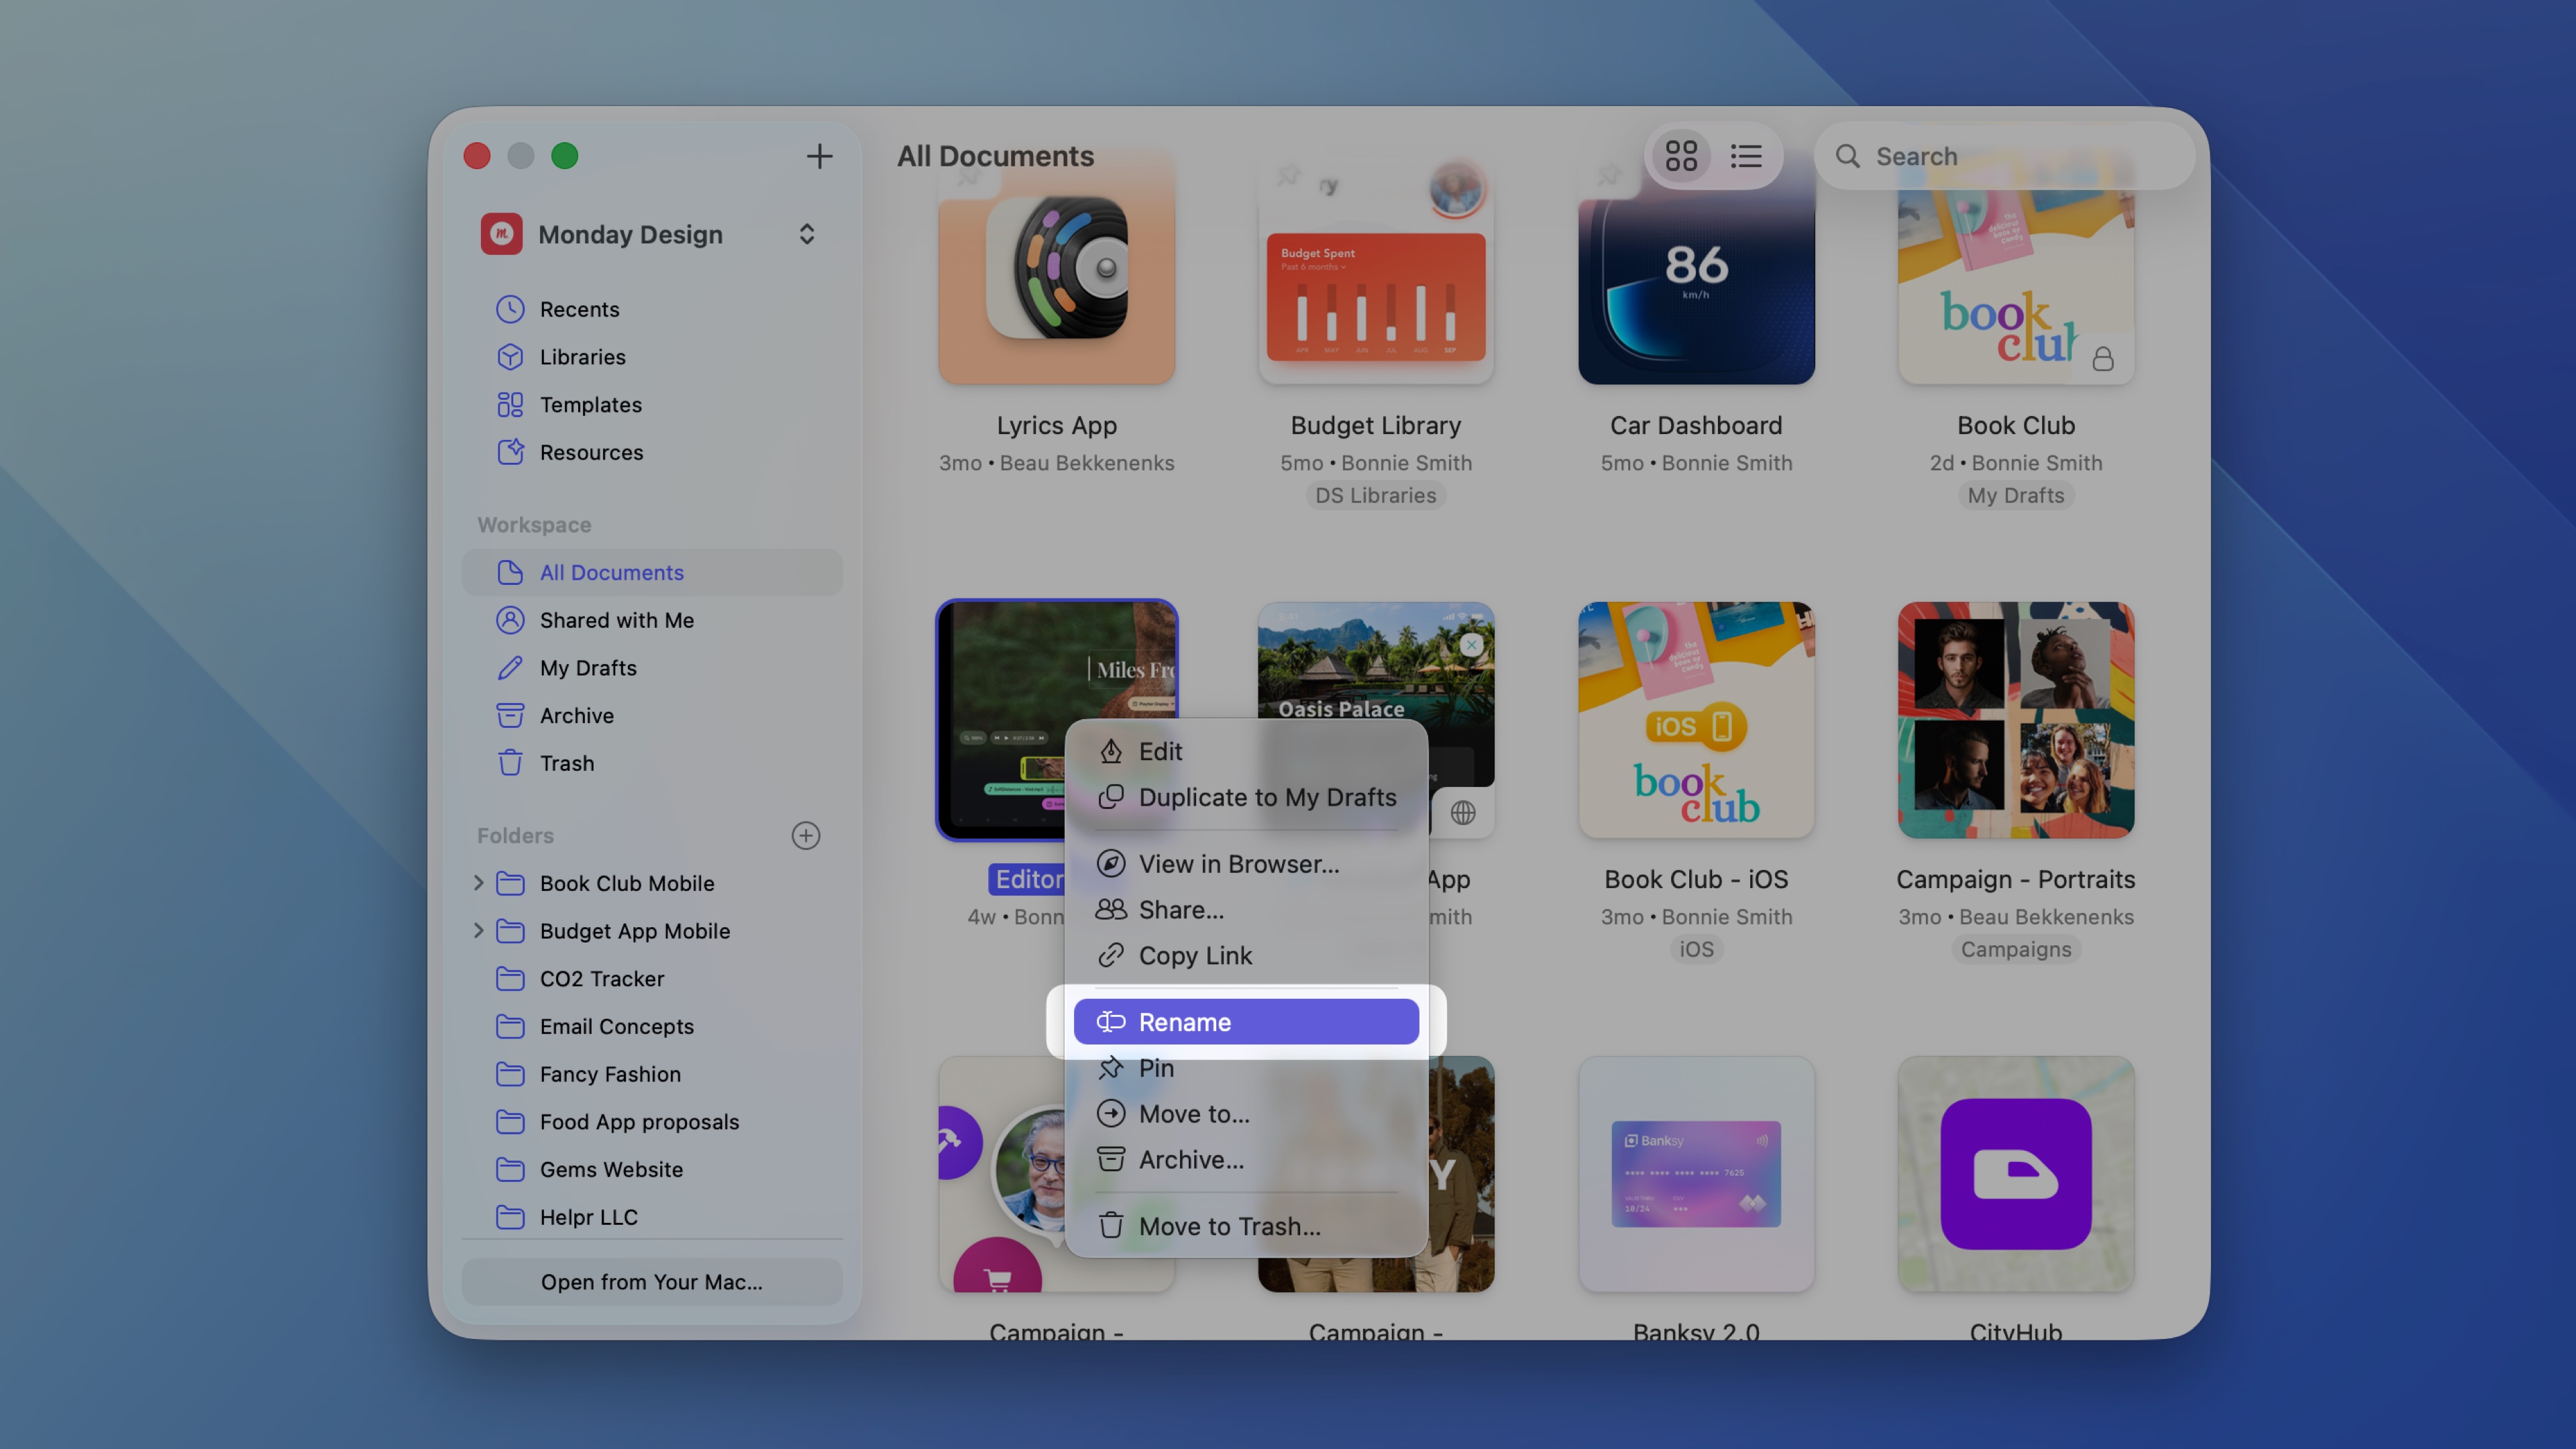
*How to rename a Workspace document in the Mac app*
- From your Workspace or folder view: hover over your document’s thumbnail, choose , then **Rename**.
- From the document or Artboard view: click the next to the document name in the right-hand sidebar, then type in a new name.
### Searching for documents
Use the search bar in the top-right of the [Workspace window](/docs/getting-started/creating-opening-and-viewing-documents/#opening-workspace-documents-in-the-mac-app) to find documents by name or by the author of the latest update. Your search stays in place when you switch between sidebar views, such as Recents, All Documents, or Shared with Me.
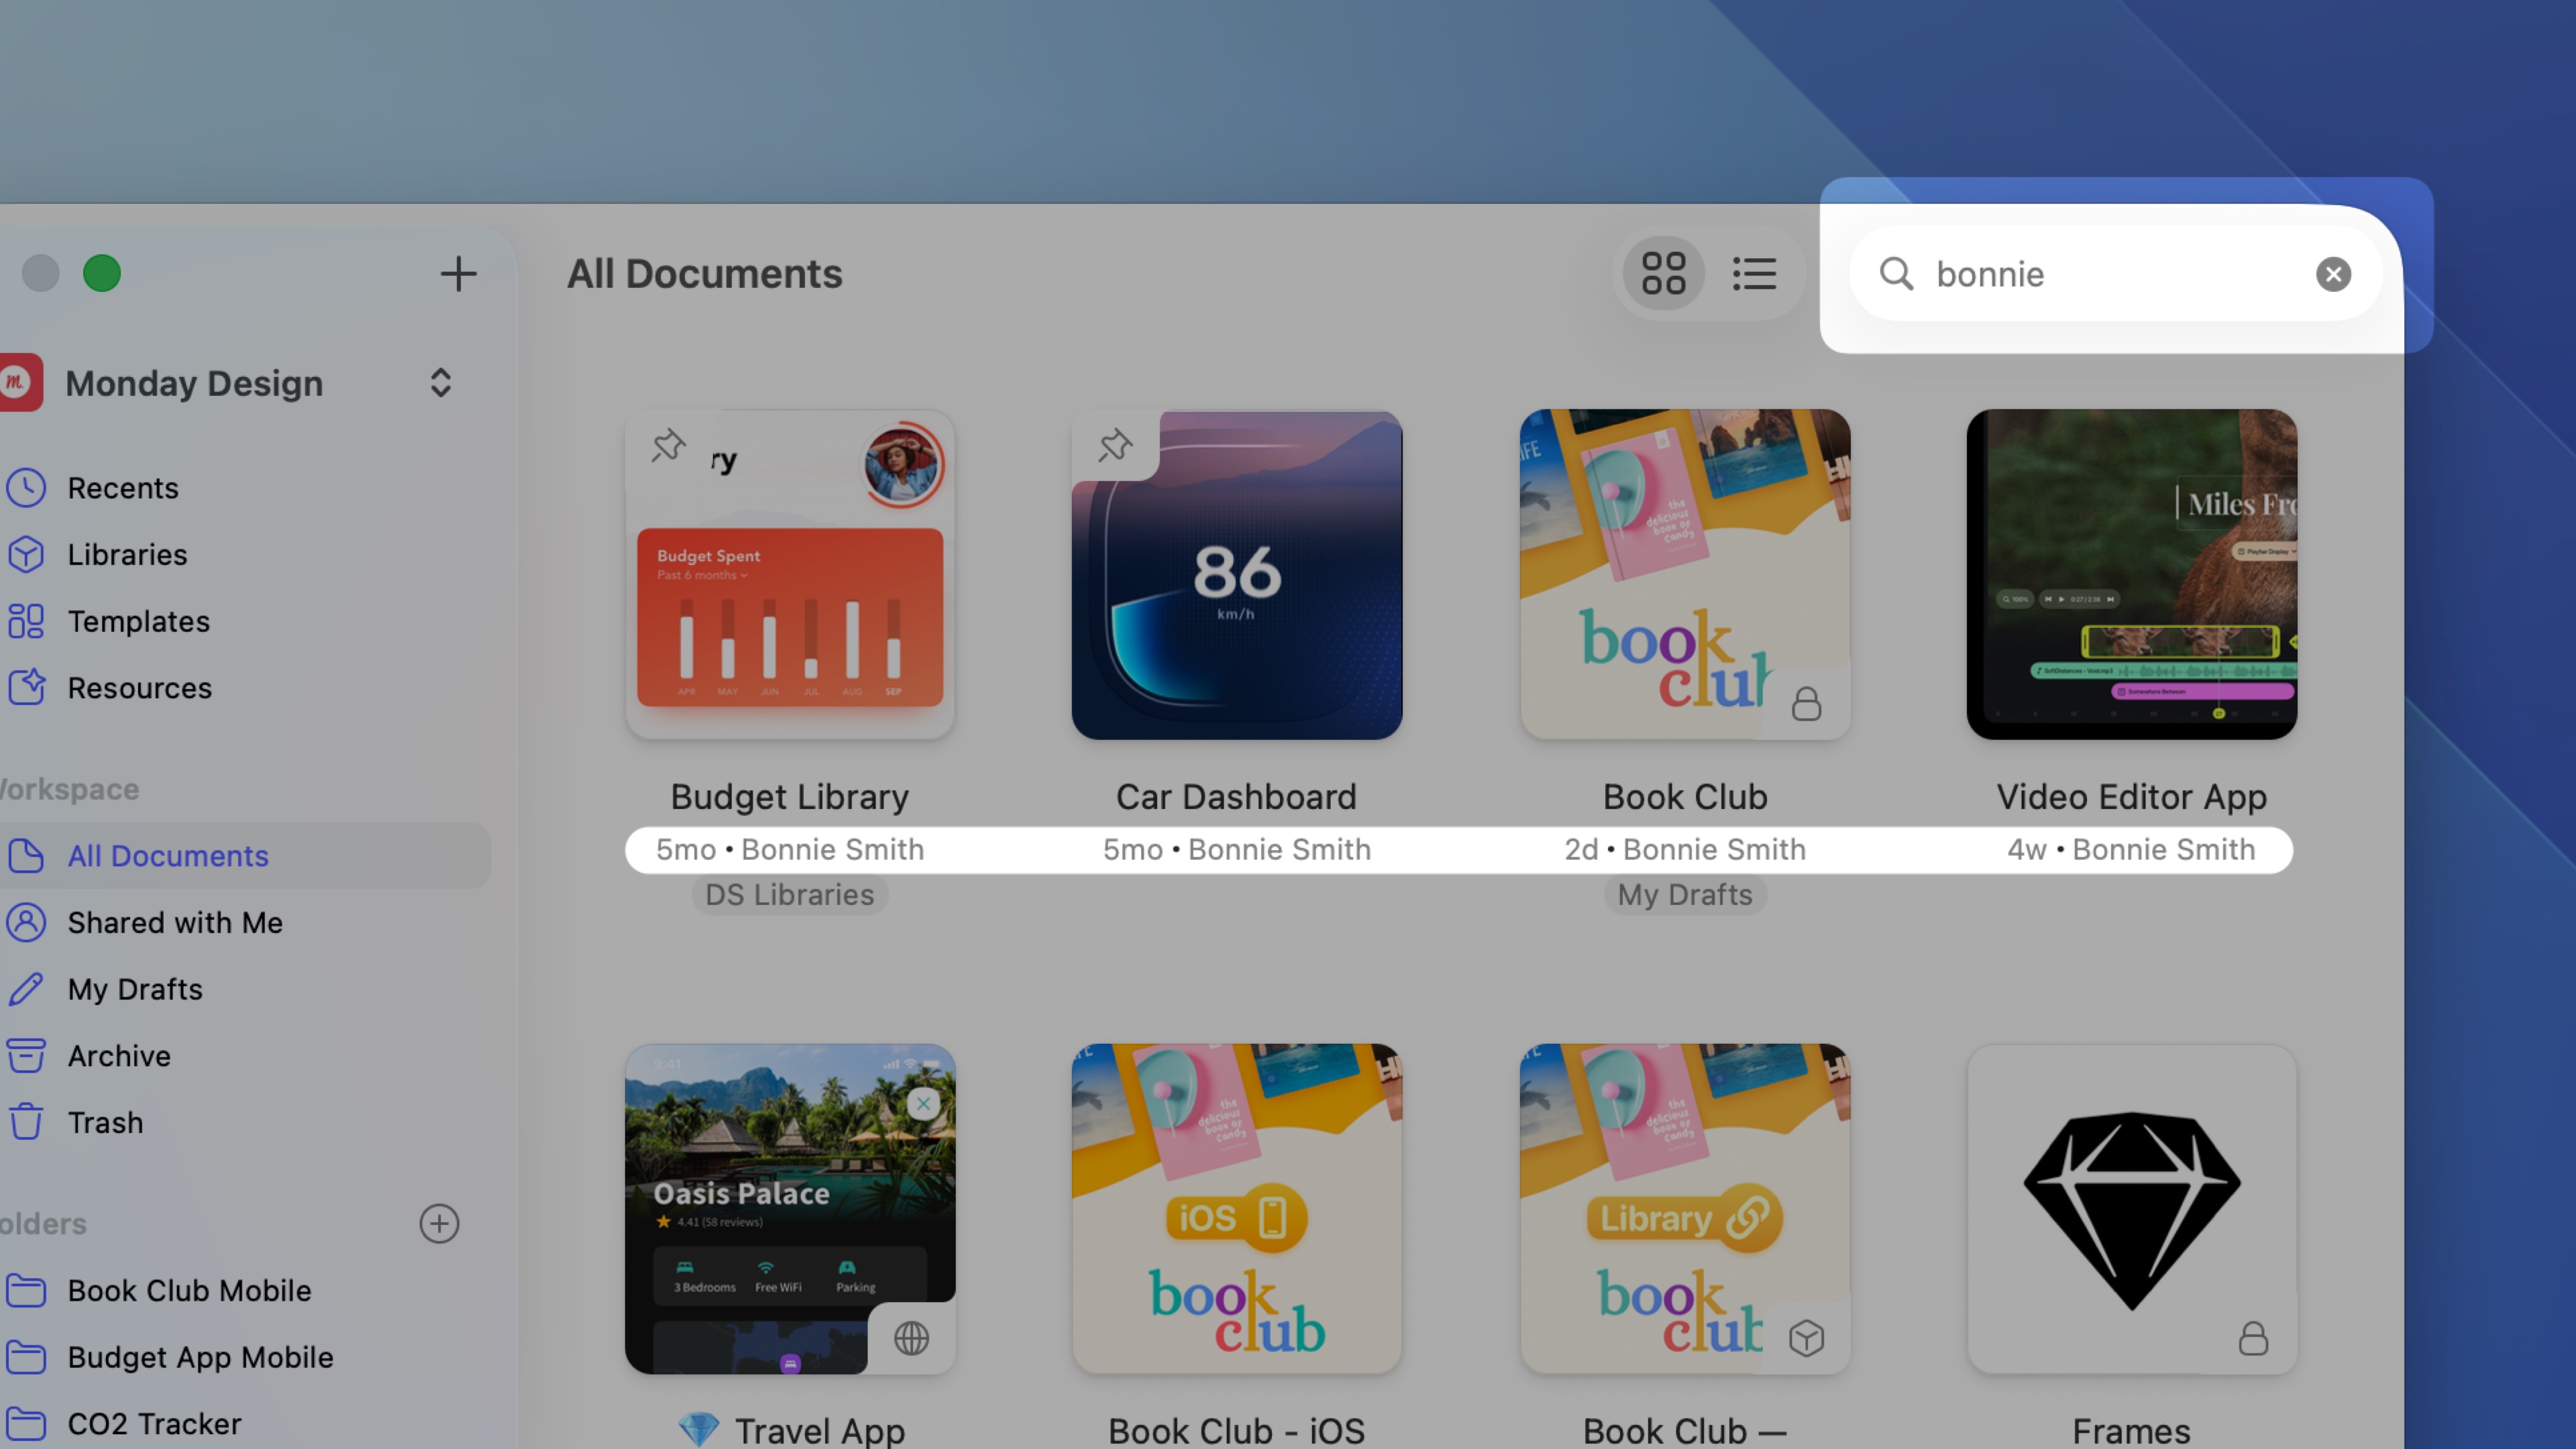
*How to search by author of the latest update of a document in the Workspace window*
Use the search bar to find documents by name or author, and choose whether to search within a specific folder or across all documents in your Workspace.
> **Note:** Search results are filtered based on the view you’re currently browsing in. For example, if you’re viewing a specific folder, searching here will only give you results from that folder.
### Pinning documents
You can pin important documents to the top of the list in the web app and Workspace window in the Mac app. Pinned items are personal to you, so you can use them in whatever way suits your workflow best.
Open the Workspace window, right-click on a document thumbnail and select **Pin Document**. To unpin it, follow the same steps and select **Unpin Document**.
Hover over a document’s thumbnail, click and select **Pin Document**. To unpin it, follow the same steps and select **Unpin Document**.
### Creating preview thumbnails
You can set any frame within a document as a preview thumbnail. The thumbnail will appear in the web app, Mac app, iOS app, and in Finder. To use a specific frame as the preview thumbnail for a document, Control-click on its name on the Canvas or in the Layer List and select **Set As Thumbnail** from the contextual menu. Selecting the option again will remove it from the frame.
If you don’t select a frame for a thumbnail, it automatically uses the first frame of the first page in your document — provided its dimensions are at least 250×250px.
### Duplicating documents
Occasionally you may want to duplicate a Workspace document to work on it separately. You can duplicate documents from the Mac app or from your web browser. Duplicate documents are always based on the original document’s most recent version.
Open the document you want to duplicate and select **File** > **Duplicate** in the menu bar or press ⇧⌘S. This will create a copy you can edit further or save right away in your Workspace or locally on your Mac.
When you duplicate from the Workspace window, the copy will be automatically saved in the **My Drafts** folder. Open the Workspace window, right-click the document’s thumbnail, and select **Duplicate to my Drafts**.

*How to duplicate a document to the My Drafts folder from the Mac app*
In the document list, hover over a document thumbnail and click on , then select **Duplicate**. Choose if you want to duplicate the document to the same folder or to your Drafts folder.
If you’re browsing a document’s contents, click on in the toolbar and select the **Duplicate** option.
### Getting a local copy
Depending on your [Auto Save settings](/docs/interface-and-settings/mac-app-settings/general/), you can either choose **File > Duplicate** (Auto Save enabled) or **File** > **Save As** (Auto Save disabled) to save a new copy of your current document. In the save sheet, you can choose to save it locally (on your Mac) or to a Workspace.
> **Note:** If you have Auto Save enabled, you’ll only see **Duplicate** in the File menu, but you can hold down ⌥ to show **Save As** instead.
You can download any document in your Workspace by hovering over a document’s thumbnail, clicking and selecting **Download document**. Alternatively, open a document, click on in the toolbar and select **Download document** from the menu options.
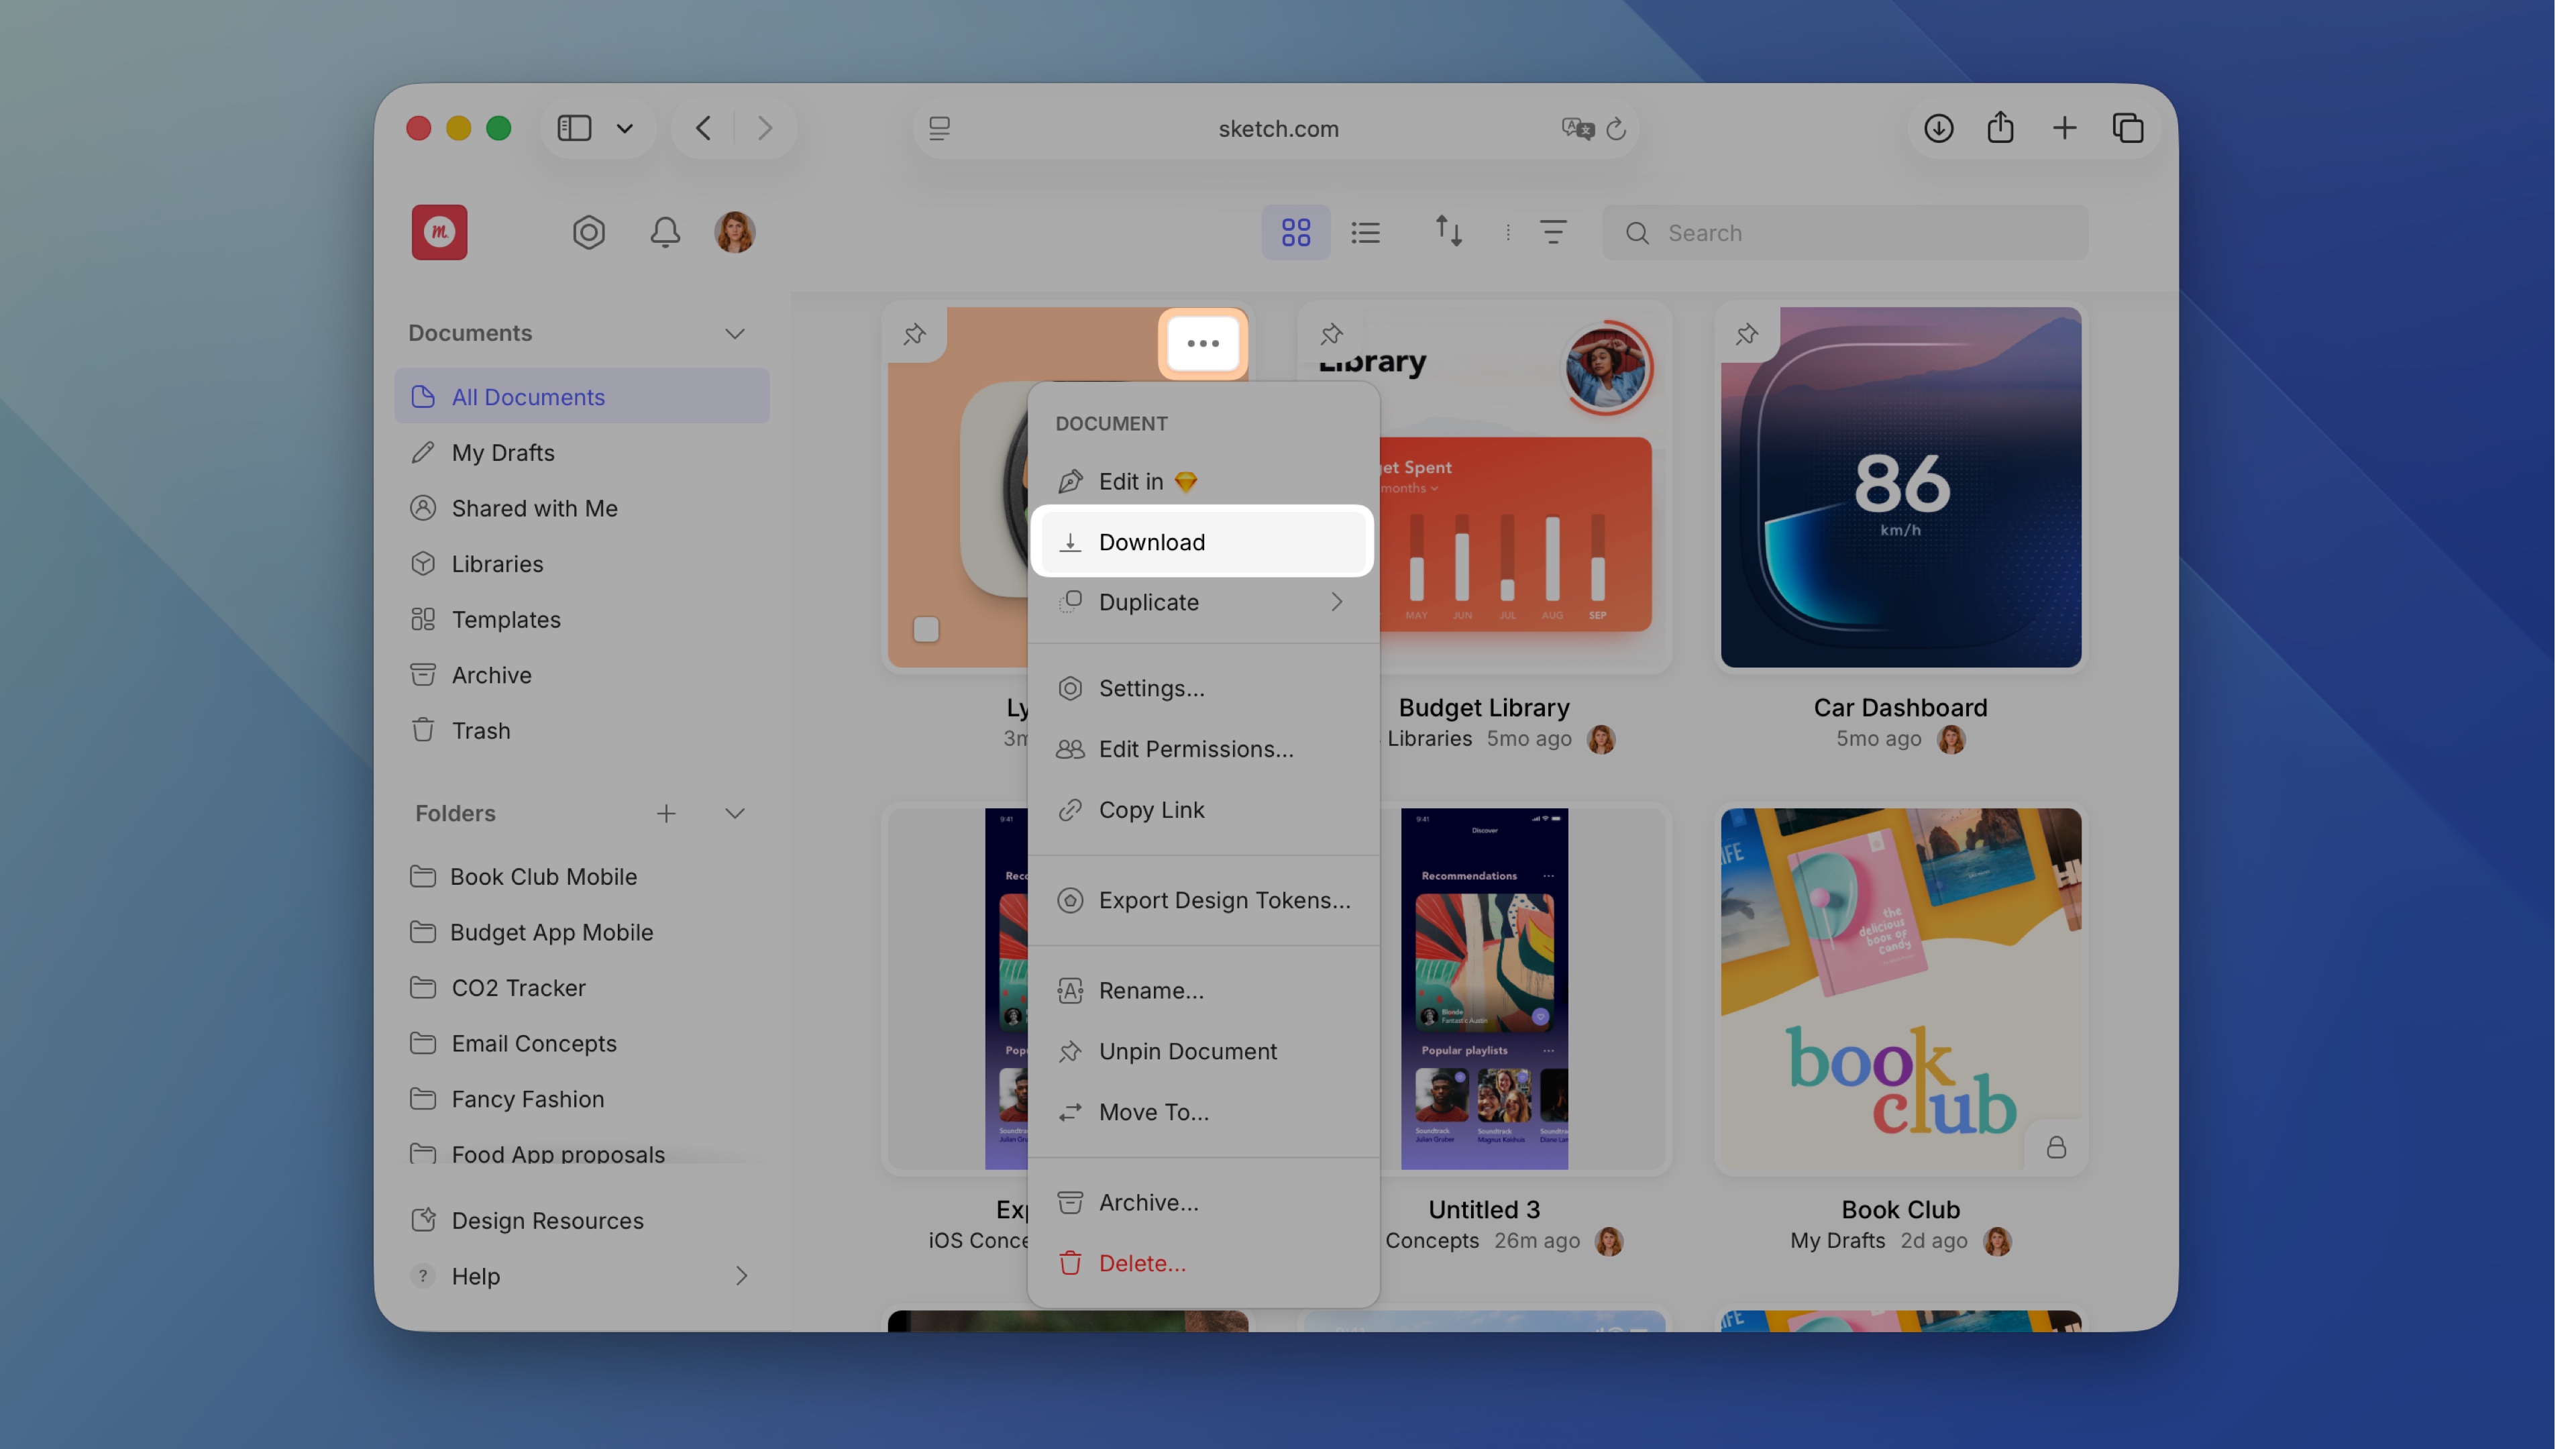
*How to download documents from a document’s thumbnail*
> **Note:** Downloading from an open document will get you the [version](/docs/getting-started/saving-and-managing-documents/#creating-and-viewing-document-versions) you’re **currently viewing** — even if that’s an older version.
## Versions
### Creating and viewing document versions
To manually save a new version, open a document in the Mac app and select **File** > **Create Version** — or press ⌃⌘S. Add an (optional) description, choose whether you want to star it, and click **Save**.
You can view all versions under the **Versions** panel in the web app. Click on any version to view it. When you’re viewing an older version, you can click the **See Latest Version** button in the top-right to go straight to the latest update.
You can also see versions of specific Artboards (if they’ve changed) when viewing an Artboard.
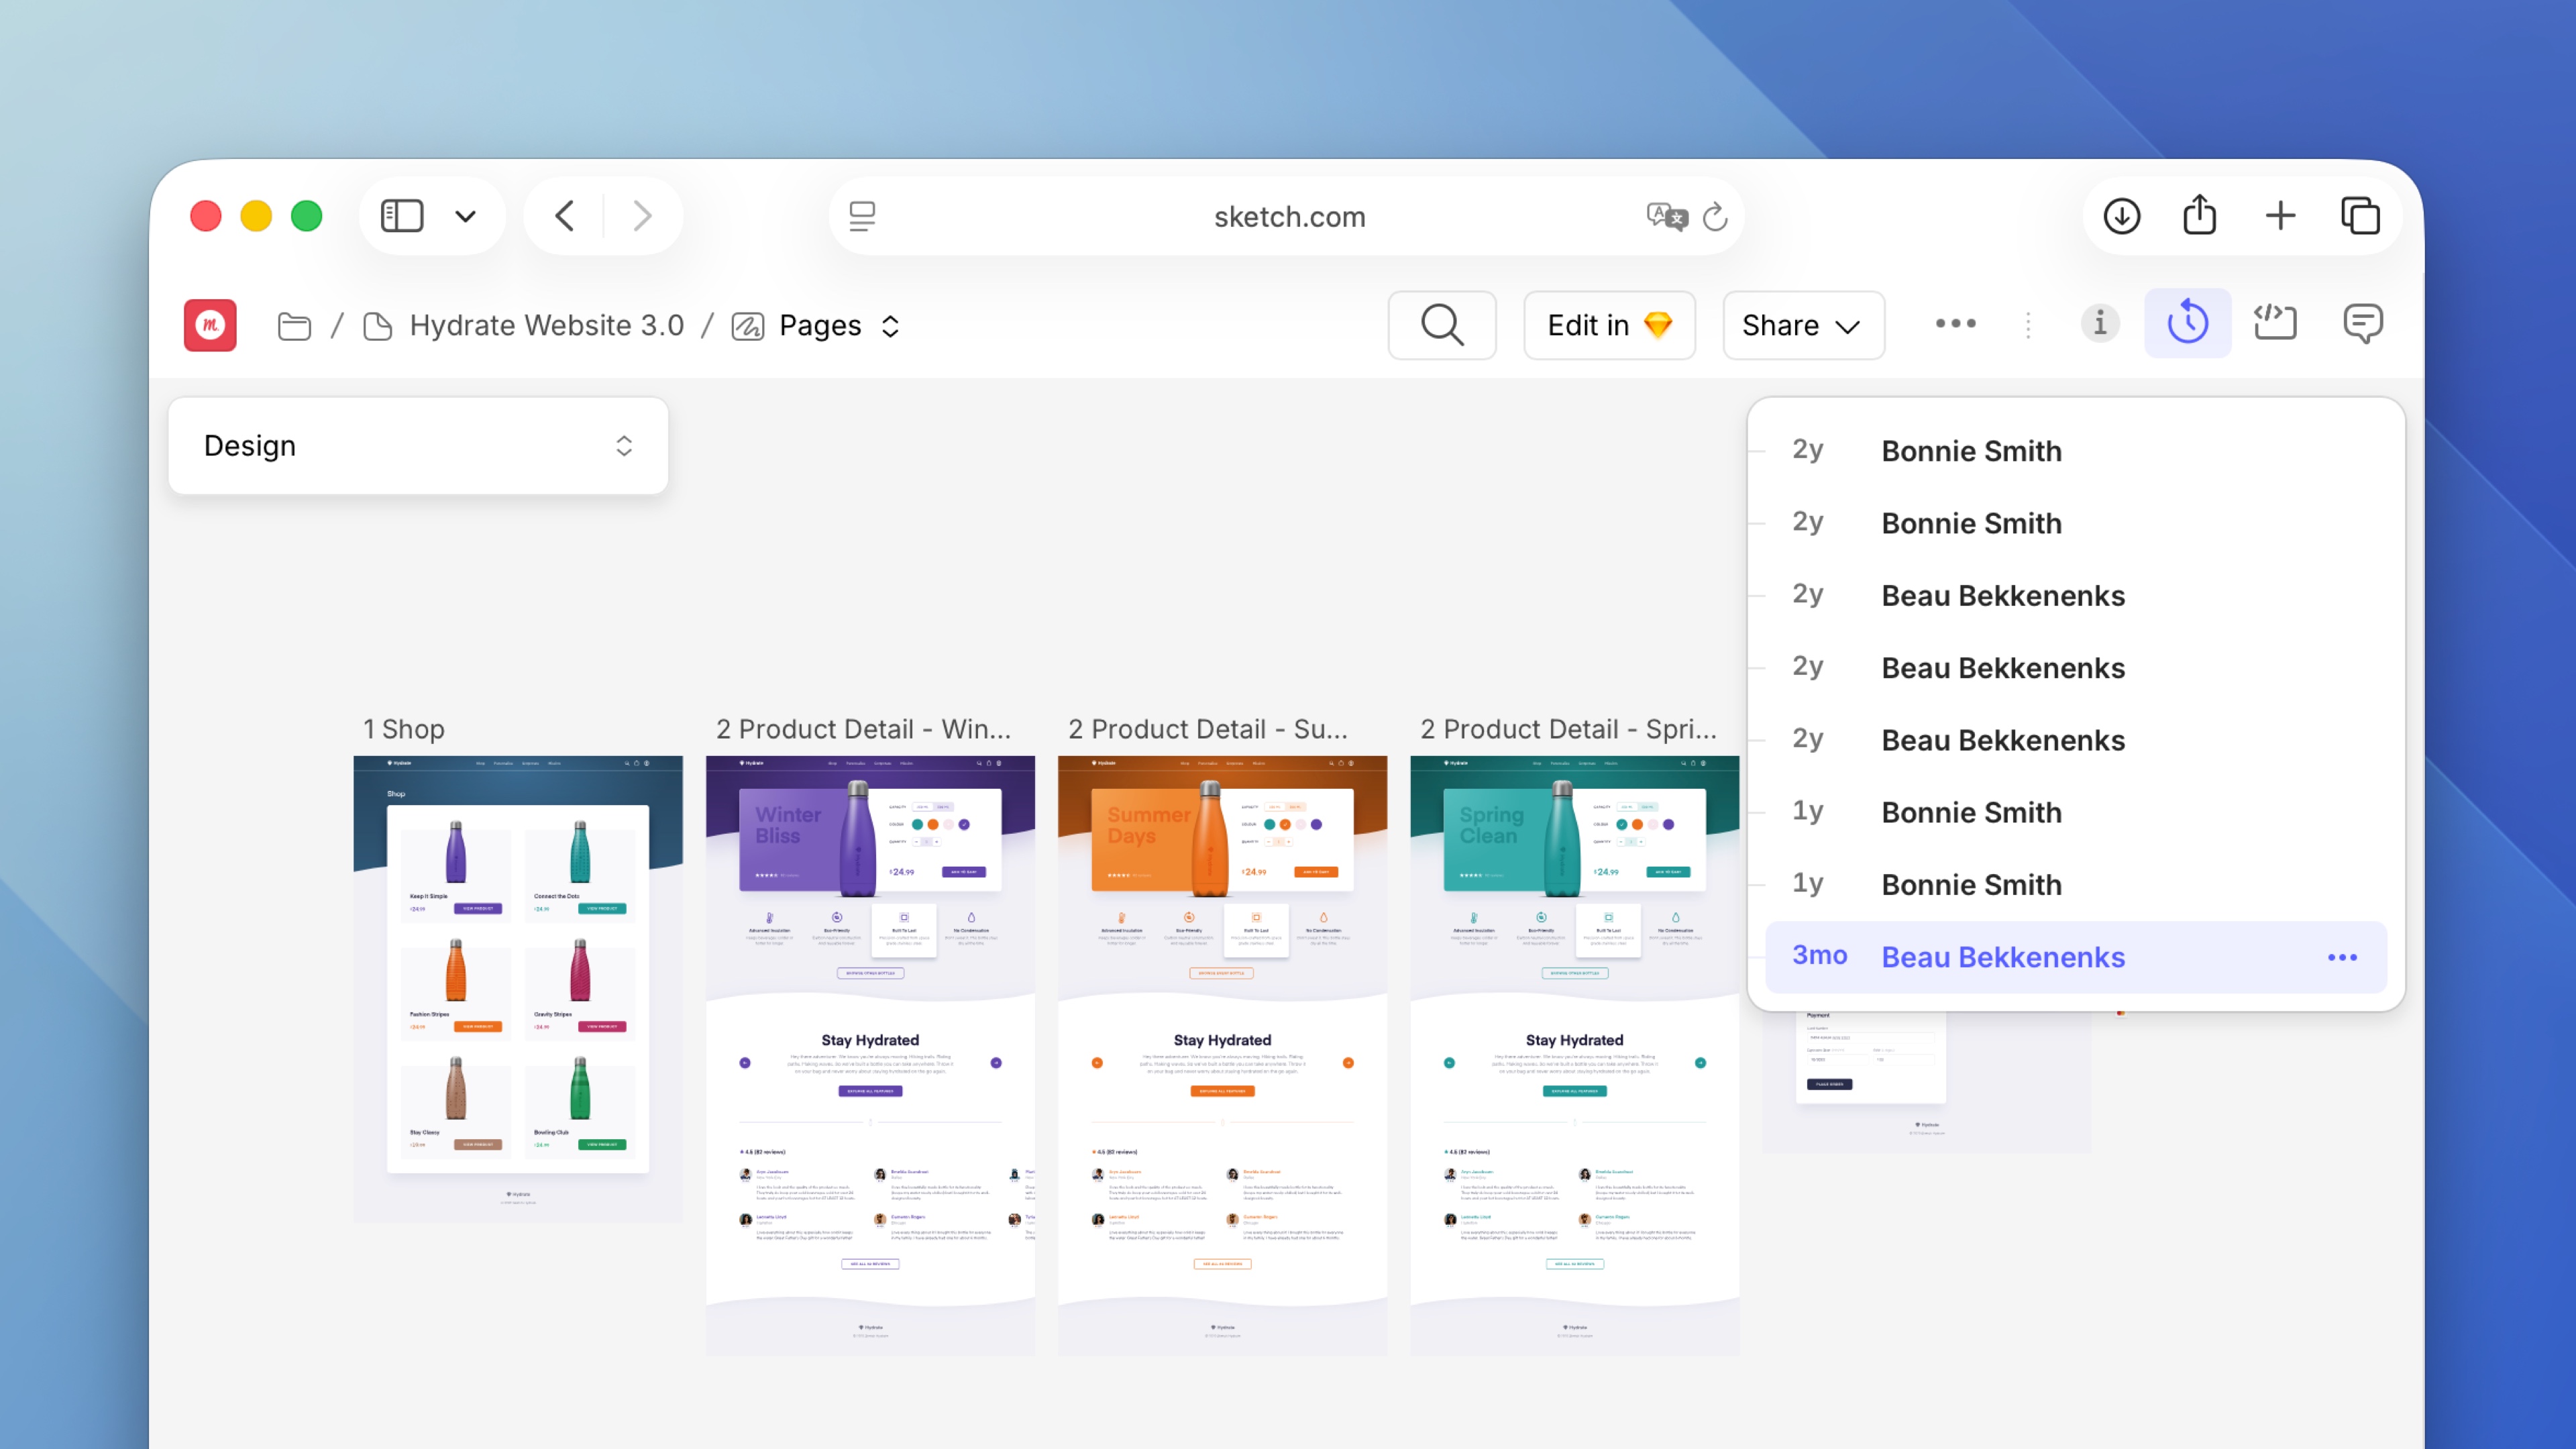
*Viewing versions in the web app*
### Adding descriptions to versions
You can add a description to any version in the web app to highlight key milestones or important changes in your document’s history. For example, you could make a note of what’s changed to your design or list the latest components you’ve added to a Library.
Head to **File** > **Create Version** or press ⌃⌘S in any open document. Enter an optional description in the dialog that appears and, if you want to, [add a star](/docs/sharing-and-collaborating/sharing-and-viewing-documents/creating-starred-versions/#how-to-star-a-version). When you’re done, click **Save**.
Open a document and select the **Versions** panel . Hover over any version, then click on and choose **Add Description**.
You can also add a description whenever you [star a version](/docs/sharing-and-collaborating/sharing-and-viewing-documents/creating-starred-versions/#how-to-star-a-version). Simply type in a quick summary in the text box.
To edit or delete a version description, select a version, open the **Document Details** panel, and click the **Edit** icon next to the description, where you can amend or delete the description entirely.
> **Note:** When you unstar a version, Sketch will still show any description you added to it. But don’t worry — if you want to remove it, you can do it manually using the process above.
### Deleting versions
Open your document and hover over the version you want to delete in the **Versions** panel , click on and choose **Delete**. You will need to confirm that you want to delete that version by clicking **Delete Version** in the confirmation window that appears.
> **Note:** If there is only one version in the document’s history, you won’t be able to delete it.
Once you’ve saved a document to your Workspace for the first time, it saves your changes automatically in the background while you work — so there’s no need to keep pressing ⌘S.
However, if you want to publish a new version that’s visible in the web app’s **Versions** panel, create a version by choosing **File > Create Version** or pressing ⌃⌘S.
If you still don’t see your latest changes, quitting Sketch will also sync any unsynced edits.
## Deleting documents
When you delete a document in your Workspace, it’ll land in the Trash . Documents stay in the Trash for 90 days — you can restore them any time before then.
Control-click on a document’s thumbnail in the Workspace window and choose **Delete Document**, or click once on the thumbnail to select it and press the backspace key on your keyboard.
There are three ways you can delete a document:
- From your Workspace or folder view, hover over your document’s thumbnail, click the icon, choose **Delete** and confirm your decision in the dialog that appears.
- You can also drag and drop a document’s thumbnail to the Trash in the sidebar.
- If you’re viewing a single Artboard or in the document’s overview, click the on the right of the Nav Bar and choose **Delete**.
### Restoring documents
To restore a file in the Trash , click on the document’s preview and click **Restore**. You can also hover over the document’s preview in the Trash, click the icon and select **Restore**.
### Permanently deleting documents
To permanently delete a document from the web app, find it in the Trash, hover over its thumbnail and click the icon and select **Delete Permanently**. When you delete a document permanently, it will also remove all its activity and history for your whole team.
> **Note:** You need to be a Workspace Admin or Owner to permanently delete documents.
You can do the same in the Mac app by right-clicking on a Trashed document and selecting **Delete Permanently**.
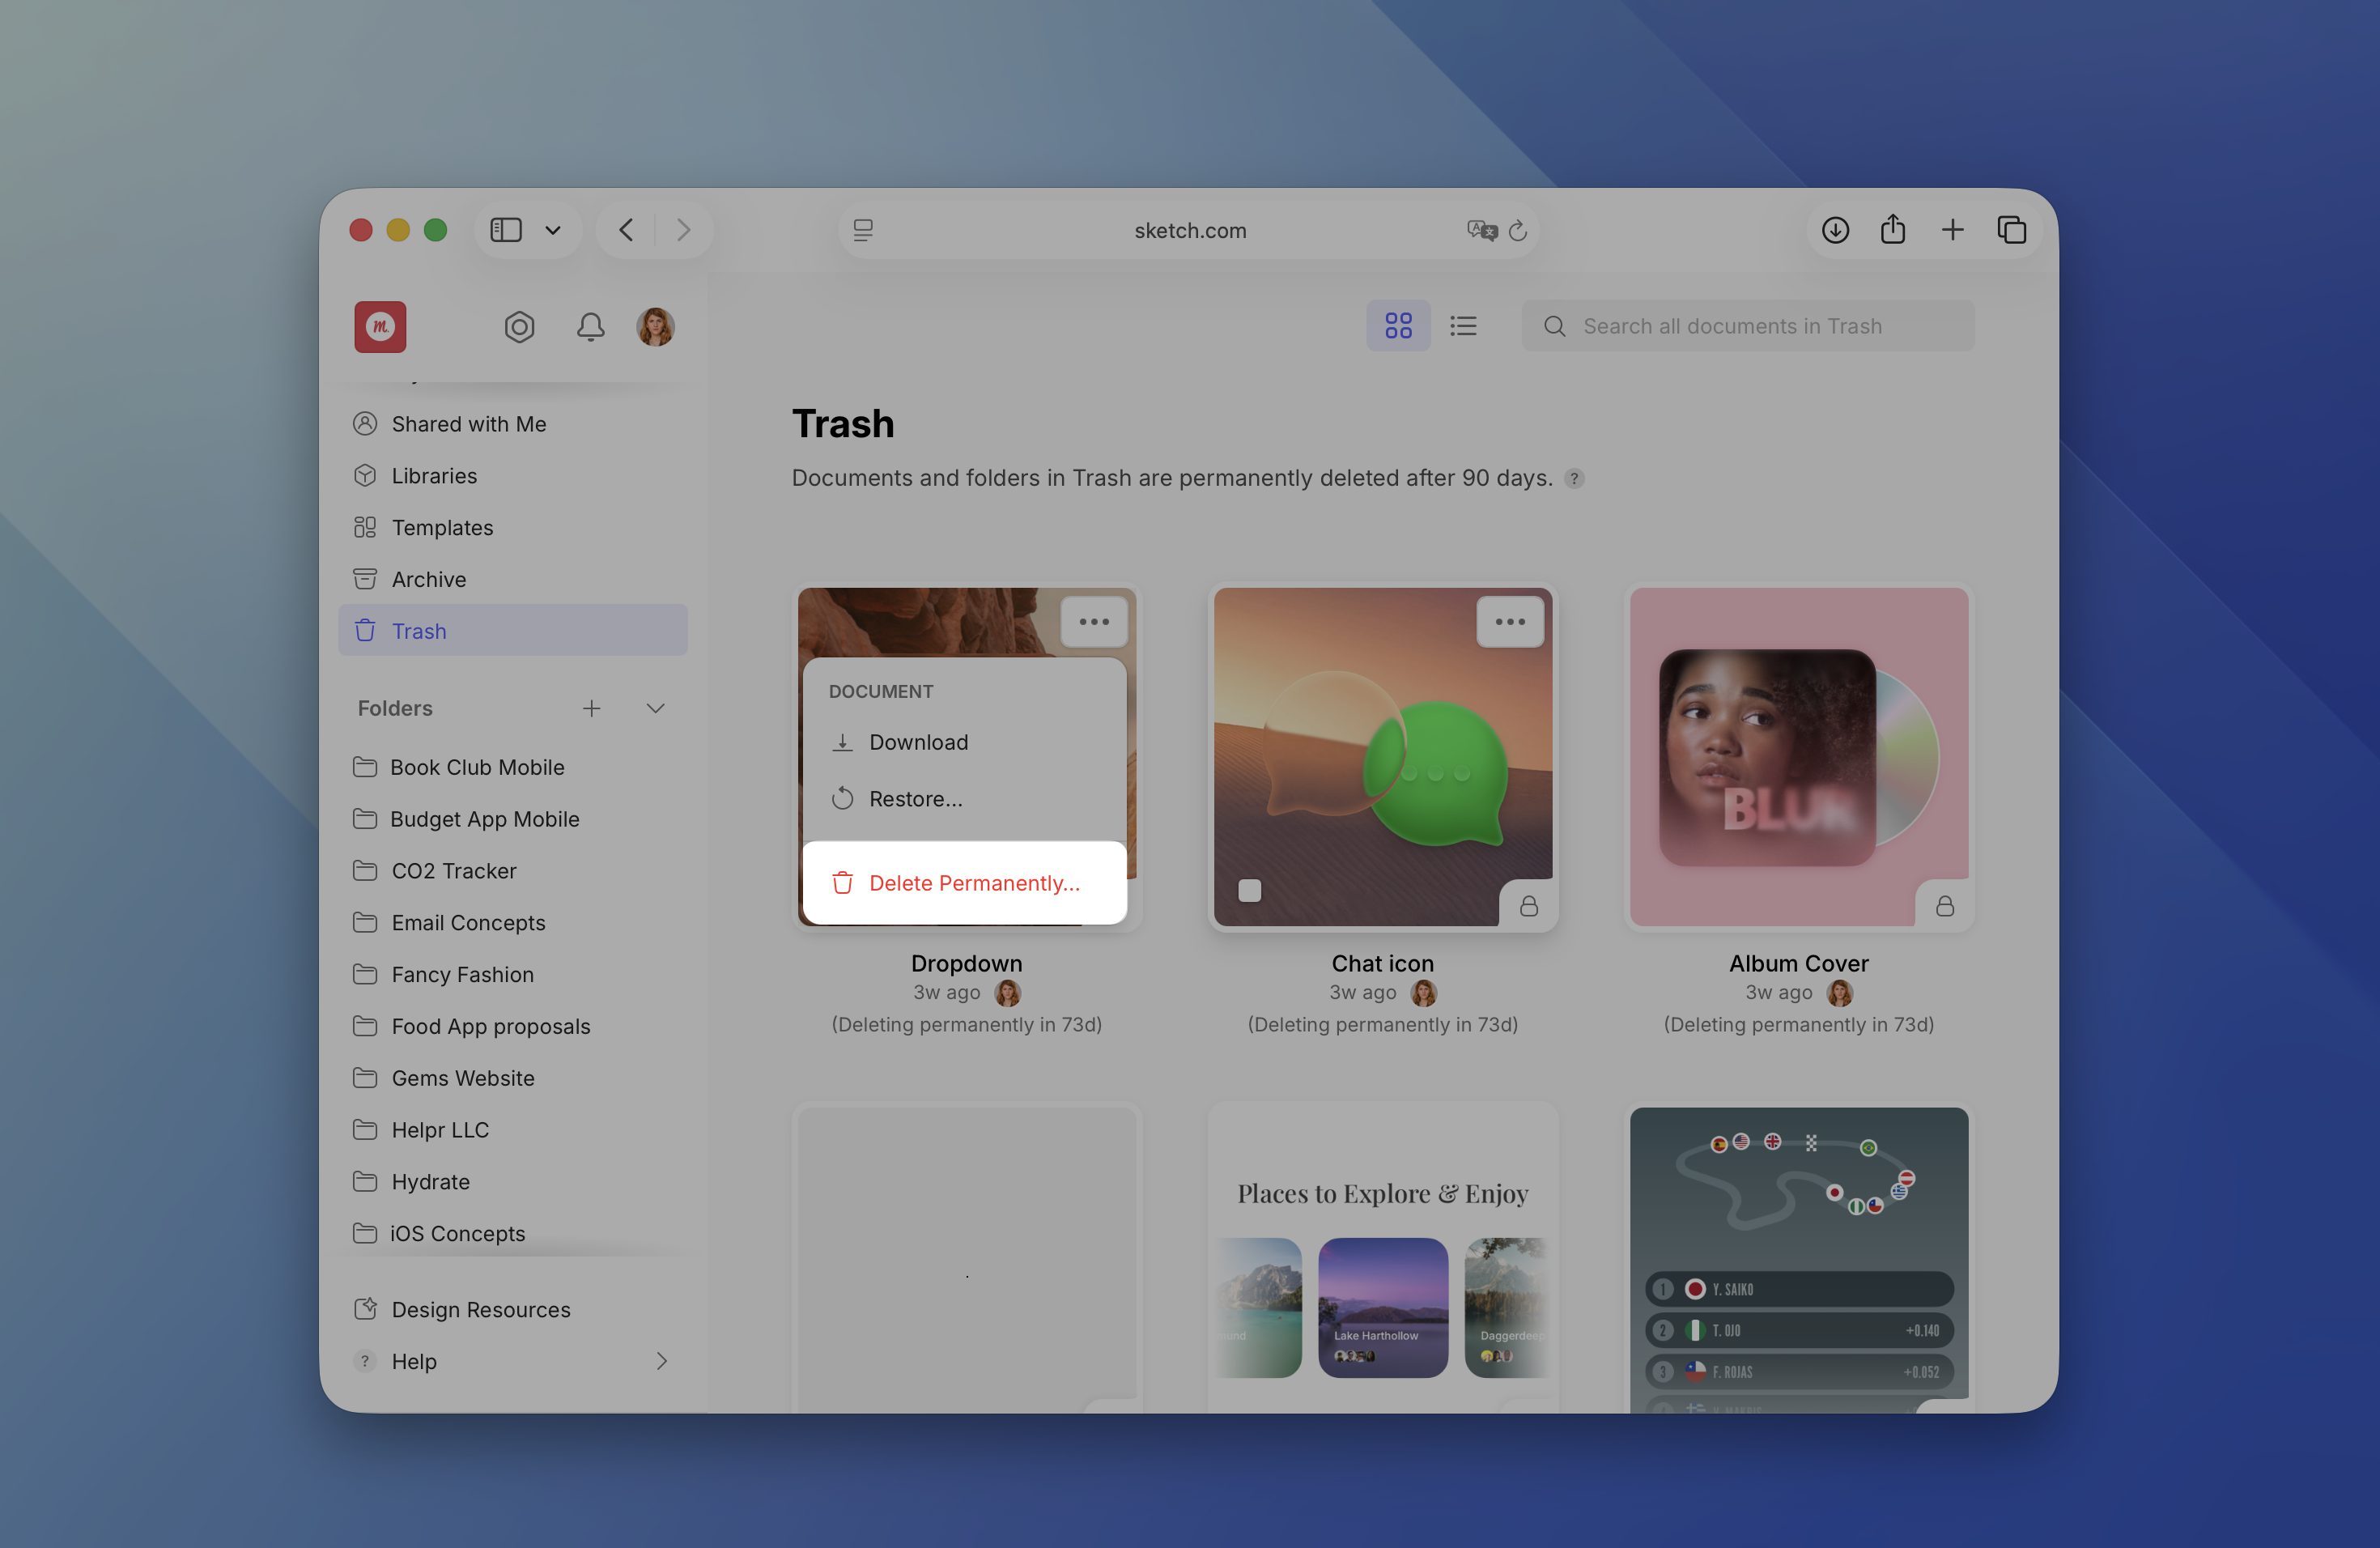
*How to permanently delete a document in the web app*
### Emptying the Trash
> **Note:** You need to be a Workspace Admin or Owner to empty the Trash. You can’t undo this action, so make sure you don’t delete anything you may need later on.
Right-click on the Trash in the Workspace window and select **Empty Trash**.
Hover over the Trash icon in the sidebar, click and select **Empty**.
--------------------------------------------------------------------------------
title: "Folders"
description: "Organize your Workspace with folders — create, move, pin, archive, and nest them to keep your documents easy to find."
last_modified: "2026-05-19"
url: "https://www.sketch.com/docs/getting-started/folders/"
--------------------------------------------------------------------------------
## Folders
Use folders to organize documents in your Workspace. Group documents by project, client, year, or status to keep everything easy to find.
> **Note:** If you’re using a version earlier than Copenhagen, you’ll find Collections instead of folders. Everyone in your Workspace will also need to update to Copenhagen to see nested folders.
## Working with folders
- **Flexible organization**: Nest folders as deep as you need to organize your documents however you like.
- **Easy management**: Move documents and folders between folders or Workspaces at any time.
- **Archiving options**: Archive documents or entire folders to keep your Workspace focused while preserving access. (Professional, Enterprise, and Private Cloud plans only)
- **Safe cleanup**: When you delete a folder, all of its contents move to Trash for easy recovery.
- **Bulk archiving**: Archiving a folder automatically archives all items inside it.
- **Consistent sharing**: Nested folders always inherit the permissions of their top-level parent folder, so access stays consistent across all documents.
## Creating a folder
To create a folder in the Mac app:
1. Open the Workspace window using ⌘O.
1. Locate the Folders section in the left sidebar.
1. Click the plus circle to create a folder.
1. Give it a new name and press ⏎.
1. Locate the Folders section in the left sidebar.
1. Click the icon.
1. Give your folder a name and add a description (optional).
1. Set your [share settings](/docs/sharing-and-collaborating/document-permissions/).
1. Click **Create Folder**.
## Adding documents to folders
In the Workspace window, drag a document onto a folder to move it there. You can drag and drop documents from the **All Documents** tab to any folder in the sidebar, or from a folder to another folder. You can also right-click a document thumbnail and select **Move To** to move documents around your Workspace.
Drag the document you want to move and drop it onto its new folder in the sidebar. You can also hover over a document’s thumbnail and click the button to bring up its options. From there, select **Move To…**. In the window that appears, select the folder from the drop-down menu, then click **Move** to confirm.
### Moving multiple documents
You can move multiple documents and folders at once by selecting them, then dragging them to the same destination. To select items, either click and drag to draw a selection, or hover over a document’s thumbnail and click the checkbox. Once selected, you can move everything together into the same folder.
## Moving folders to other Workspaces
To move a folder to another Workspace:
1. Hover over its thumbnail in the left sidebar and click > **Move To**.
1. In the **Move** modal, select the new Workspace from the list. You can also search for it using the search bar.
1. Pick the destination folder. We’ll ask you to confirm whether you want to keep sharing it with everyone who already has access.
> **Note:** You’ll also see expired Workspaces in the list, but you can’t move documents to them until you reactivate them.
> **Note:** Only Admins can move documents to other Workspaces. They’ll also need to be an [Admin or an Editor](/docs/interface-and-settings/workspace-and-account-settings/editors-viewers-and-guests/#editors) in the Workspace they are moving documents to.
## Removing documents from folders
1. Right-click a document’s thumbnail and select **Move To…**.
1. Select your Workspace from the list.
1. Review how this may affect access to your document in the modal.
1. Click **Move Document**.
1. Hover over a document’s thumbnail and click the button.
1. Select **Move To** from the menu.
1. Select your Workspace at the top of the list, or search for it using the search bar.
1. Review the permissions and destination of the document.
1. Click **Move** to confirm.
## Pinning folders and documents
Pin a folder or document to keep it at the top of your Workspace.
### Pinning folders
Open the Workspace window using ⌘O, right-click a folder in the sidebar, and select **Pin Folder**. You’ll find pinned folders at the top of your list of folders in the sidebar. Follow the same steps to unpin a folder.
Find the folder you want to pin, click the button, and select **Pin Folder**.
### Pinning documents
Right-click the document in the Workspace window, and select **Pin Document**. Pinned documents appear at the top of the list or grid in the **All Documents** tab. Follow the same steps to unpin a document.
Hover over the document’s thumbnail, click the button, and select **Pin Document**. Follow the same steps to unpin a document.
## Archiving folders
Admins in your Workspace can archive folders you no longer need to see or access frequently. Archived folders no longer appear in the sidebar or All Documents tab, but you can always unarchive them to bring them back.
> **Note:** Archiving folders is available to customers on our [Professional plan](/support/subscriptions/professional/), [Enterprise plan](/support/subscriptions/enterprise/), and [Private Cloud](/support/subscriptions/private-cloud/).
Find your folder in the Workspace window, right-click the folder, select **Archive**, and confirm your decision in the modal that appears. You’ll find archived folders in the Archive tab at the top of the sidebar in the Workspace window. You can still view and edit archived documents and folders.
Find your folder in the sidebar, click the button, select **Archive**, and confirm your decision in the modal that appears. You’ll find archived folders in the Archive tab at the top of the sidebar in the Workspace window. You can still view and edit archived documents and folders in the Mac app.
## Unarchiving folders
Find your folder in the Archive, right-click the folder, and select **Unarchive**. When you unarchive a folder, it will go back to the sidebar in the Workspace window.
Find it in the Archive, click the button, and select **Unarchive**. When you unarchive a folder, it will appear in the Workspace window’s sidebar again.
--------------------------------------------------------------------------------
title: "Single Sign-On (SSO) & SCIM"
description: "Learn how Single Sign-On (SSO) and SCIM provisioning work in Sketch, and find step-by-step guides to get set up."
last_modified: "2026-05-19"
url: "https://www.sketch.com/docs/getting-started/single-sign-on/"
--------------------------------------------------------------------------------
## Single Sign-On (SSO) & SCIM
Single Sign-On (SSO) gives members in our [Professional plan](/support/subscriptions/plans/professional/) a quick and safe way to sign in to both the Mac app and web app. Along with SSO, the Professional plan also includes invoice-based billing, permissions groups, project archiving, and the permissions directory.
If you need to automate user management through your identity provider, [SCIM provisioning](/docs/getting-started/single-sign-on/scim-provisioning/) is available on our Enterprise and Private Cloud plans. Sounds like a fit for your team? [Get in touch](/support/contact/?topic=professional) and we’ll tell you all about it.
Looking to set up SSO or SCIM? Head straight to [Setting up SAML SSO](/docs/getting-started/single-sign-on/setting-up-saml-sso/) or [Setting up SCIM provisioning](/docs/getting-started/single-sign-on/scim-provisioning/).
--------------------------------------------------------------------------------
title: "SSO & provisioning"
description: "Learn how to set up SSO and provisioning for Sketch with the help of our step-by-step guides and video tutorials."
last_modified: "2026-01-23"
url: "https://www.sketch.com/docs/getting-started/single-sign-on/sso-and-provisioning/"
--------------------------------------------------------------------------------
## SSO & provisioning
## The benefits of SSO
Single Sign-On (SSO) is an authentication process that lets users access their Sketch Account through an identity provider (IdP) — like Google, OneLogin, Okta, Azure and others — instead of setting up separate sign-in details.
There are two key benefits to SSO. First, it’s a very secure authentication method that gives you full control over who can access your company’s Sketch Account — your Head of Security will love it! Second, it makes signing into Sketch faster and easier for your team, because they won’t need to create (and remember) new sign-in credentials.
From a technical perspective, our current SSO implementation is compliant with SAML 2.0, including JIT provisioning. It’s also compatible with almost every identity provider that uses the SAML 2.0 basis.
**Note:** Security Assertion Markup Language (SAML) is an XML-based protocol that uses security tokens to pass information between a SAML authority (i.e., an Identity Provider or IdP) and a SAML consumer (i.e., a Service Provider — in this case, us) about a principal (usually an end user).
## Provisioning
When someone signs in for the first time using your preferred IdP, we’ll create a new, free Viewer Seat in your Workspace. Your Workspace Admin can upgrade it to an Editor Seat at any point. If you have a long list of users, don’t worry — **[contact us](/support/contact/)** and we can help speed up the process.
Keep in mind that only users that your security team has given access to through your IdP will be able to sign in to Sketch.
Once SSO is enabled, all users in the Workspace will have to sign in via SSO. However, Workspace Admin(s) in the Workspace will still be able to use their sign-in credentials to access Sketch to troubleshoot configuration.
**Note:** Just-in-time provisioning of accounts (JIT) avoids the need for SSO users to create a Sketch account before signing in with SSO. The first successful sign in with an IdP will automatically create an account with an identity and membership for the Workspace where that IdP belongs.
## Other
- **IdP initiated SSO**: For [security reasons](https://www.identityserver.com/articles/the-dangers-of-saml-idp-initiated-sso/), we don’t allow IdP-initiated SSO. Users will need to begin the sign-in process from Sketch.
- **Changing your name/email address in your SSO Workspace**: If a user wants to change their name or email address, you’ll need to do so via your IdP.
- **Inviting other people to the SSO Workspace**: You can’t invite other users to an SSO Workspace. To access the Workspace, they’ll need to know the Workspace’s shortname and use it to sign in. If they don’t have an account in the organization’s IdP, they’ll need to speak to their IT department.
- **Technical requirements**: You’ll need MacOS 10.15 or later and Sketch 70.2 or later.
--------------------------------------------------------------------------------
title: "Setting up SCIM provisioning"
description: "Learn what SCIM is and how to set up SCIM provisioning with your identity provider"
last_modified: "2026-04-01"
url: "https://www.sketch.com/docs/getting-started/single-sign-on/scim-provisioning/"
--------------------------------------------------------------------------------
## Setting up SCIM provisioning
This article covers what SCIM is, why it’s useful, how to turn it on, and which identity providers work with Sketch.
## Setup guides
- [Microsoft Entra ID](/docs/getting-started/single-sign-on/scim-provisioning/microsoft-entra/) (formerly Azure Active Directory)
- [Okta](/docs/getting-started/single-sign-on/scim-provisioning/okta/)
- [Ping Identity](/docs/getting-started/single-sign-on/scim-provisioning/ping-identity/)
## What is SCIM provisioning?
With SCIM provisioning you can automate user management through your identity provider (IdP). It helps keep your users, permissions, and access in sync with your internal systems — and cuts down the manual work involved. You’ll need to be on an [Enterprise](/support/subscriptions/enterprise/) or [Private Cloud](/support/subscriptions/private-cloud/) plan.
## What is SCIM?
SCIM (System for Cross-domain Identity Management) is an industry standard for automating user provisioning. It lets your identity provider create, update, and deactivate user accounts in external services without any manual work from Workspace admins.
SCIM keeps your Sketch Workspace in sync with your organization’s directory. When someone joins, changes teams, or leaves the company, their Sketch access updates automatically.
## Benefits of SCIM
SCIM gives your organization better security and consistency, and makes user management far easier. It is especially helpful for larger teams, distributed organizations, or companies with strict compliance requirements.
- User lifecycle management runs automatically.
- Adding a user in your IdP automatically creates their Sketch account.
- Removing or disabling a user in your IdP immediately revokes their access.
- Admins spend less time managing seats manually: access stays aligned with your internal directory, reducing errors and keeping everything up to date.
- Security and compliance improve by preventing outdated accounts or lingering access after role changes or when someone leaves.
## How do I enable SCIM for my organization?
SCIM is available on [Enterprise](/support/subscriptions/enterprise/) and [Private Cloud](/support/subscriptions/private-cloud/) plans.
- Head to your Workspace settings, then look for the [Single Sign-on](/workspace/settings/sso) tab.
- Copy the `Base URL` and `SCIM Token` that appear.
- Paste these values in the **Provisioning** section of your identity provider.
If you need any help setting things up, [contact us](/support/contact/?topic=enterprise&subject=other&summary=I%20need%20help%20setting%20up%20SSO%20or%20SCIM.%0A%0A---%0A%0AAdd%20any%20other%20details%20below%3A%0A) and we’ll help you out.
--------------------------------------------------------------------------------
title: "Microsoft Entra ID"
description: "Learn how to set up SCIM provisioning with Microsoft Entra ID (formerly Azure Active Directory) for your Sketch Workspace."
last_modified: "2026-02-26"
url: "https://www.sketch.com/docs/getting-started/single-sign-on/scim-provisioning/microsoft-entra/"
--------------------------------------------------------------------------------
## Microsoft Entra ID
This guide shows you how to set up SCIM provisioning with [Microsoft Entra ID](https://www.microsoft.com/en-us/security/business/identity-access/microsoft-entra-id) for your Sketch Workspace. If you get stuck during setup, [contact us](/support/contact/?topic=enterprise&subject=other&summary=I%20need%20help%20setting%20up%20SSO%20or%20SCIM.%0A%0A---%0A%0AAdd%20any%20other%20details%20below%3A%0A) and we’ll help you out.
> **Note:** **[Start here if you already use Entra ID for SSO](#existing-entra-id-sso-configuration).**
You’ll need to delete the Gallery app and create a custom app before continuing.
## 1. Create a custom application
1. Navigate to **Enterprise apps** > **All applications**, then click **New application**.
1. Select **Create your own application**.
1. Name your application and keep the preselected option *Integrate any other application you don’t find in the gallery (Non-gallery)*.
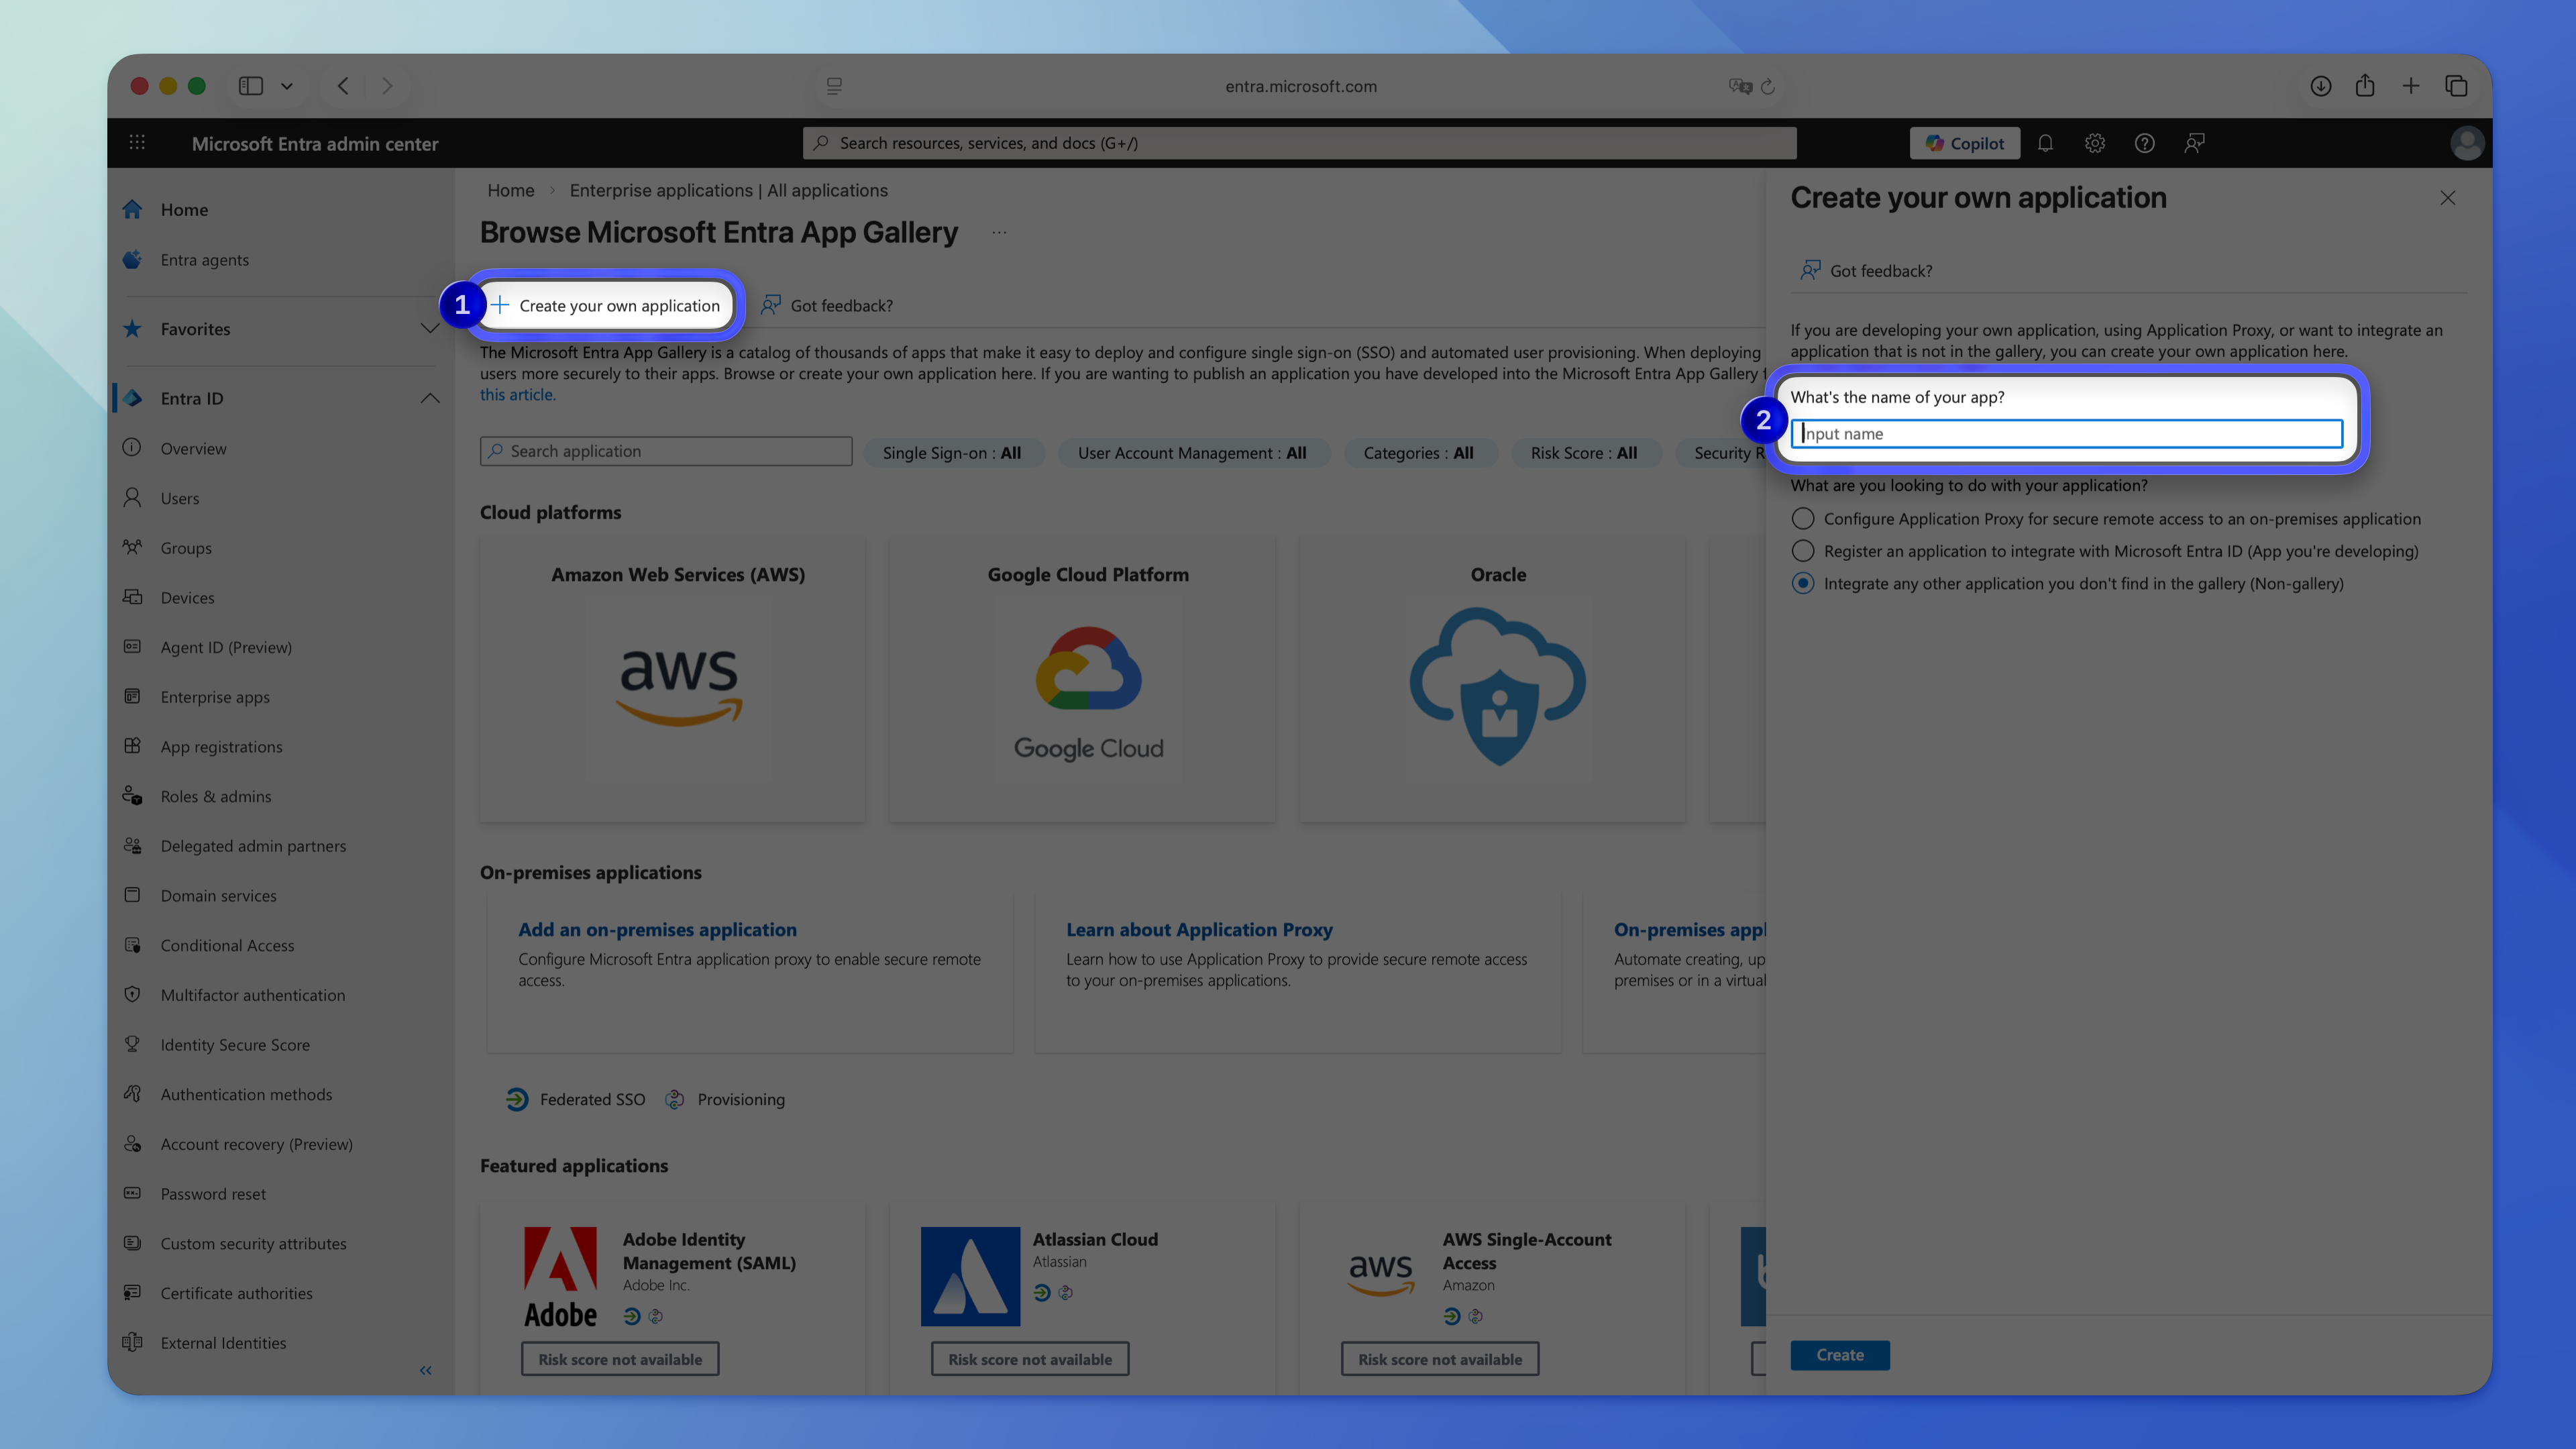
### Configure SSO
1. Set up SAML by adding the Entity ID, ACS, and sign-on URLs.
1. Update the SSO attributes and claims in Entra ID. You’ll need to change the default values for the SSO attributes and claims.
Manually review and create new claim mappings for a successful sign-in. Incorrect mappings are a common cause of sign-in issues.
- **Email:** Map the email claim to `userPrincipalName`.
- **Given Name (First Name):** Map to `user.givenname`.
- **Surname:** Map to `user.surname`.
1. Save your changes to the attribute mappings.
### Upload the metadata to Sketch
1. Download the **Federation Metadata XML** file from Entra ID.
1. Sign in to Sketch as an admin.
1. Navigate to **Settings** > **[Single Sign-on](/workspace/settings/sso)**.
1. Open the **Configure Sketch** tab, then drag and drop the XML file.
> **Note:** For more details on configuring SSO, see our [Entra ID SSO documentation](/docs/getting-started/single-sign-on/setting-up-saml-sso/setup-identity-provider/azure-active-directory/).
## 2. SCIM provisioning setup
### Enable provisioning in Entra ID and Sketch
In your custom Entra ID application, go to **Provisioning** and enable SCIM. In the **Admin credentials** section, enter the following:
- **Authentication method:** `Bearer authentication`
- **Tenant URL:** SCIM endpoint URL from Sketch
- **Secret token:** SCIM token from Sketch
To get these values from Sketch:
1. Sign in to your Sketch Workspace as an admin.
2. Go to **Settings** > **[Single sign-on](/workspace/settings/sso)**.
3. Scroll to the bottom of the page and click **Enable SCIM**.
4. Copy the **SCIM endpoint URL** (Tenant URL) and **SCIM token** (Secret token).
5. Paste these values into the provisioning settings in Entra ID.
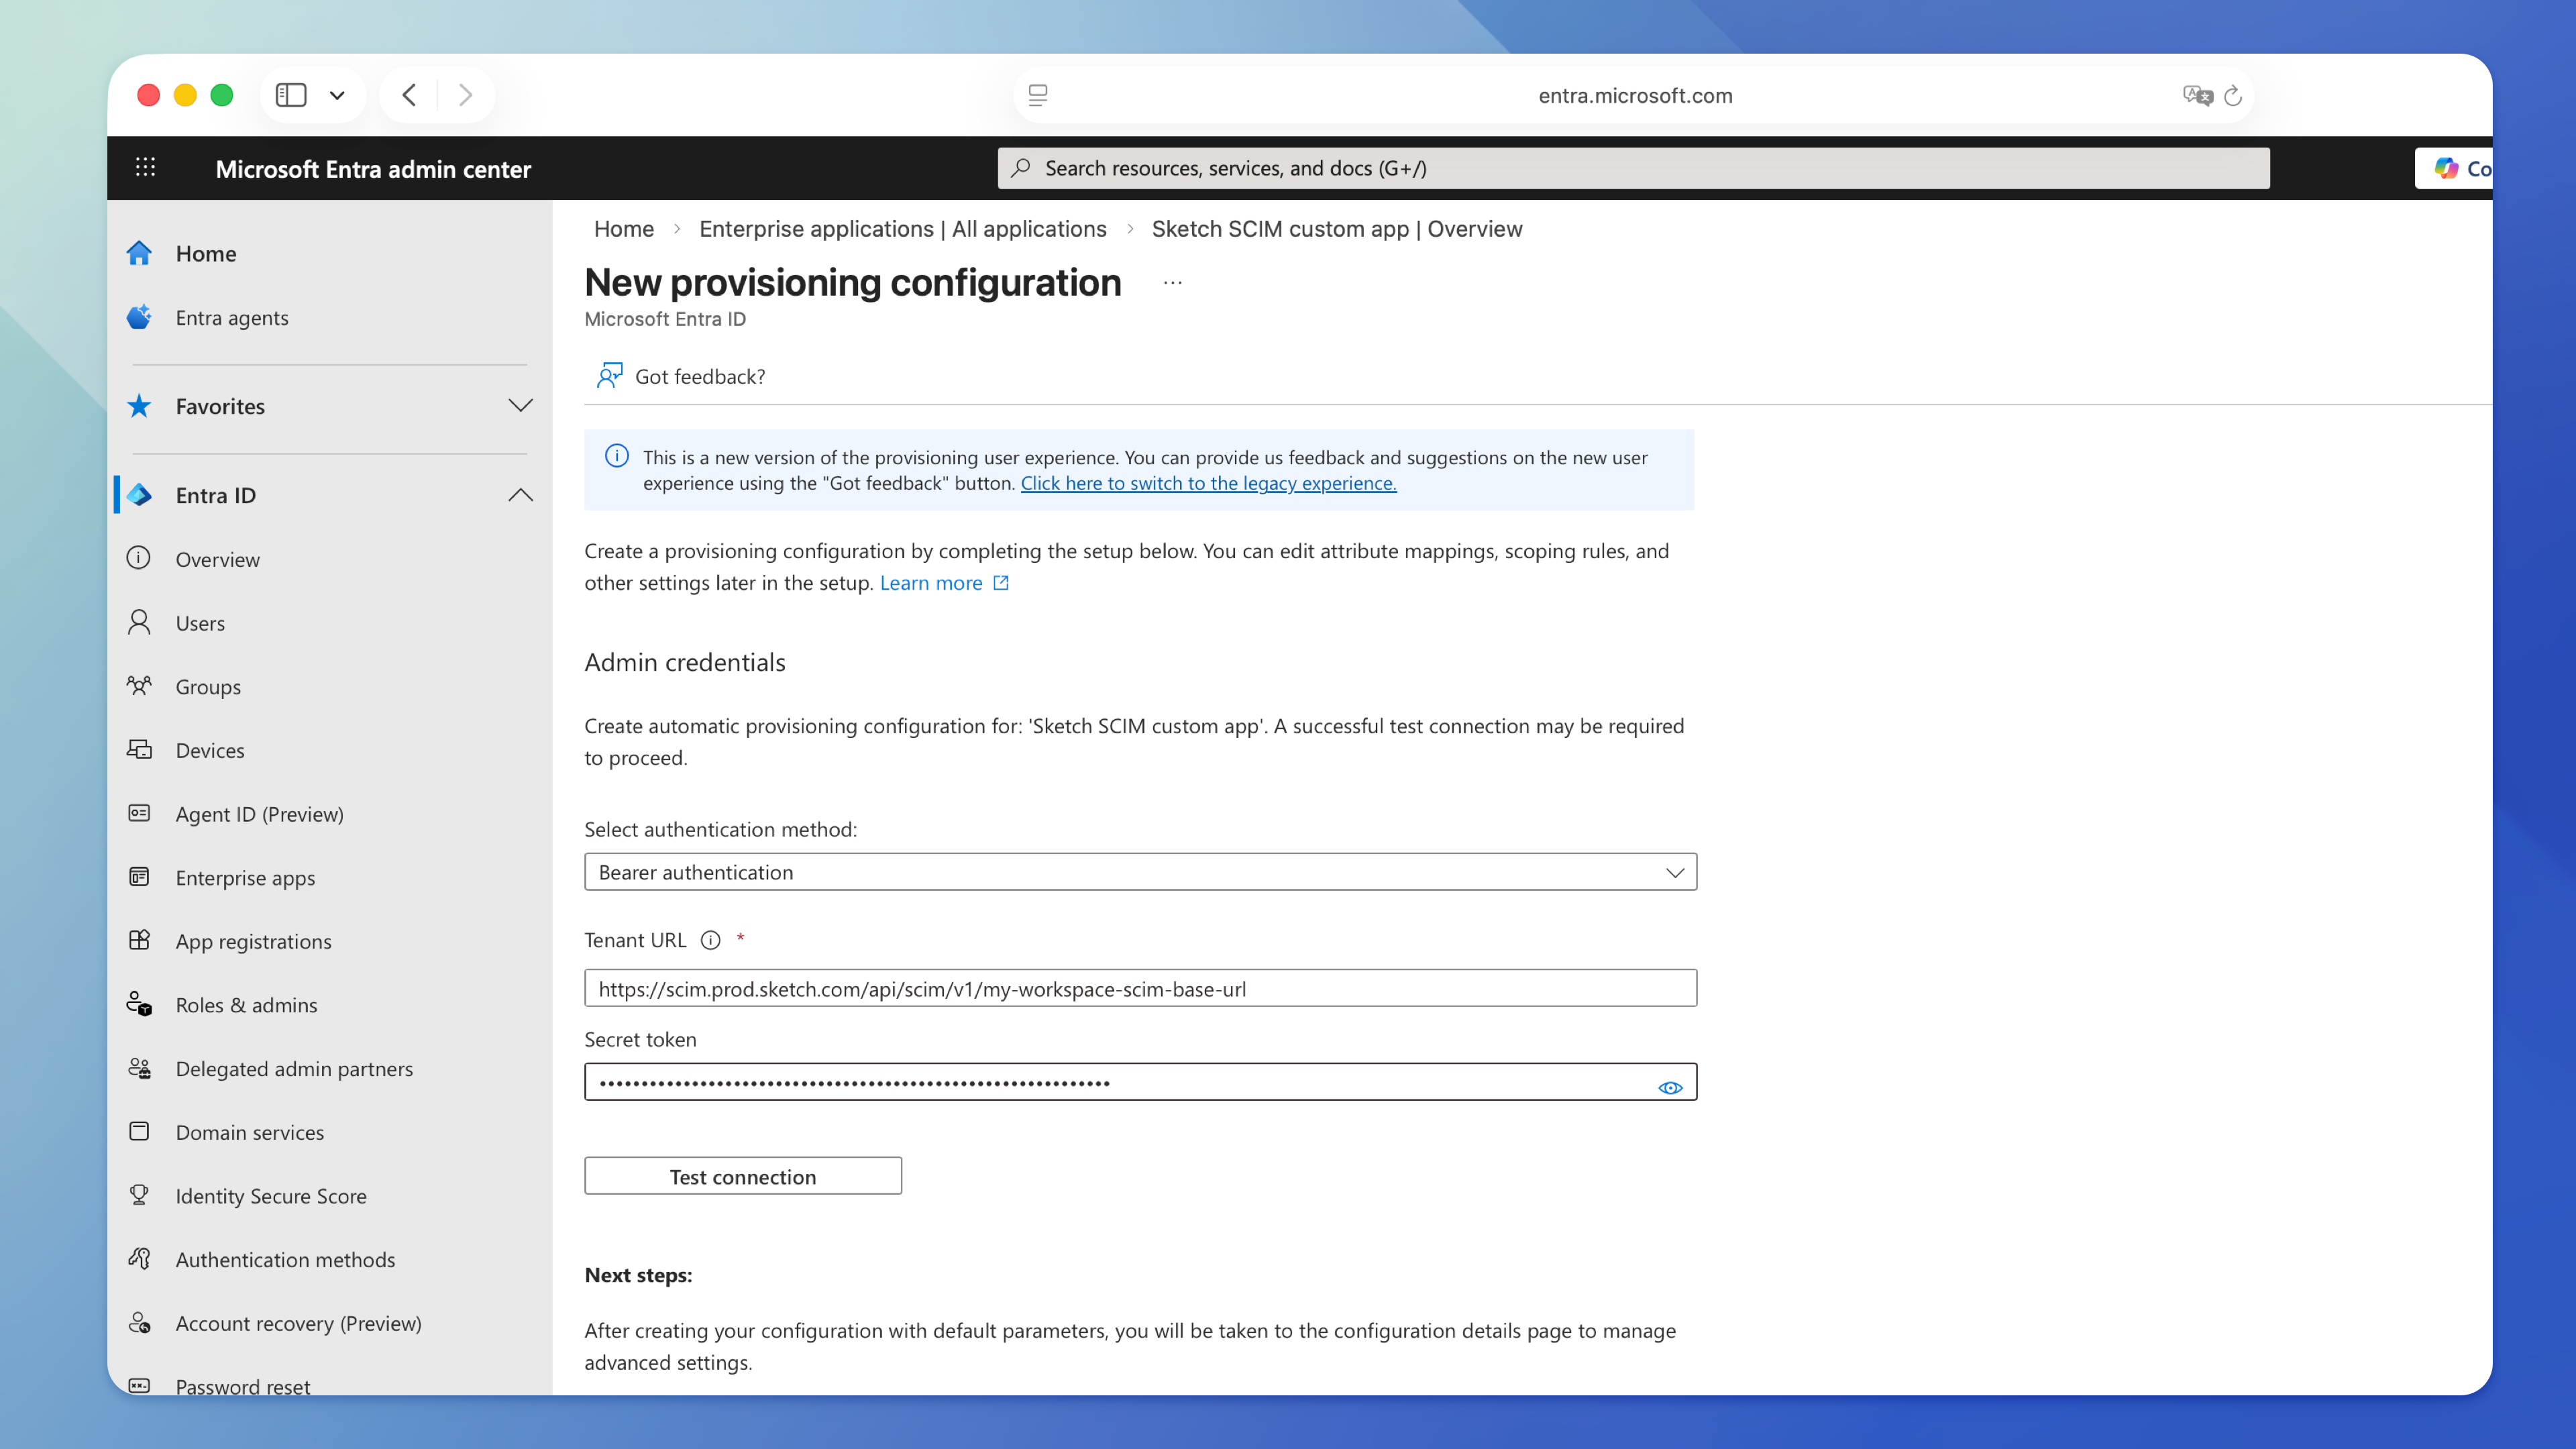
### Test the connection
After pasting the Tenant URL and token, click **Test connection** to check everything is set up correctly.
### Configure app roles
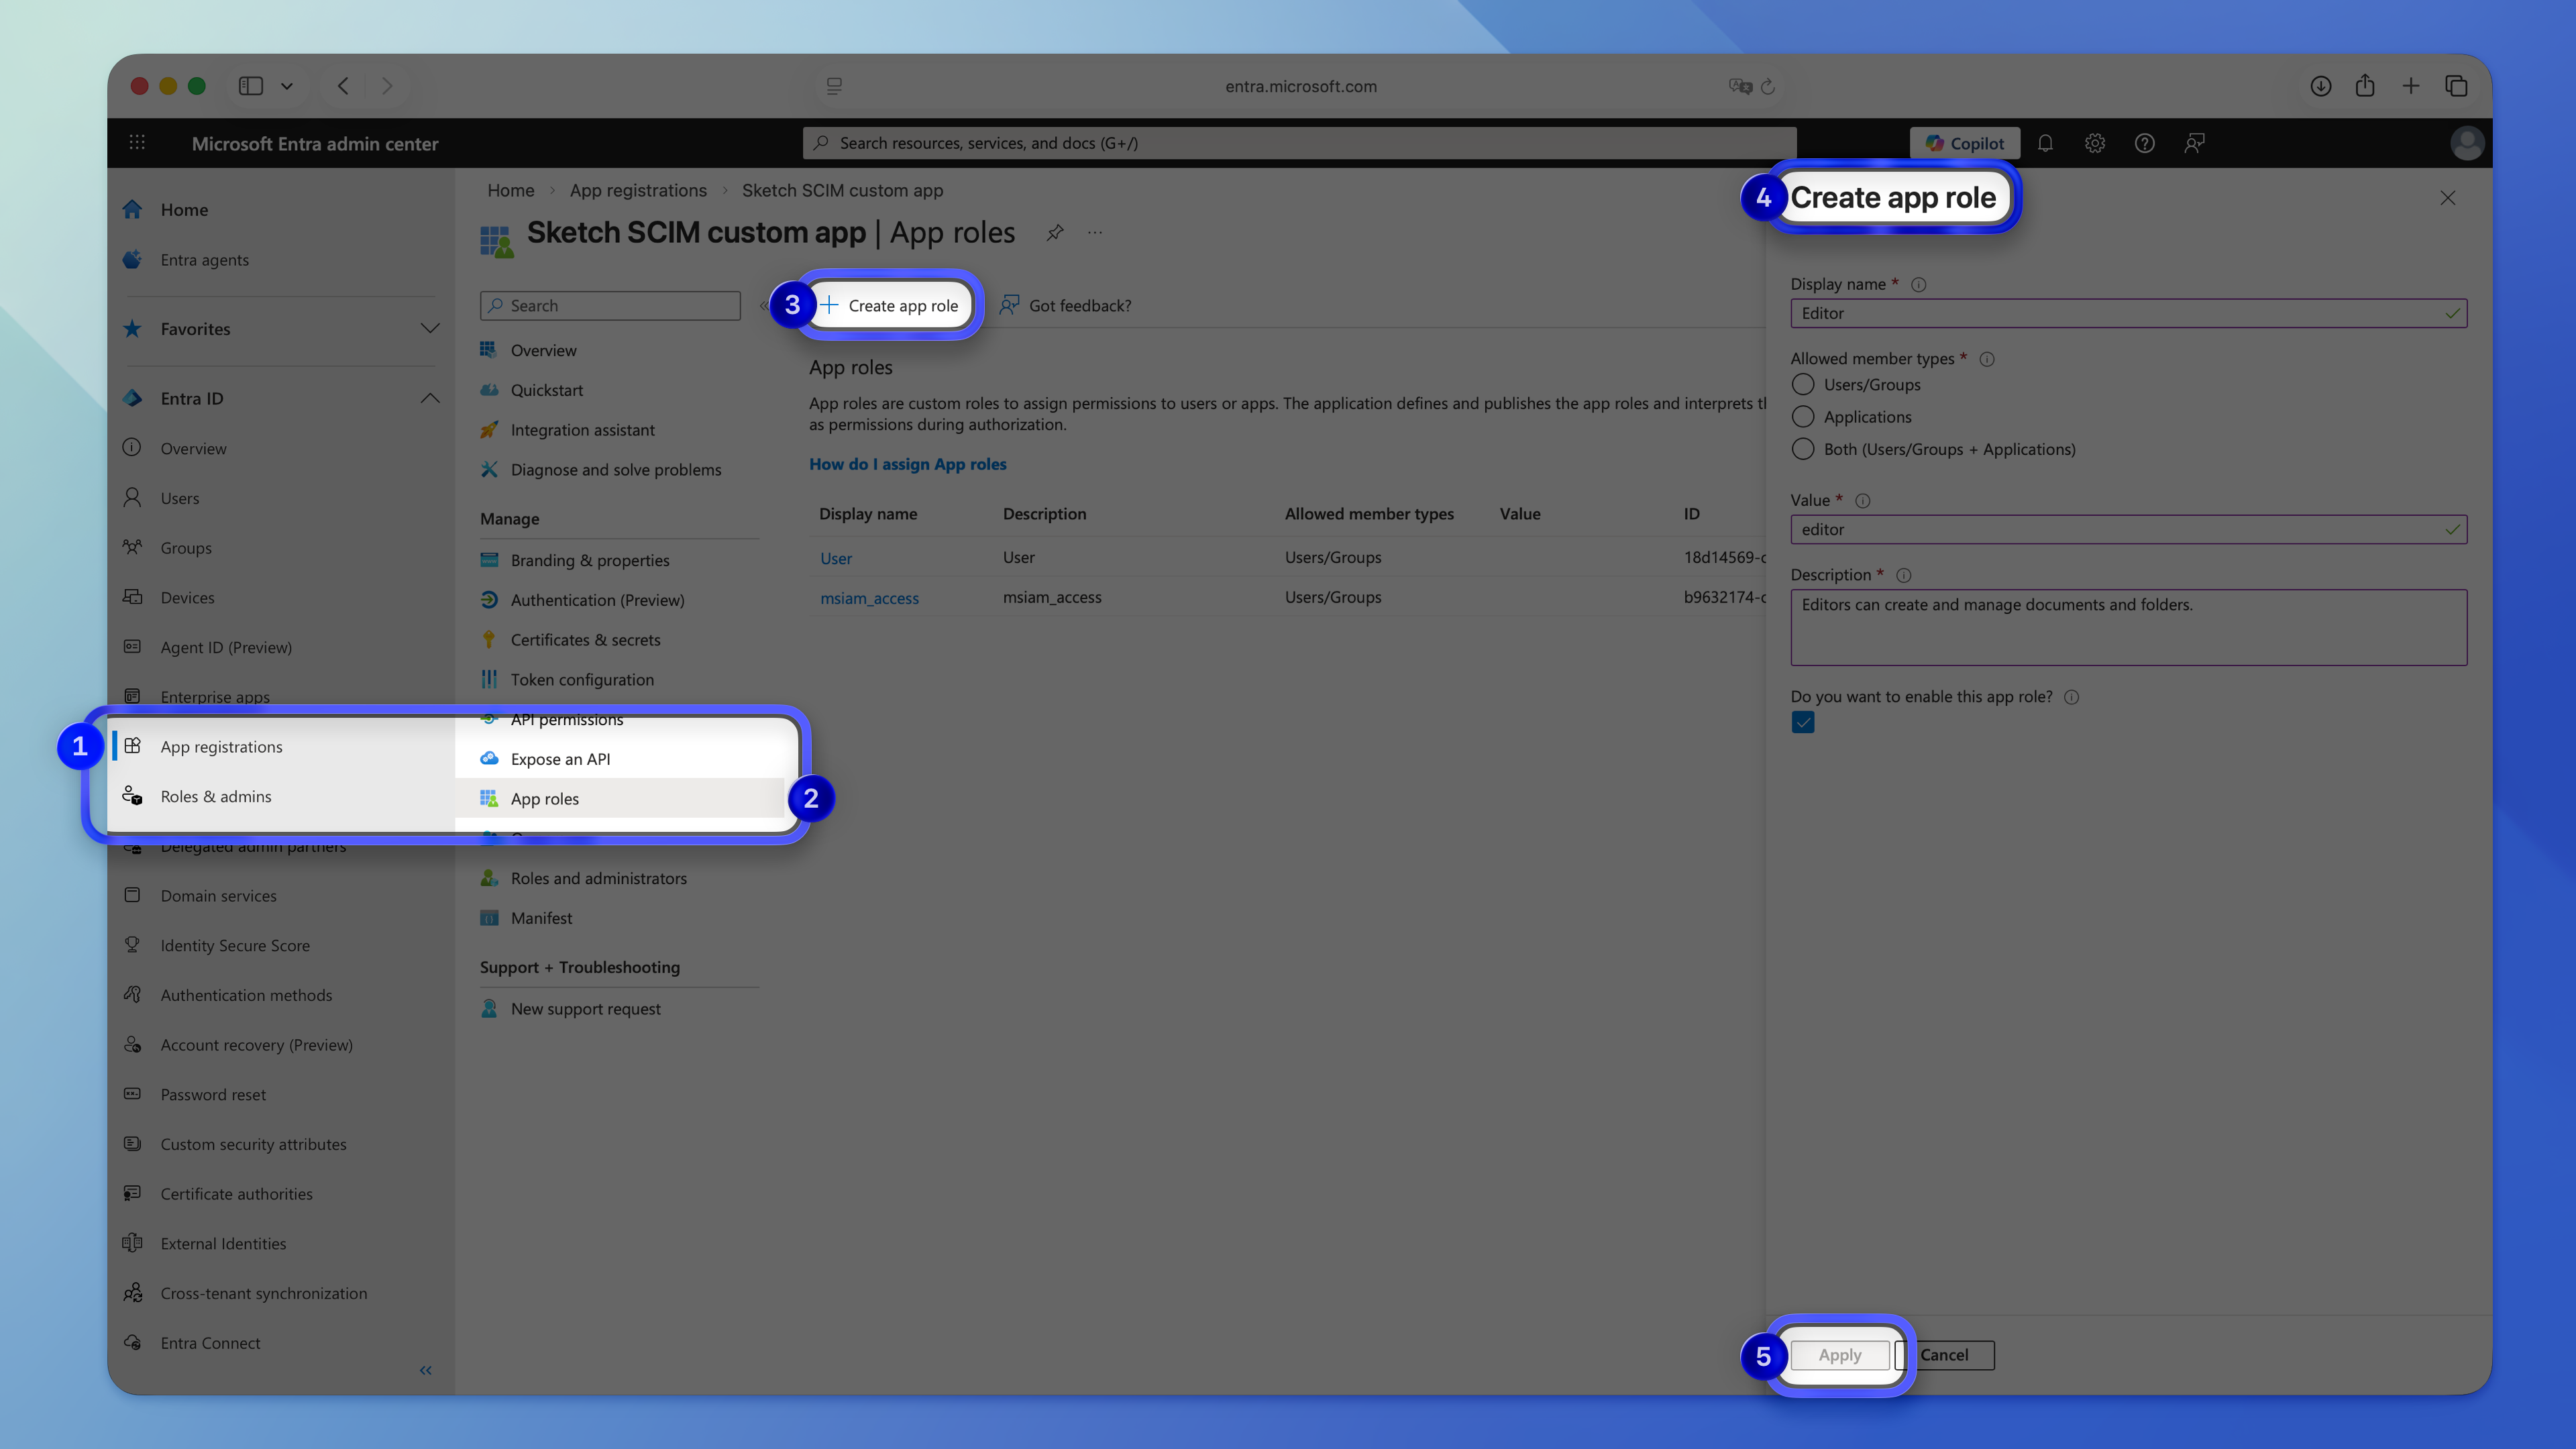
Before SCIM can provision roles correctly, you’ll need to configure them in the application manifest.
1. In Entra ID, go to **App registrations**.
1. Select your custom app.
1. Configure the application roles (App Roles).
Create two new roles: **Editor** and **Viewer**. Make sure the **value** field is in lowercase (`editor` and `viewer`) to avoid capitalisation issues in provisioning.
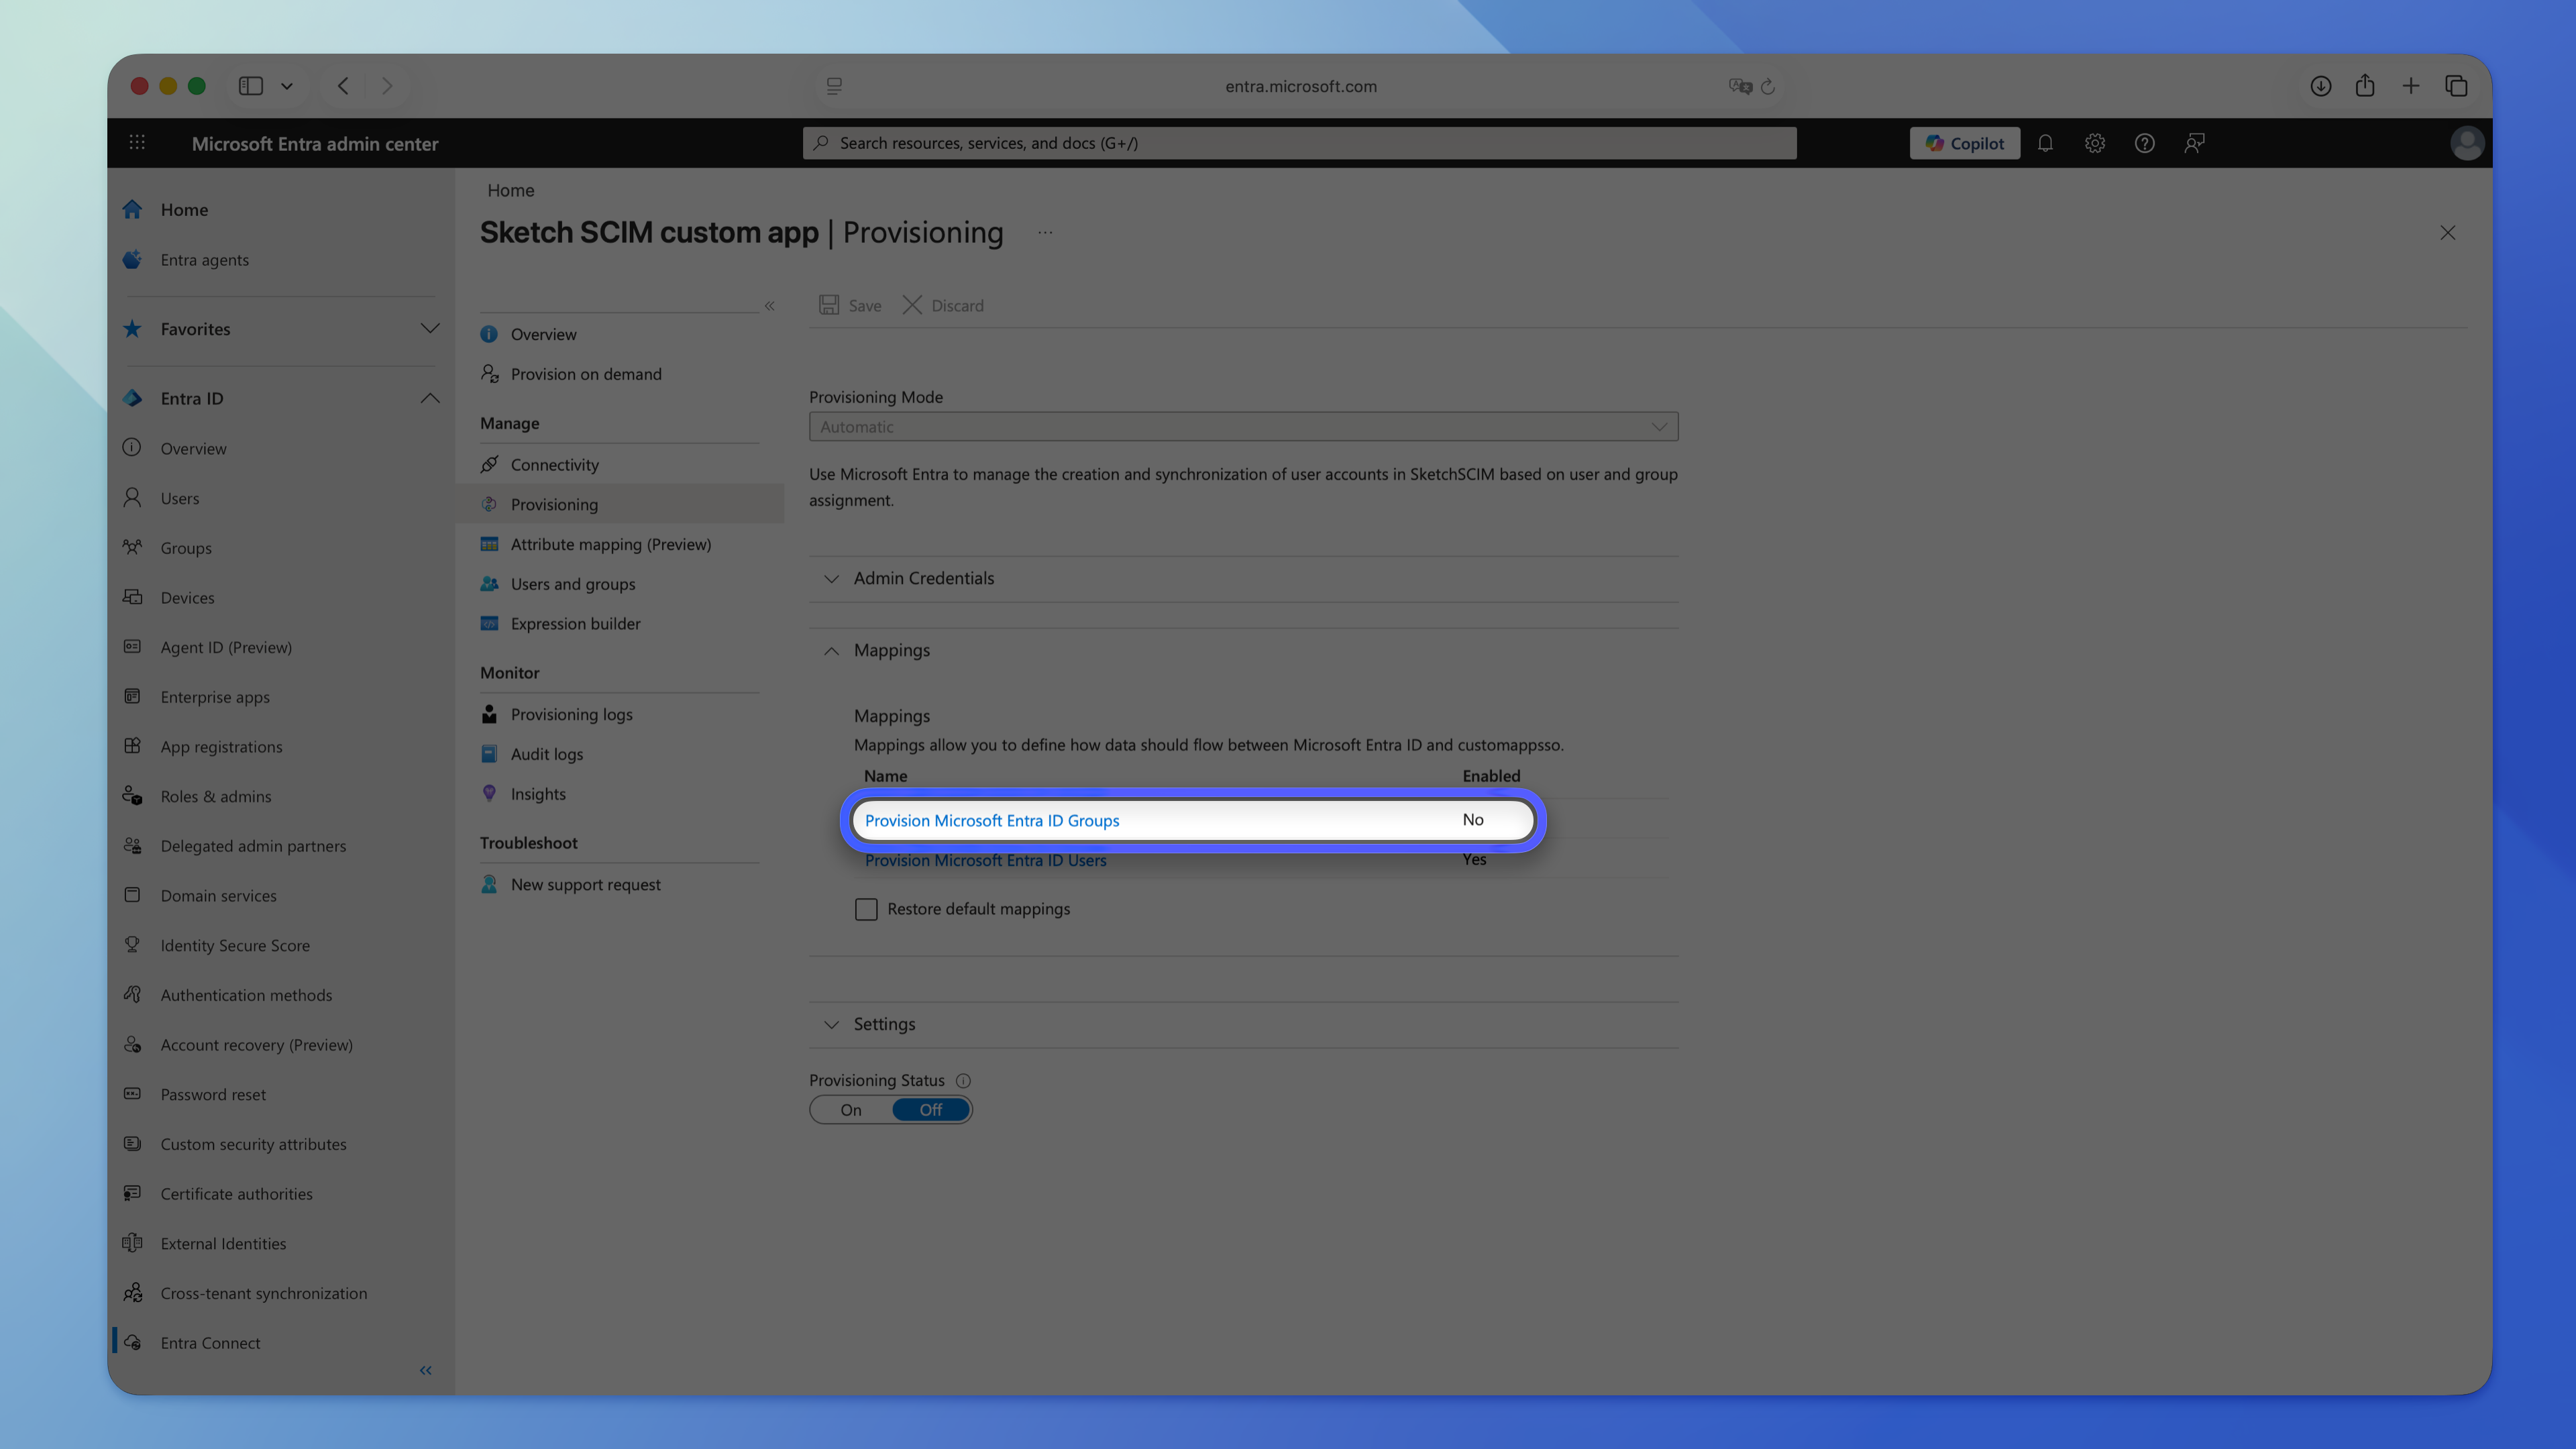
### Disable group provisioning
Sketch doesn’t support creating groups through the API — only users. To handle this, Entra ID uses *group expansion*: it reads the members of a group and provisions those users individually, instead of trying to create a group in Sketch.
### Adjust SCIM attribute mappings
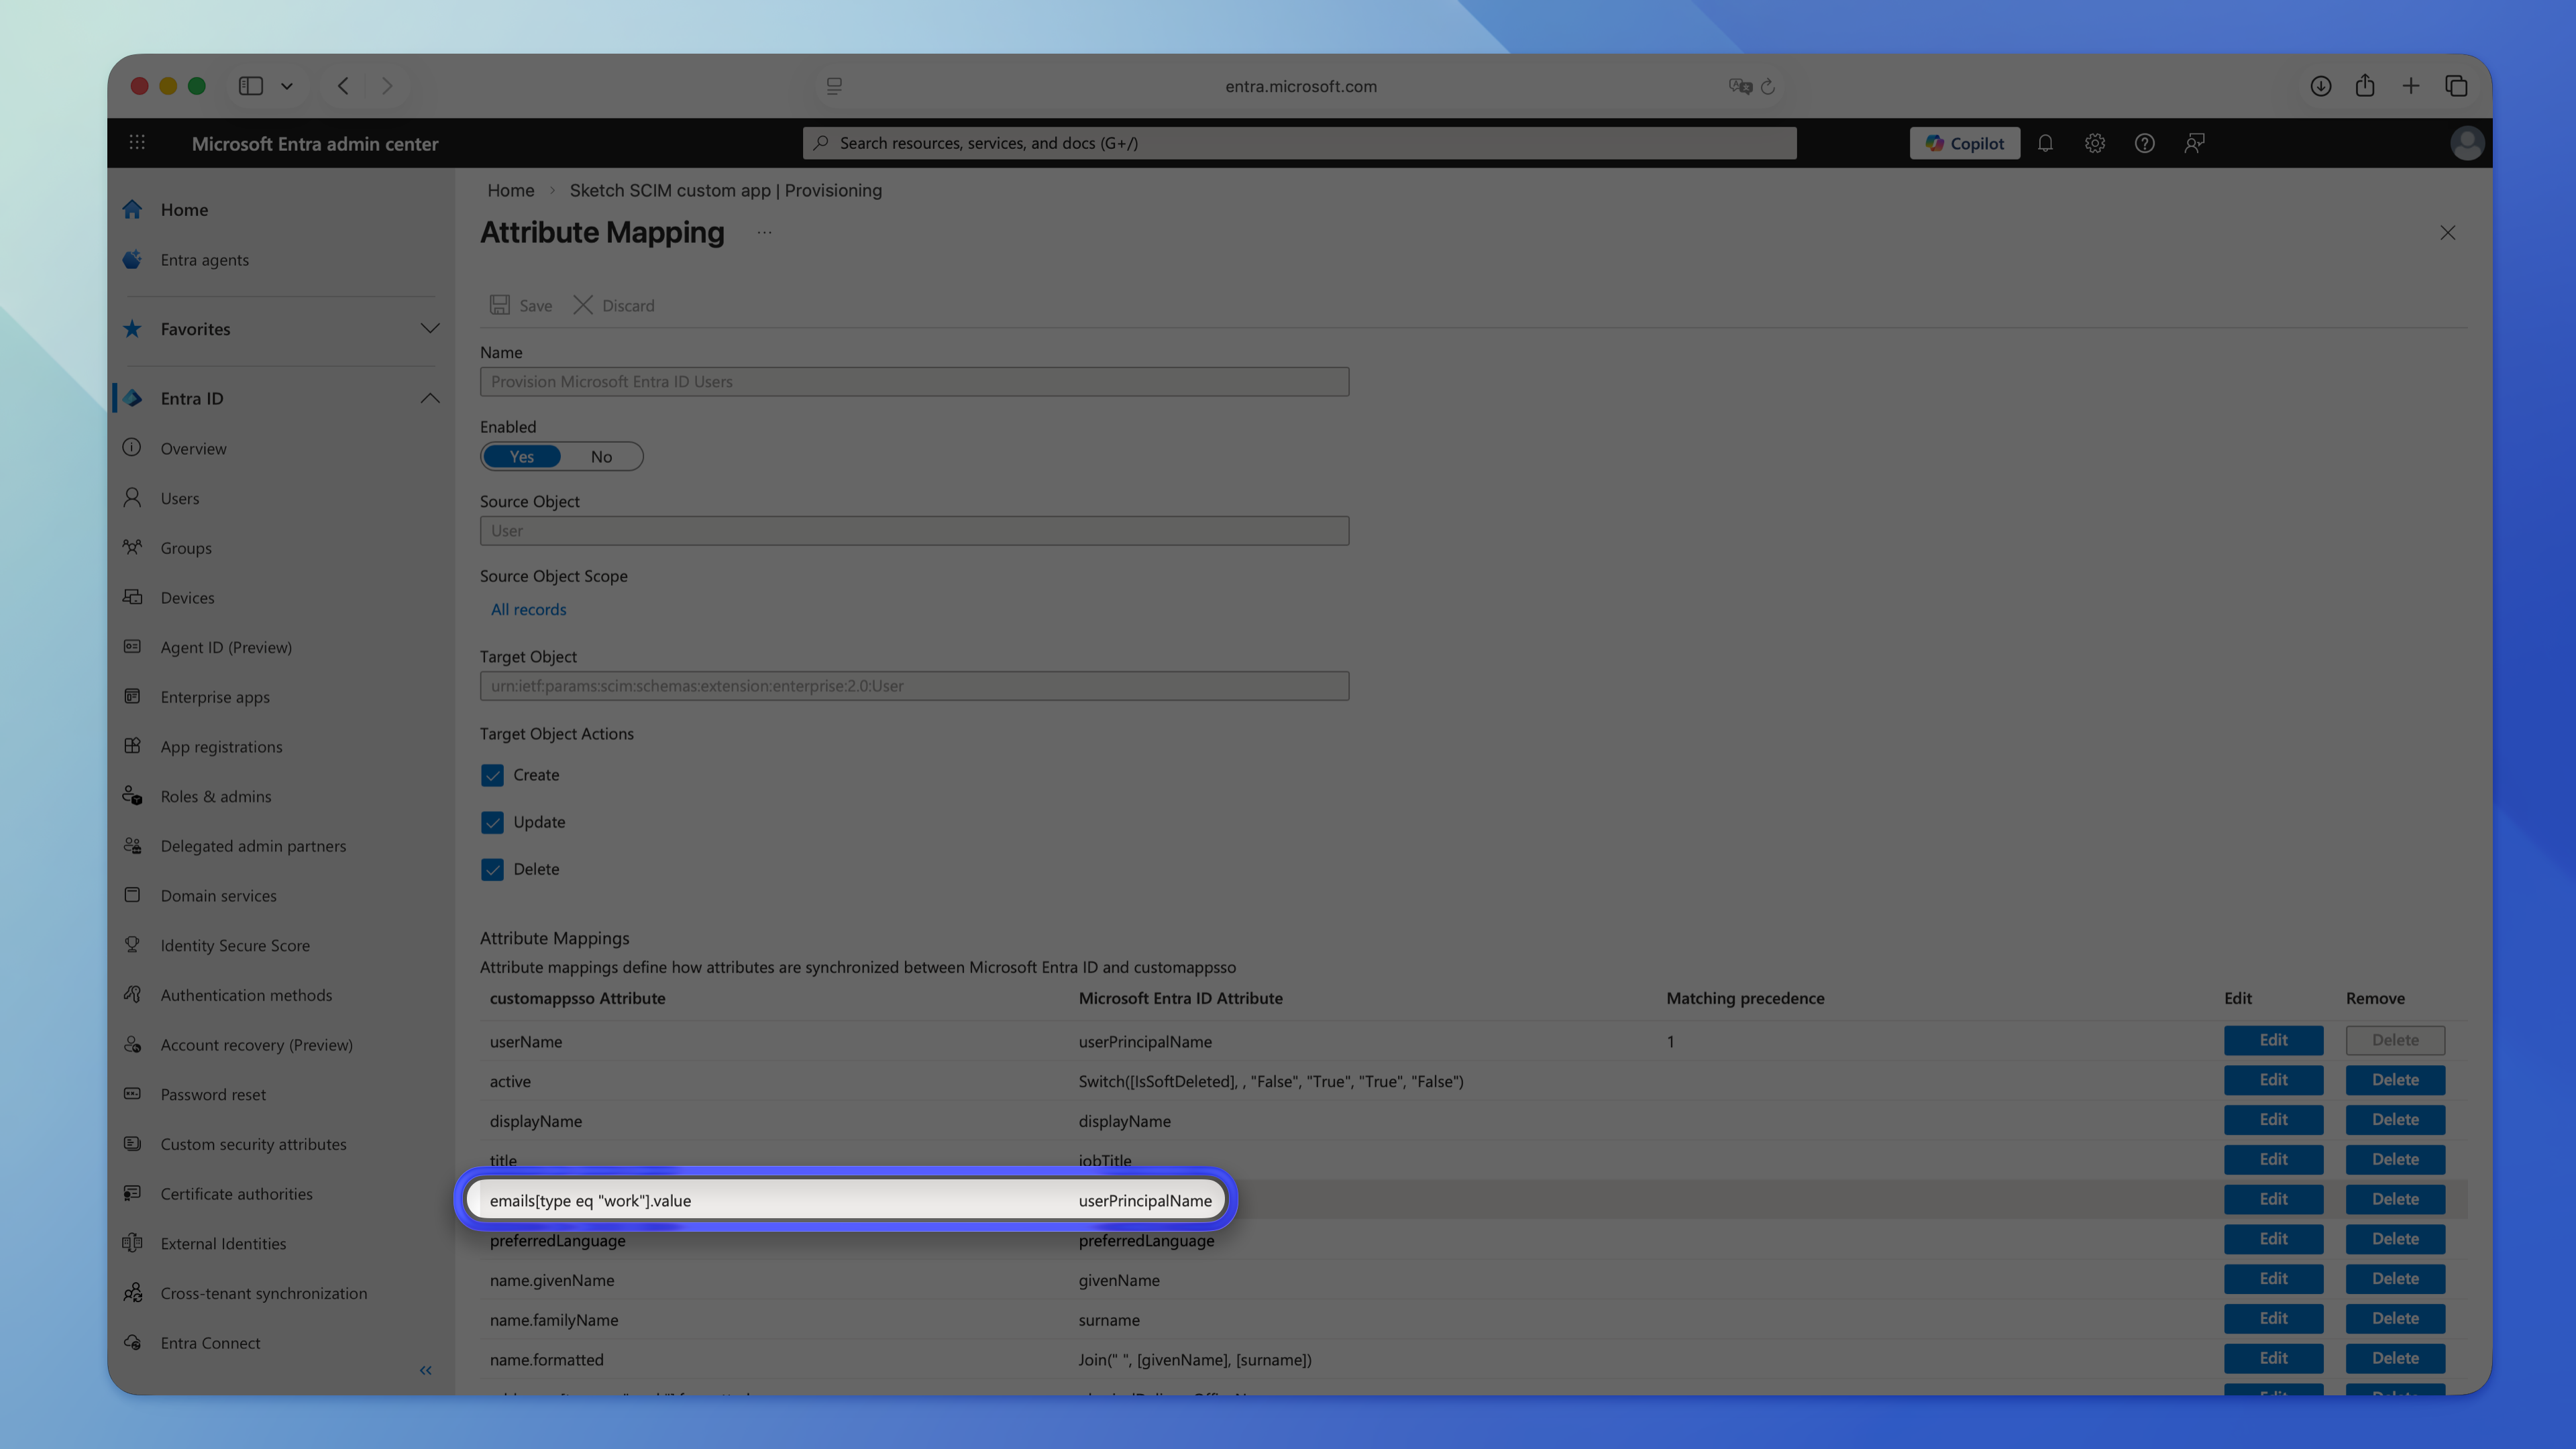
For provisioning to work correctly, you’ll need to update the default SCIM attribute mappings in Entra ID.
1. Go to **Provisioning** → **Edit attribute mappings** for your custom application.
2. Update `emails[type eq "work"].value` by changing the source attribute to `userPrincipalName`.
### Create an access level attribute
1. Go to **Enterprise apps** and select your custom app.
2. Click **Provisioning**.
3. Click **Provisioning** again to open the provisioning settings.
4. Expand the **Mappings** section and select **Provision Microsoft Entra ID Users**.
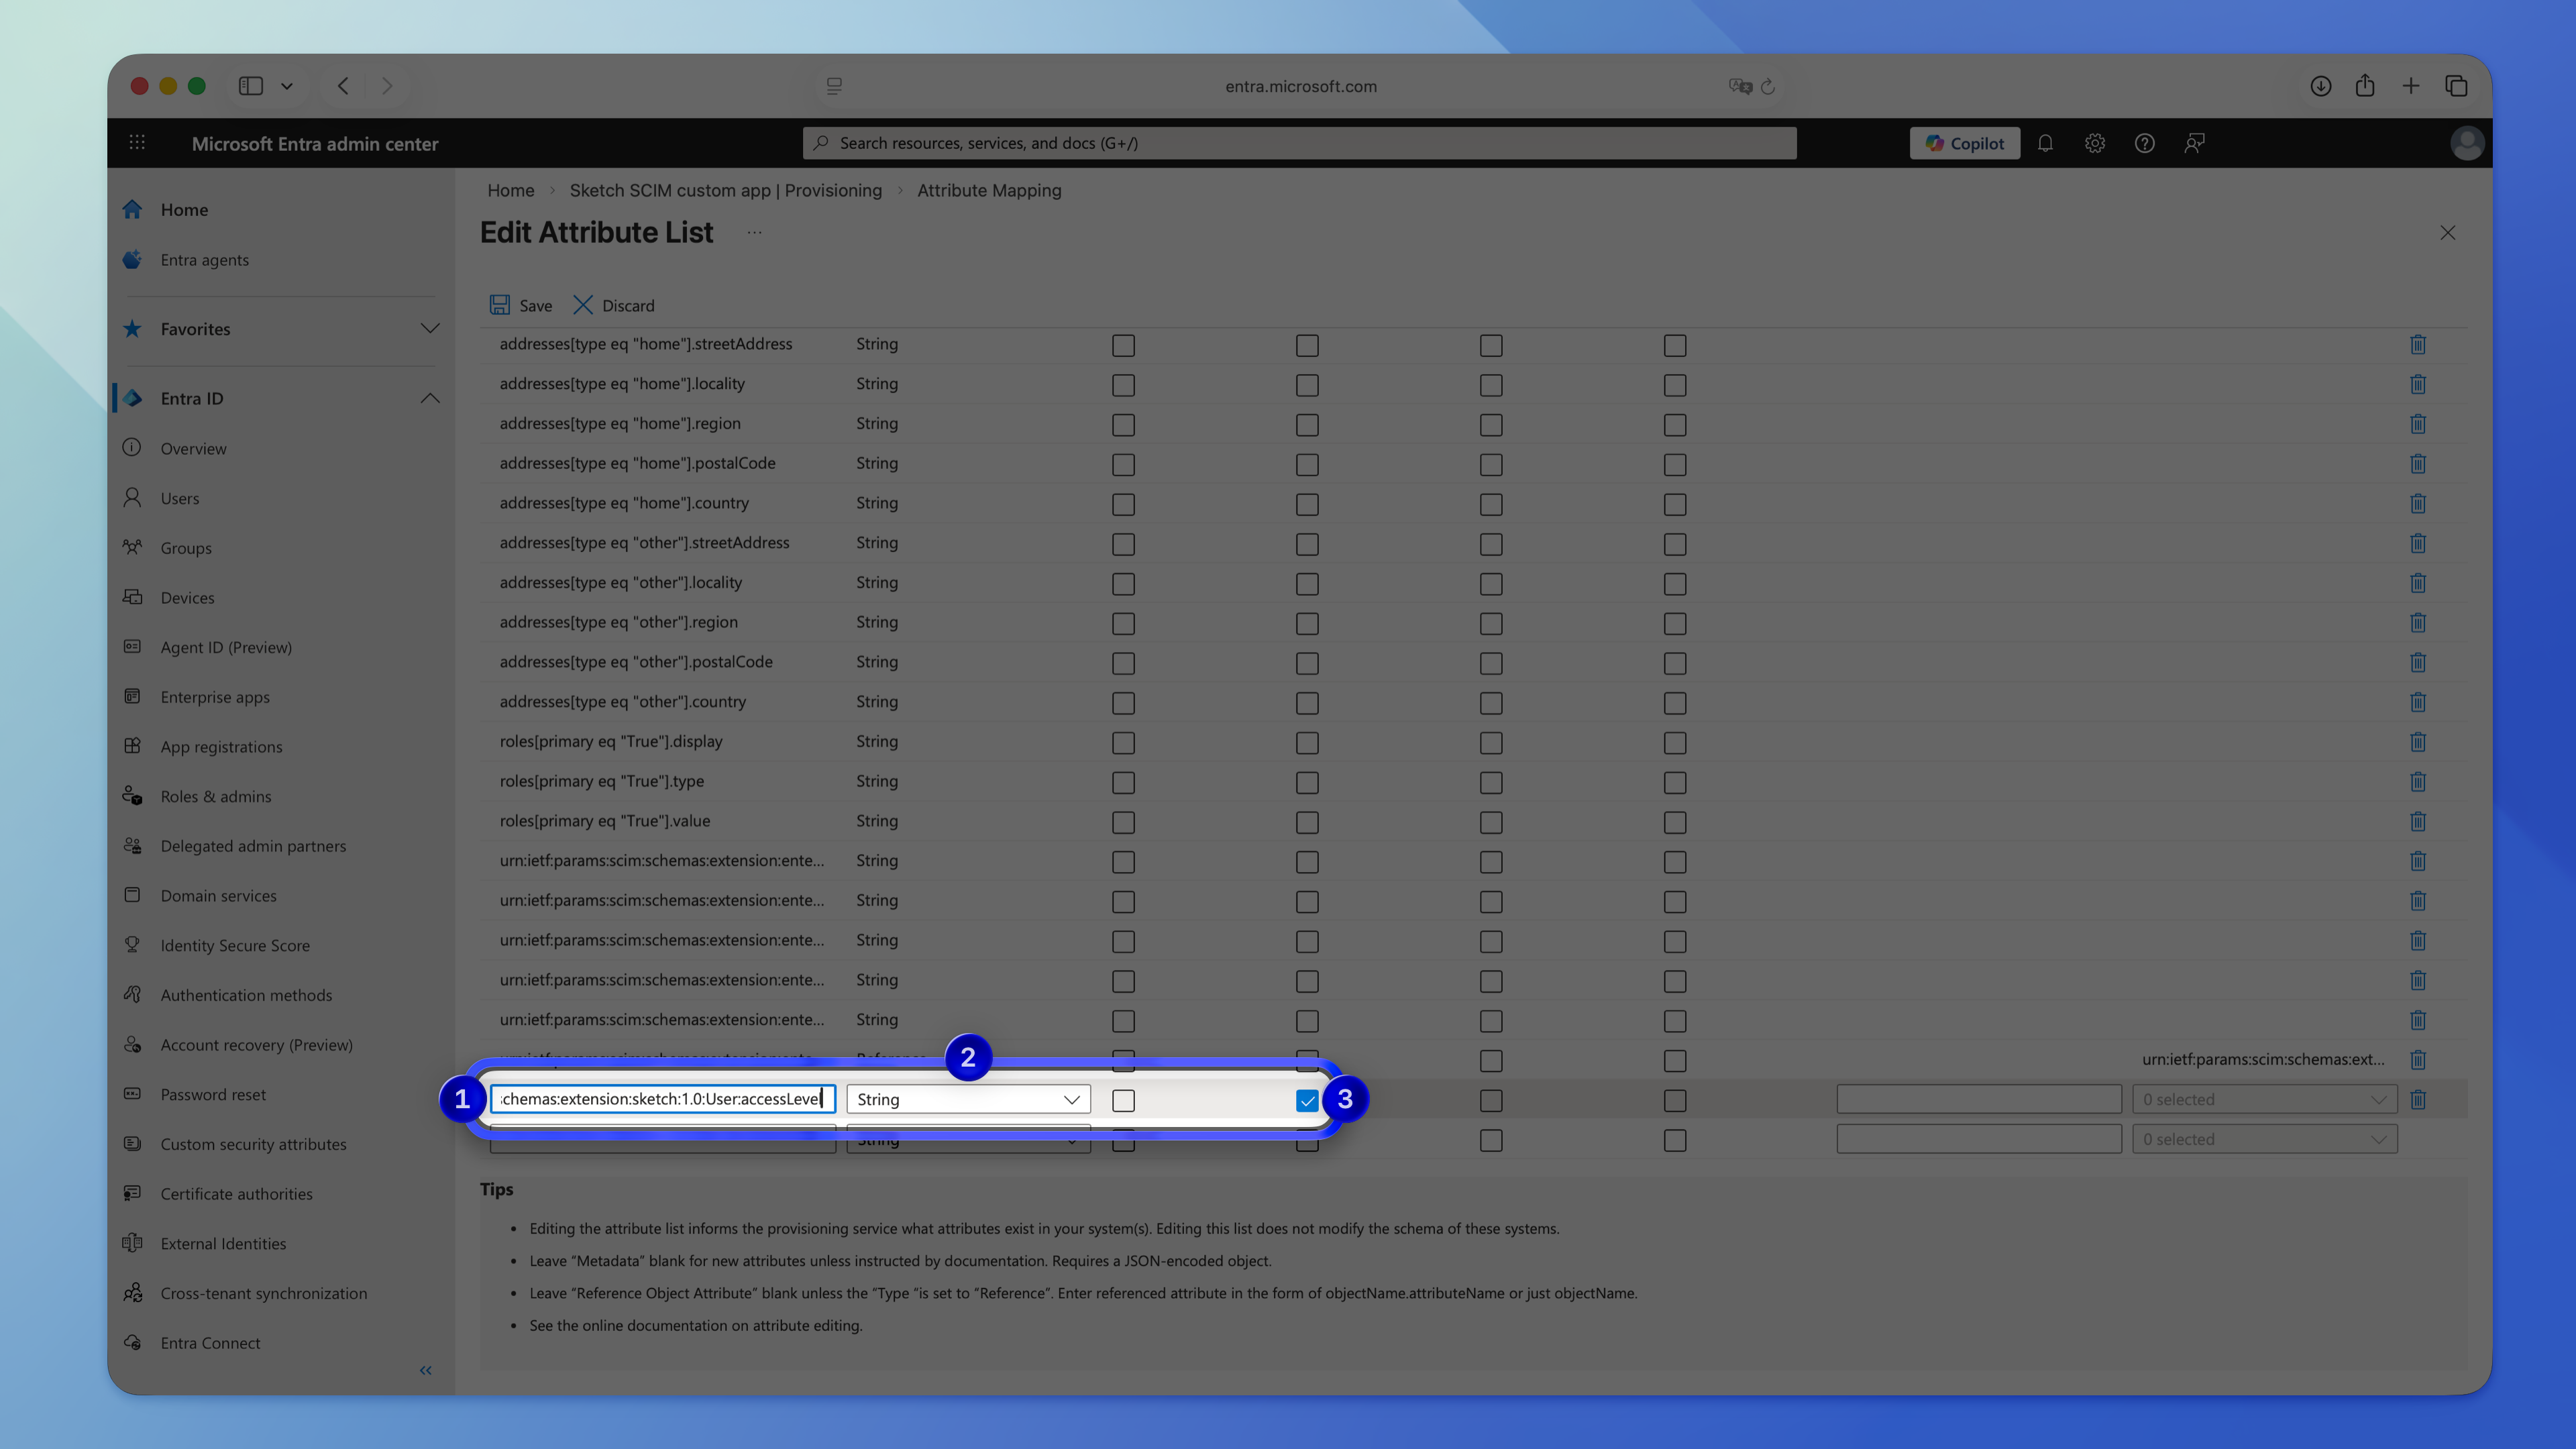
5. Scroll to the bottom and click **Show advanced options**, then select **Edit attribute list for customappsso**.
6. Scroll to the bottom of the attribute list and add a new attribute with the following value:
```
urn:ietf:params:scim:schemas:extension:sketch:1.0:User:accessLevel
```
7. Keep **String** selected and check the **Required** checkbox.
### Create a mapping for the access level attribute
Map the Entra ID app role (**editor** or **viewer**) to the Sketch access level using an advanced mapping.
1. Go to **Enterprise apps** and select your custom app.
2. Click **Provisioning**.
3. Click **Provisioning** again, then expand the **Mappings** section.
4. Select **Provision Microsoft Entra ID Users**.
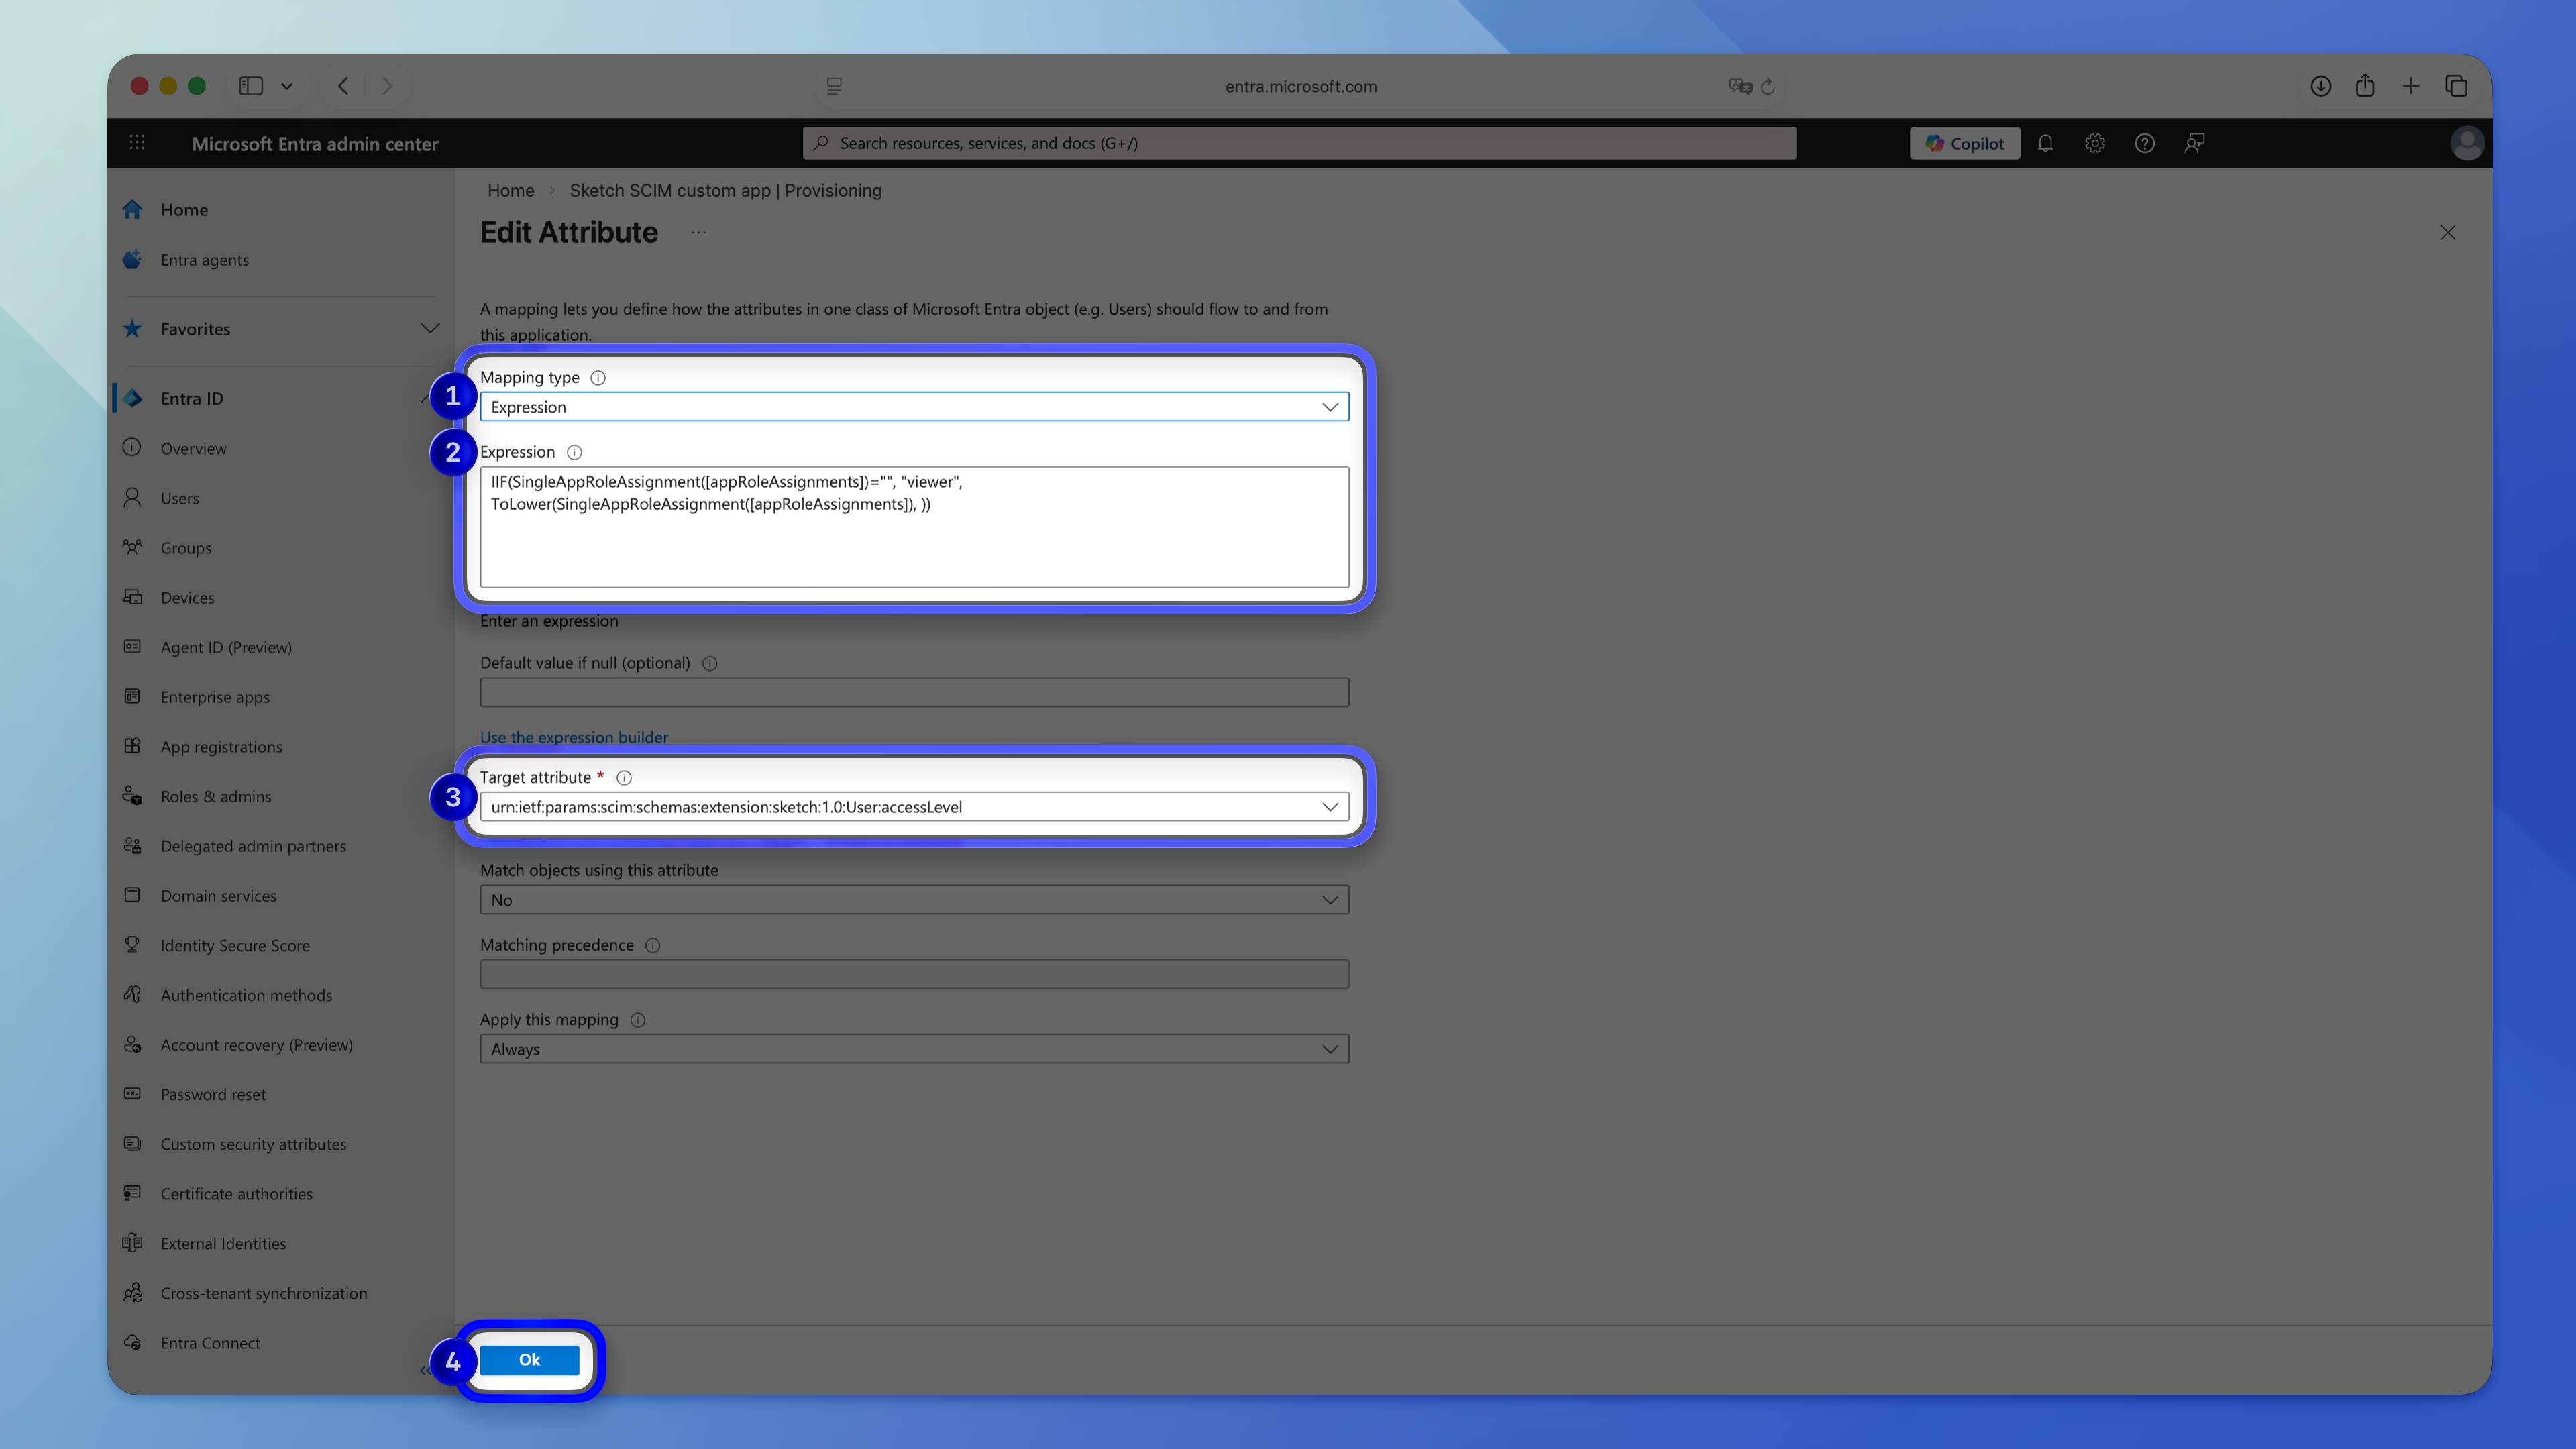
5. Scroll to the bottom and click **Add new mapping**.
Use the following settings:
- **Mapping type:** Expression
- **Expression:**
```
IIF(SingleAppRoleAssignment([appRoleAssignments])="", "viewer", ToLower(SingleAppRoleAssignment([appRoleAssignments]), ))
```
- **Target attribute:** Select the access level attribute you created in the previous section.
6. Click **OK** to save.
## 3. Assign groups or users
### Create the groups
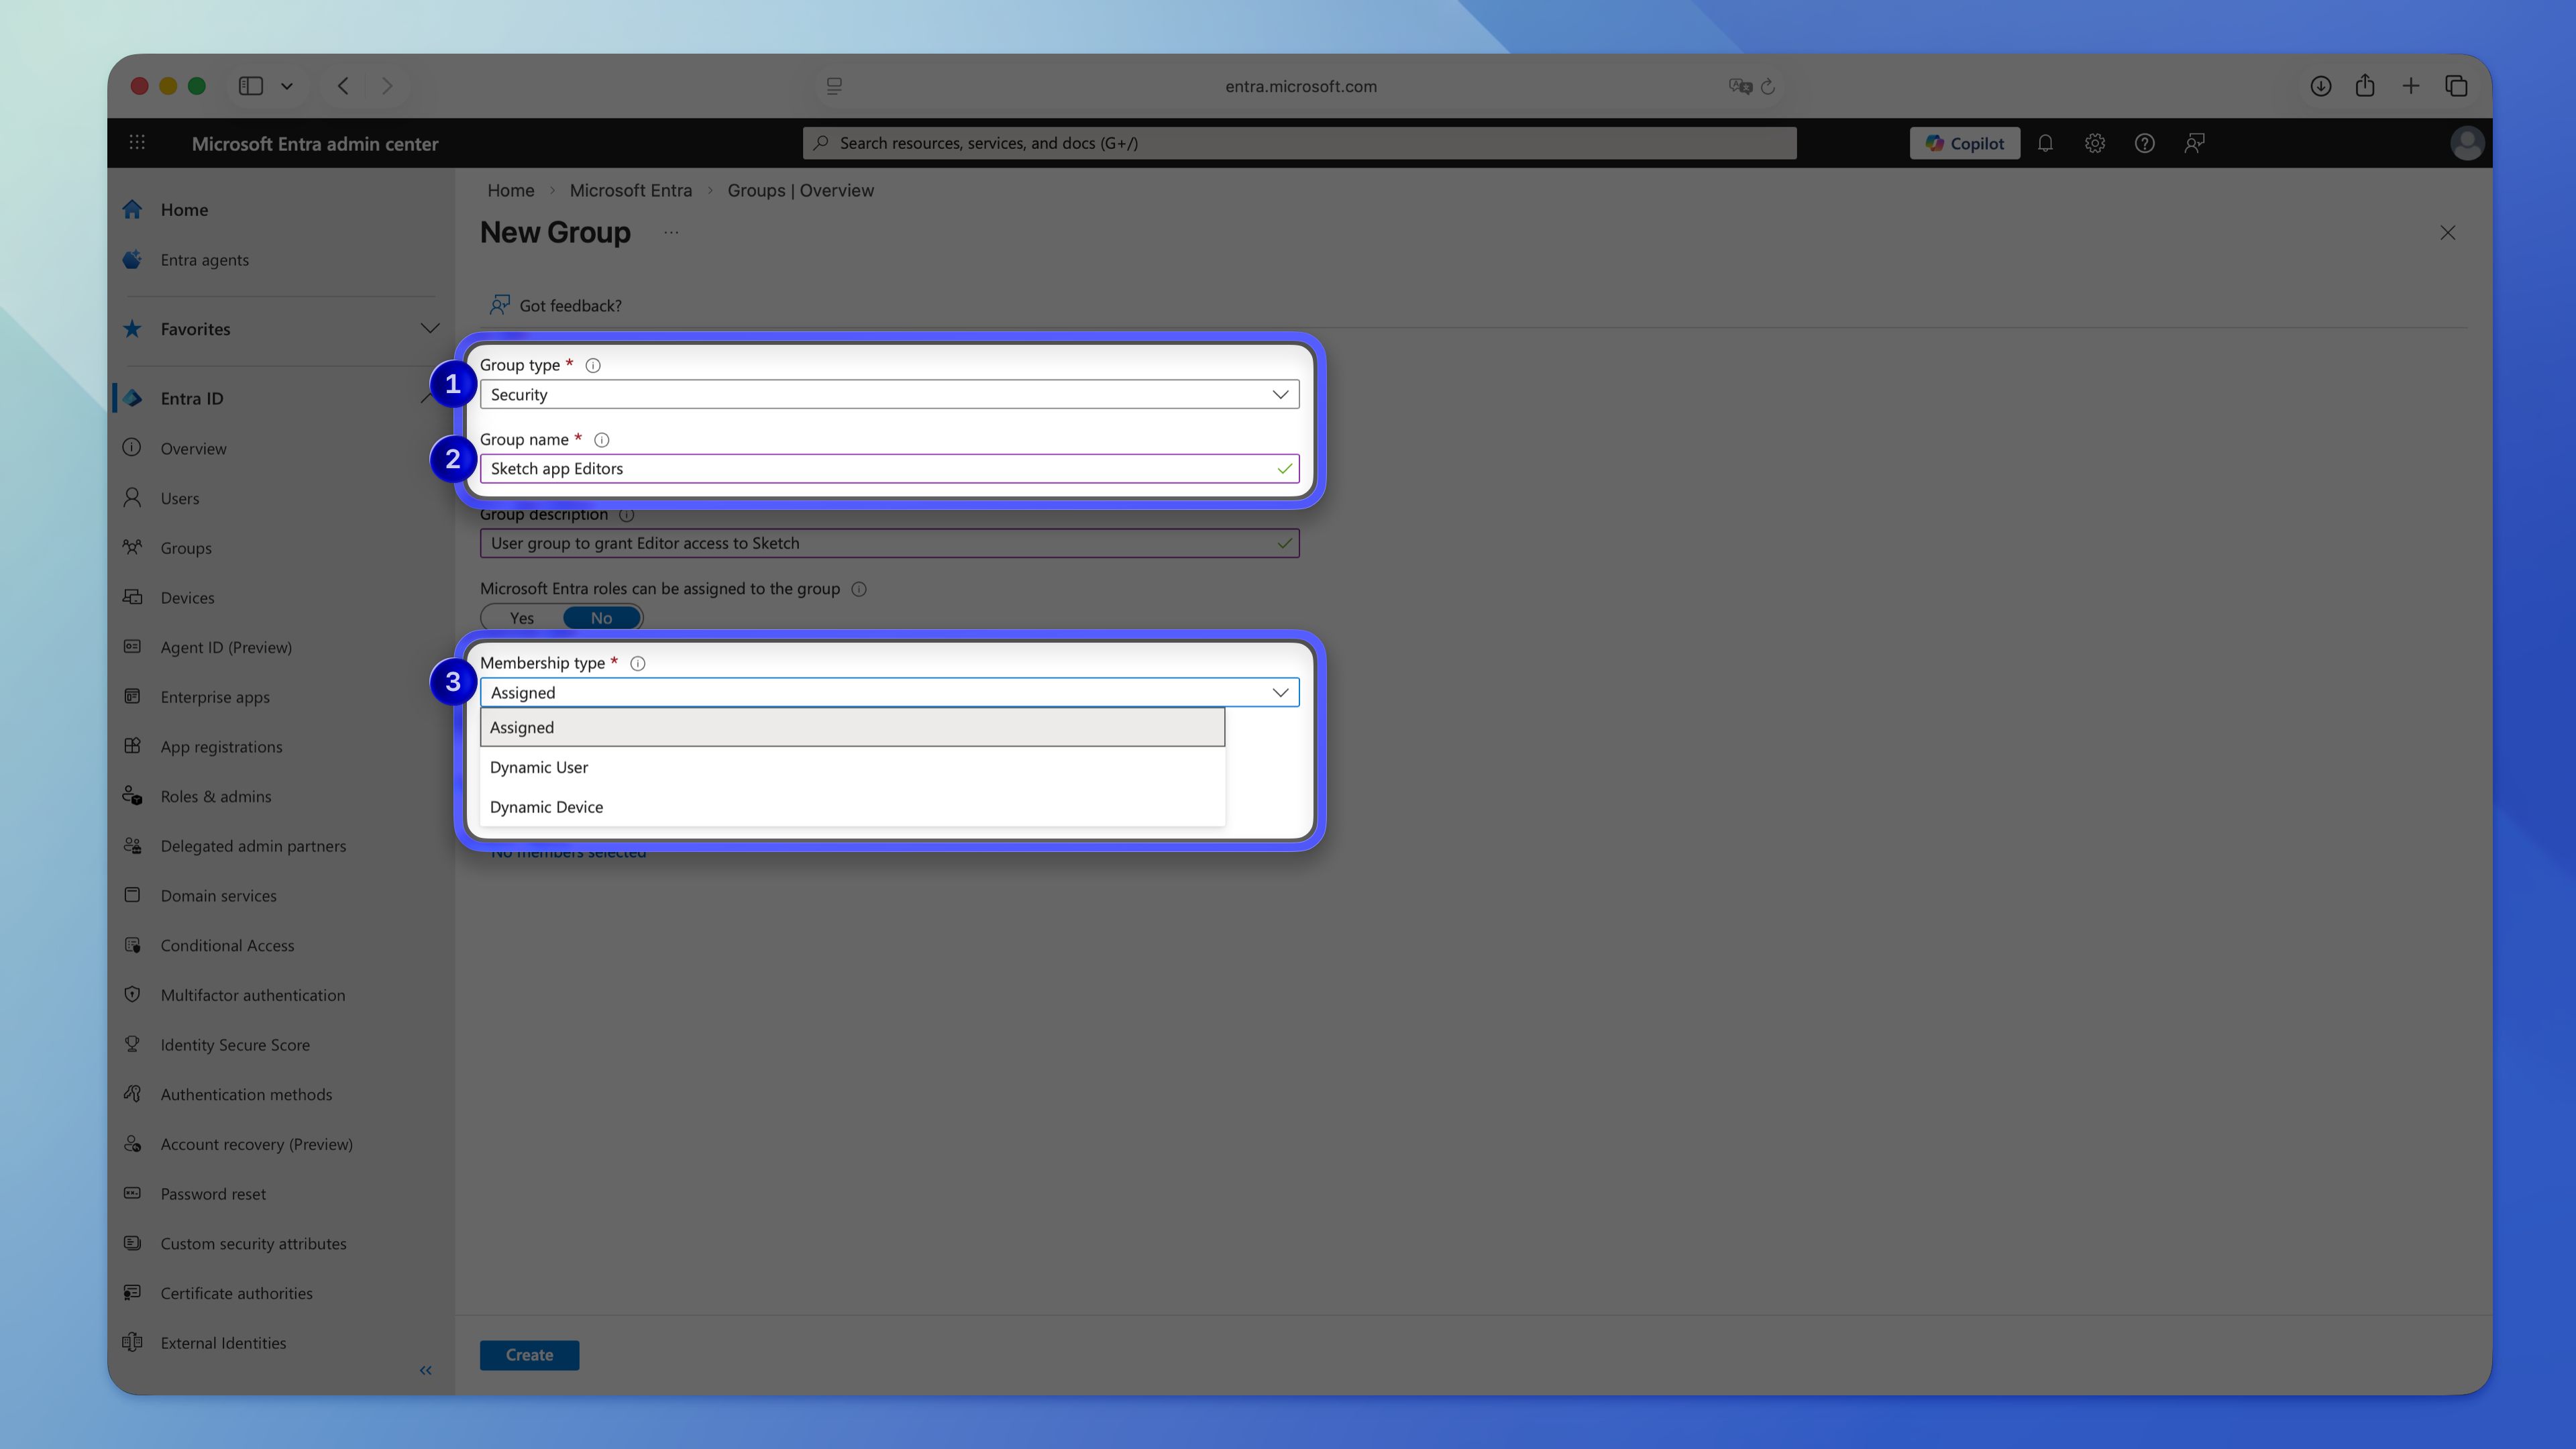
You’ll need two security groups — one for Editors and one for Viewers. You can create new groups or reuse existing ones.
1. In Entra ID, click **Groups** in the sidebar.
2. For each group, set the following:
- **Group type:** Security
- **Group name:** Use a clear, descriptive name, such as `sketch-users-editor` and `sketch-users-viewer`.
- **Membership type:** Choose what fits your setup:
- *Assigned* — assign users manually
- *Dynamic user* — define a rule to match users
- *Dynamic device* — define a rule to match devices
3. If you’re using assigned membership, add users to the group.
### Assign the groups to the custom app
This is where group membership is mapped to Sketch access levels.
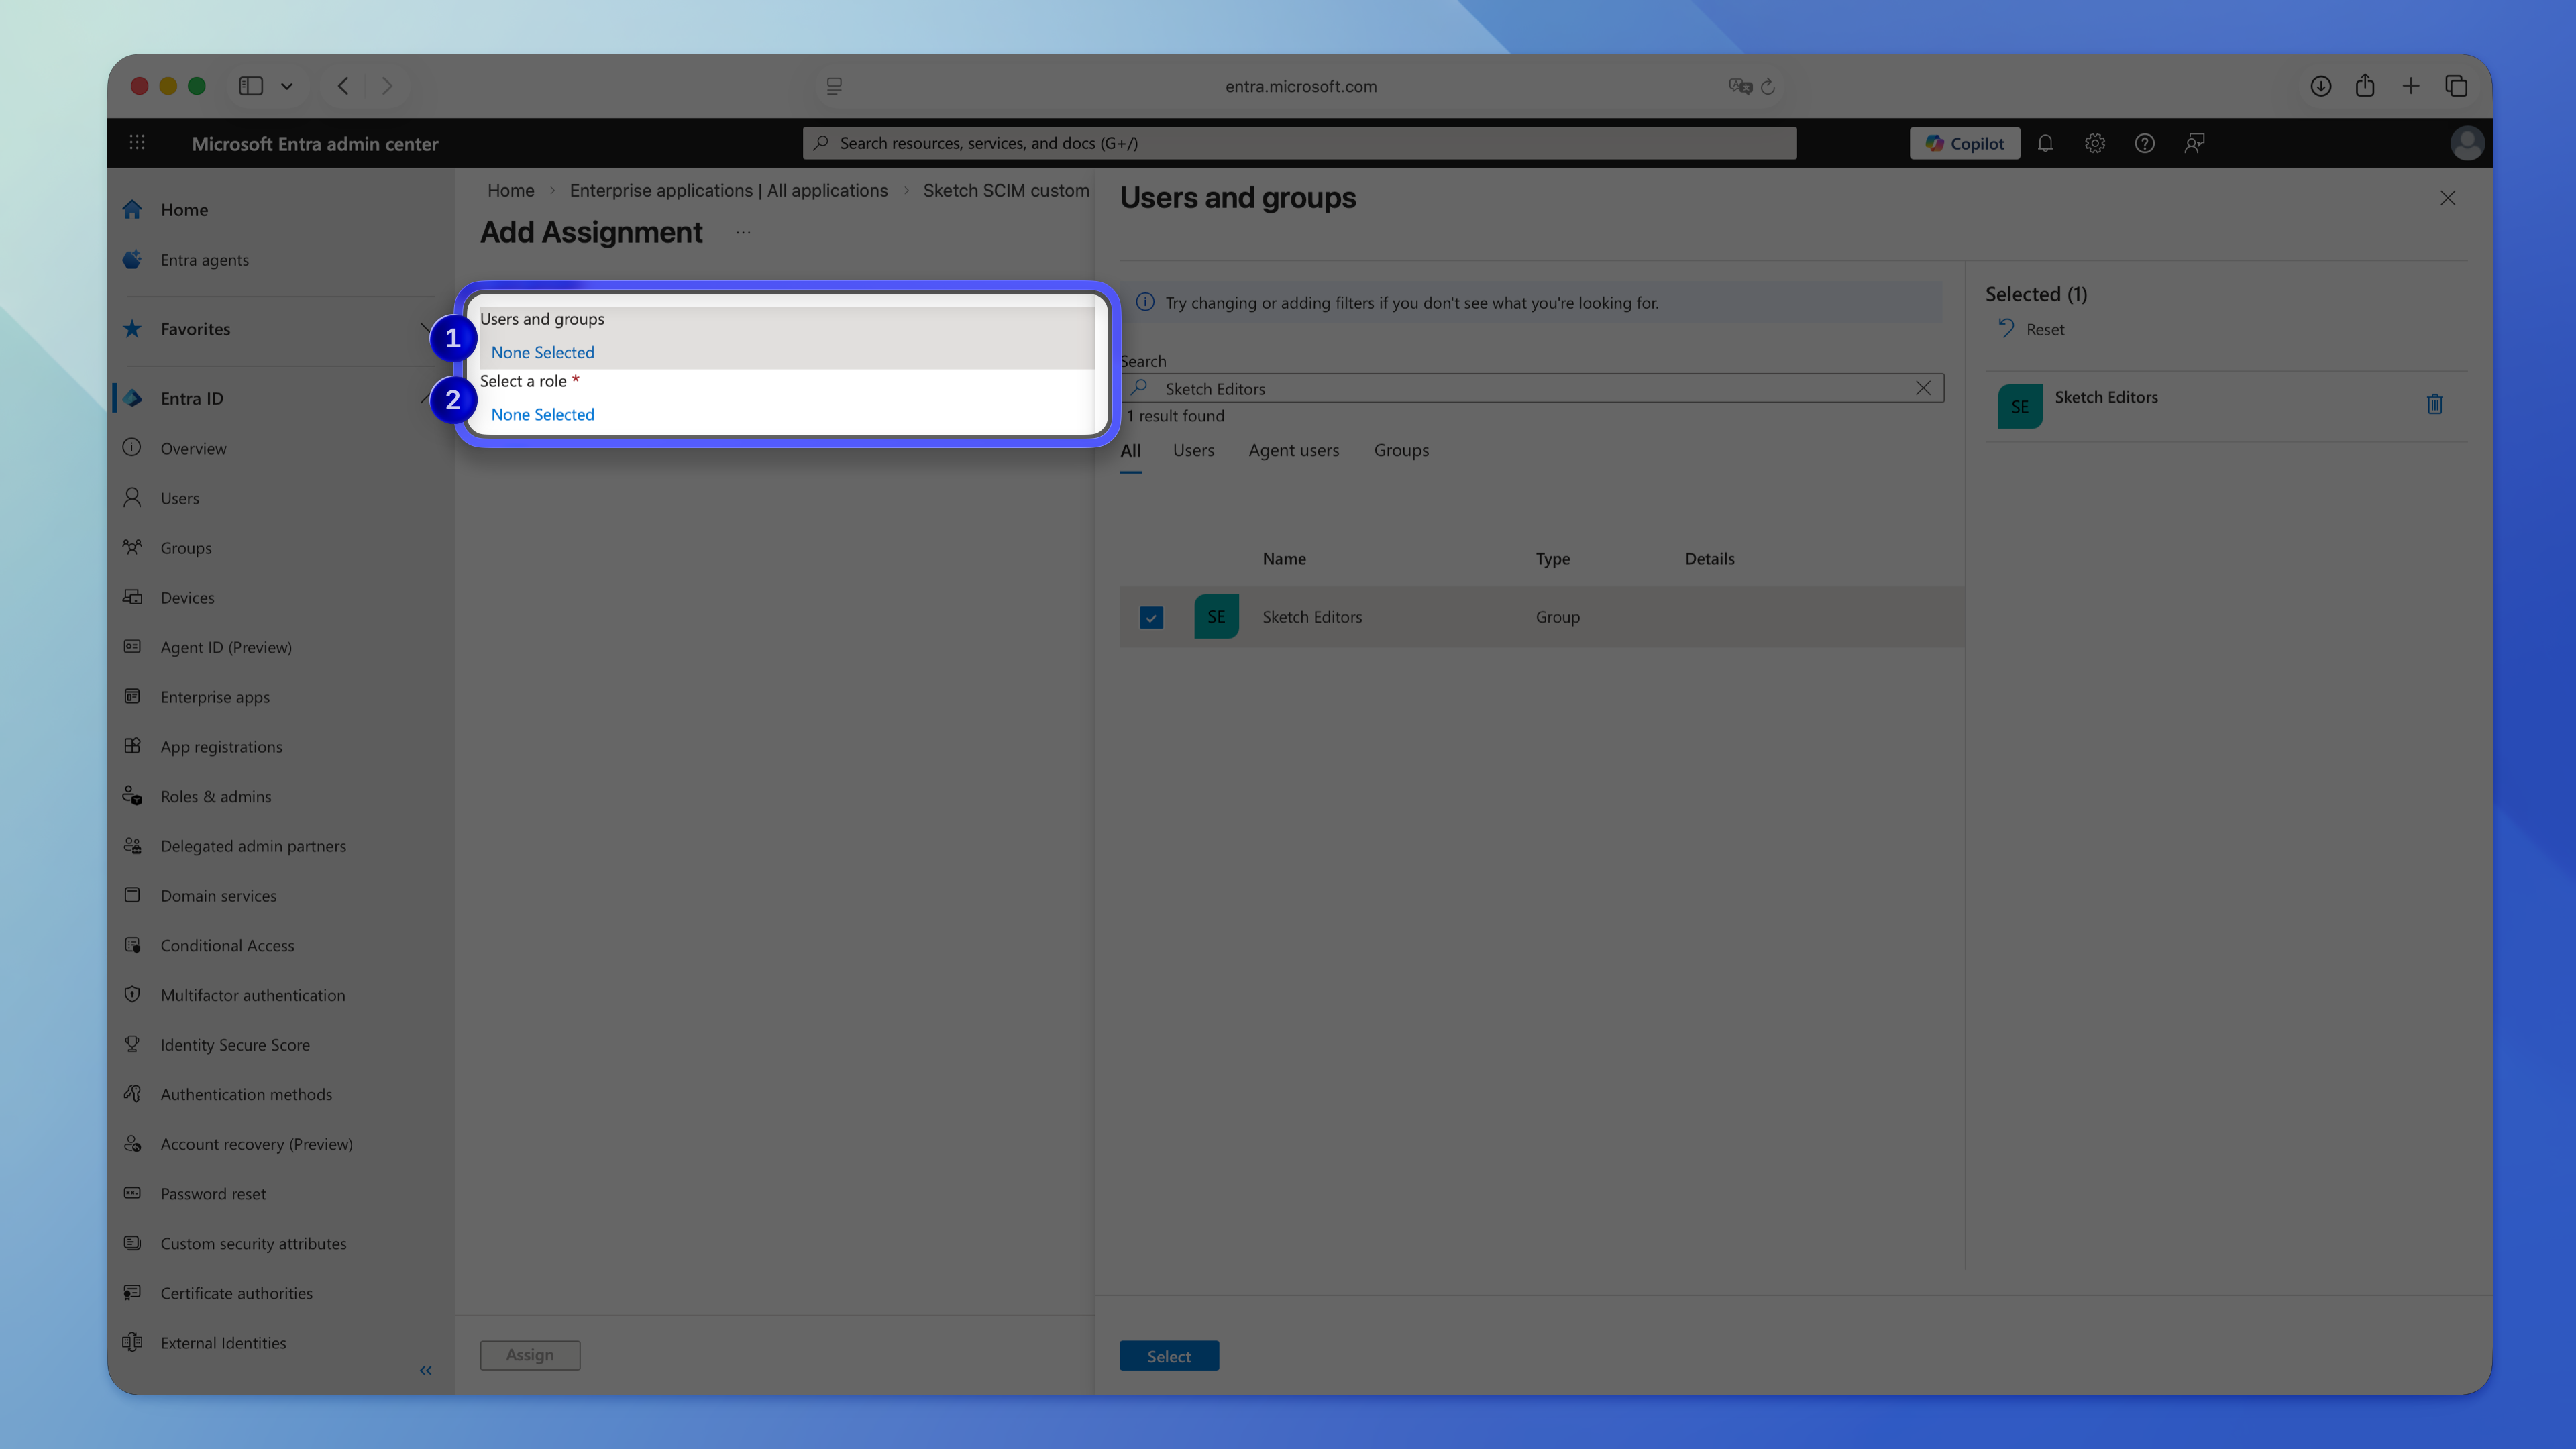
1. Go to **Enterprise apps** and select your custom SCIM/SSO app.
2. Select **Users and groups** in the sidebar.
3. Click **Add user/group**.
4. Select a group and assign a role. Do this one group at a time:
- Assign the Viewers group to the **Viewer** role.
- Assign the Editors group to the **Editor** role.
Double-check the mappings before saving.
## 4. Testing and confirmation
Run a **Provision on demand** test for an assigned user.
**Note:** You can’t run a provision-on-demand test for a group. Entra ID will prompt you to select up to five users from the assigned groups instead. The outcome should be the same: the user is added to your Workspace with the correct role.
Once the test succeeds, turn on provisioning for the custom app. From now on, any changes you make to users or groups in Entra ID will sync automatically to your Sketch Workspace.
## Considerations
- If you reach your Editor seat limit, provisioning will appear as successful in Entra ID, but we’ll add them as Viewers to avoid unwanted extra charges.
- If you disable a user in Entra ID, they’ll be deleted from the Workspace. Any documents in their **My Drafts** folder will move to a restricted folder that Workspace Admins can access.
## Existing Entra ID SSO configuration
If you already have SSO configured with Entra ID, you’ll need to delete the Gallery app and create a new custom app to enable SCIM. The Gallery app doesn’t support SCIM provisioning.
Deleting the Gallery app won’t affect existing users or their documents. You don’t need to make any changes in your Sketch Workspace — Entra ID handles everything.
### Delete the Gallery app
> **Note:** Ask users to sign out of their accounts and quit the Mac app before you delete the app that handles user sign-in.
1. Sign in to your Entra ID account.
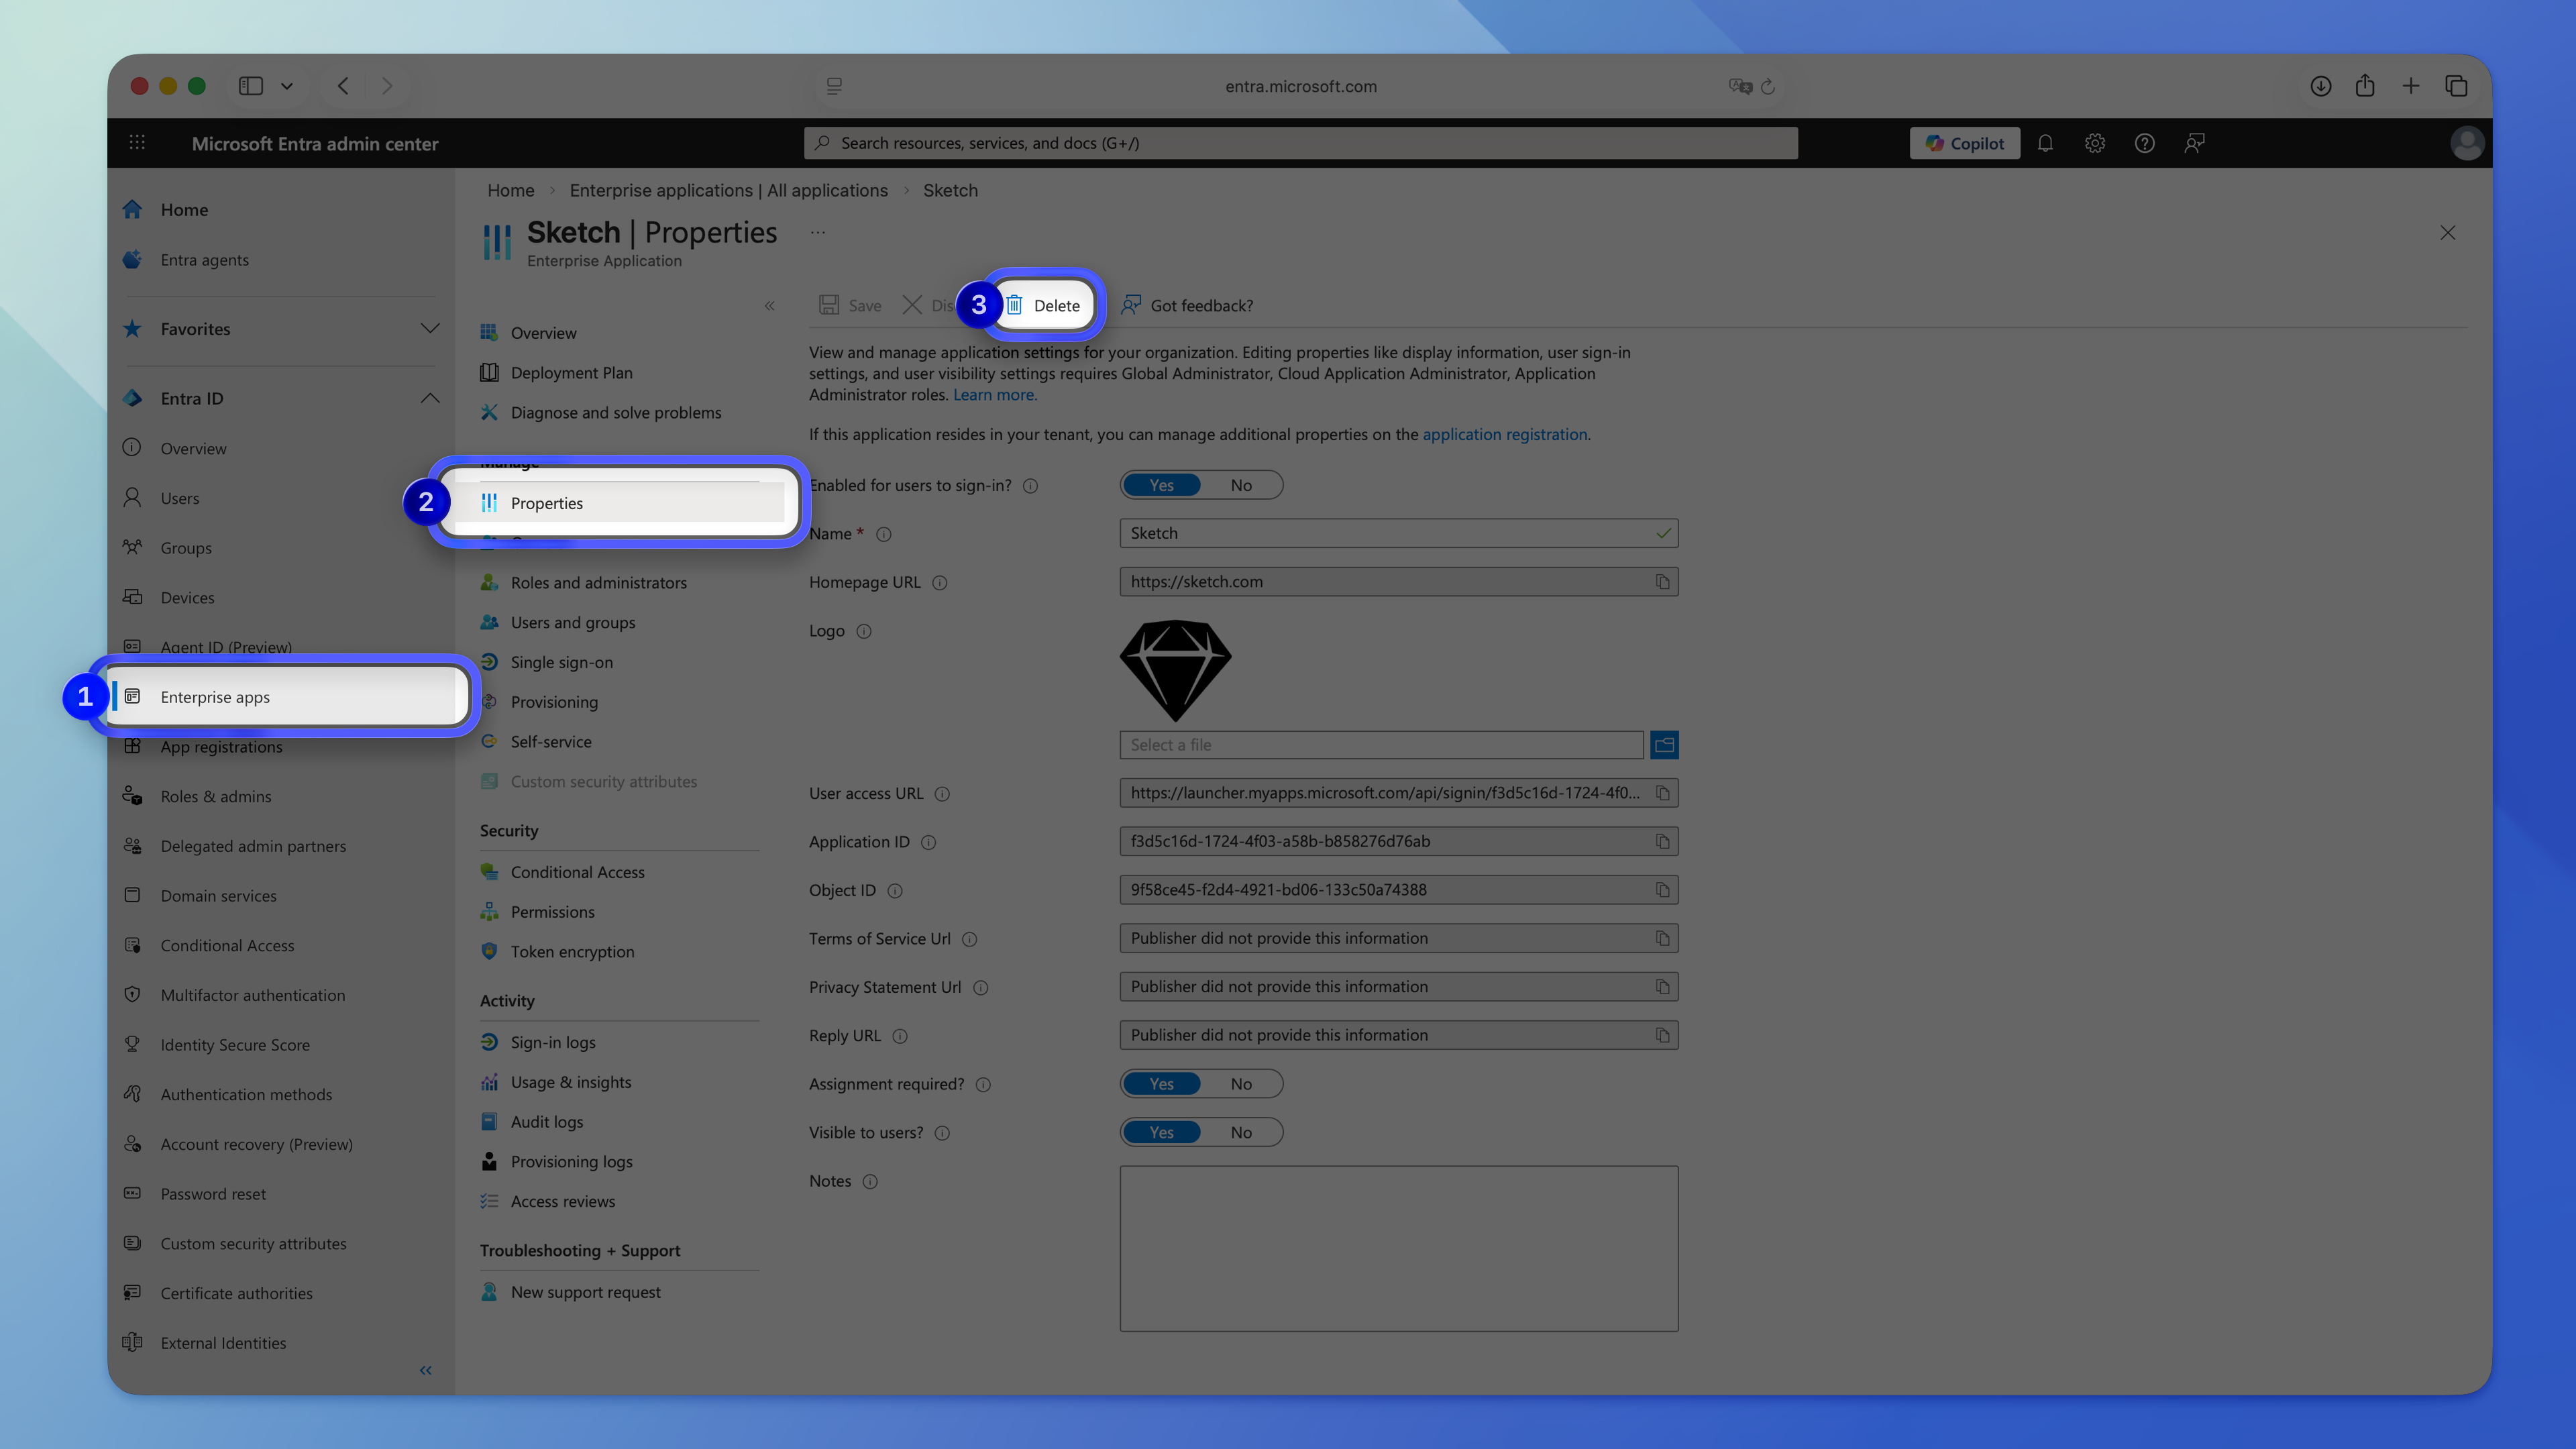
1. Go to **Enterprise apps** and select **Sketch** from the app list.
1. Open **Properties**, then select **Delete**.
> **Note:** Once you’ve deleted the Gallery app, [go back to step 1](#1-create-a-custom-application) to create the custom app and set up SCIM.
--------------------------------------------------------------------------------
title: "Okta"
description: "Learn how to set up automated SCIM user provisioning with Okta for your Sketch Workspace, including SSO, group assignment, and access levels."
last_modified: "2026-02-26"
url: "https://www.sketch.com/docs/getting-started/single-sign-on/scim-provisioning/okta/"
--------------------------------------------------------------------------------
## Okta
This guide walks you through setting up SCIM provisioning with [Okta](https://www.okta.com/) for your Sketch Workspace. If you need help along the way, [contact us](/support/contact/?topic=enterprise&subject=other&summary=I%20need%20help%20setting%20up%20SSO%20or%20SCIM.%0A%0A---%0A%0AAdd%20any%20other%20details%20below%3A%0A) and we’ll help you out.
> **Note:** **[Already use Okta for SSO?](#existing-okta-sso-configuration)**
You’ll need to create a new custom app to enable SCIM. The Gallery app doesn’t support SCIM provisioning.
## 1. Create a custom Okta app
Sign in to your Okta account and open the **Admin console**. Make sure you can create and configure applications and groups.
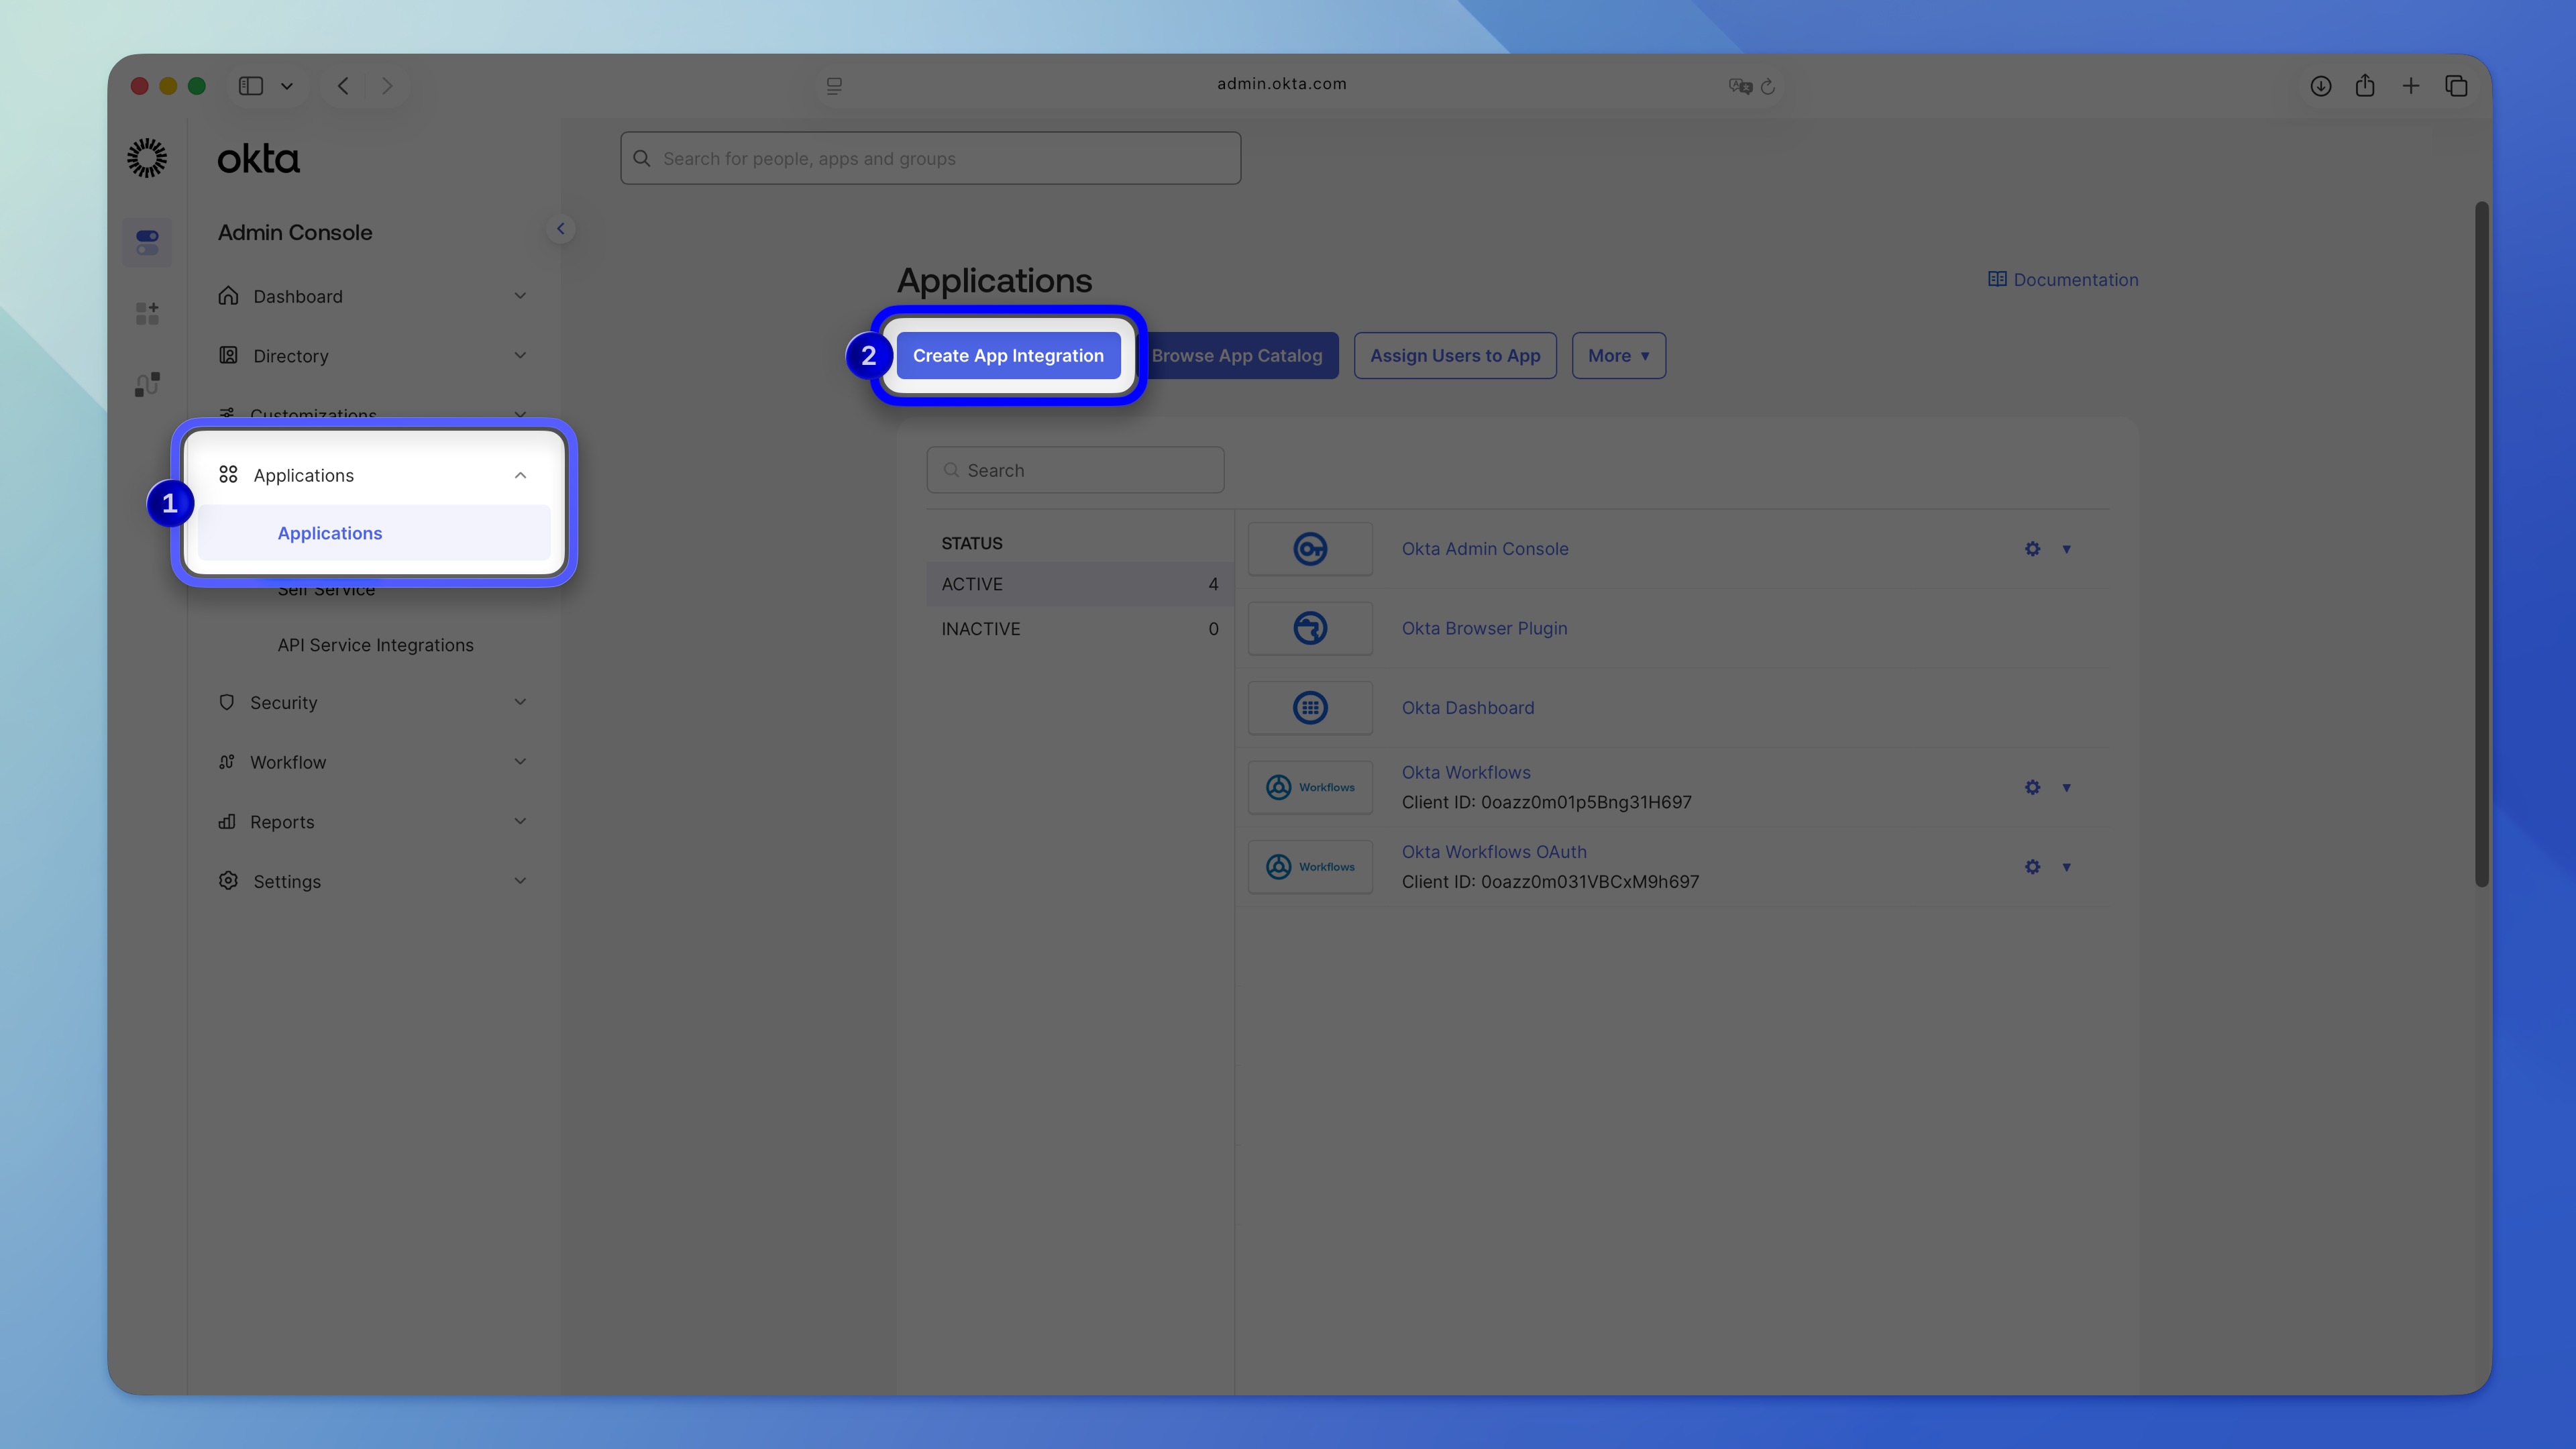
1. On the left sidebar, click **Applications** > **Applications** > **Create App Integration**.
1. Select **SAML 2.0** from the list.
1. Name your app.
### Configure SAML SSO
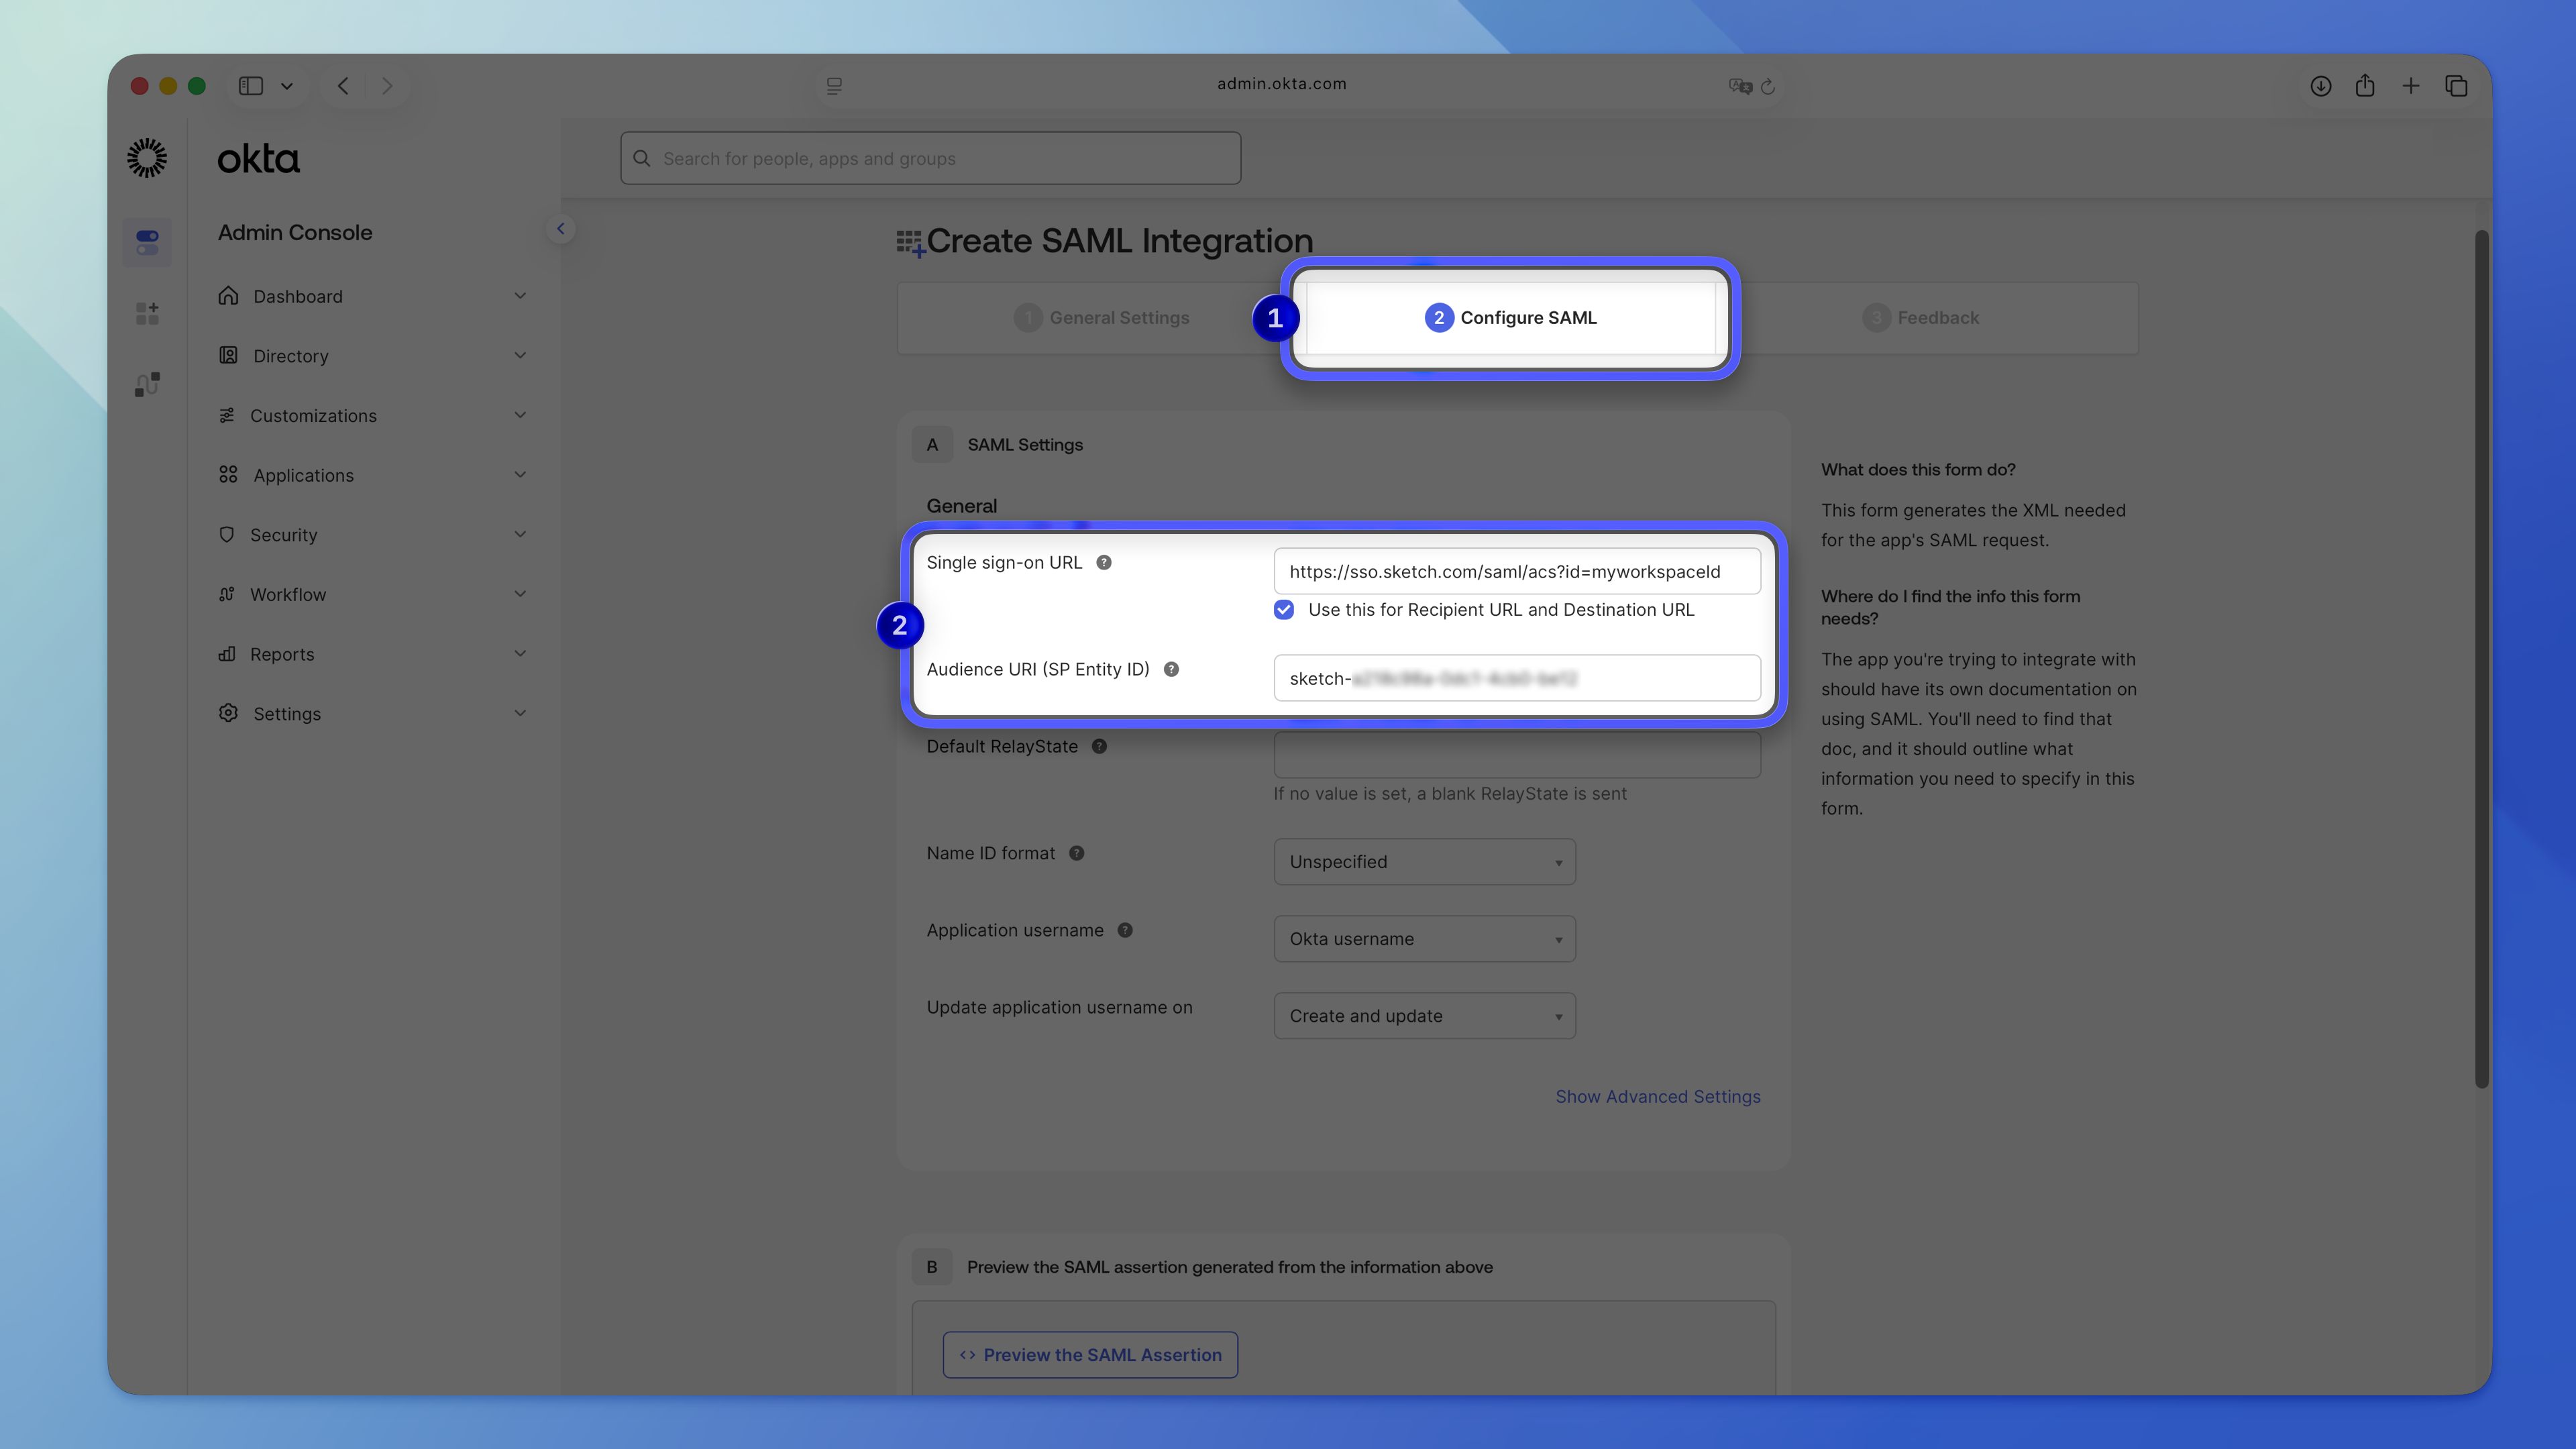
On the next screen, you’ll need to provide the SAML SSO configuration data from the web app.
1. Paste your Workspace ACS URL in the **Single sign-on URL** field.
1. Paste your Workspace Entity ID in the **Audience URI** field.
To get these values, sign in to the web app as an Admin and go to **Settings** > **[Single Sign-on](/workspace/settings/sso)**.
1. Leave the rest of the form with the default values and click **Next**.
You’ll see an additional step where Okta asks you to provide data on how you configured the app. This step is optional — you can skip it.
### Add SAML attribute statements
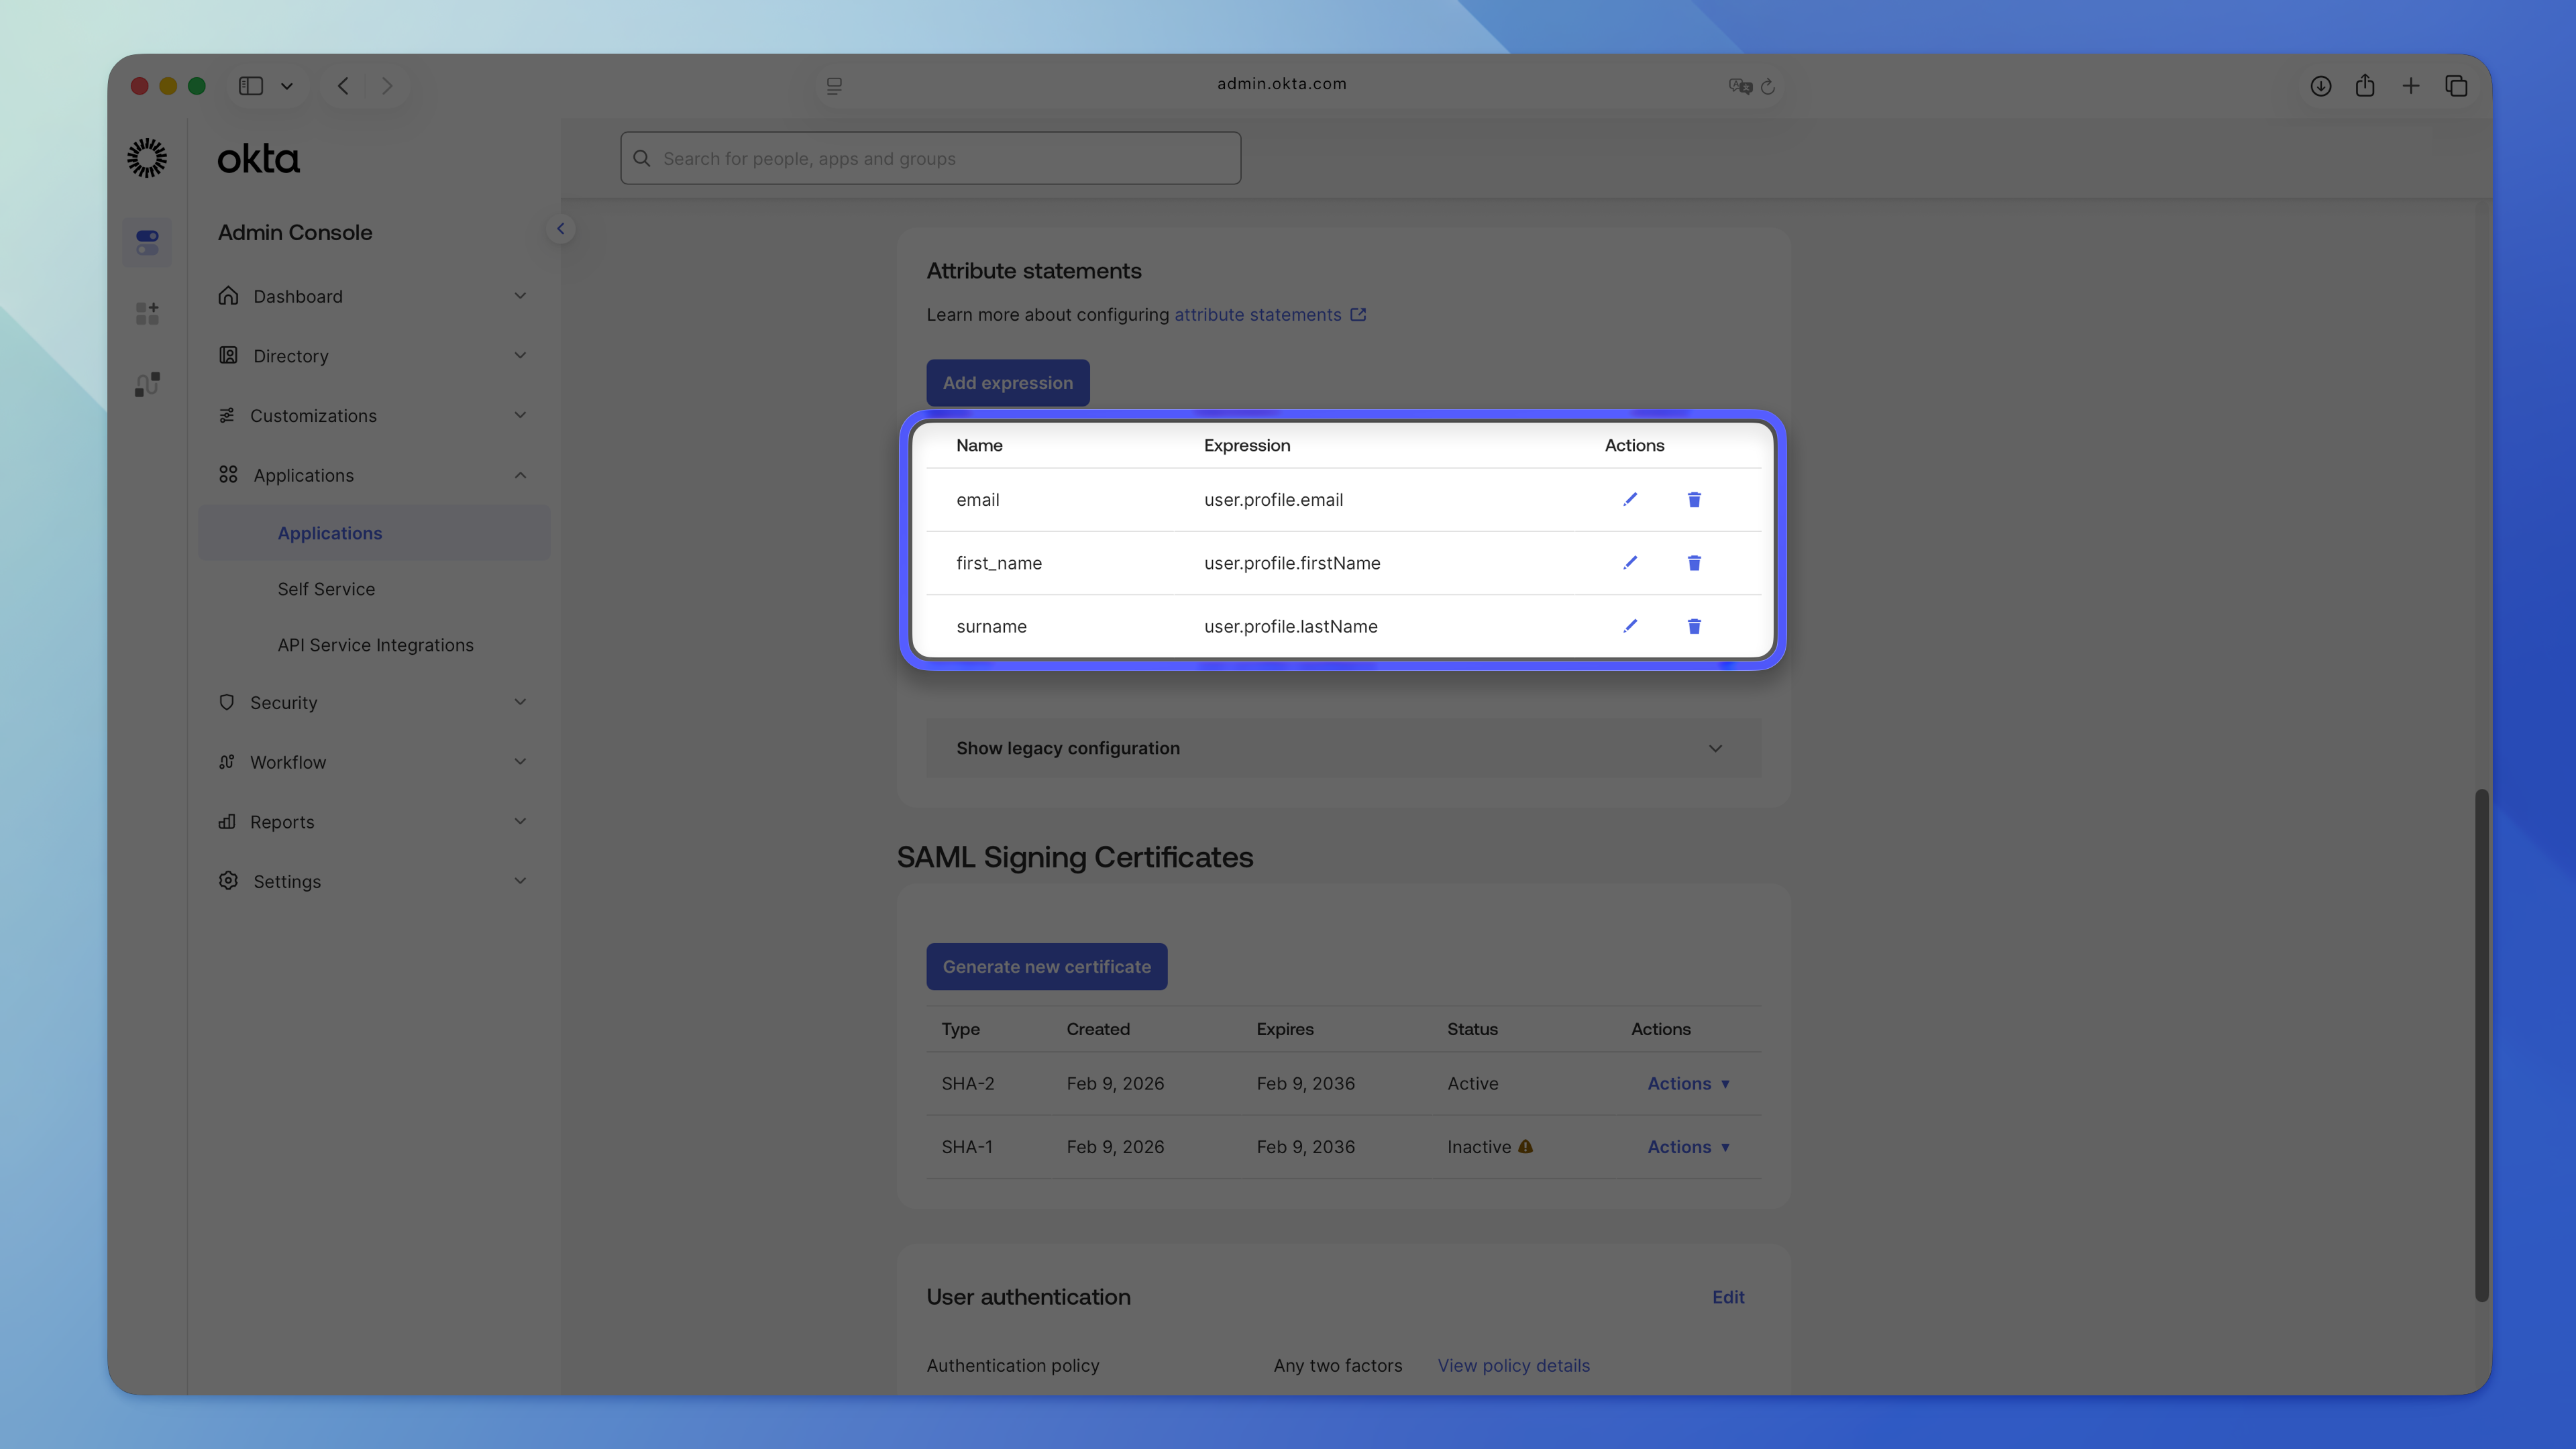
After you create the custom app, open the **Sign On** tab and scroll to **Attribute Statements**. Click **Add expression**, then add the following:
1. **Email**
- Name: `email`
- Expression: `user.profile.email`
1. **First Name**
- Name: `first_name`
- Expression: `user.profile.firstName`
1. **Surname**
- Name: `surname`
- Expression: `user.profile.lastName`
### Upload the XML metadata file to your Workspace
1. Scroll down to the **SAML Signing Certificates** section.
1. Click **Actions** for the active certificate.
1. Click **View IdP metadata**.
1. Press ⌘S to save the XML file (IdP metadata).
Switch back to the web app and upload the downloaded XML file.
> **Note:** For more details on uploading metadata, see our [finishing SSO setup documentation](/docs/getting-started/single-sign-on/setting-up-saml-sso/finish-setting-saml-sso/).
## 2. Configure SCIM
### Activate SCIM
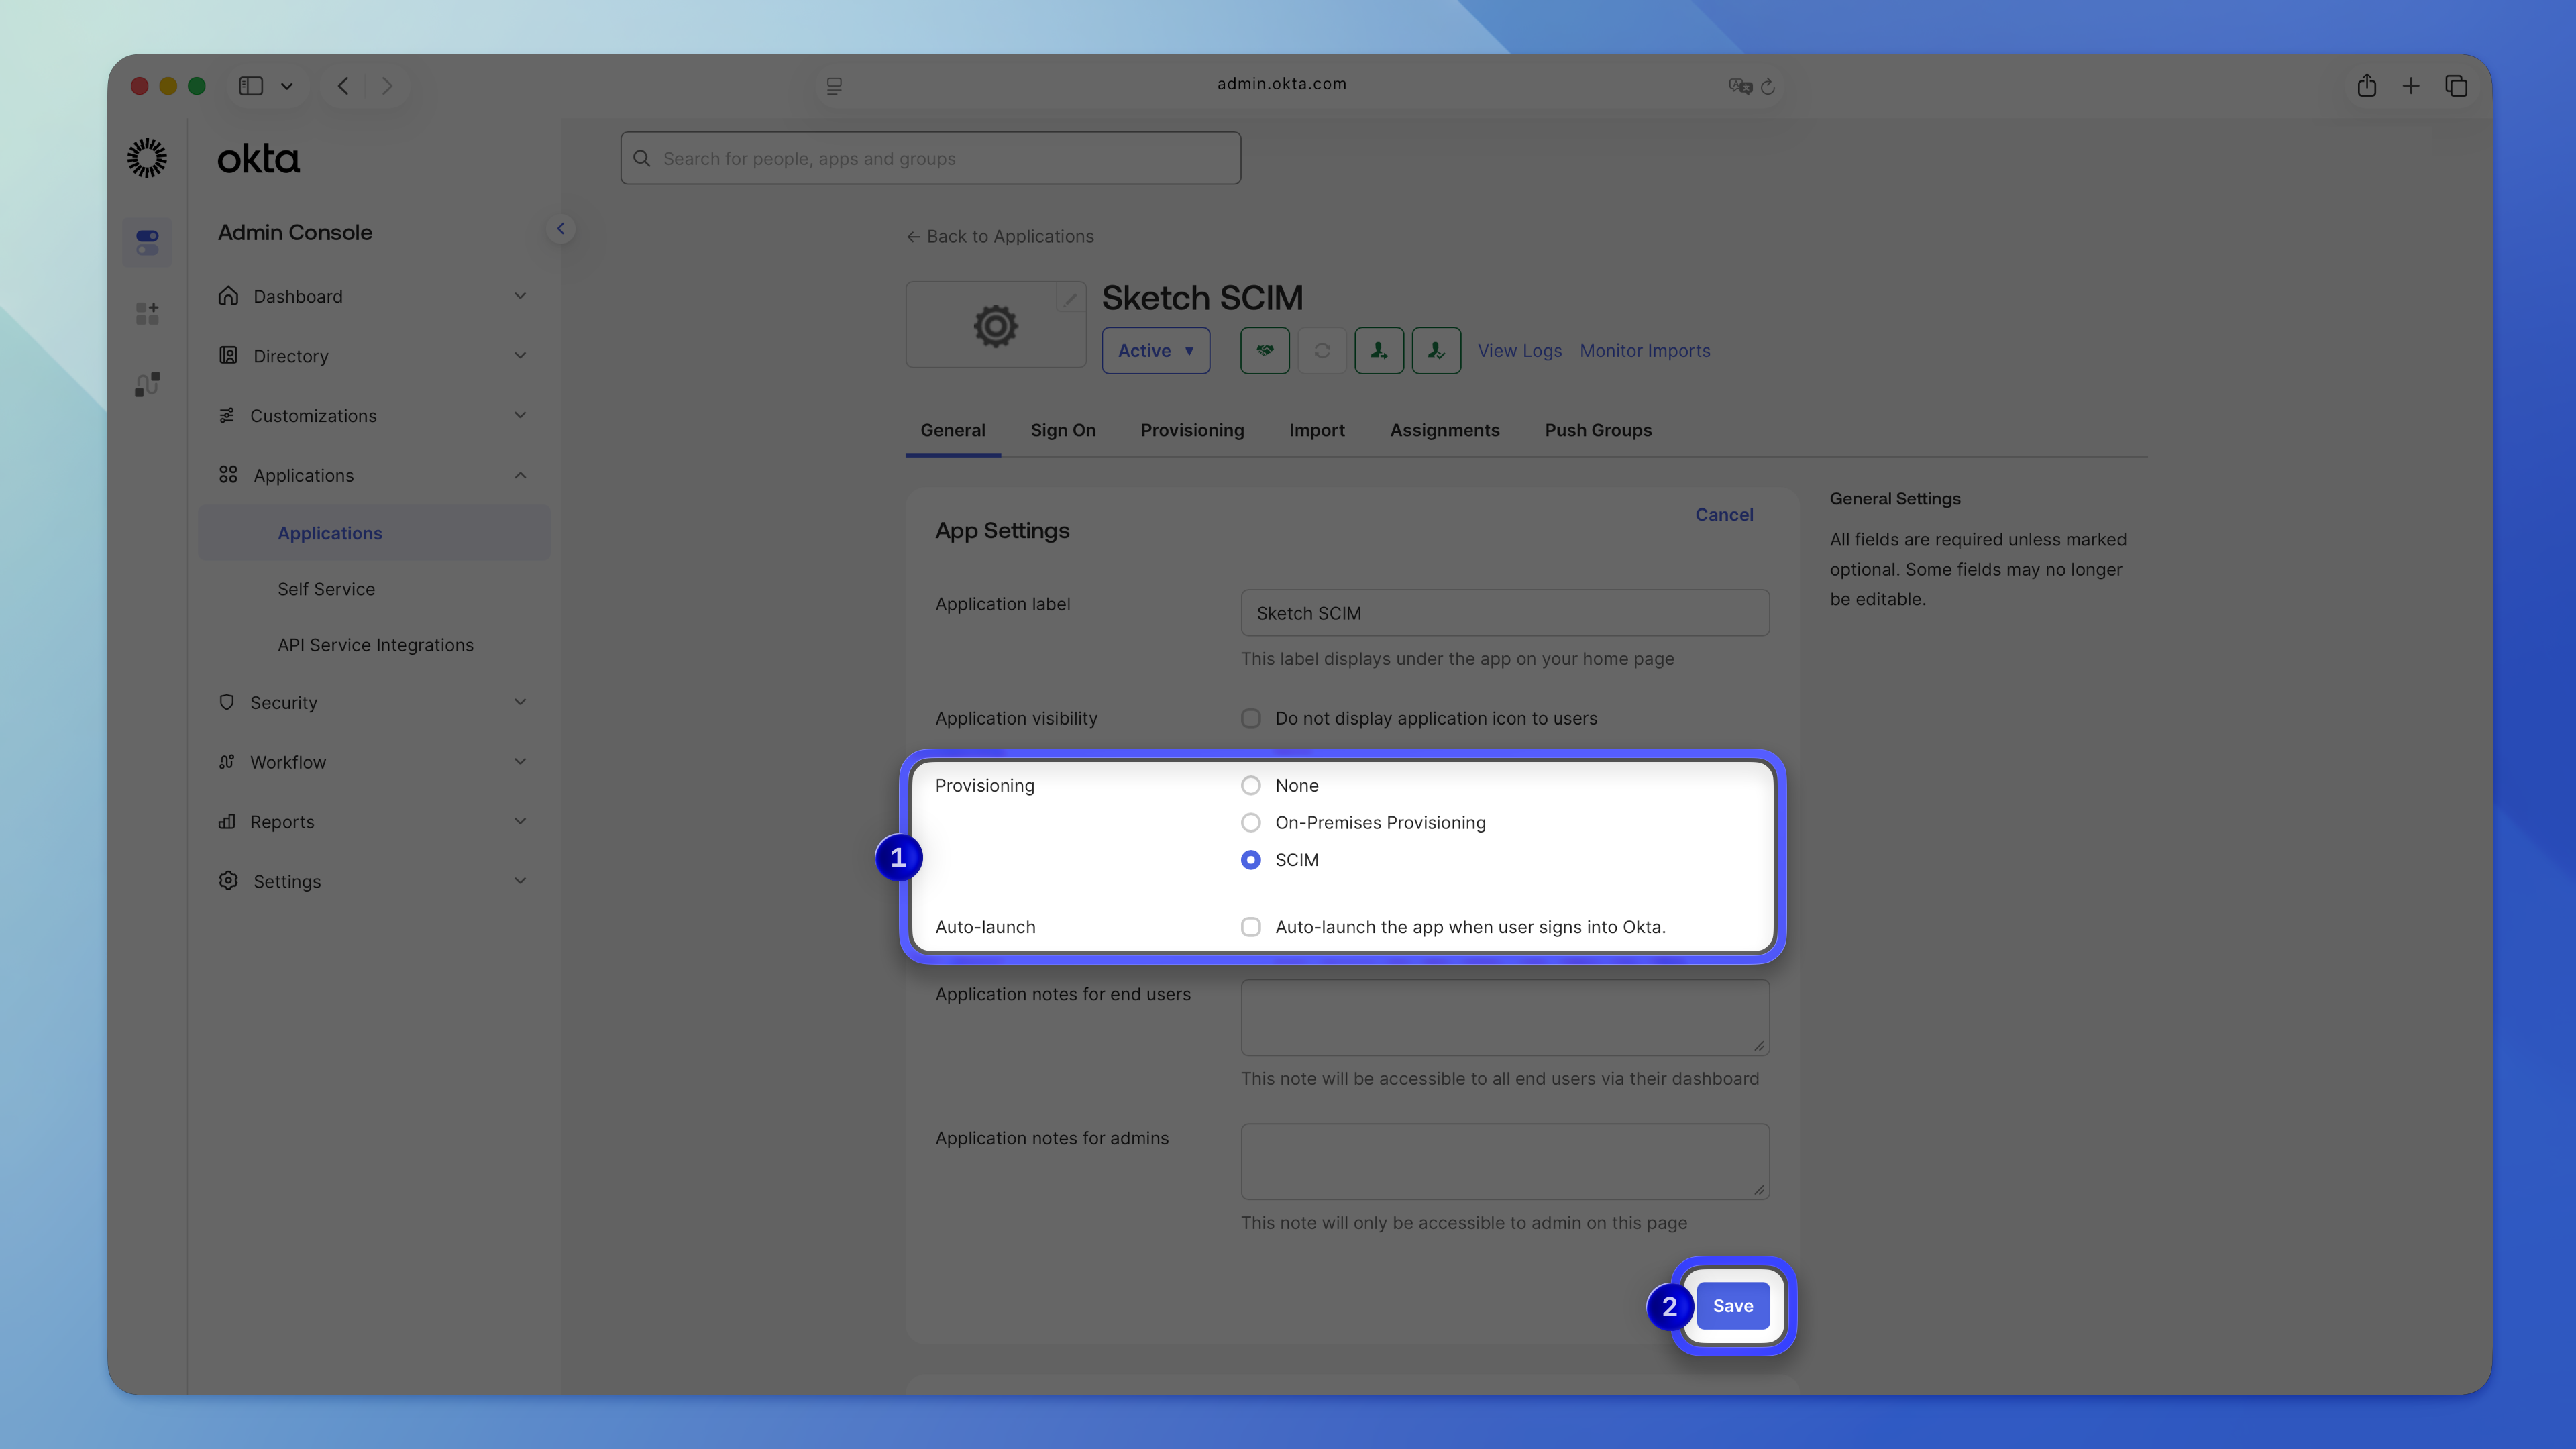
1. Go to the **General** tab and click **Edit** in the **App Settings** section.
1. Select **SCIM** in the **Provisioning** section.
1. Click **Save**.
### Configure provisioning
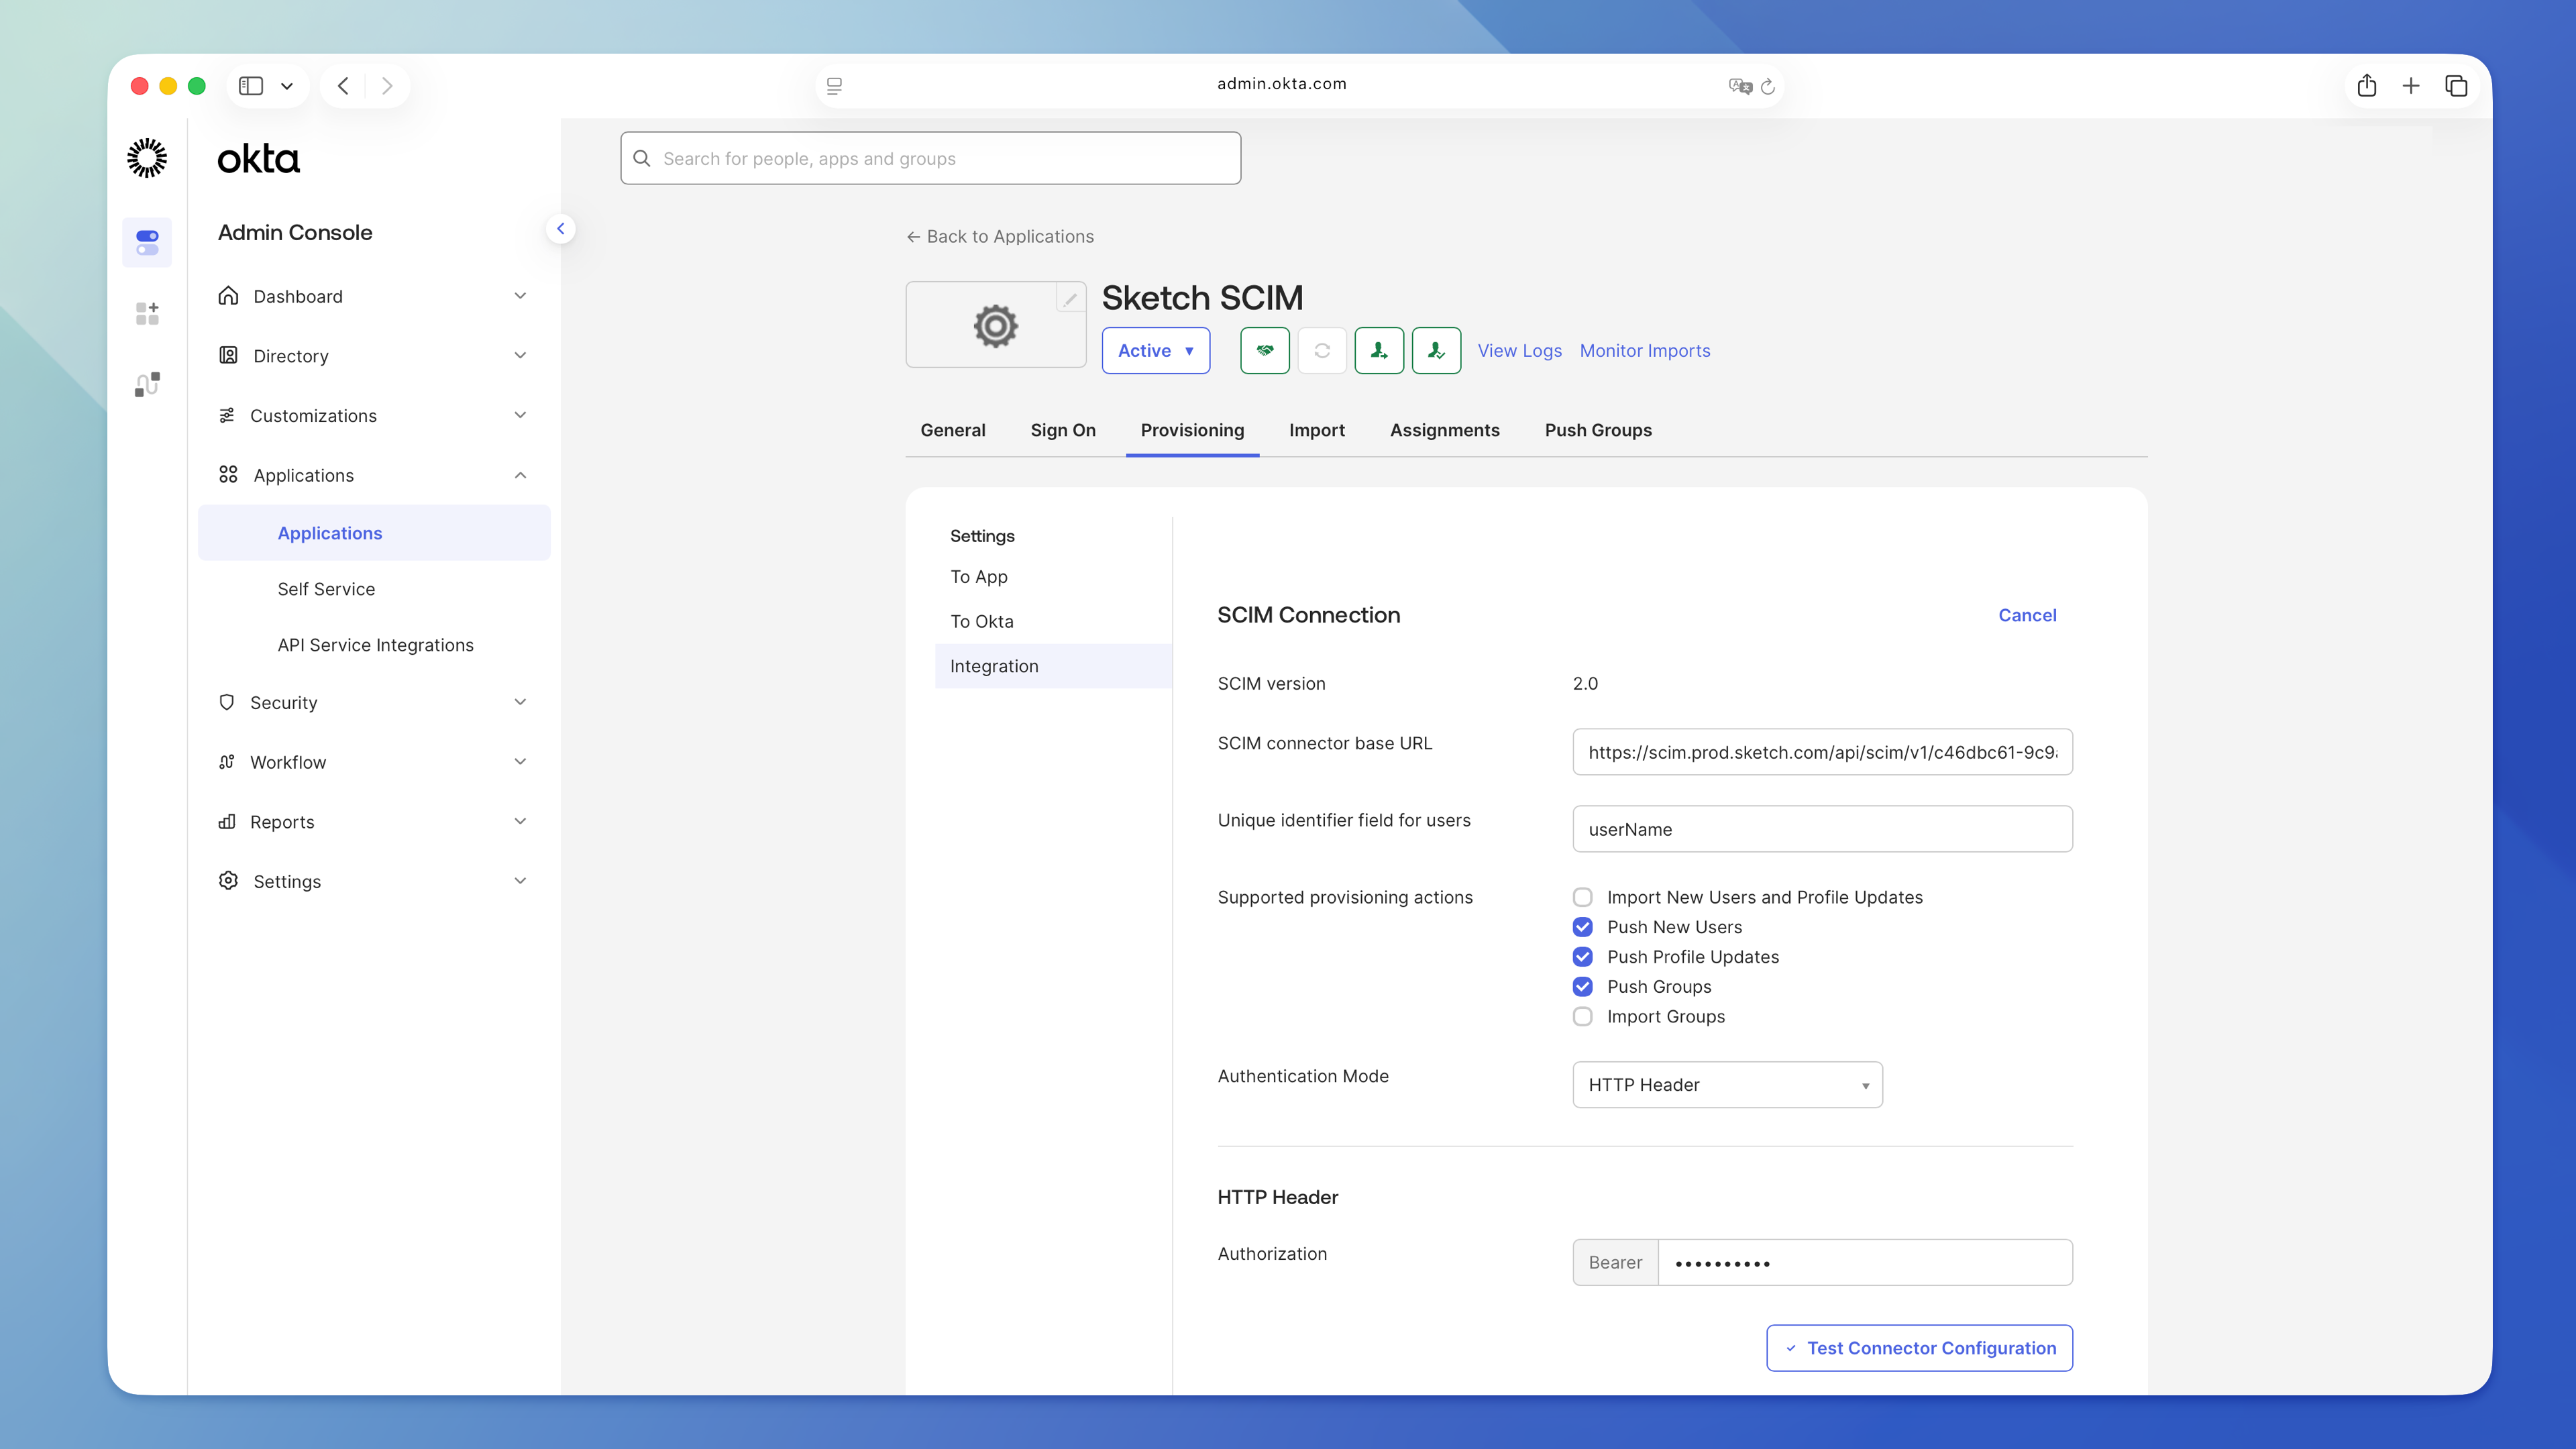
To connect Okta to your Sketch Workspace, you’ll first need to enable SCIM and collect a few values:
1. Open the web app and go to **Settings** > **[Single Sign-on](/workspace/settings/sso)**.
1. Click **Enable SCIM**.
1. Have the **SCIM Base URL** and the **SCIM token** ready.
Switch to your Okta custom SCIM app:
1. Open the **Provisioning** tab.
1. Click **Edit**.
1. Paste the **SCIM Base URL** from the web app in the **SCIM connector base URL** field in Okta.
1. Type `userName` in the **Unique identifier field for users**.
1. Select **HTTP header** in **Authentication Mode** and paste the SCIM token in the **Bearer** field.
1. Click **Test Connector Configuration**.
1. Click **Save** if your connection test is successful.
### Create assignment groups
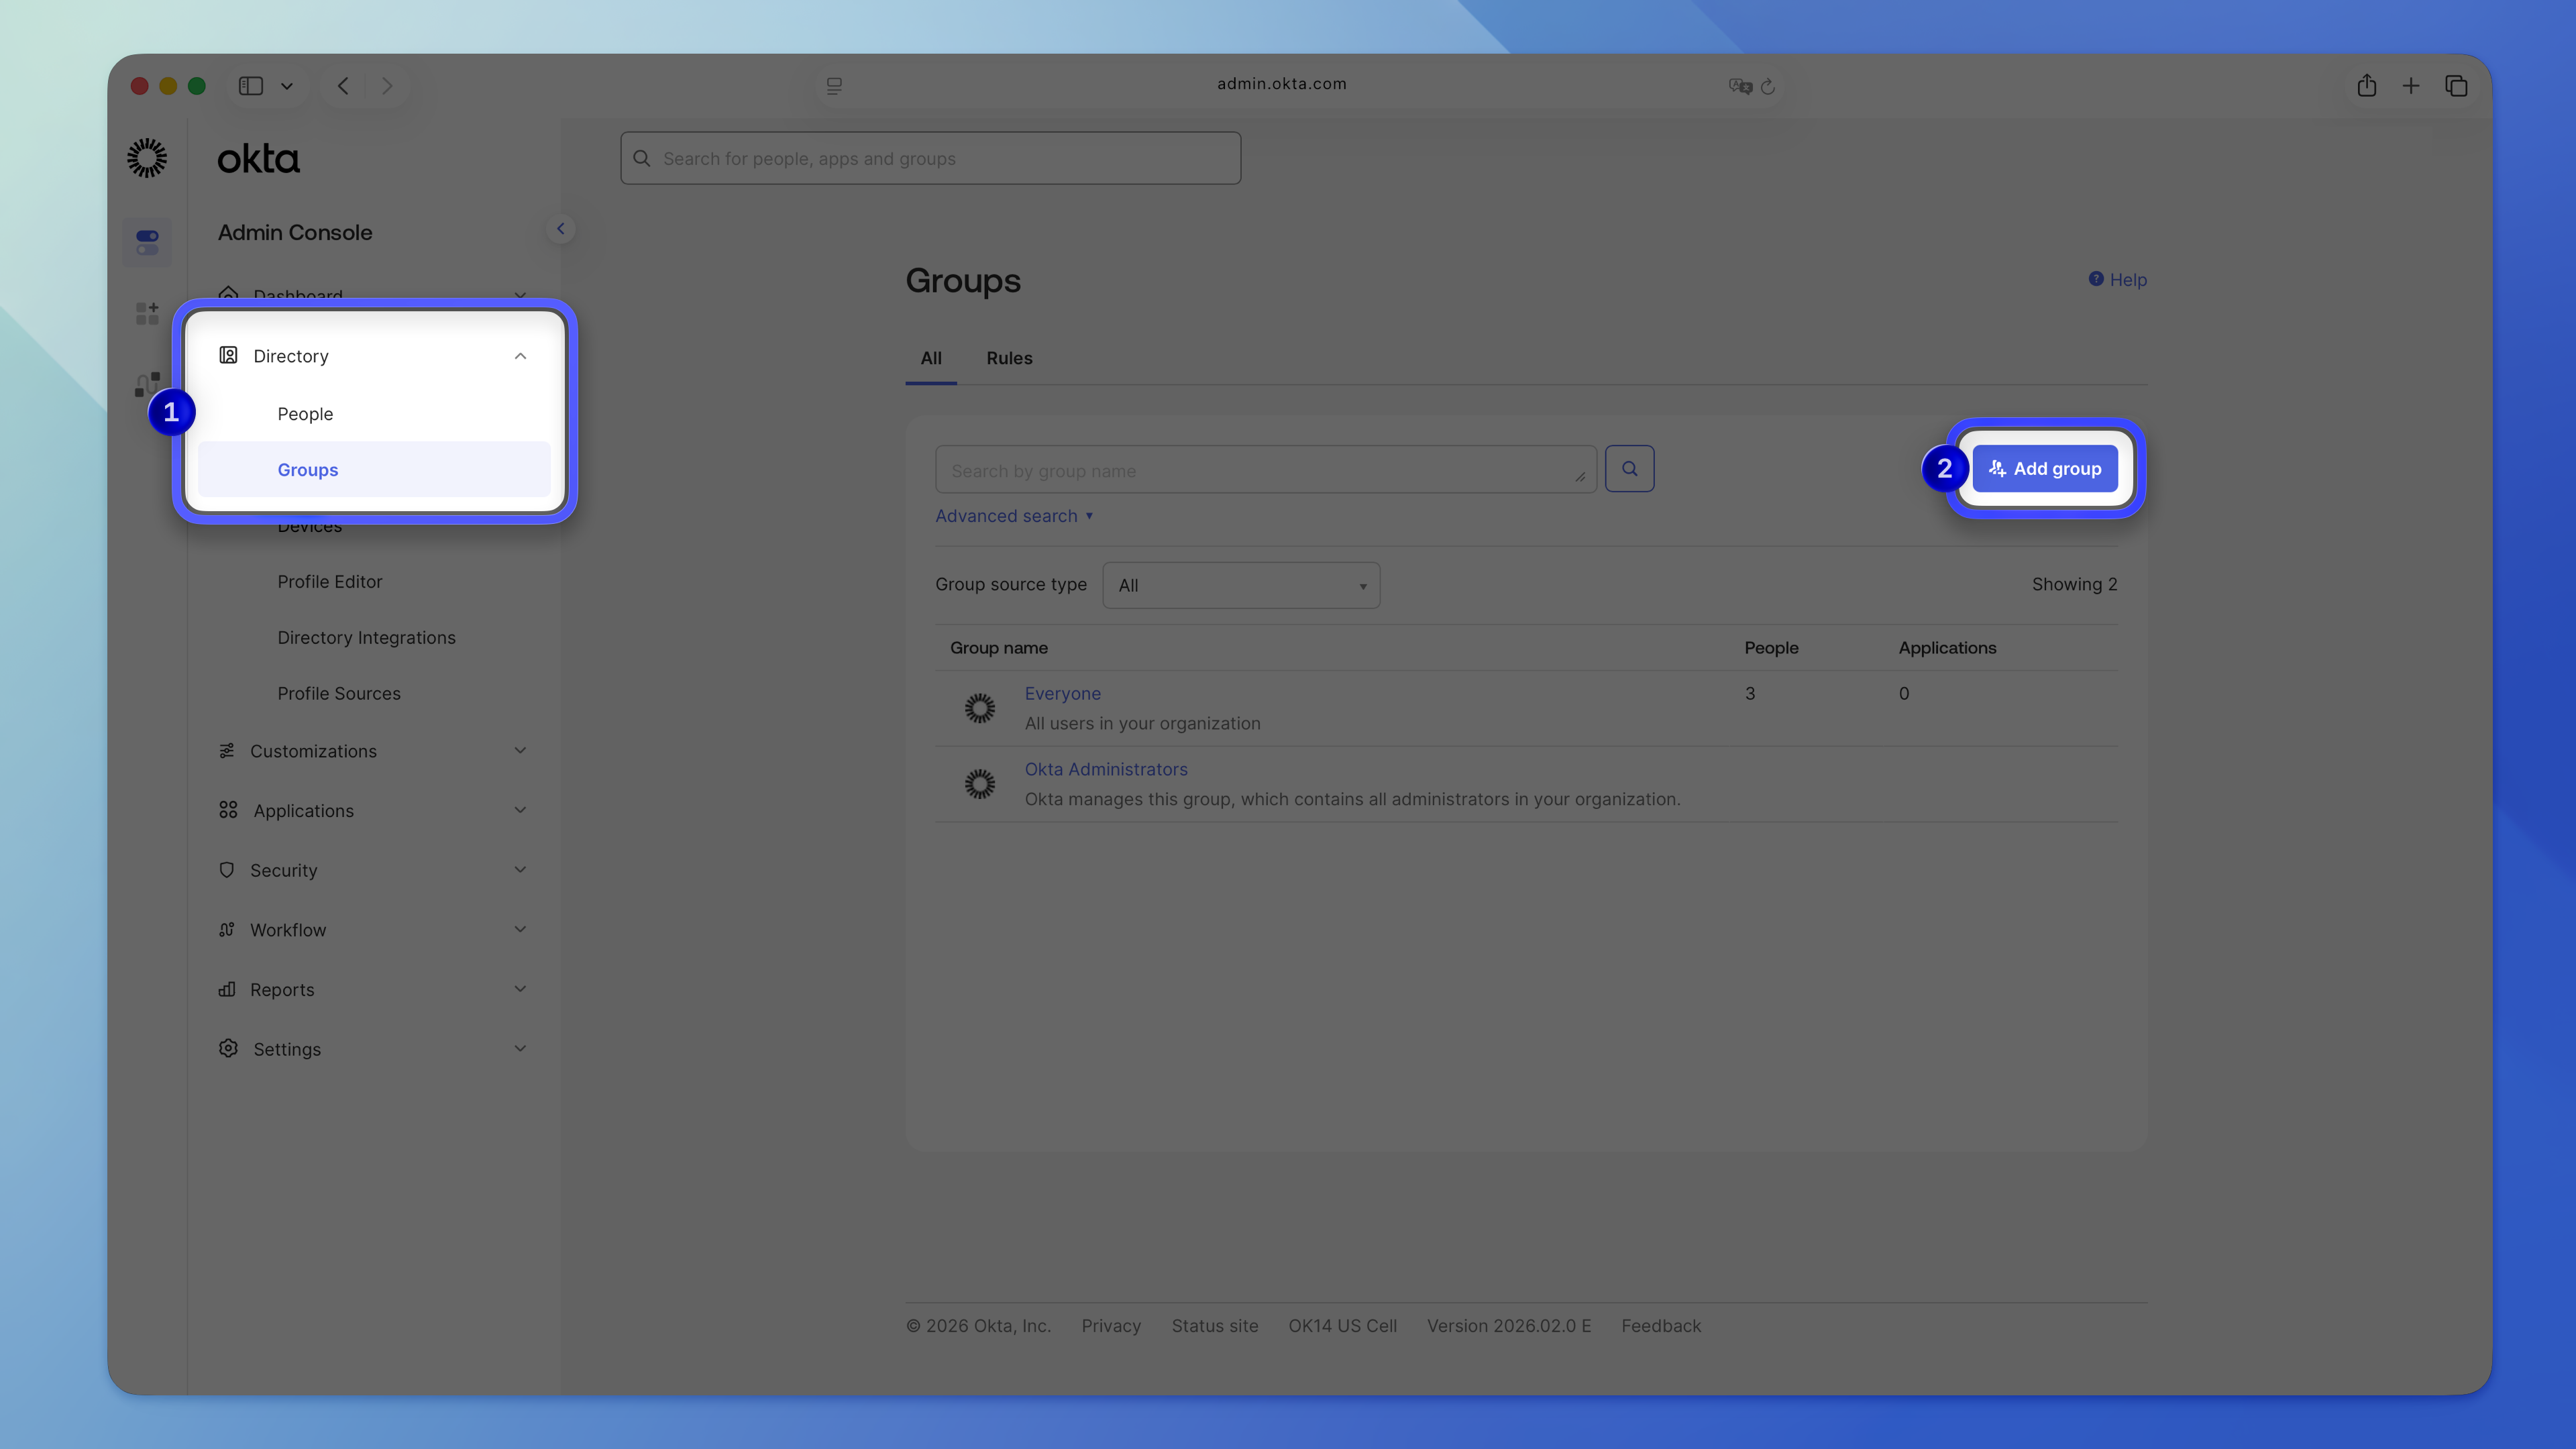
Create two groups to control which access level users get in your Sketch Workspace: editors or viewers.
1. Go to **Directory** > **Groups** and click **Add group**.
1. Name the group. Use a descriptive name, like `Sketch-editors` or `Sketch-viewers`.
1. Add users to each group.
### Create a custom attribute
You’ll need a custom attribute to control whether users are provisioned as Editors or Viewers in your Sketch Workspace.
1. Go to **Applications** and select your Sketch SCIM app.
1. Go to **Provisioning** > **To App**.
1. Scroll down to the attribute list and click **Go to Profile Editor**.
1. Click **+Add Attribute**.
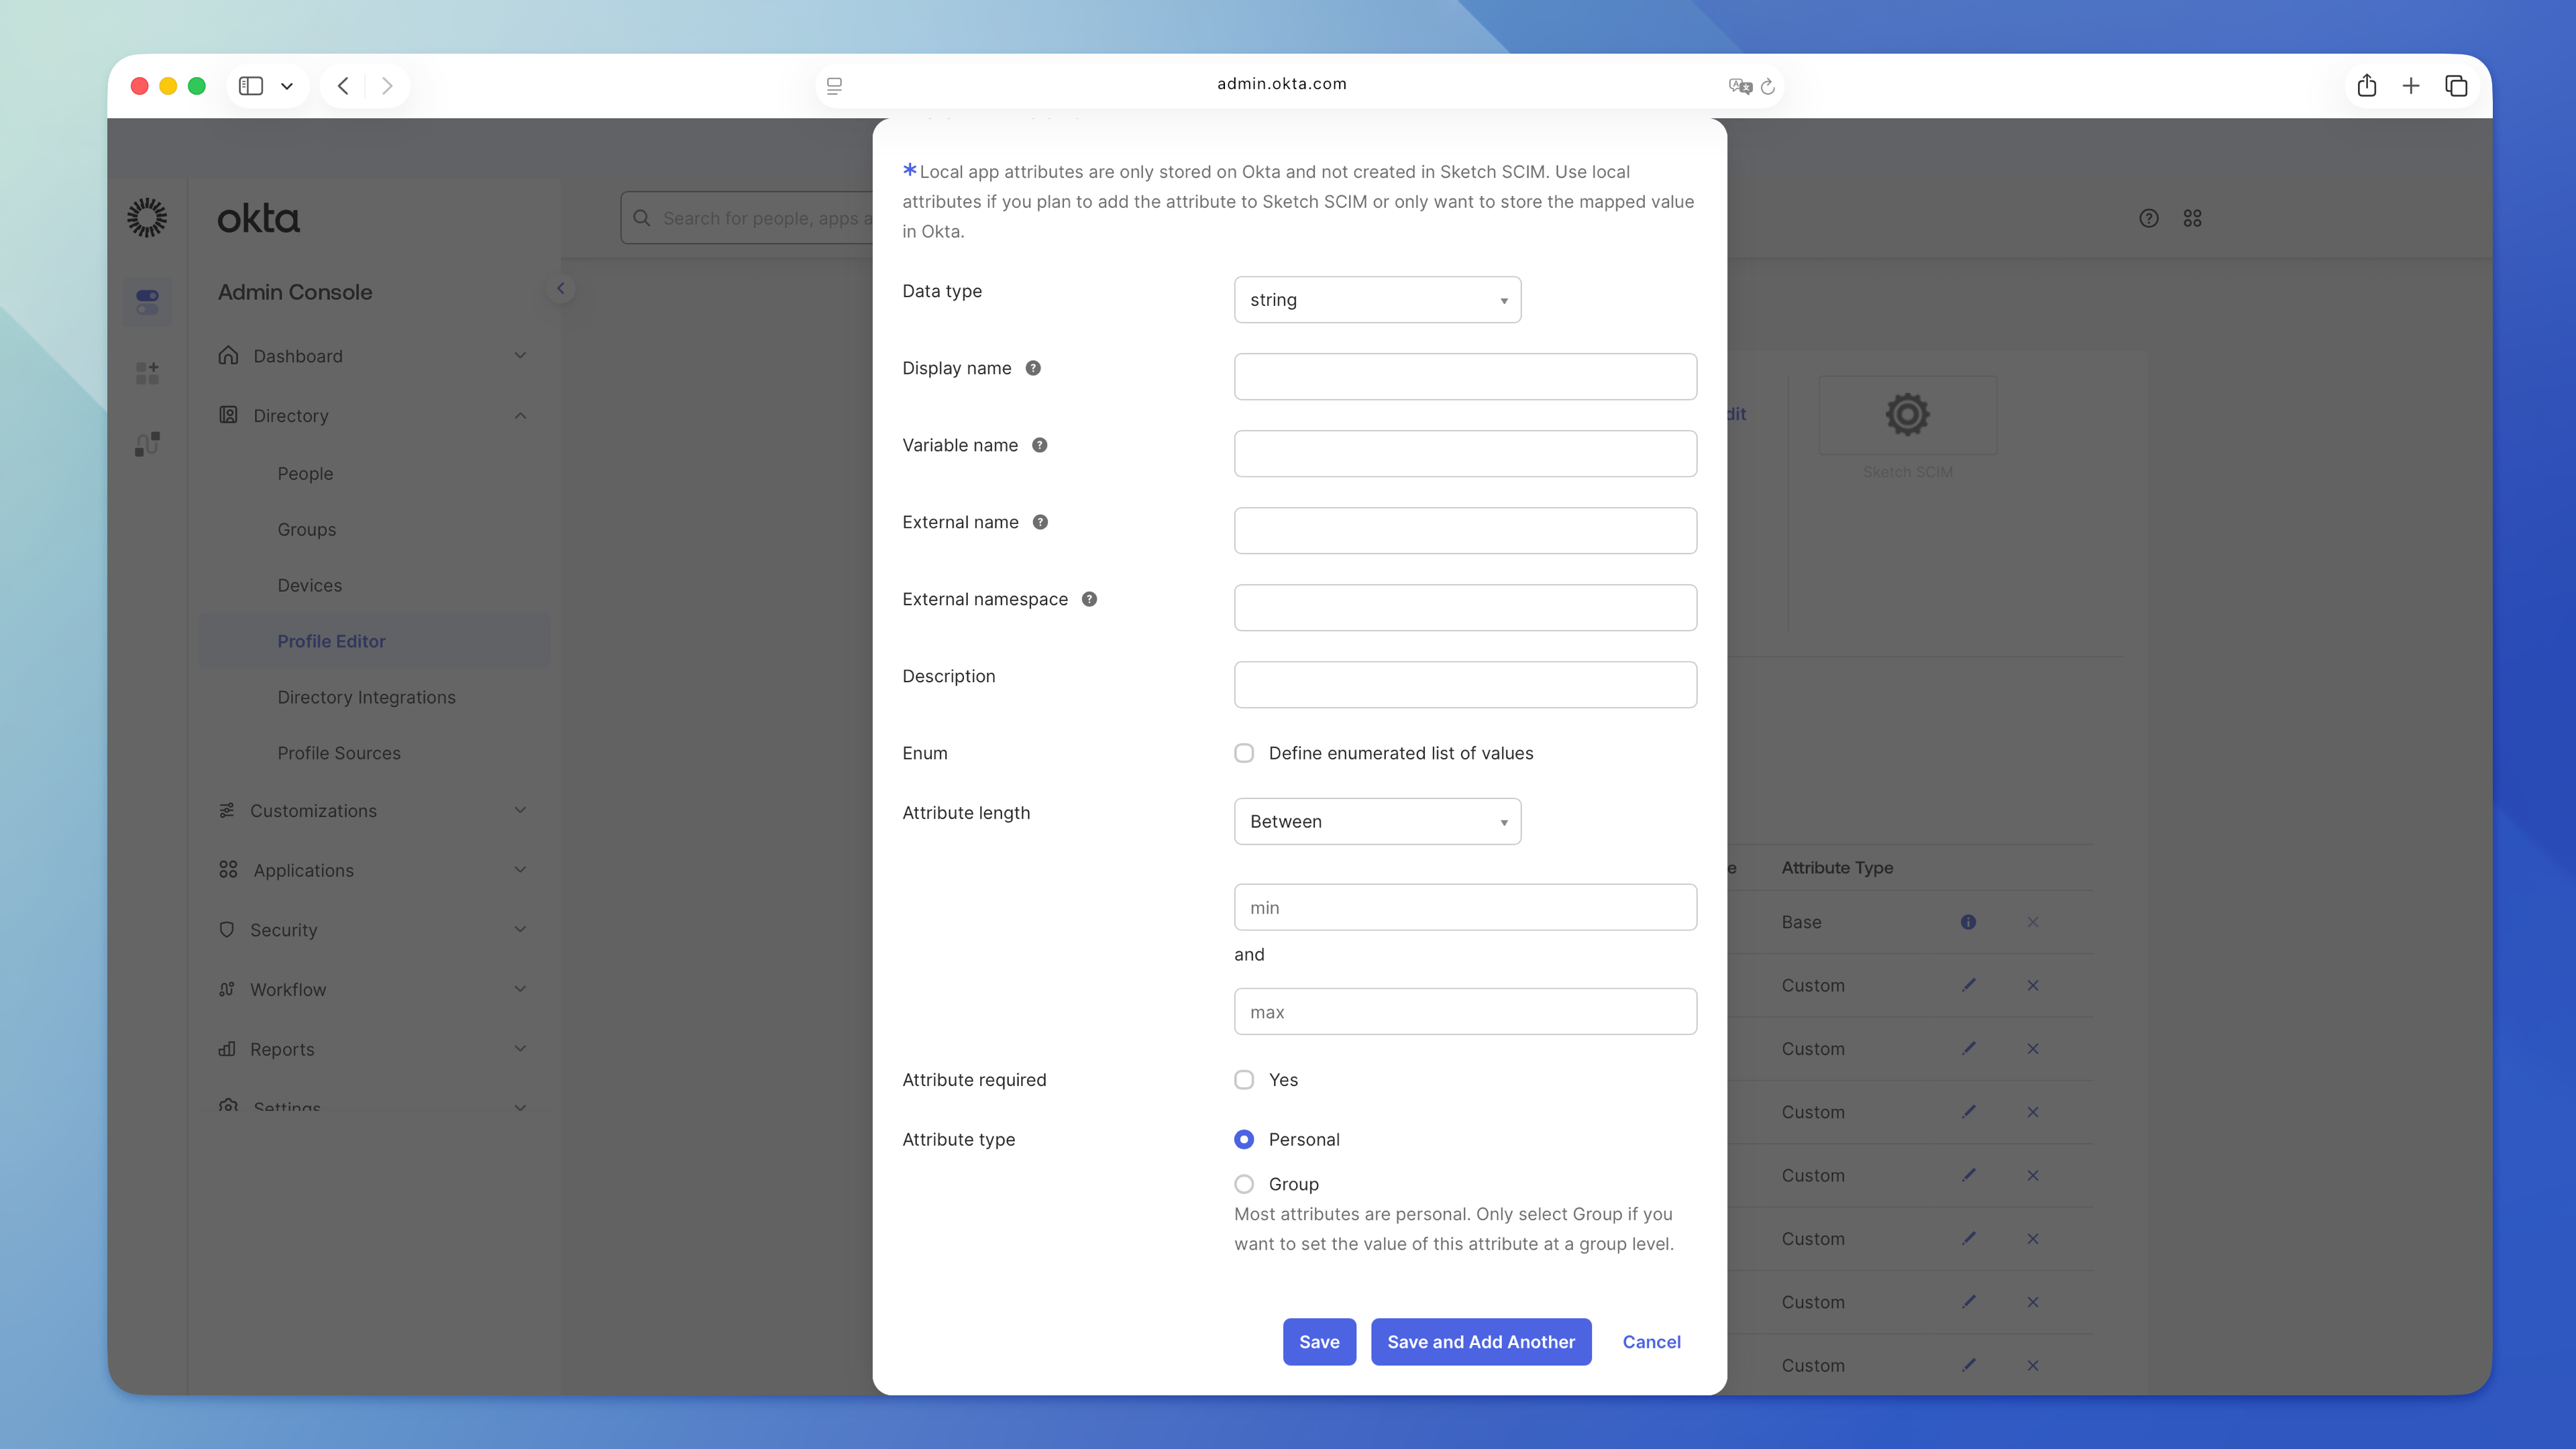
Fill in these fields:
- **Data type:** String
- **Display name:** Sketch Access Level
- **Variable name:** `accessLevel`
- **External name:** Okta sets this automatically to `accessLevel`
- **External namespace:** `urn:ietf:params:scim:schemas:extension:sketch:1.0:User`
- **Description:** optional
- **Enum:** Check this and add two values:
- Display name: `Editor`; Value: `editor`
- Display name: `Viewer`; Value: `viewer`
- **Attribute required:** No
- **Attribute type:** Group
Click **Save** to create the new attribute.
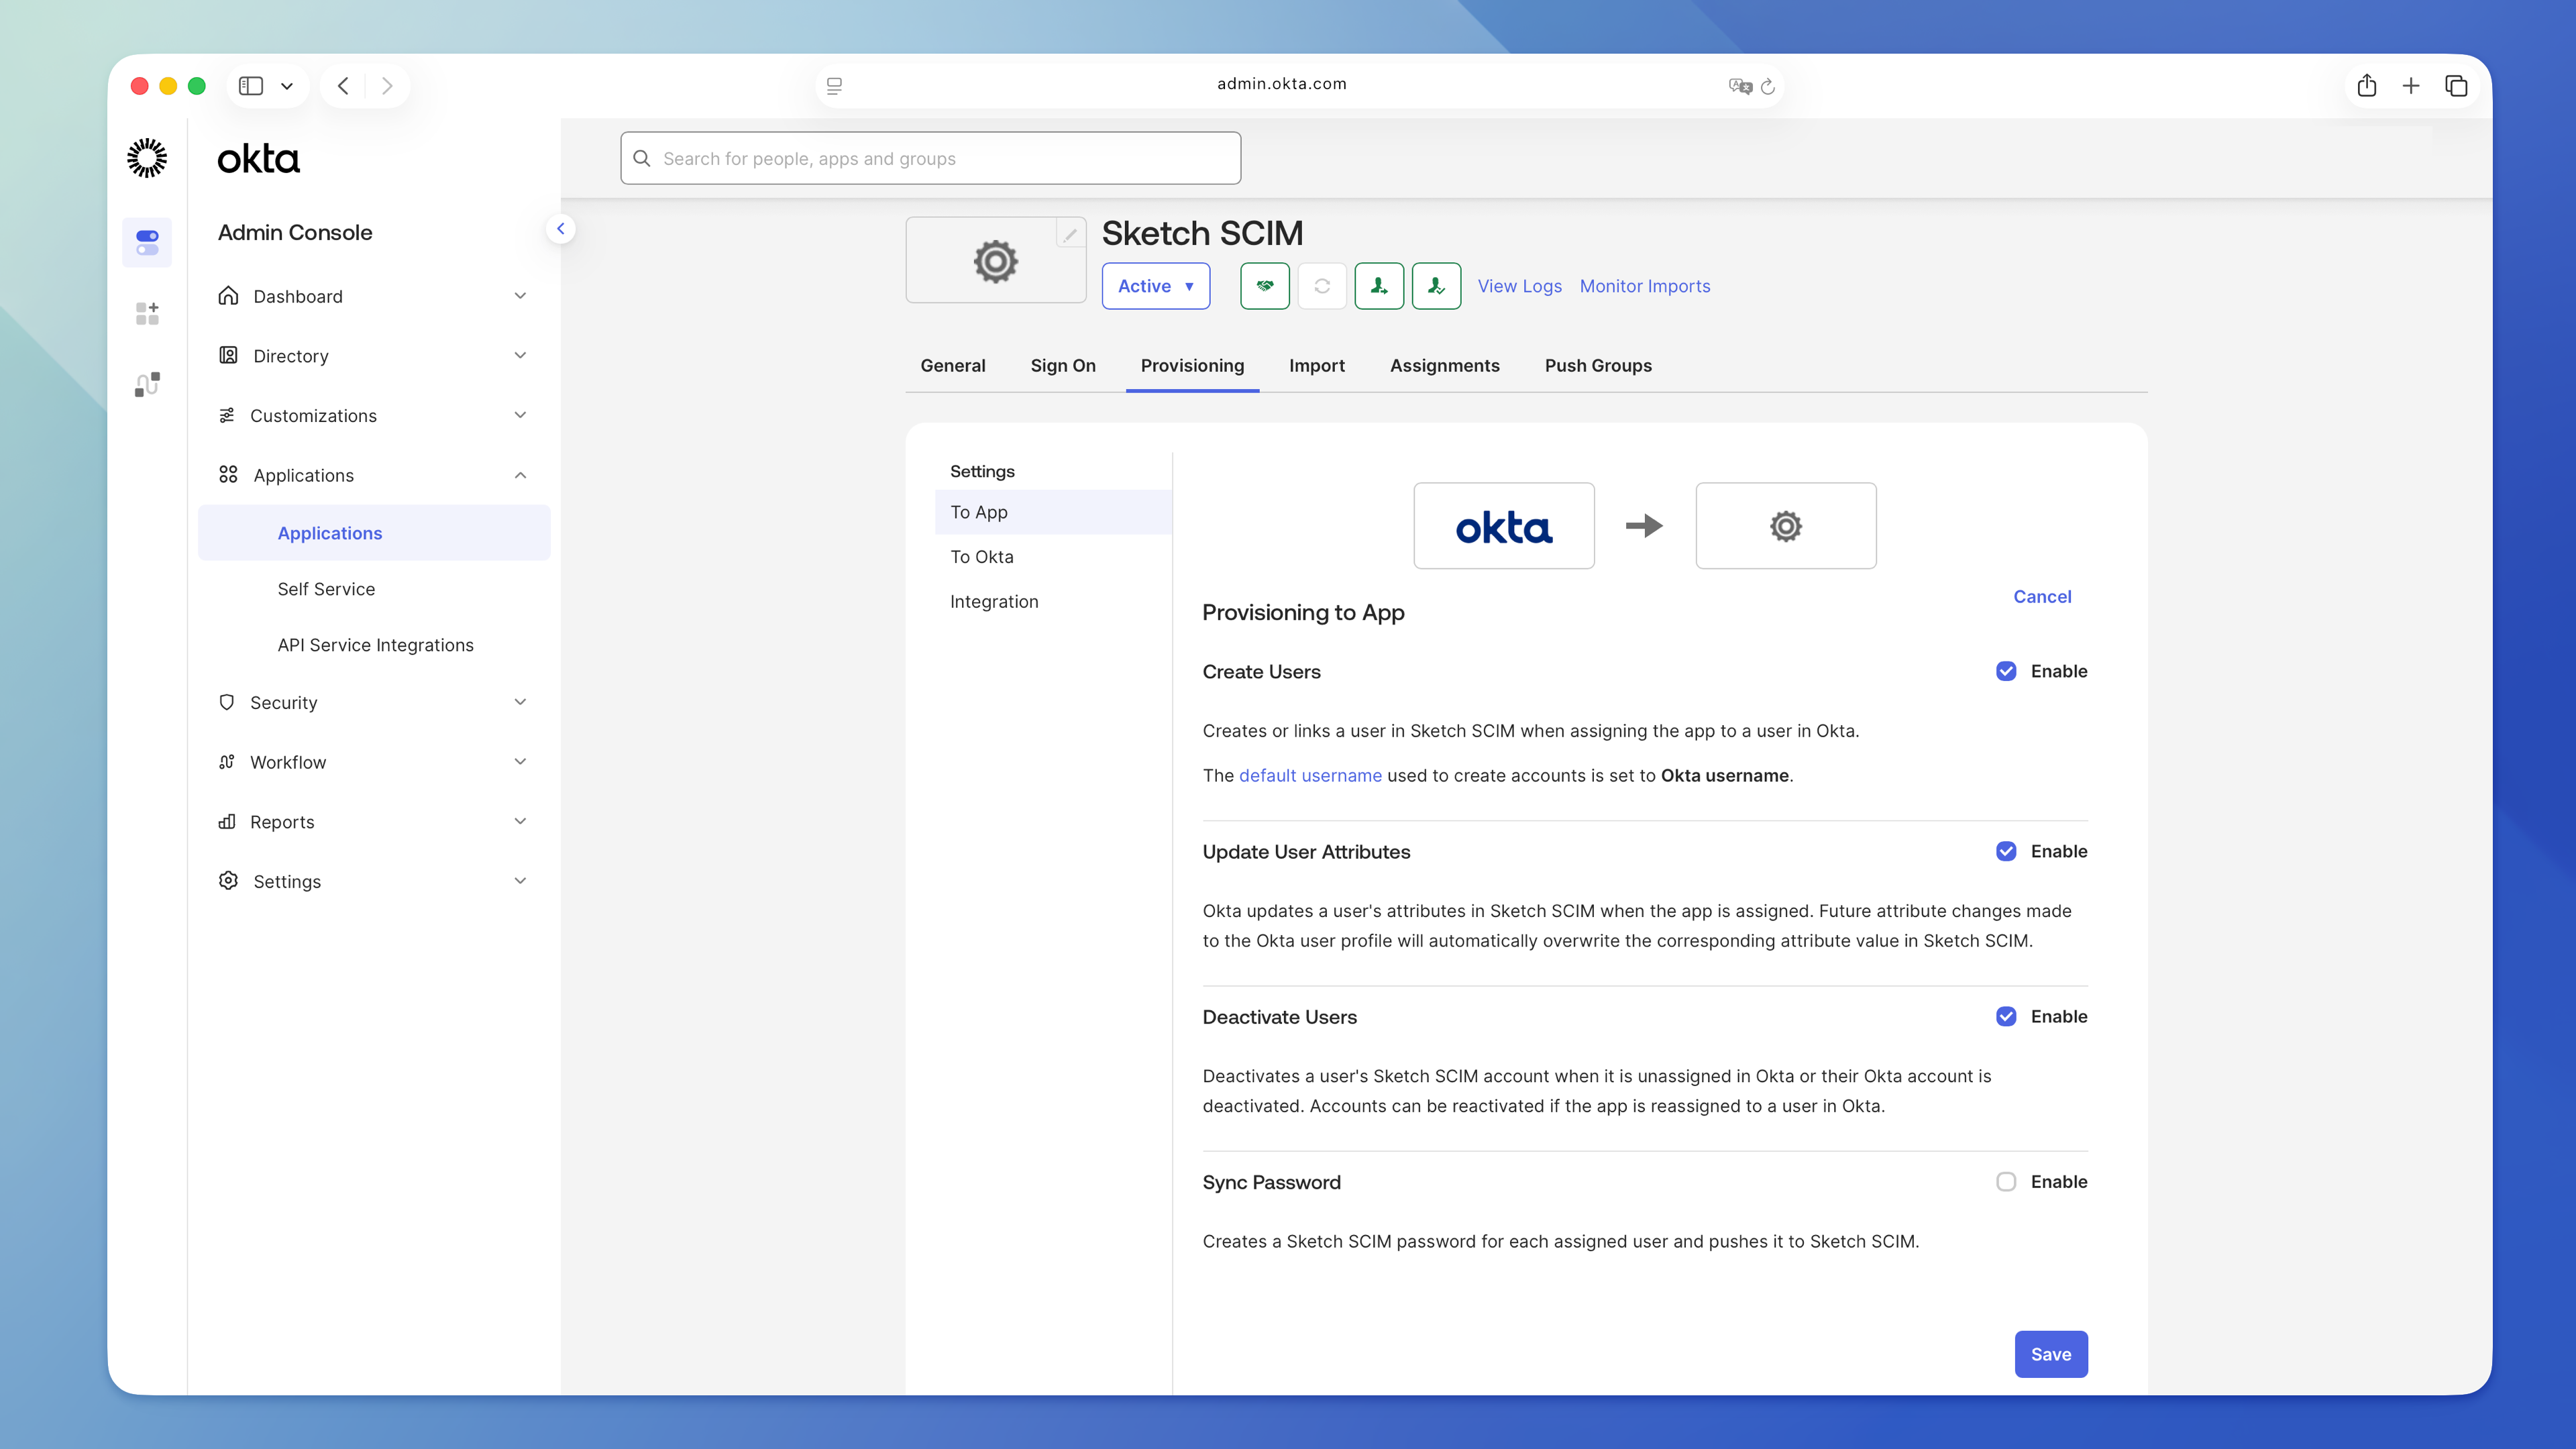
## 3. Activate provisioning
Activate provisioning before adding groups or users:
1. Click on the **Provisioning** tab.
1. Click **Edit** on the **To App** section.
1. Enable the following actions:
- **Create Users**
- **Update User Attributes**
- **Deactivate Users**
1. Click **Save**.
### Assign the groups to start syncing users
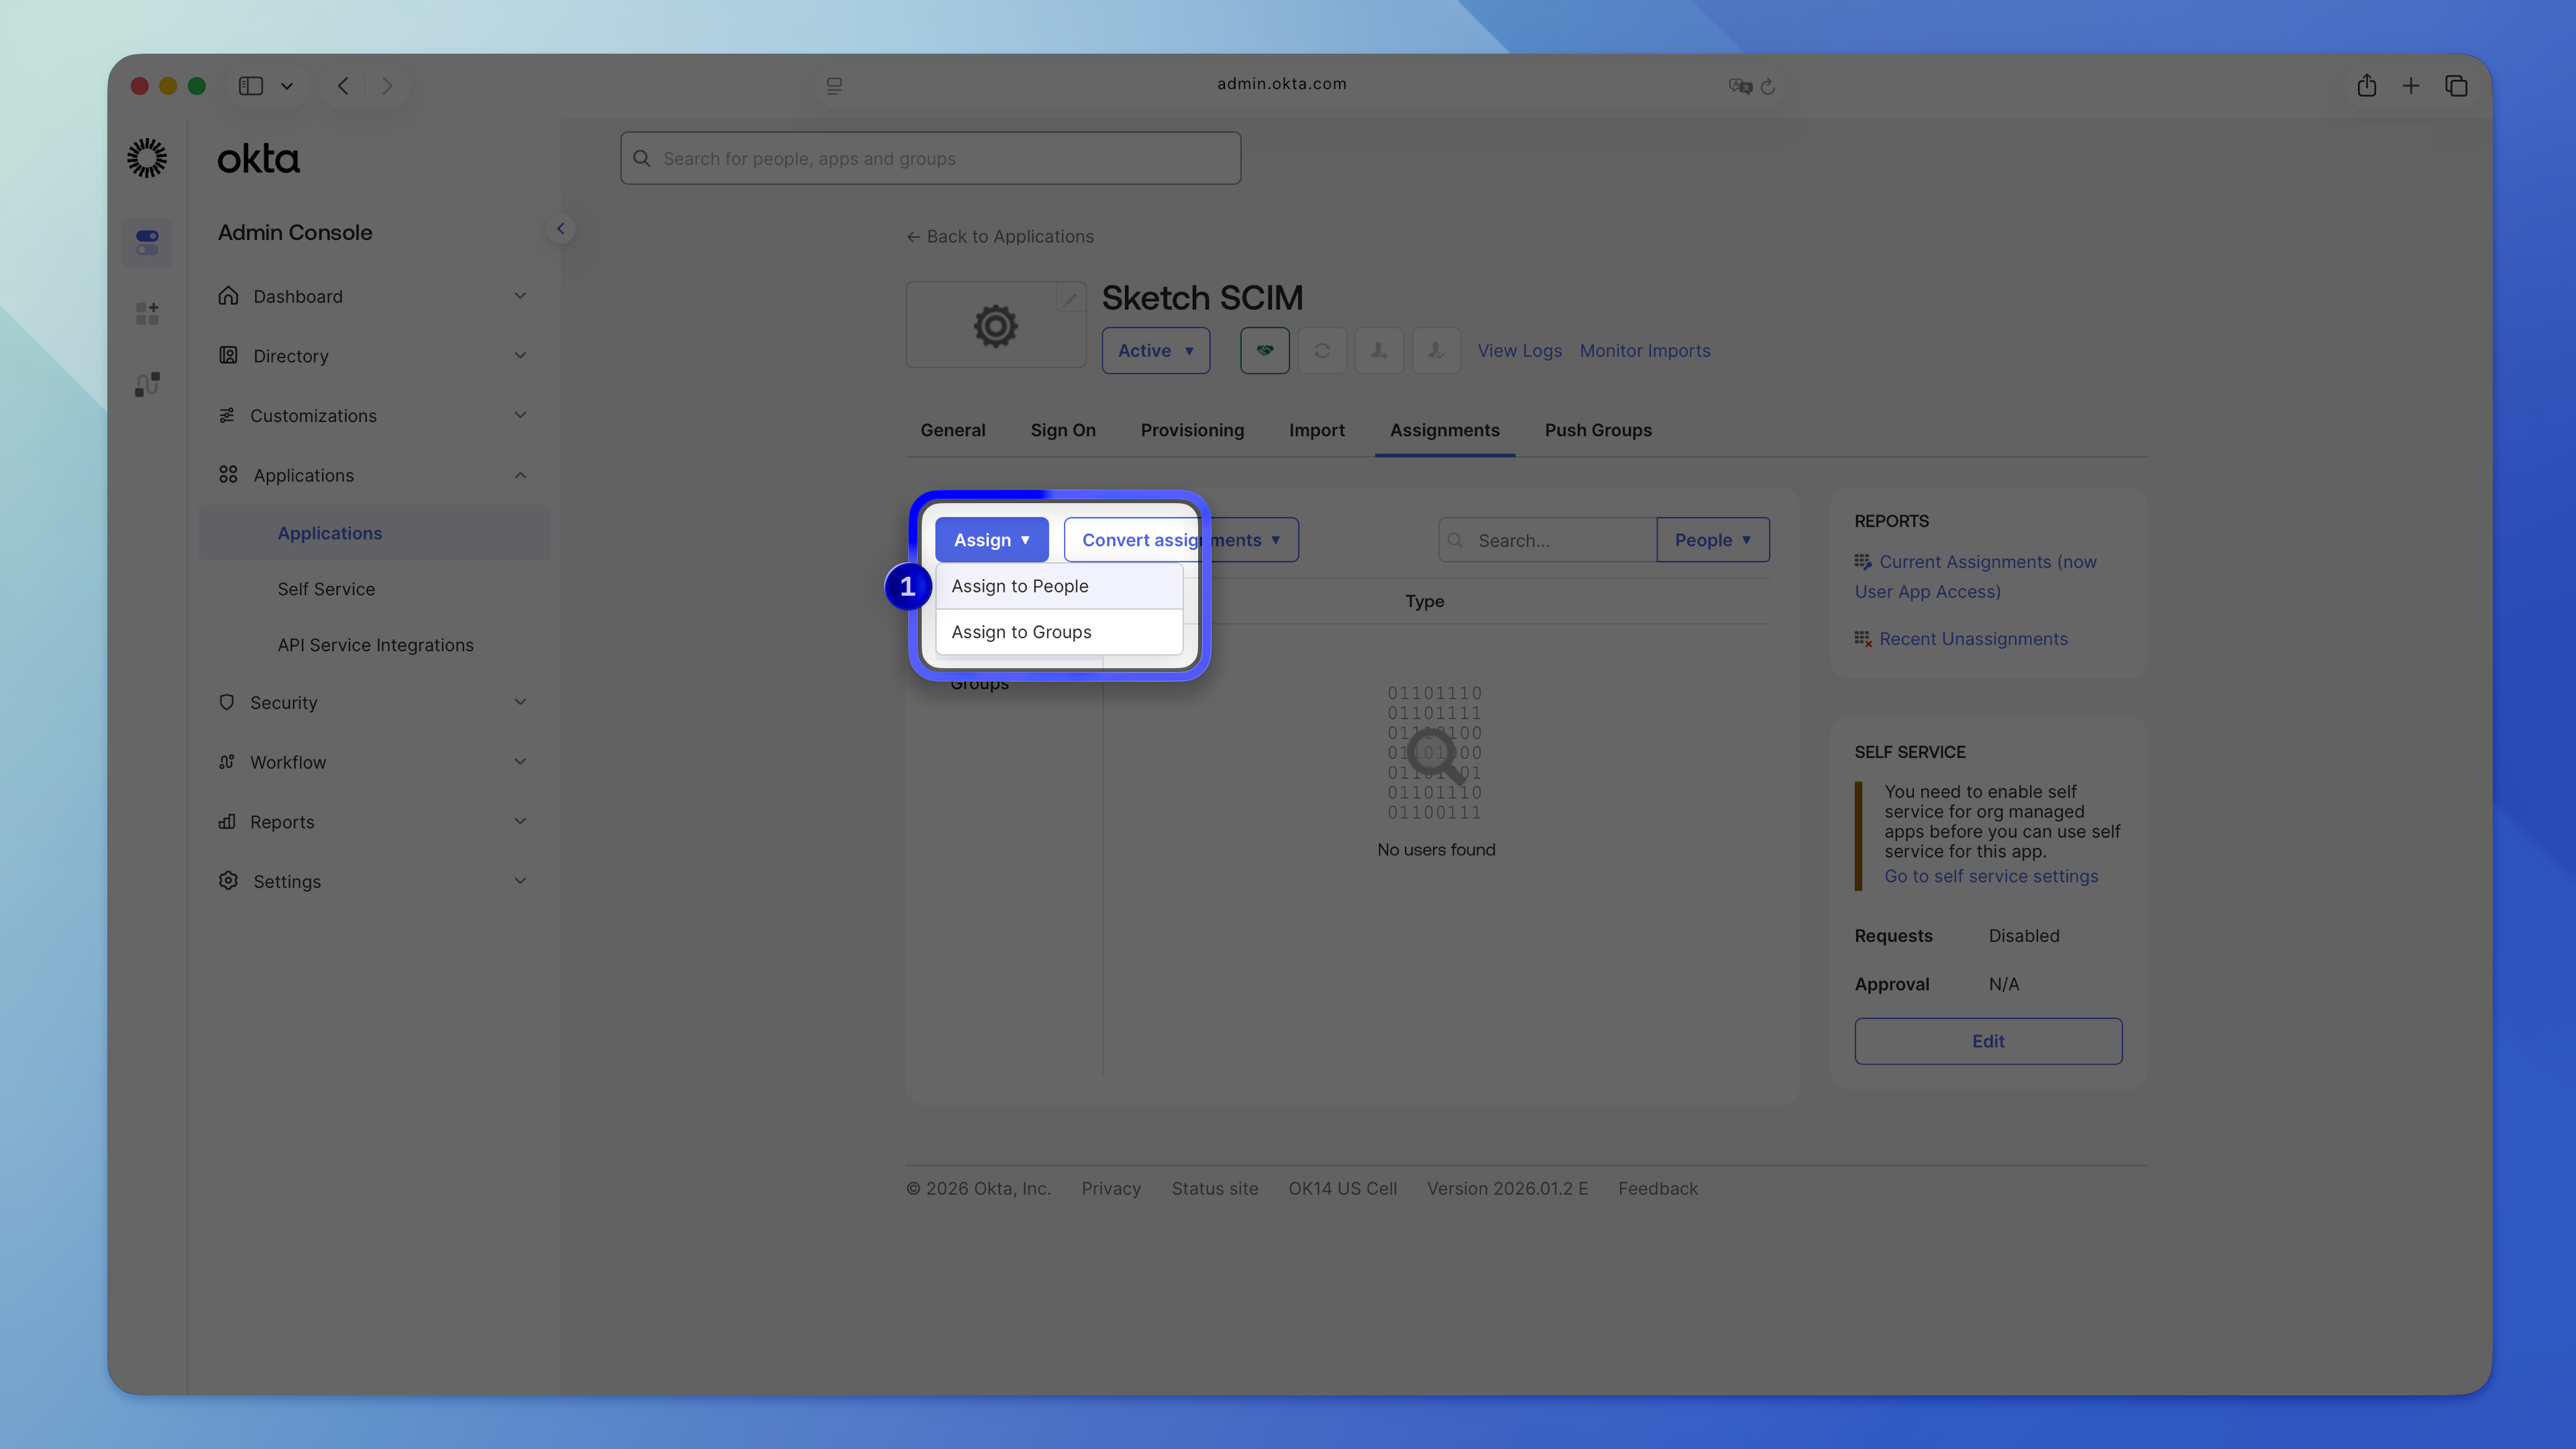
The last step is assigning groups to the custom app. This triggers user sync to create, update, or delete users in your Workspace.
1. Open your custom SCIM/SSO app.
1. Click on the **Assignments** tab.
1. Click **Assign** > **Assign to Groups**.
1. Select one of the groups and click **Assign**.
1. Scroll to the bottom and set the access level that matches the group (editor or viewer).
1. Repeat the same steps for the other group, so both groups are assigned to your app.
## Considerations
- If you reach your Editor seat limit, Okta will still provision the user, but we’ll add them as a Viewer to avoid unwanted extra charges.
- If you disable a user in Okta, they’ll be deleted from the Workspace. Any documents in their **My Drafts** folder will move to a restricted folder that Workspace Admins can access.
## Existing Okta SSO configuration
If you already use Okta for SSO, you’ll need to deactivate and delete the Gallery app, then create a new custom app to enable SCIM. The Gallery app doesn’t support SCIM provisioning.
Deleting the Gallery app won’t affect existing users or their documents. You don’t need to make any changes in your Sketch Workspace — Okta handles everything.
### Deactivate the Gallery app
> **Note:** Ask users to sign out of their accounts and quit the Mac app before you deactivate the Gallery app. Once SCIM configuration is complete, they can sign in again with the same credentials.
1. Sign in to your Okta account and open the **Admin console**.
1. Go to **Applications** > **Applications** and find the Sketch SSO gallery app in the list.
1. Deactivate the app. You need to deactivate it first, then delete it.
> **Note:** Once you’ve deleted the Gallery app, [go back to step 1](#1-create-a-custom-okta-app) to create the custom app and set up SCIM.
--------------------------------------------------------------------------------
title: "Ping Identity"
description: "Learn how to set up automated SCIM user provisioning with Ping Identity for your Sketch Workspace, including user attributes, groups, and provisioning rules."
last_modified: "2026-04-01"
url: "https://www.sketch.com/docs/getting-started/single-sign-on/scim-provisioning/ping-identity/"
--------------------------------------------------------------------------------
## Ping Identity
This guide walks you through setting up SCIM provisioning with [Ping Identity](https://www.pingidentity.com/) for your Sketch Workspace. You’ll need SAML SSO configured before you begin — if you haven’t done that yet, follow the [Ping Identity SSO setup guide](/docs/getting-started/single-sign-on/setting-up-saml-sso/setup-identity-provider/ping-identity-setup/) first.
> **Note:** If you need help along the way, [contact us](/support/contact/?topic=enterprise&subject=other&summary=I%20need%20help%20setting%20up%20SSO%20or%20SCIM.%0A%0A---%0A%0AAdd%20any%20other%20details%20below%3A%0A) and we’ll help you out.
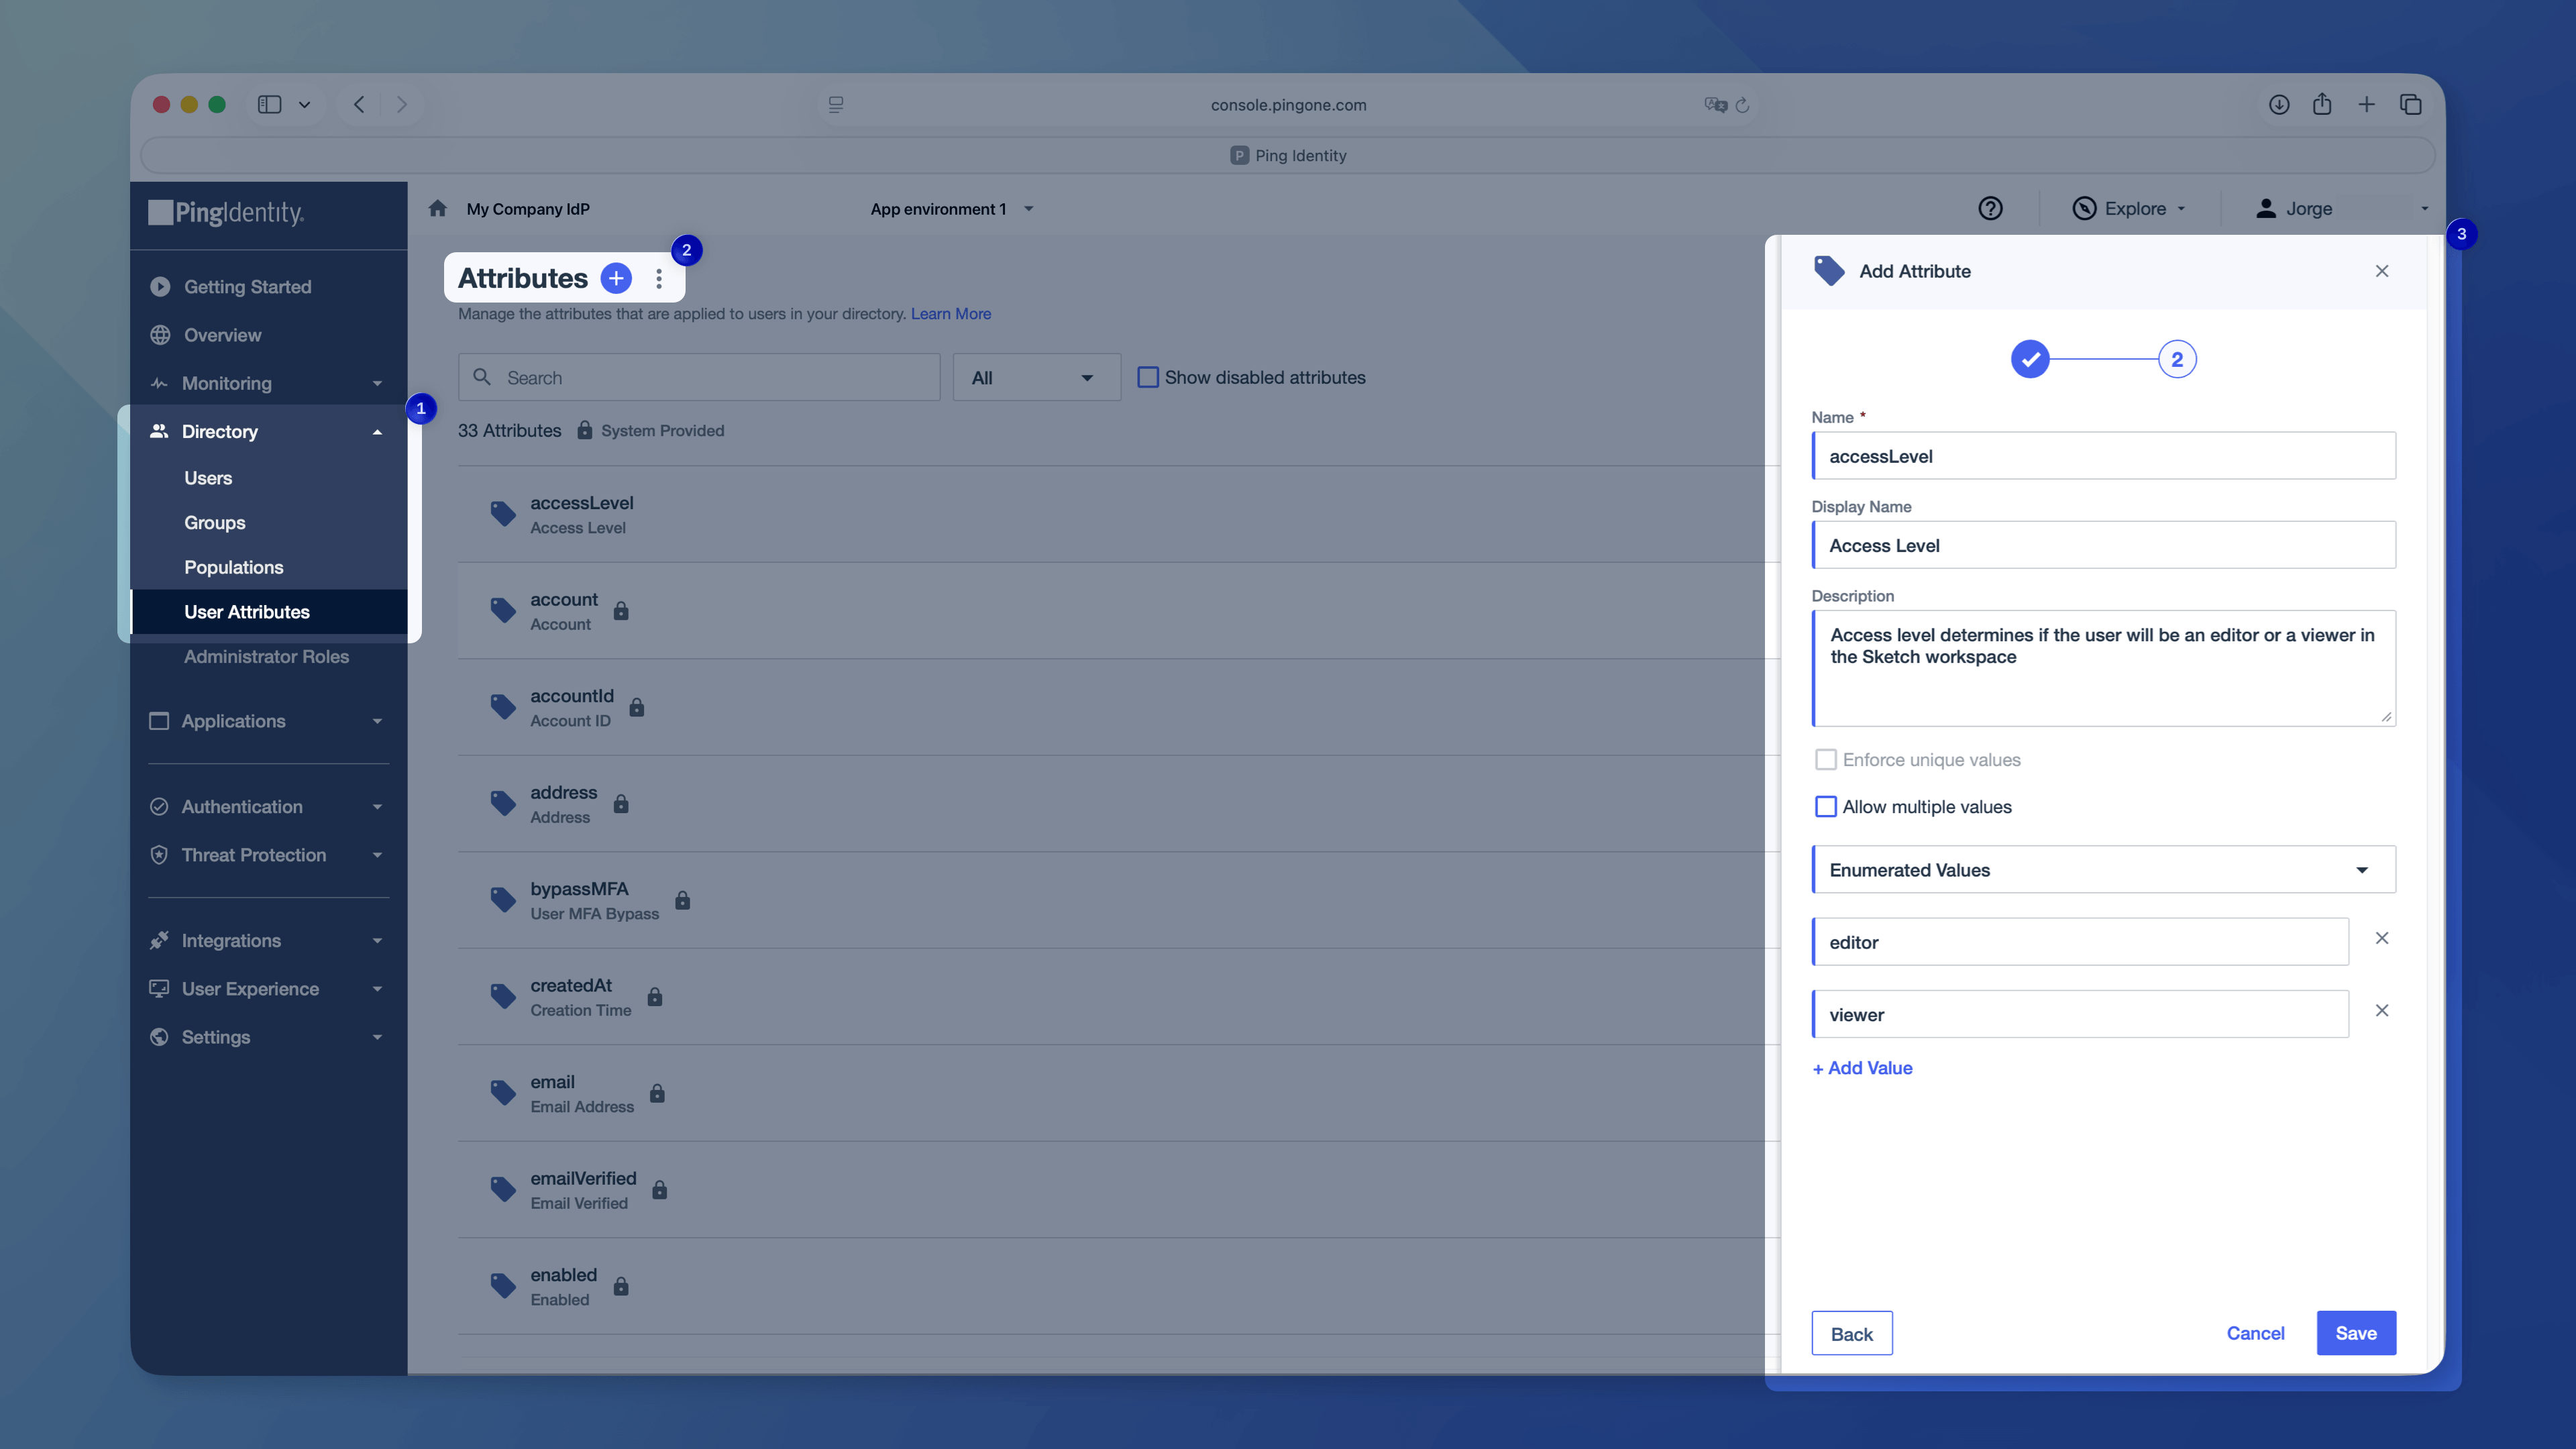
## 1. Create a custom user attribute
This step controls whether Sketch provisions users as Editors or Viewers. Make sure you’re in the same environment as your SAML app. You can verify this in the header breadcrumb.
1. Go to **Directory** > **User attributes**.
1. Click the blue **+** button, select **Declared**, and continue.
1. Enter `accessLevel` in the name field.
1. Enter **Access Level** as the display name.
1. Optionally, enter a description.
1. Select **Enumerated values** from the dropdown and add:
- `editor`
- `viewer`
1. Click **Save**.
### Apply the attribute to users
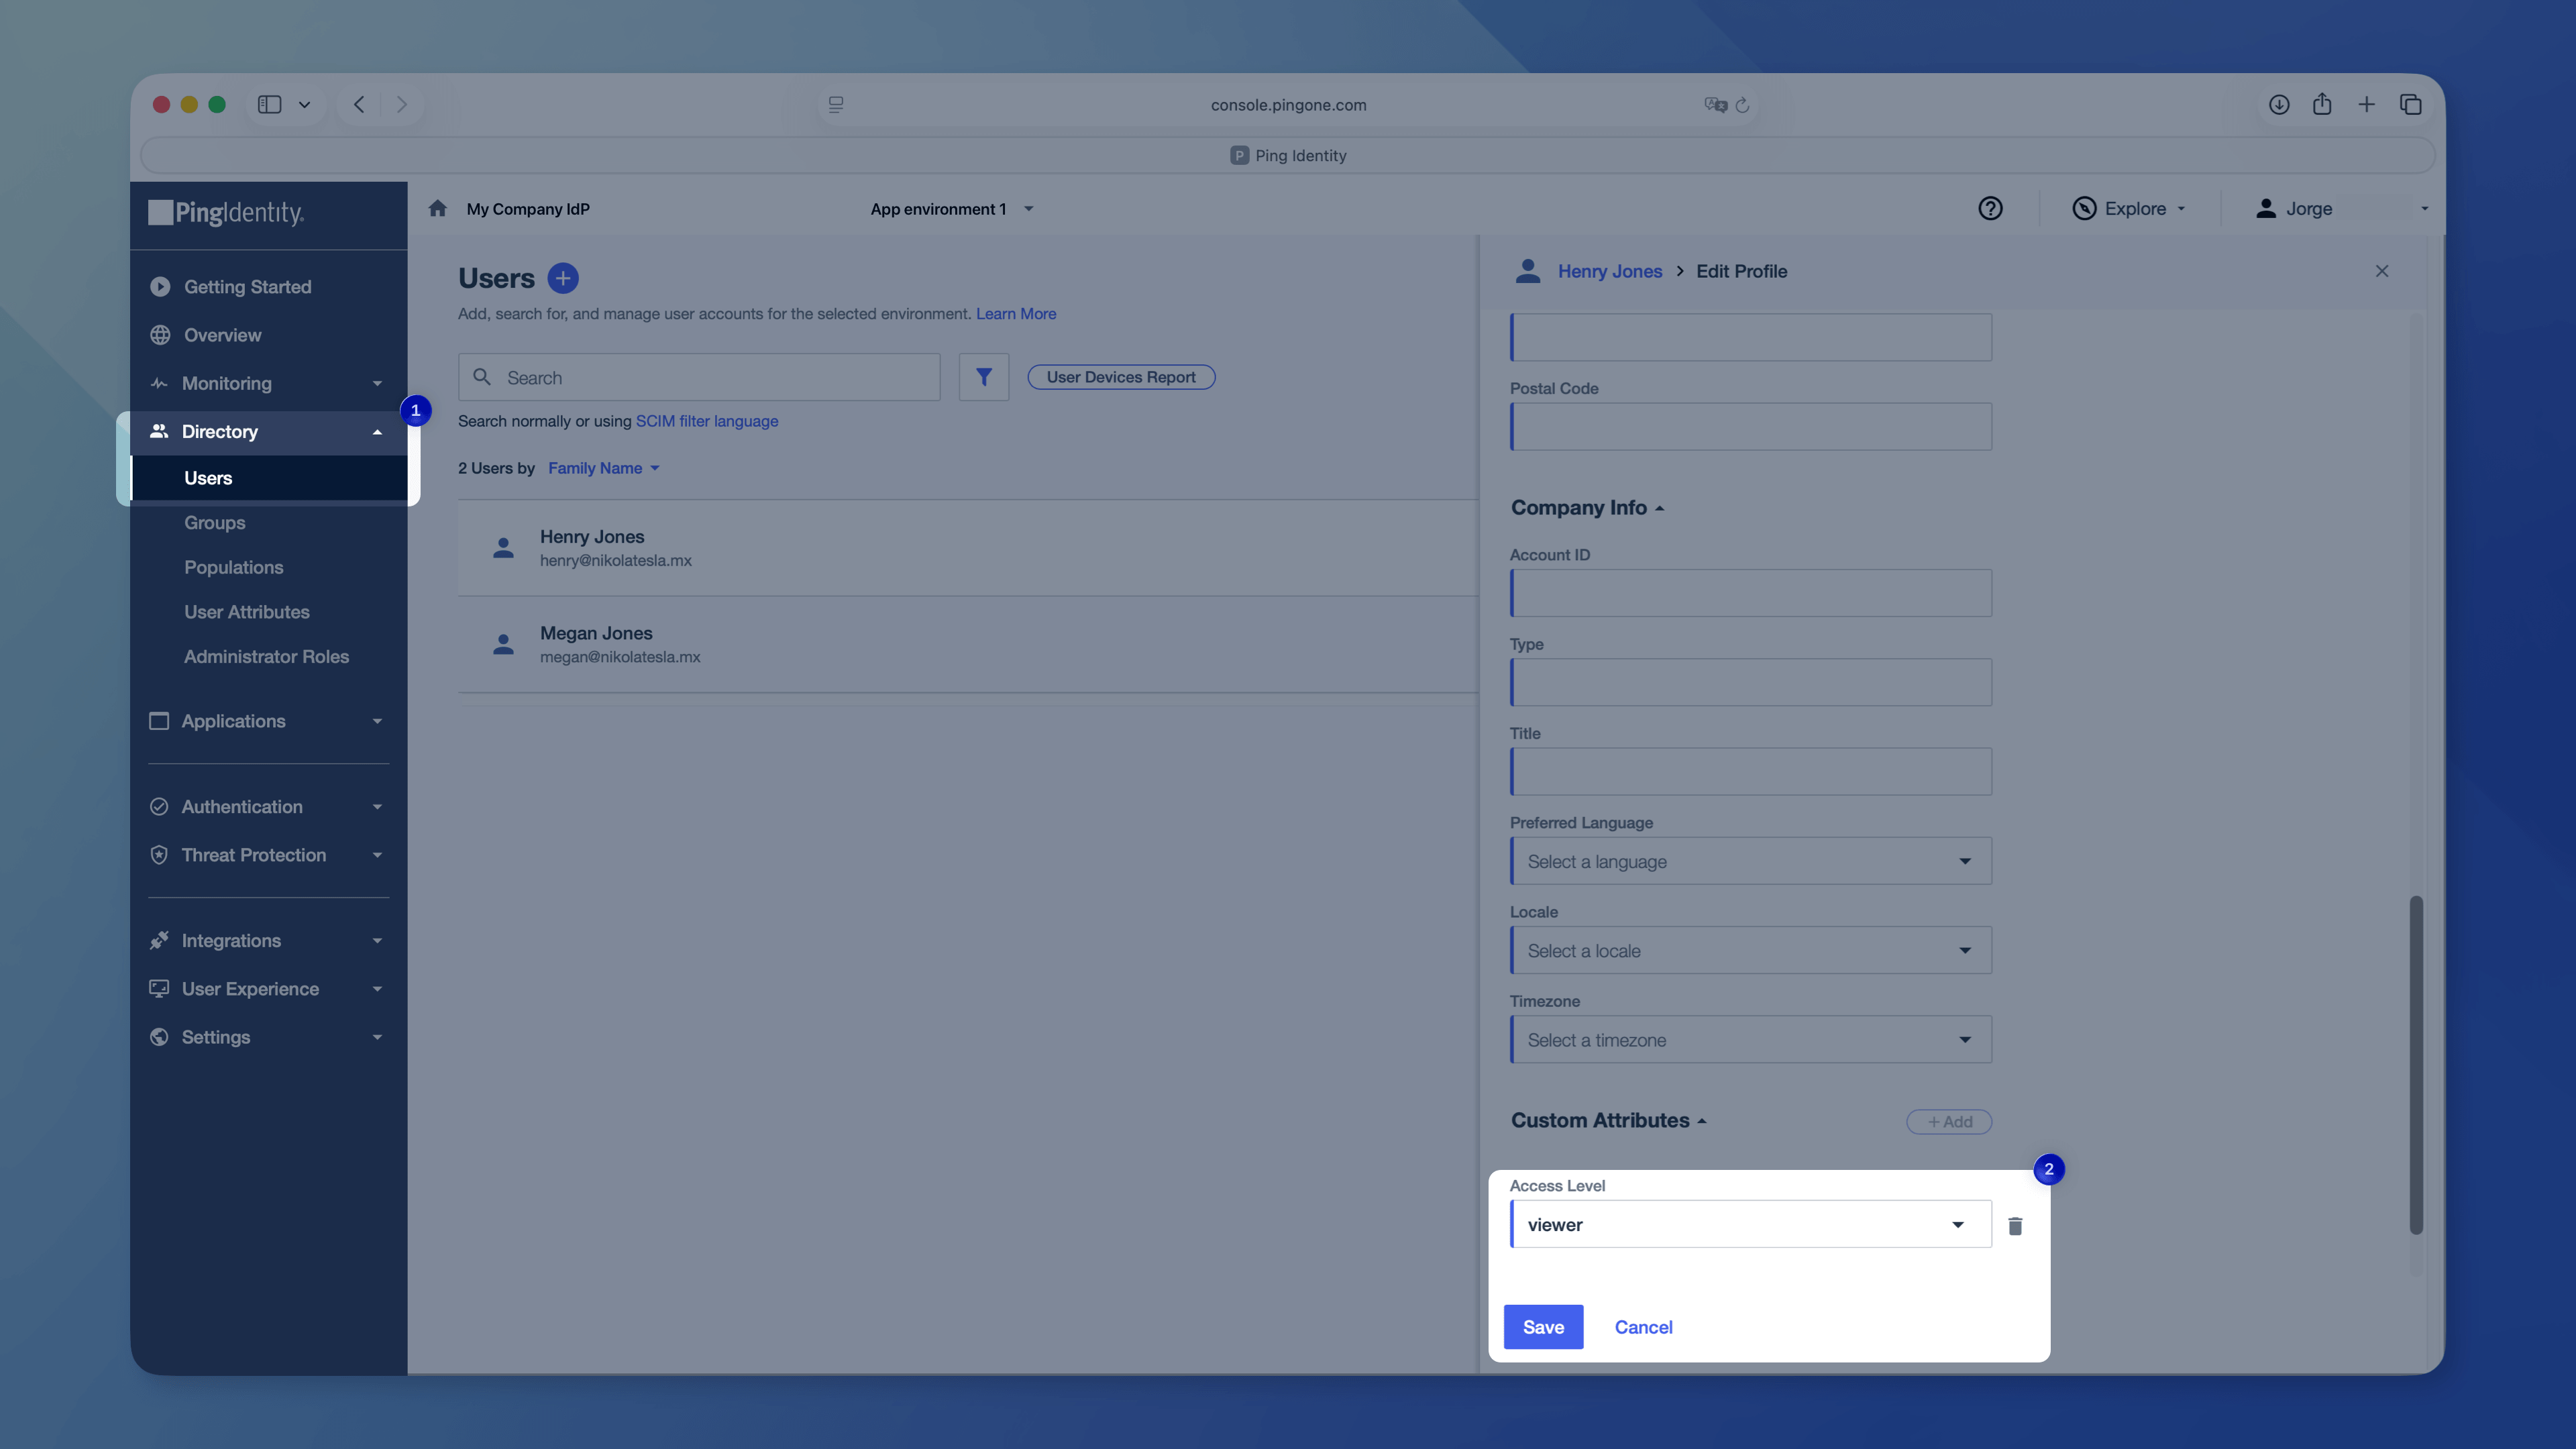
Apply the Access Level attribute to the users who need access to Sketch.
1. Go to **Directory** > **Users**.
1. Select a user and click **Edit user**.
1. Scroll to the bottom and click **+Add** in the Custom attributes section.
1. Select the Access Level attribute and set the value to `editor` or `viewer`.
> **Note:** We’ll provision users without a custom attribute value as **Viewers**.
## 2. Create user groups
User groups control who has access to Sketch. You’ll assign these groups to your SAML app in the next step.
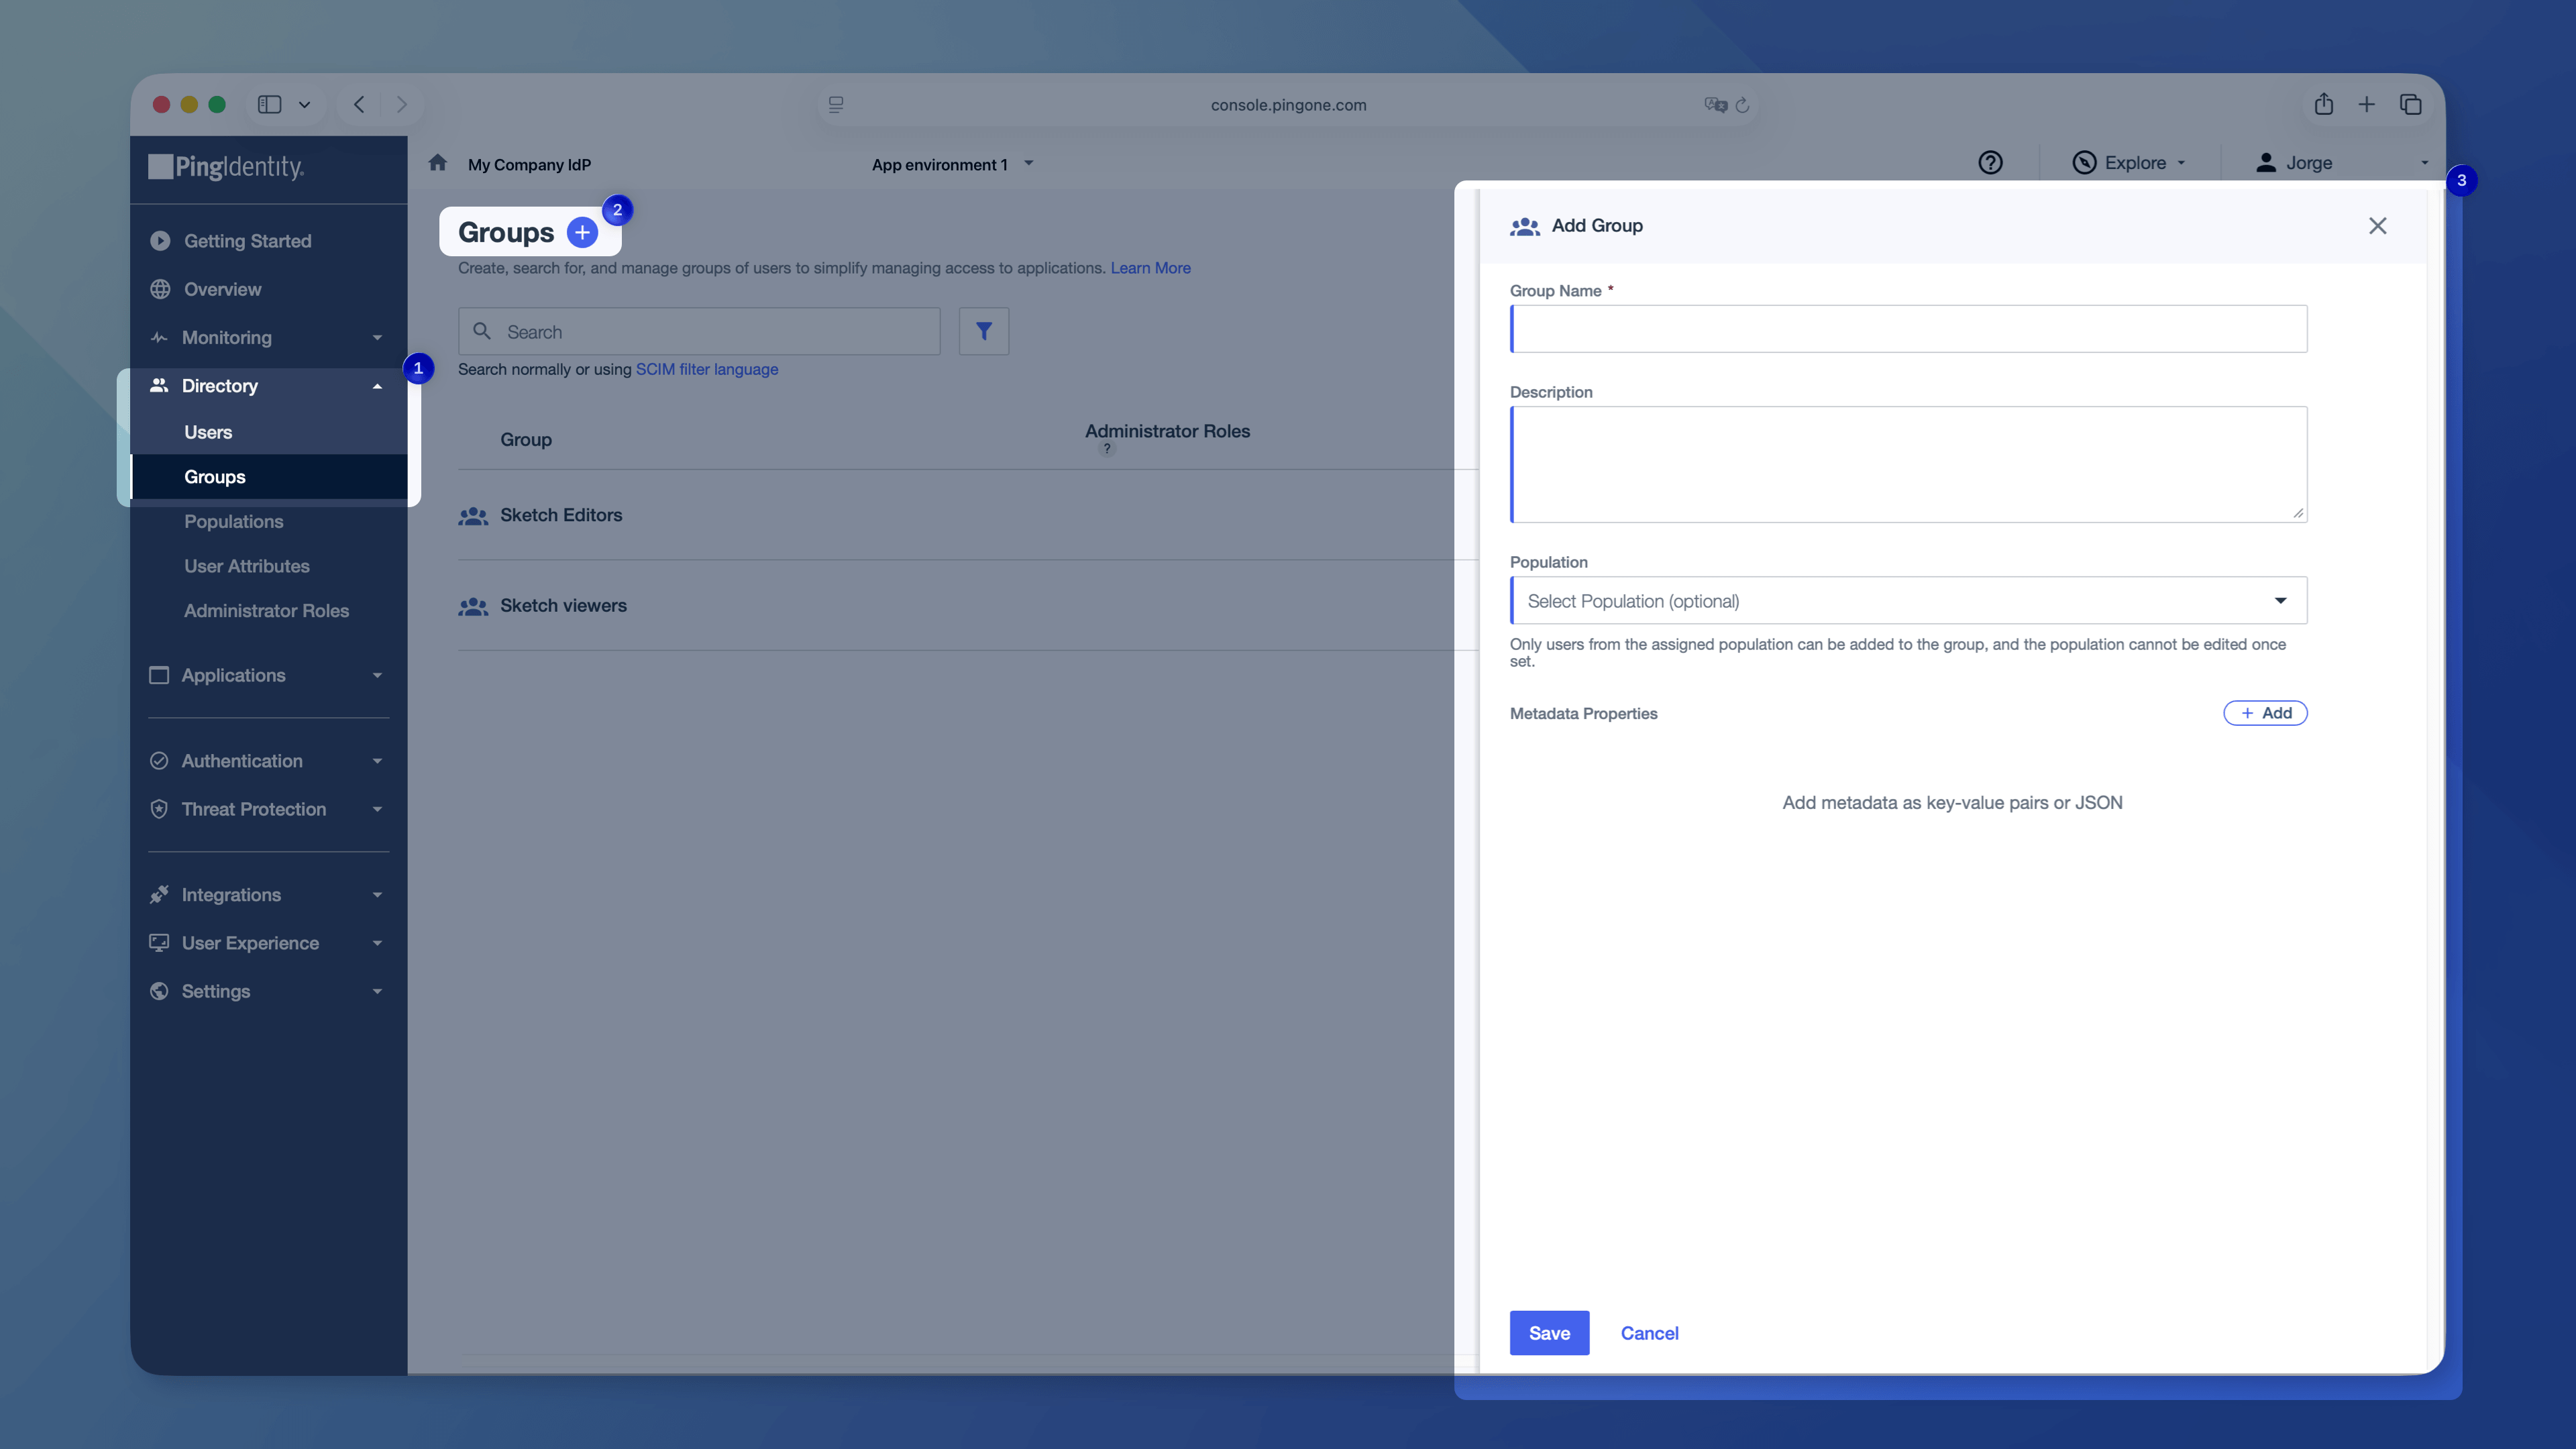
1. Go to **Directory** > **Groups**.
1. Click the blue **+** button.
1. Enter a descriptive name — for example, `Sketch-viewers` or `Sketch-editors`.
1. Add the required members to each group.
### Assign groups to the SAML app
By default, all users in your directory can sign in to Sketch. Assigning groups lets you limit access to specific users.
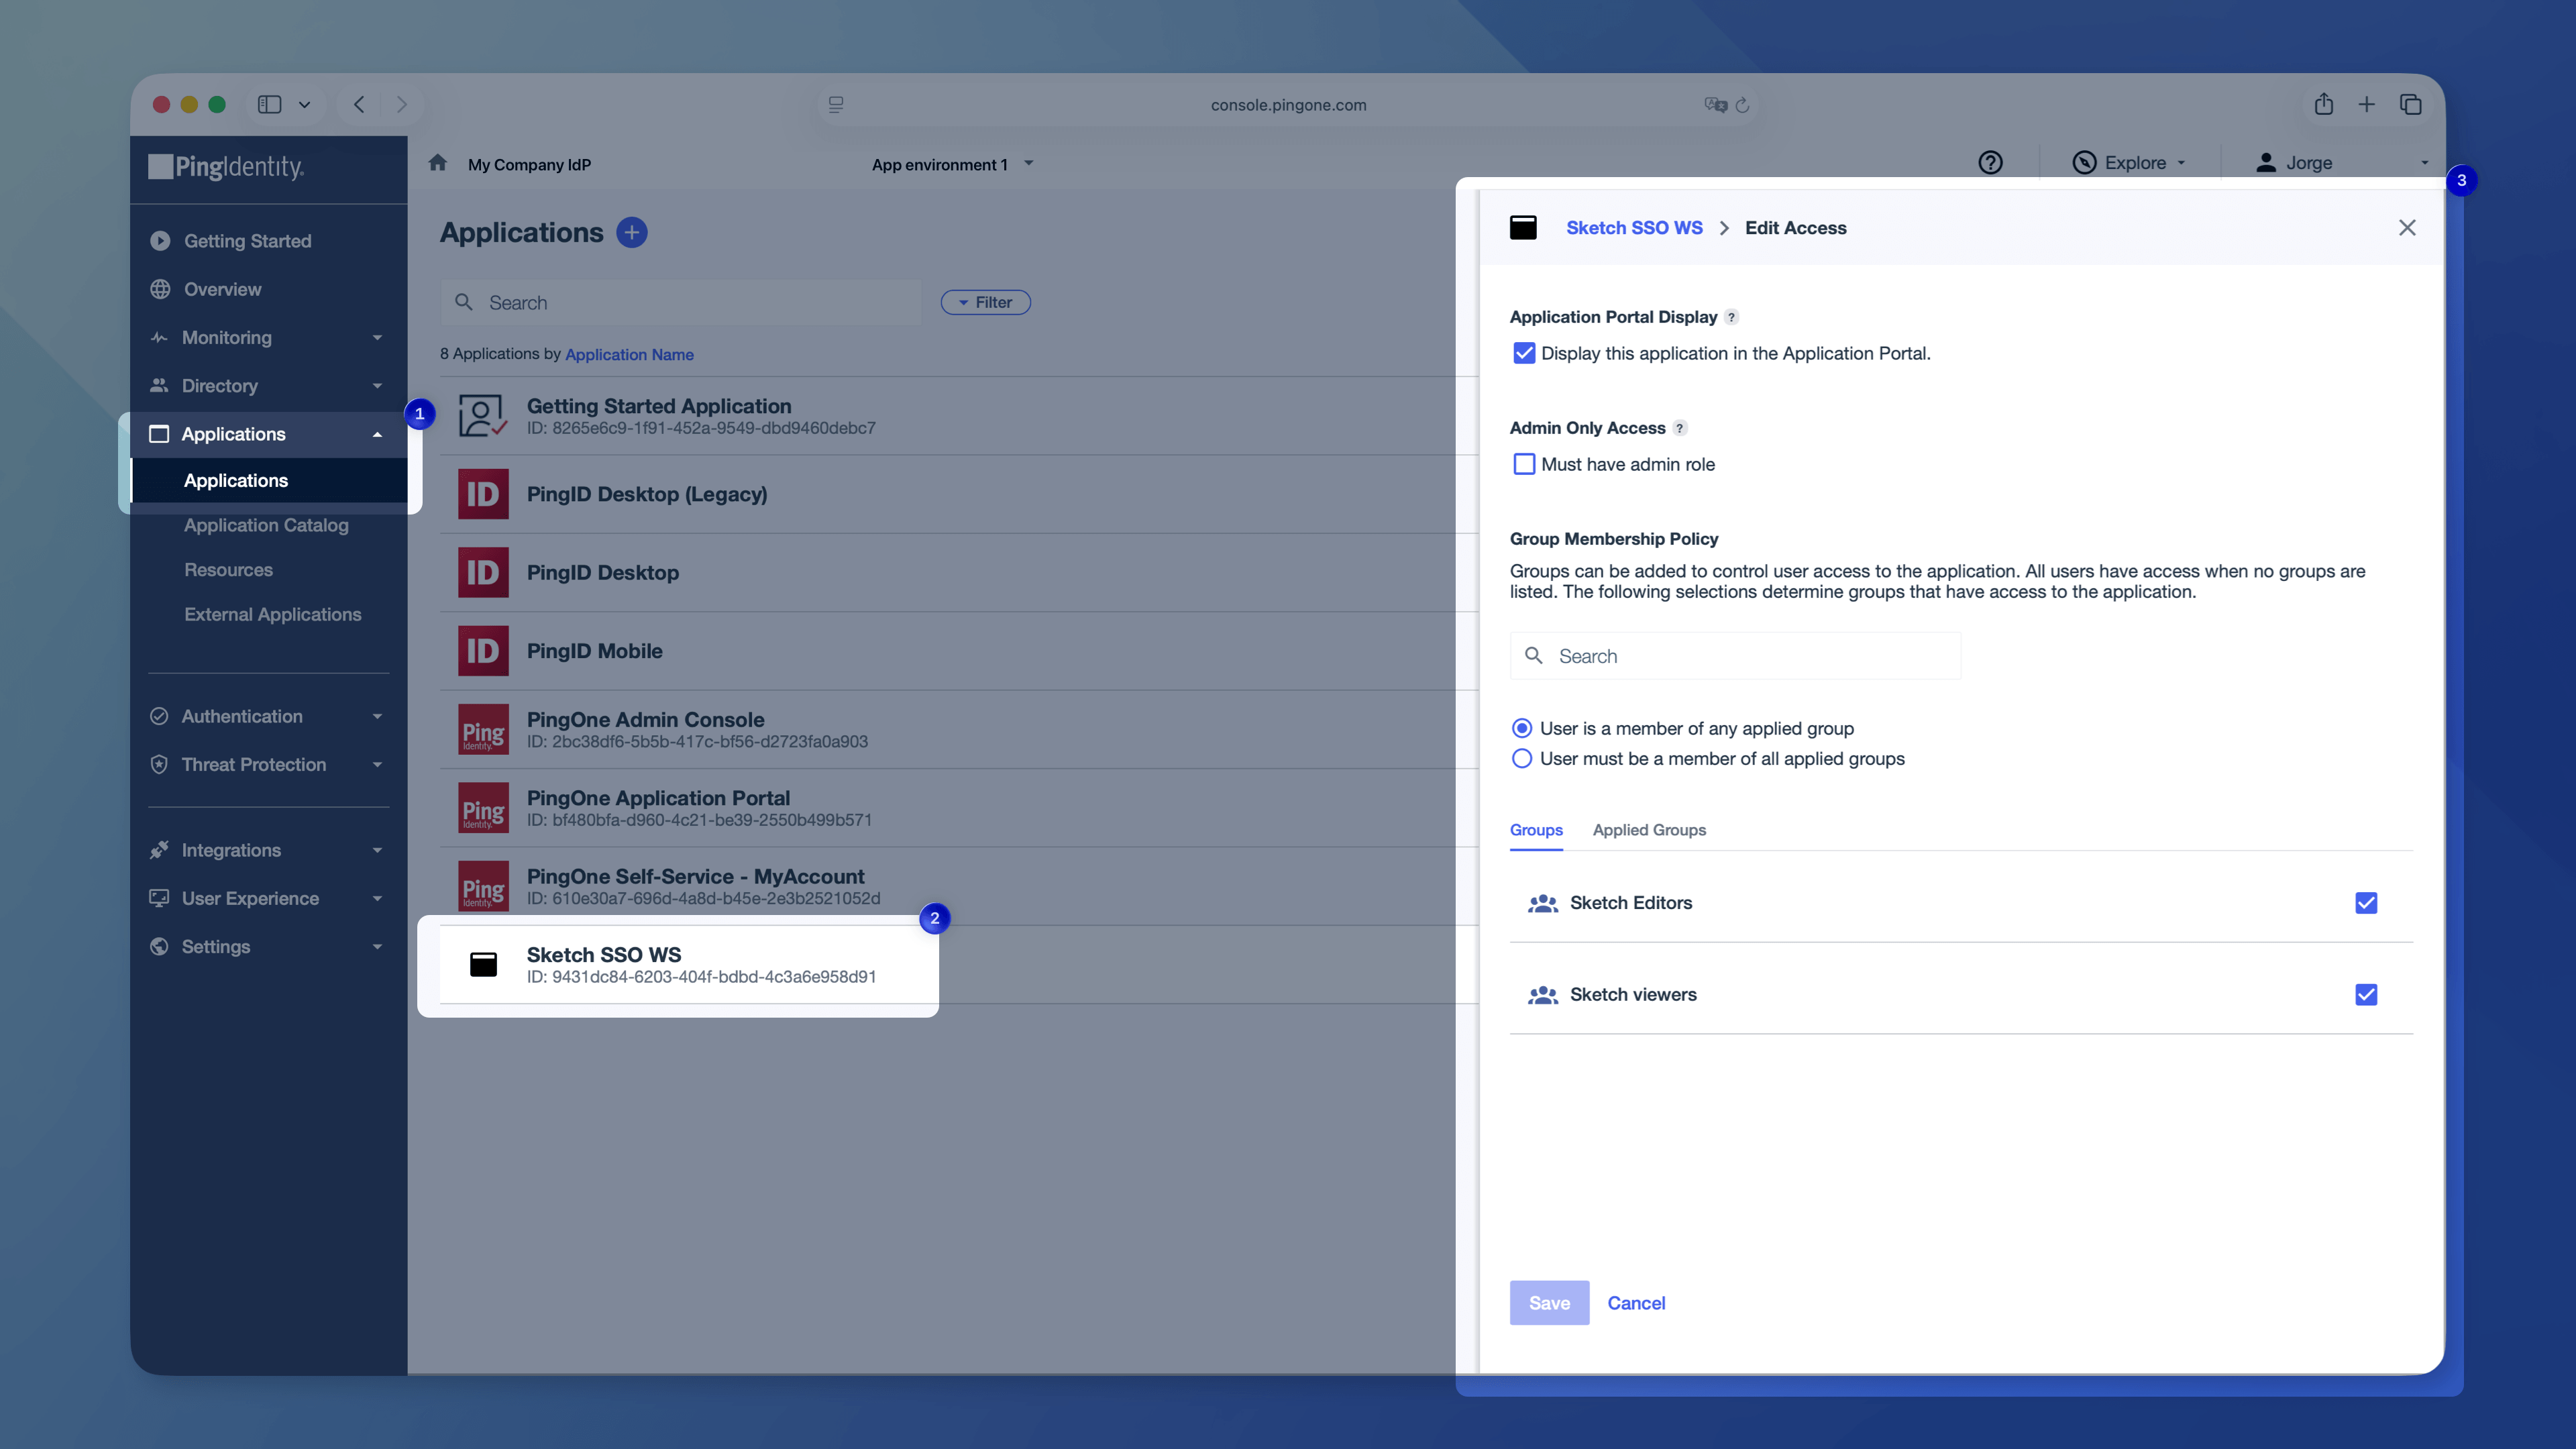
1. Go to **Applications** > **Applications**.
1. Click the SAML app you configured for Sketch.
1. Go to the **Access** tab and click **Edit**.
1. Select your Editors and Viewers groups and save.
> **Note:** If you don’t assign any groups, all users in your directory can sign in to Sketch. We’ll add them as Viewers by default.
## 3. Set up SCIM provisioning
Before you start, get the SCIM Base URL and token from your Sketch Workspace:
1. Open the web app and go to **Settings** > **[Single Sign-on](/workspace/settings/sso)**.
1. Click **Enable SCIM**.
1. Have the **SCIM Base URL** and **SCIM token** ready.
### Create a provisioning connection
1. Go to **Integrations** > **Provisioning**.
1. Click the blue **+** button and select **New Connection**.
1. Select **SSO Identity Store**.
1. Search for "scim" and select **SCIM outbound**.
1. Enter a name and an optional description.
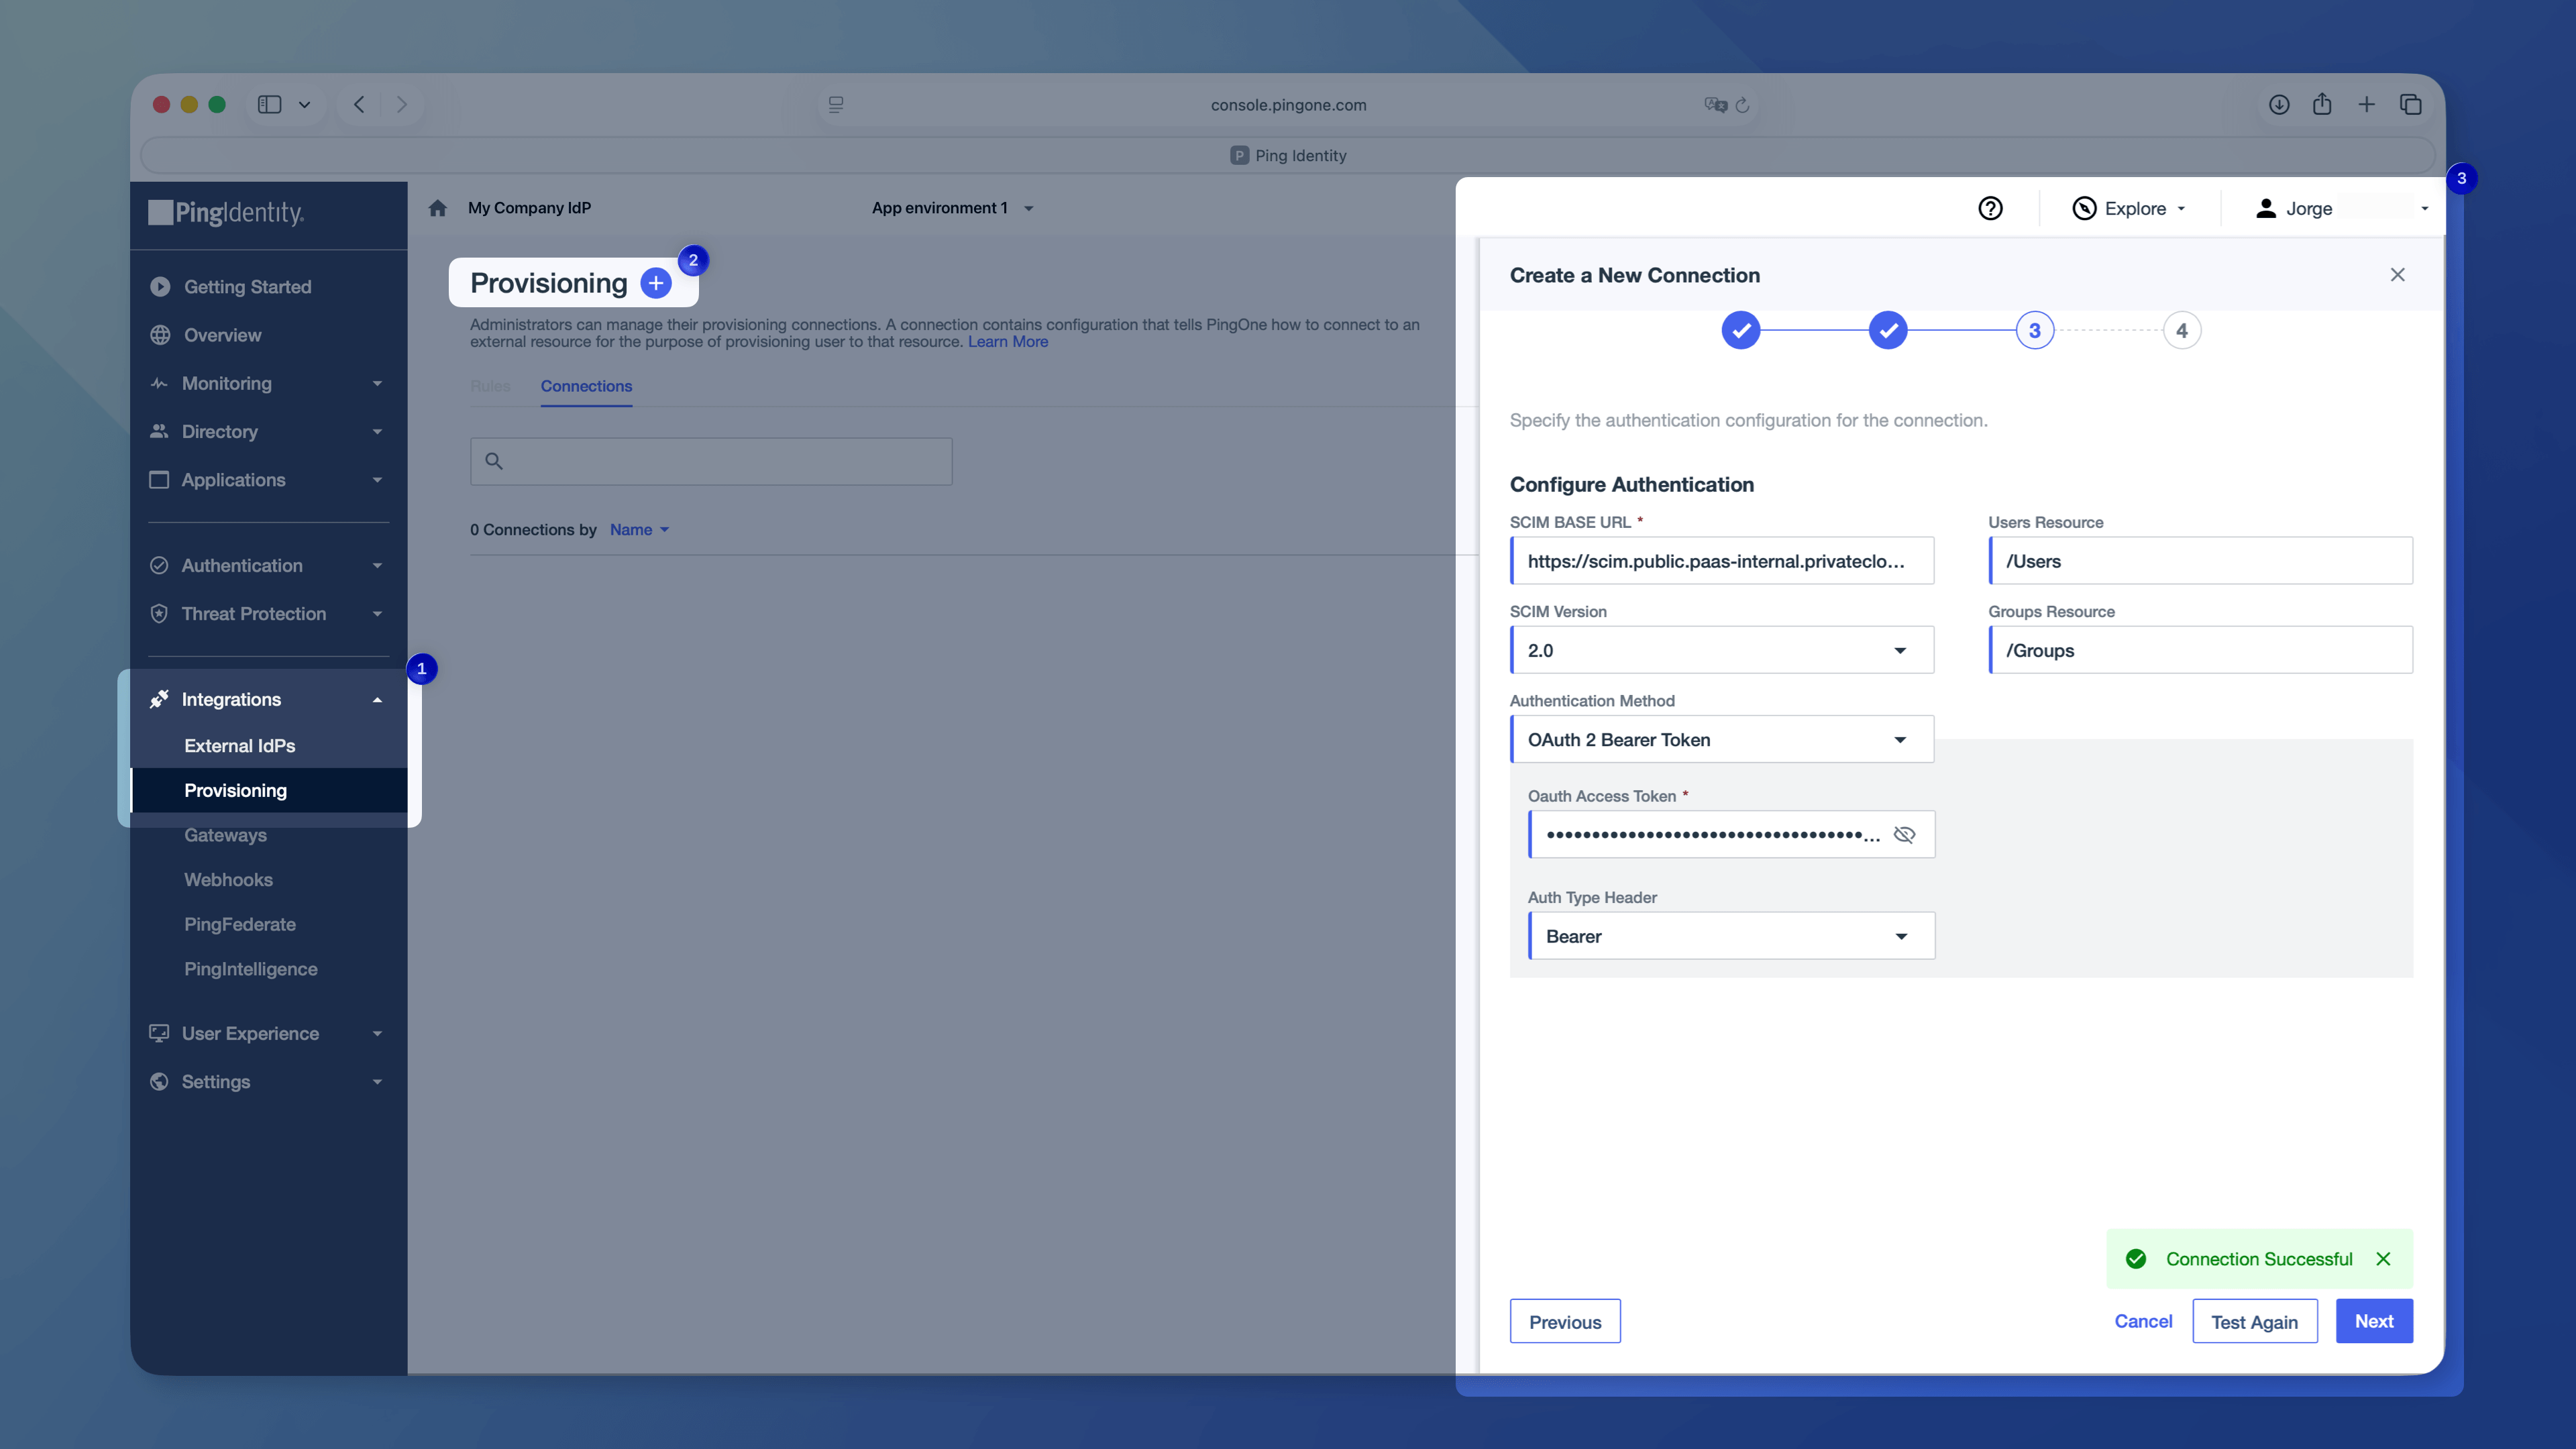
1. Paste the **SCIM Base URL** from your Sketch Workspace.
1. Set **Authentication method** to **OAuth 2 Bearer Token** and paste the SCIM token.
1. Test the connection. If it’s successful, move on to configure connection preferences.
### Configure connection preferences
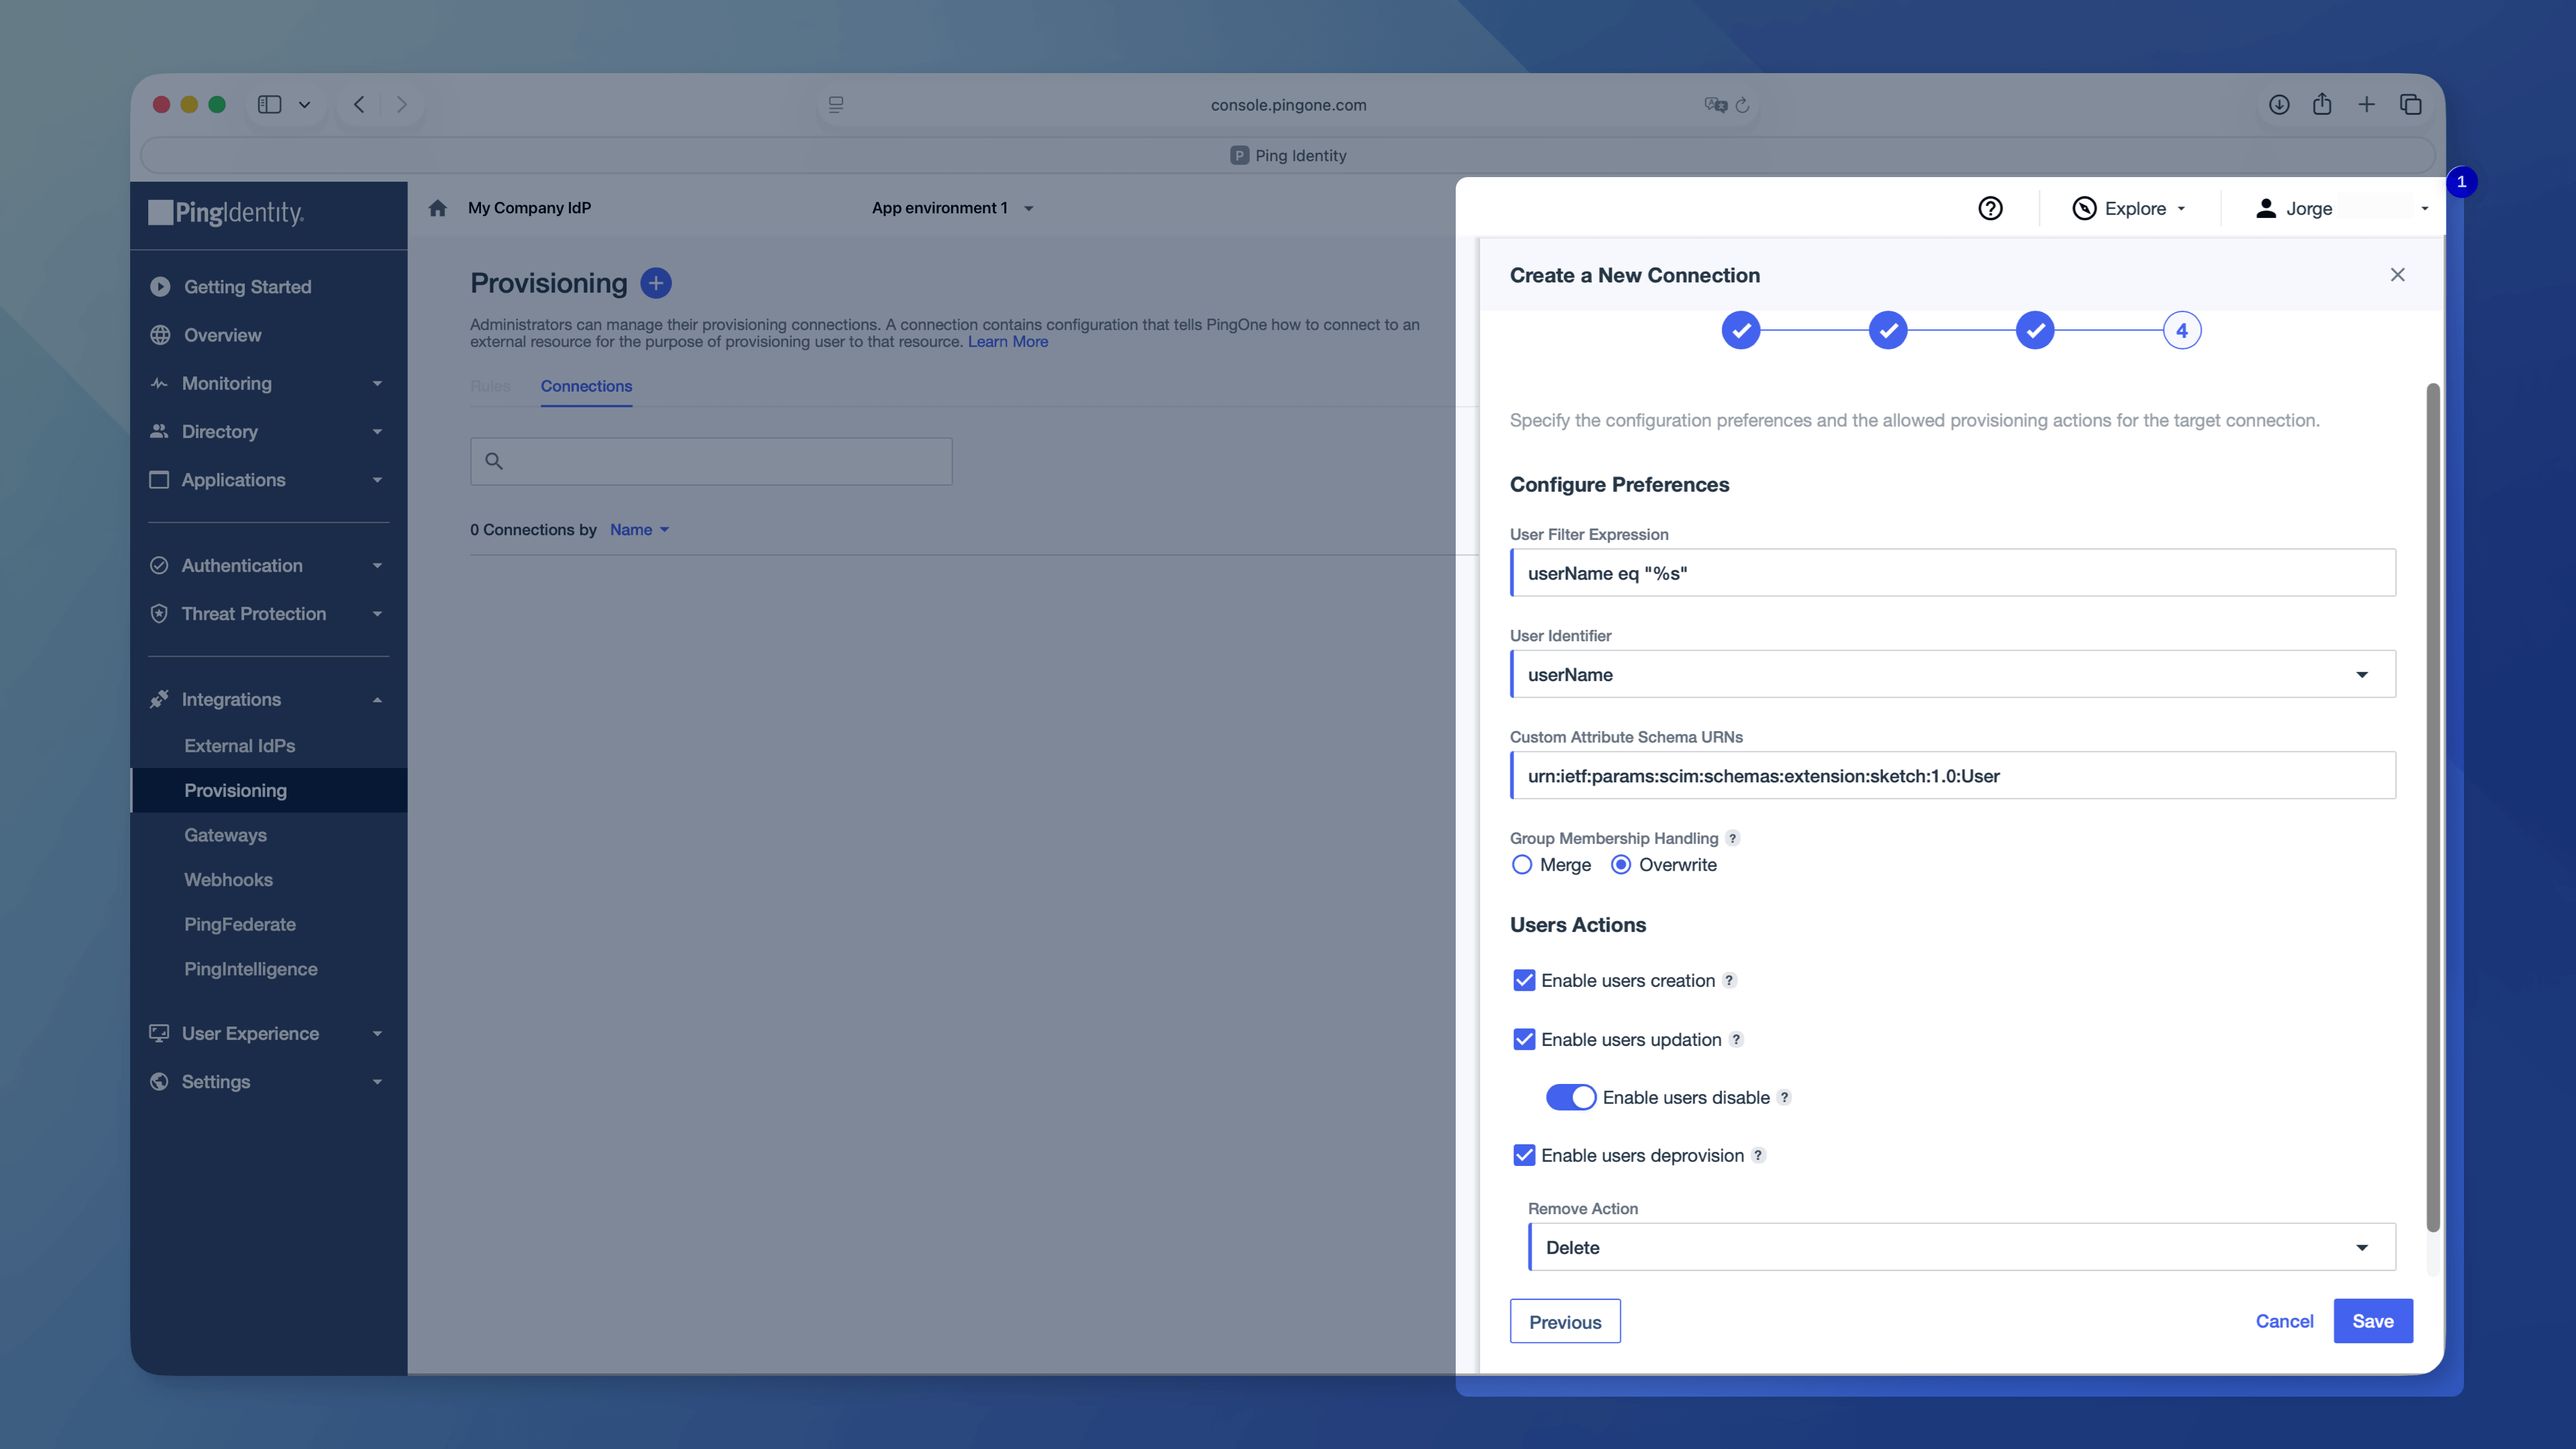
1. Select a user identifier:
- Choose **userName** if your users sign in with their email address.
- Choose **workEmail** if they use a separate username.
1. Paste the following value in the **Custom Attribute Schema URN** field:
```
urn:ietf:params:scim:schemas:extension:sketch:1.0:User
```
1. Enable the following options:
- **Enable users creation**
- **Enable users updation** (Ping Identity’s label for user updates, including **Enable users disable**)
- **Enable users deprovision**
1. In **Remove Action**, select **Delete**.
1. Save, then enable the connection.
## 4. Configure provisioning rules
Create two rules — one for Editors, one for Viewers. The Editors rule needs an extra attribute mapping in step 6. Skip that step for the Viewers rule.
1. Click the blue **+** button and select **New Rule**.
1. Select **PingOne as source**.
1. Select the connection you created and continue.
1. Name the rule — for example, `Sketch-editors` or `Sketch-viewers`.
1. Add a user filter:
- Select `Group names` in the **Attribute** field.
- Click the value field and select the group that matches the rule.
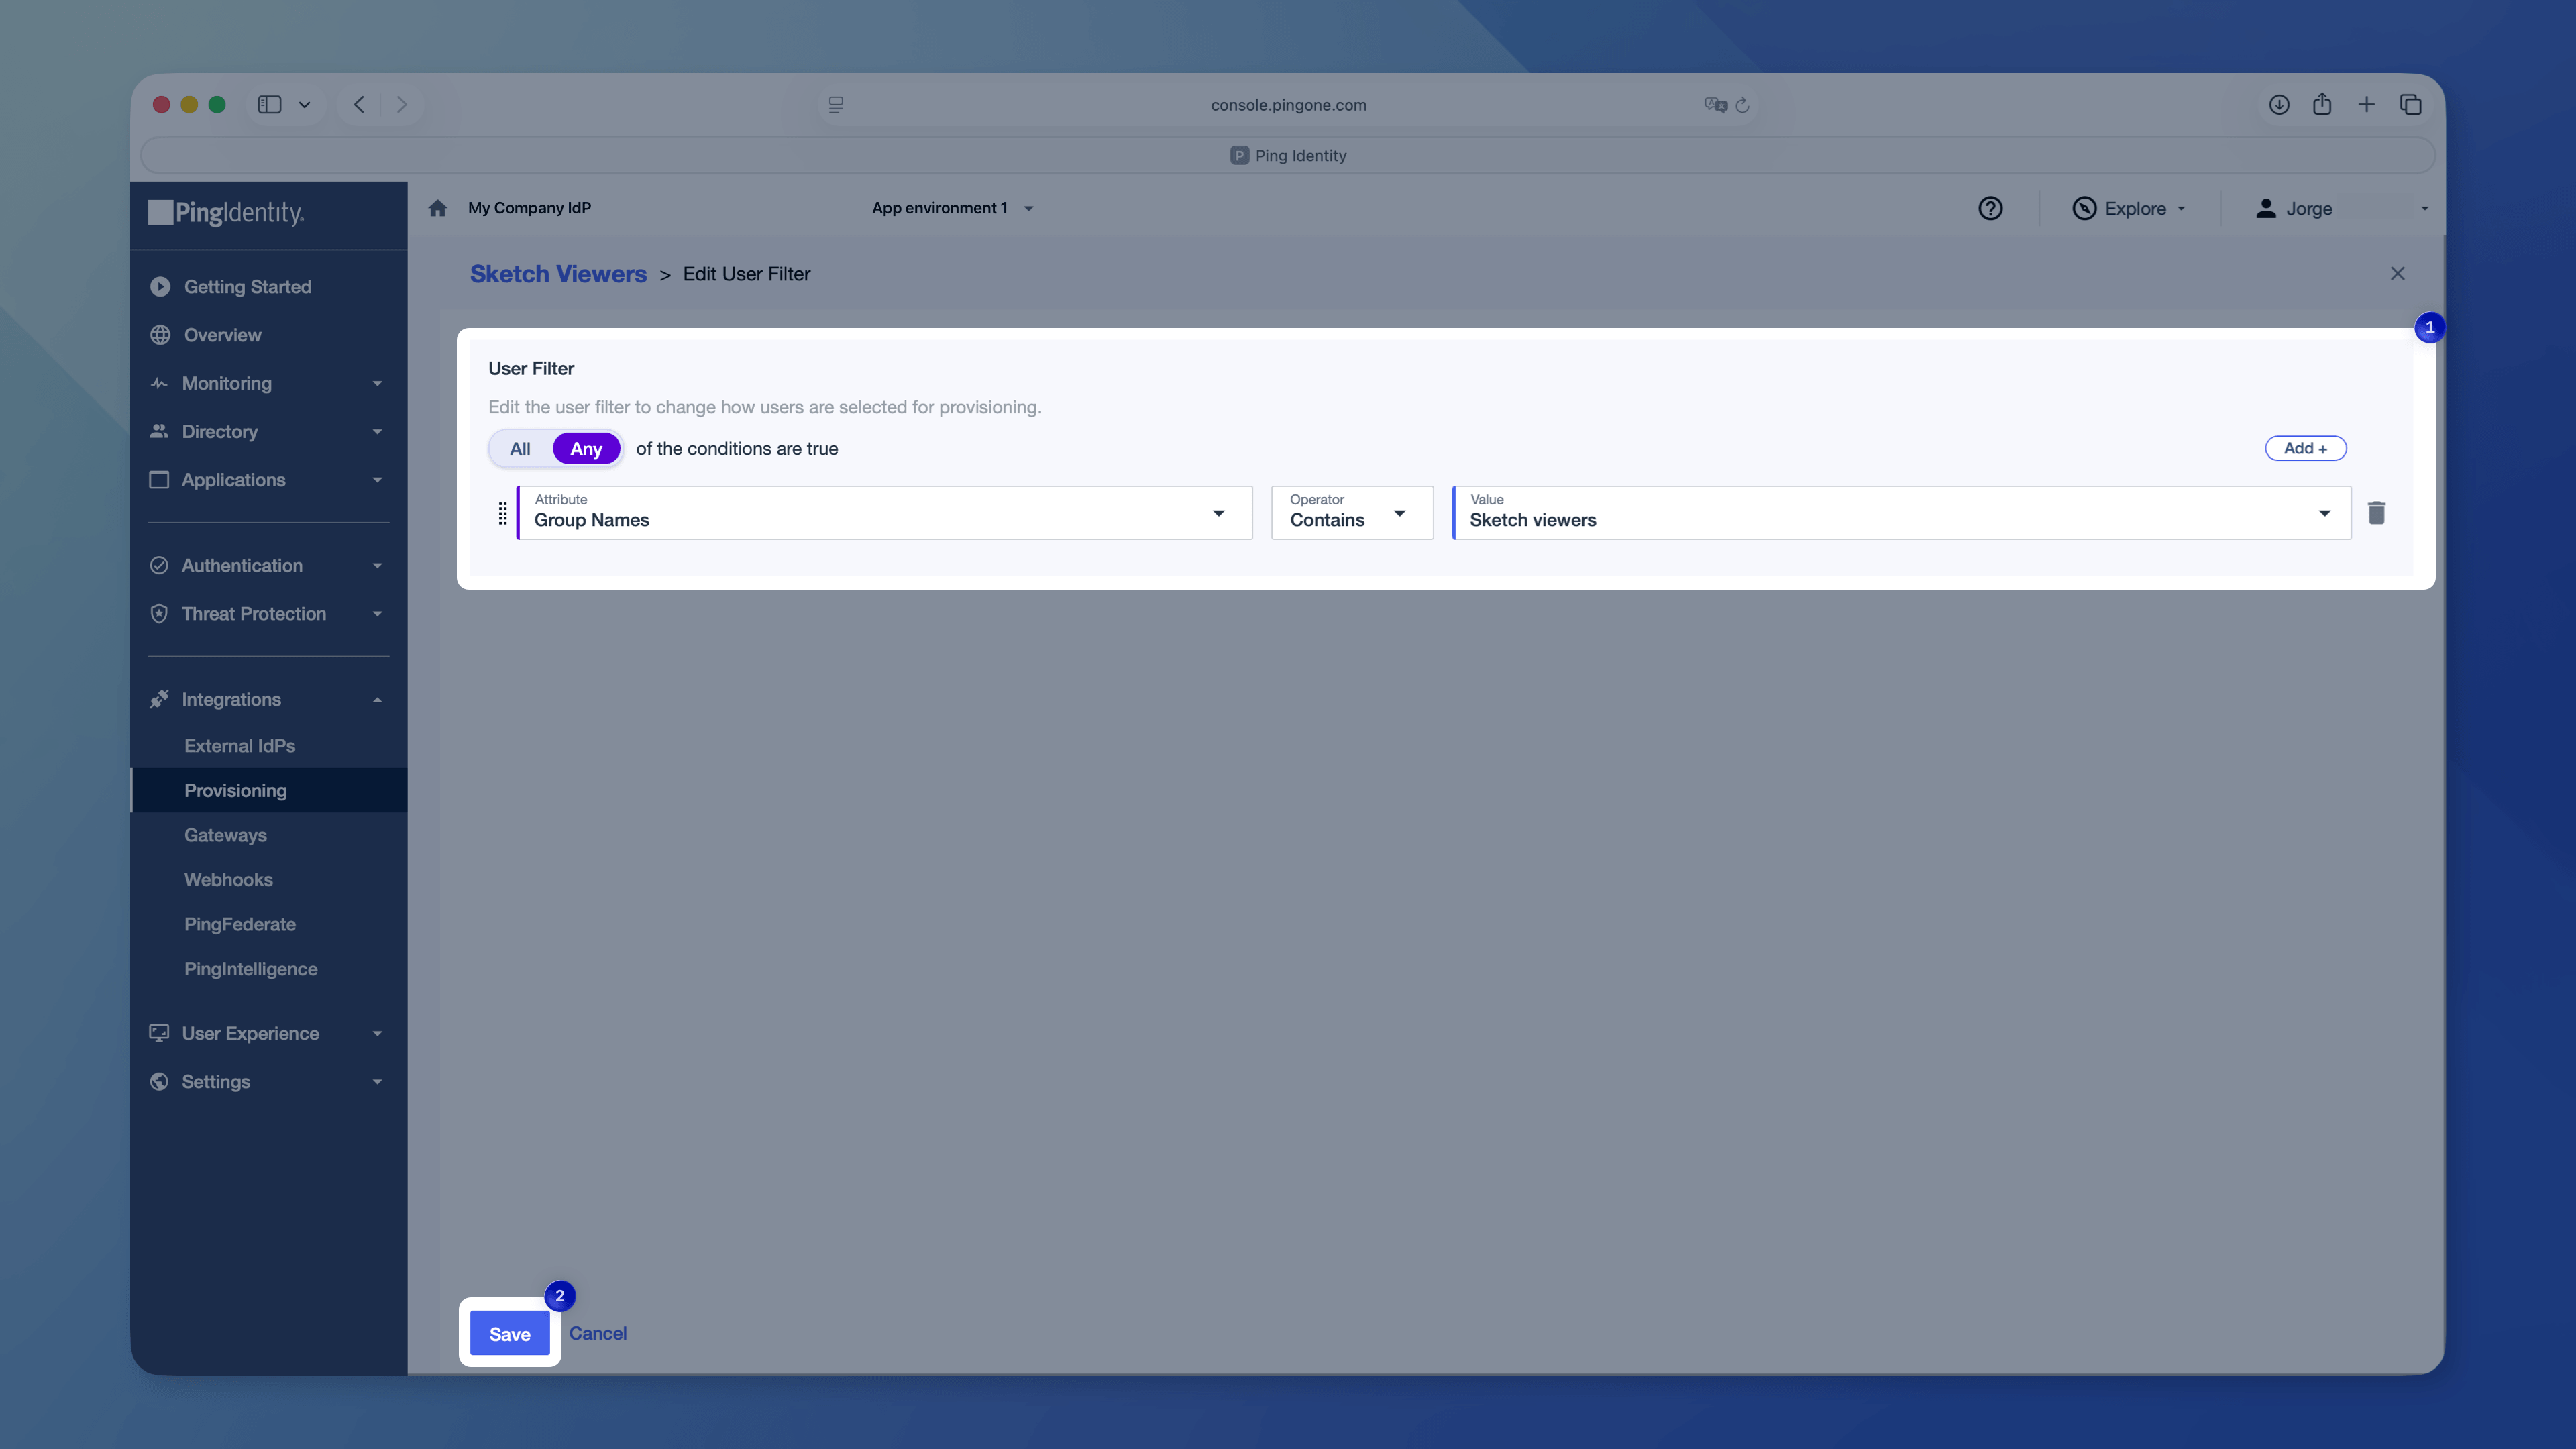
1. For the **Editors rule**, map the `accessLevel` attribute:
- Click **+Add**.
- Select `accessLevel` in the left column and `roles` in the right column.
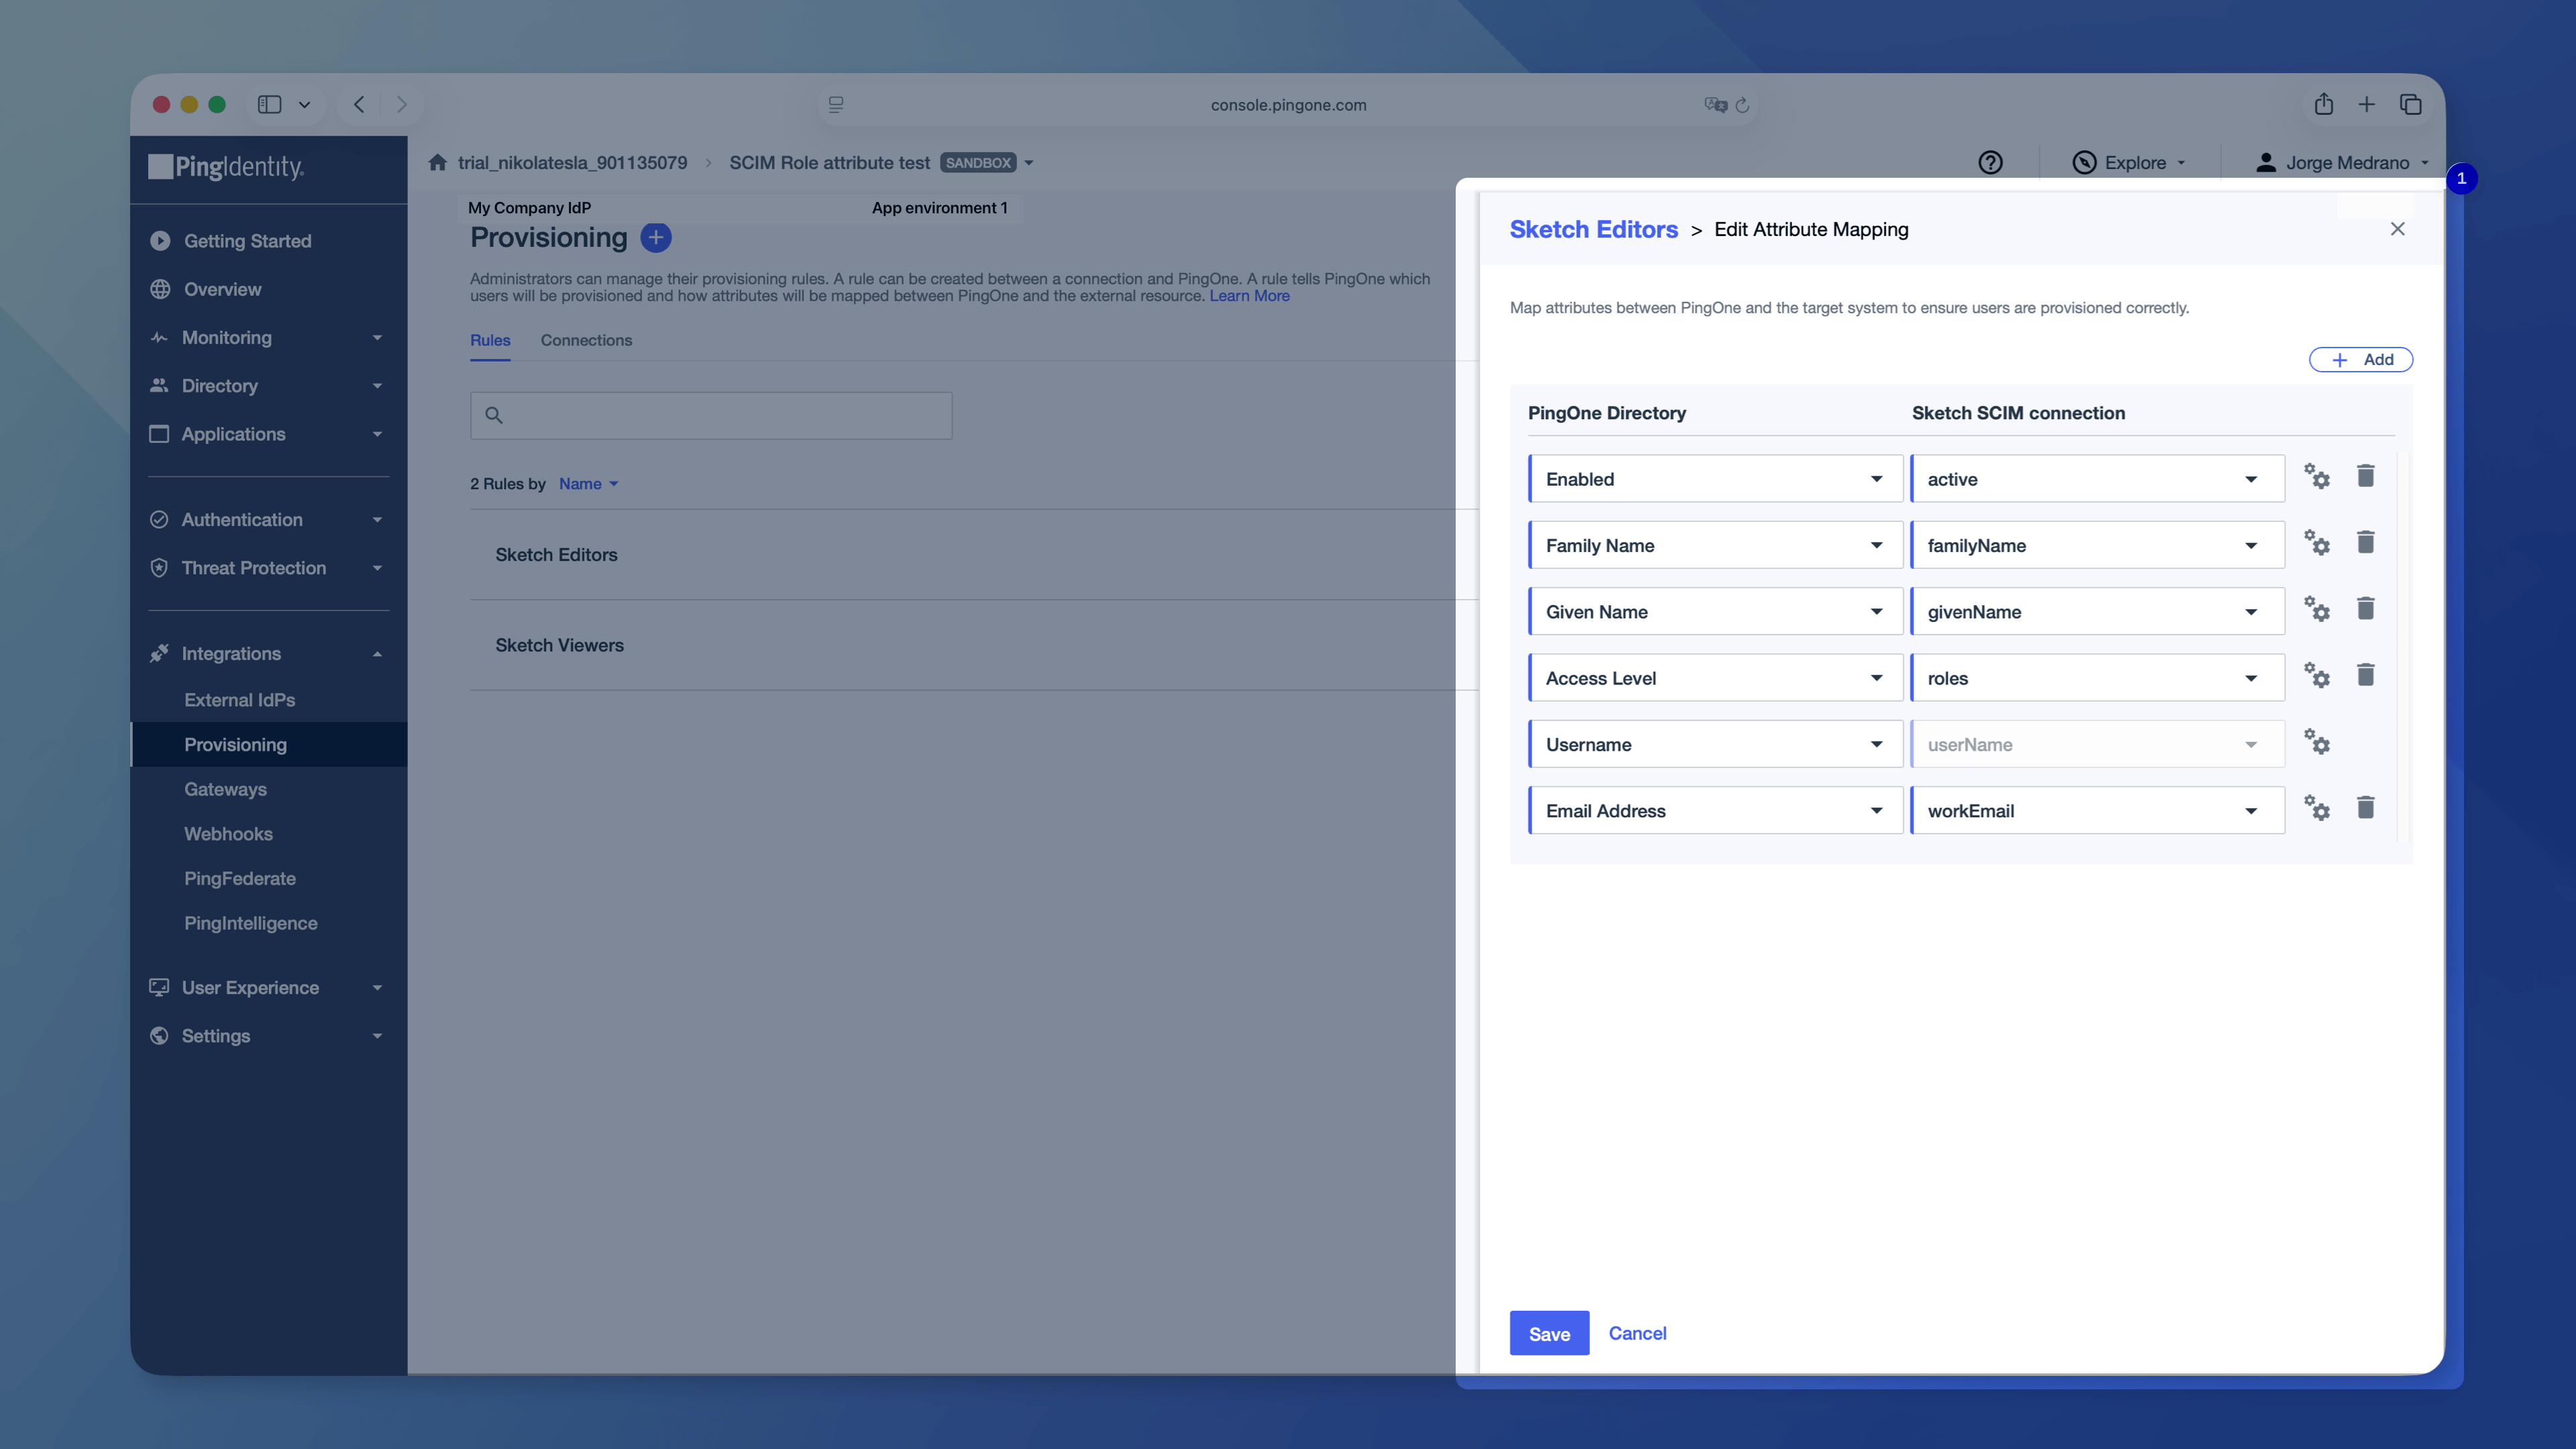
1. Click **Save**.
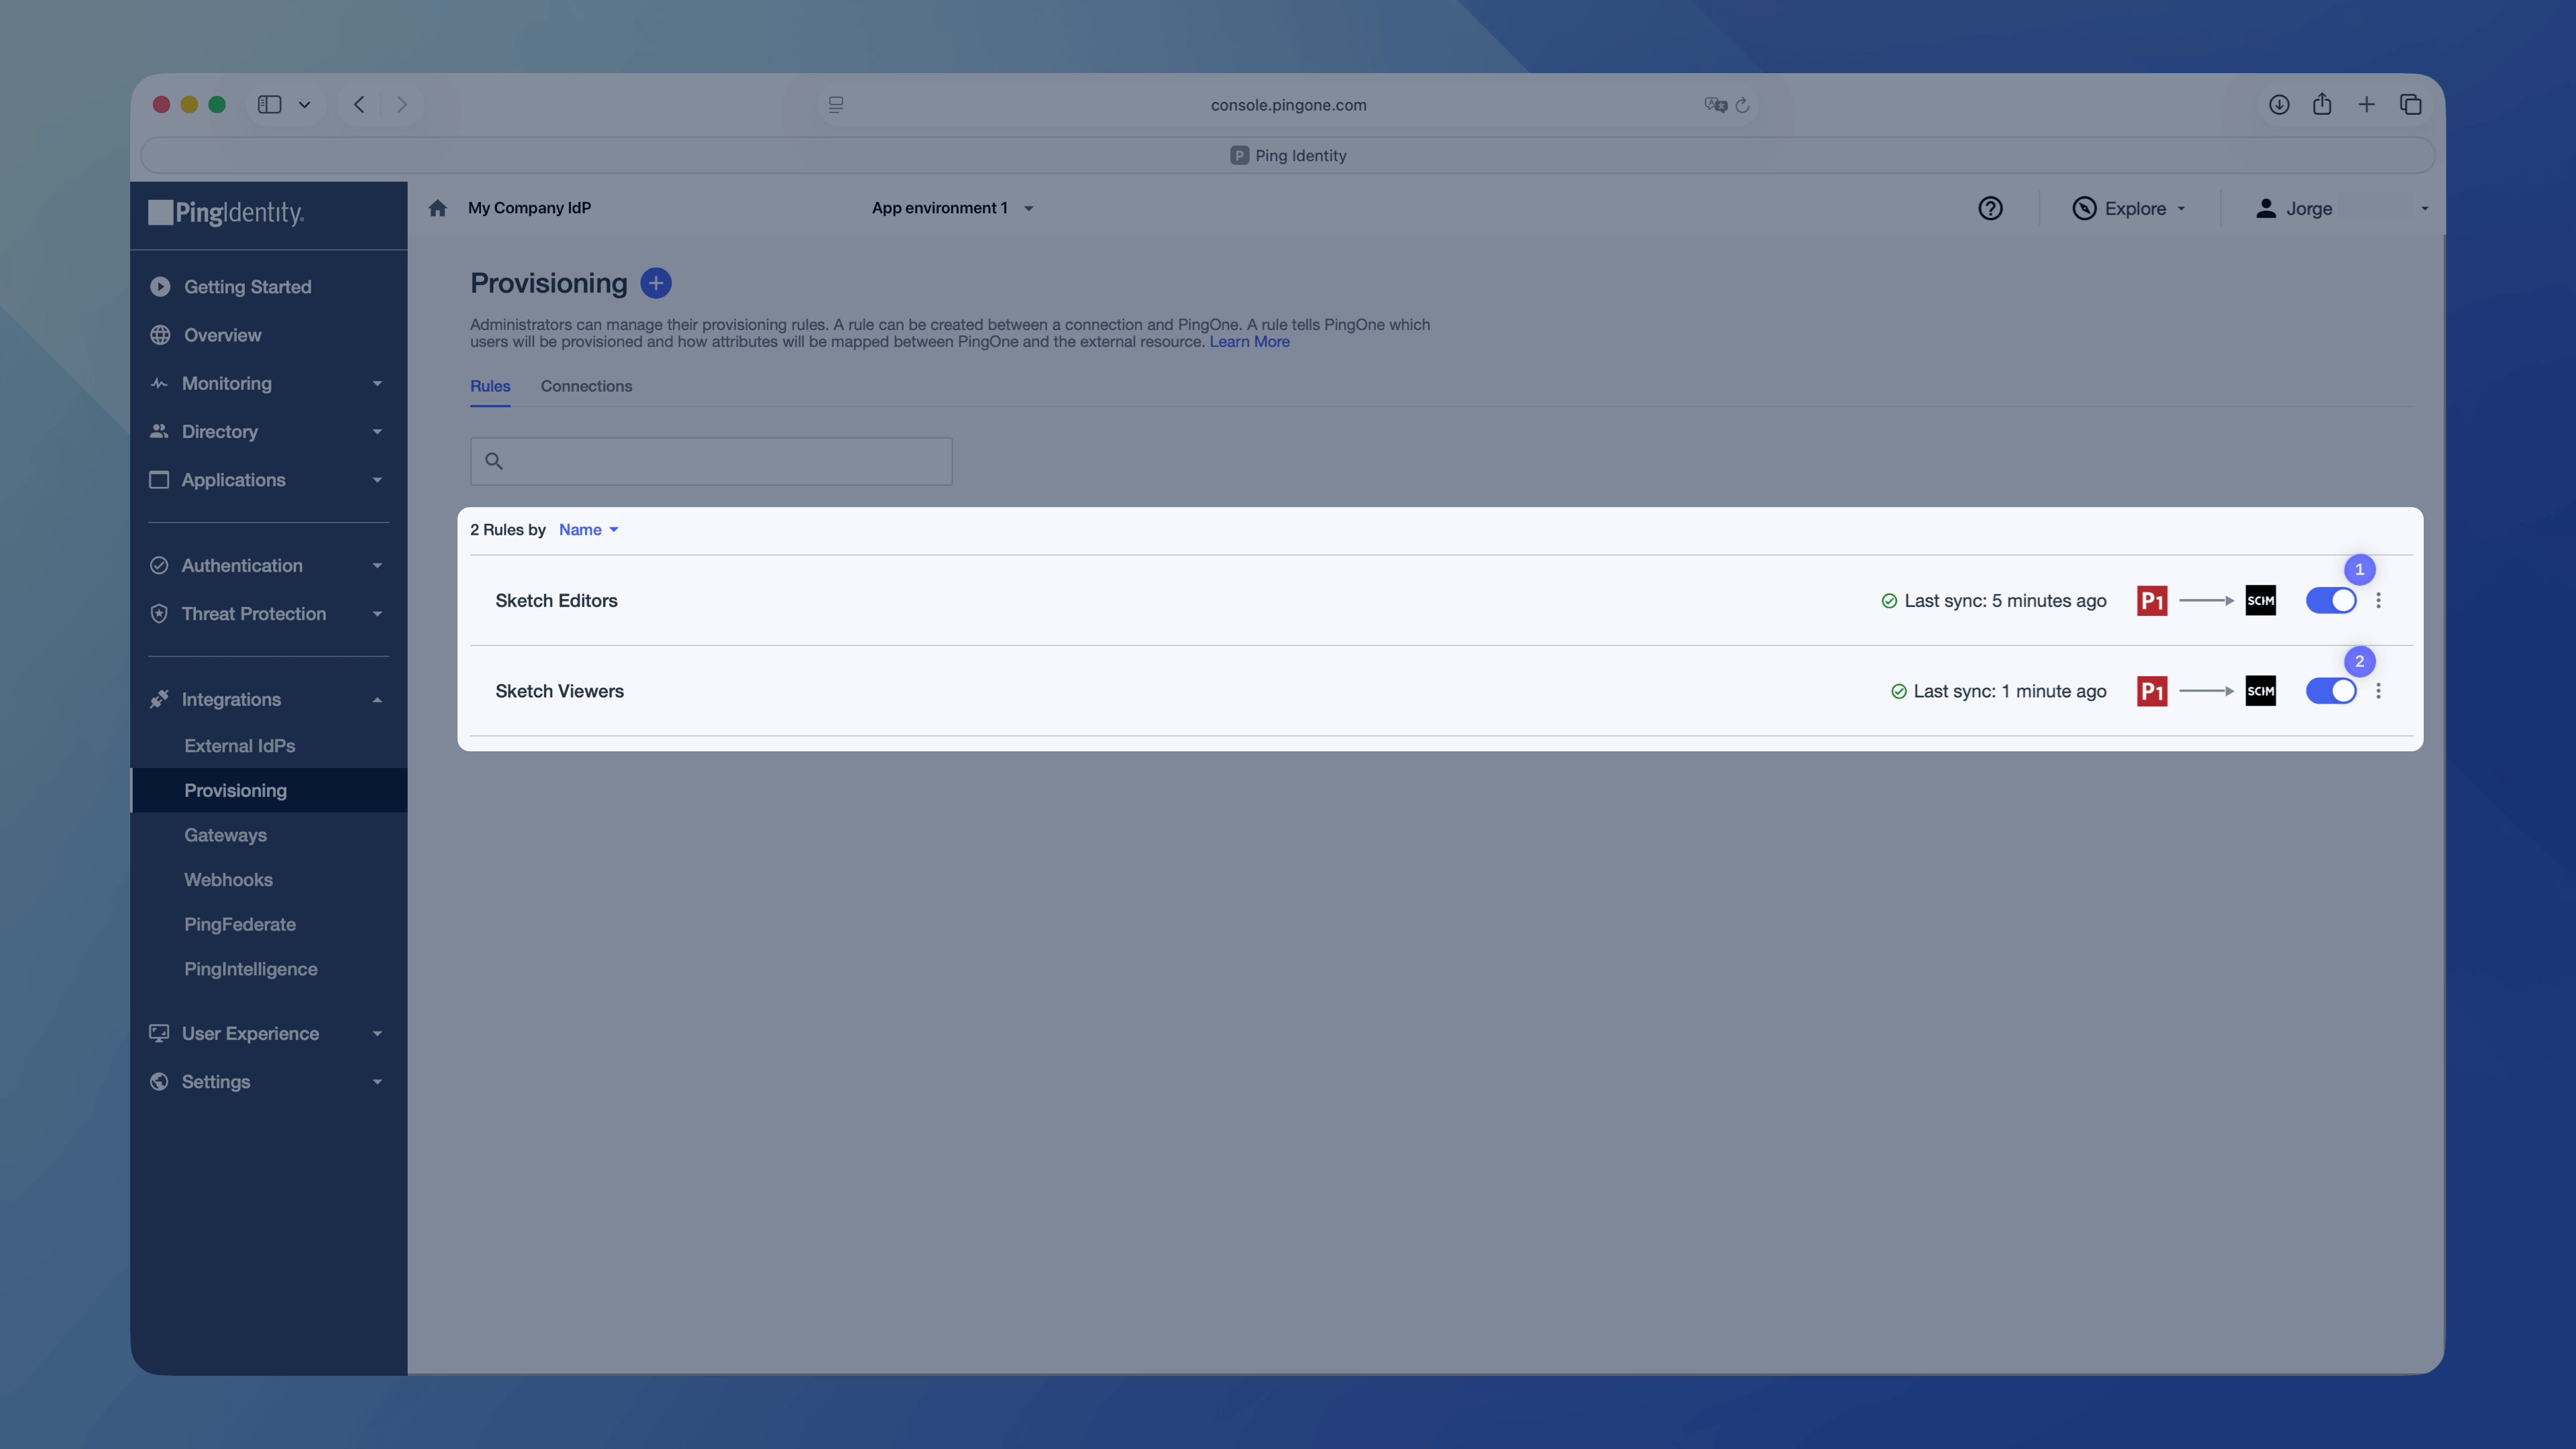
## 5. Enable provisioning rules
Enable the provisioning rules for both Editors and Viewers. User syncing starts shortly after — give it a few minutes, then check your Sketch Workspace to confirm provisioning worked correctly.
## Considerations
- If you reach your Editor seat limit, Ping Identity will still provision the user, but we’ll add them as a Viewer to avoid unwanted extra charges.
- If you disable a user, we’ll remove them from the Workspace. Any documents in their **My Drafts** folder will move to a restricted folder that Workspace Admins can access.
--------------------------------------------------------------------------------
title: "Setting up SAML SSO"
description: "Learn how to set up SAML SSO for Sketch with the help of our step-by-step guides and video tutorials."
last_modified: "2026-04-08"
url: "https://www.sketch.com/docs/getting-started/single-sign-on/setting-up-saml-sso/"
--------------------------------------------------------------------------------
## Setting up SAML SSO
Here’s a quick guide on how to set up SAML SSO both in your Identity Provider (IdP) and in your Workspace.
If you already have a Workspace, make sure SSO is available for setup by clicking on the Settings icon at the the top of the sidebar, then clicking on the Single Sign-On option. If you’re creating a new Workspace, you can make SSO available by adding your credit card info, and selecting [Professional plan](/support/subscriptions/professional/).
These are the **three steps** that you’ll need to follow to set up SAML SSO:
1. [Choose a shortname and gather the information to set up SSO in your IdP](/docs/getting-started/single-sign-on/setting-up-saml-sso/choose-a-shortname/): first, you’ll need to go to your Workspace Settings, where we’ll give you the setup values you’ll need to configure your IdP.
1. Once you have the values, you’ll need to [set up SAML SSO in your IdP](/docs/getting-started/single-sign-on/setting-up-saml-sso/setup-identity-provider/) — you’ll find the instructions to do so for different IdP providers below.
1. Lastly, you’ll need to [finish setting up SAML SSO in your Workspace](/docs/getting-started/single-sign-on/setting-up-saml-sso/finish-setting-saml-sso/). You’ll have to import the IdP metadata that you got in the previous step in Sketch.
--------------------------------------------------------------------------------
title: "SSO setup and shortnames"
description: "Learn how to set up an SSO shortname for Sketch with the help of our step-by-step guides and video tutorials."
last_modified: "2026-01-23"
url: "https://www.sketch.com/docs/getting-started/single-sign-on/setting-up-saml-sso/choose-a-shortname/"
--------------------------------------------------------------------------------
## SSO setup and shortnames
1. [Sign in to your Workspace](/signin/) as an Admin.
1. Head to the Workspace’s Single Sign-On (SSO) settings by clicking on the **Settings** icon at the top of the sidebar.
1. Click on the **Single Sign-On** option.
1. Click **Choose a short name**

1. Enter a unique name — it should have less than 16 characters and can only include letters, numbers or hyphens. You can edit this name later on.
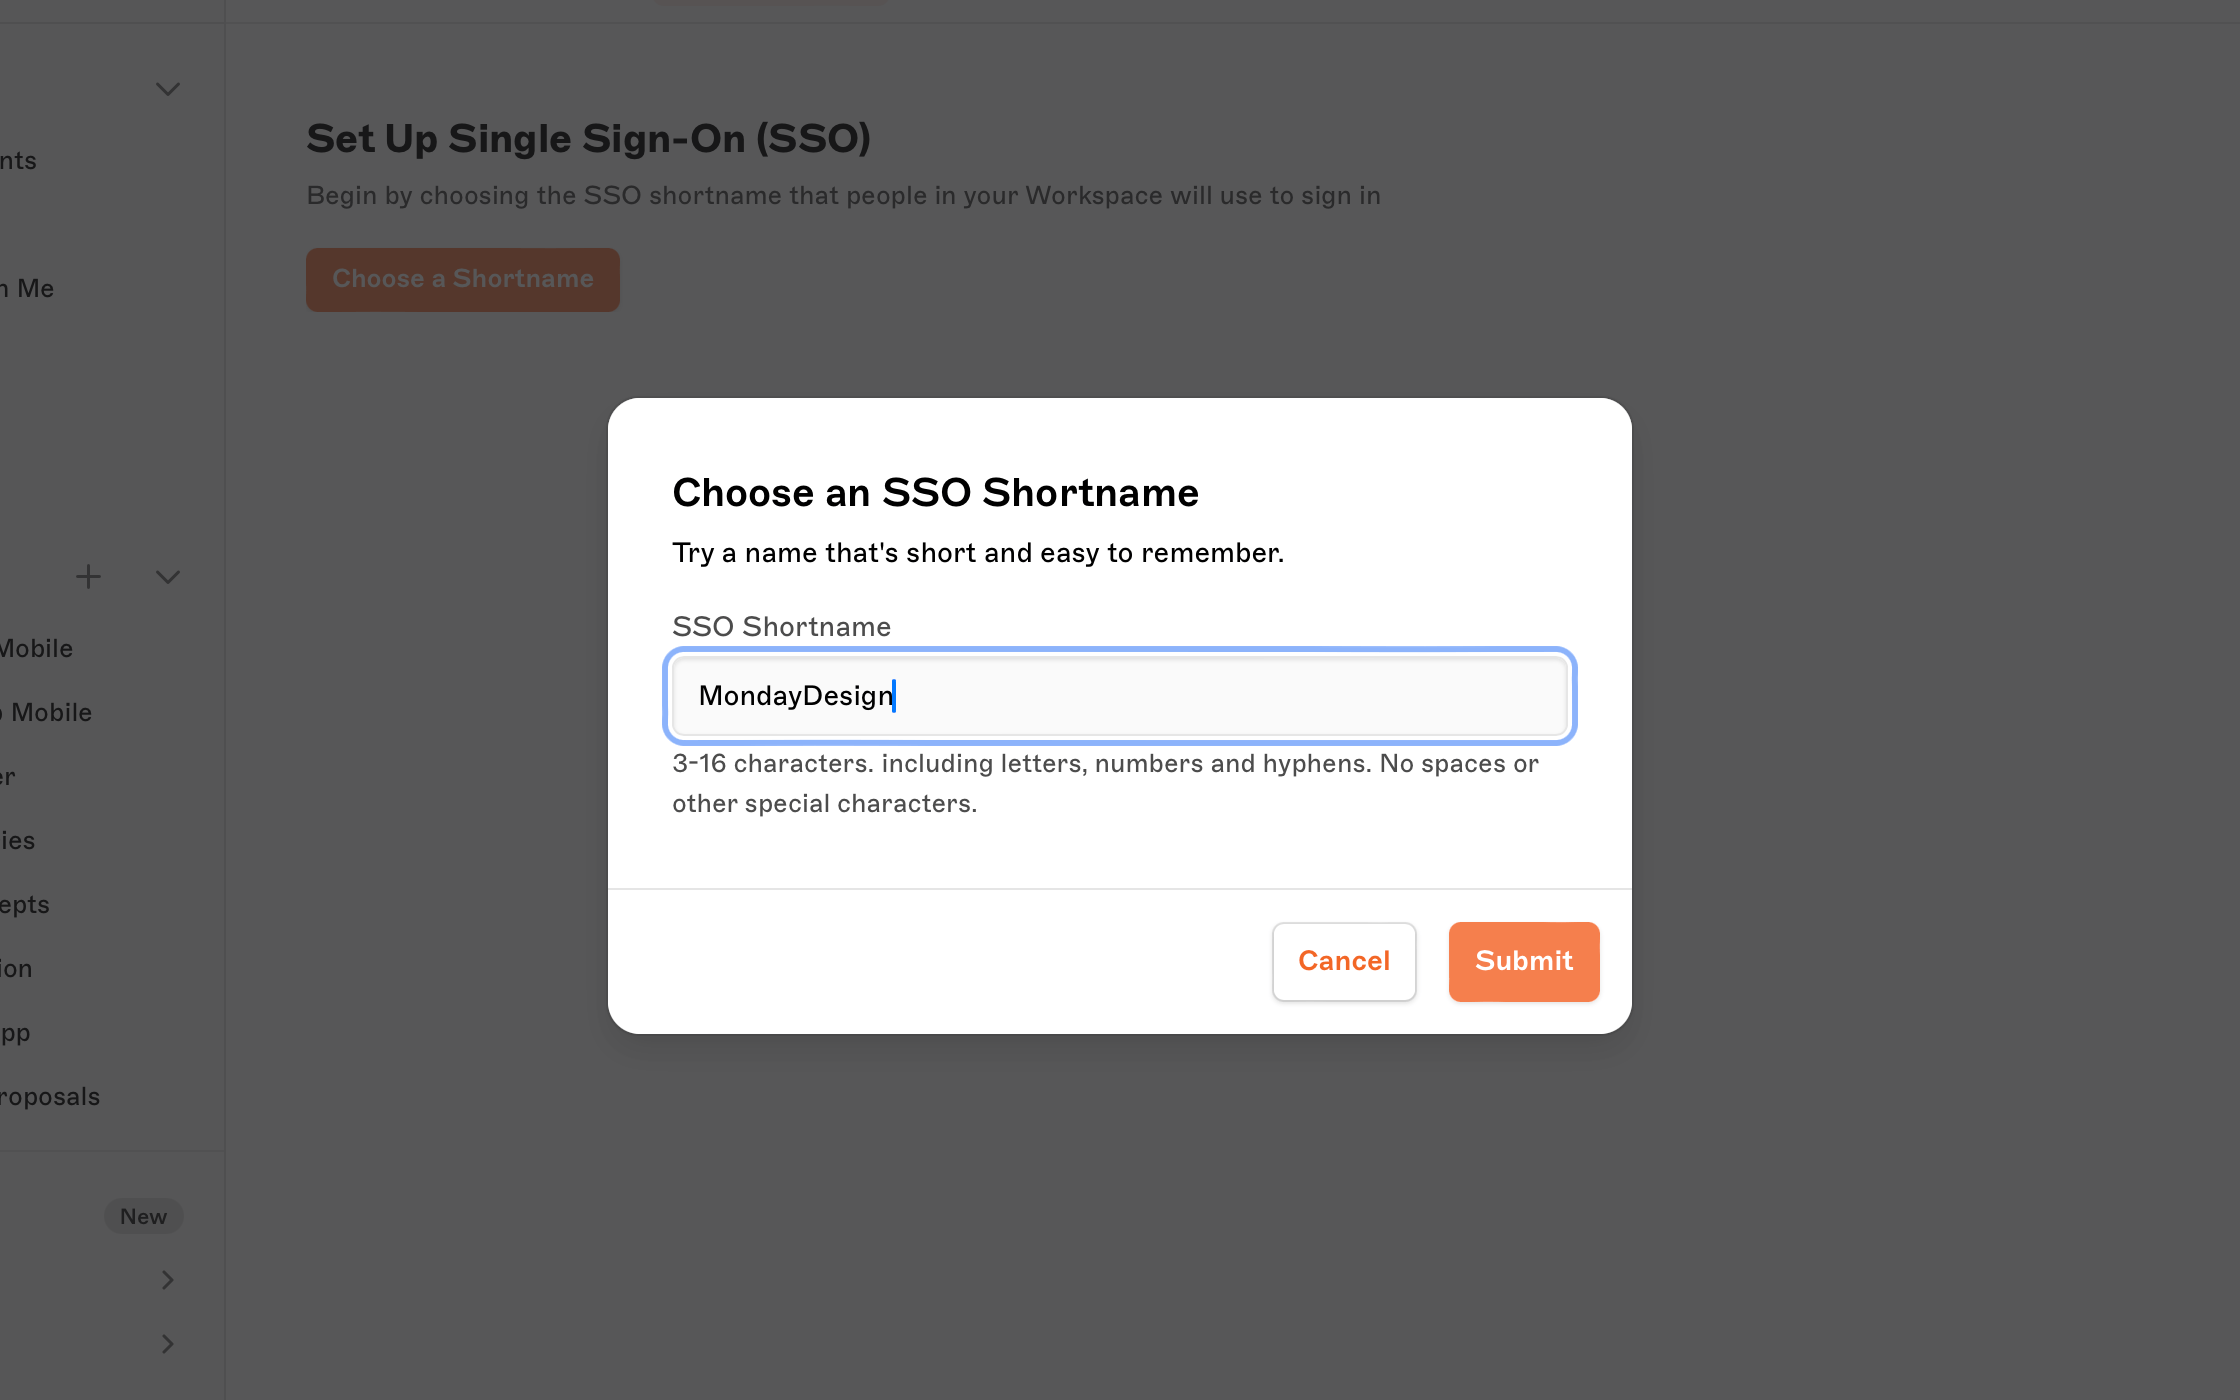
1. Click **Submit**.
1. Click on the first tab **Set Up Identity Provider**. In this tab, you’ll find the unique Workspace values you’ll need to set up your IdP.
- **EntityID**: Your IdP may refer to this value as **Audience** or **SP Entity ID**.
- **ACS URL**: Your IdP may refer to this value also as **SSO URL**, **Reply URL**, or **Consumer URL**.
- **Other metadata we support**: Pay attention to the SAML attributes that we support. You’ll need to map them to those in your IdP.
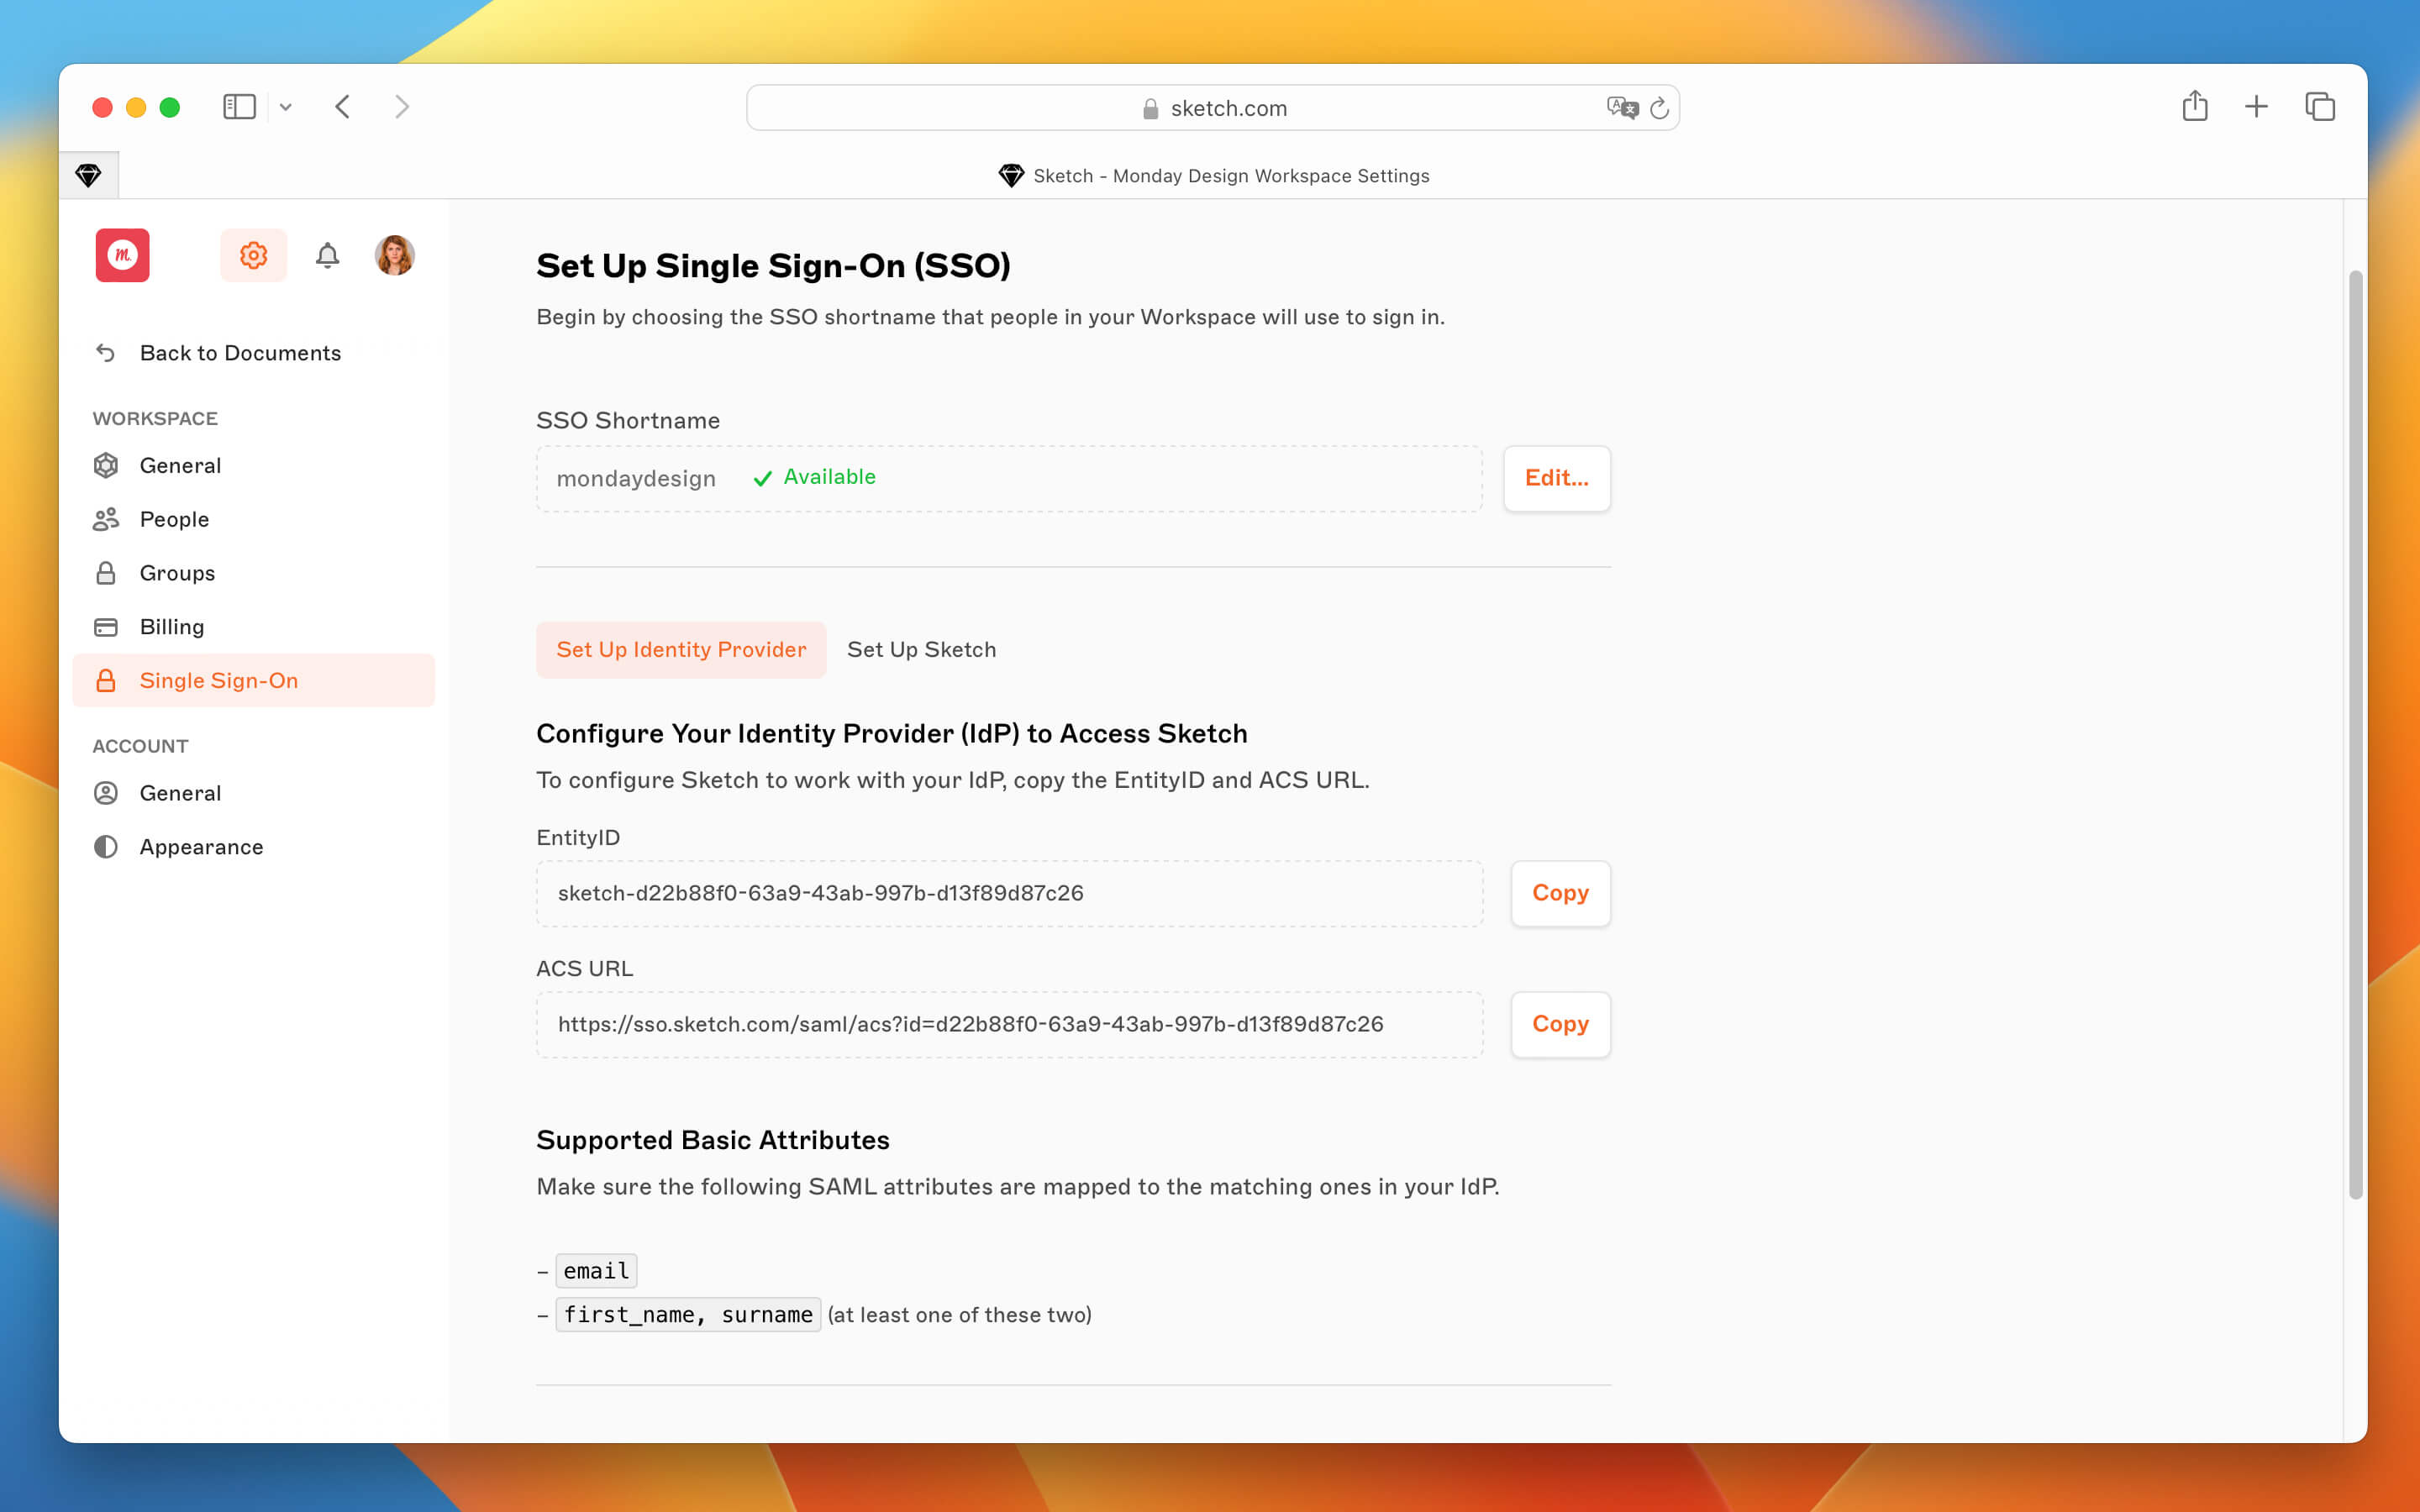
1. Make sure to keep these values at hand! You’ll need them to set up your SAML file in your identity provider. Click **Copy** next to each value to copy it to your clipboard.
1. [Head to your IdP and configure an application with SAML SSO](/docs/getting-started/single-sign-on/setting-up-saml-sso/setup-identity-provider/). Once you are done and have the XML file ready, head to [How to finish setting up SAML SSO in your Workspace](/docs/getting-started/single-sign-on/setting-up-saml-sso/finish-setting-saml-sso/)
--------------------------------------------------------------------------------
title: "Setting up SAML SSO in your IdP"
description: "Learn how to set up SAML SSO in your IdP for Sketch with the help of our step-by-step guides and video tutorials."
last_modified: "2026-04-01"
url: "https://www.sketch.com/docs/getting-started/single-sign-on/setting-up-saml-sso/setup-identity-provider/"
--------------------------------------------------------------------------------
## Setting up SAML SSO in your IdP
You can find a step-by-step guide on some of the most common Identity Providers below. Don’t worry if you can’t find instructions for your IdP, it’ll work as long as it’s compliant with SAML 2.0.
When setting up SAML SSO in your IdP, please pay attention to the following:
- The **NameID** attribute needs to be a static and persistent value that **will not change between users sessions** — this is the value that identifies a user. On hosted IdPs, this is usual the case by default. If you are using a self-hosted IdP (like KeyCloak) please ensure this is configured correctly.
- **EntityID**: Enter the value you got after choosing your SSO shortname, as described in [step 7 of this article](/docs/getting-started/single-sign-on/setting-up-saml-sso/choose-a-shortname/). This is a unique value for your Workspace. Your IdP may also call it **SP Entity ID**, or **Audience**.
- **ACS URL**: Enter the value you got after choosing your SSO shortname, as described in the previous point. This is a unique URL for your Workspace. Your IdP may also refer to it as **SSO URL**, **Reply URL** or **Consumer URL**.
- Attributes. Make sure you have the following SAML attributes created and mapped to those in your IdP that hold that information:
- `email`
- at least one of these two: `first_name` and/or `surname`.
--------------------------------------------------------------------------------
title: "Google Workspaces setup"
description: "Learn how to set up Google Workspace as an identity provider for Sketch with the help of our step-by-step guides and video tutorials."
last_modified: "2026-01-23"
url: "https://www.sketch.com/docs/getting-started/single-sign-on/setting-up-saml-sso/setup-identity-provider/google-workspaces/"
--------------------------------------------------------------------------------
## Google Workspaces setup
1. Sign in to your Google Workspace as an Admin.
1. Click on **Apps** > **Overview** > **Web and mobile apps**.
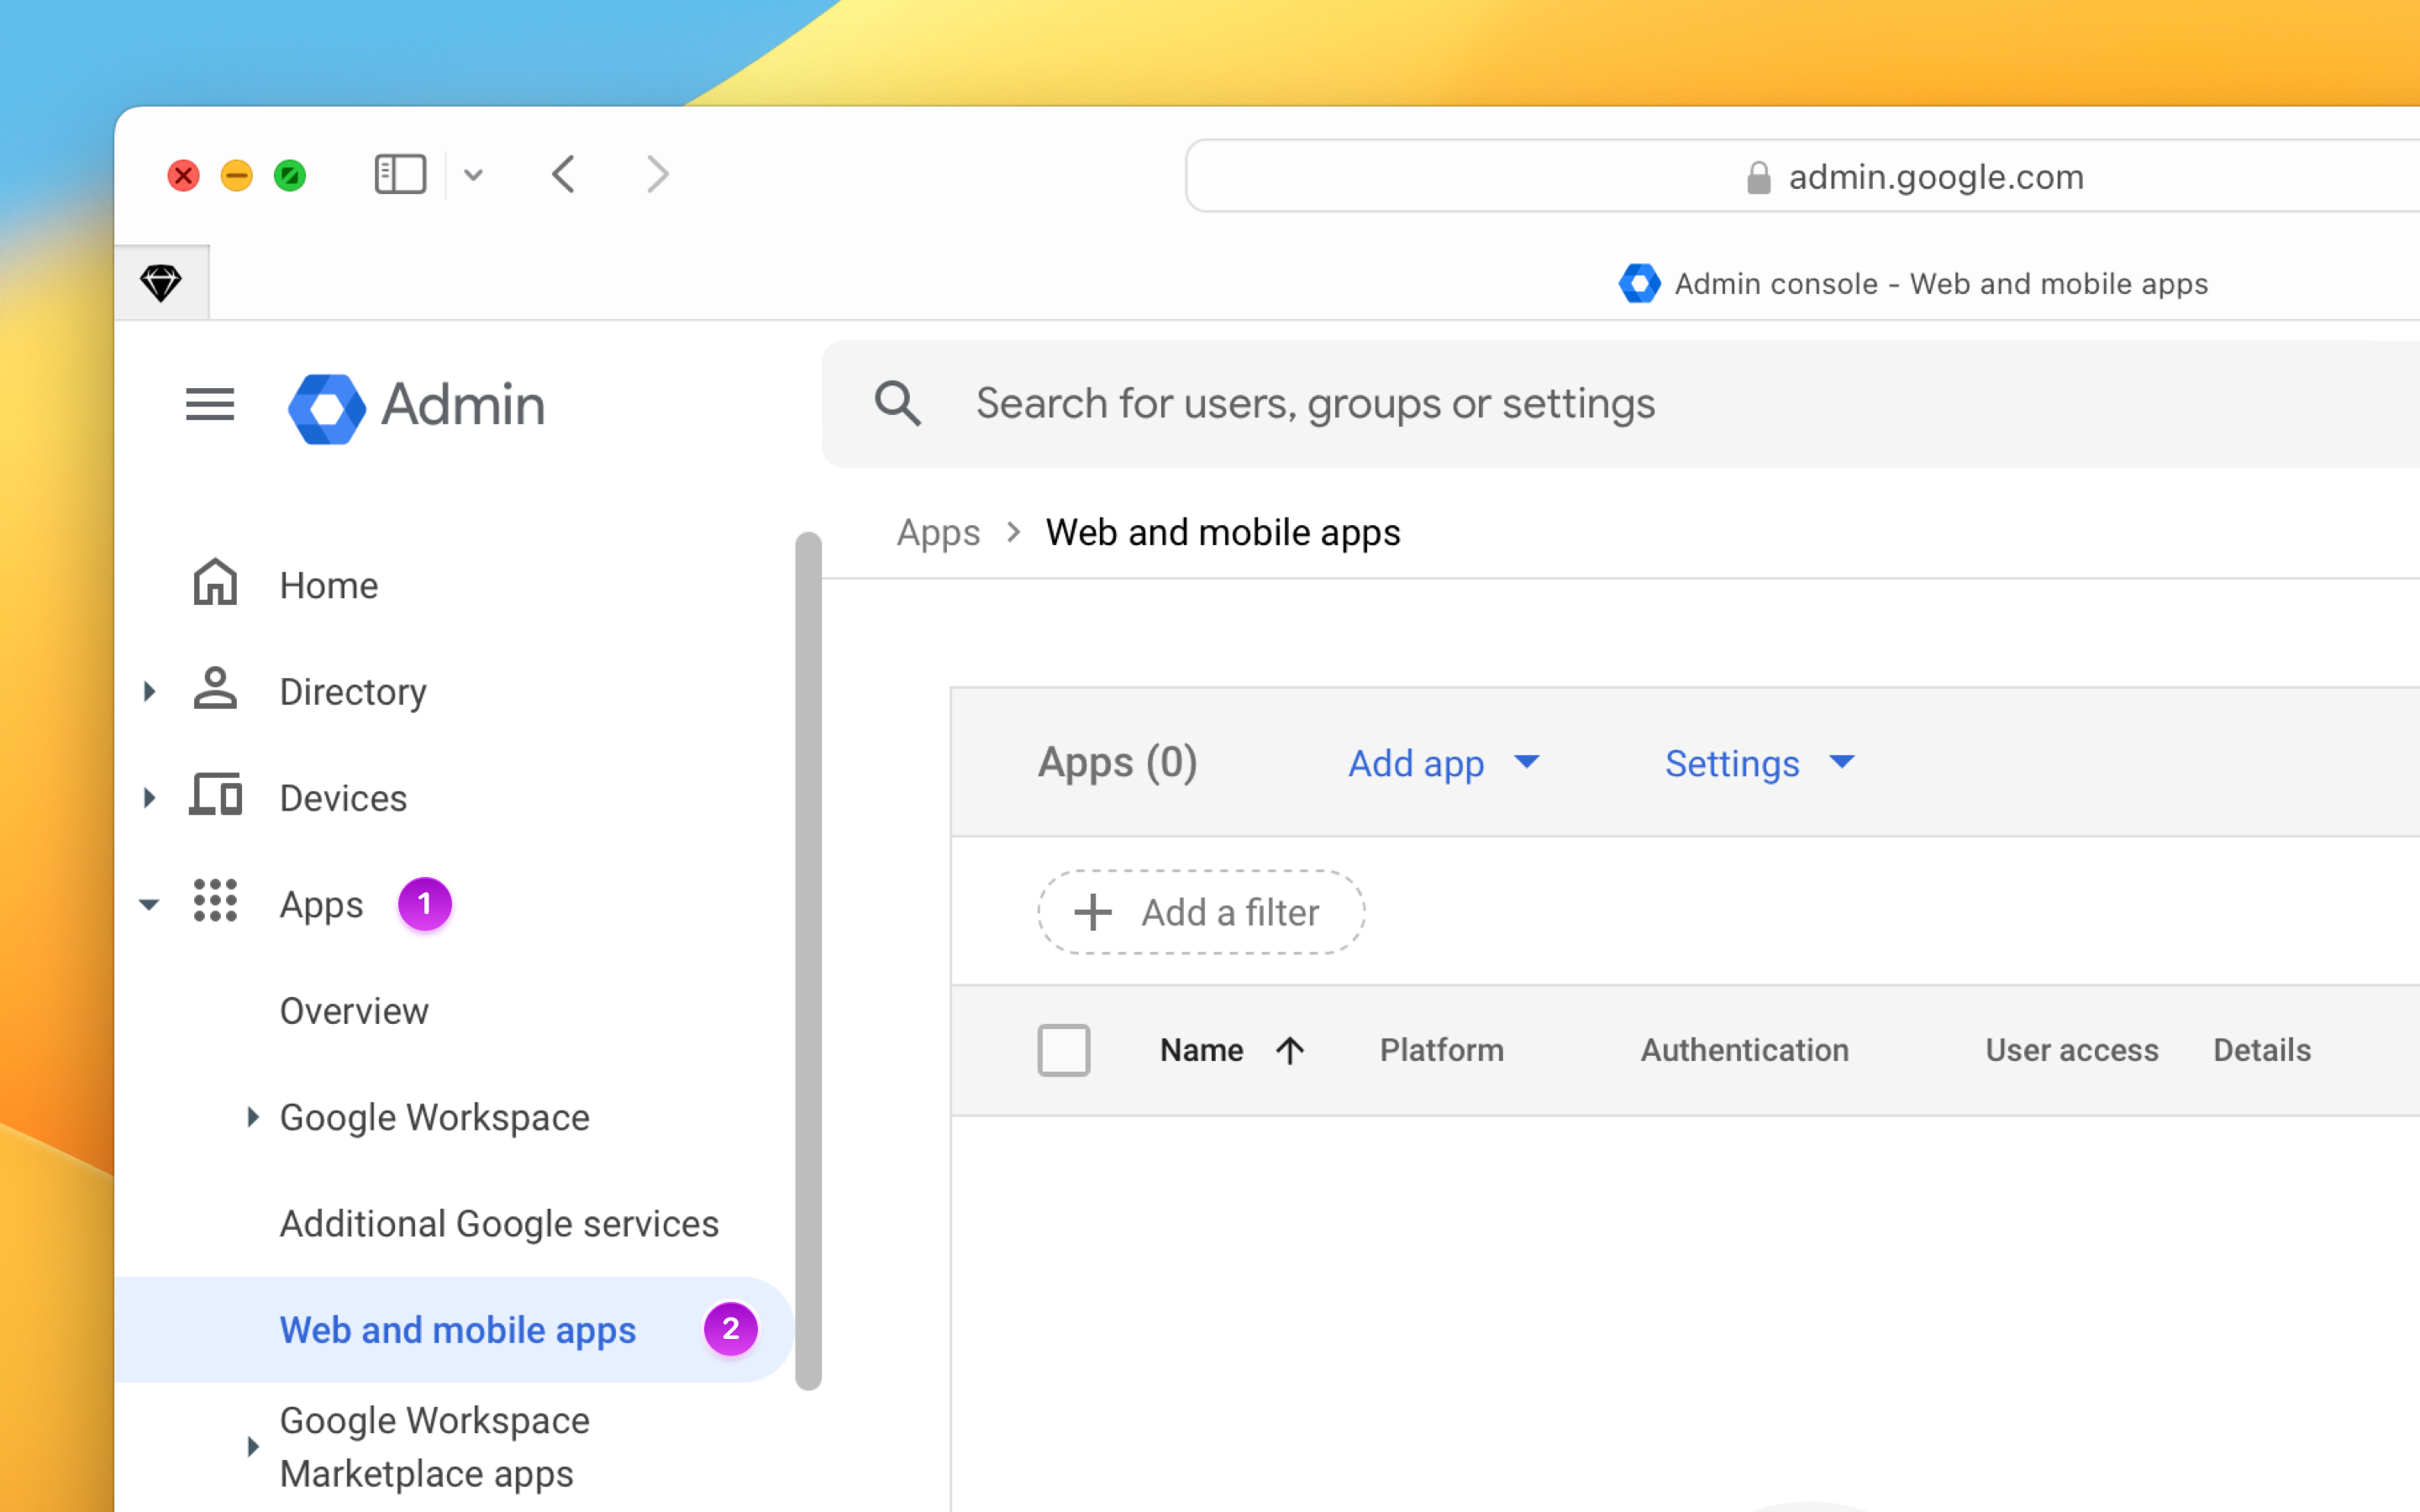
1. Click on **Add app** > **Add custom SAML app**.
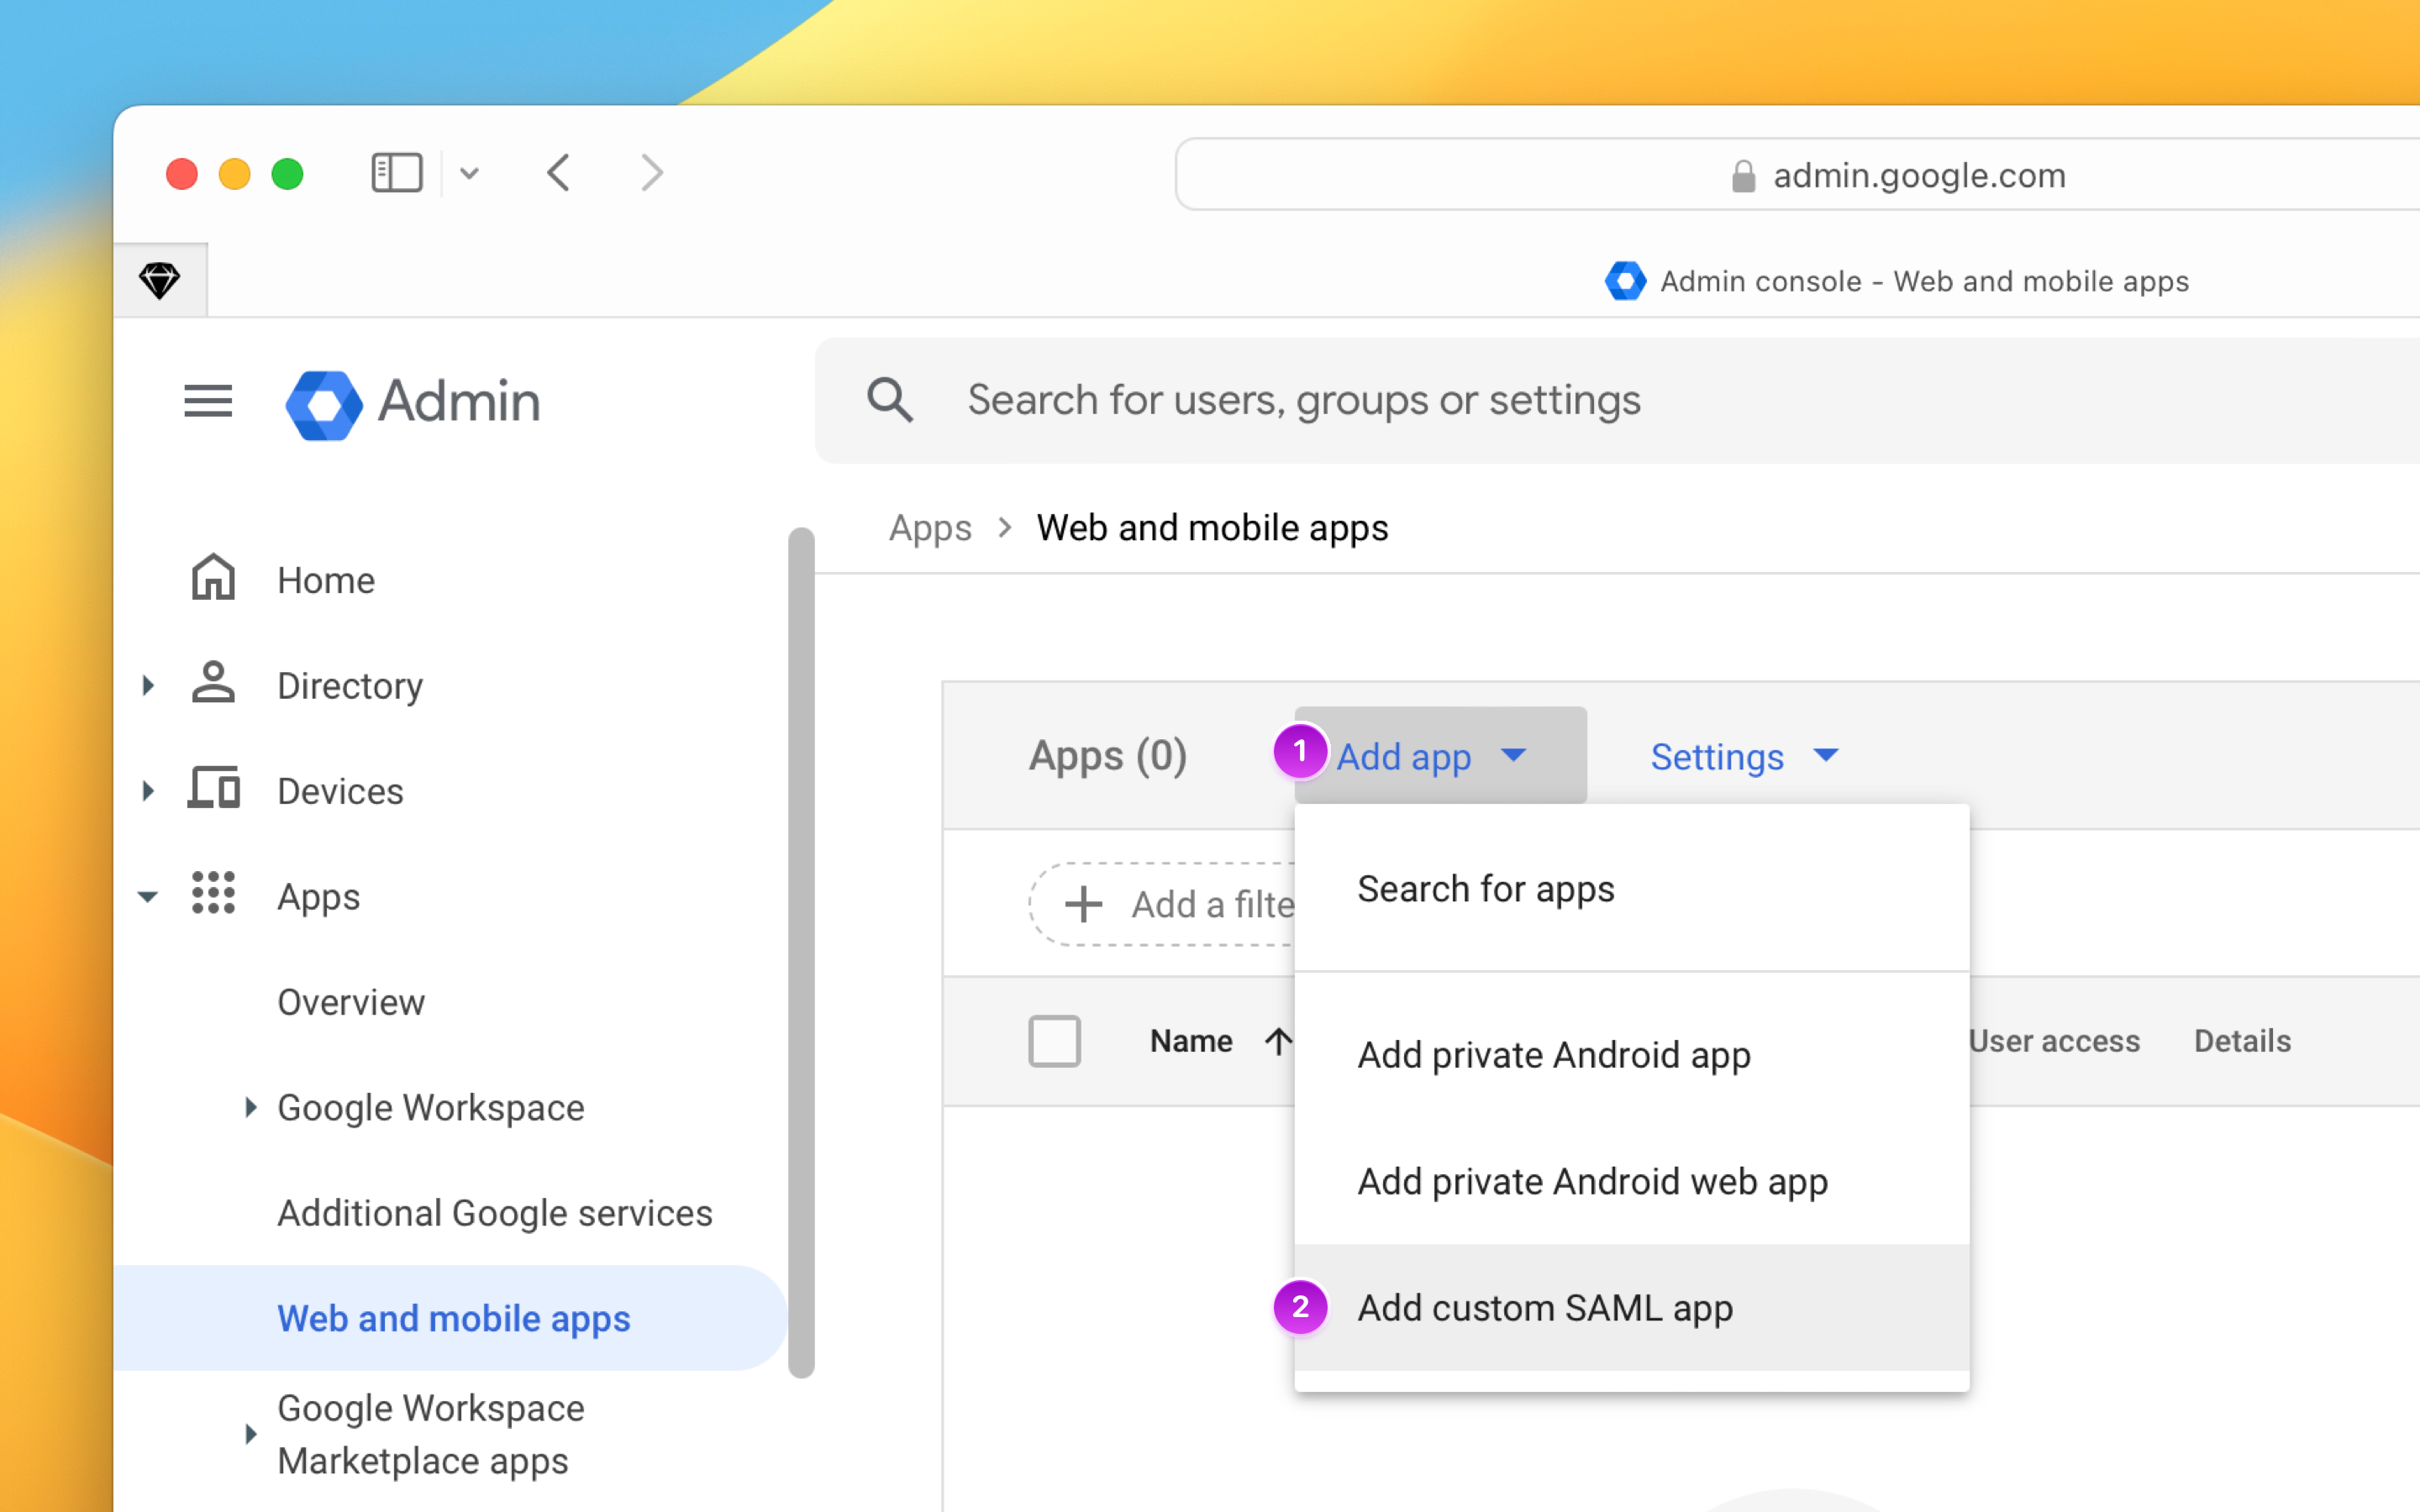
1. Type `Sketch` in the App name field and upload [Sketch’s logo](https://cdn.sketch.com/docs/sso/sketch-logo.png). Click **Continue** when you’re ready.
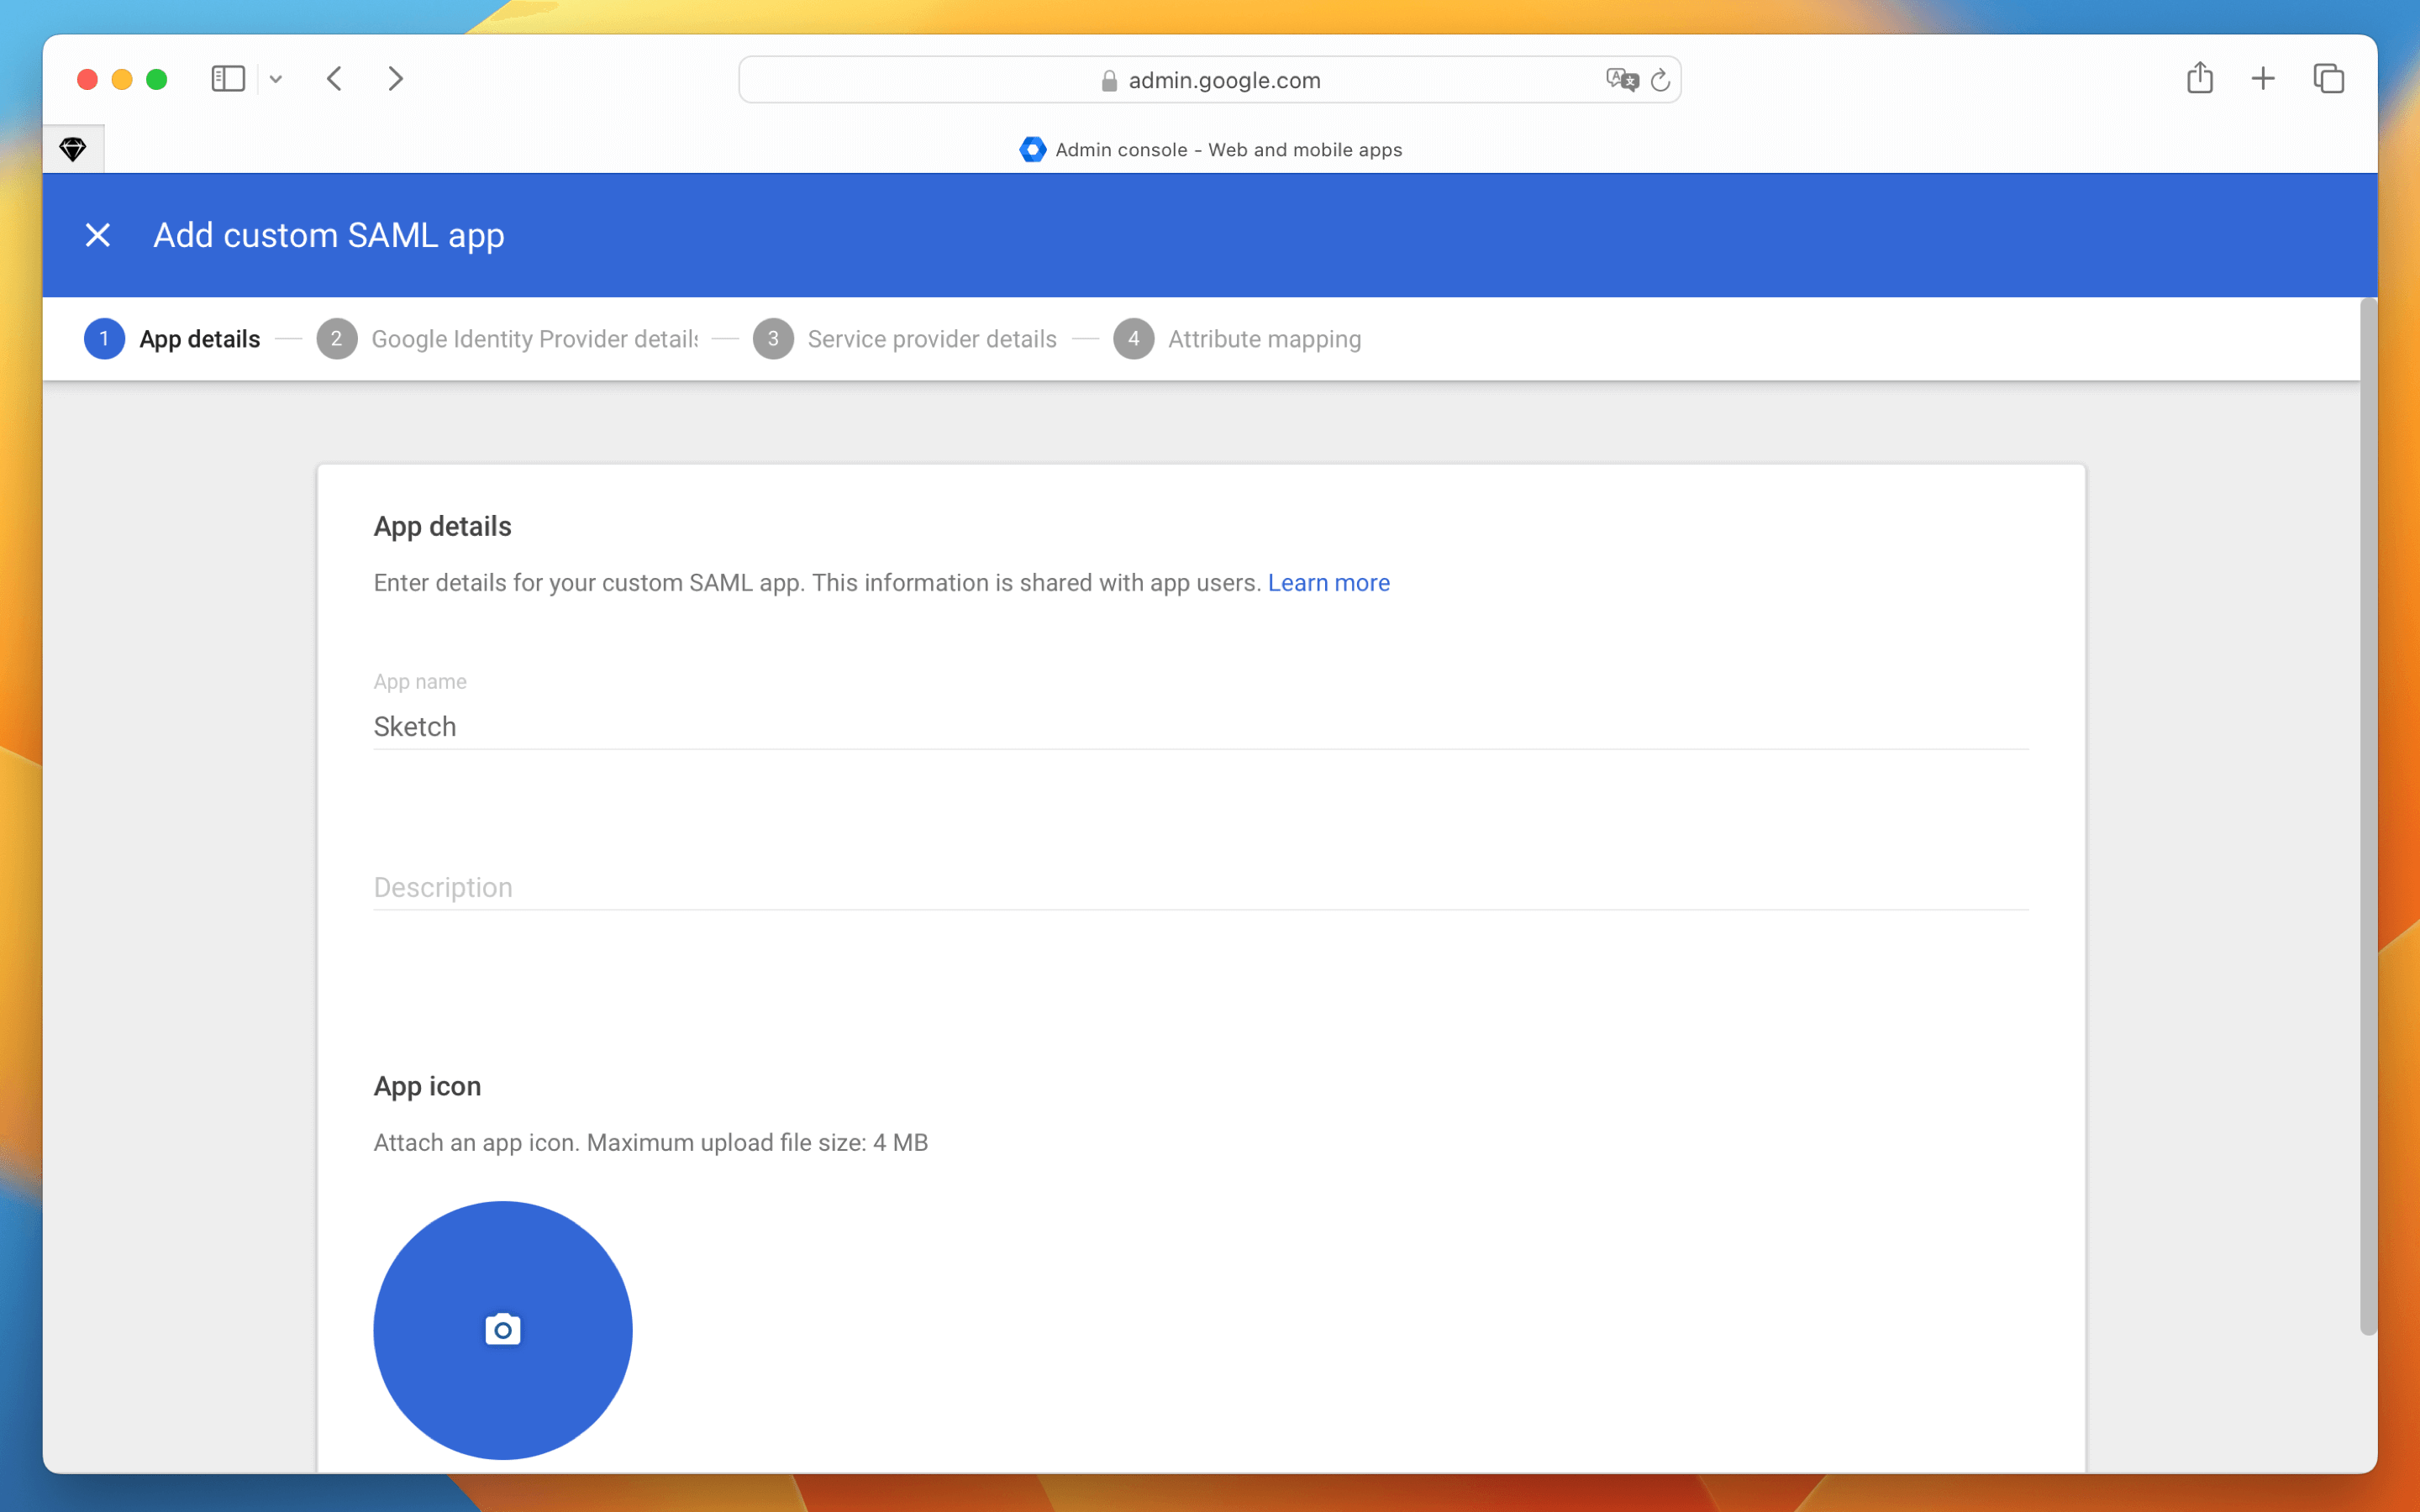
1. Download the IdP Metadata .XML file — you’ll need it to finish setting up SAML SSO in your Workspace. Click **Continue**.
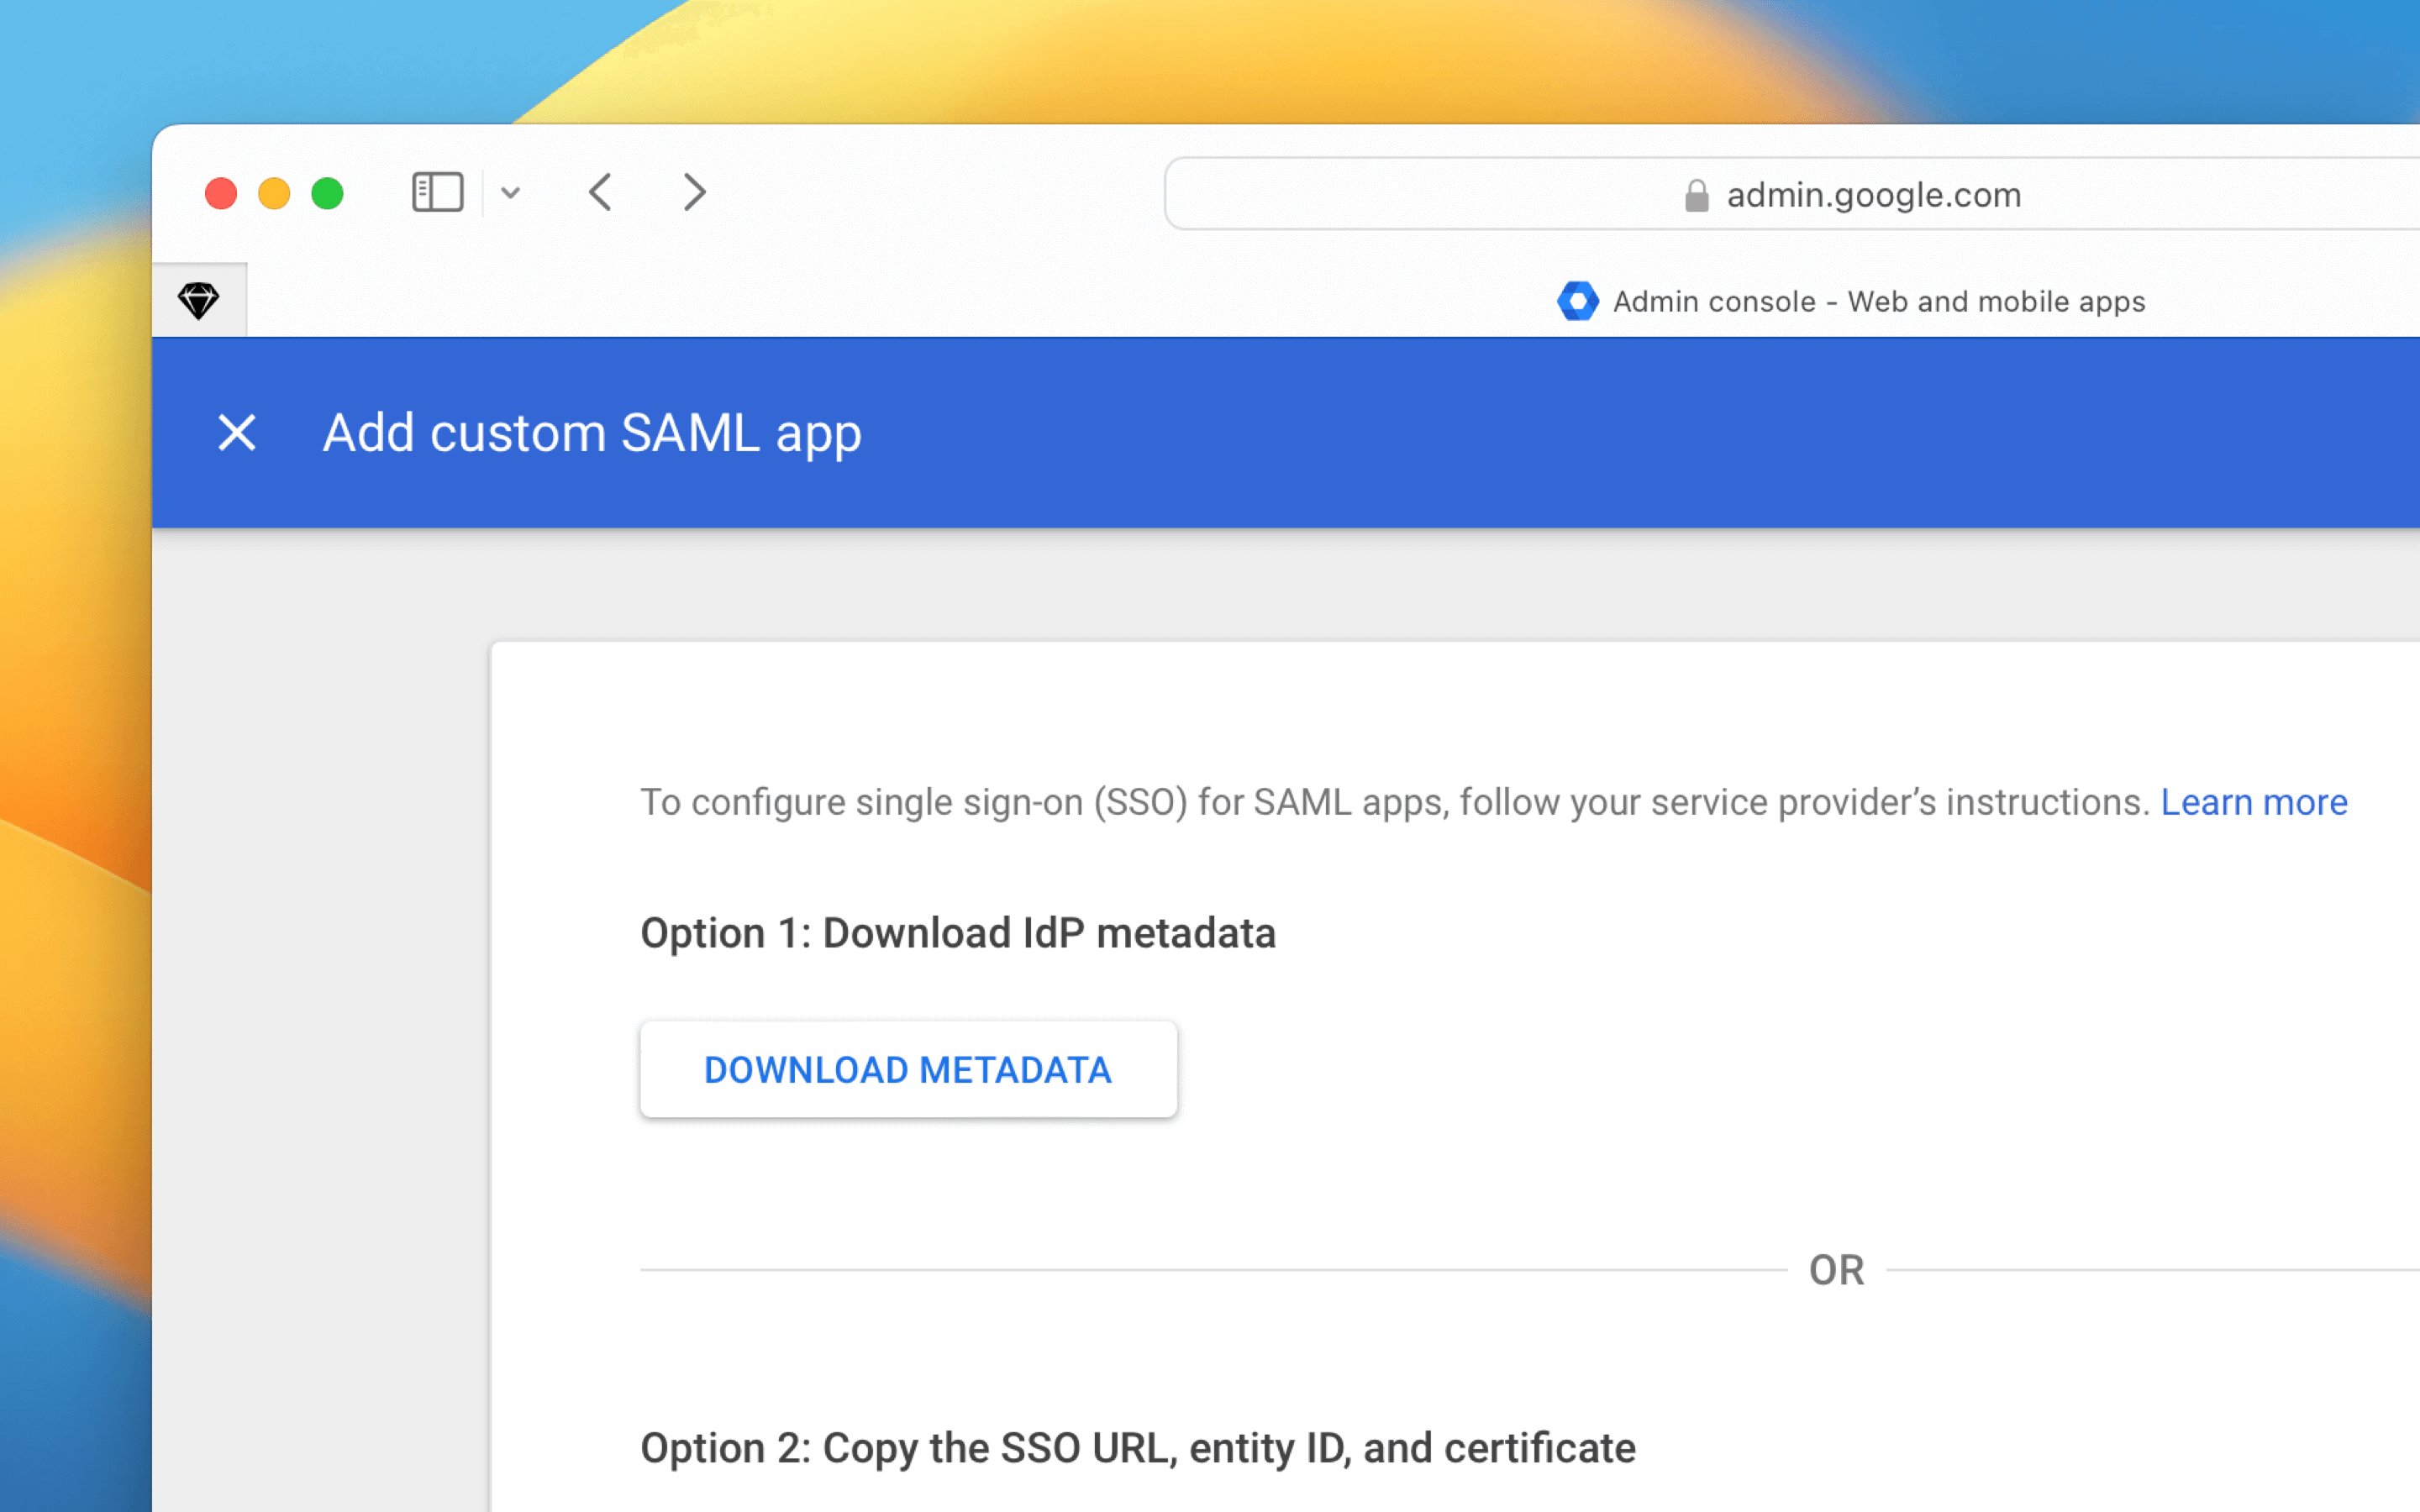
1. Use the EntityID and ACS URL values that you got when [setting up SAML SSO in your Workspace](/docs/getting-started/single-sign-on/setting-up-saml-sso/choose-a-shortname/). Remember — these are unique to your Workspace.
- You’ll need to place the **EntityID** value in **Audience** field.
- Set the **ACS URL** value in the **ACS URL** field.
The rest of the fields should be filled as follows:
- **Start URL**
- **Signed Response**: tick the checkbox
- **Name ID**: Basic information - Primary Email
- **Name ID Format**: UNSPECIFIED
**Note**: Make sure that there are no spaces at the end of these fields. Otherwise, the SSO process will fail.
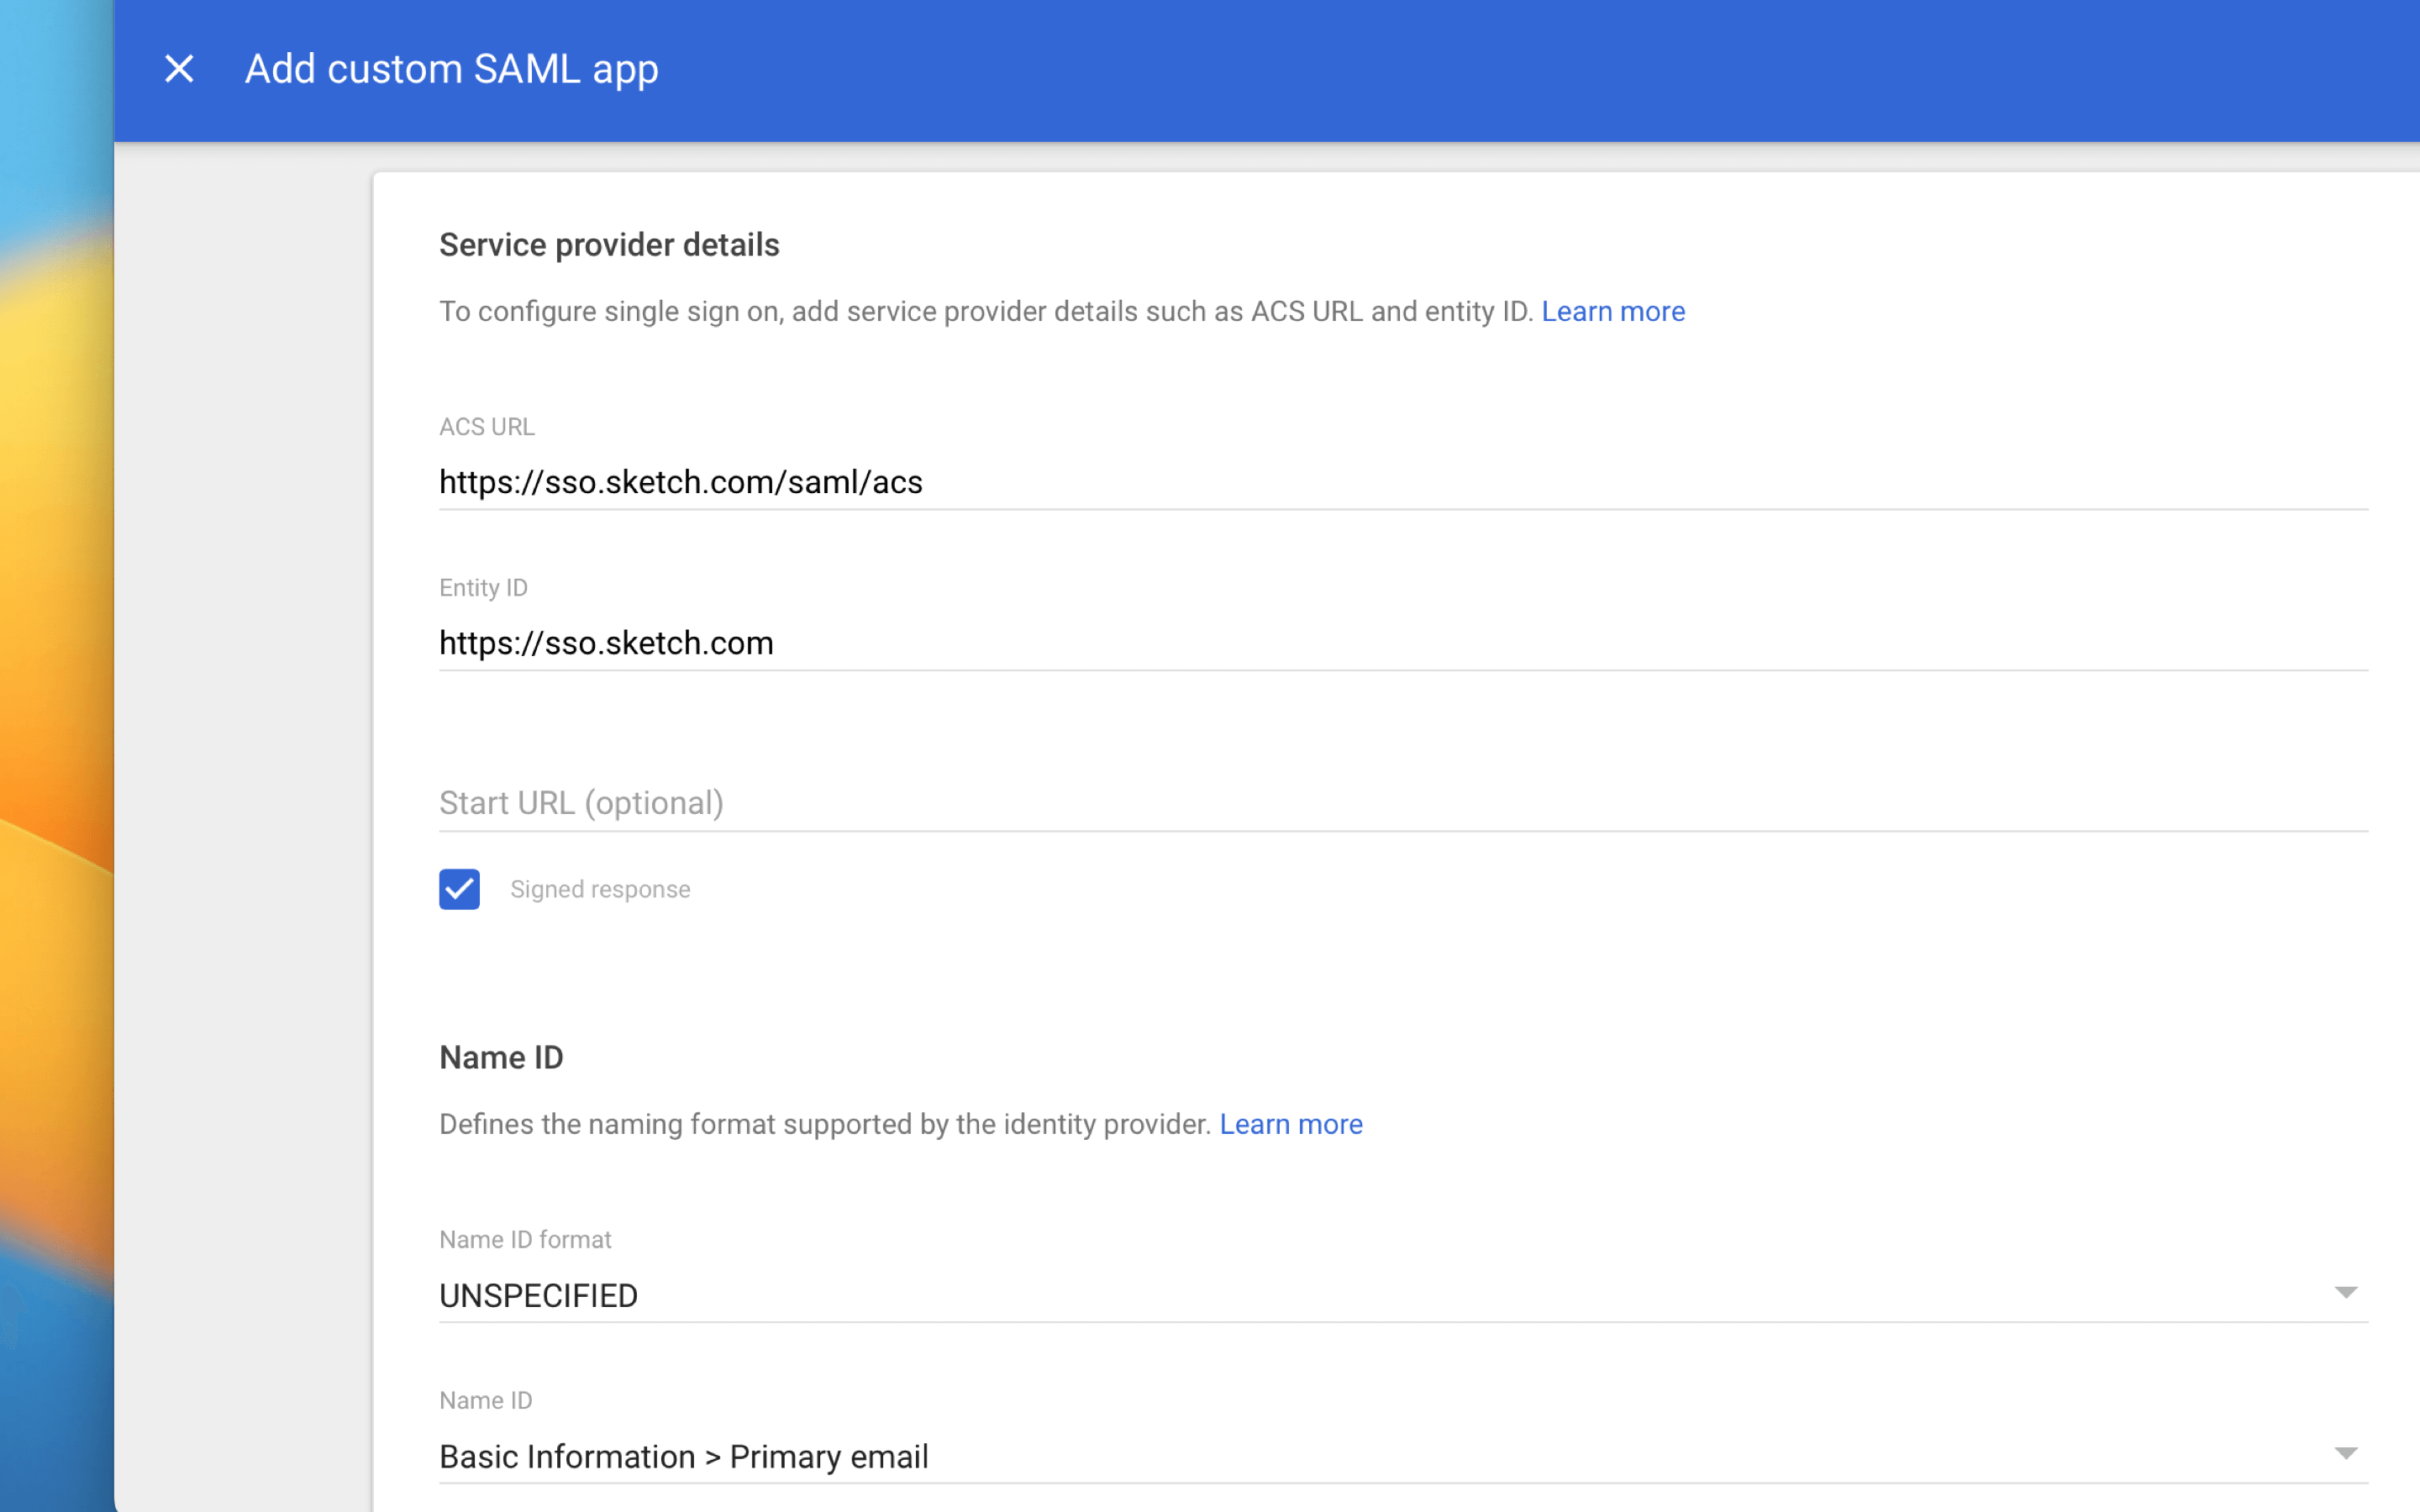
1. Click **Continue**.
1. Click **Add Mapping**.
1. Add the following three mappings:
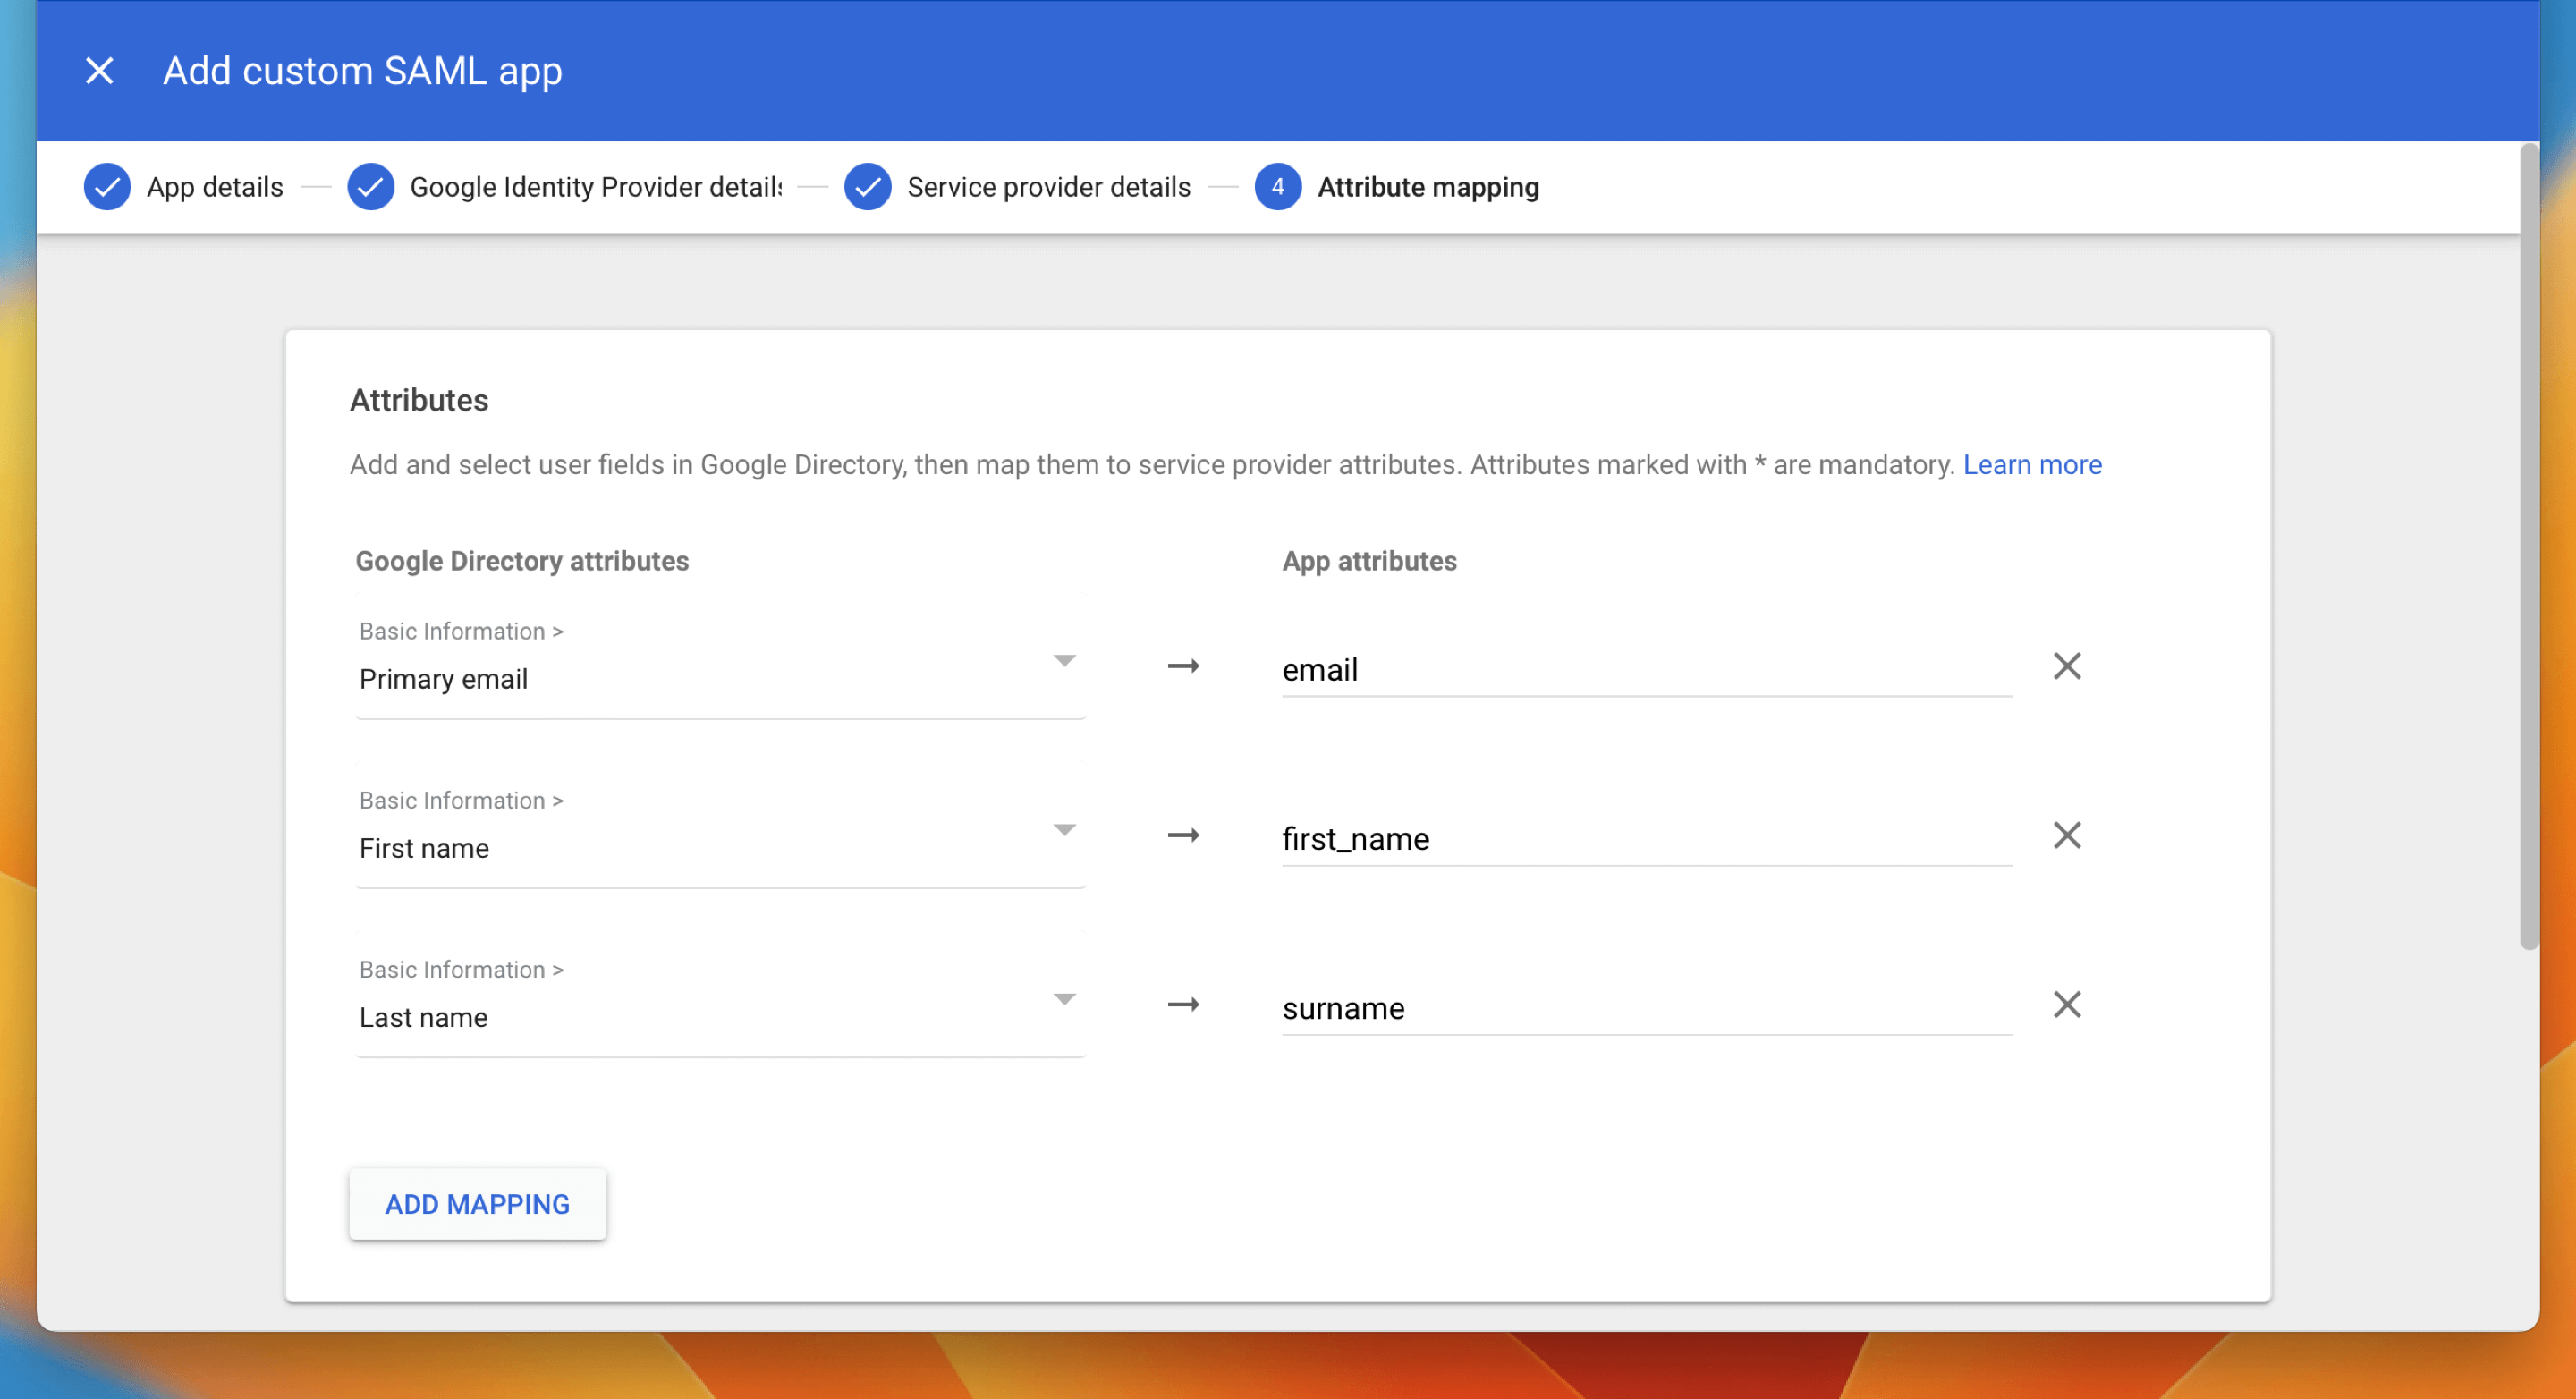
1. Click **Finish.**
1. Once you’re done, user access will be off. Click on the **User access** card.
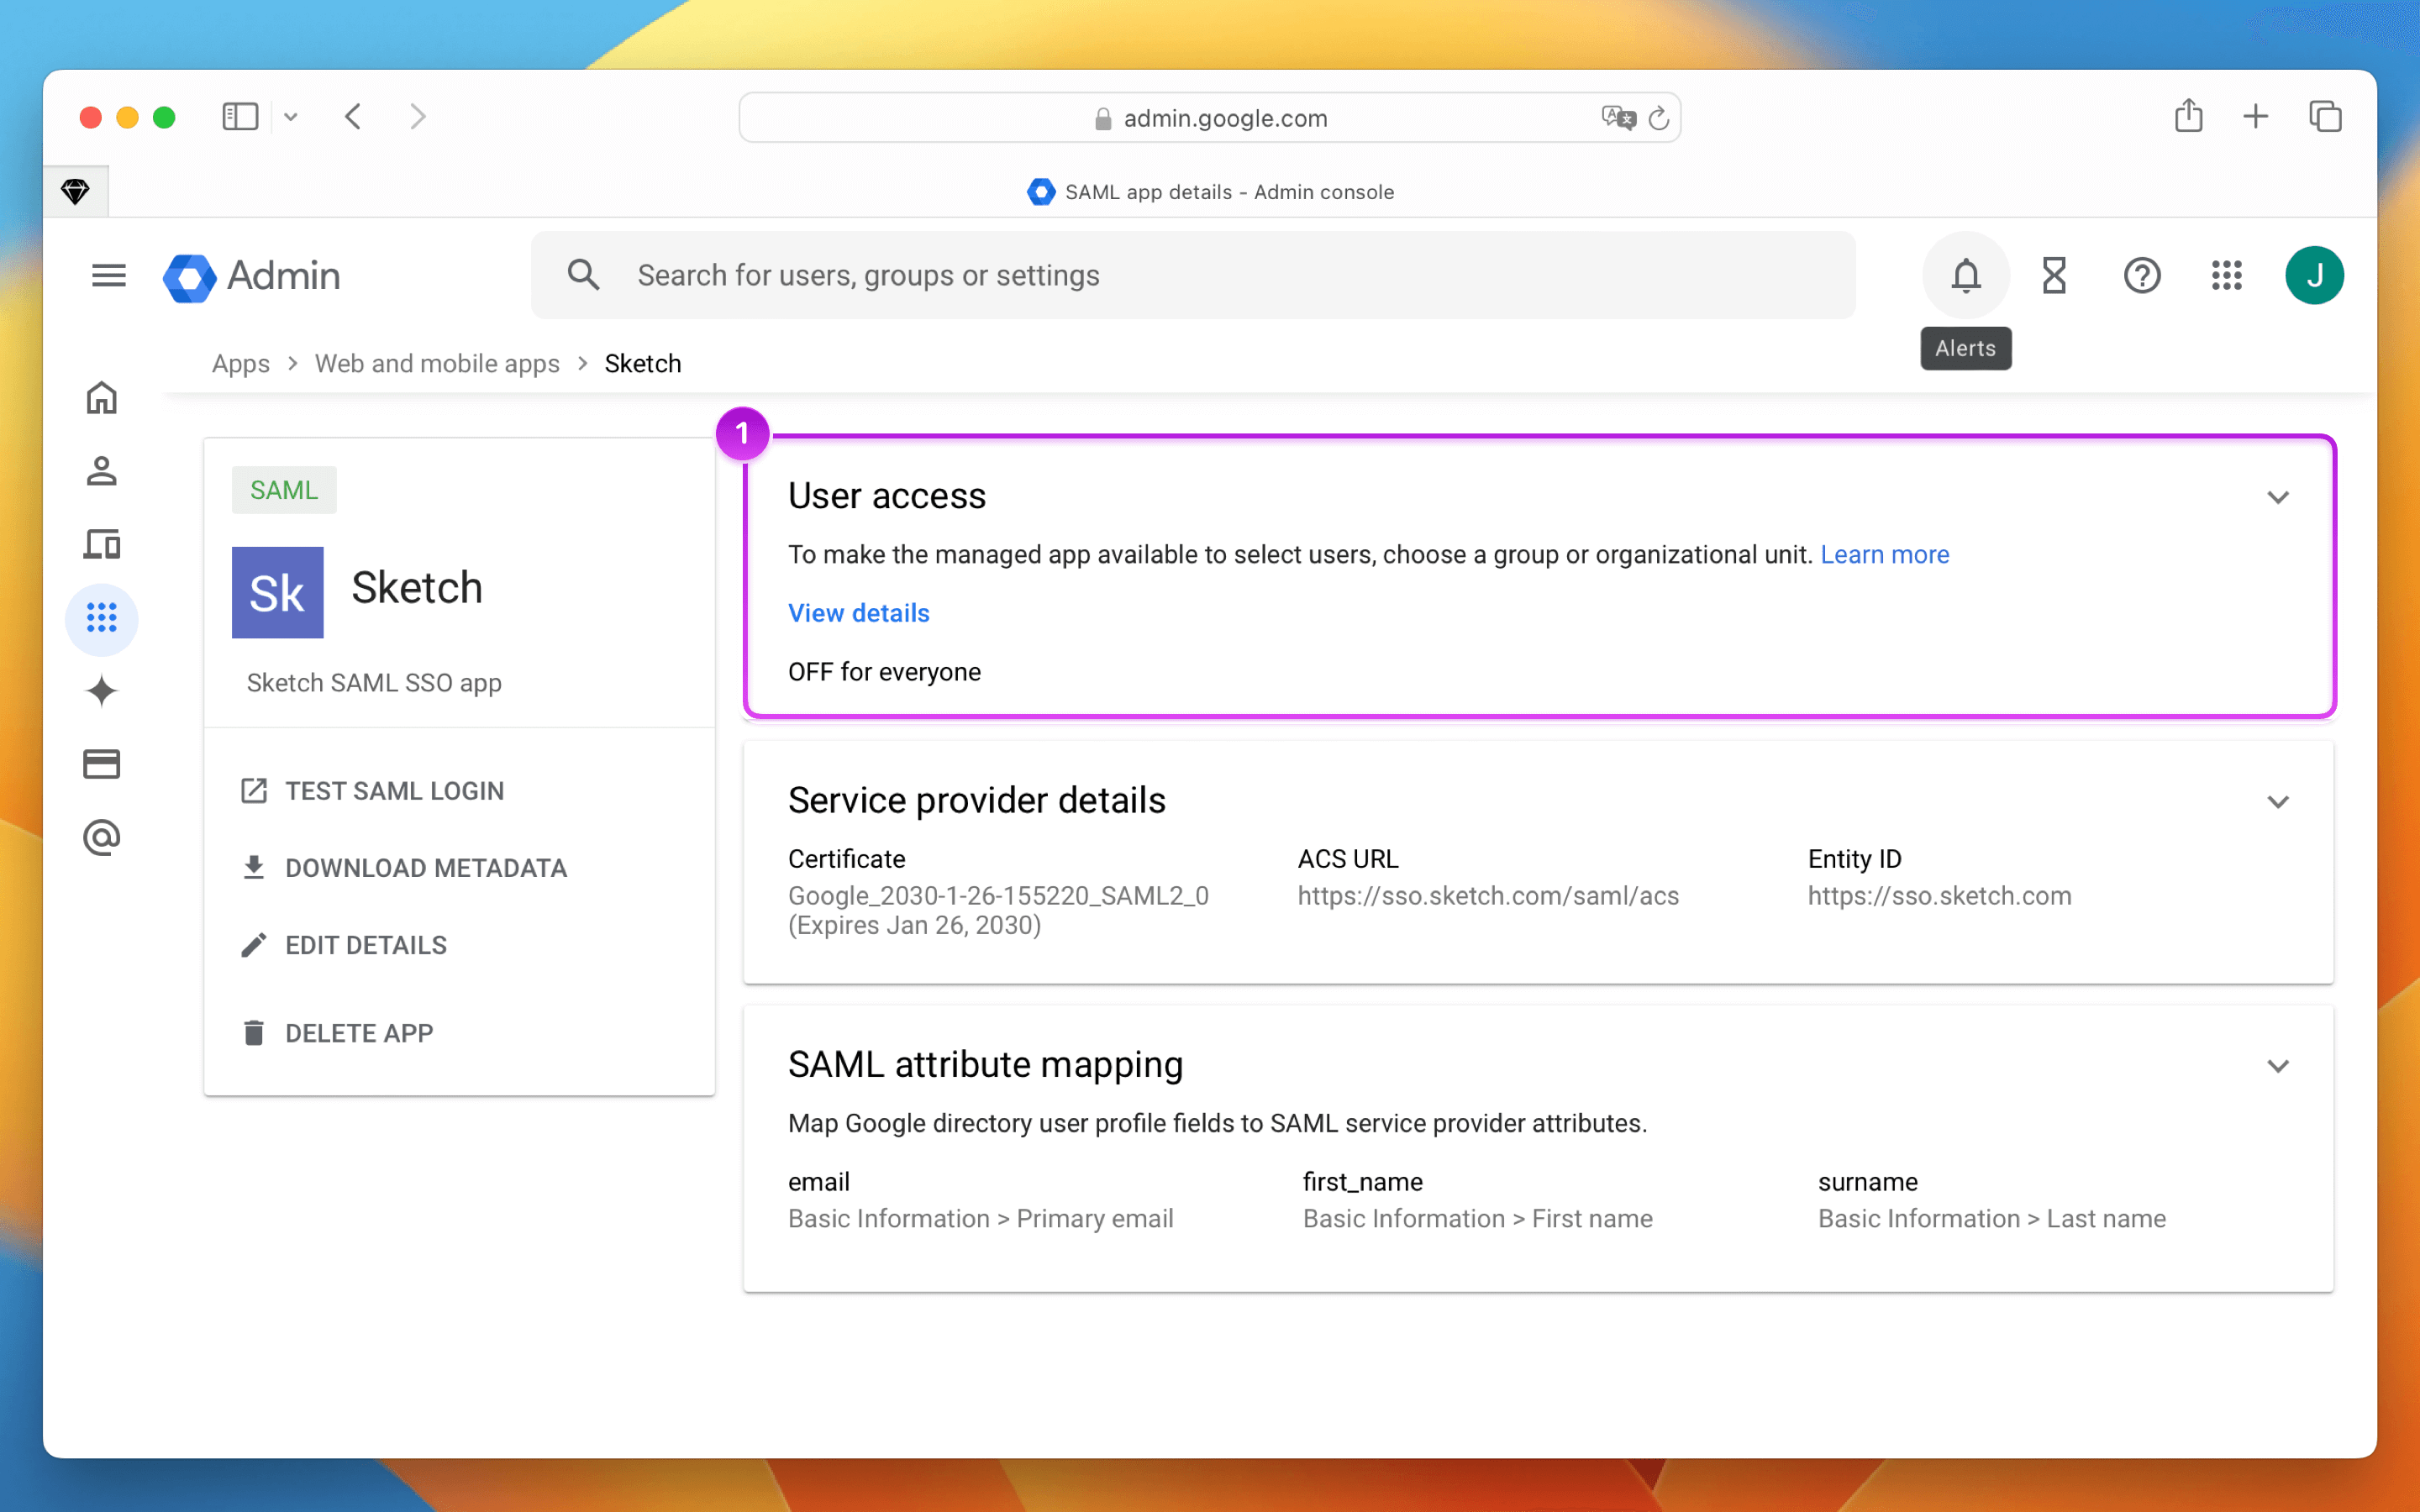
1. Enable access for everyone — or for the users and groups that you want.
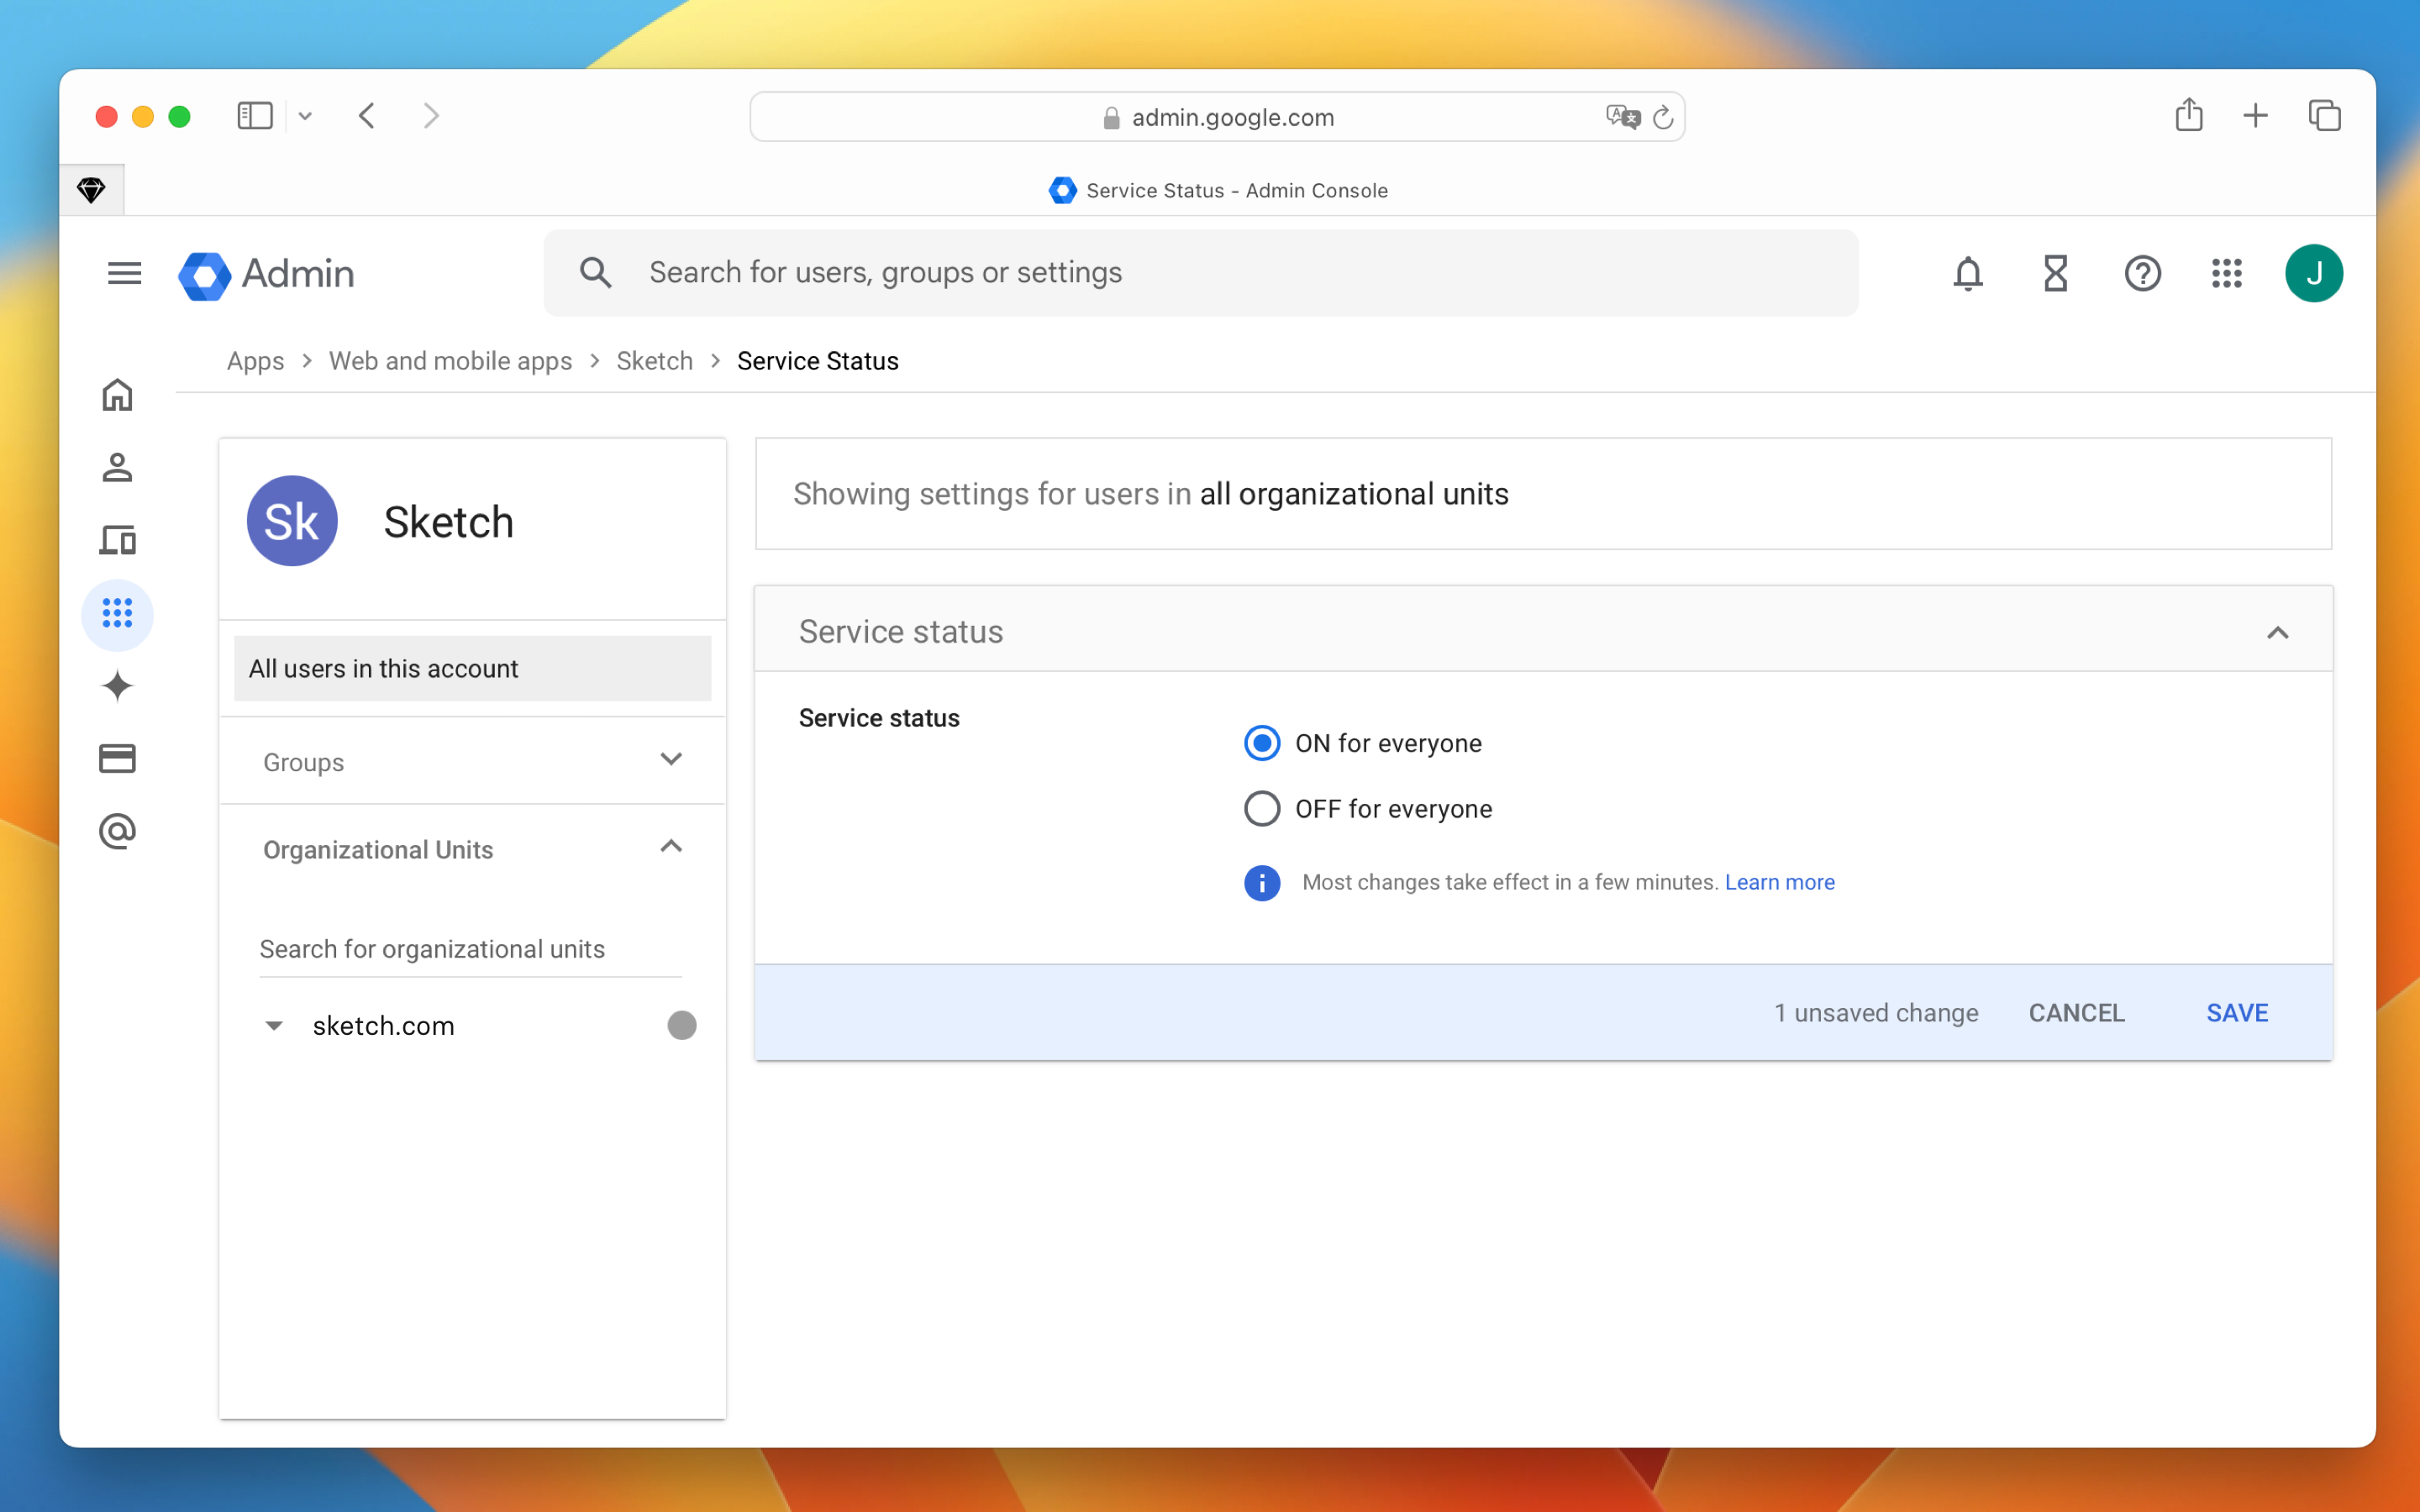
1. Head to [How to finish setting up SAML SSO in your Workspace](/docs/getting-started/single-sign-on/setting-up-saml-sso/finish-setting-saml-sso/) to finish the SAML SSO process in Sketch.
--------------------------------------------------------------------------------
title: "Microsoft Entra ID setup"
description: "Learn how to set up Microsoft Entra ID (formerly Azure Active Directory) as an identity provider for Sketch with the help of our step-by-step guides and video tutorials."
last_modified: "2026-01-23"
url: "https://www.sketch.com/docs/getting-started/single-sign-on/setting-up-saml-sso/setup-identity-provider/azure-active-directory/"
--------------------------------------------------------------------------------
## Microsoft Entra ID setup
1. Log in to Microsoft Entra ID as an Admin.
1. Go to the **Microsoft Entra ID** page.
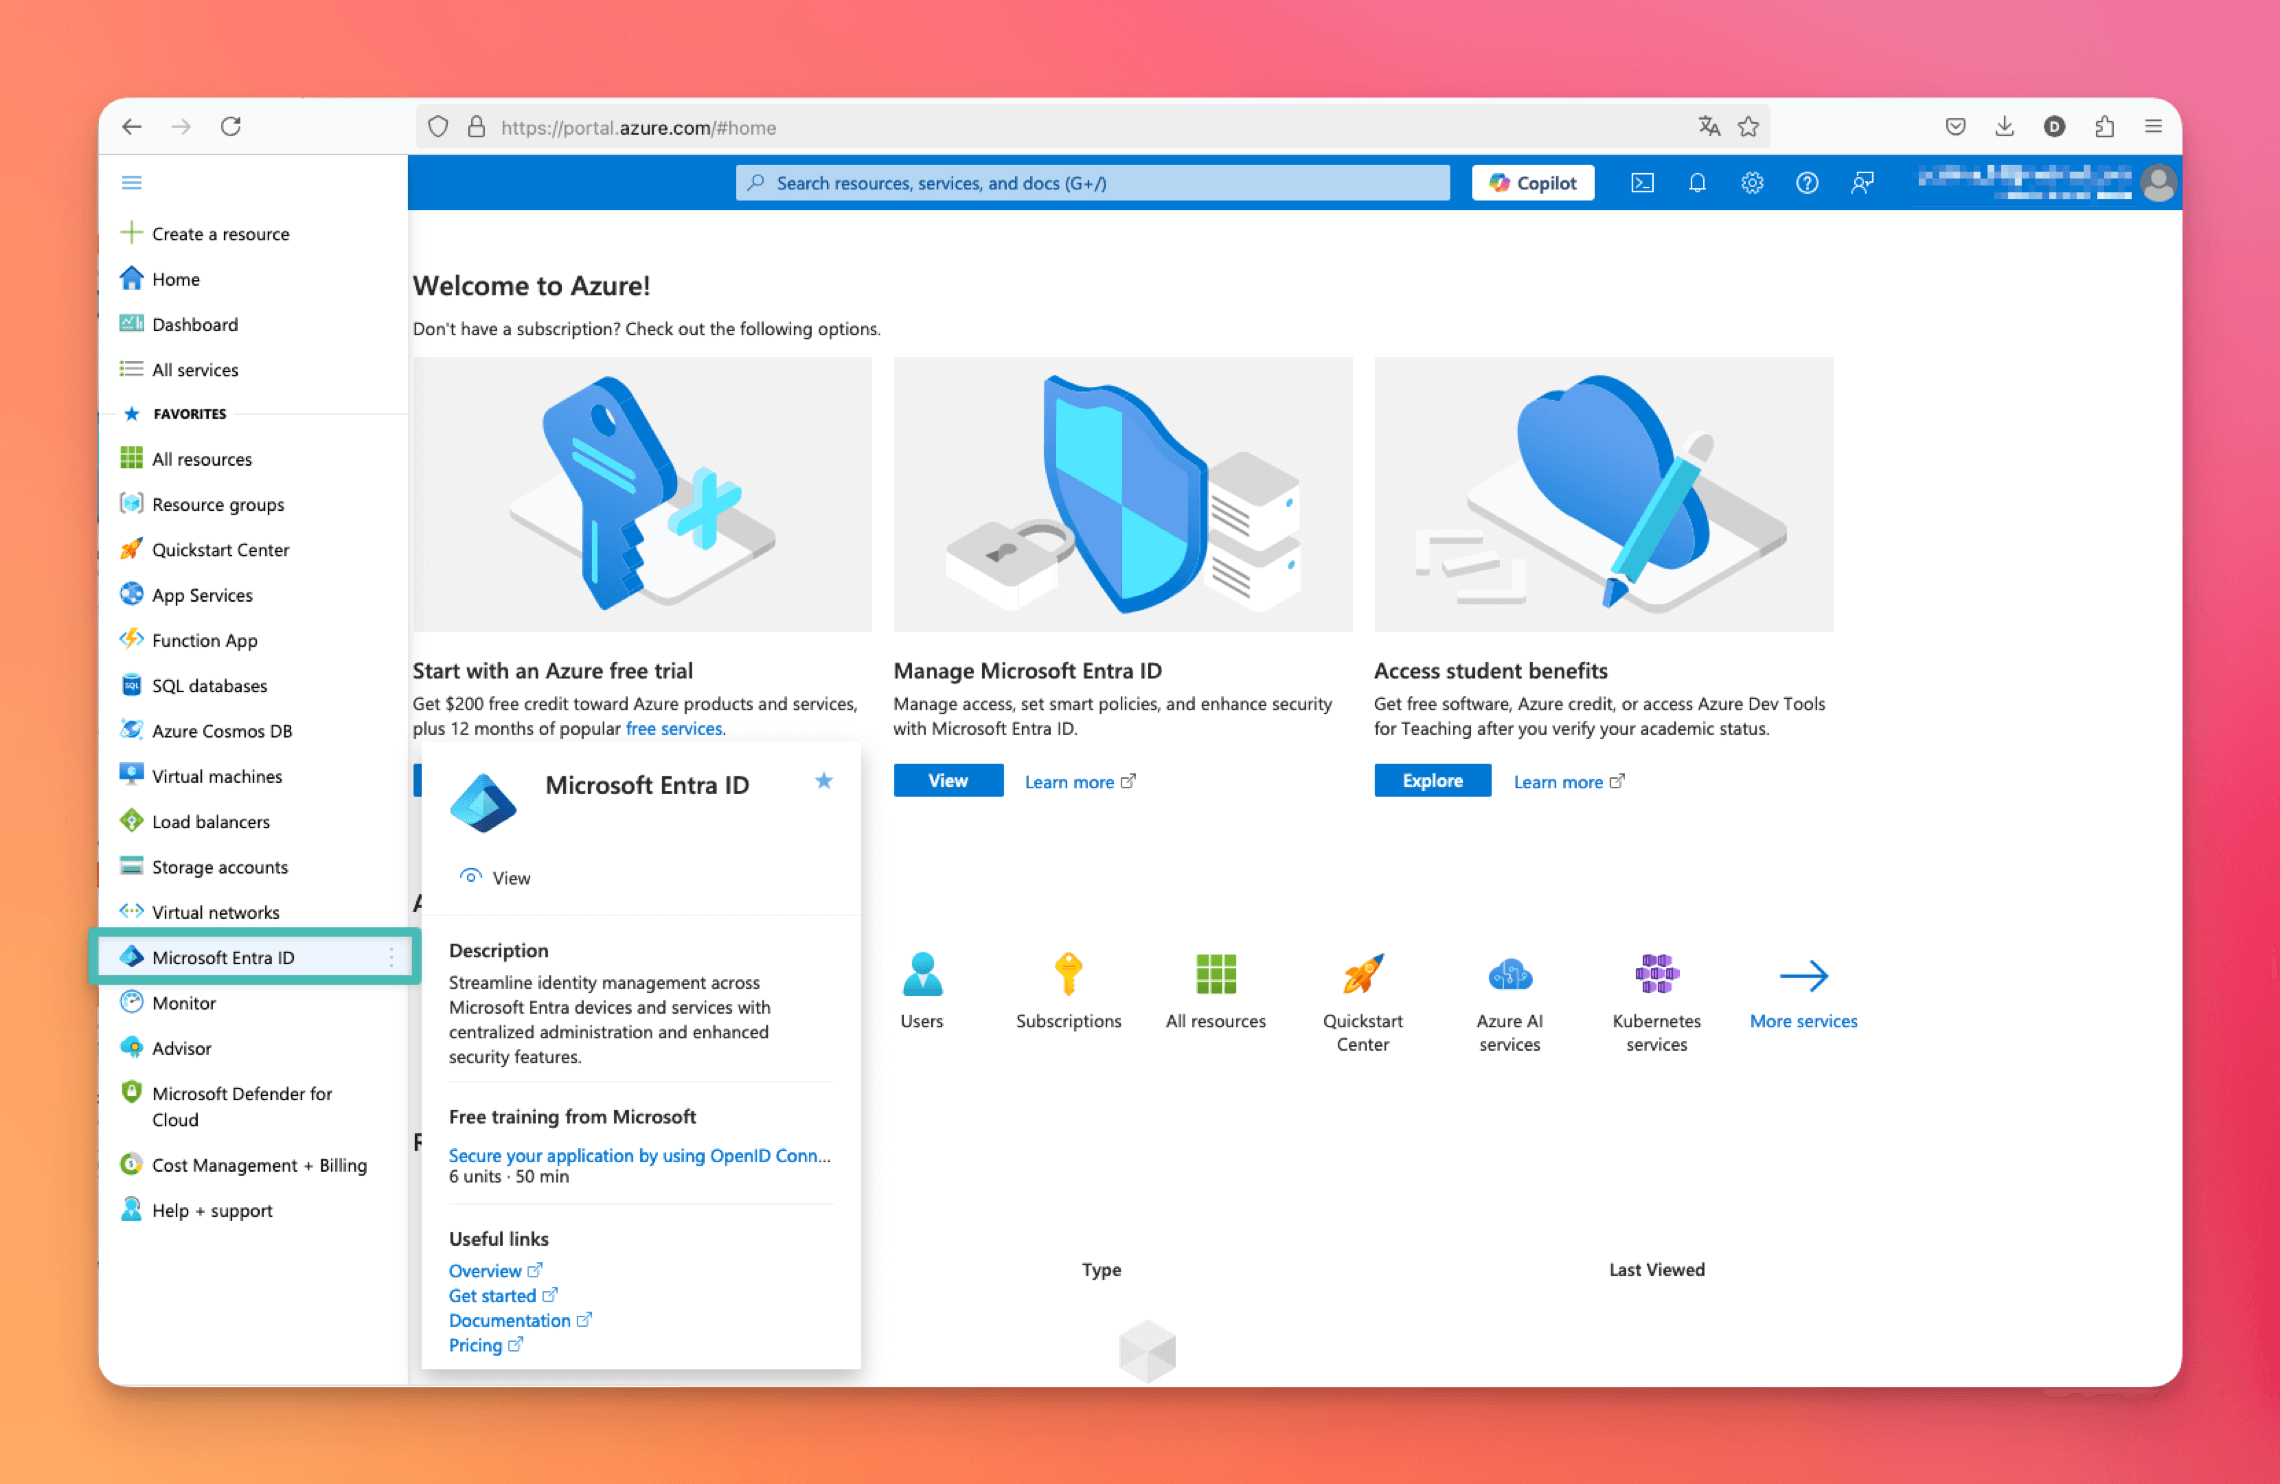
1. Click on **Enterprise applications**.
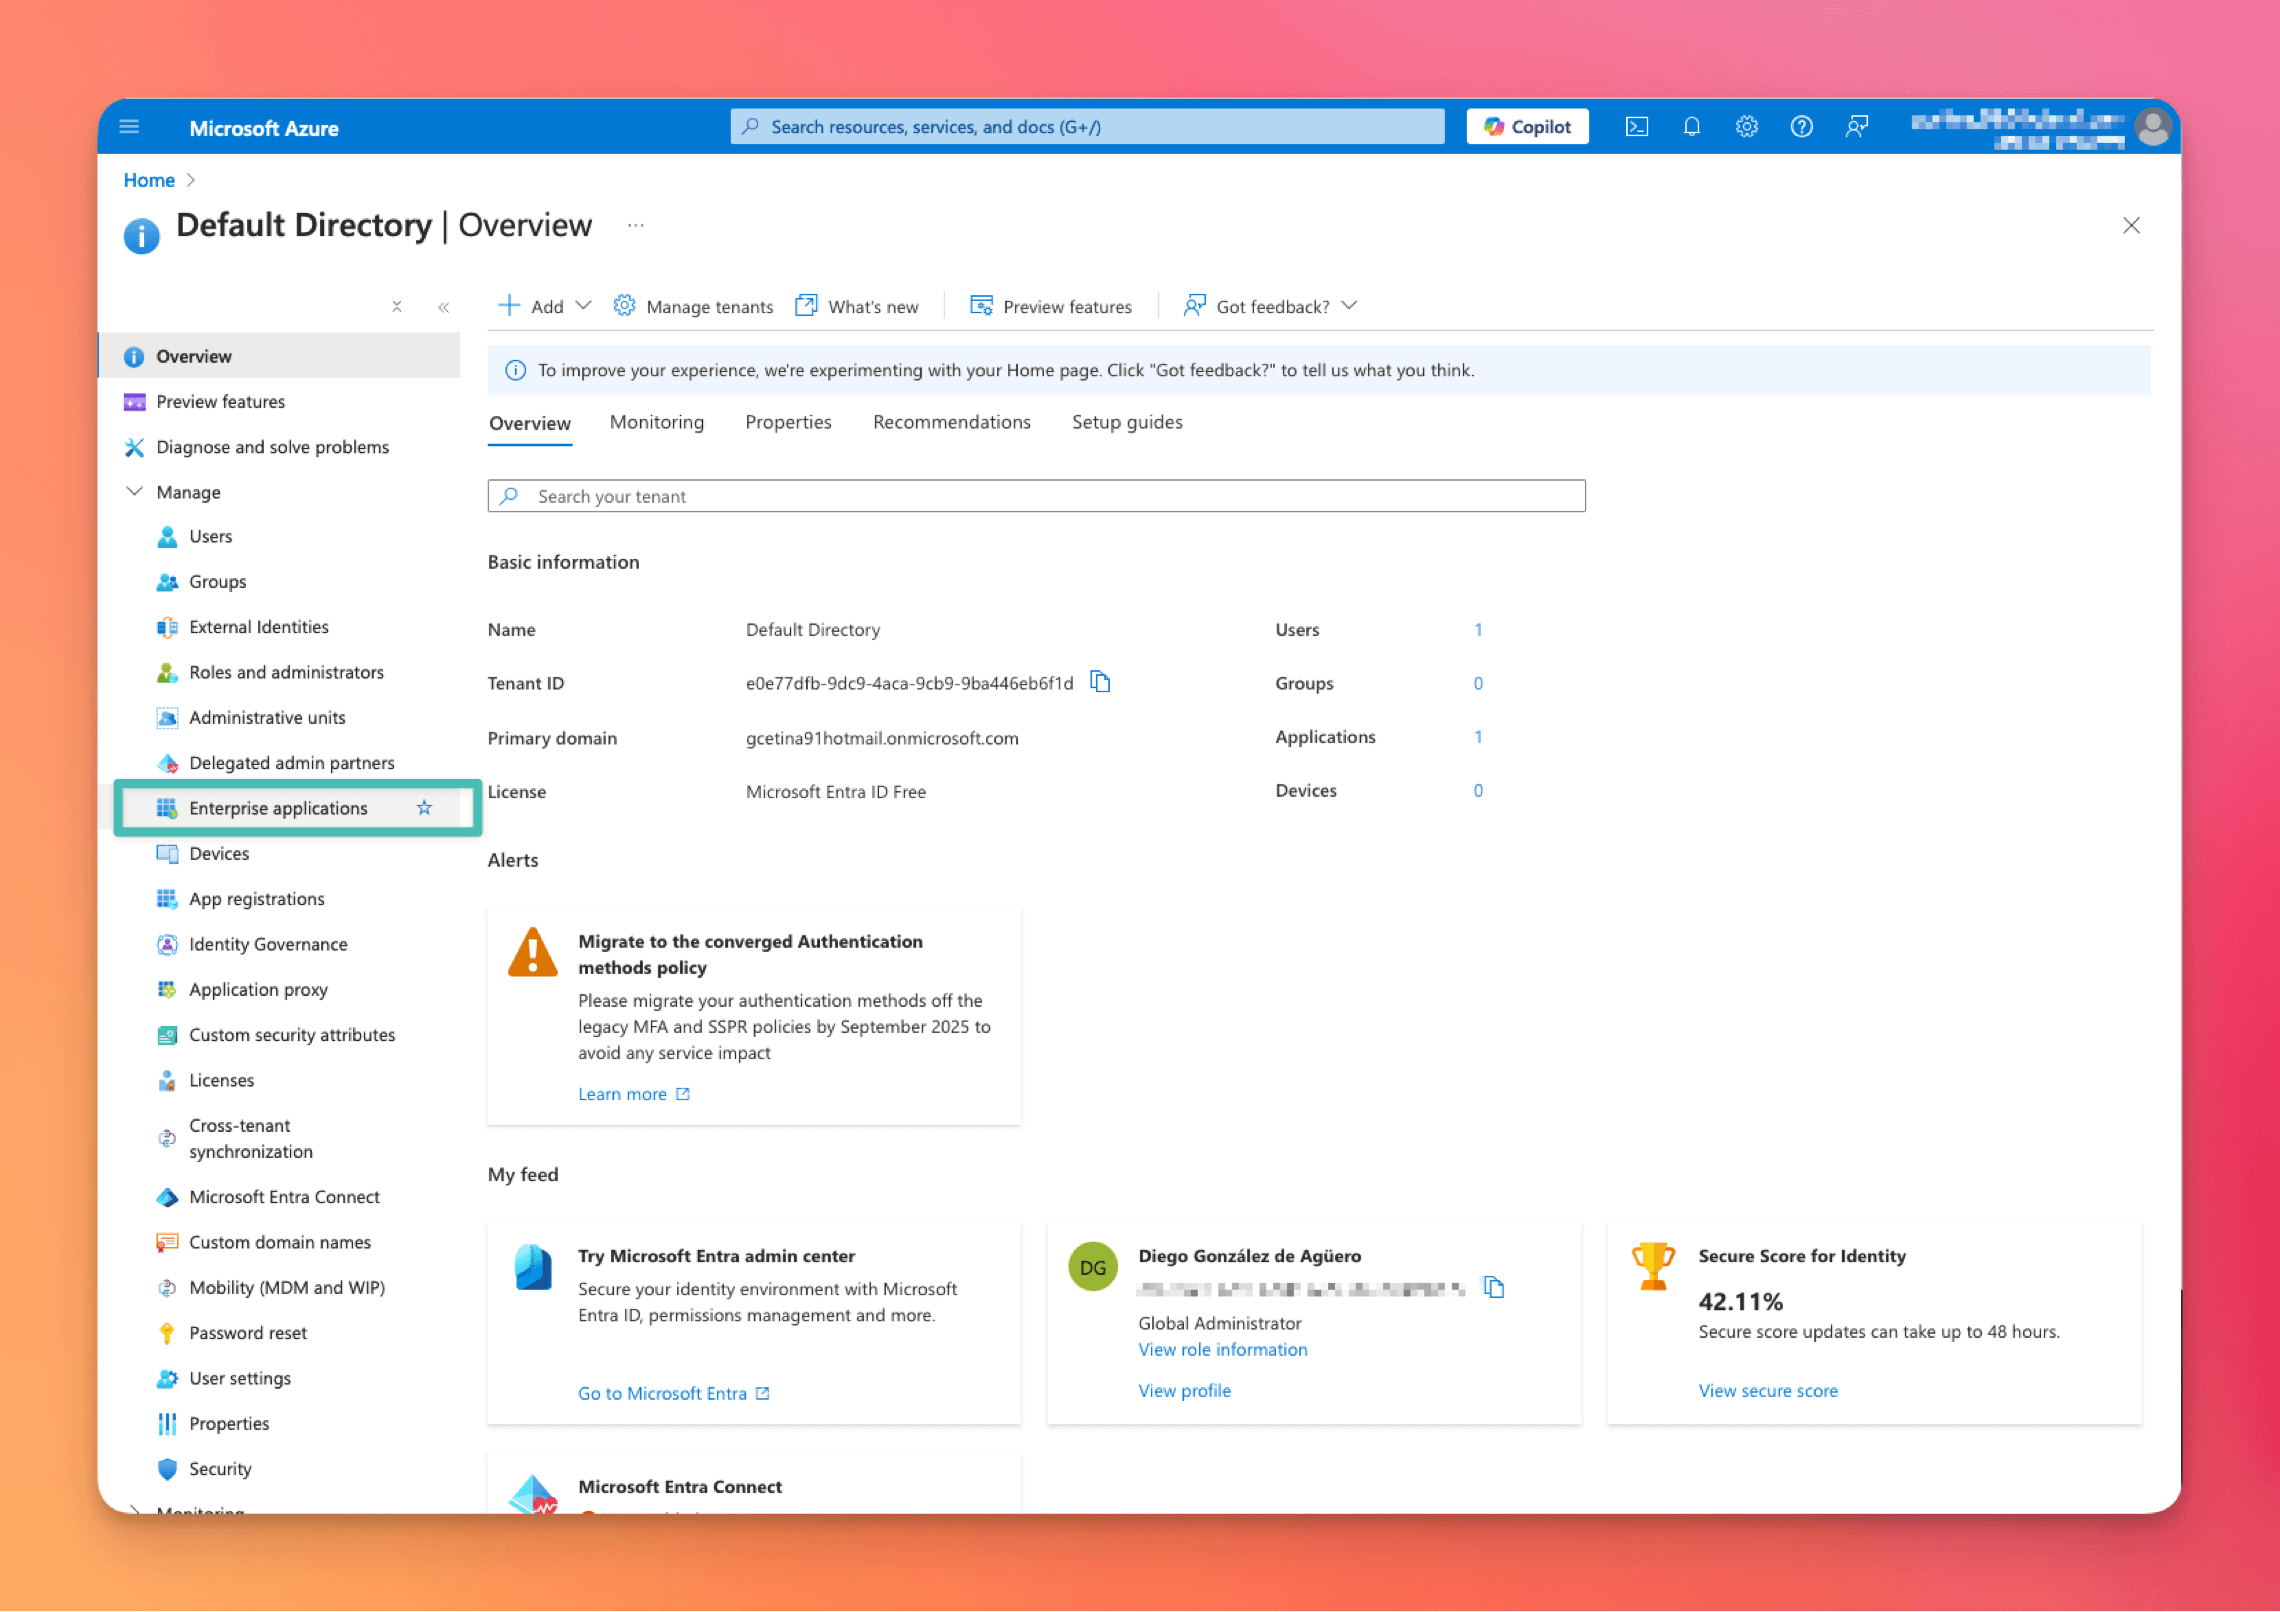
1. Click on **New application**.
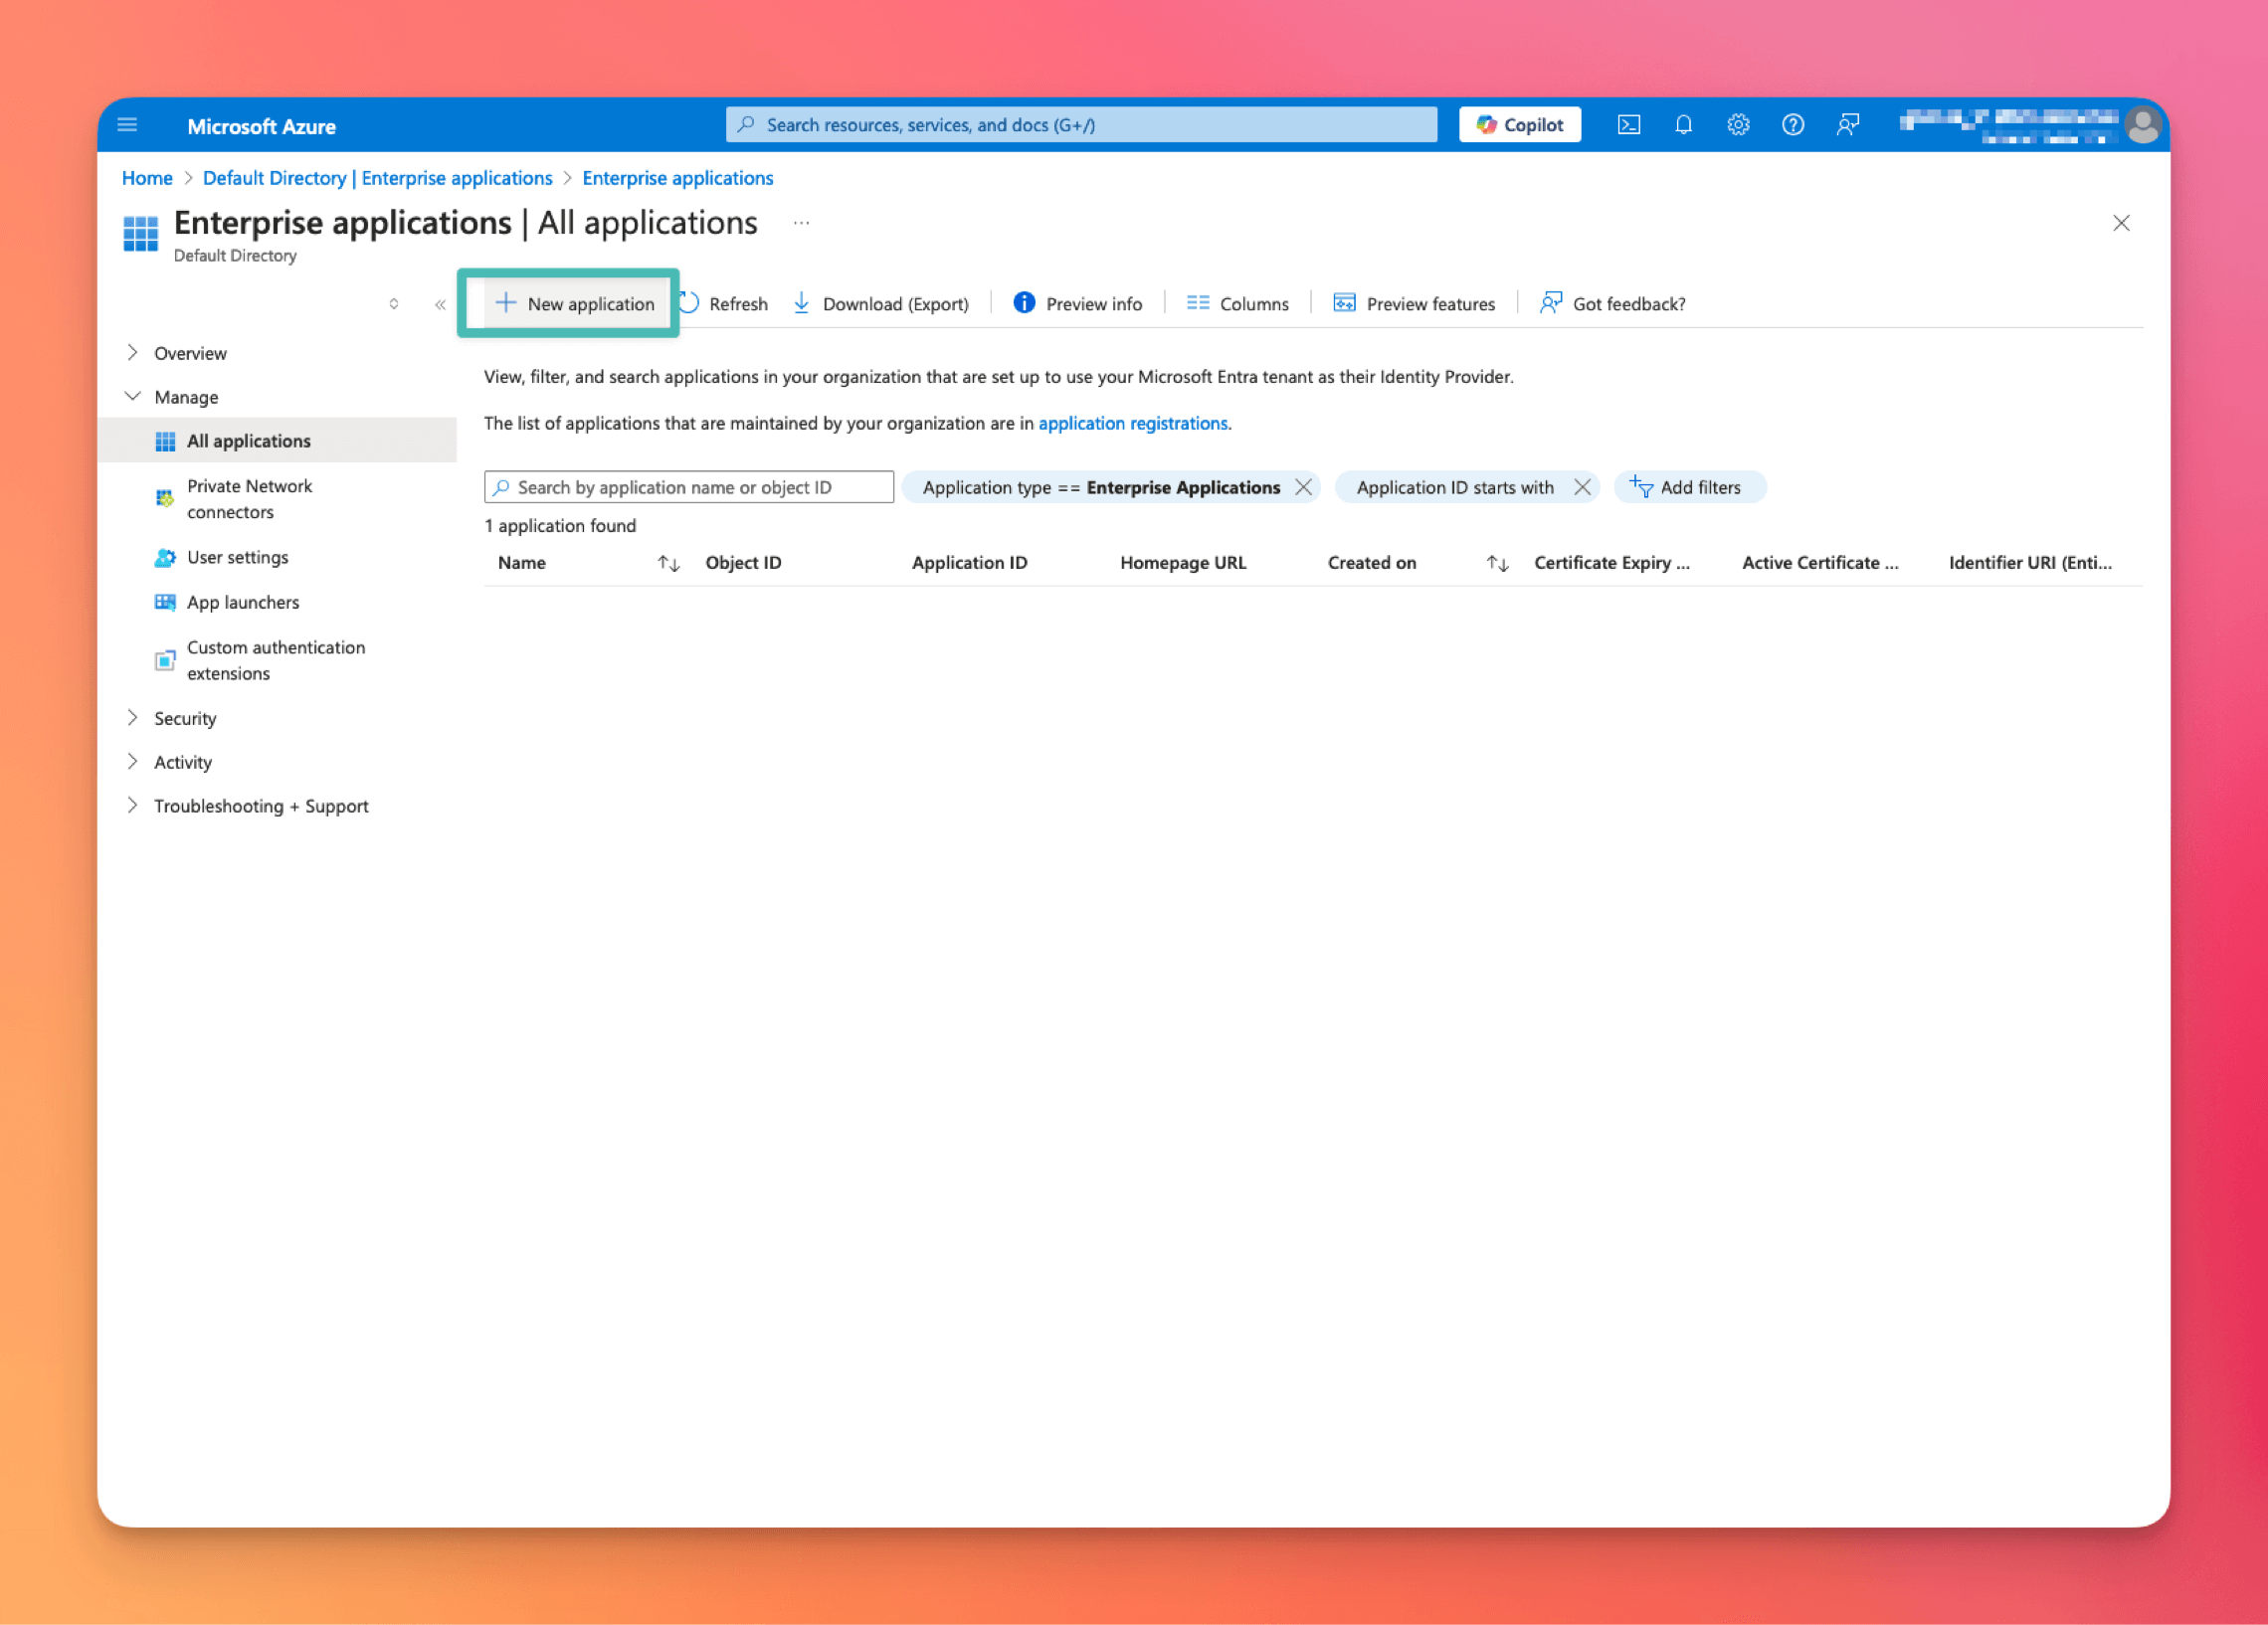
1. In the **Browse Microsoft Entra Gallery** page, type `sketch` in the search box.
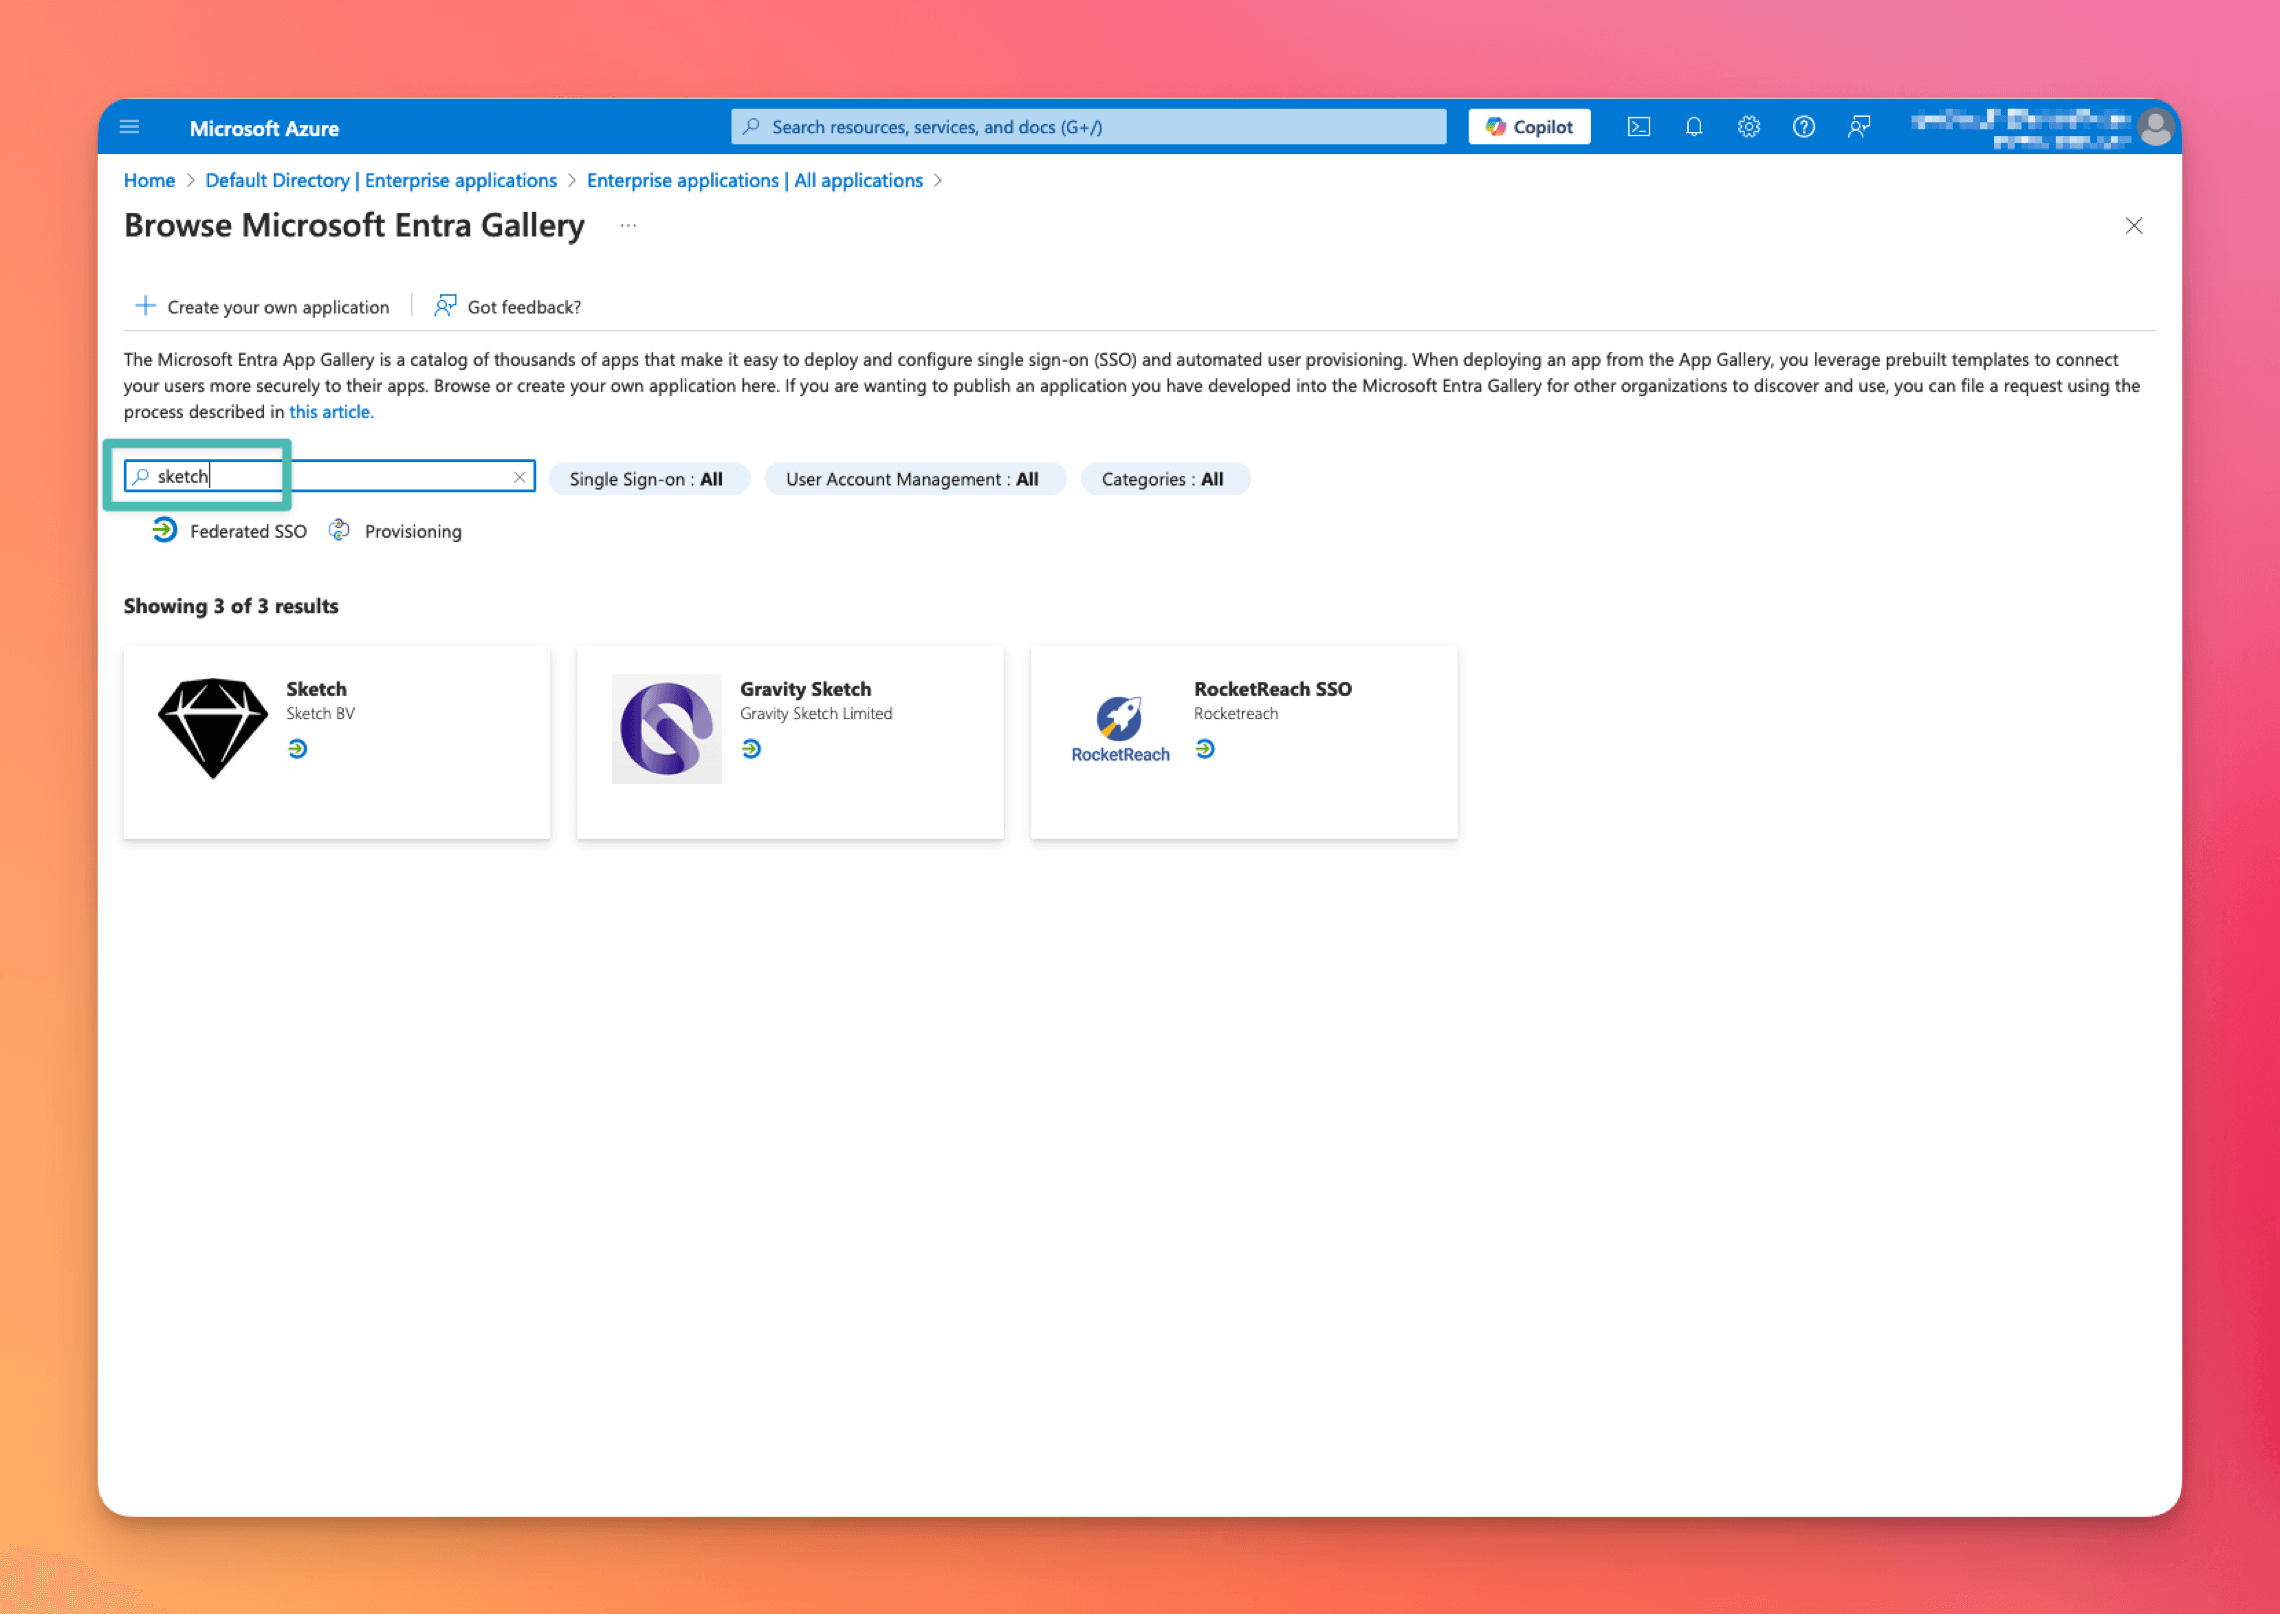
1. Select the **Sketch** tile from the results panel and then add the app. Give it a name, for example `Sketch` and click **Create**. Wait a few seconds while the app is added to your tenant.
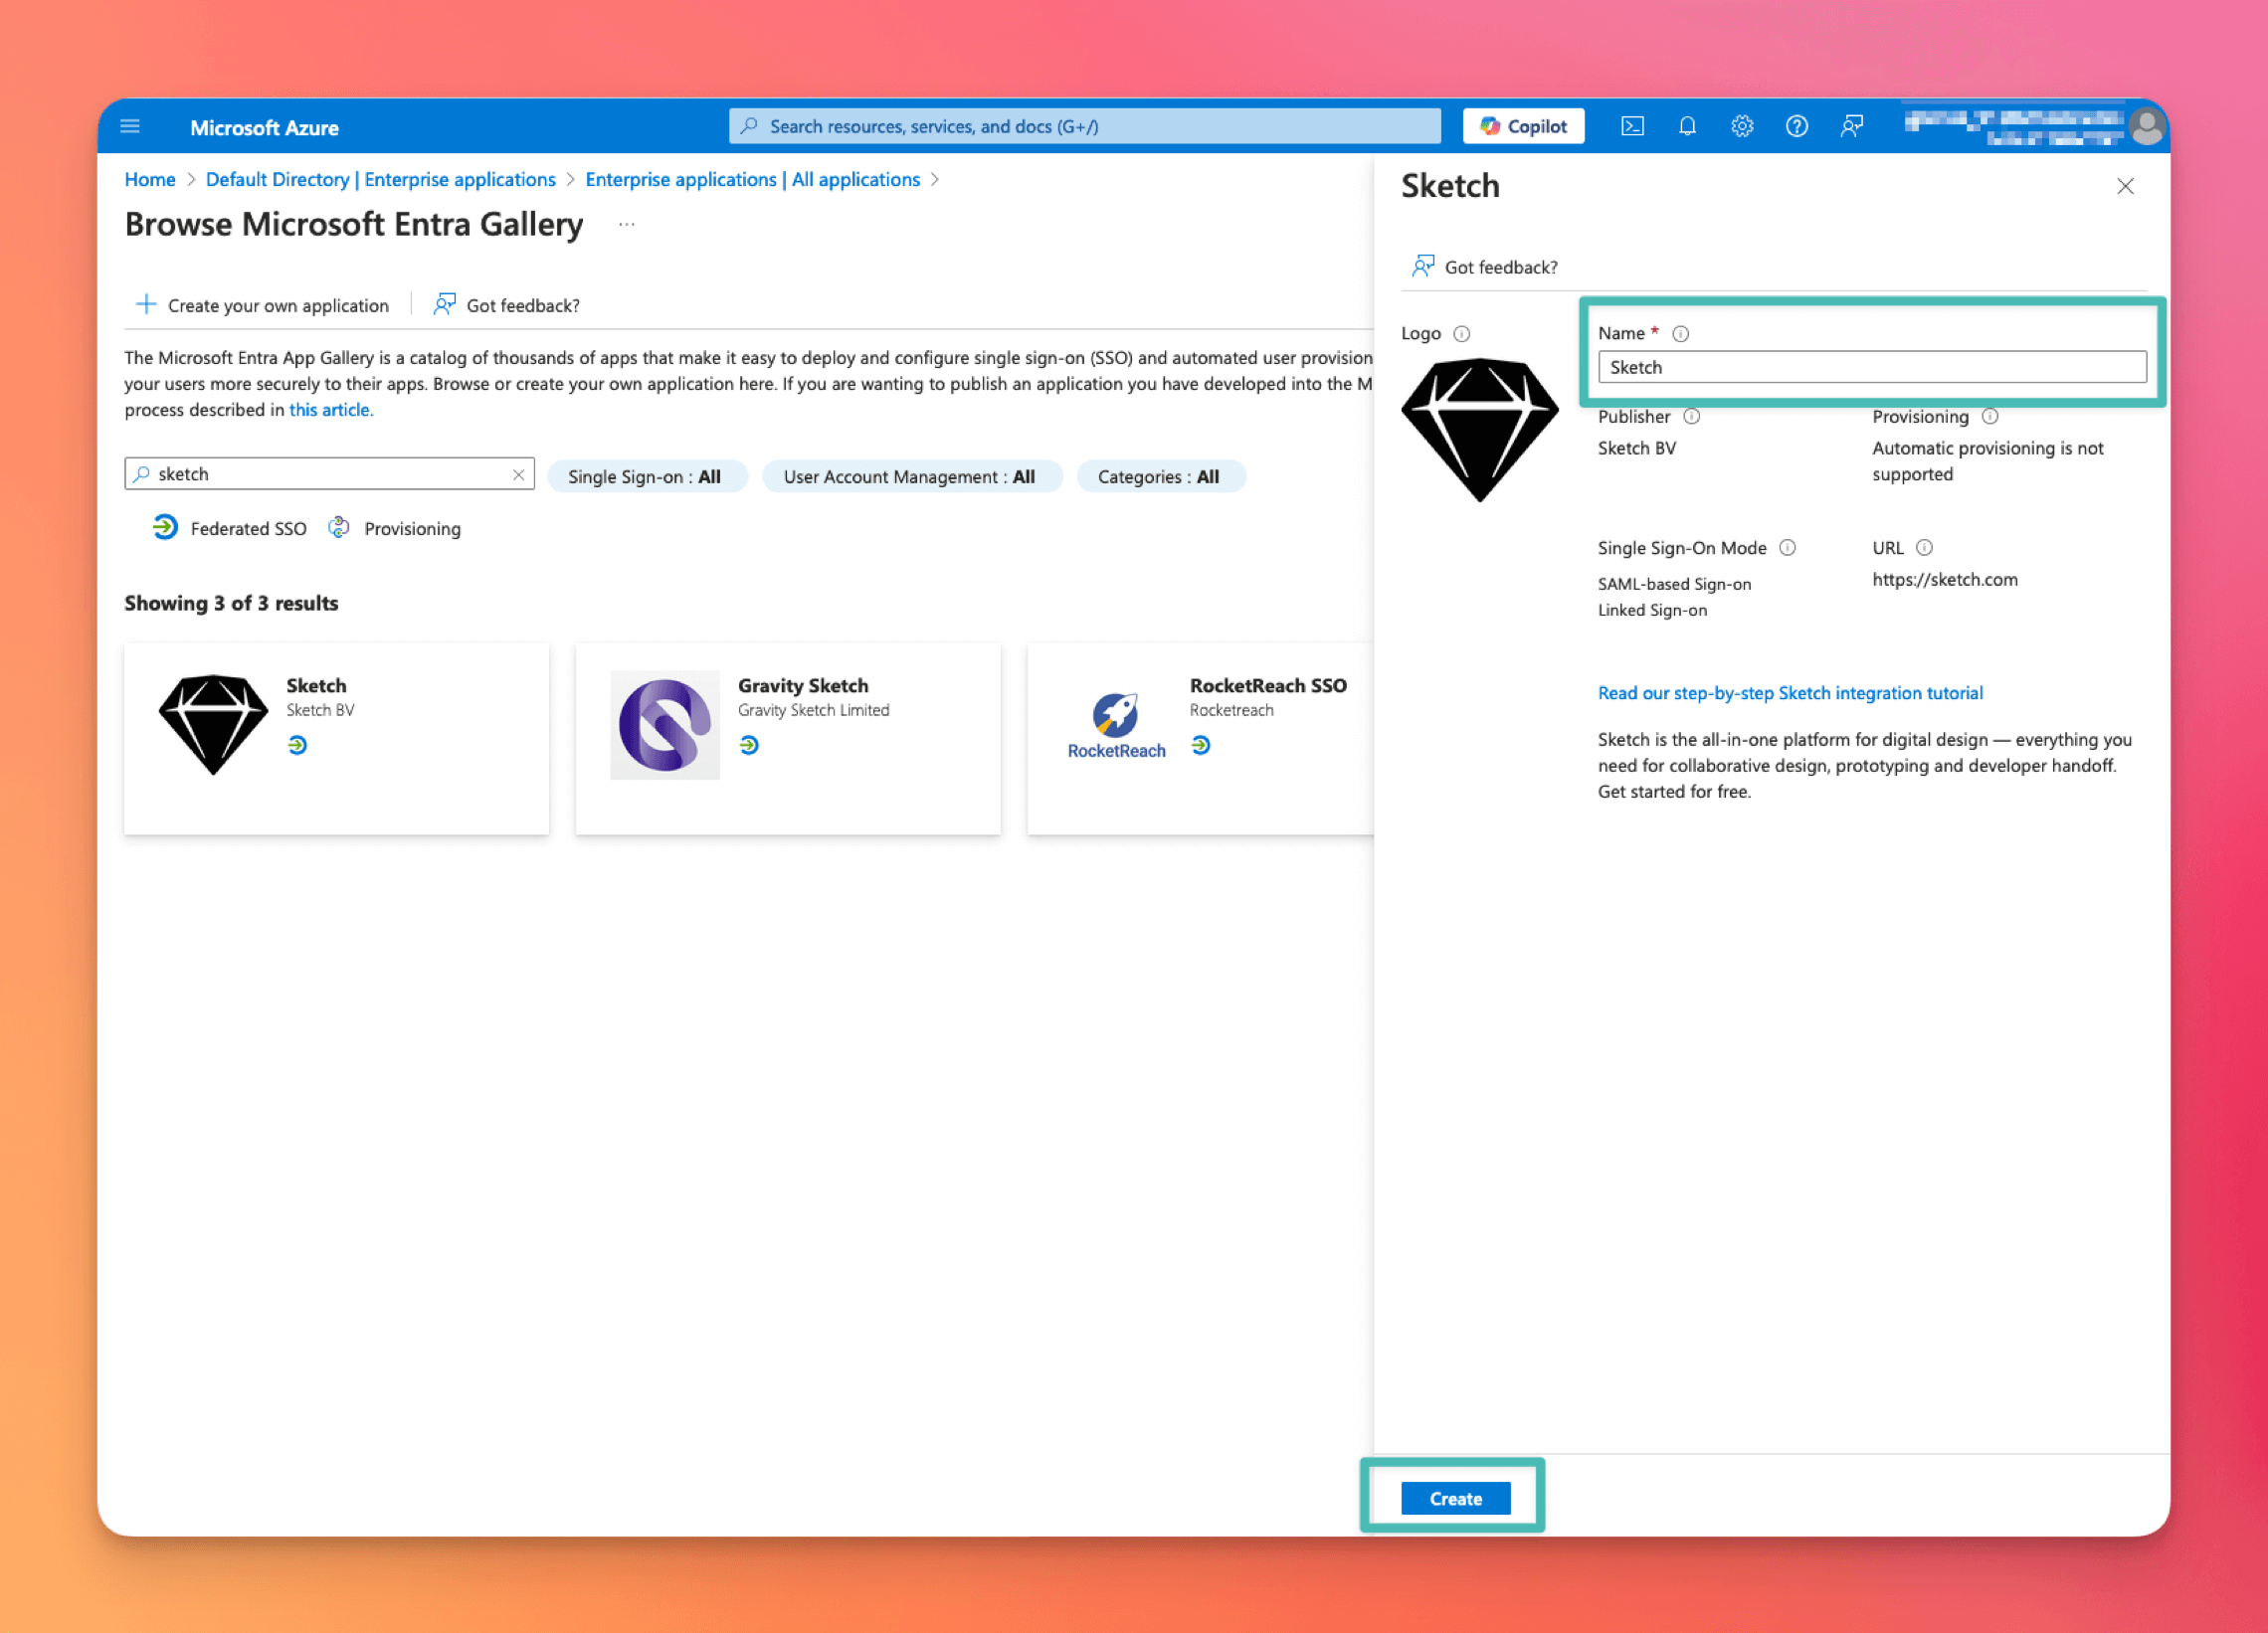
1. Click on **Single sign-on**.
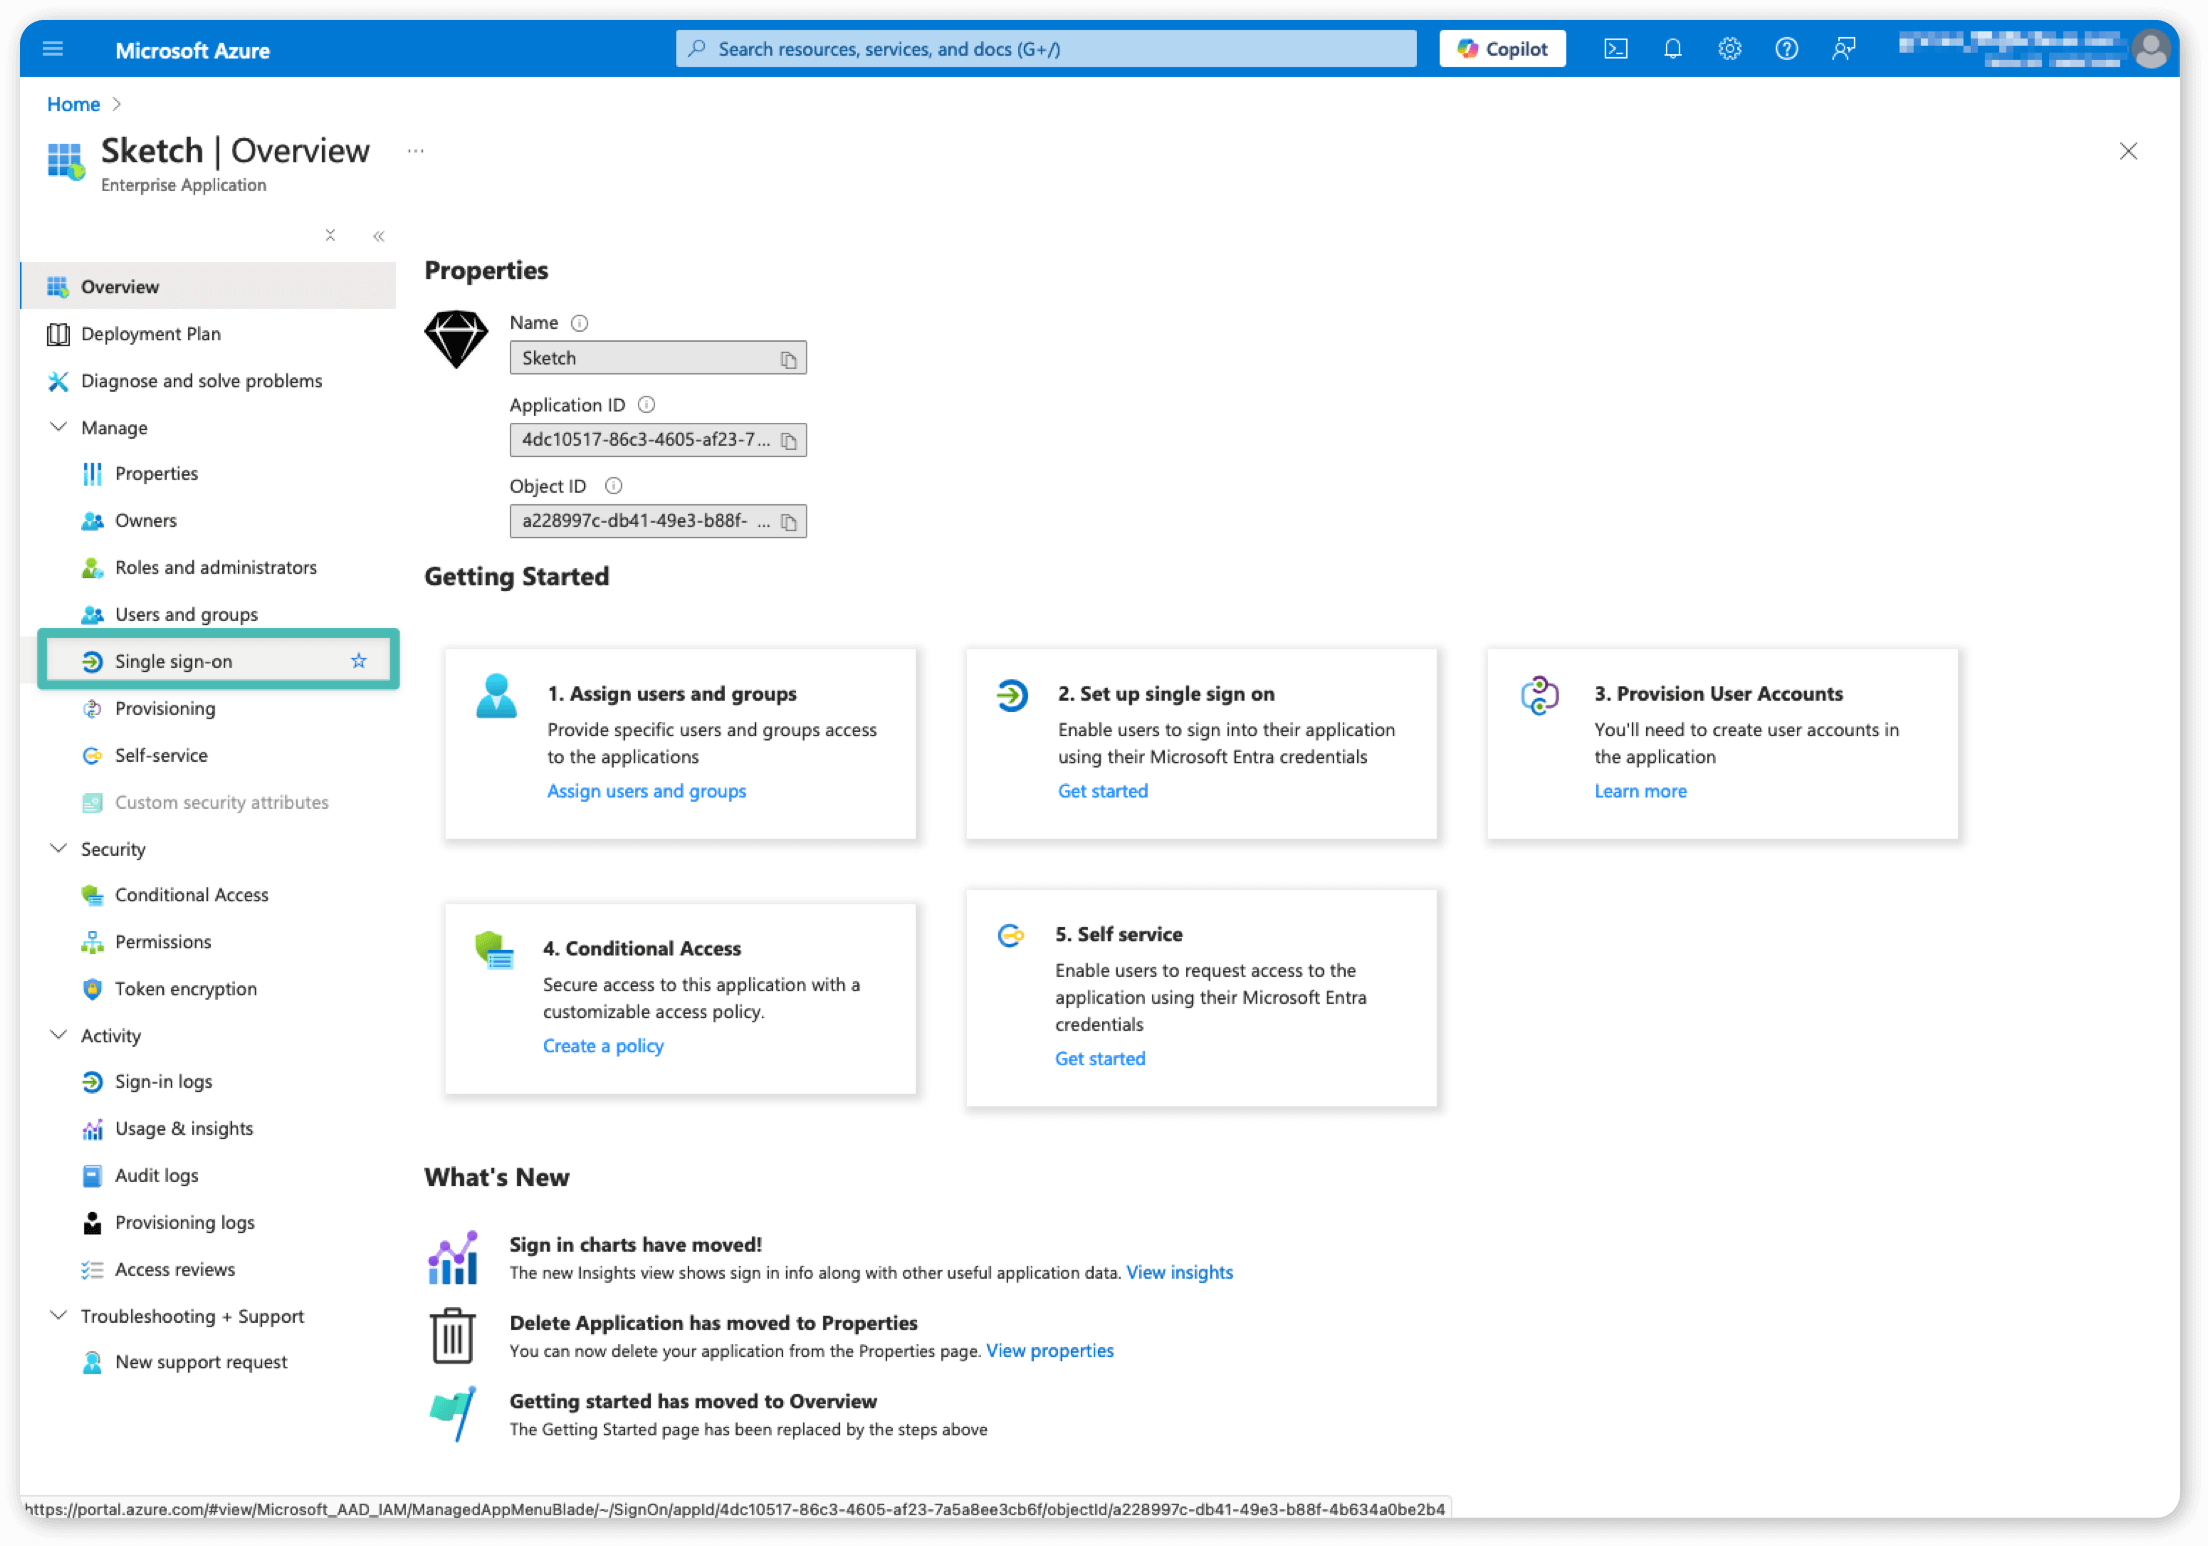
1. Select the **SAML** tile.
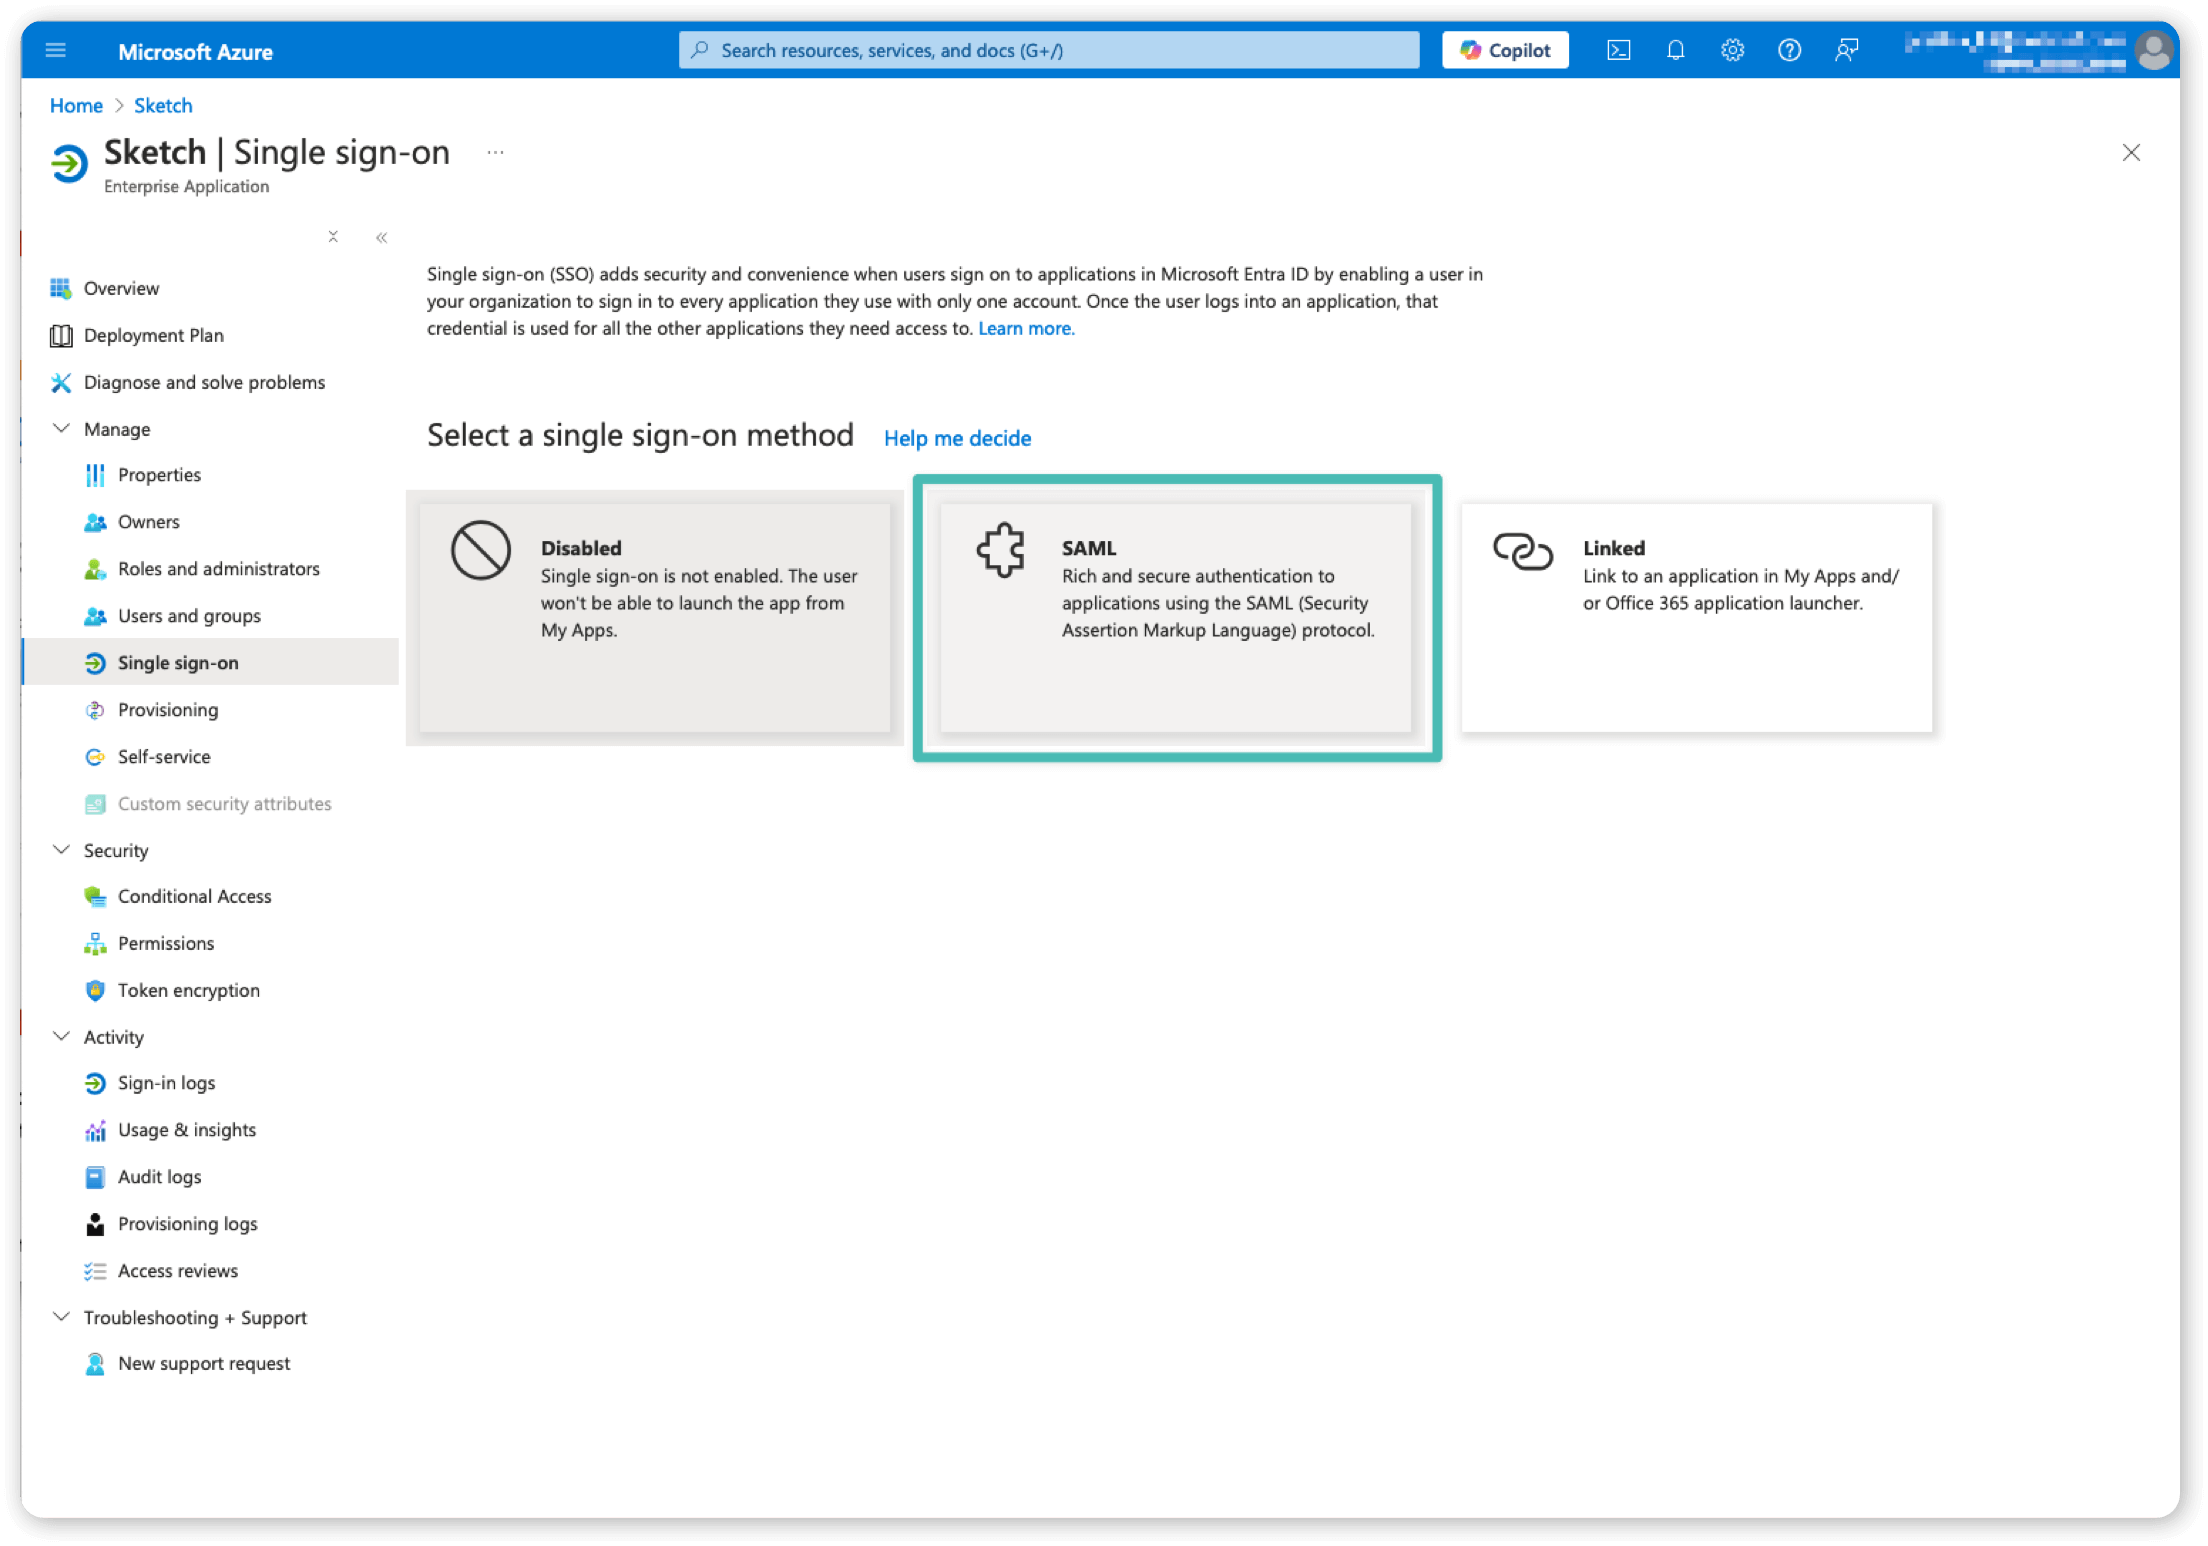
1. Complete the **Basic SAML Configuration** section using the following information from the Single Sign-On tab of the People & Settings page in the Sketch web app:
- **Identifier (Entity ID)**: `Your Workspace’s Entity ID`
- **Reply URL (Assertion Consumer Service URL)**: `Your Workspace’s ACS URL`
- **Sign-on URL**: `https://www.sketch.com`
**Note**: Make sure that there are no spaces at the end of these fields — if there are, the SSO process will fail.
Next, complete the **Attributes & Claims** section. Make sure you don’t use any namespace.
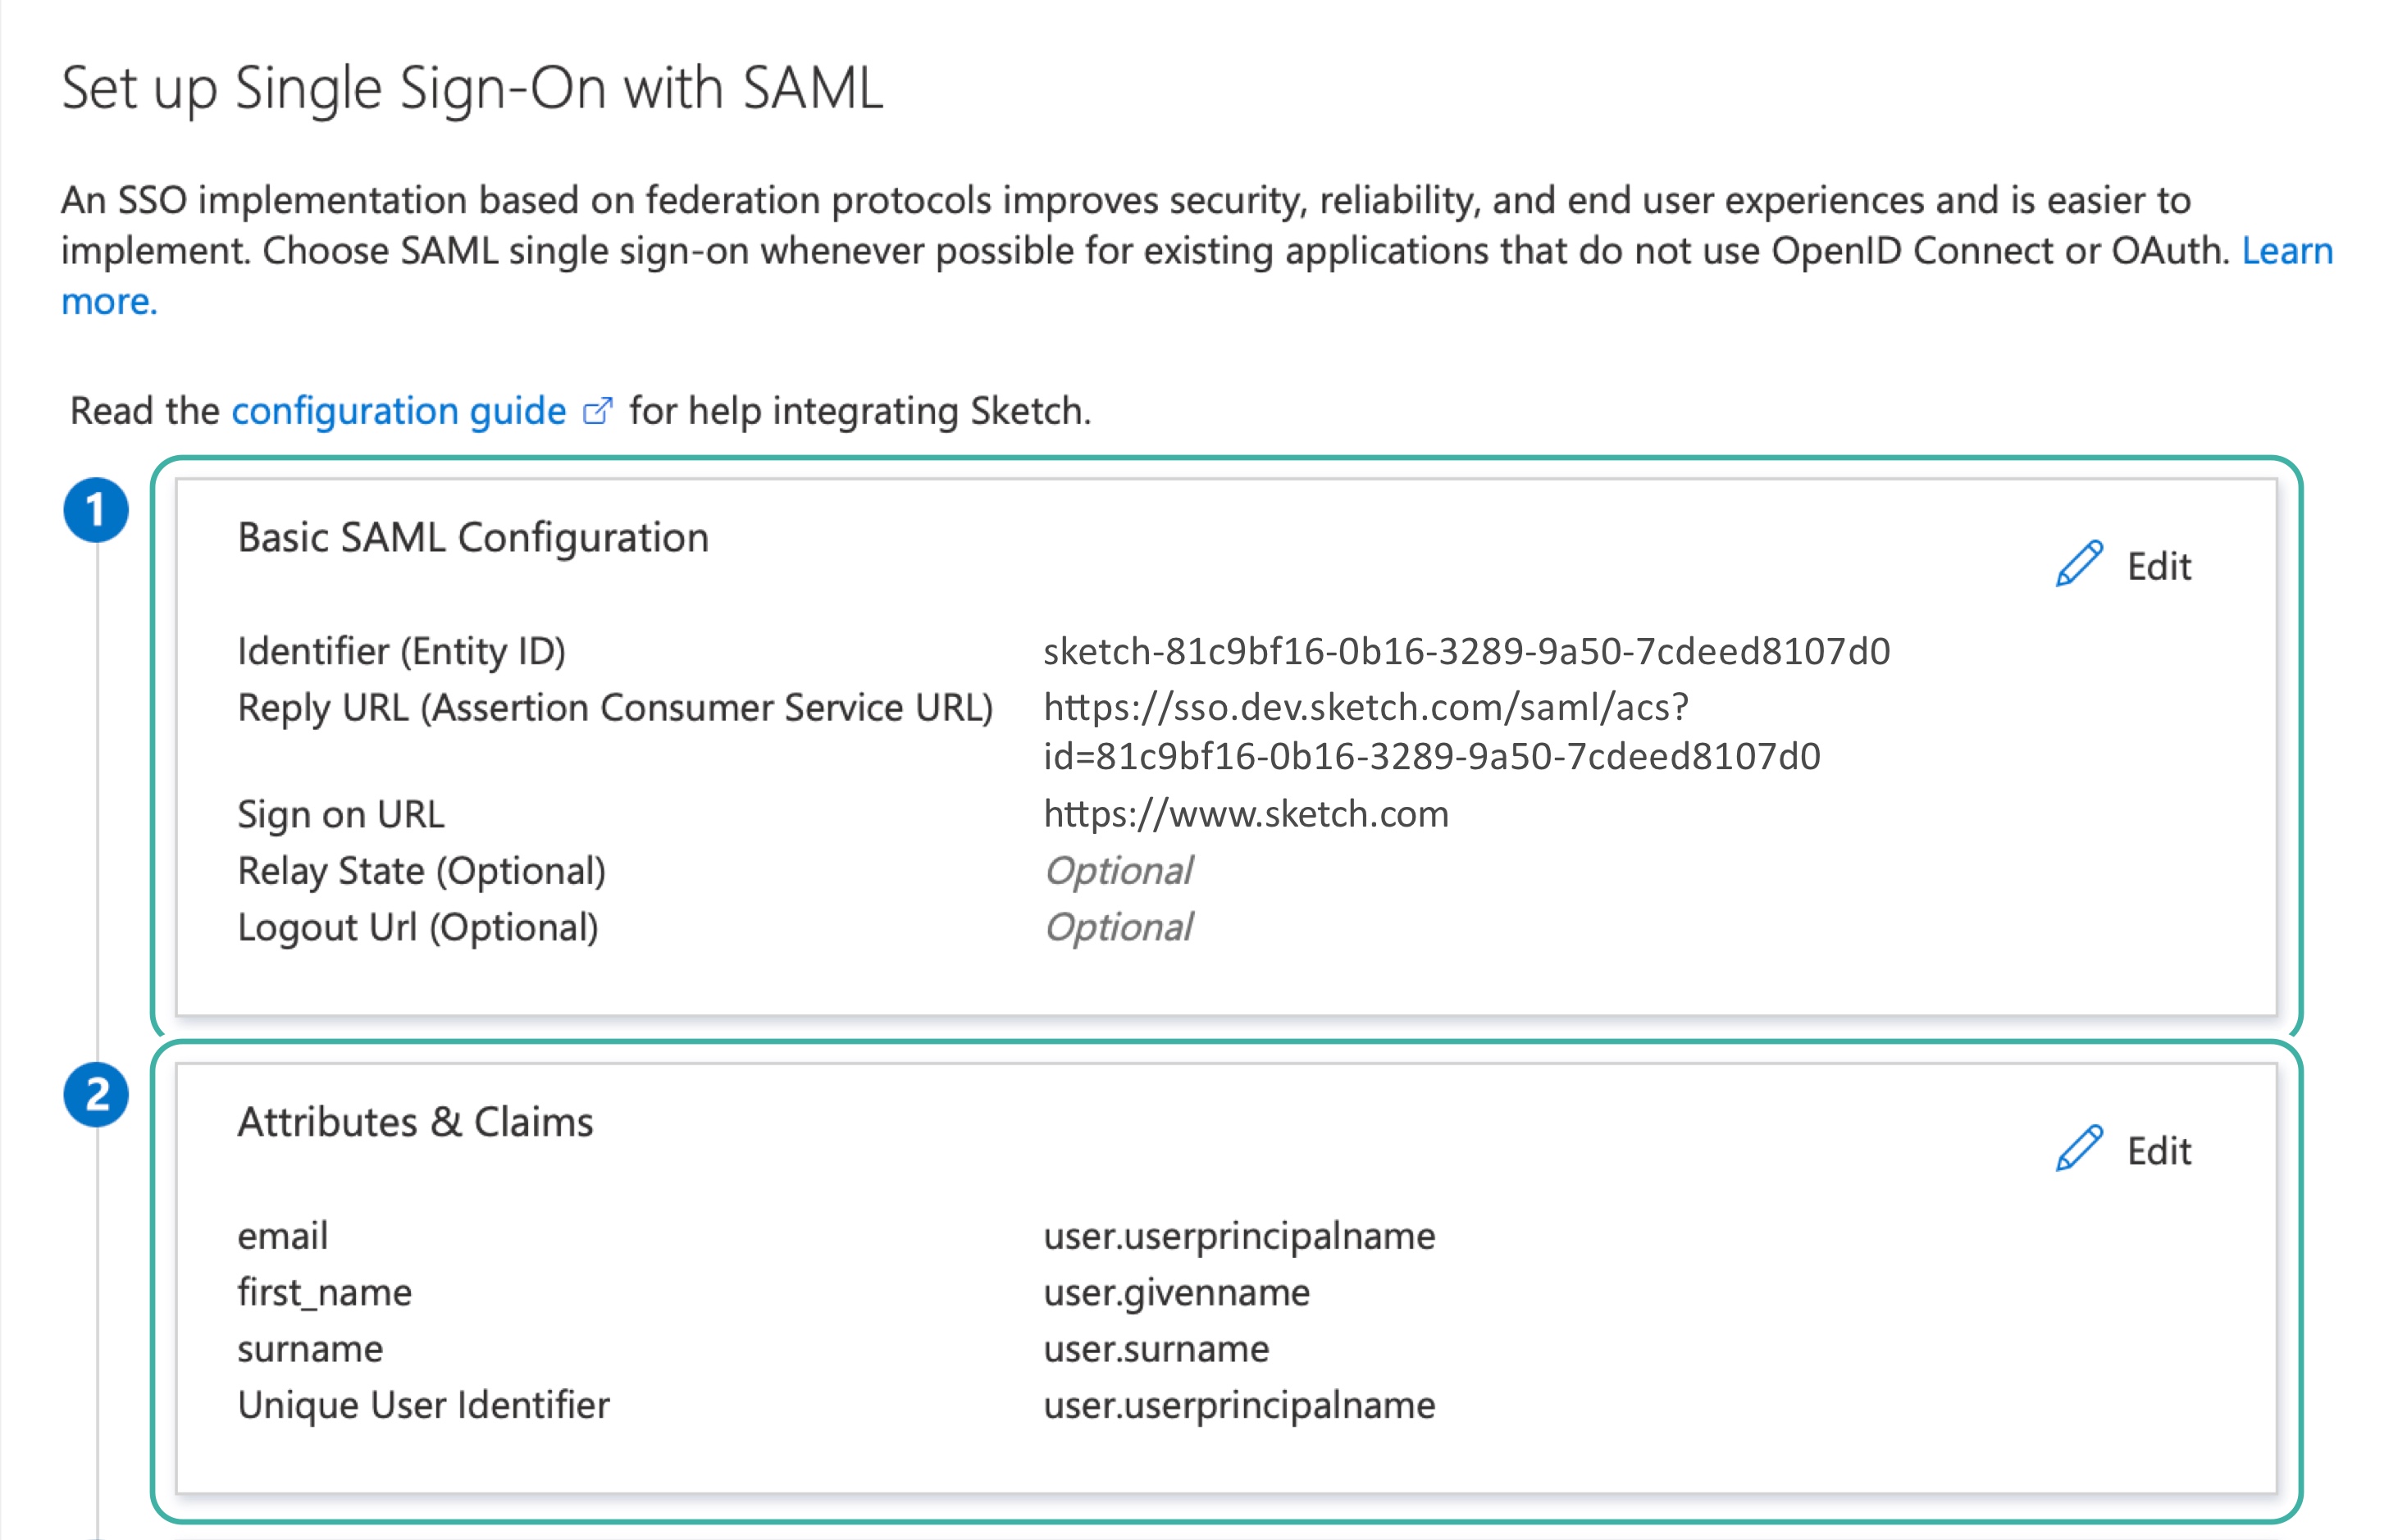
*Examples of the Basic SAML Configuration and the Attributes & Claims sections. The entered values will be different for every account*
The values in the right column will be specific to your organisation — make sure that you add the right information.
**Note**: If you are using Safari, you might have trouble typing in the text field. We recommend trying another browser.
1. Download the **Federation Metadata XML** file from the link in the **SAML Certificates** section — you’ll need it when setting up SAML SSO in Sketch.
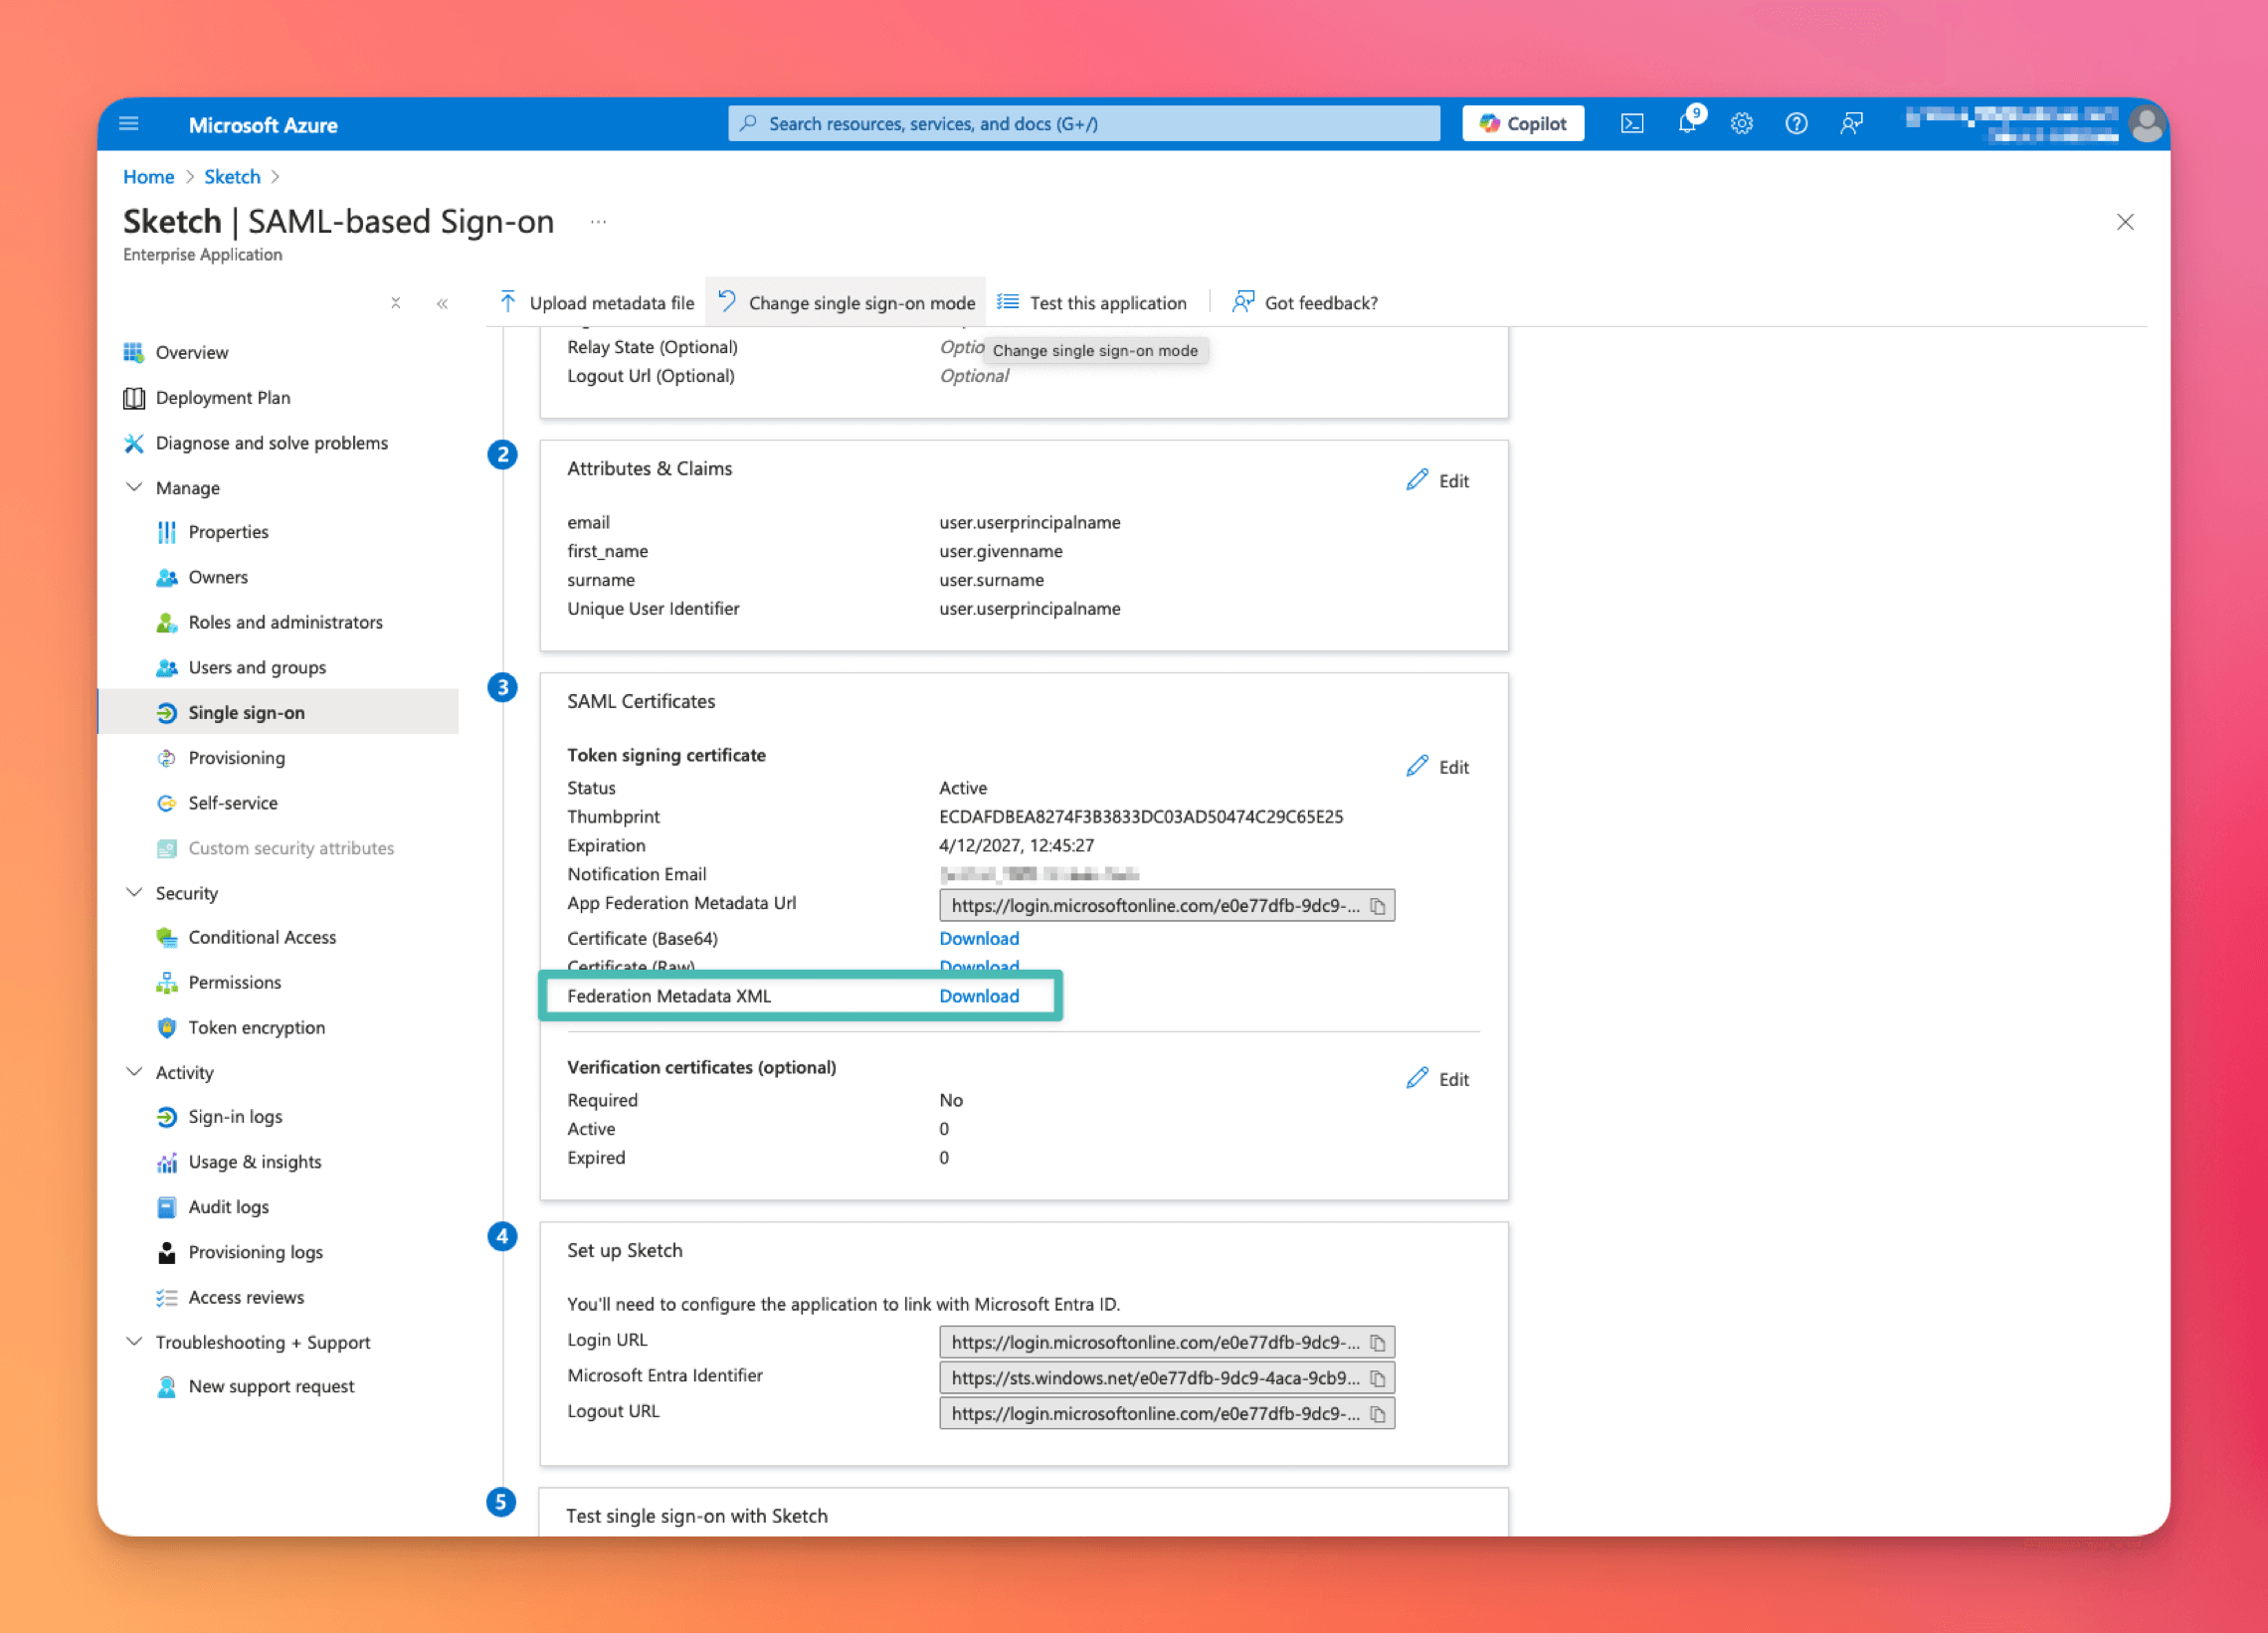
1. Head to **Users and groups** to give access to Sketch to relevant users.
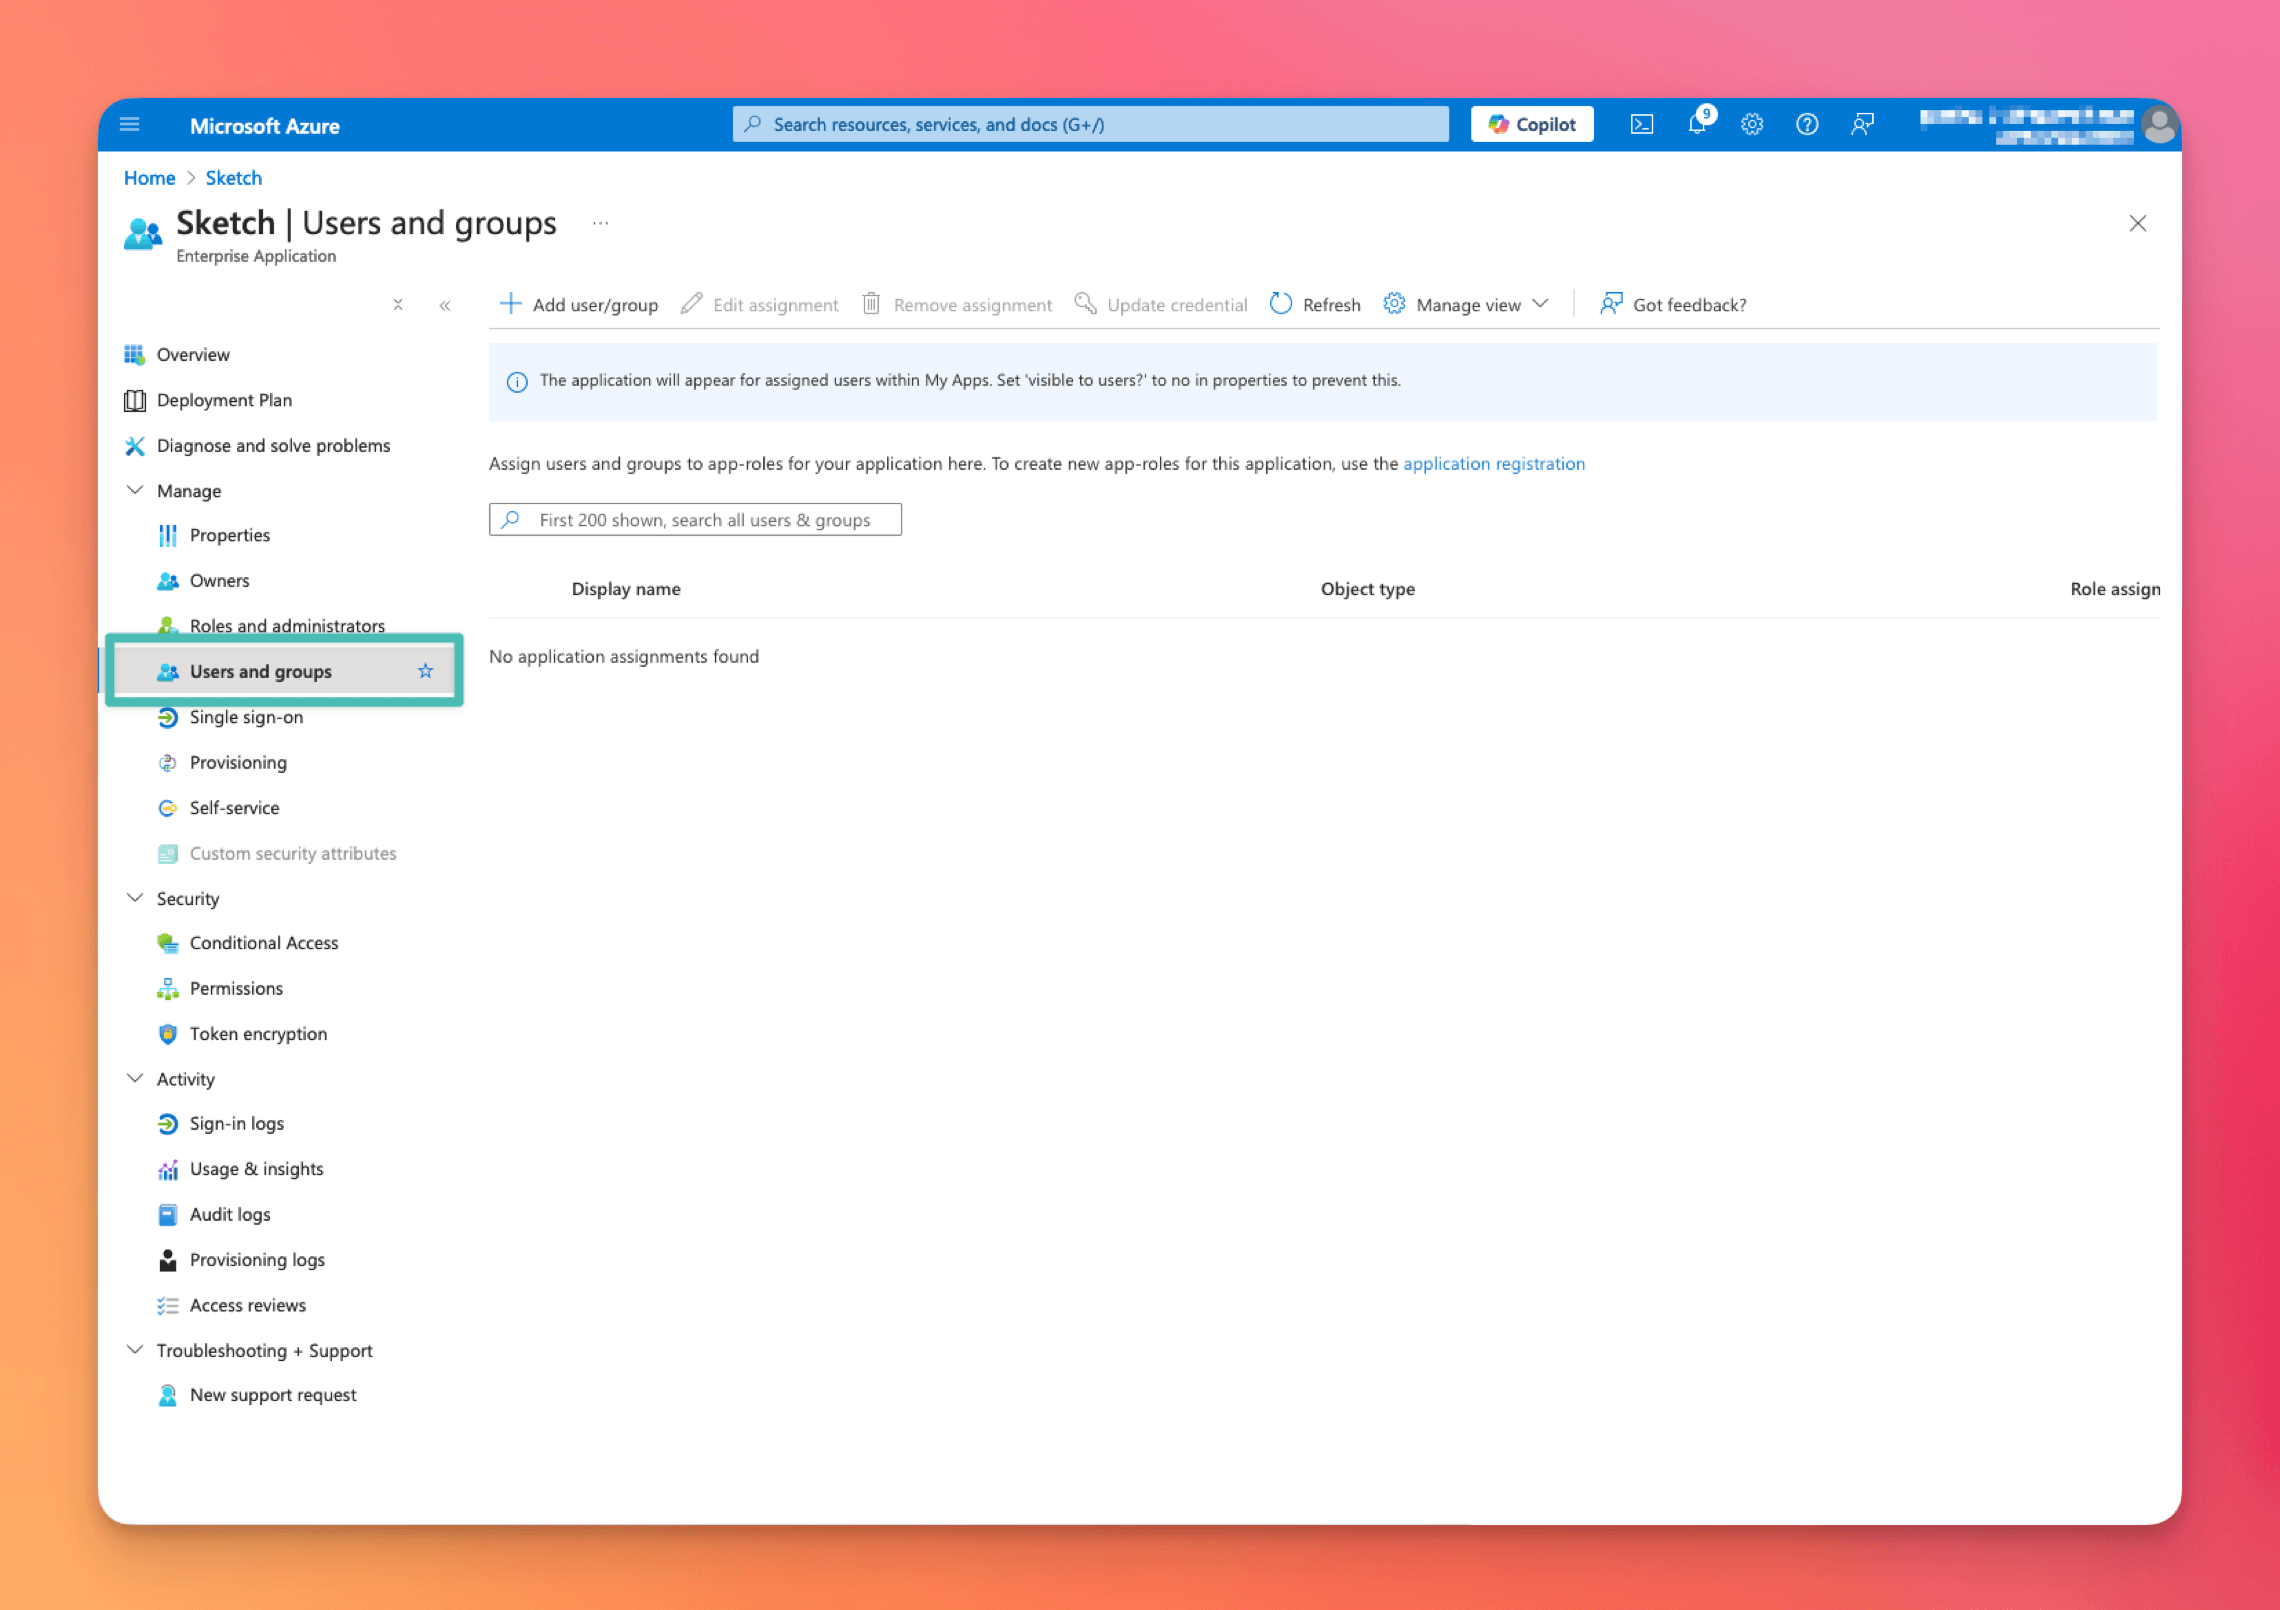
1. Head to [How to finish setting up SAML SSO in your Workspace](/docs/getting-started/single-sign-on/setting-up-saml-sso/finish-setting-saml-sso/) to finish the SAML SSO process in Sketch.
--------------------------------------------------------------------------------
title: "OneLogin setup"
description: "Learn how to set up OneLogin as an identity provider for Sketch with the help of our step-by-step guides and video tutorials."
last_modified: "2026-01-23"
url: "https://www.sketch.com/docs/getting-started/single-sign-on/setting-up-saml-sso/setup-identity-provider/onelogin-setup/"
--------------------------------------------------------------------------------
## OneLogin setup
1. Log in to your OneLogin Admin account.
1. Click on **Applications** > **Applications**
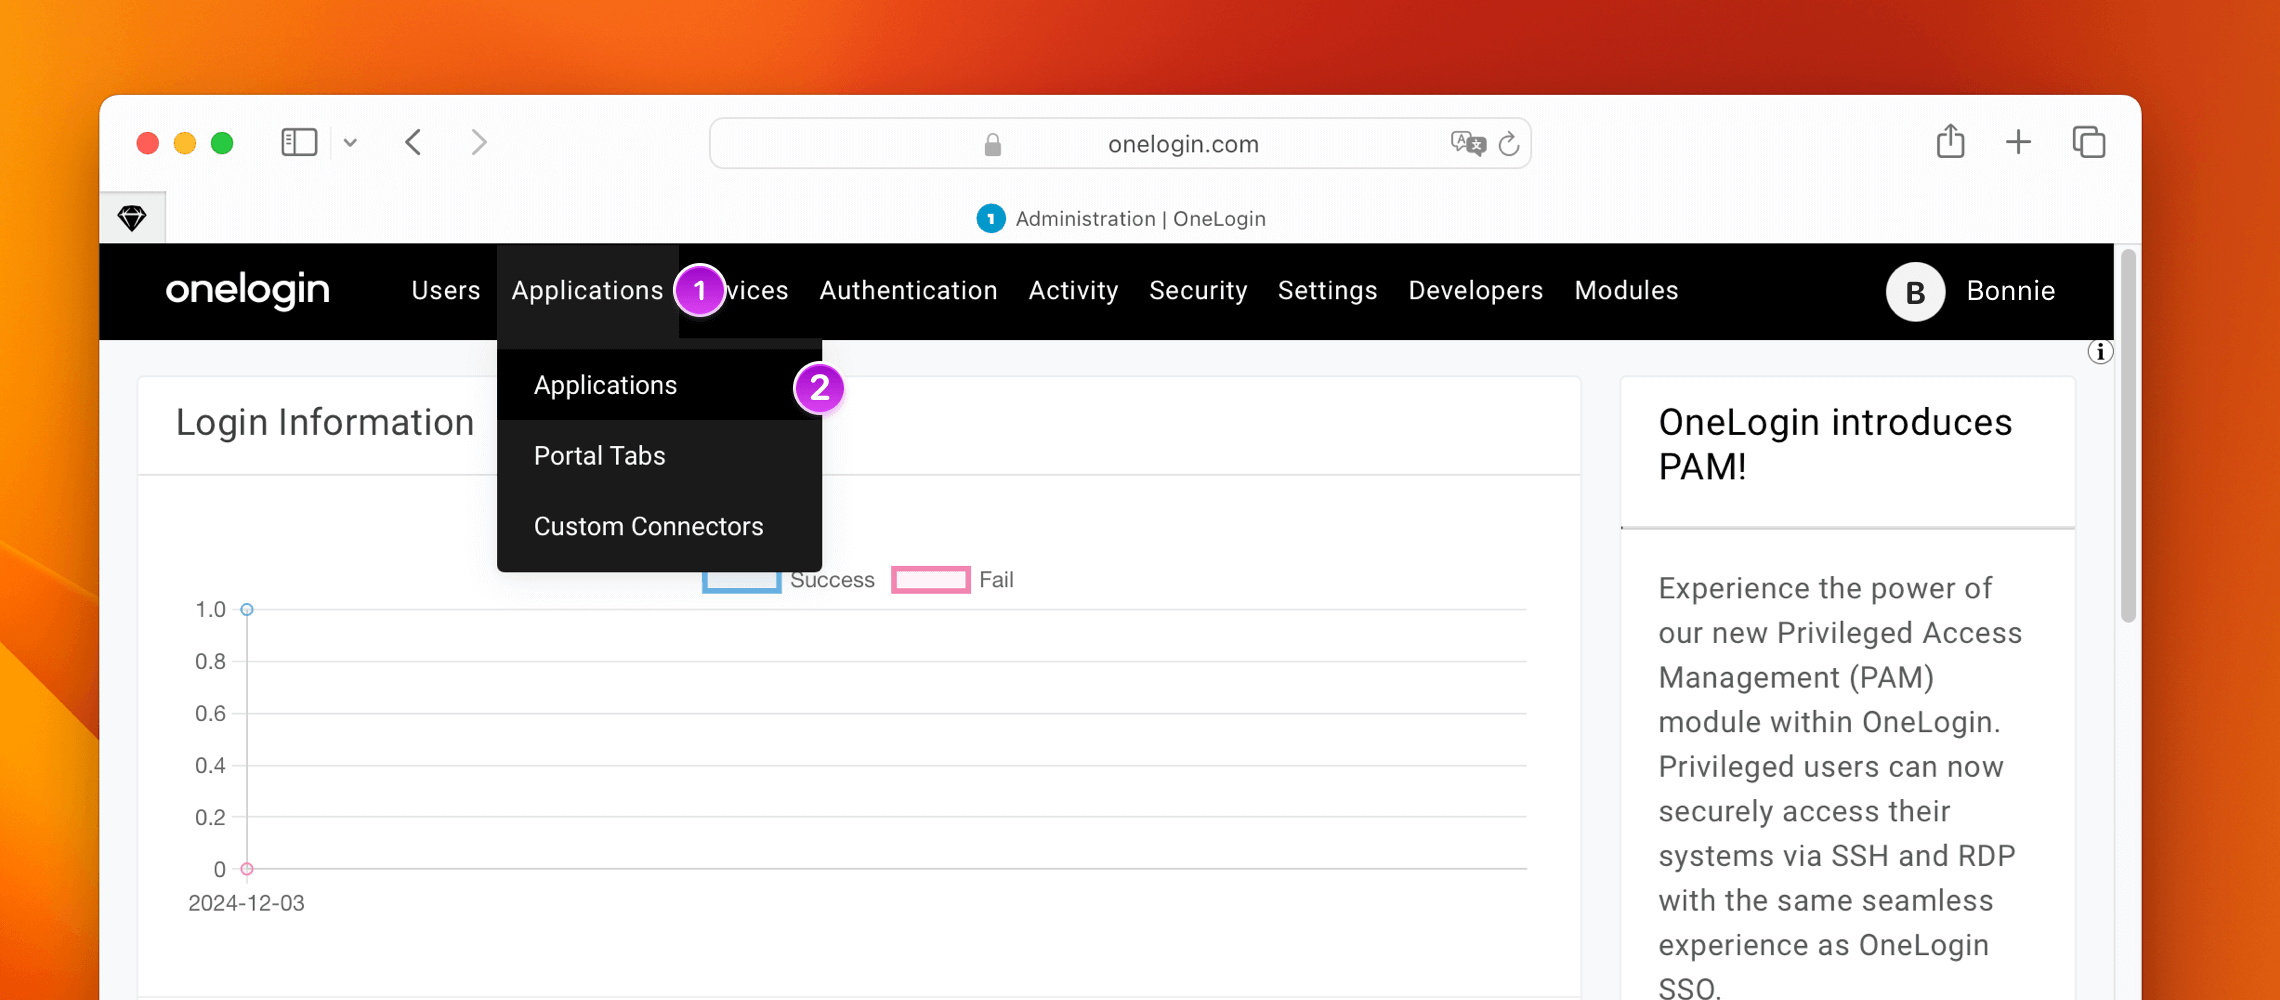
1. Click on the **Add App** button on the top right side
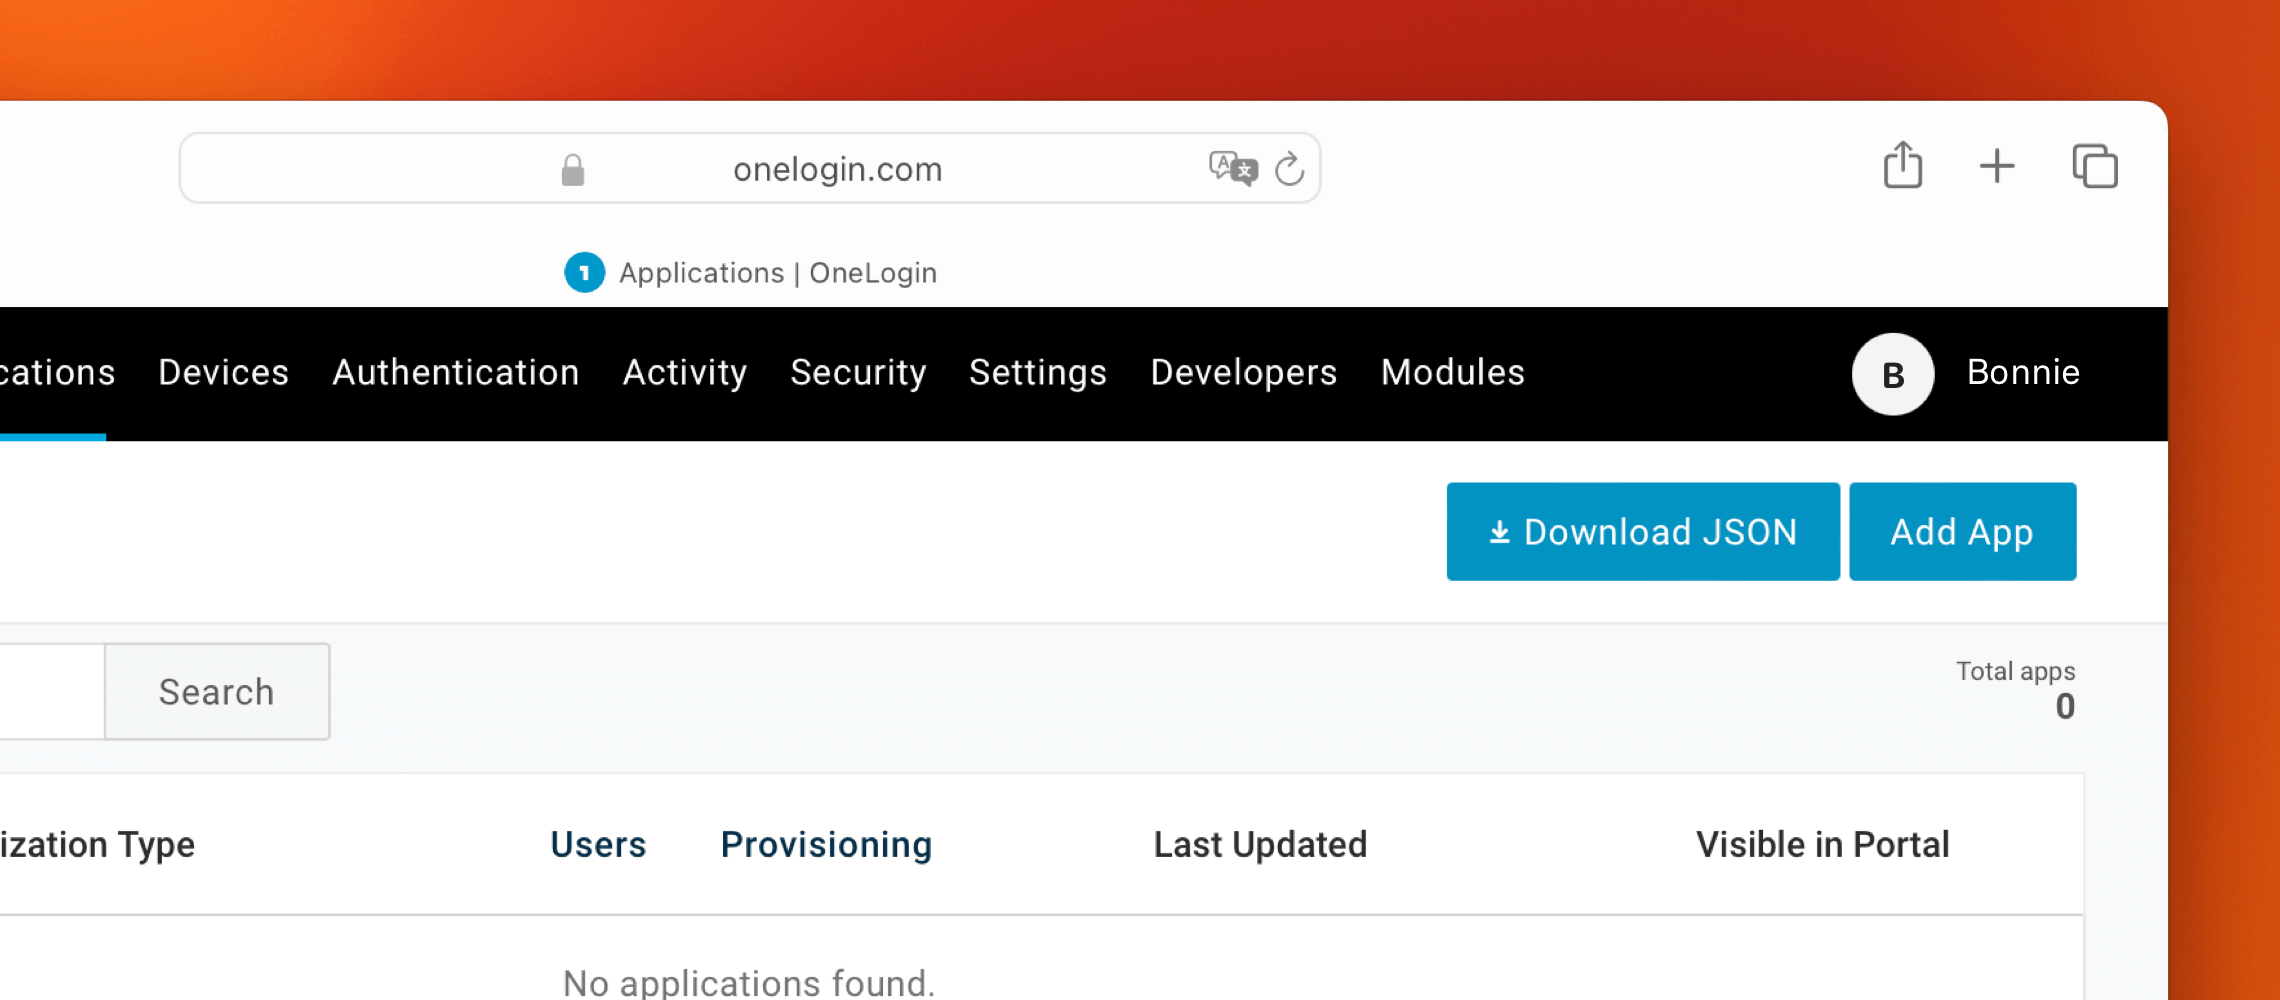
1. In the search box, type `SAML Test Connector (IdP)` and click on the matching search result.
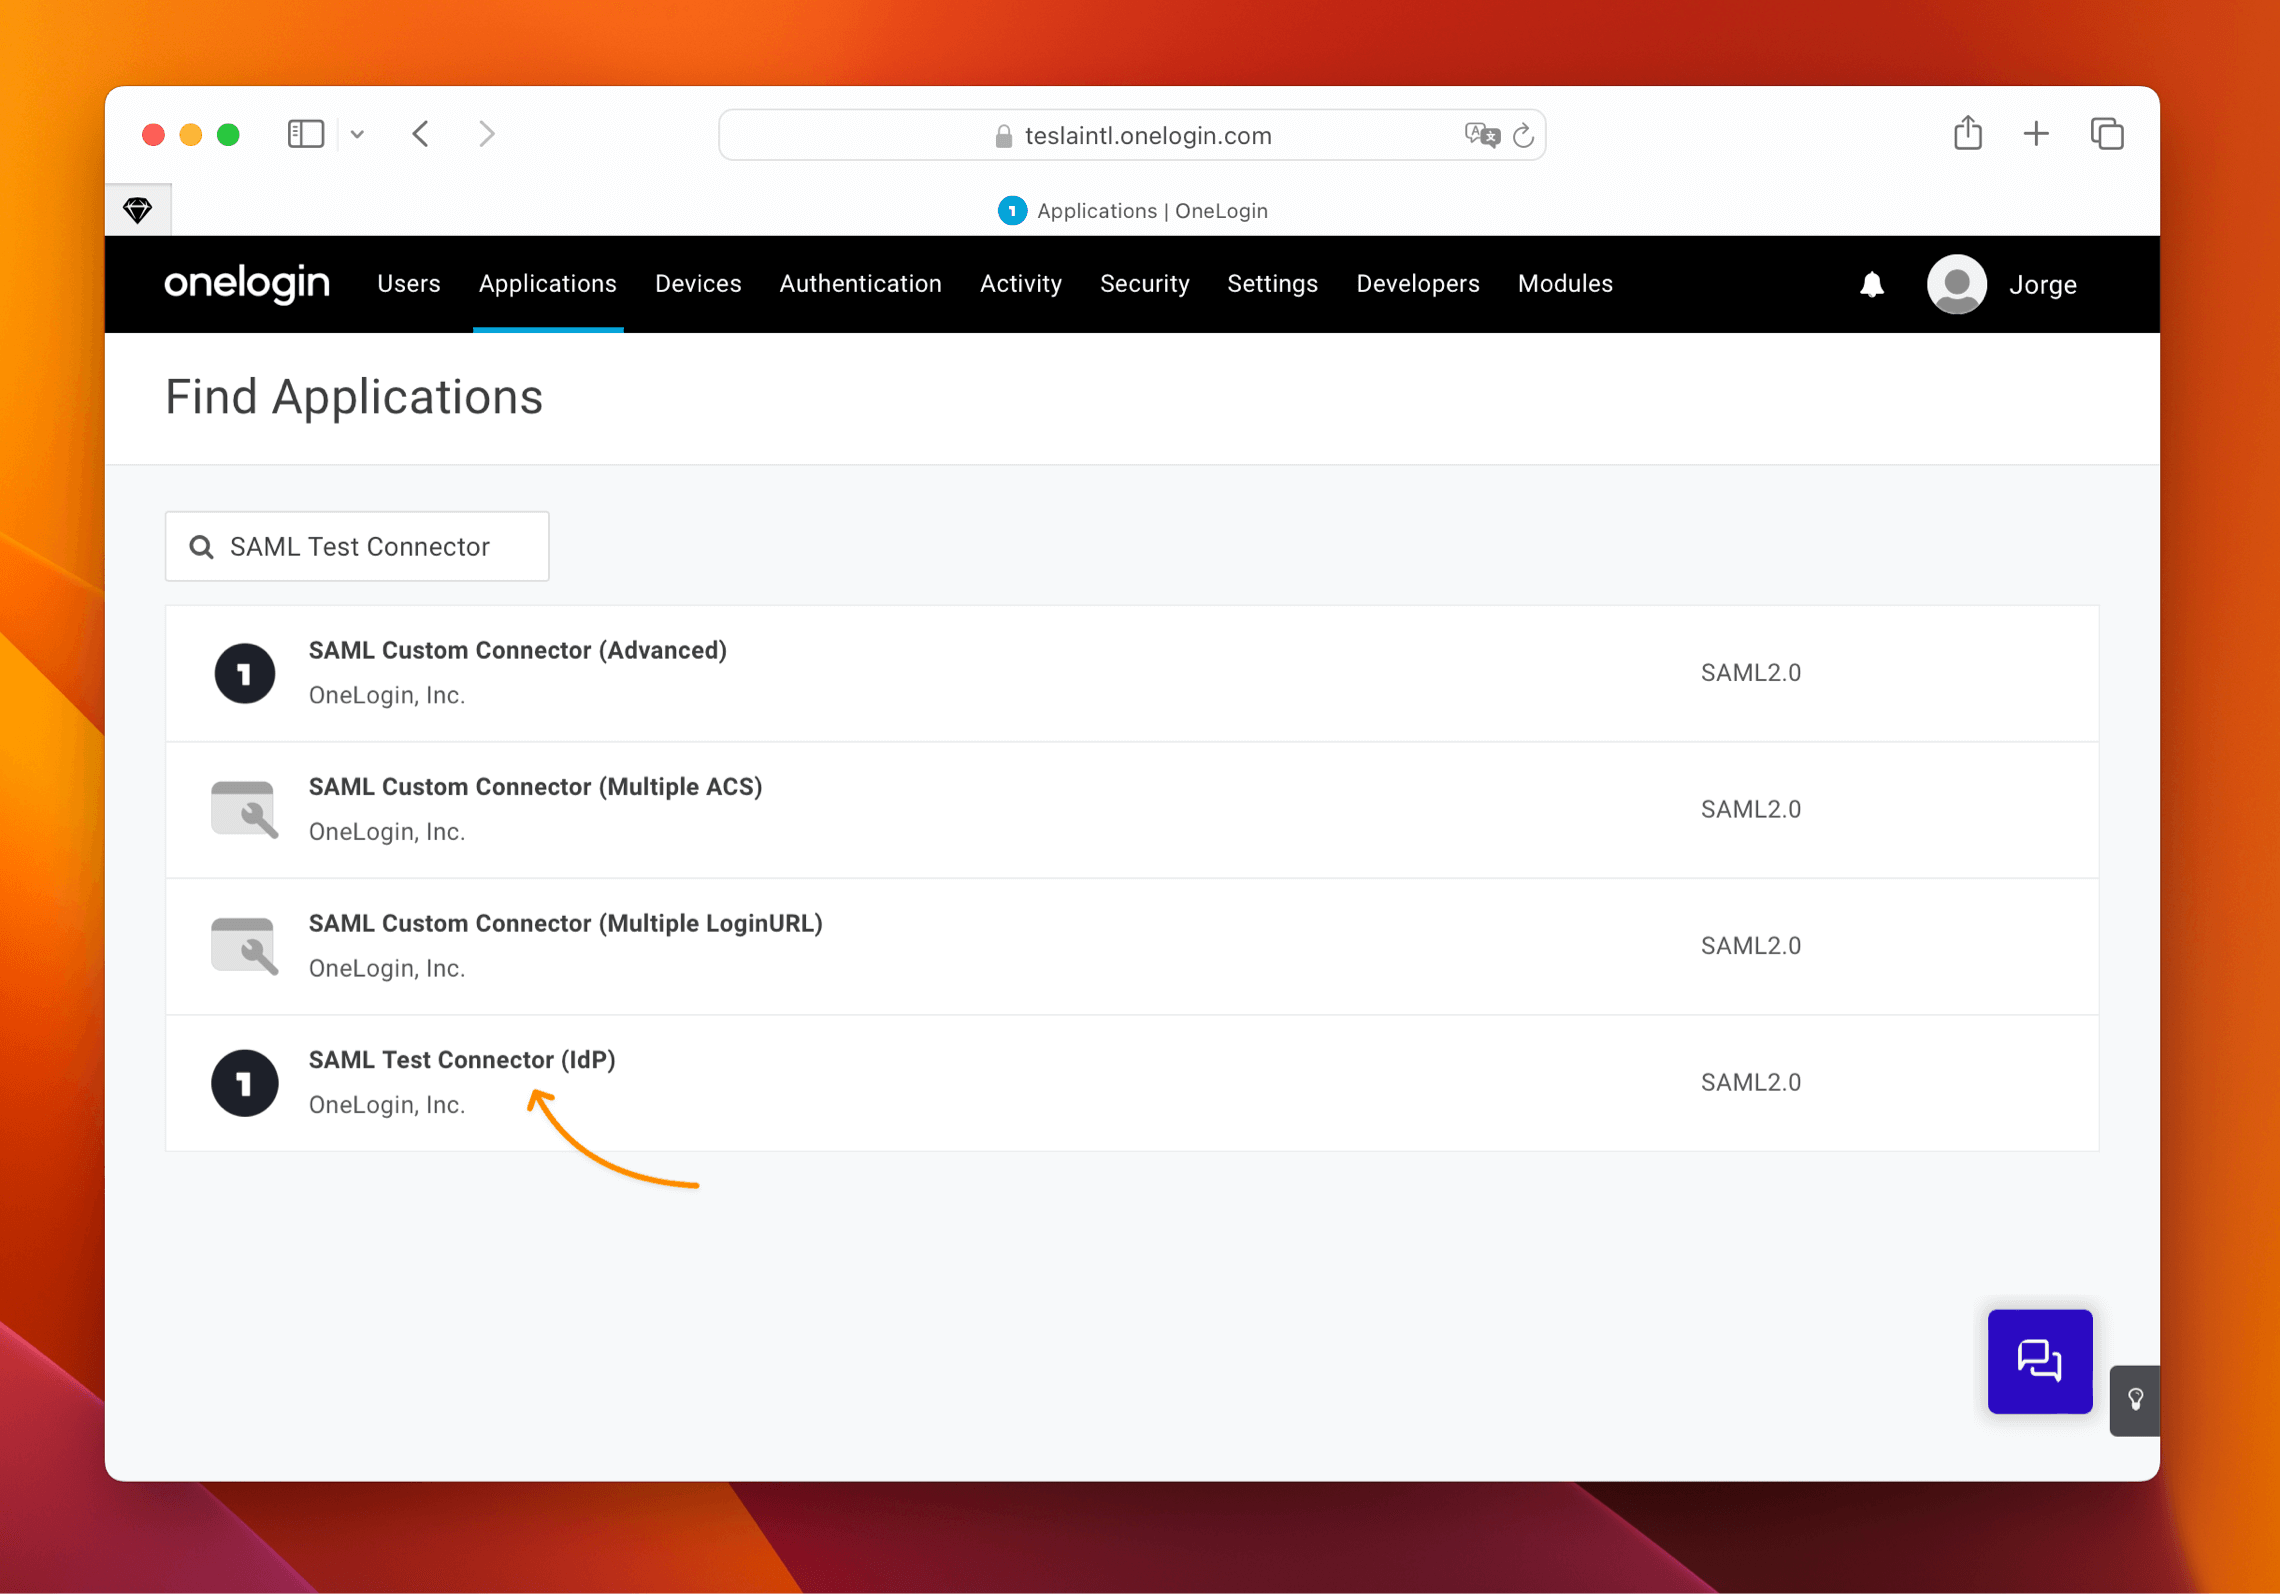
1. Type `Sketch` in the name field and add a description and [Sketch’s logo ](https://cdn.sketch.com/docs/sso/sketch-logo.png?_ga=2.80394071.1353189384.1612952350-1262828796.1612343687)(optional).
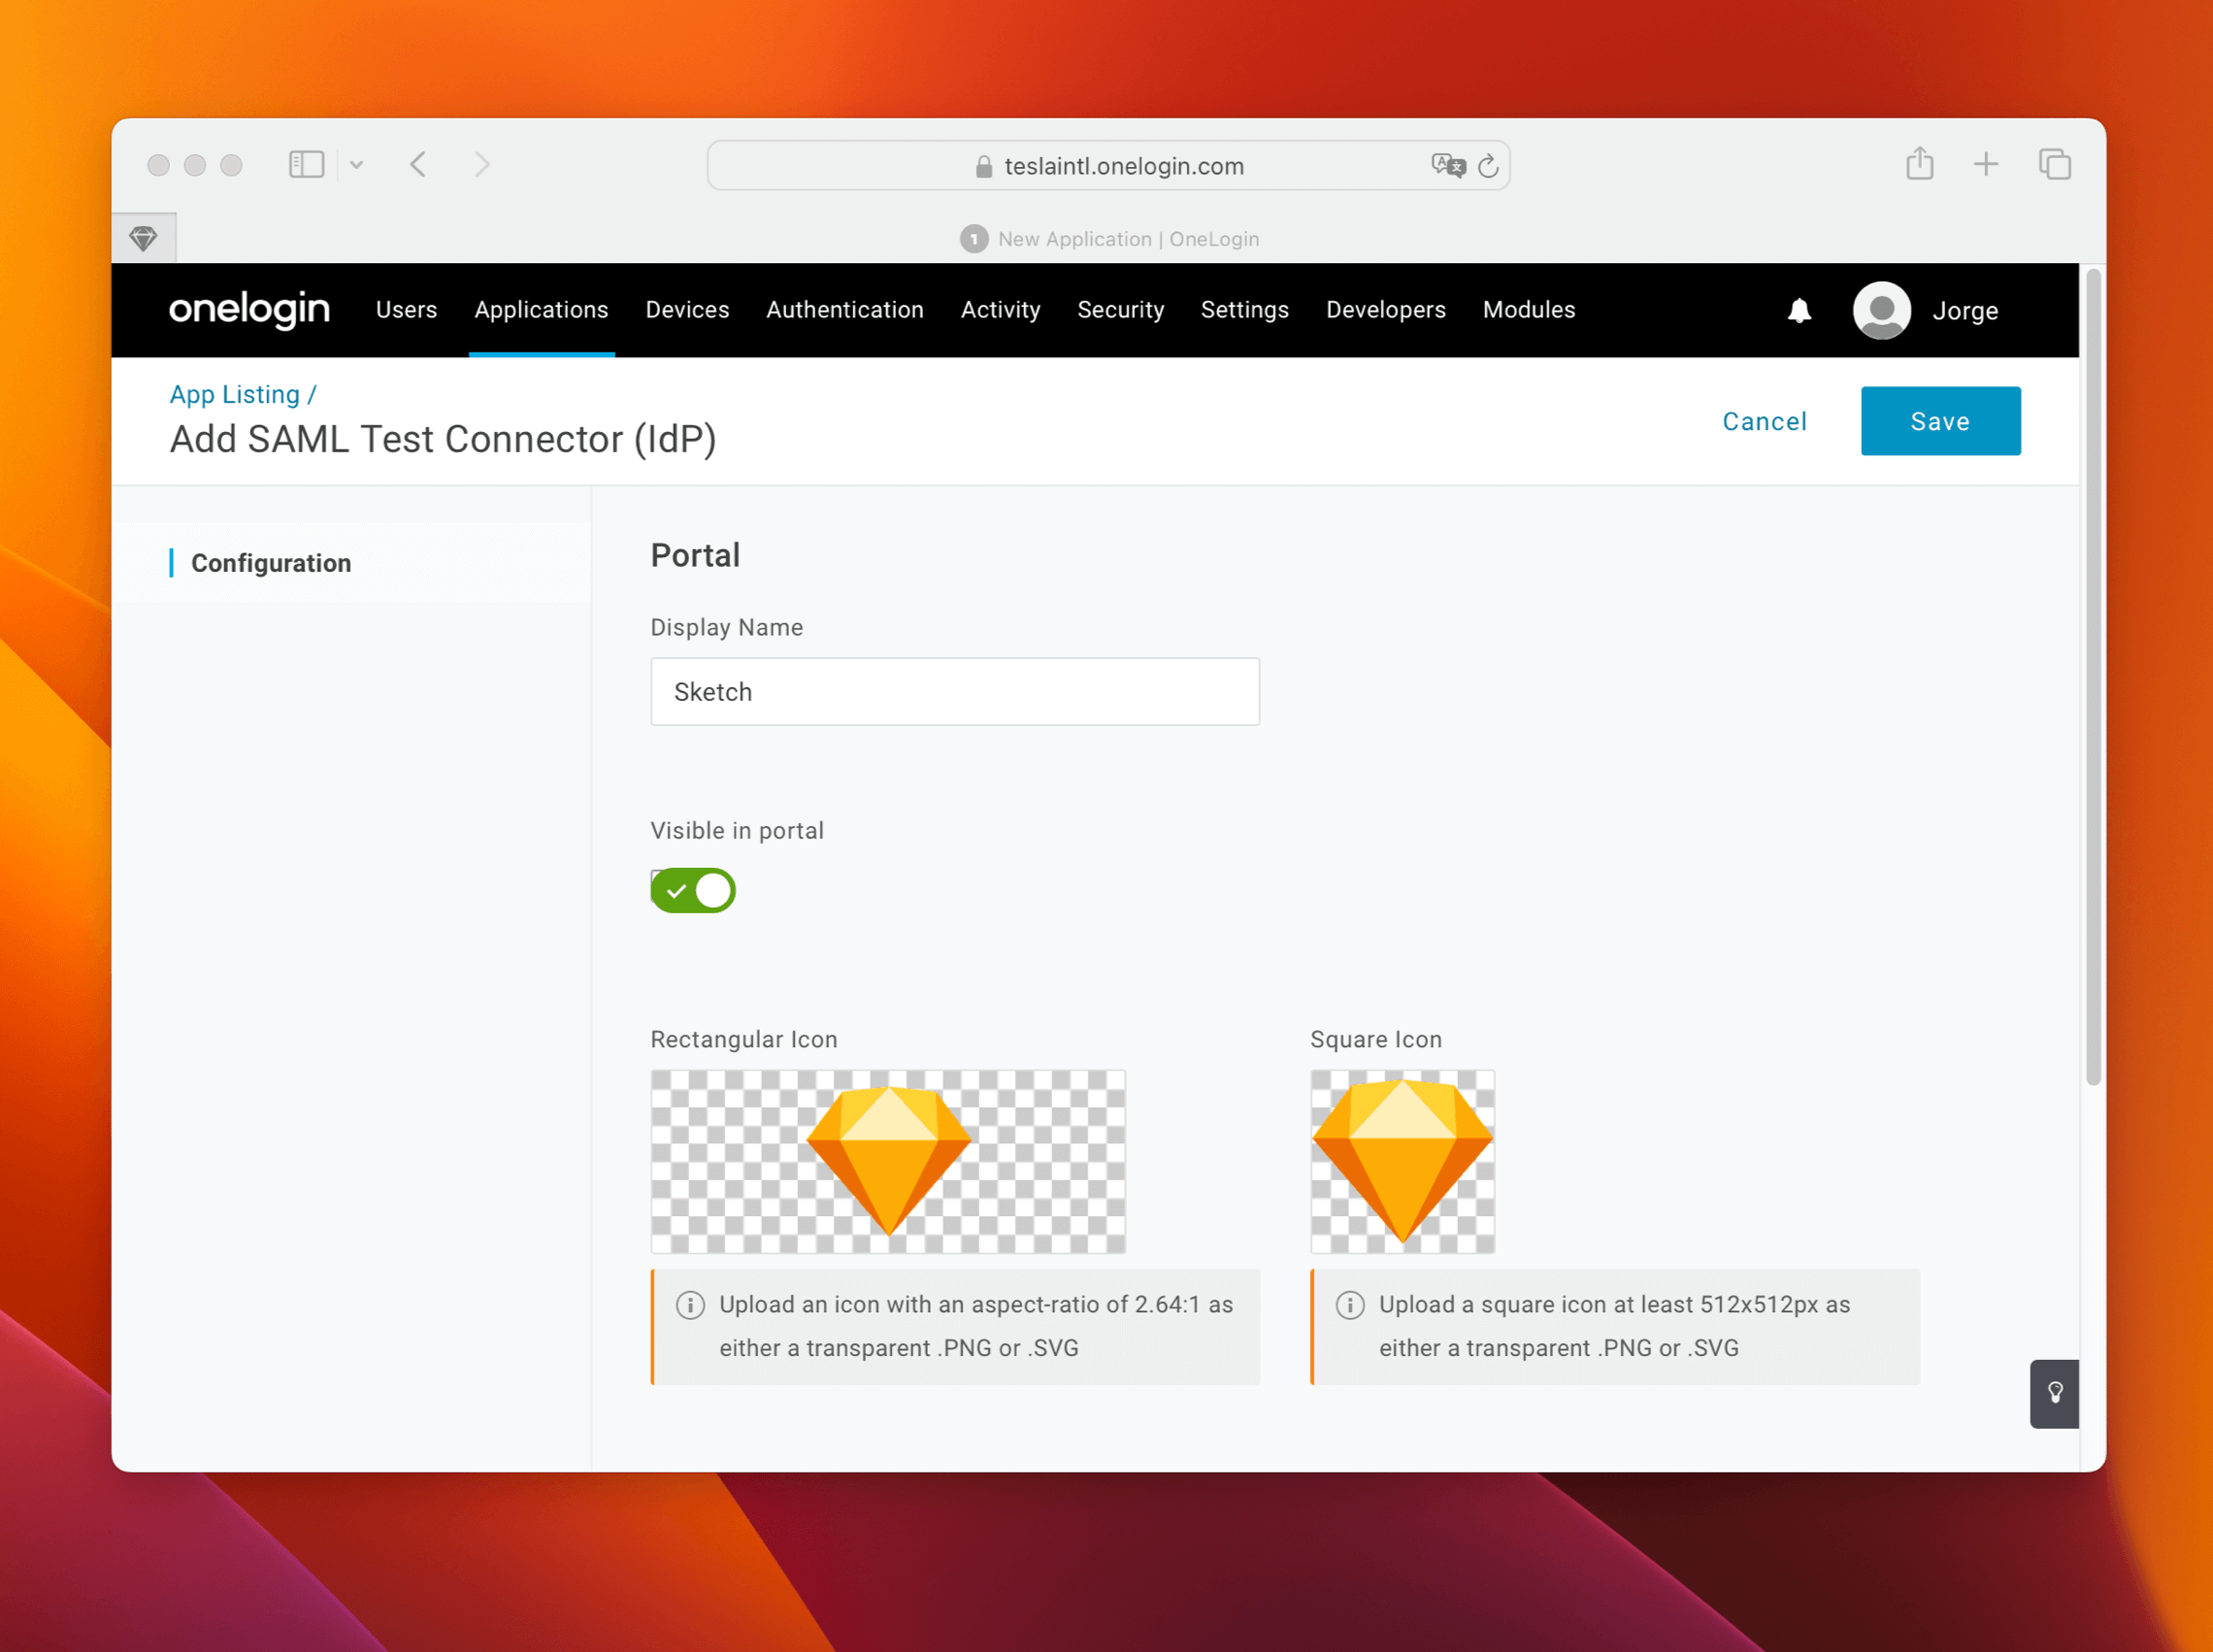
1. Use the EntityID and ACS URL values that you got when [setting up SAML SSO in your Workspace](/docs/getting-started/single-sign-on/setting-up-saml-sso/choose-a-shortname/). Remember, these are unique to your Workspace.
Place the **EntityID** value in the **Audience (EntityID)** field.
Set the **ACS URL** value in the following fields:
- **Recipient**
- **ACS (Consumer) URL Validator**
- **ACS (Consumer) URL**
**Note**: Make sure that there are no spaces at the end of these fields. Otherwise, the SSO process will fail.
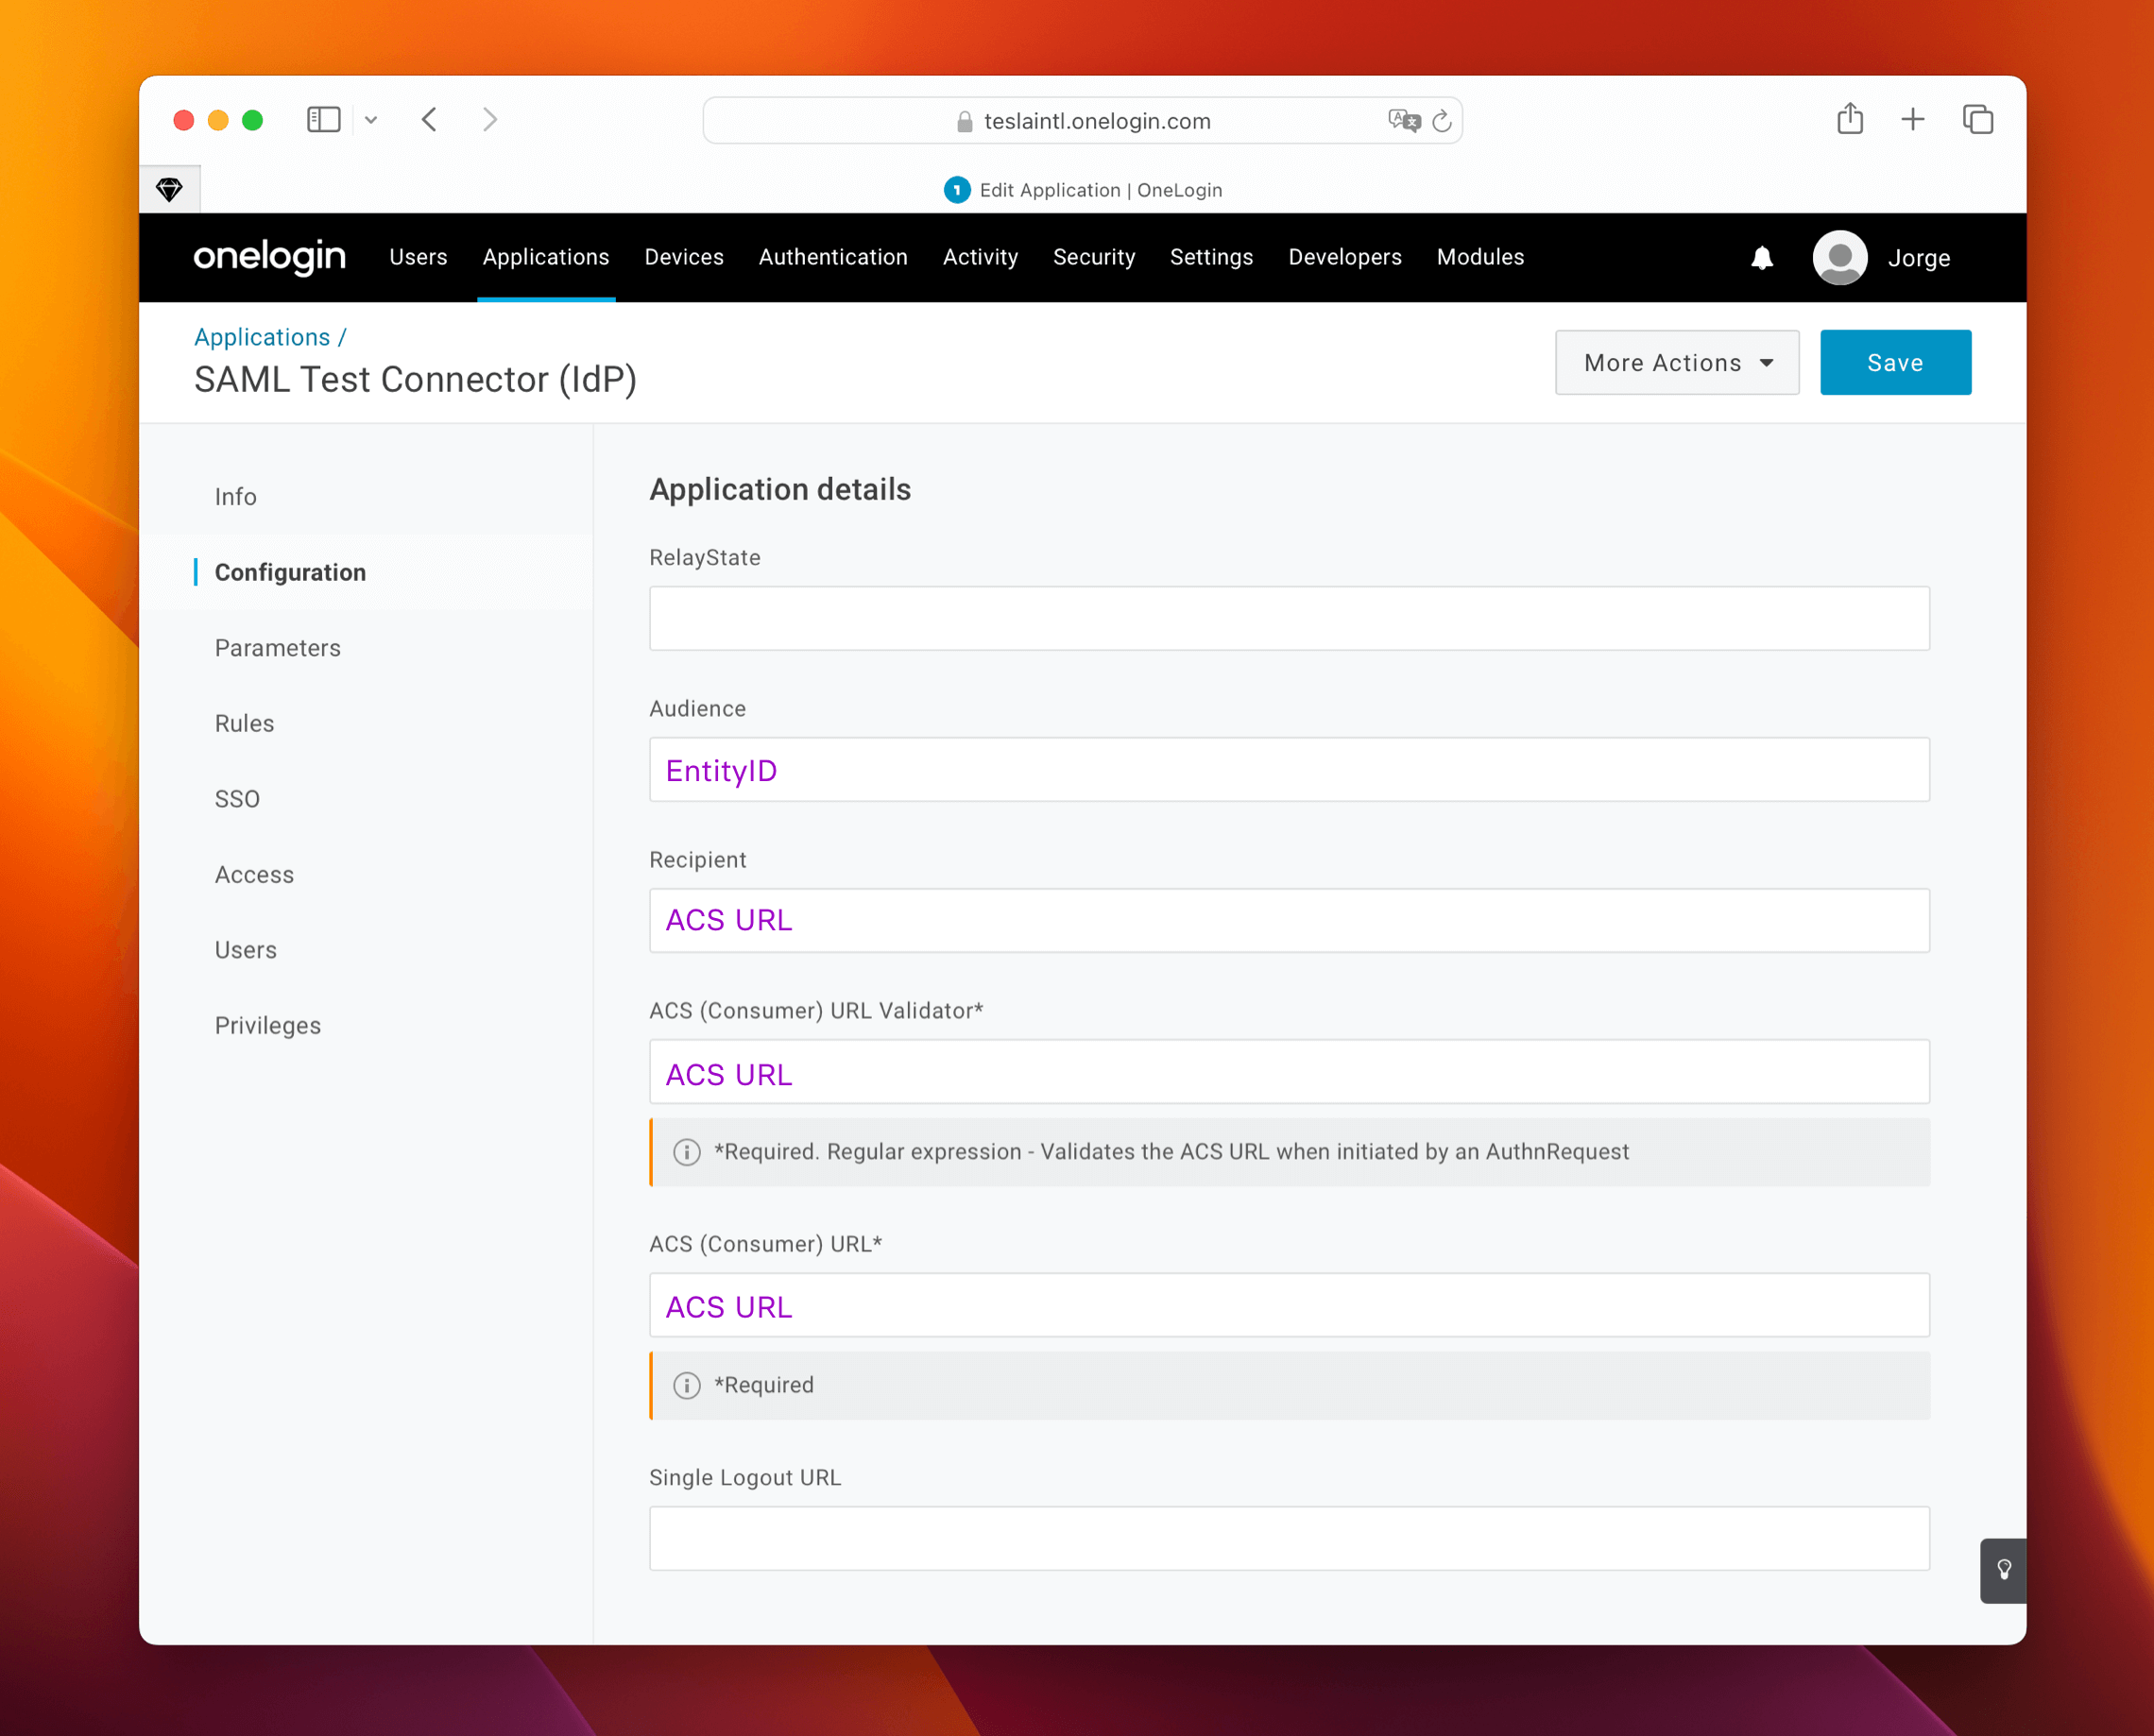
1. Click on the **Parameters** tab. Use the **+** button to add the fields in the list below. Make sure you check the **Include in SAML assertion** checkbox for every field you add.
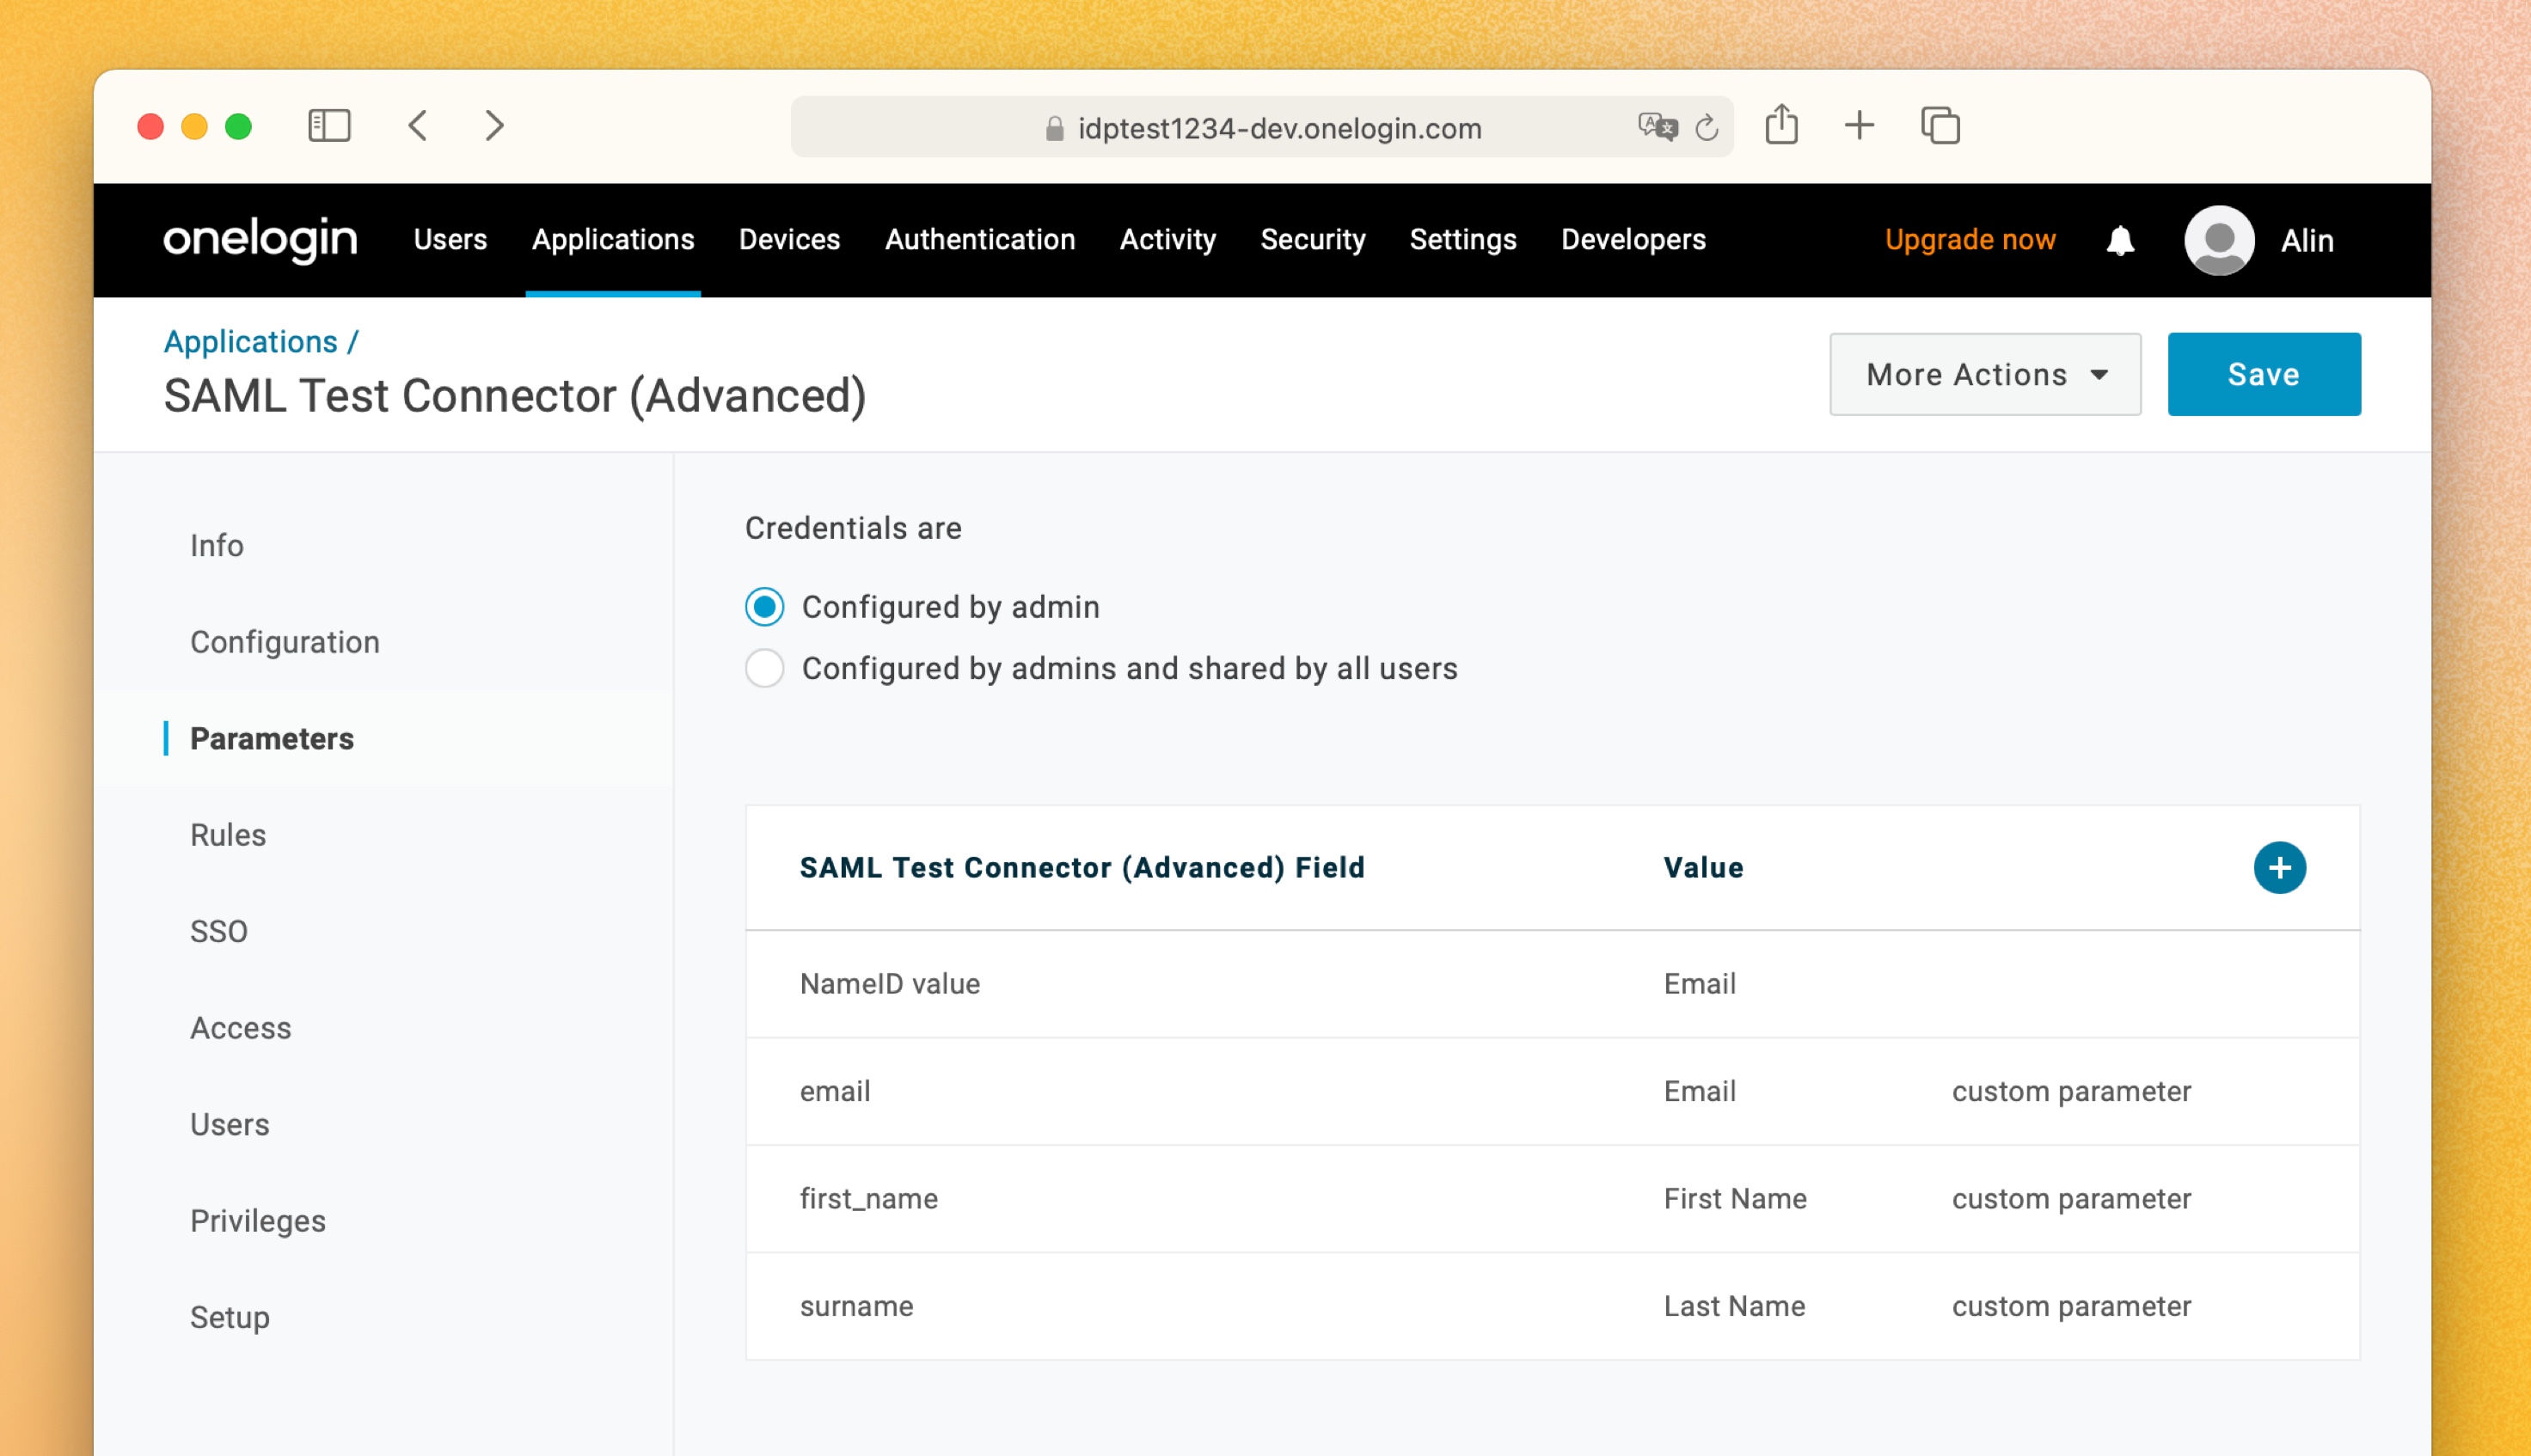
- NameID value
- email
- first_name
- surname
Here’s how adding a field in the Parameters page looks:

1. Click the **Save** button in the top-right corner.
1. When you’re done, click the **More Actions** menu in the top right corner and select **SAML Metadata** to export the XML file. You’ll need it when setting up SAML SSO in Sketch.
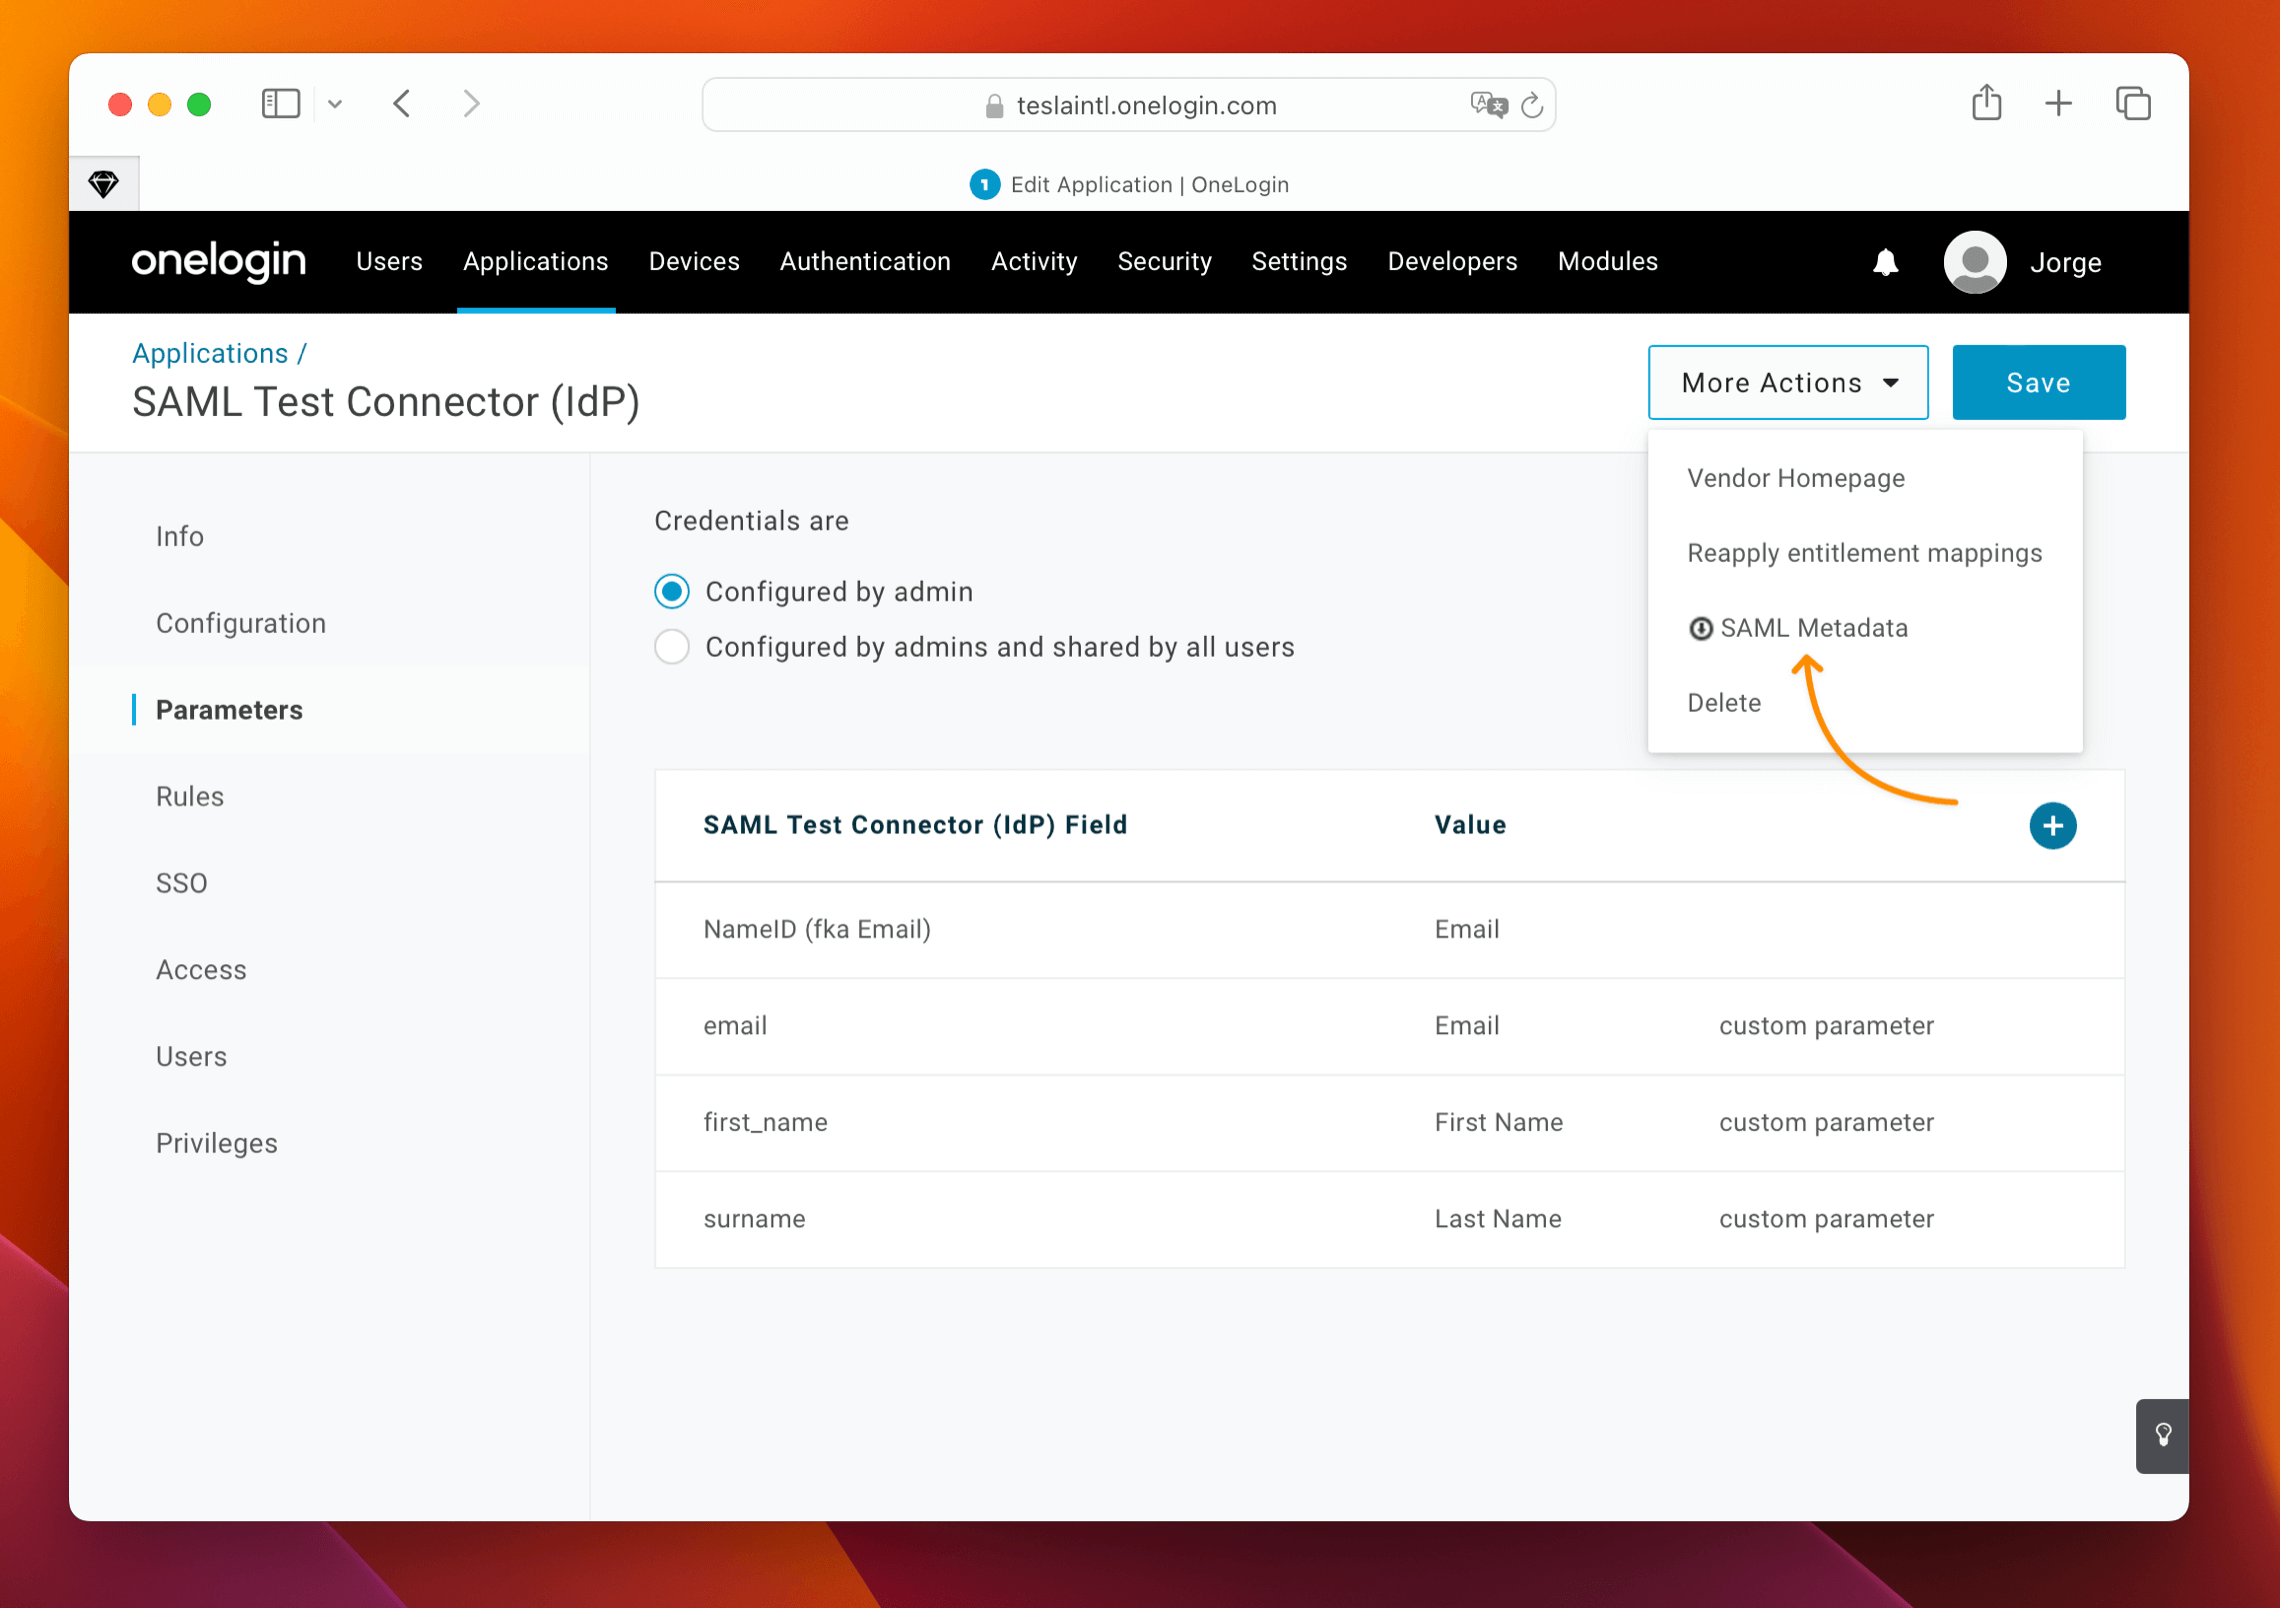
1. Now head to [How to finish setting up SAML SSO in your Workspace](/docs/getting-started/single-sign-on/setting-up-saml-sso/finish-setting-saml-sso/) to finish the SAML SSO process in your Workspace.
--------------------------------------------------------------------------------
title: "Okta setup"
description: "Learn how to set up Okta as an identity provider for Sketch with the help of our step-by-step guides and video tutorials."
last_modified: "2026-01-23"
url: "https://www.sketch.com/docs/getting-started/single-sign-on/setting-up-saml-sso/setup-identity-provider/okta-setup/"
--------------------------------------------------------------------------------
## Okta setup
1. Log in to Okta as an Admin.
1. Head to the Admin Console by clicking **Admin** in the upper-right corner.
1. Click on **Applications** > **Applications** on the sidebar.
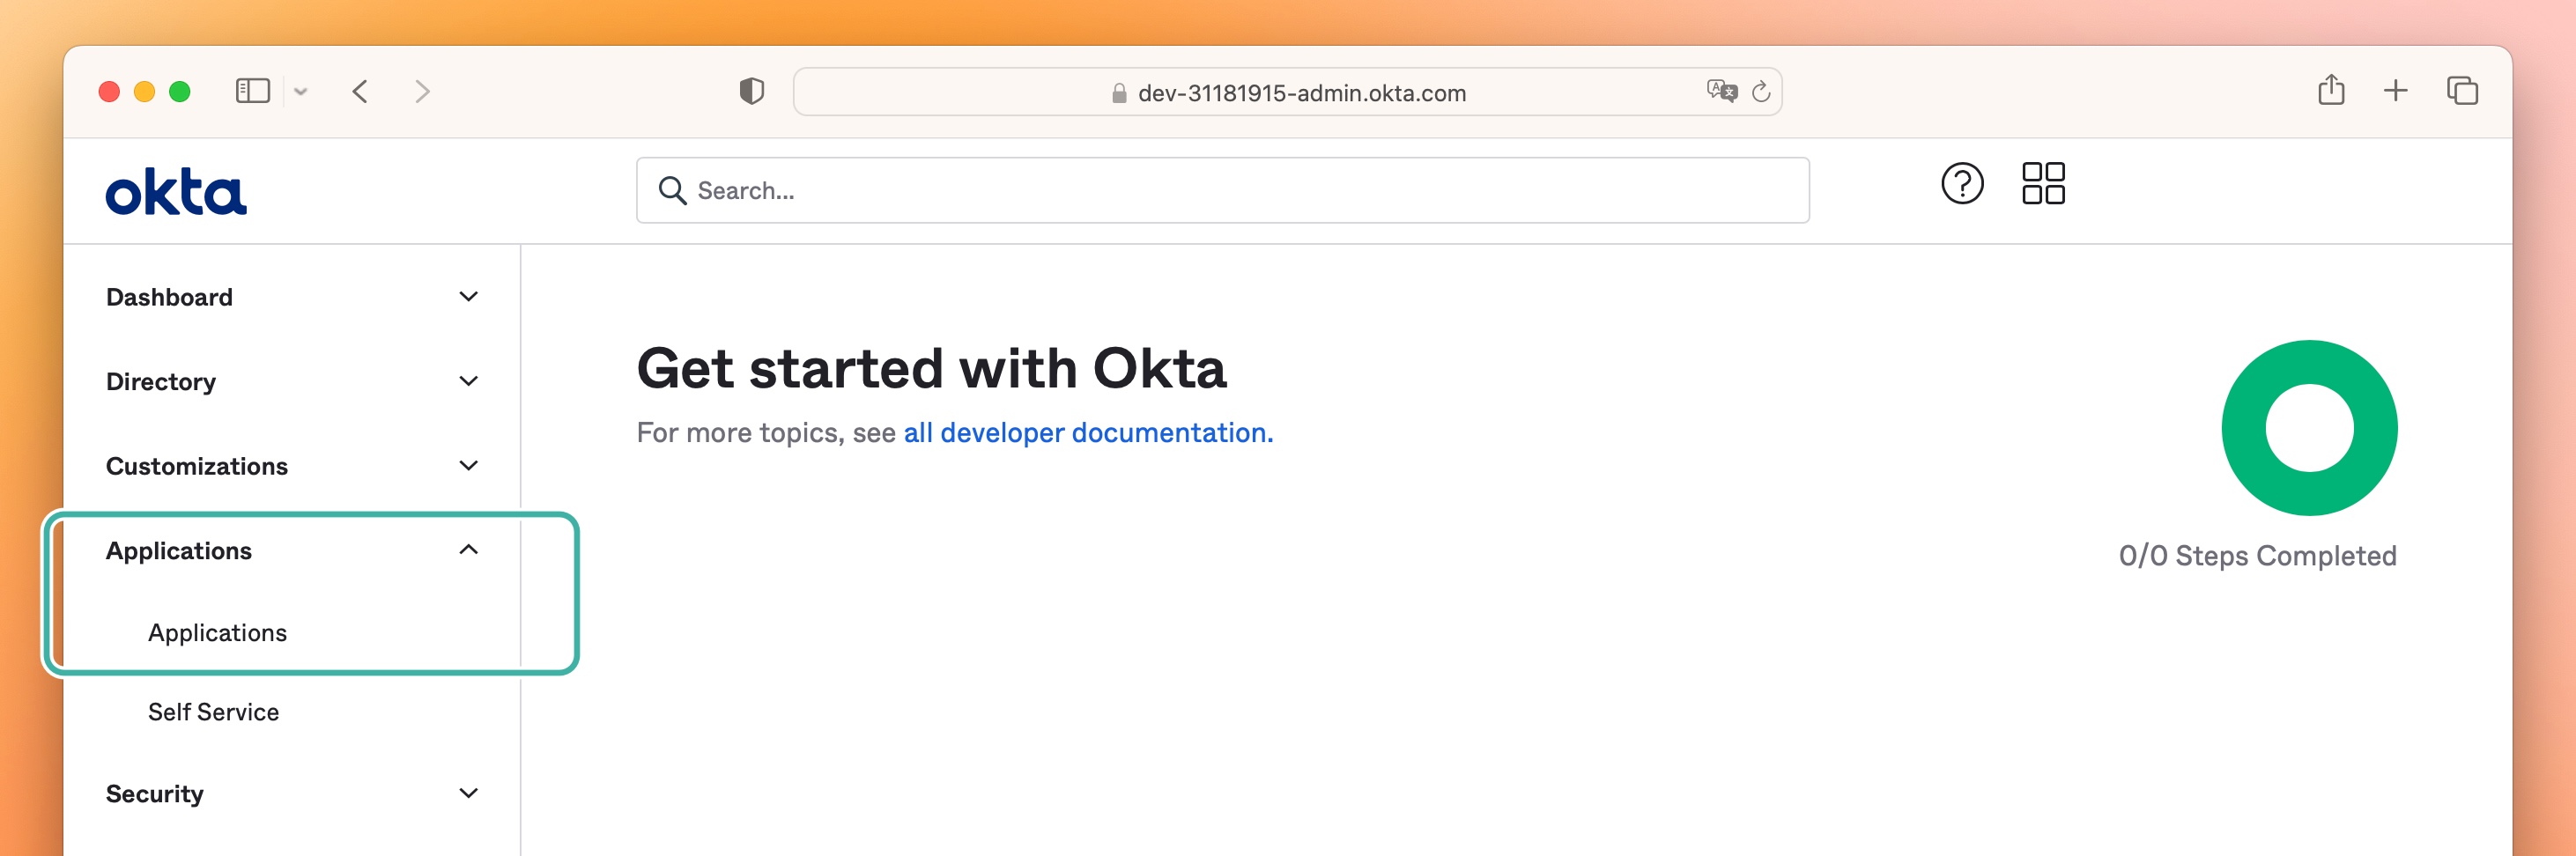
1. Click on **Browse App Catalog**.
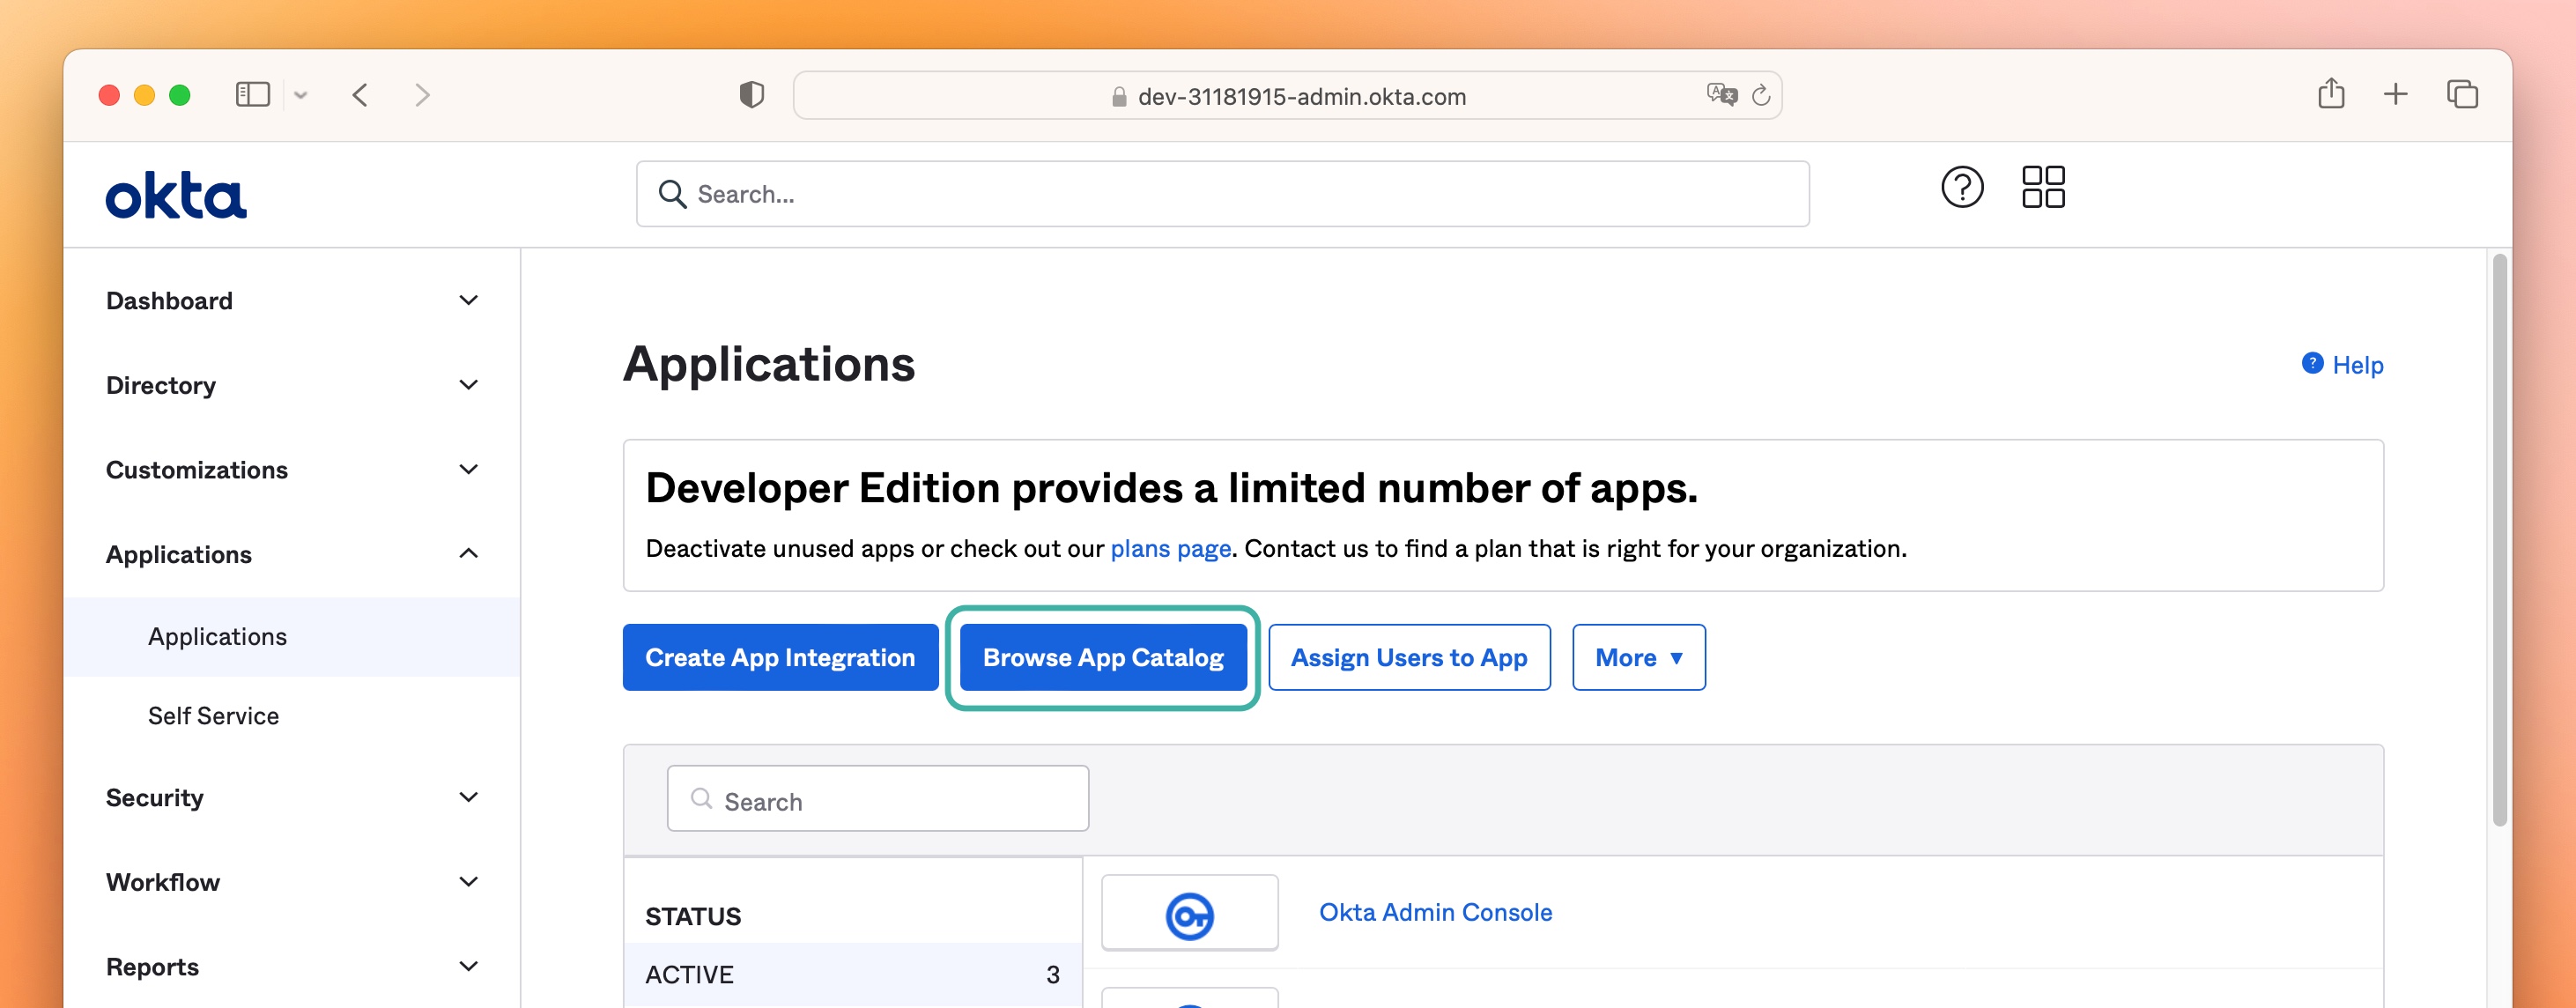
1. In the Search bar type `sketch` and select the **Sketch - SAML** option from the Search results.
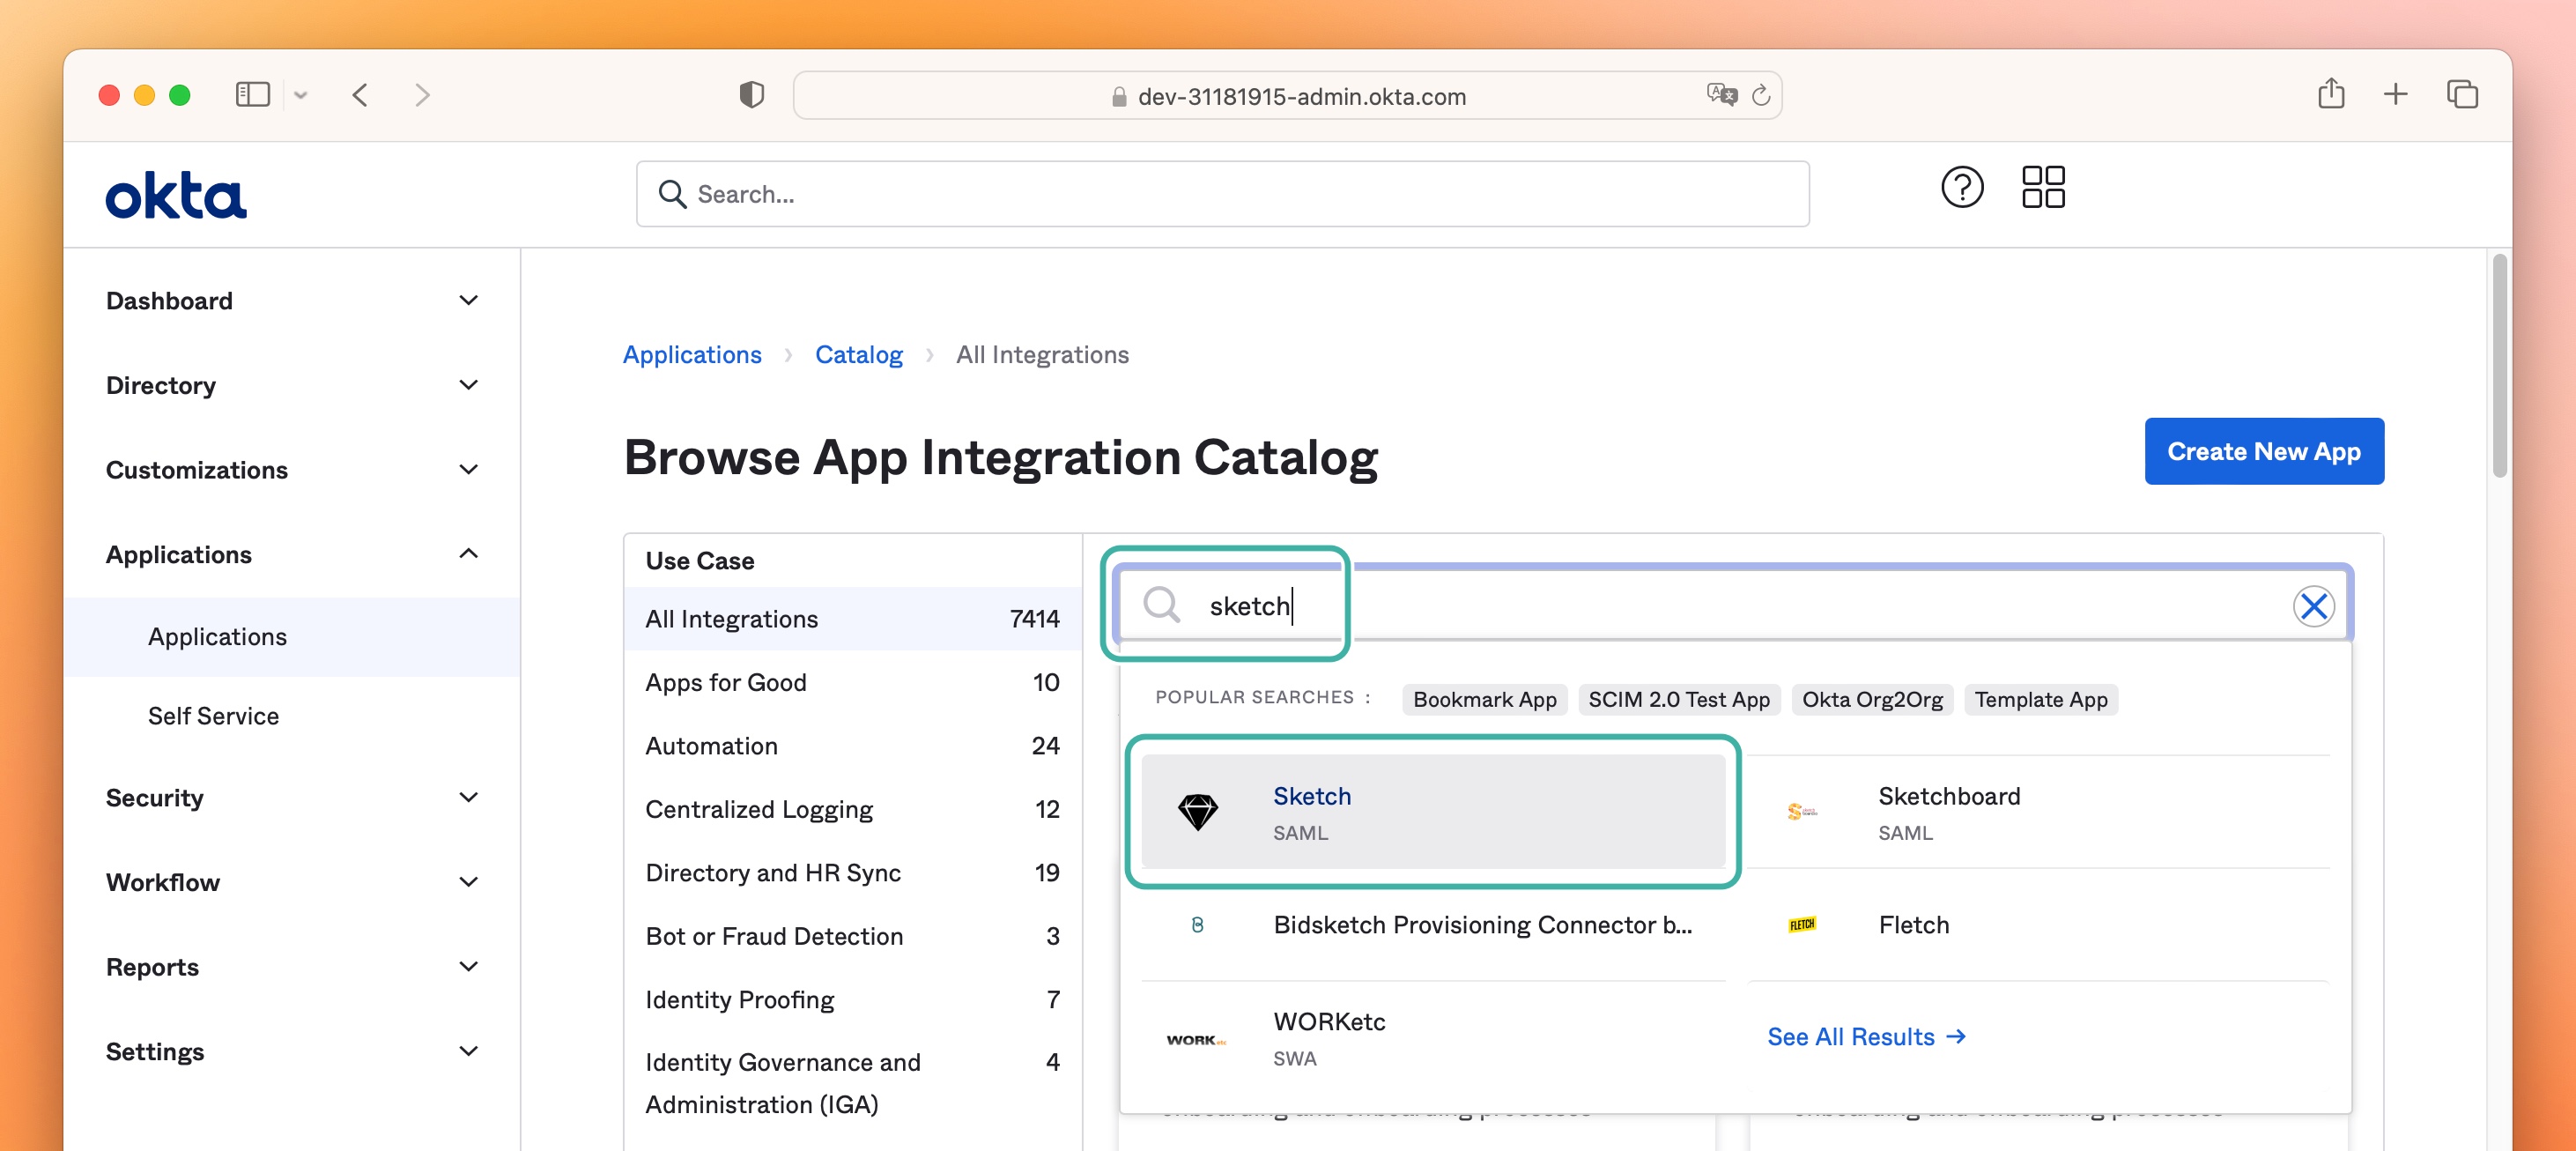
1. Click on **Add Integration**.
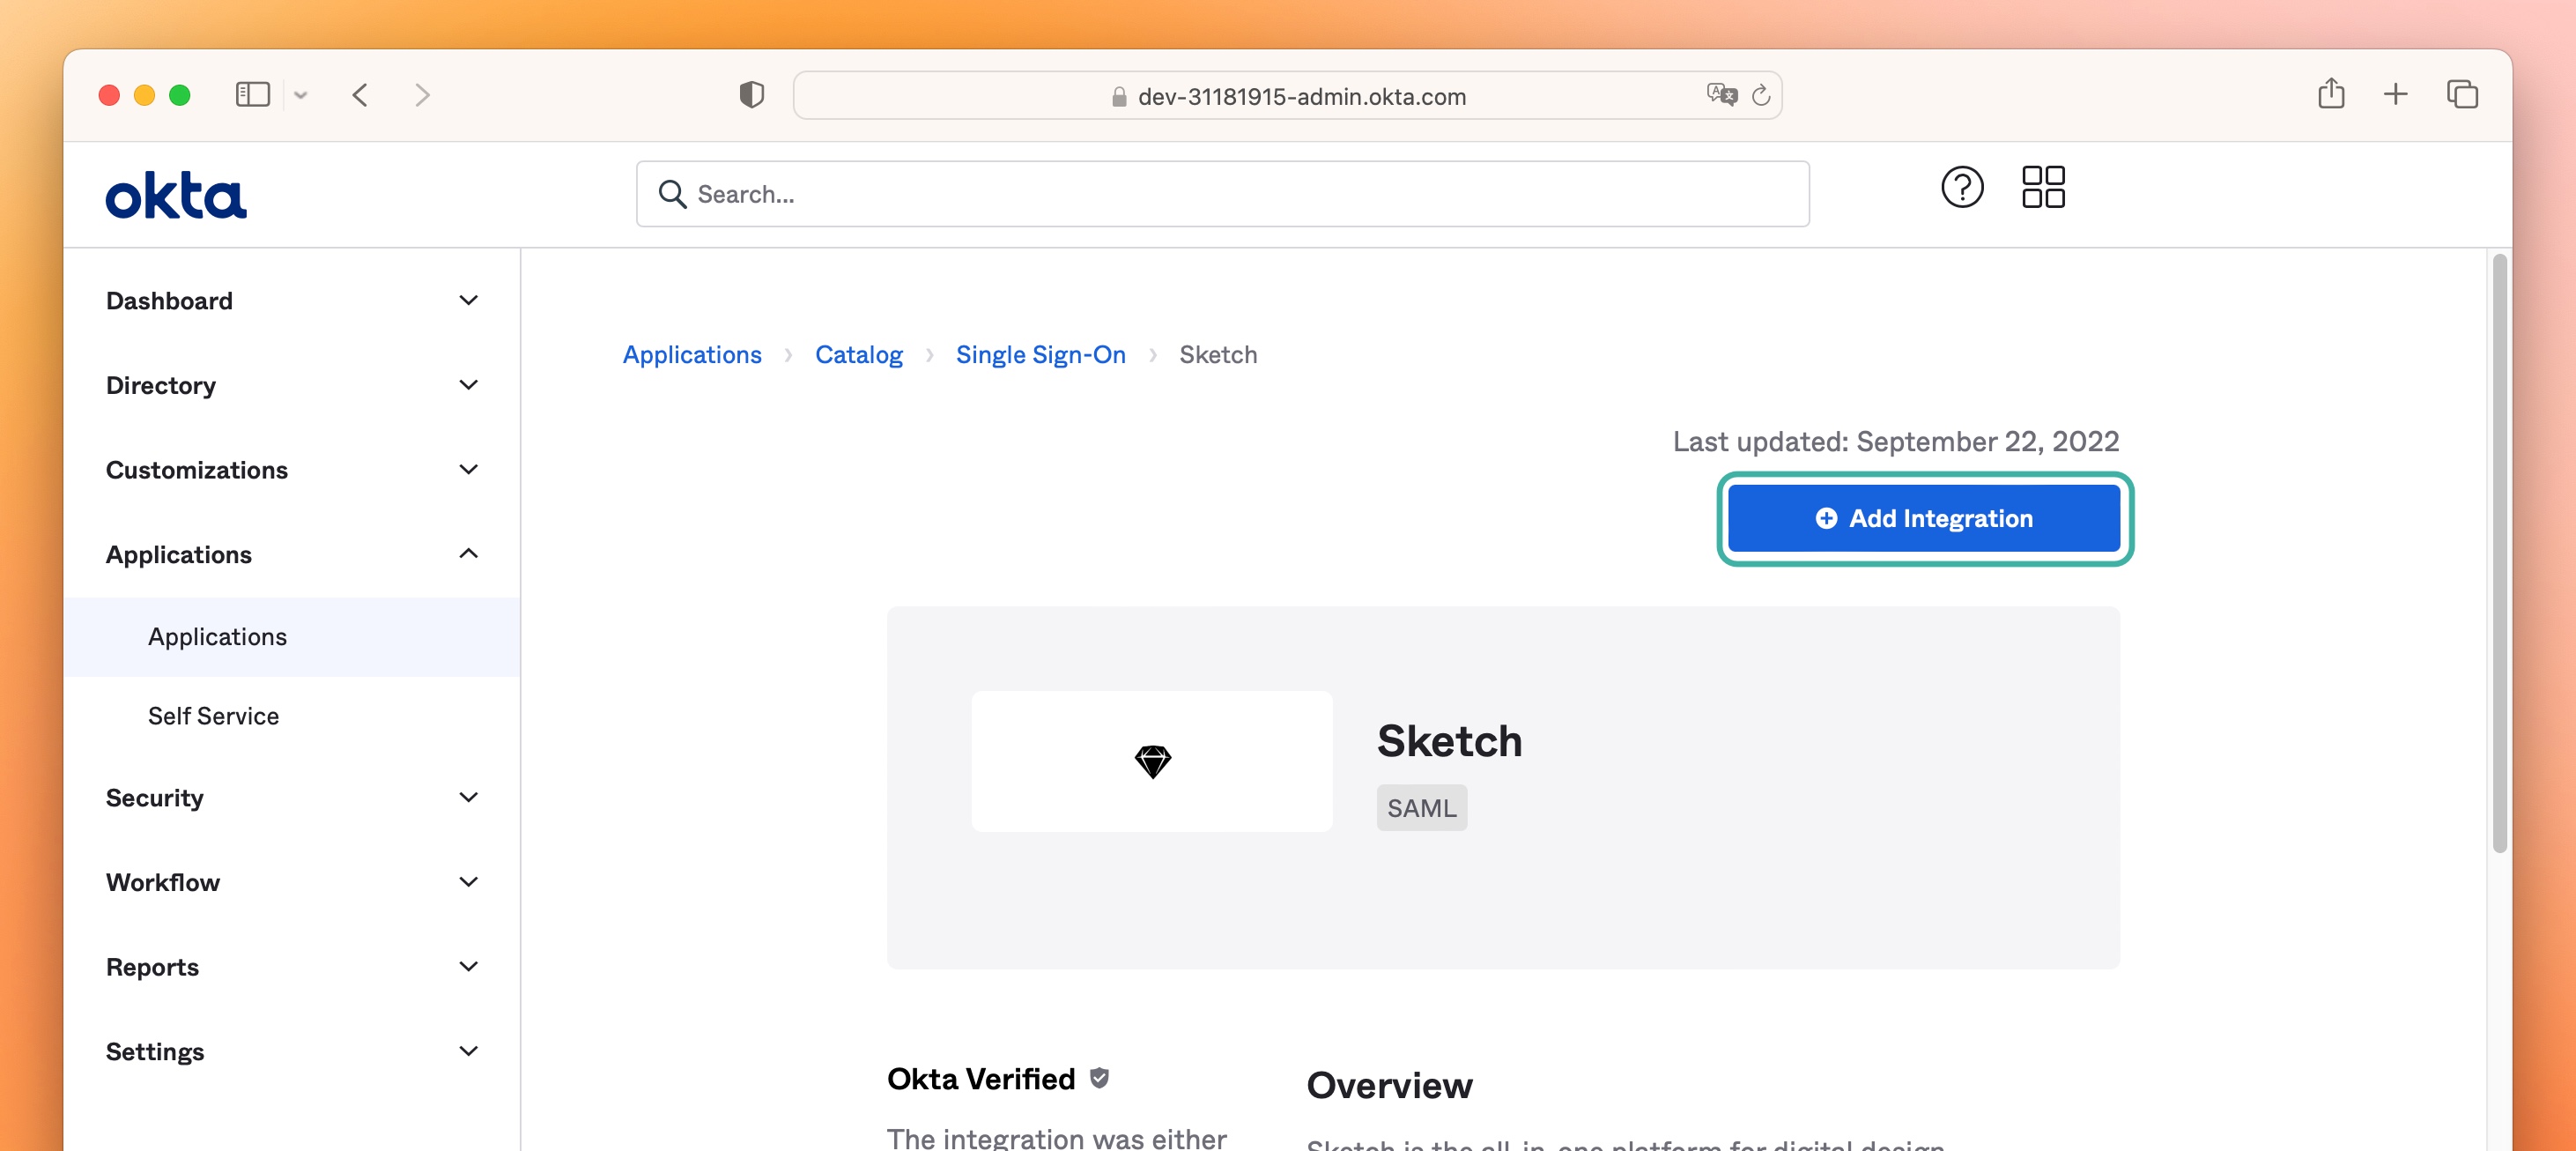
1. Enter `Sketch` in the **Application label** field. Click **Done**.
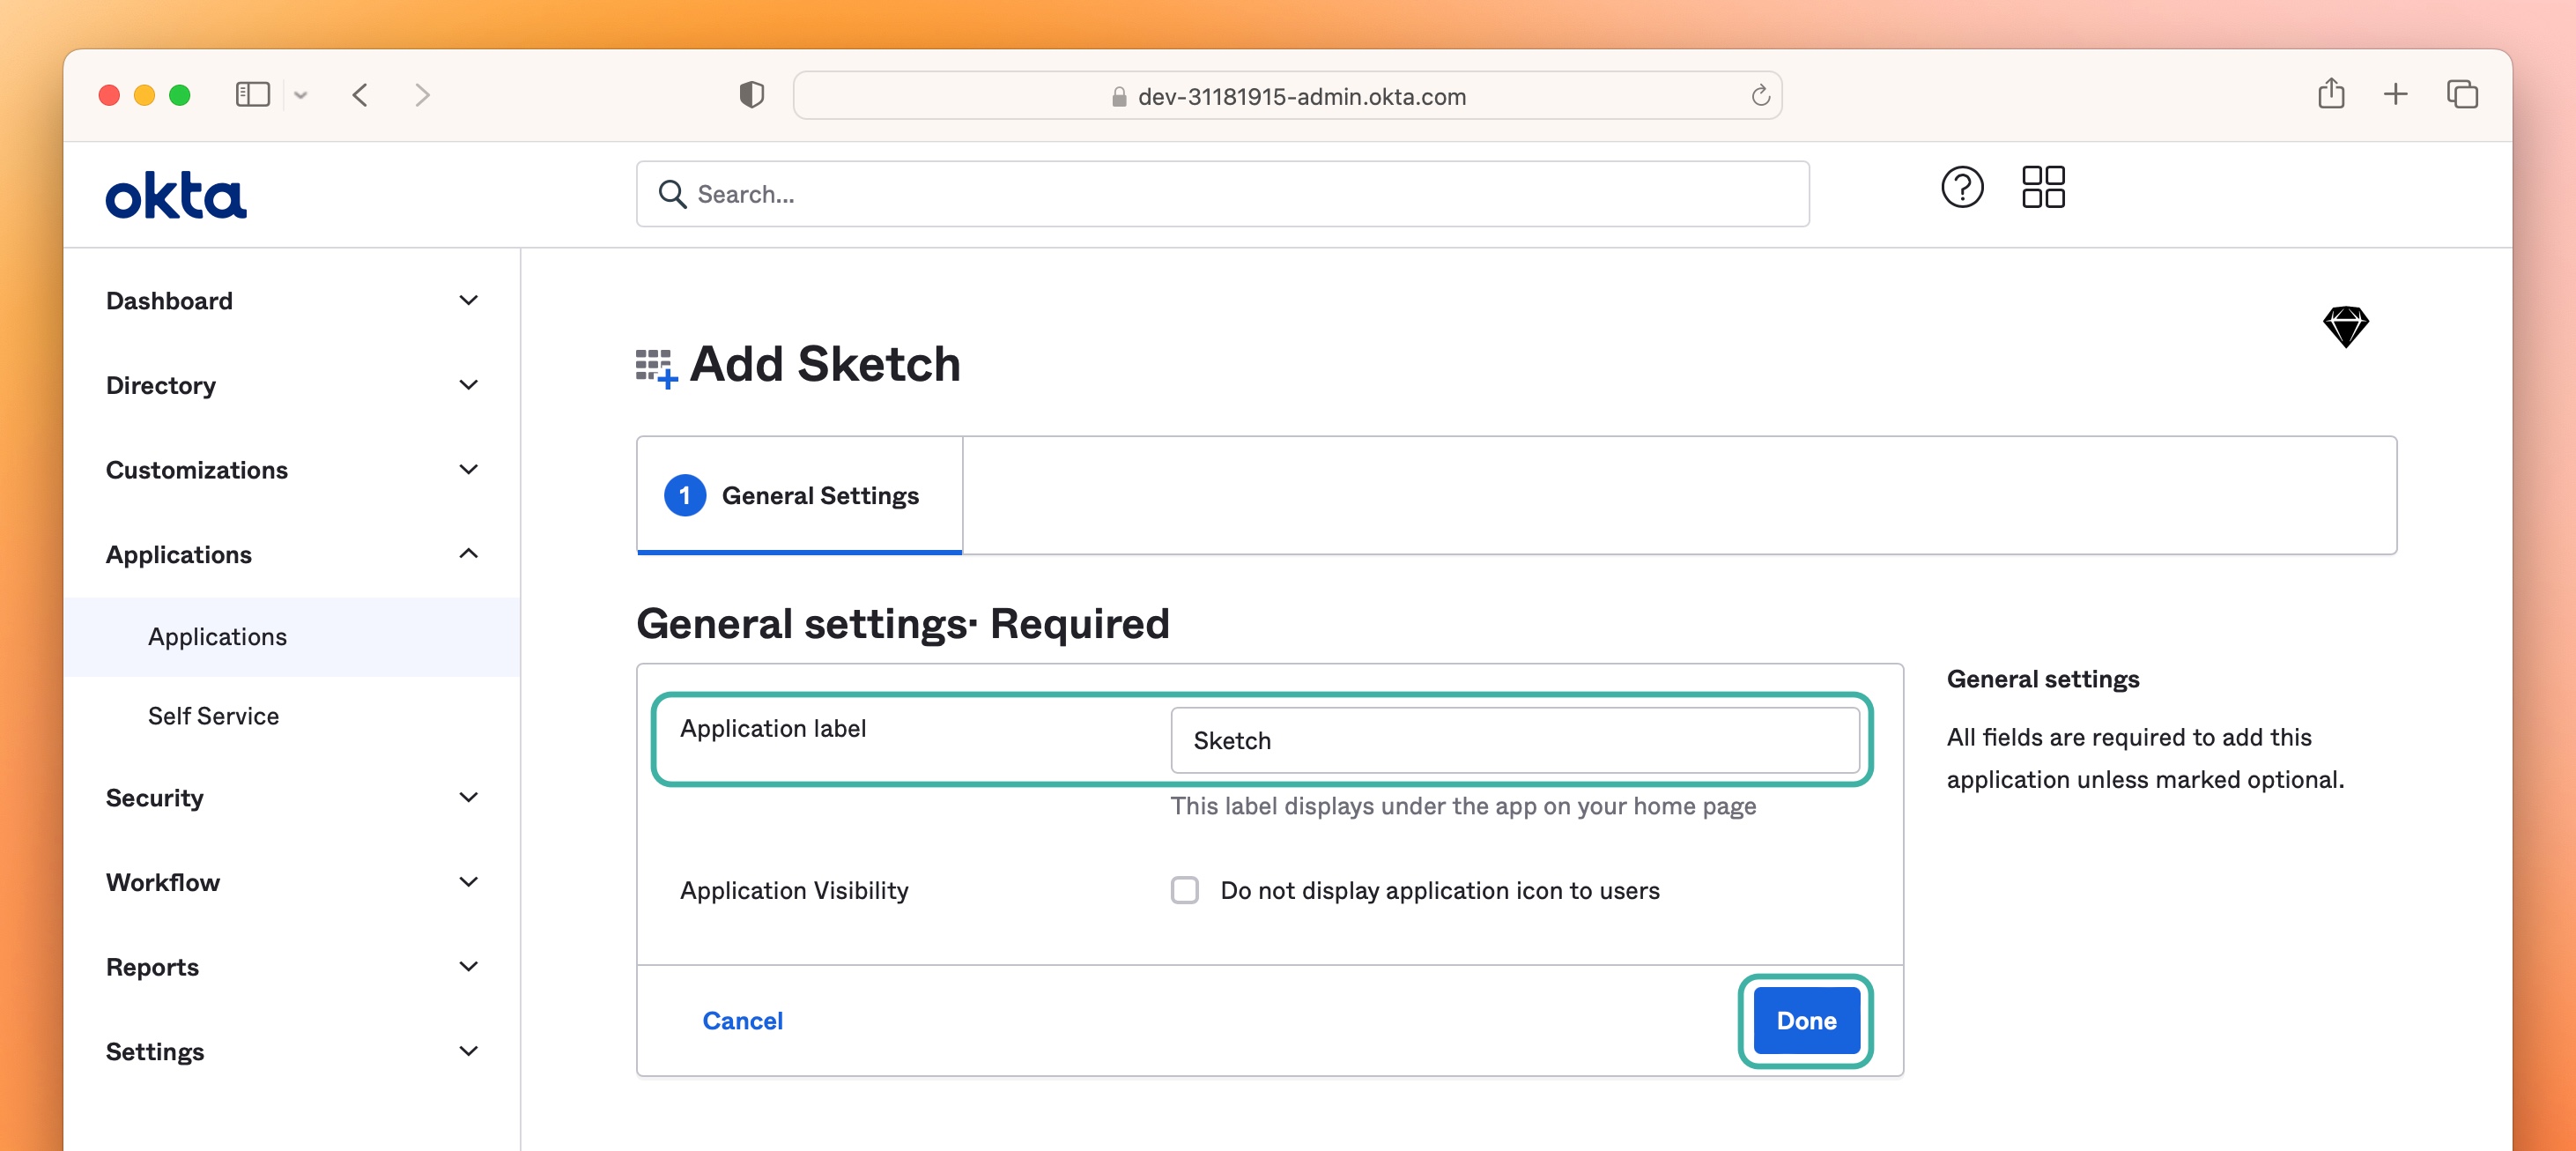
1. Under the **Sign On** tab, click on **Edit** to add your unique Sketch **Workspace ID**. You can copy this from either the **EntityID** or **ACS URL** fields created when [setting up SAML SSO in your Sketch Workspace](/docs/getting-started/single-sign-on/setting-up-saml-sso/choose-a-shortname/). Paste your Workspace ID into the Okta **Workspace ID** field and click **Save**.
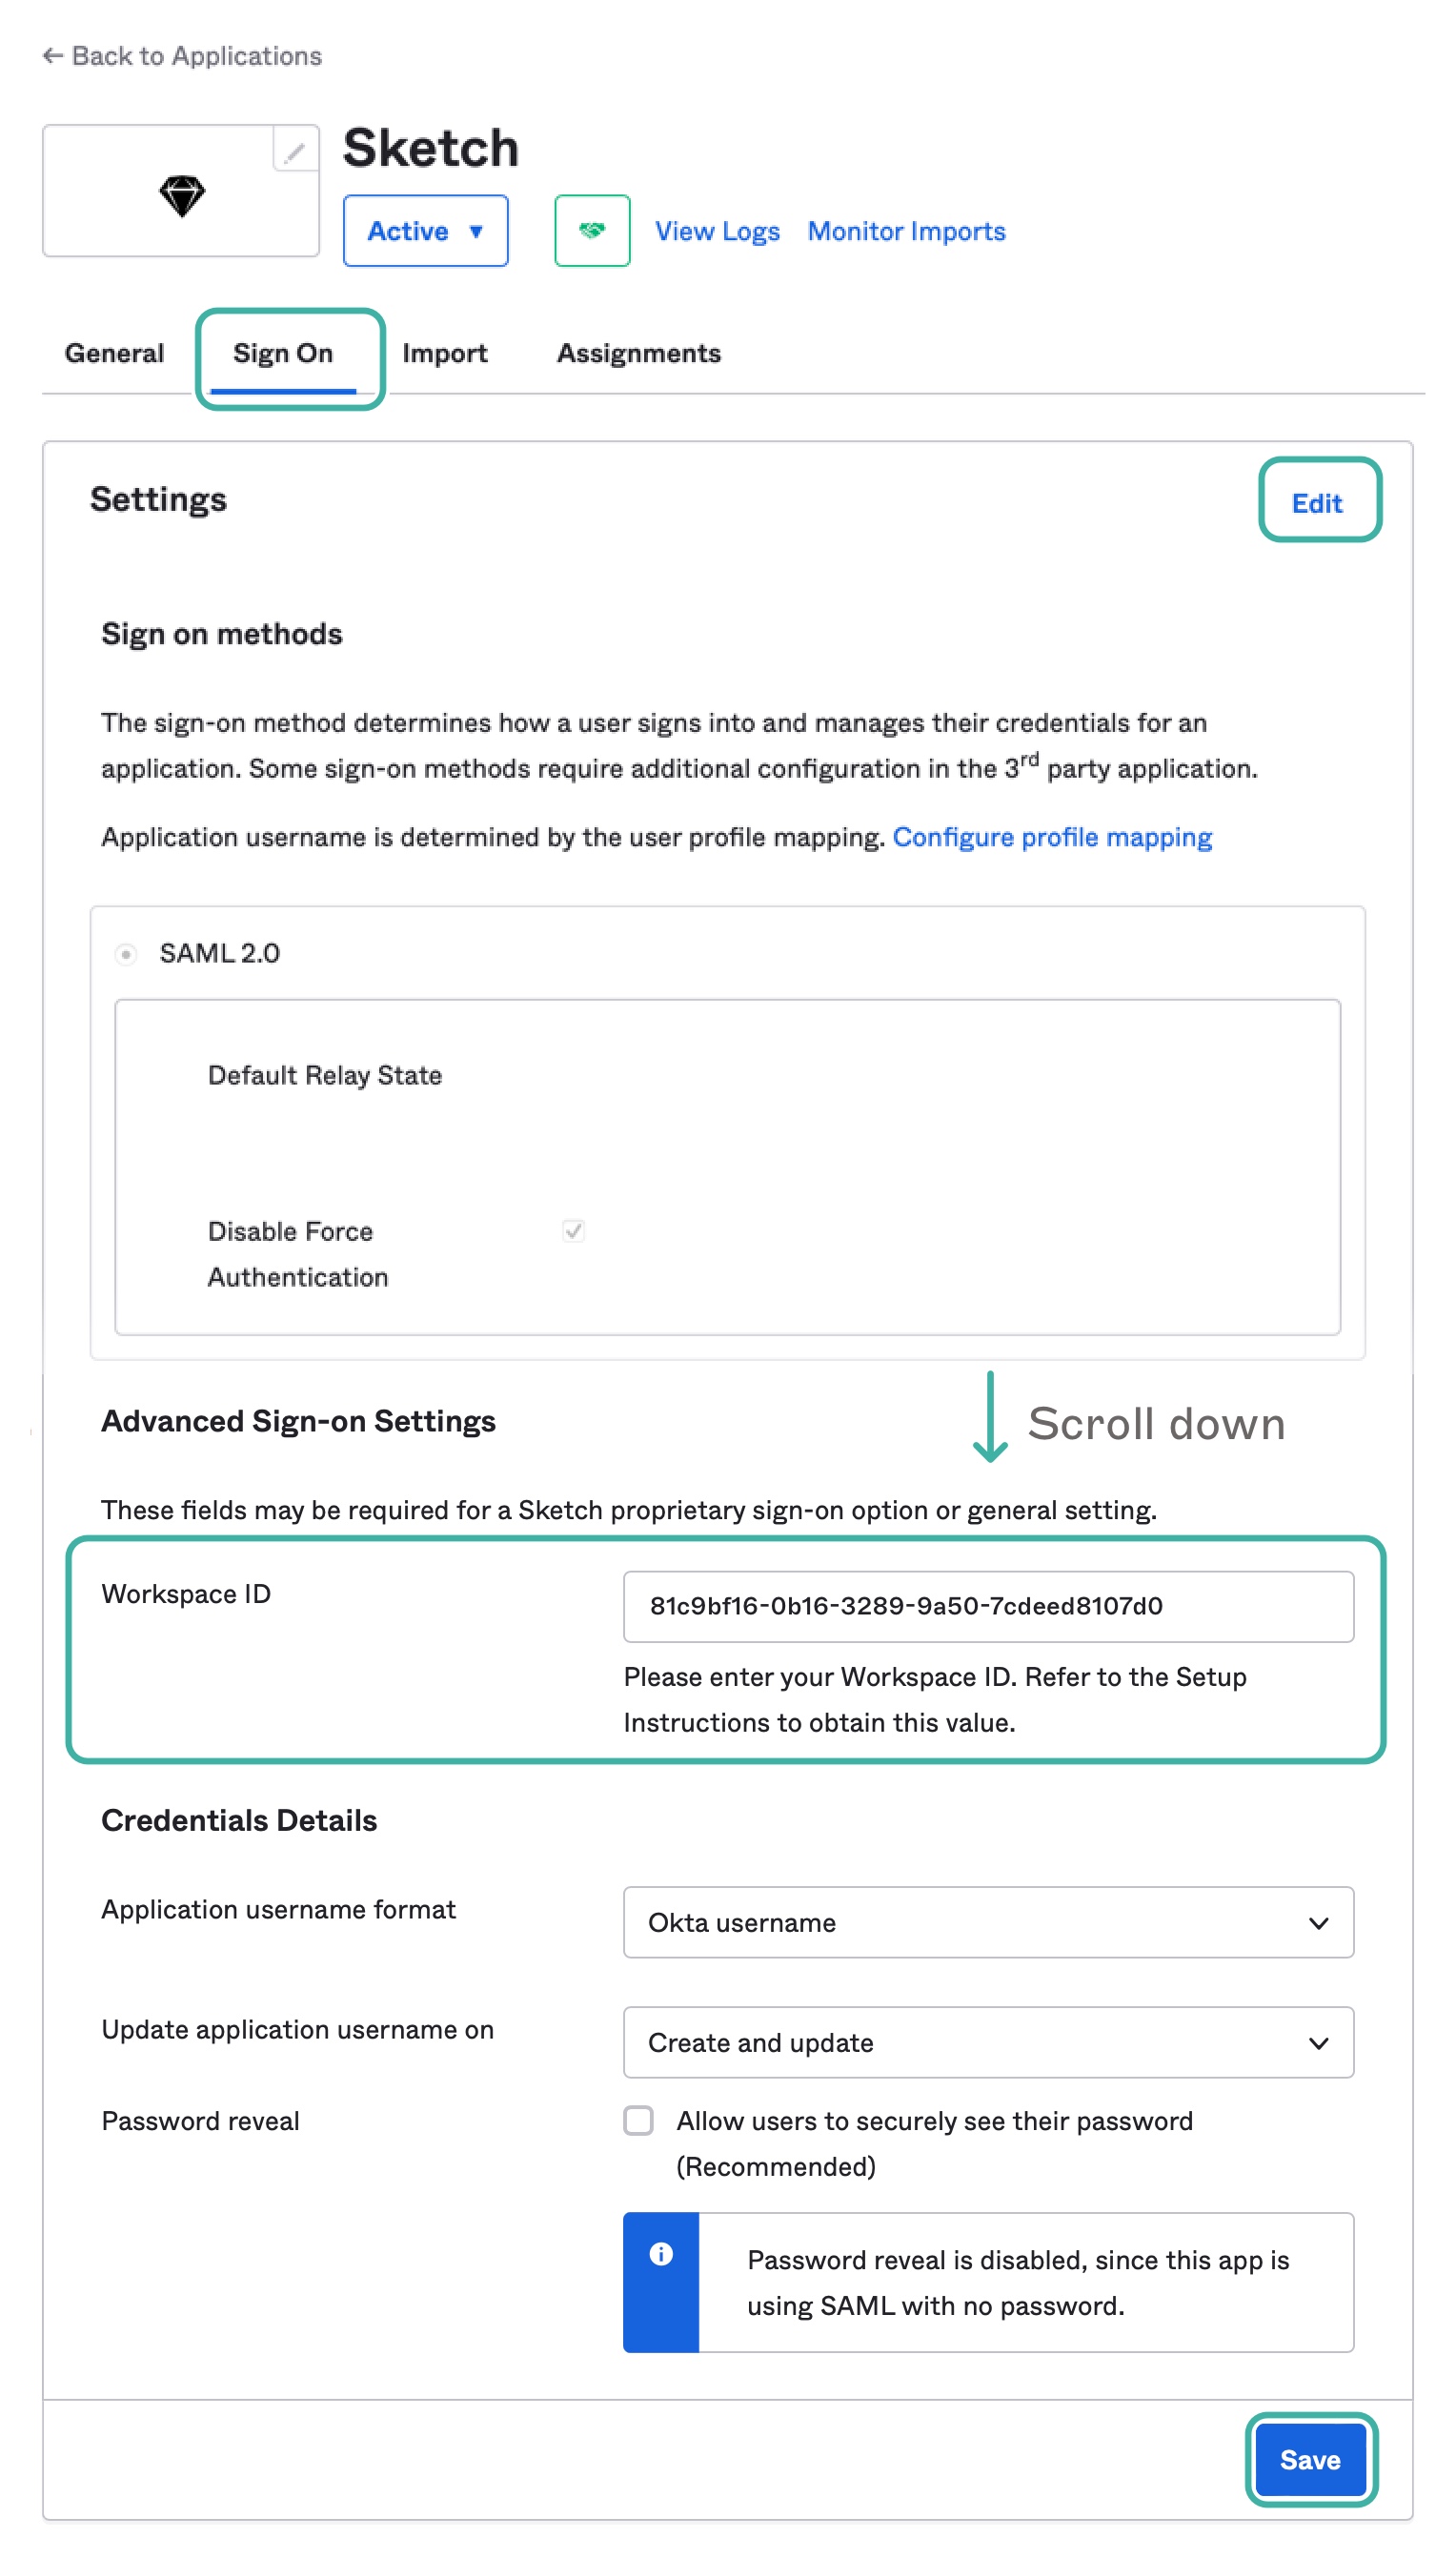
**Note**: When copying these values from Sketch make sure you’re only copying the Workspace ID. In the **Entity ID** field, the Workspace ID is everything after `sketch-`. In the **ACS URL**, it is everything after `acs?id=`.
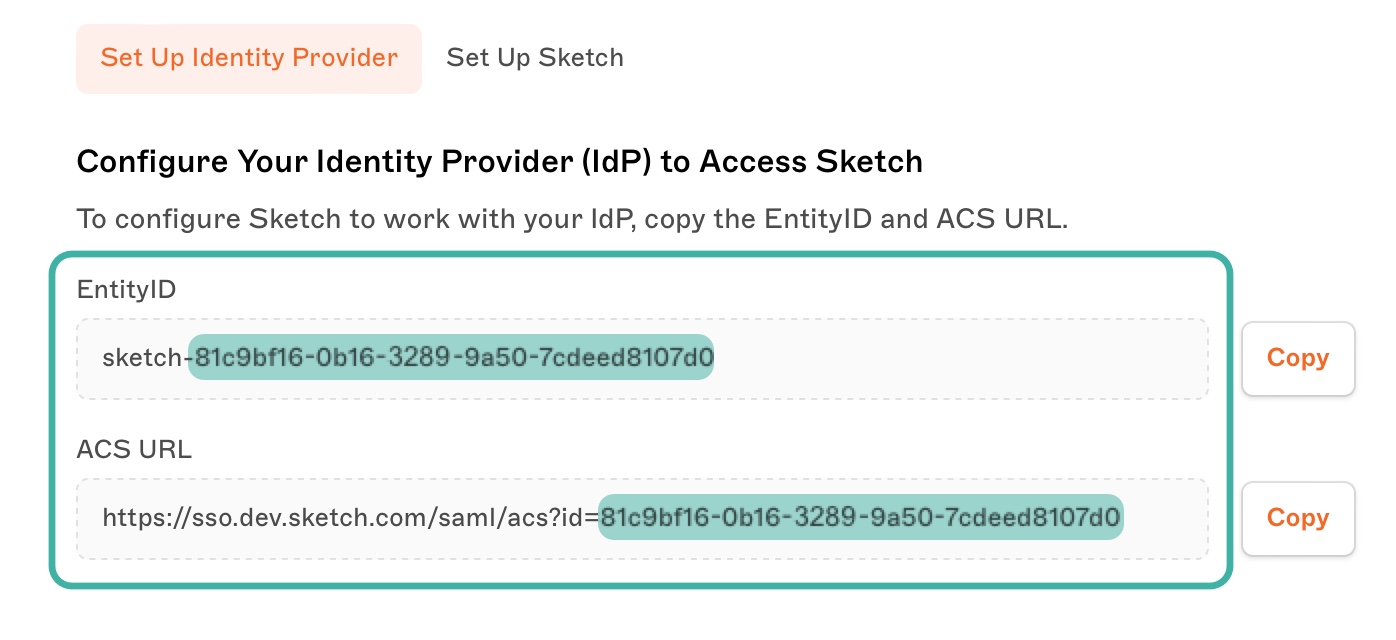
*This image highlights where to find the Workspace ID in the Single Sign-On tab of the People & Settings page in the Sketch web app*
1. Click on the **View IdP metadata** link in the **Actions** menu to download the `metadata.XML` file. You’ll need it when setting up SAML SSO in Sketch.
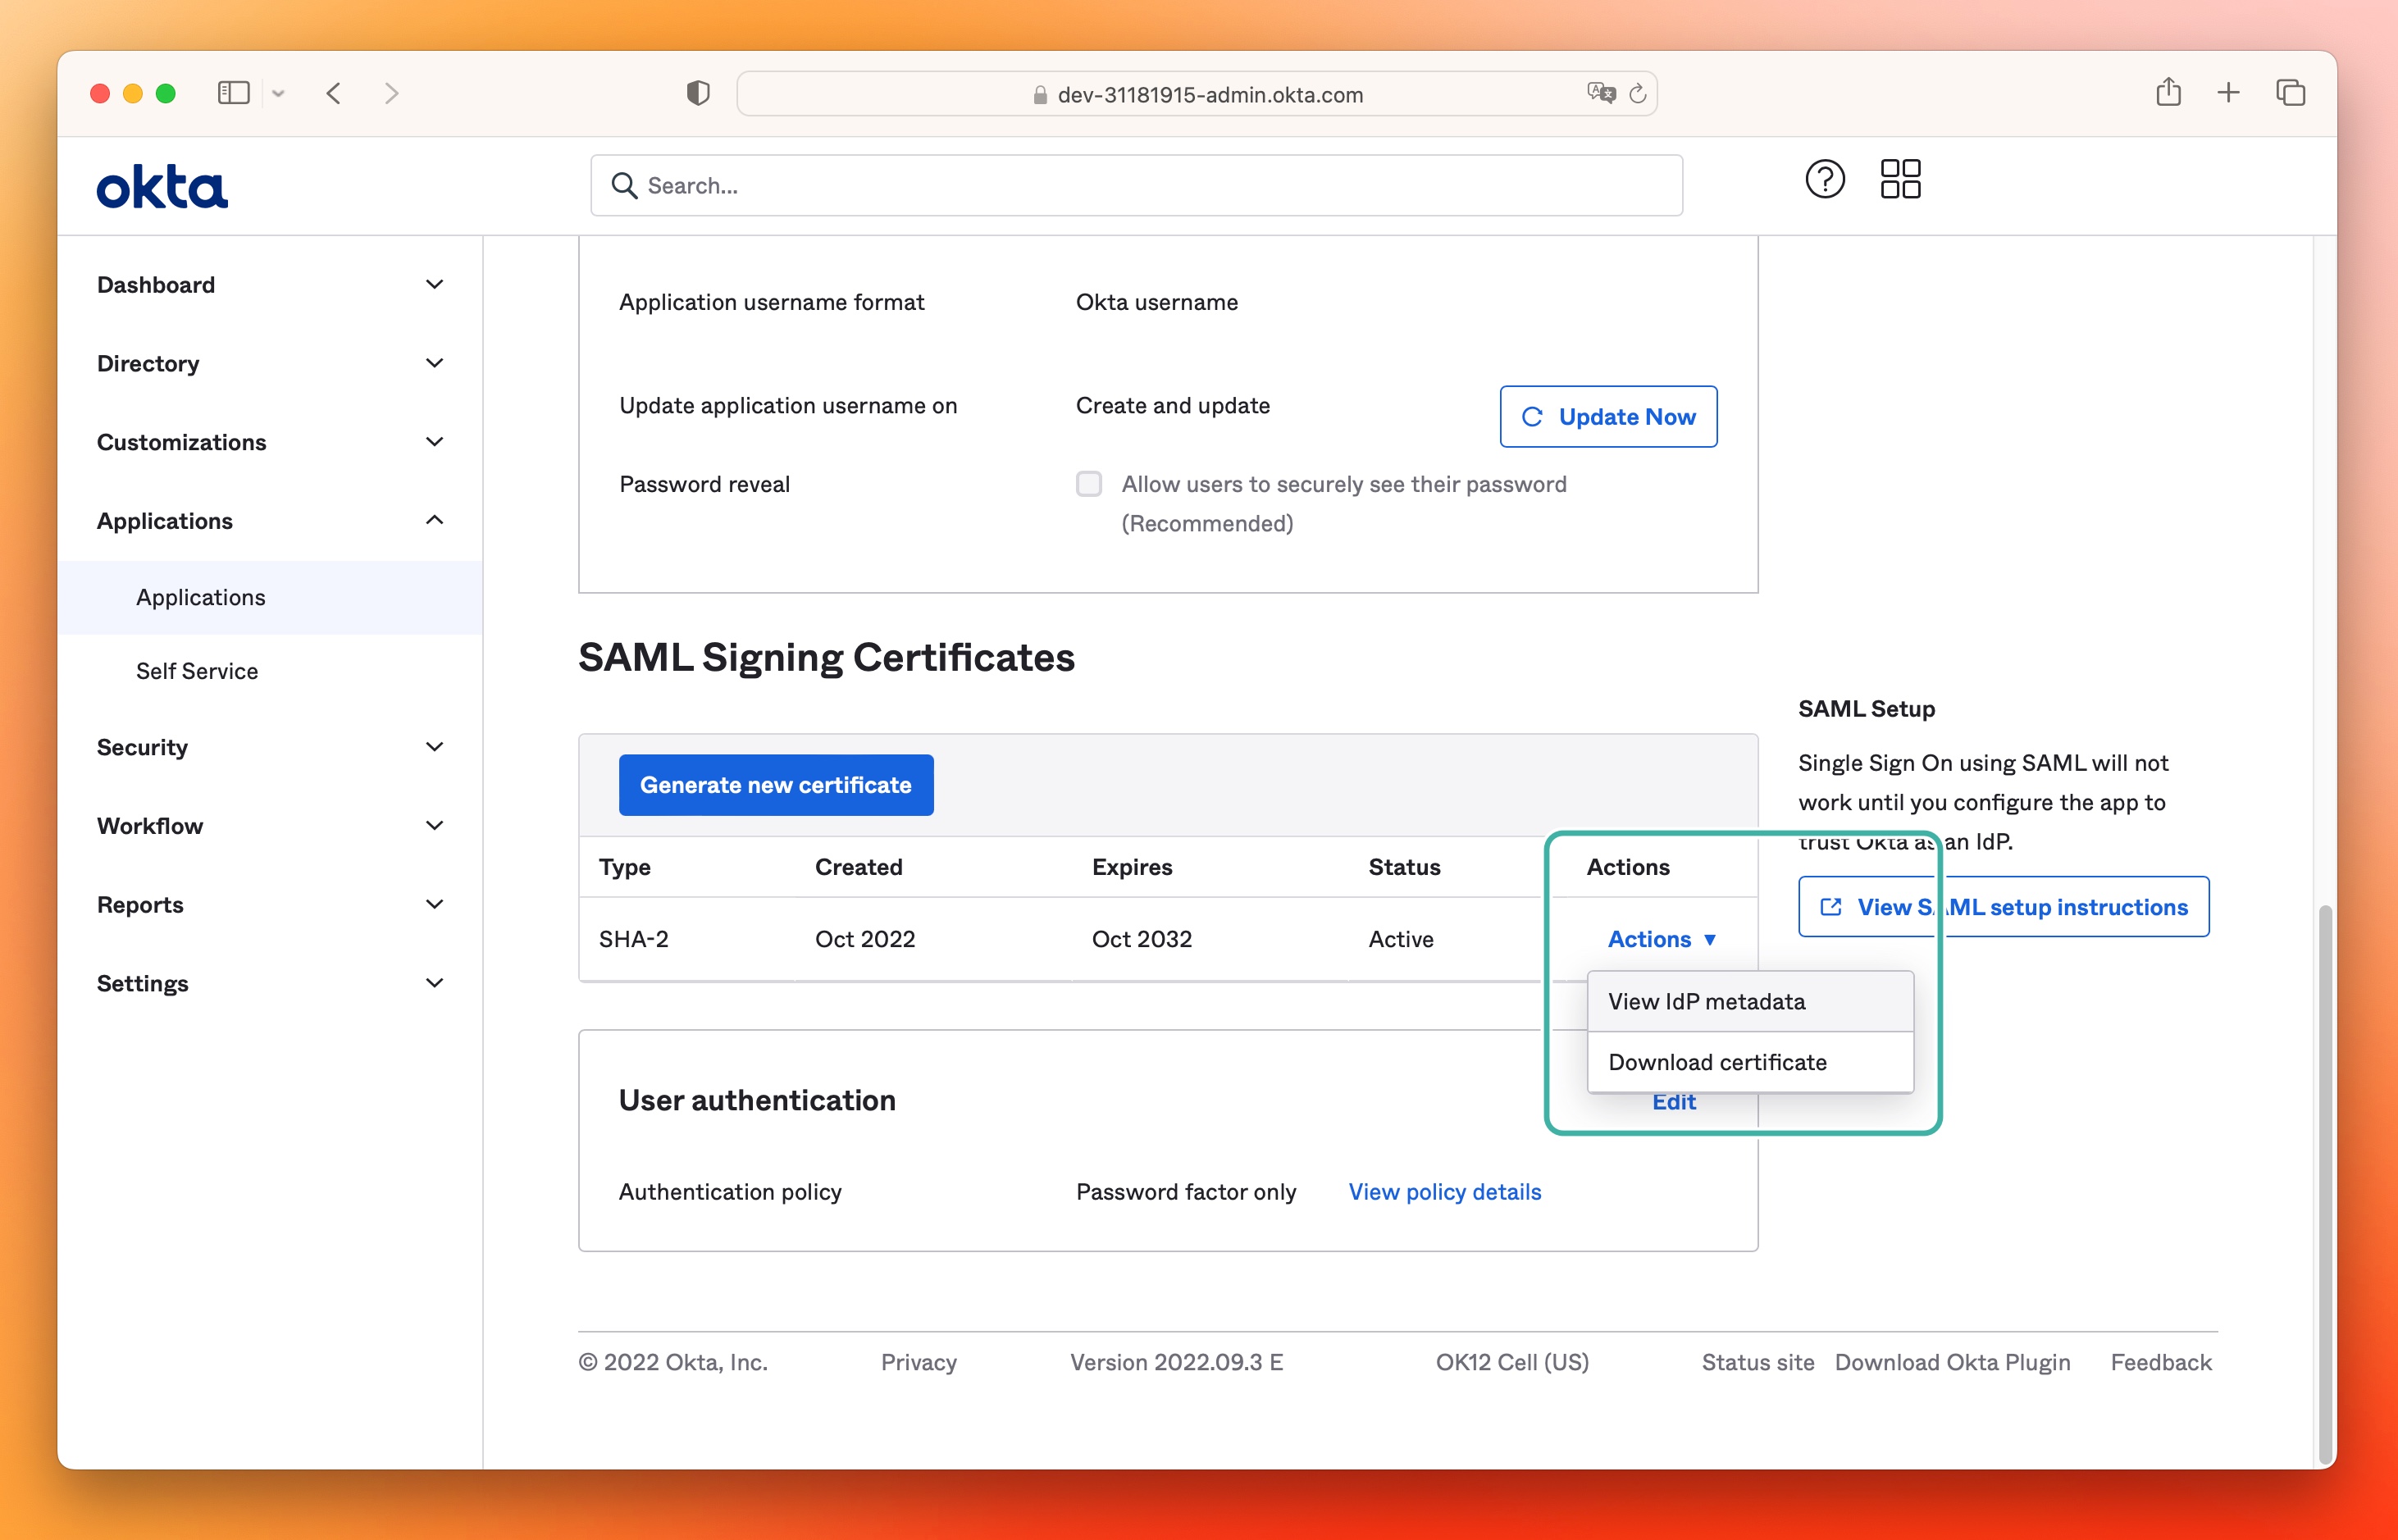
1. Head to the **Assignments** tab and give People or Groups access to your Workspace.
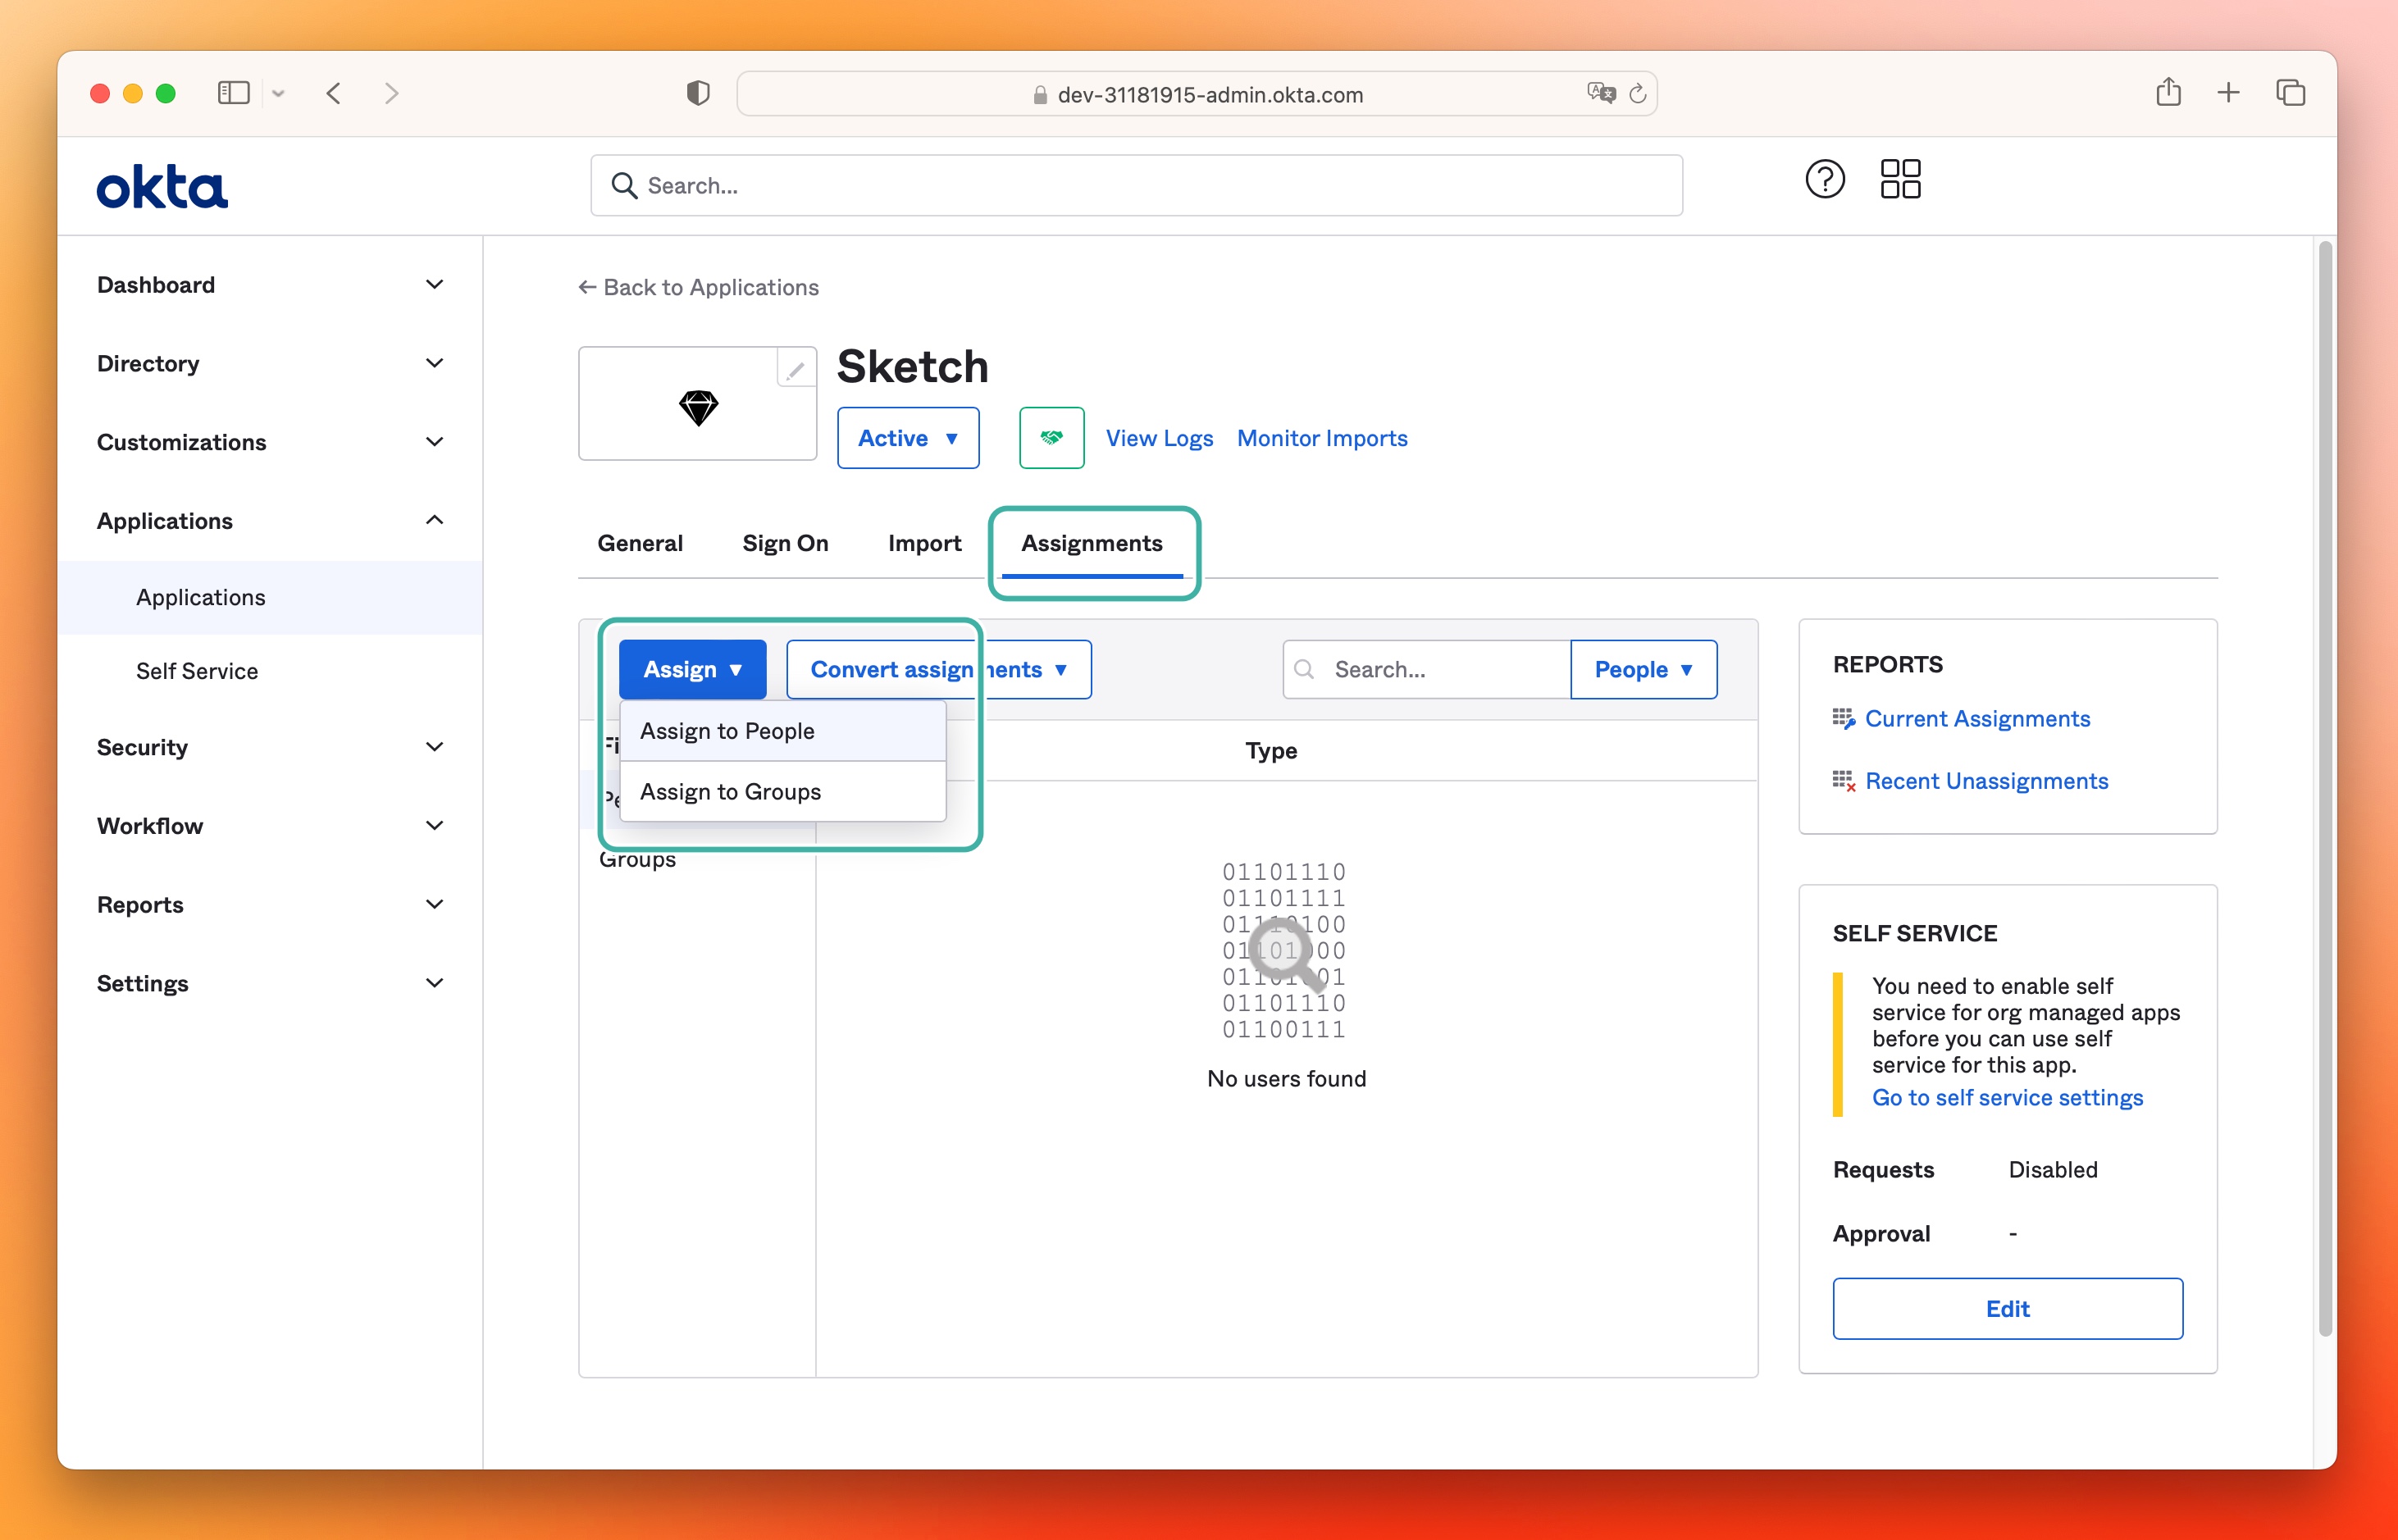
1. Now head to [How to finish setting up SAML SSO in your Workspace](/docs/getting-started/single-sign-on/setting-up-saml-sso/finish-setting-saml-sso/) to finish the SAML SSO process in Sketch.
--------------------------------------------------------------------------------
title: "TrustLogin setup (Only Chrome)"
description: "Learn how to set up TrustLogin as an identity provider for Sketch with the help of our step-by-step guides and video tutorials."
last_modified: "2026-01-23"
url: "https://www.sketch.com/docs/getting-started/single-sign-on/setting-up-saml-sso/setup-identity-provider/trustlogin-setup/"
--------------------------------------------------------------------------------
## TrustLogin setup (Only Chrome)
1. Log in as an Admin in the TrustLogin Admin portal.
1. Head to **Apps** on the left sidebar.
1. Click on **Add own SAML app** in the right corner.
1. Type `Sketch` as the App name and upload [Sketch’s logo](https://cdn.sketch.com/docs/sso/sketch-logo.png) as the app logo.
1. Click on **Download metadata** to download the metadata.XML file — you’ll need this file when setting up SAML SSO in Sketch.
1. Use the EntityID and ACS URL values that you got when [setting up SAML SSO in your Workspace](/docs/getting-started/single-sign-on/setting-up-saml-sso/choose-a-shortname/). Remember these are unique to your Workspace. Complete the rest of the fields with the following information:
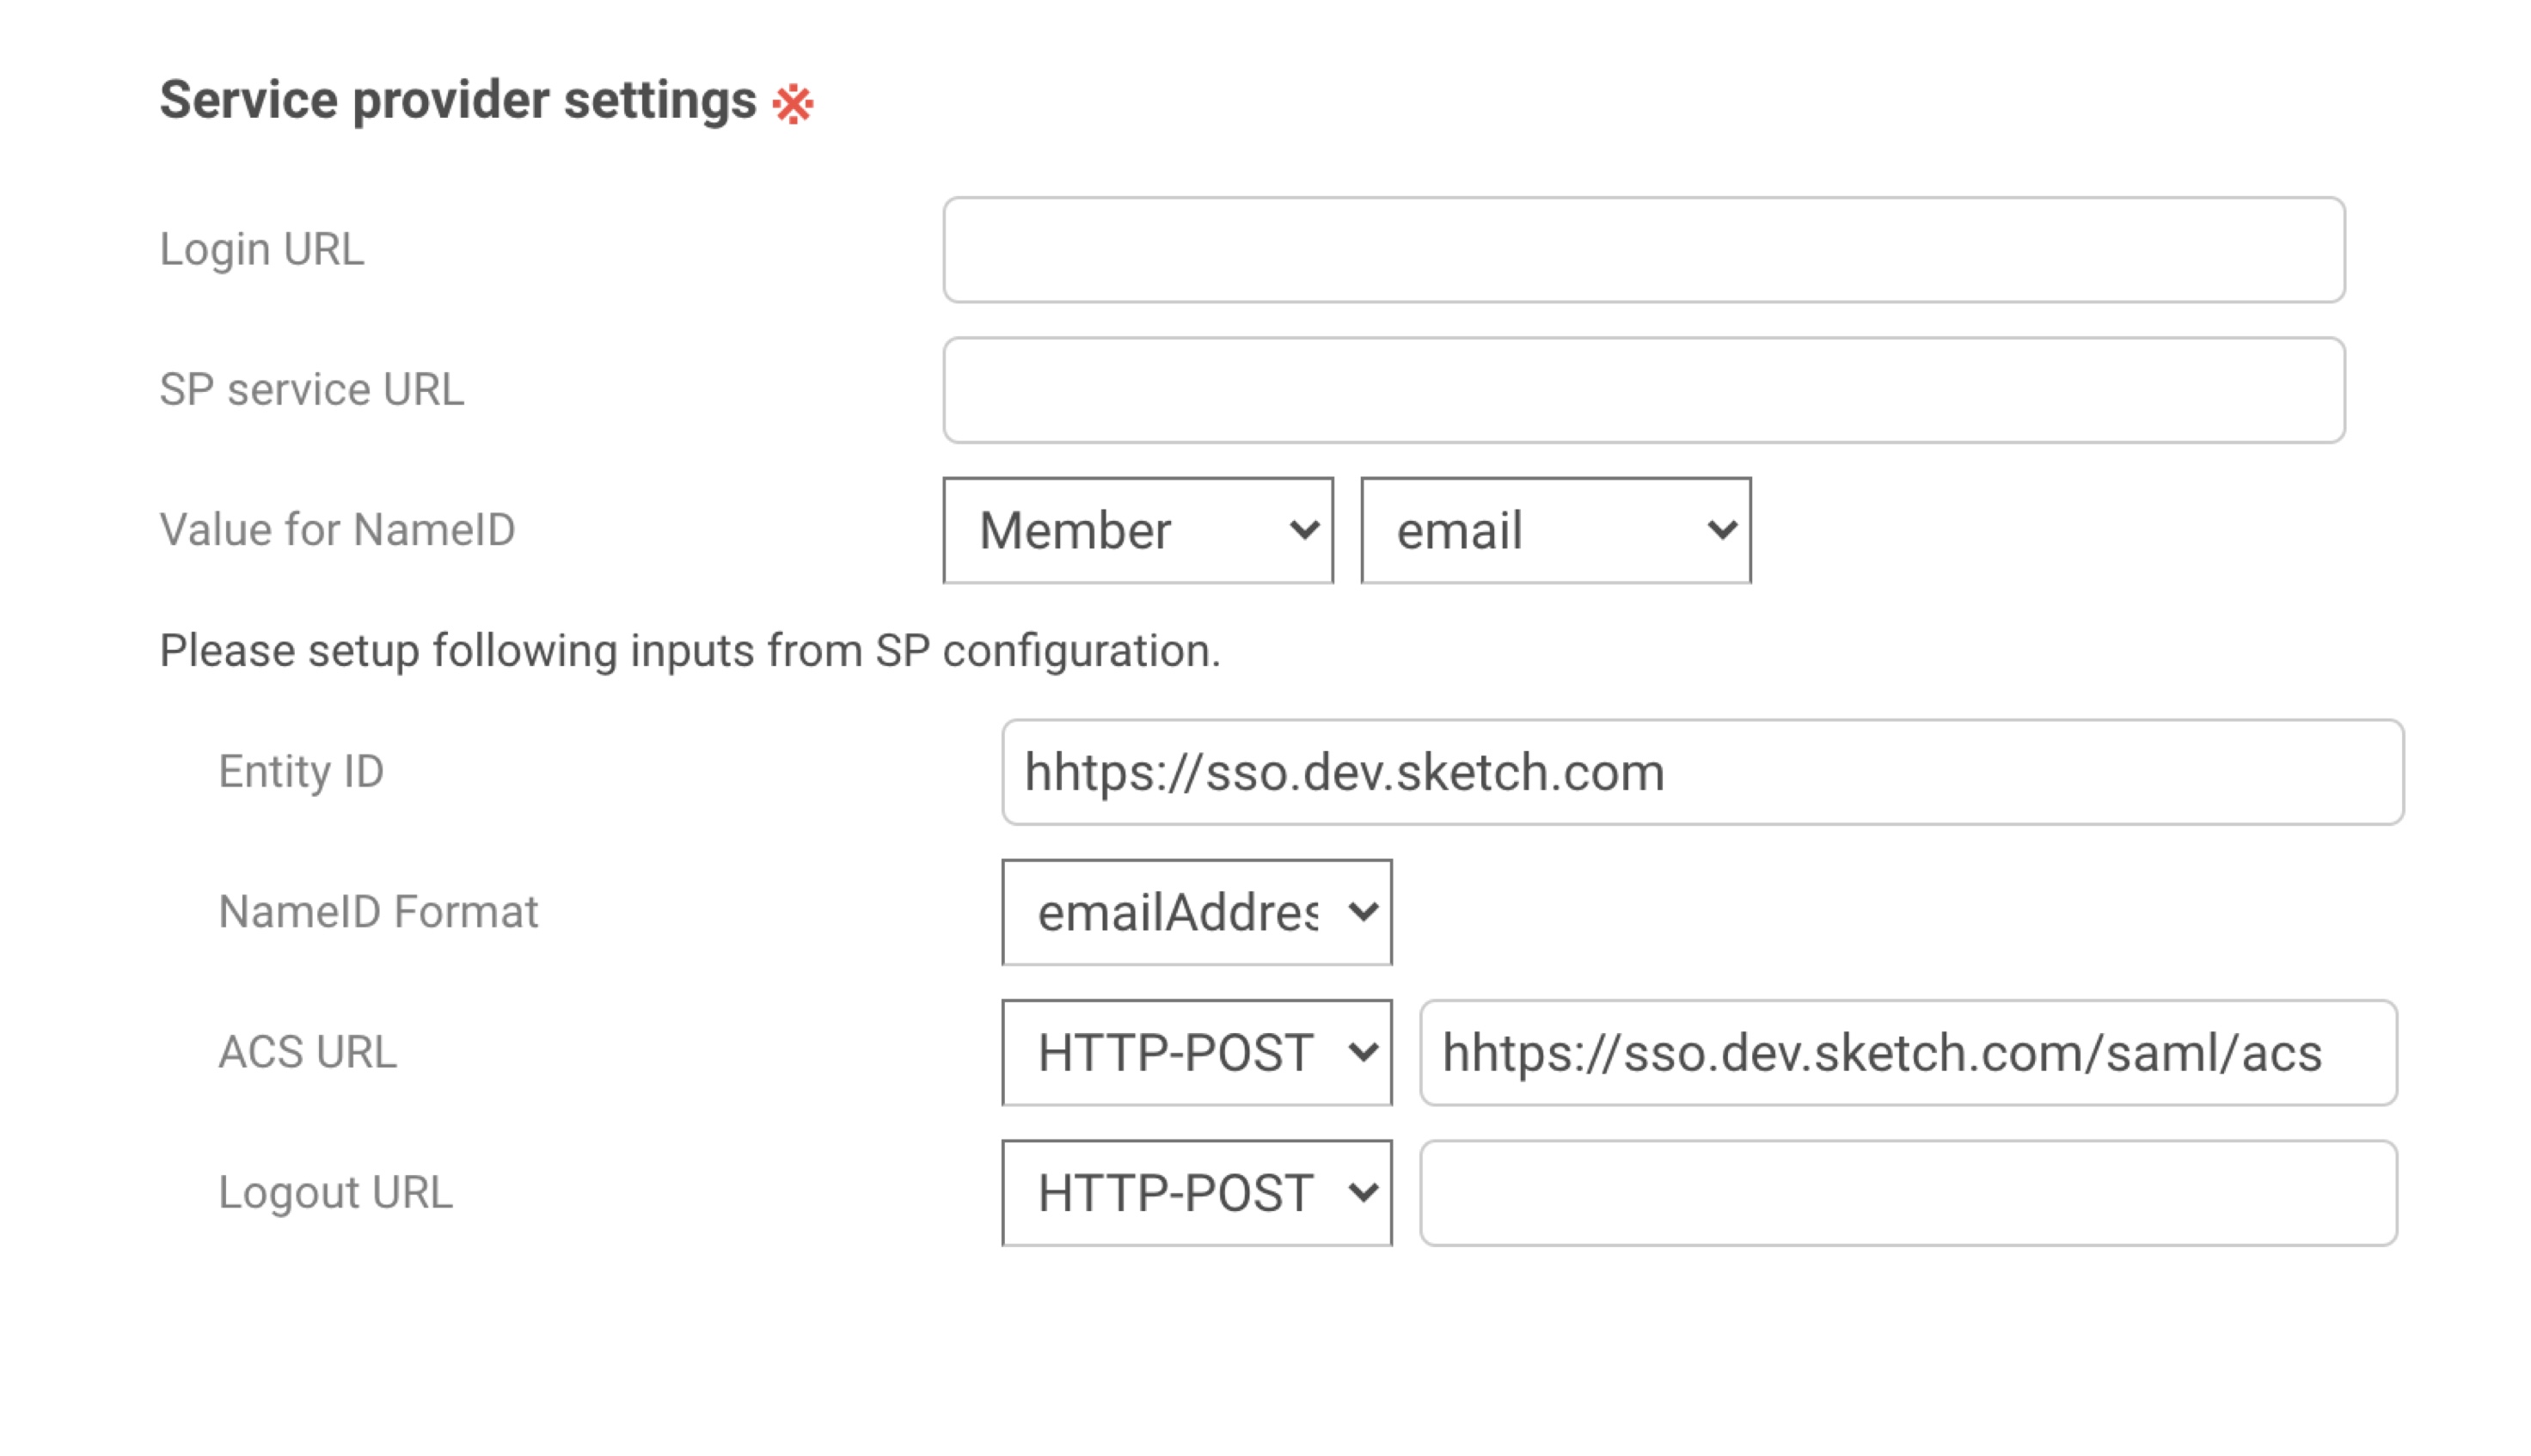
1. Click **Configure** and add the following attributes. In the IdP’s `Value` column you’ll find the values for usernames in TrustLogin.
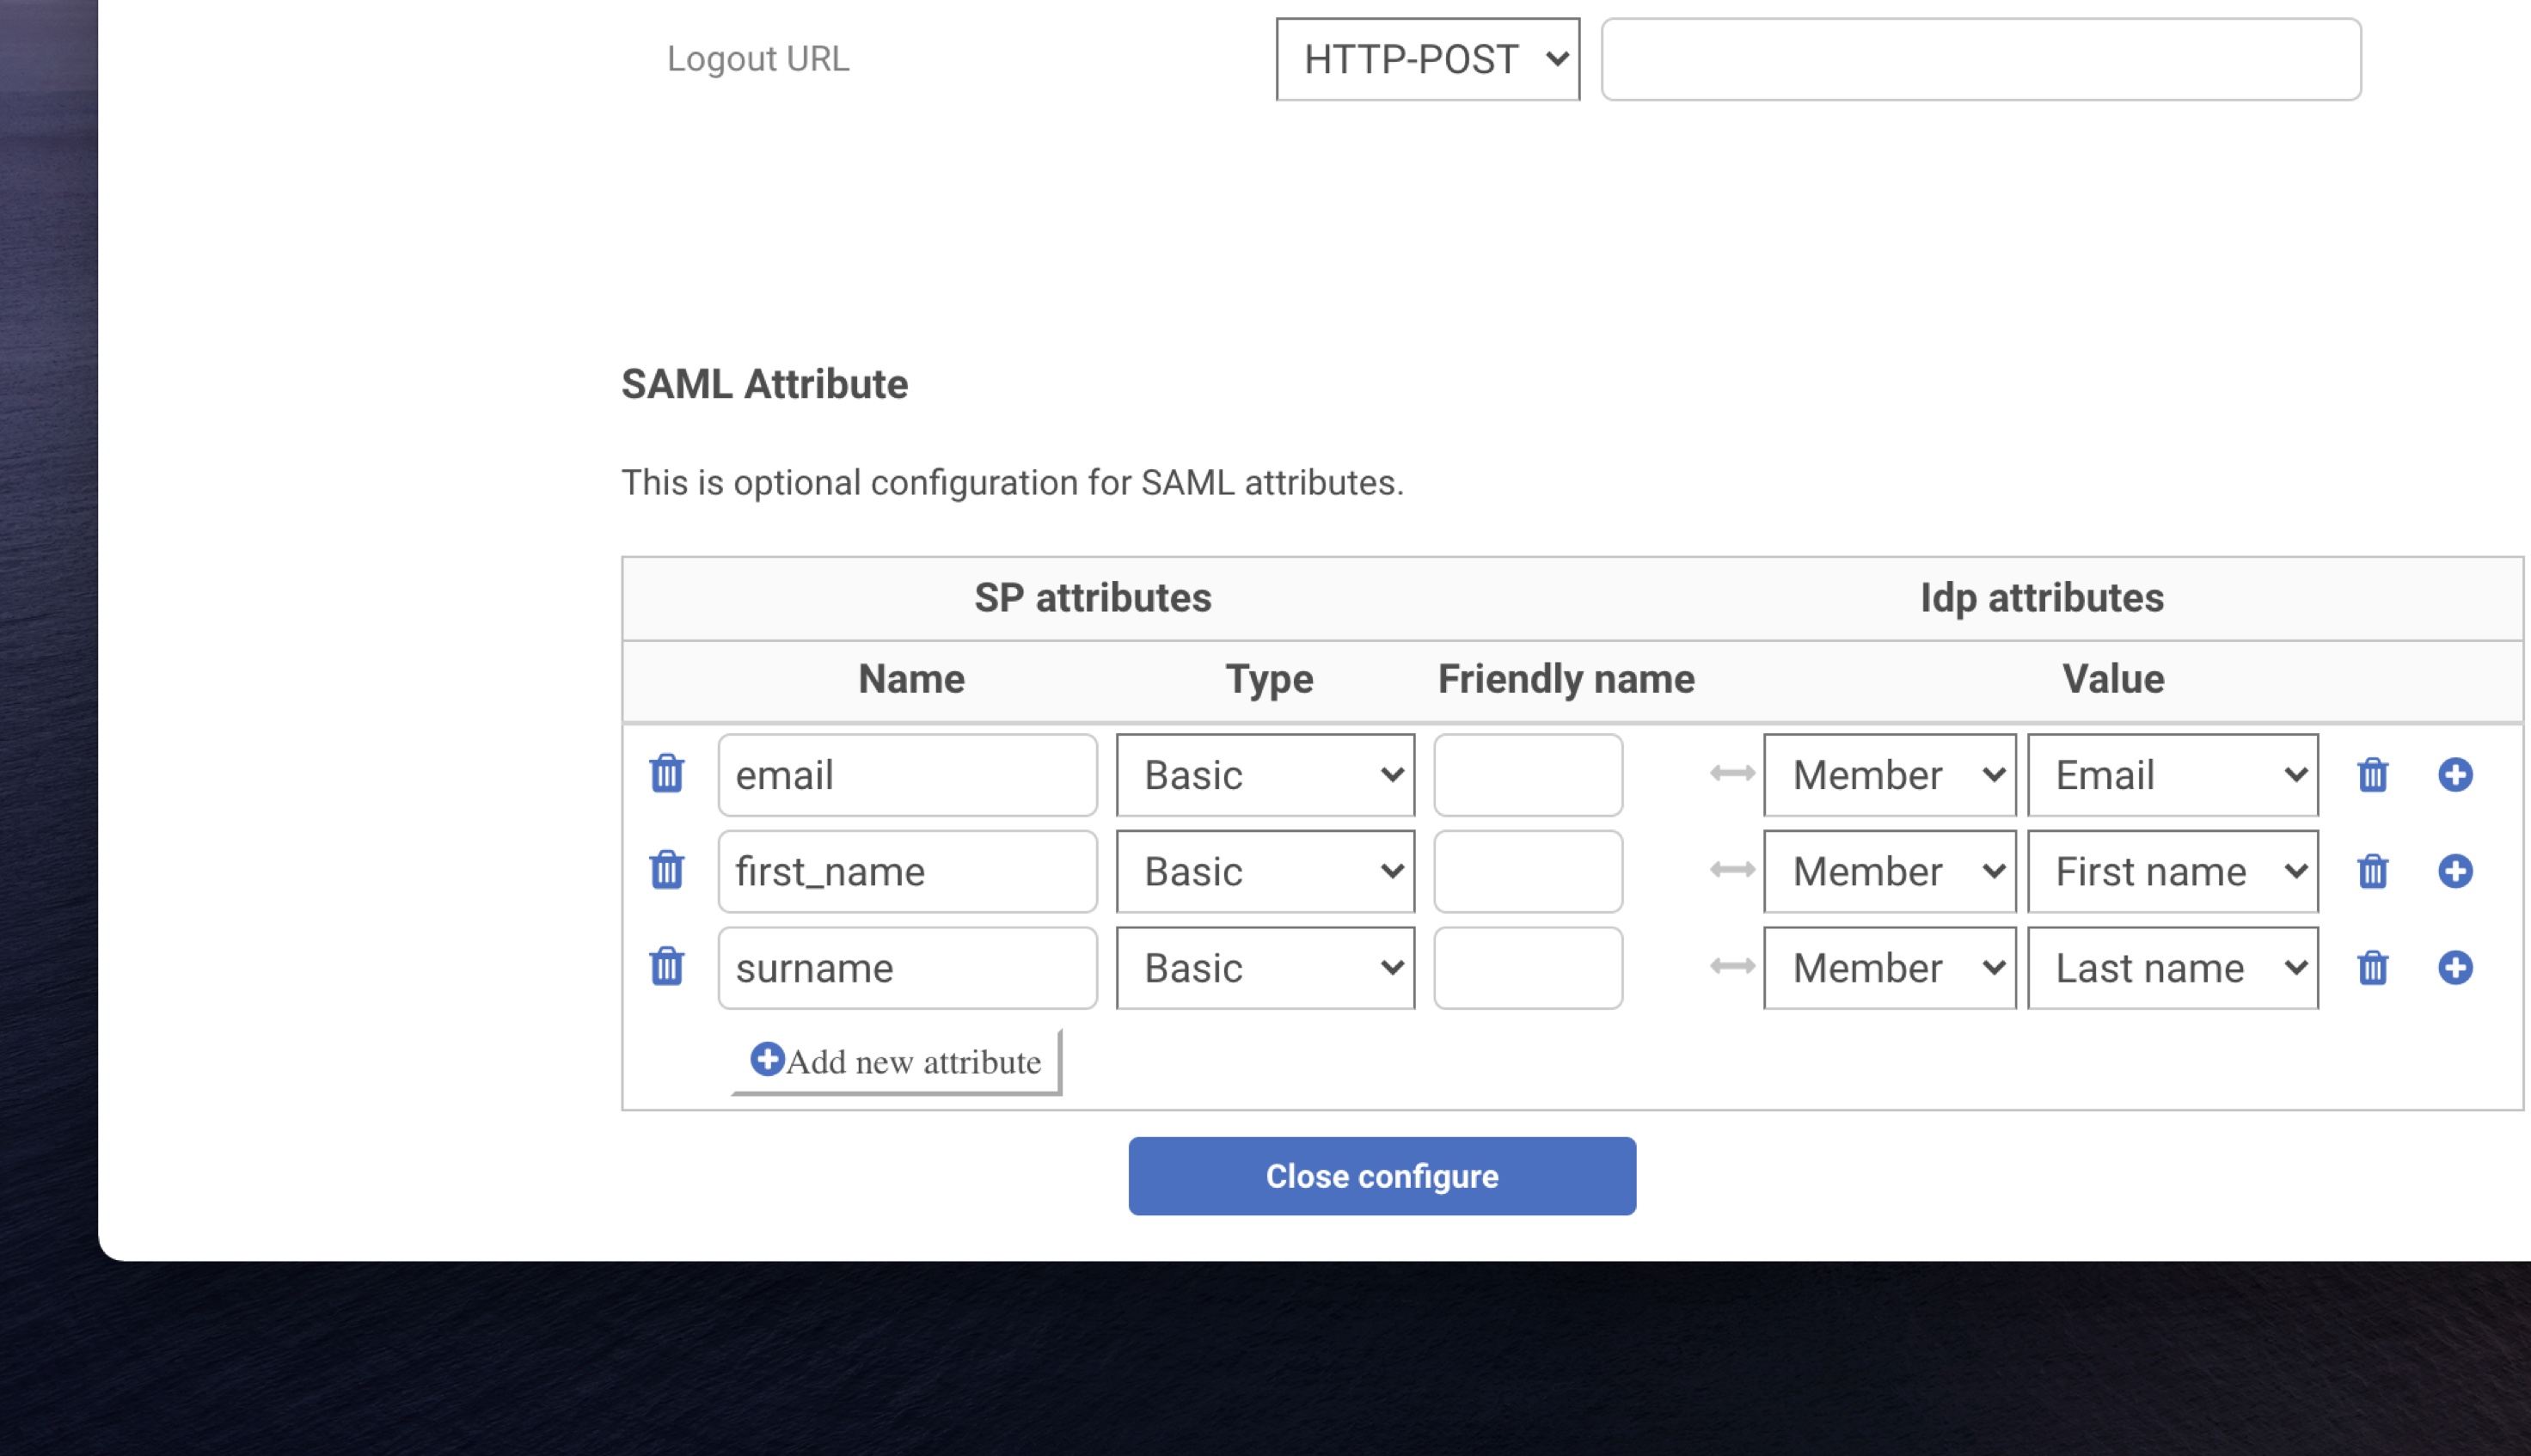
1. Click **Register**.
1. Add users to the new app.
1. Now head to the [How to finish setting up SAML SSO in your Workspace](/docs/getting-started/single-sign-on/setting-up-saml-sso/finish-setting-saml-sso/) to finish the SAML SSO process in Sketch.
--------------------------------------------------------------------------------
title: "Ping Identity setup"
description: "Learn how to set up Ping Identity as an identity provider for Sketch with the help of our step-by-step guides."
last_modified: "2026-04-01"
url: "https://www.sketch.com/docs/getting-started/single-sign-on/setting-up-saml-sso/setup-identity-provider/ping-identity-setup/"
--------------------------------------------------------------------------------
## Ping Identity setup
### Create a Workforce environment
1. Click the **Ping Identity logo** in the top-left corner to go to the Environments page.
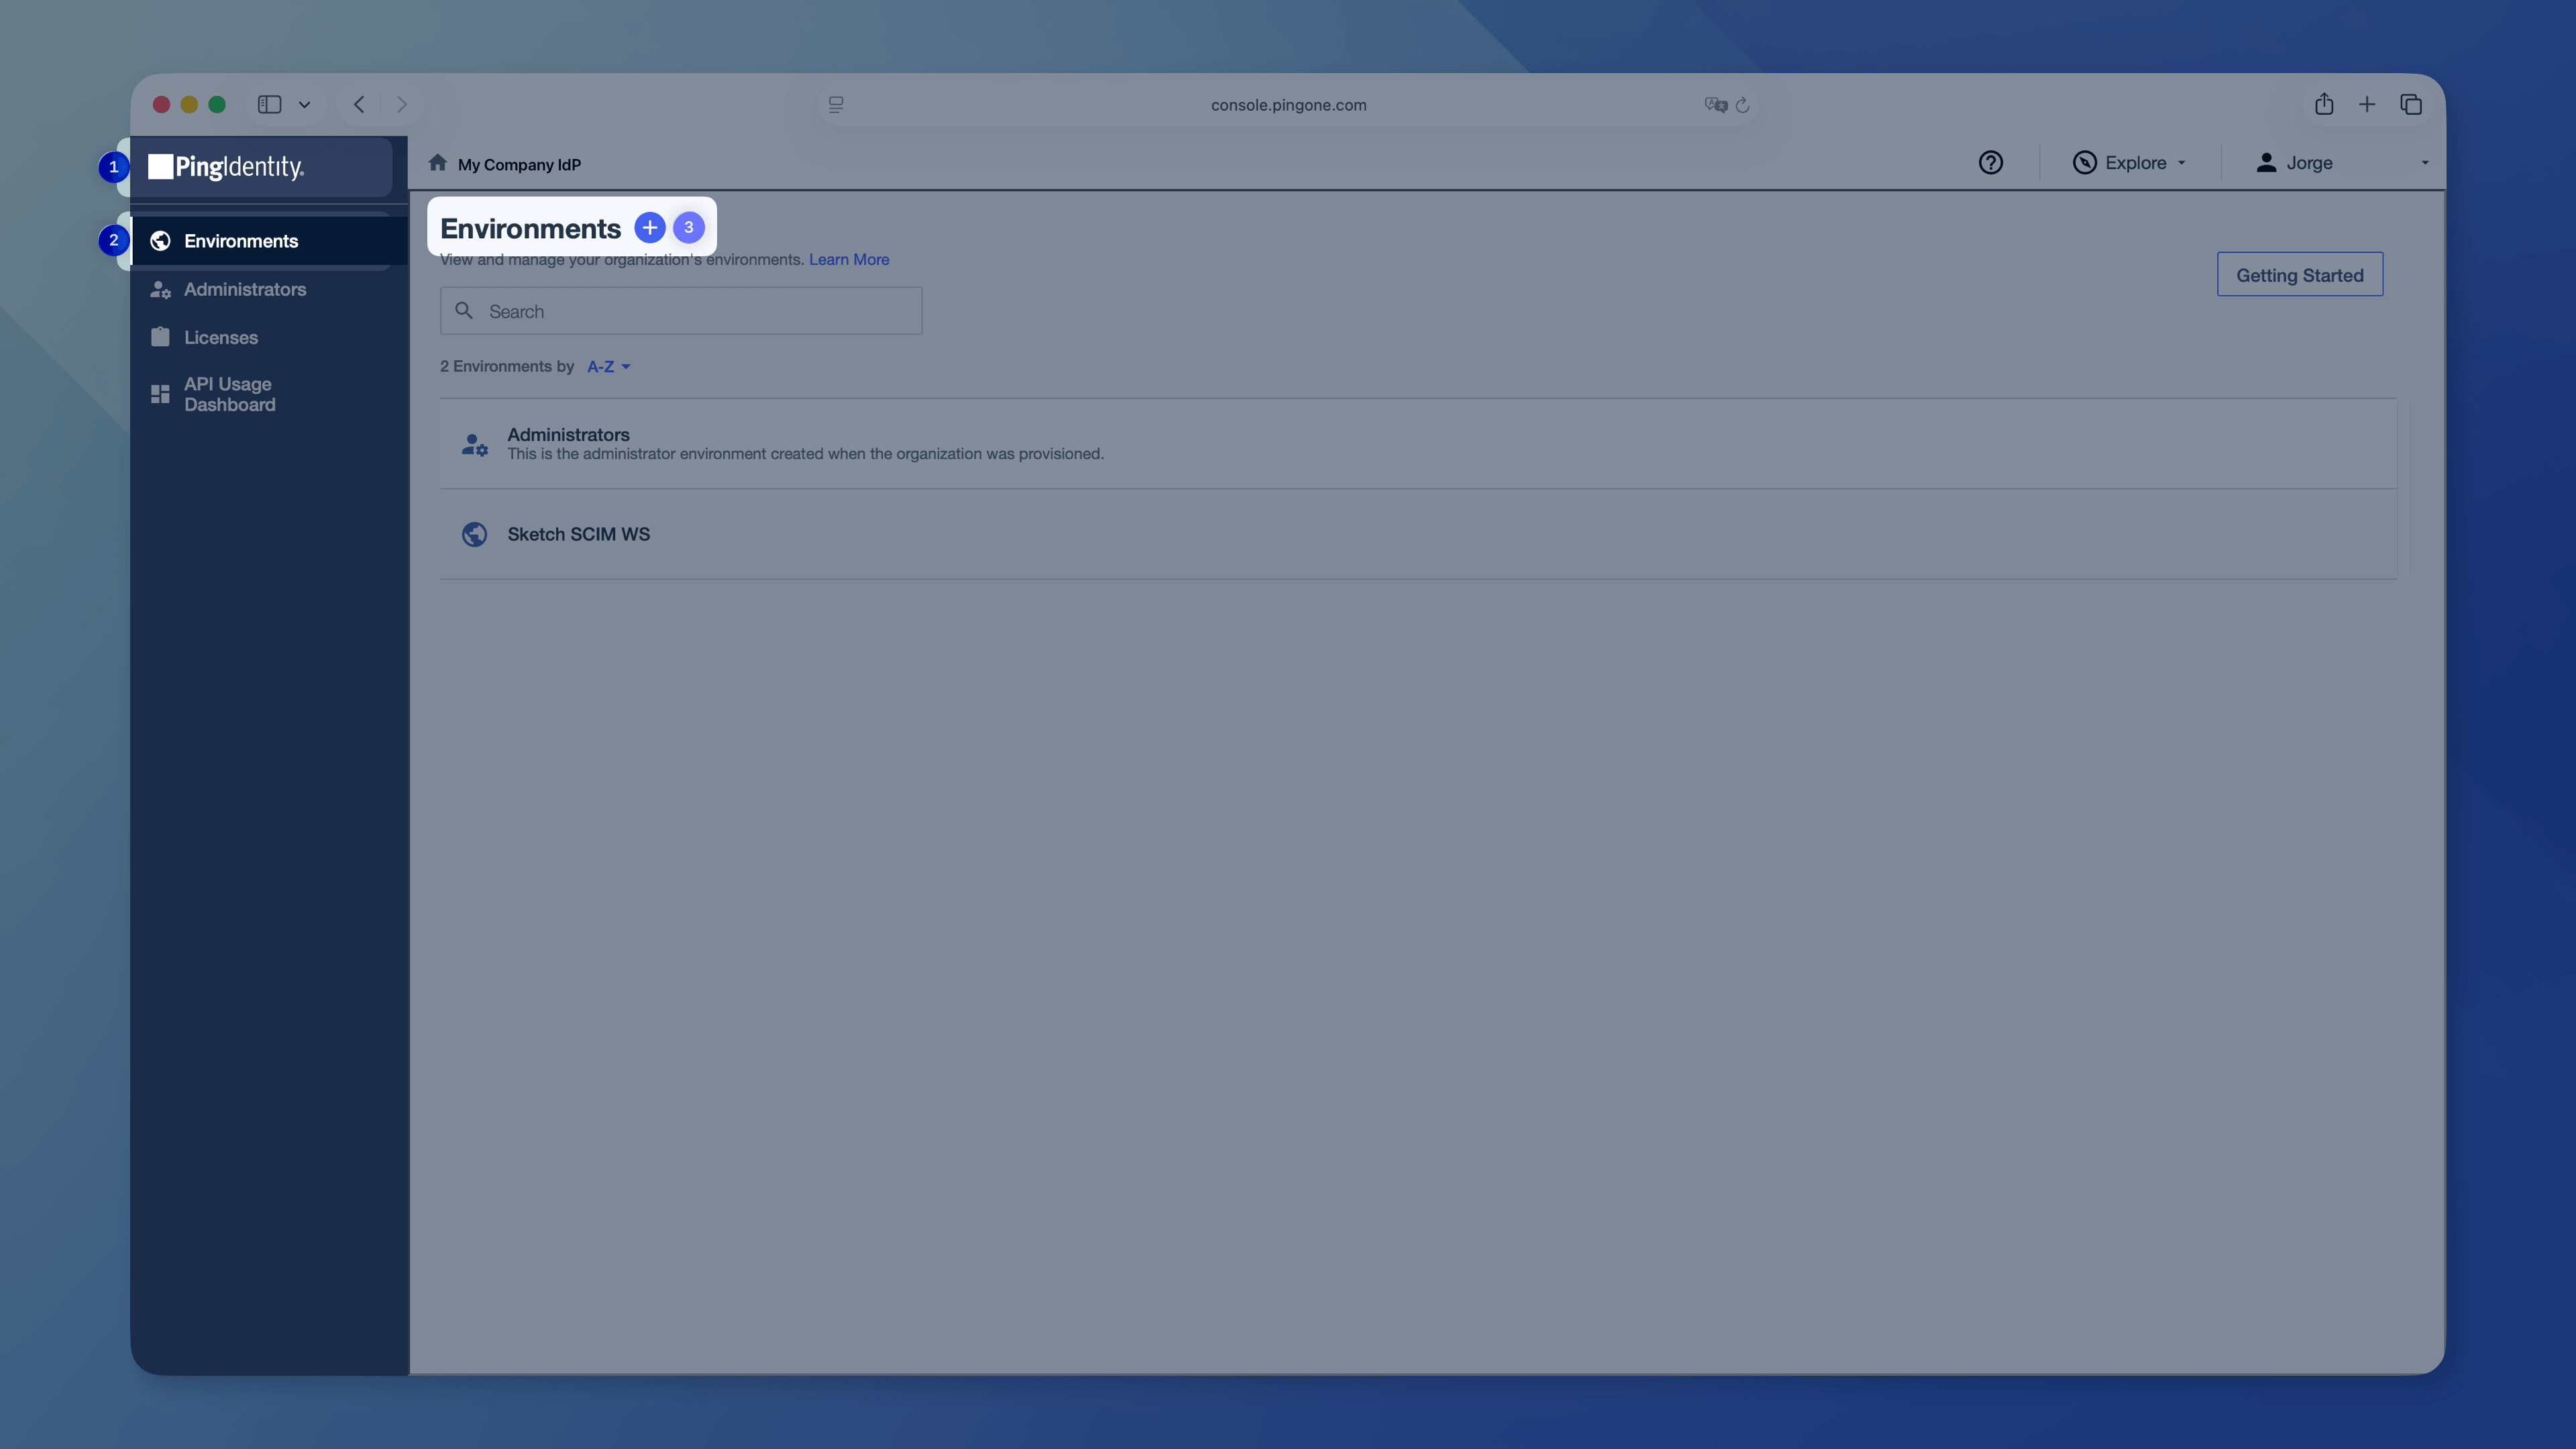
1. Click **+ Create Environment**.
1. Select **Workforce** as the solution type.
1. Choose an environment type. Select **Sandbox** for testing, or **Production** for your live environment.
1. Name your environment, select your region and click **Next** to create it.
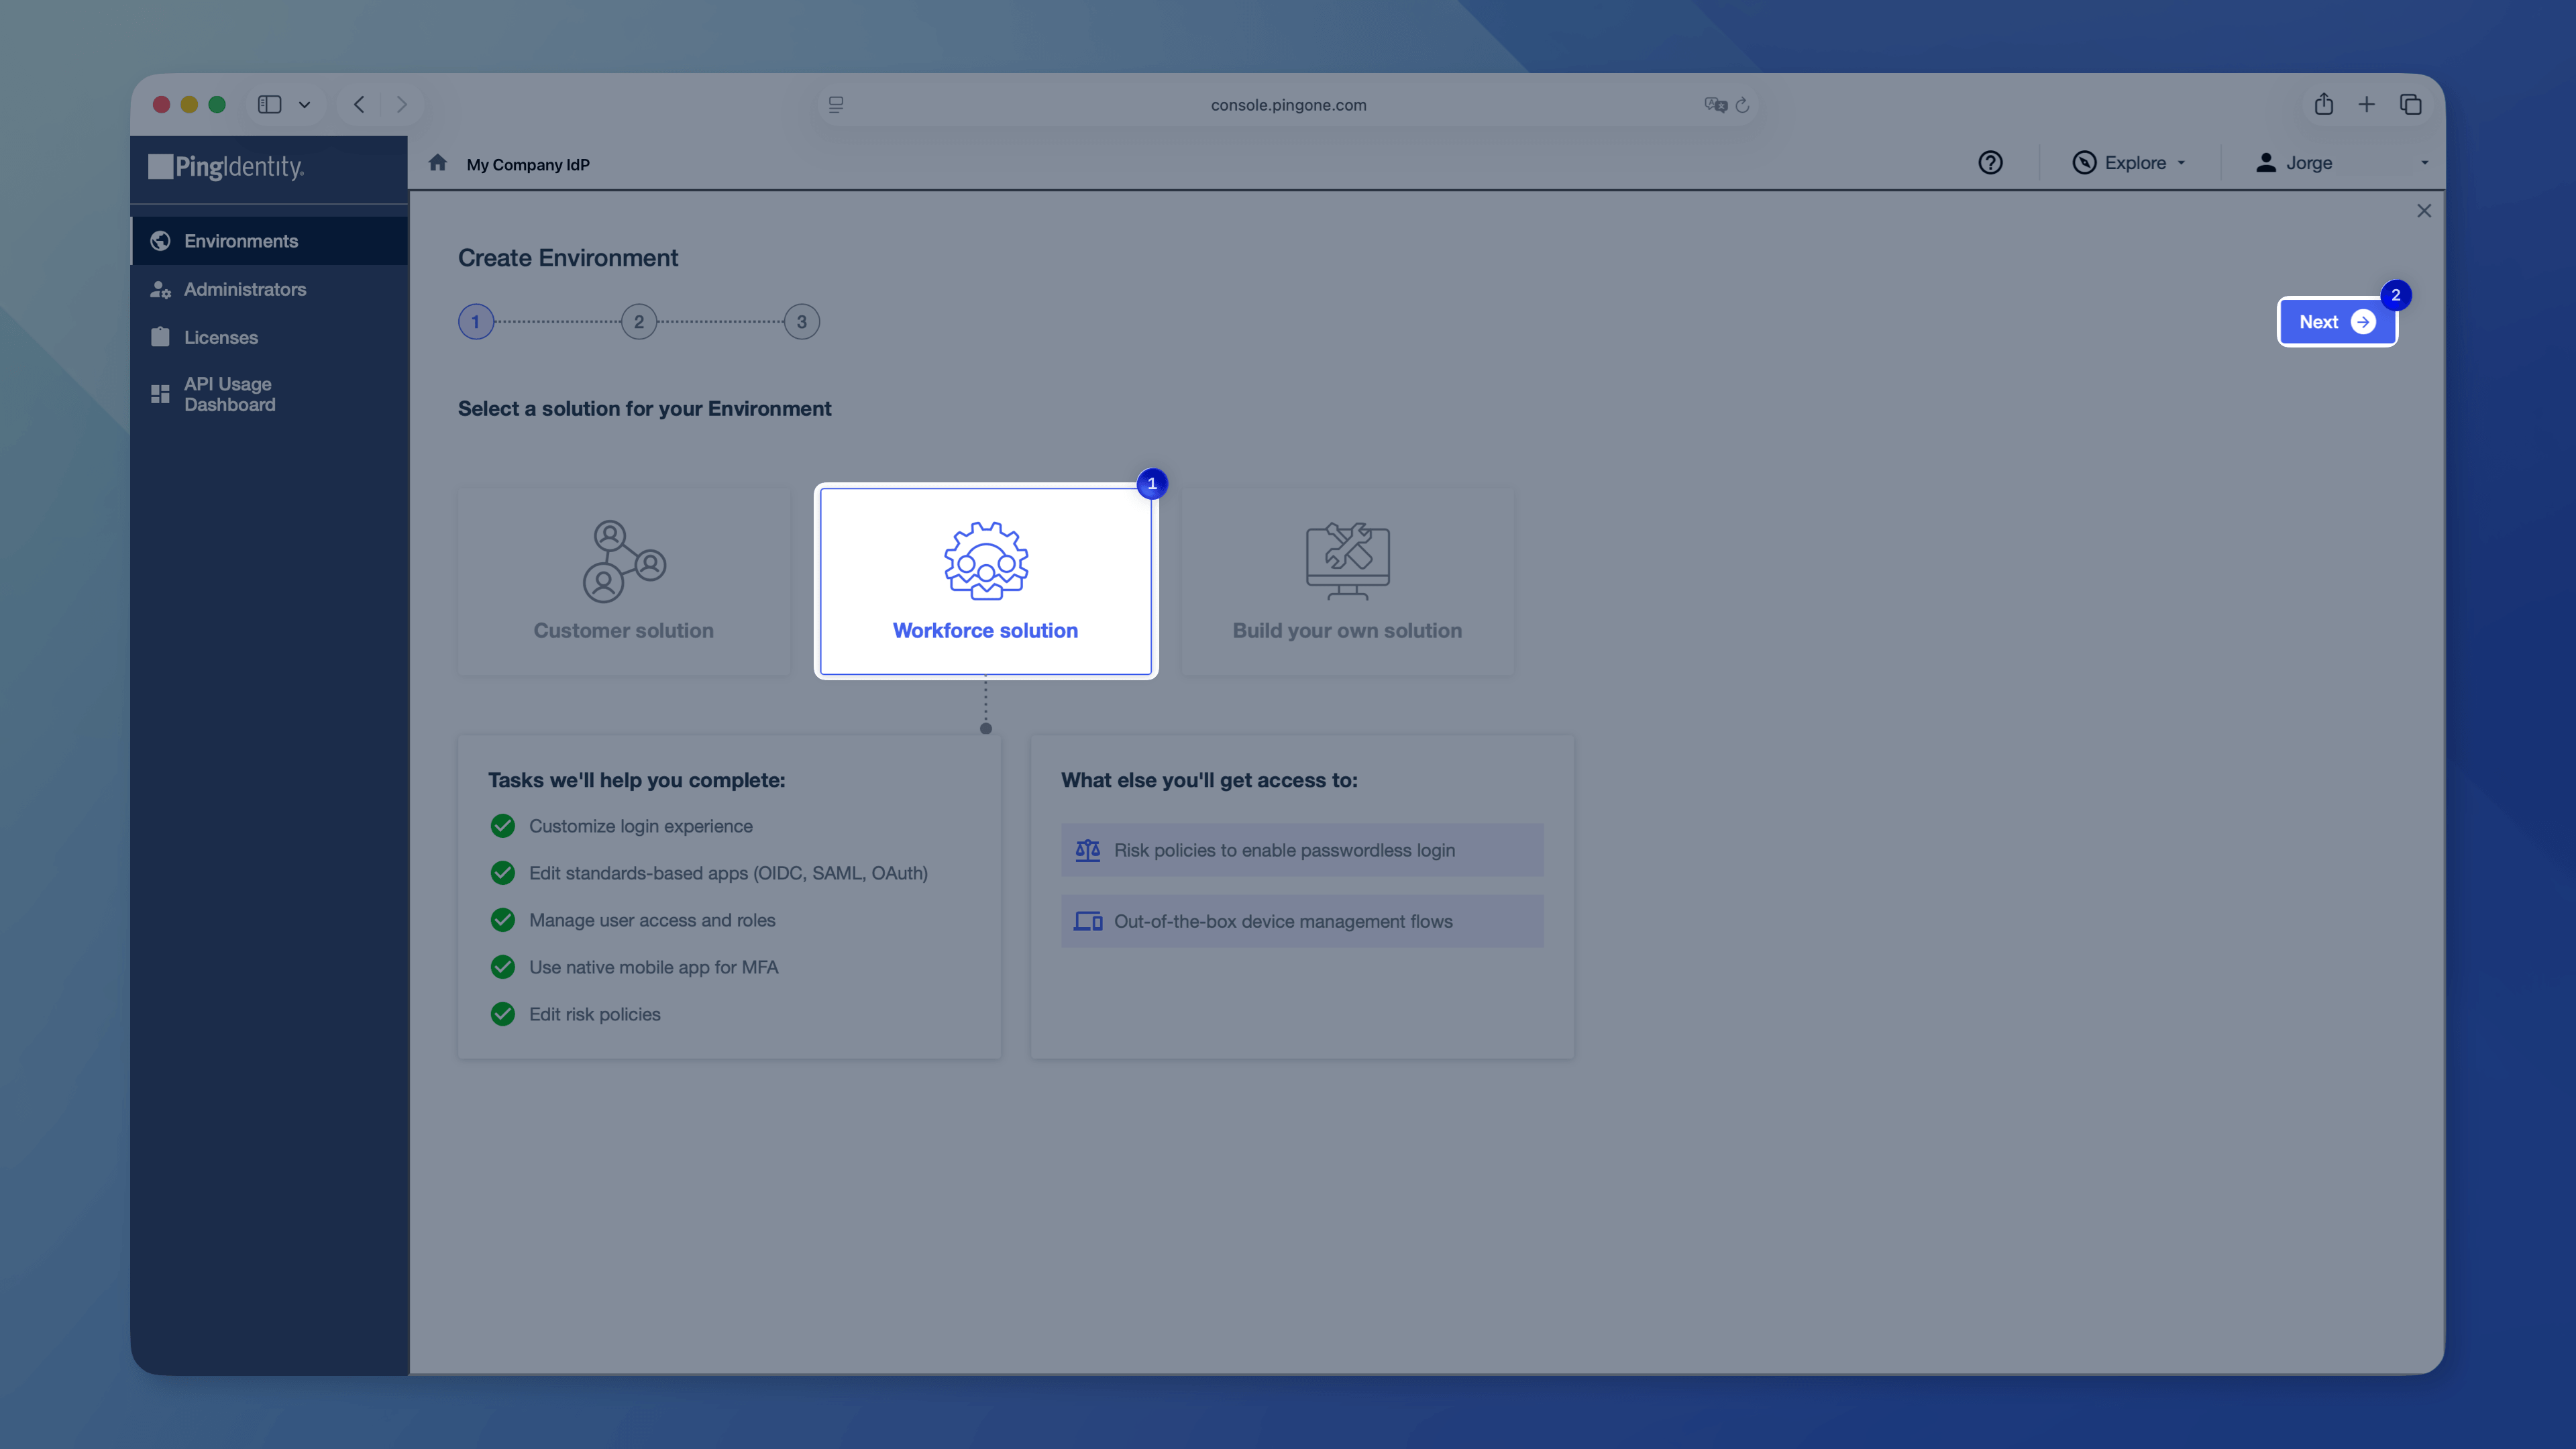
1. Open the new environment. In the left sidebar, confirm **Applications** and **Integrations > Provisioning** appear in the sidebar.
### Create a SAML application in PingOne
1. Make sure you’re in your **Workforce environment** — check the breadcrumb at the top of the page.
1. Go to **Applications > Applications** in the left sidebar.
1. Click the **+** button to add a new application.
1. Enter an **Application Name** — for example, `Sketch Enterprise` — and an optional description.
1. Select **SAML Application** as the application type.
1. Click **Configure**.
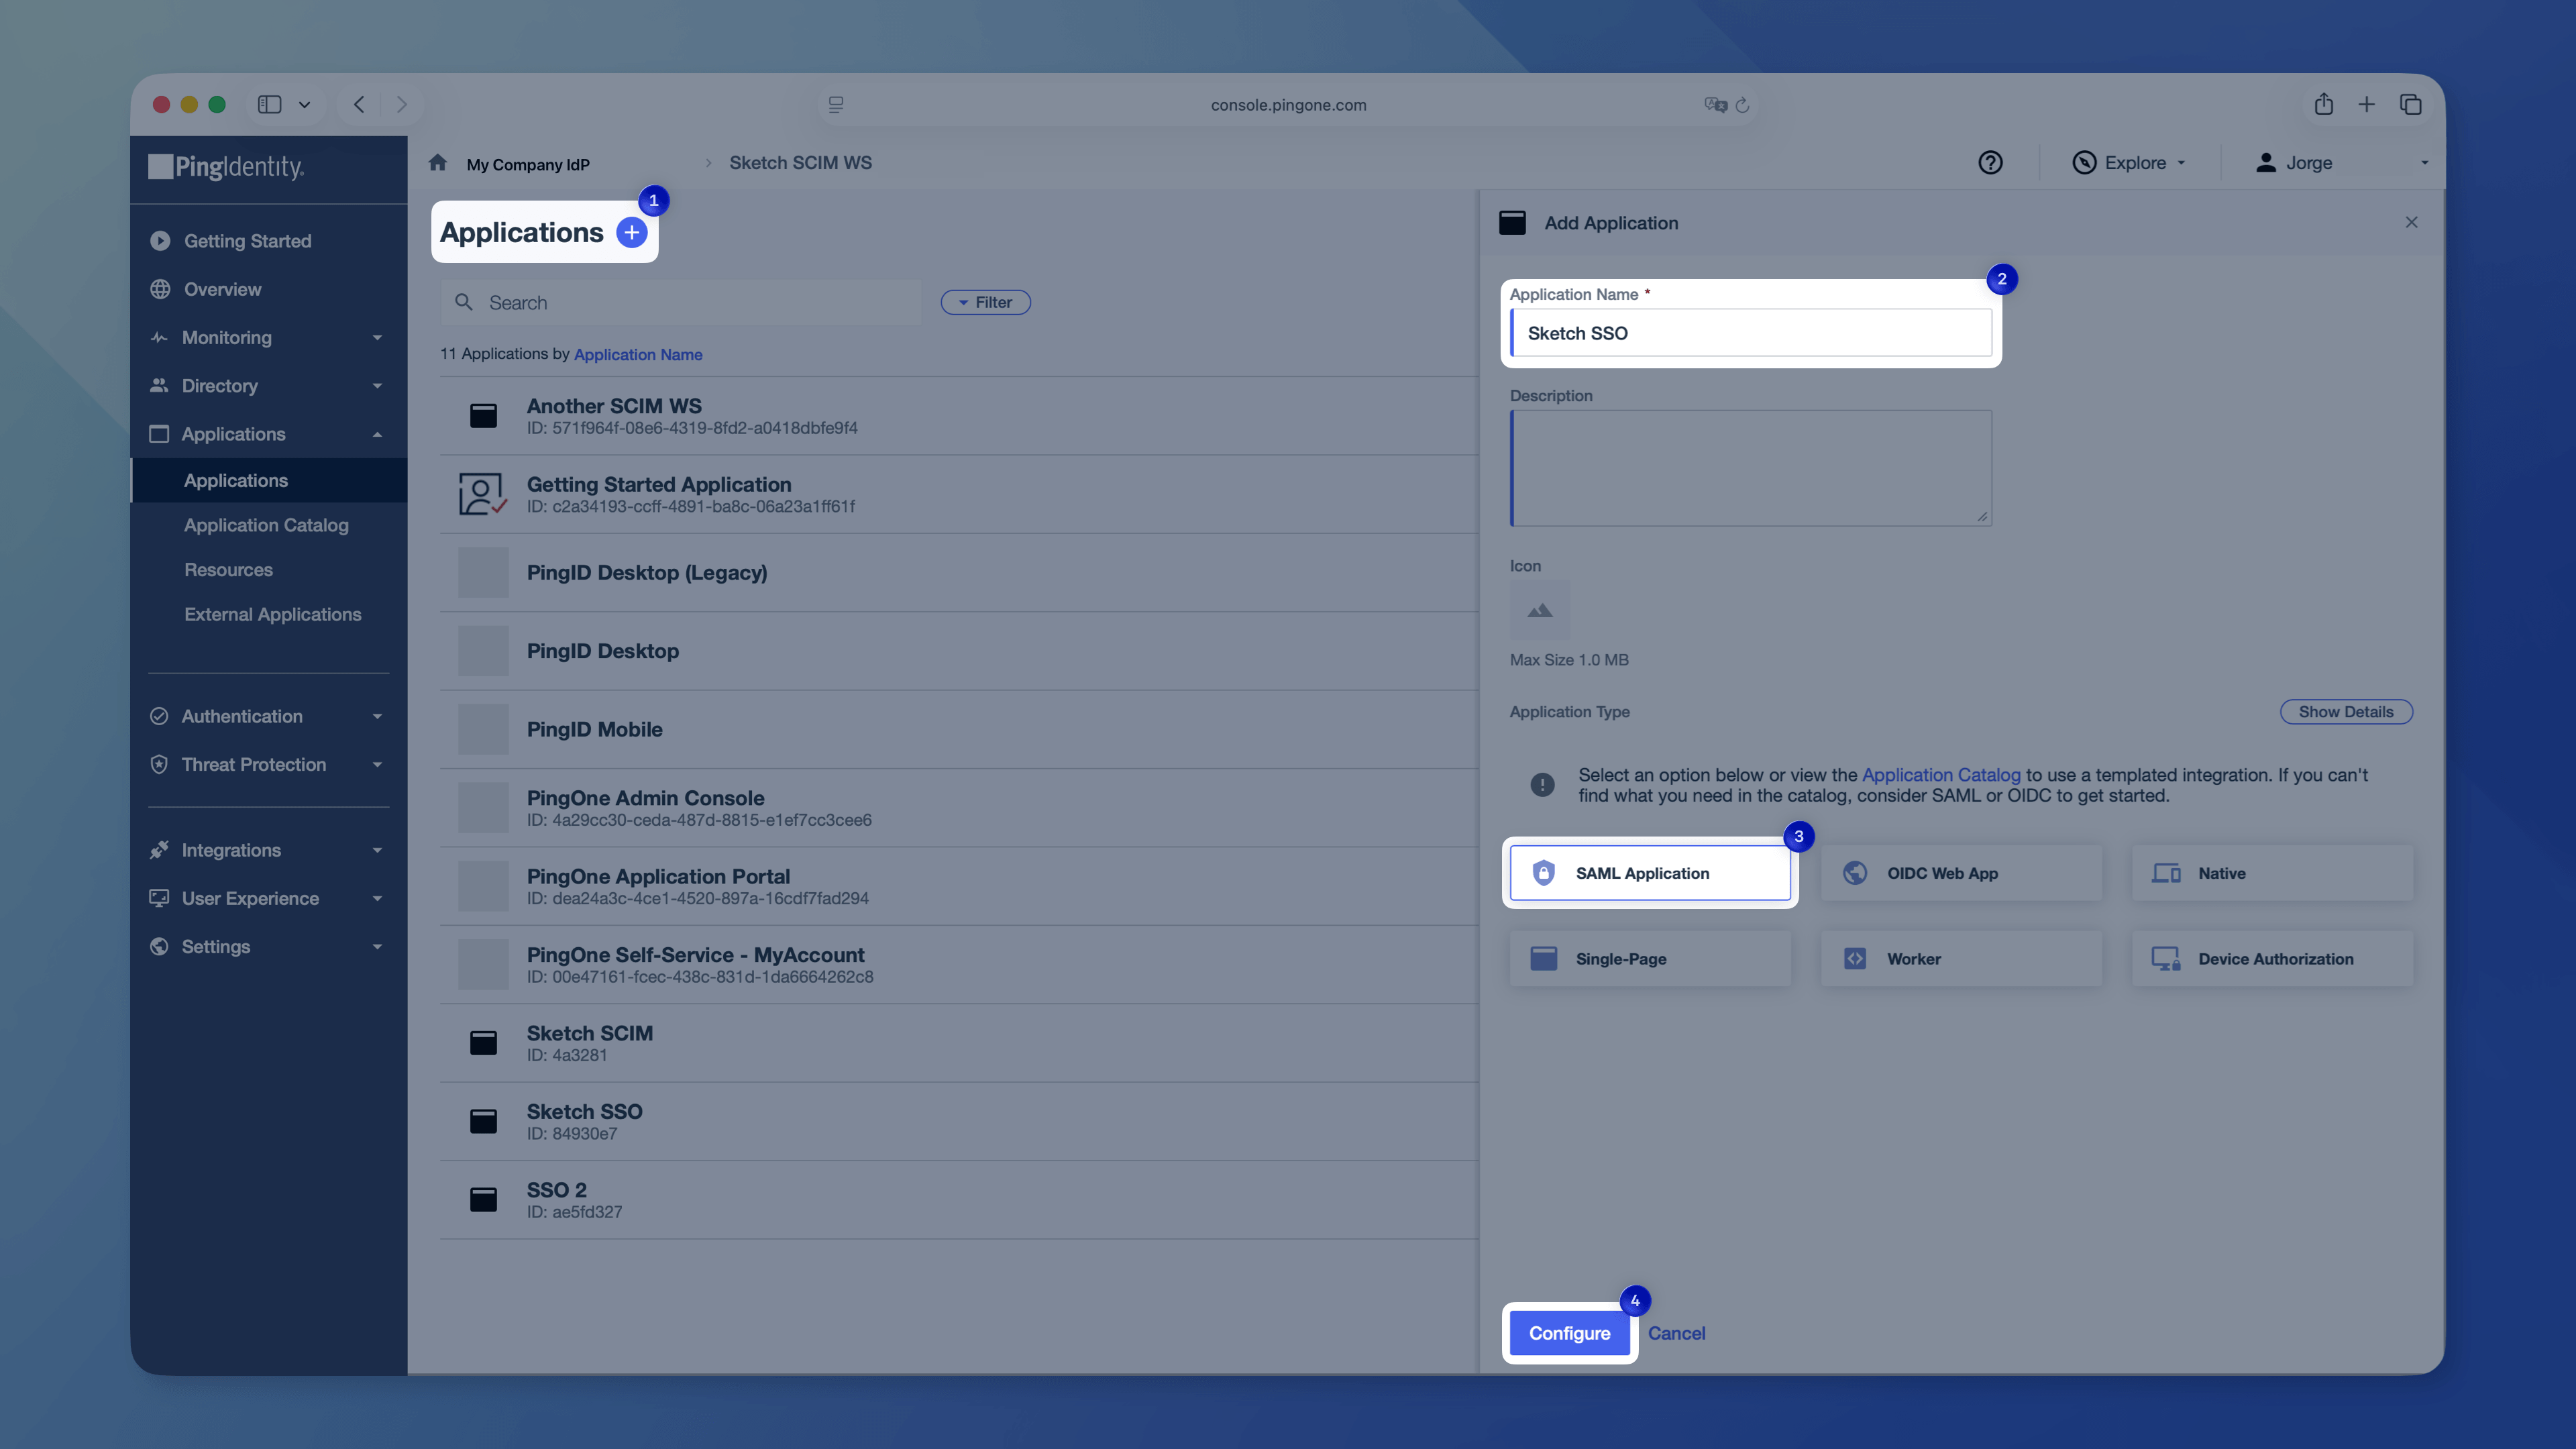
### Configure SAML settings
1. Select the **Manually enter** option.
1. Paste the values you copied when [setting up SAML SSO in your Workspace](/docs/getting-started/single-sign-on/setting-up-saml-sso/choose-a-shortname/):
- **ACS URLs**: your ACS URL from Sketch
- **Entity ID**: your Entity ID from Sketch
1. Click **Save**.
1. Scroll down and click **Download Metadata** to save the XML file. You’ll need this to complete setup in Sketch.
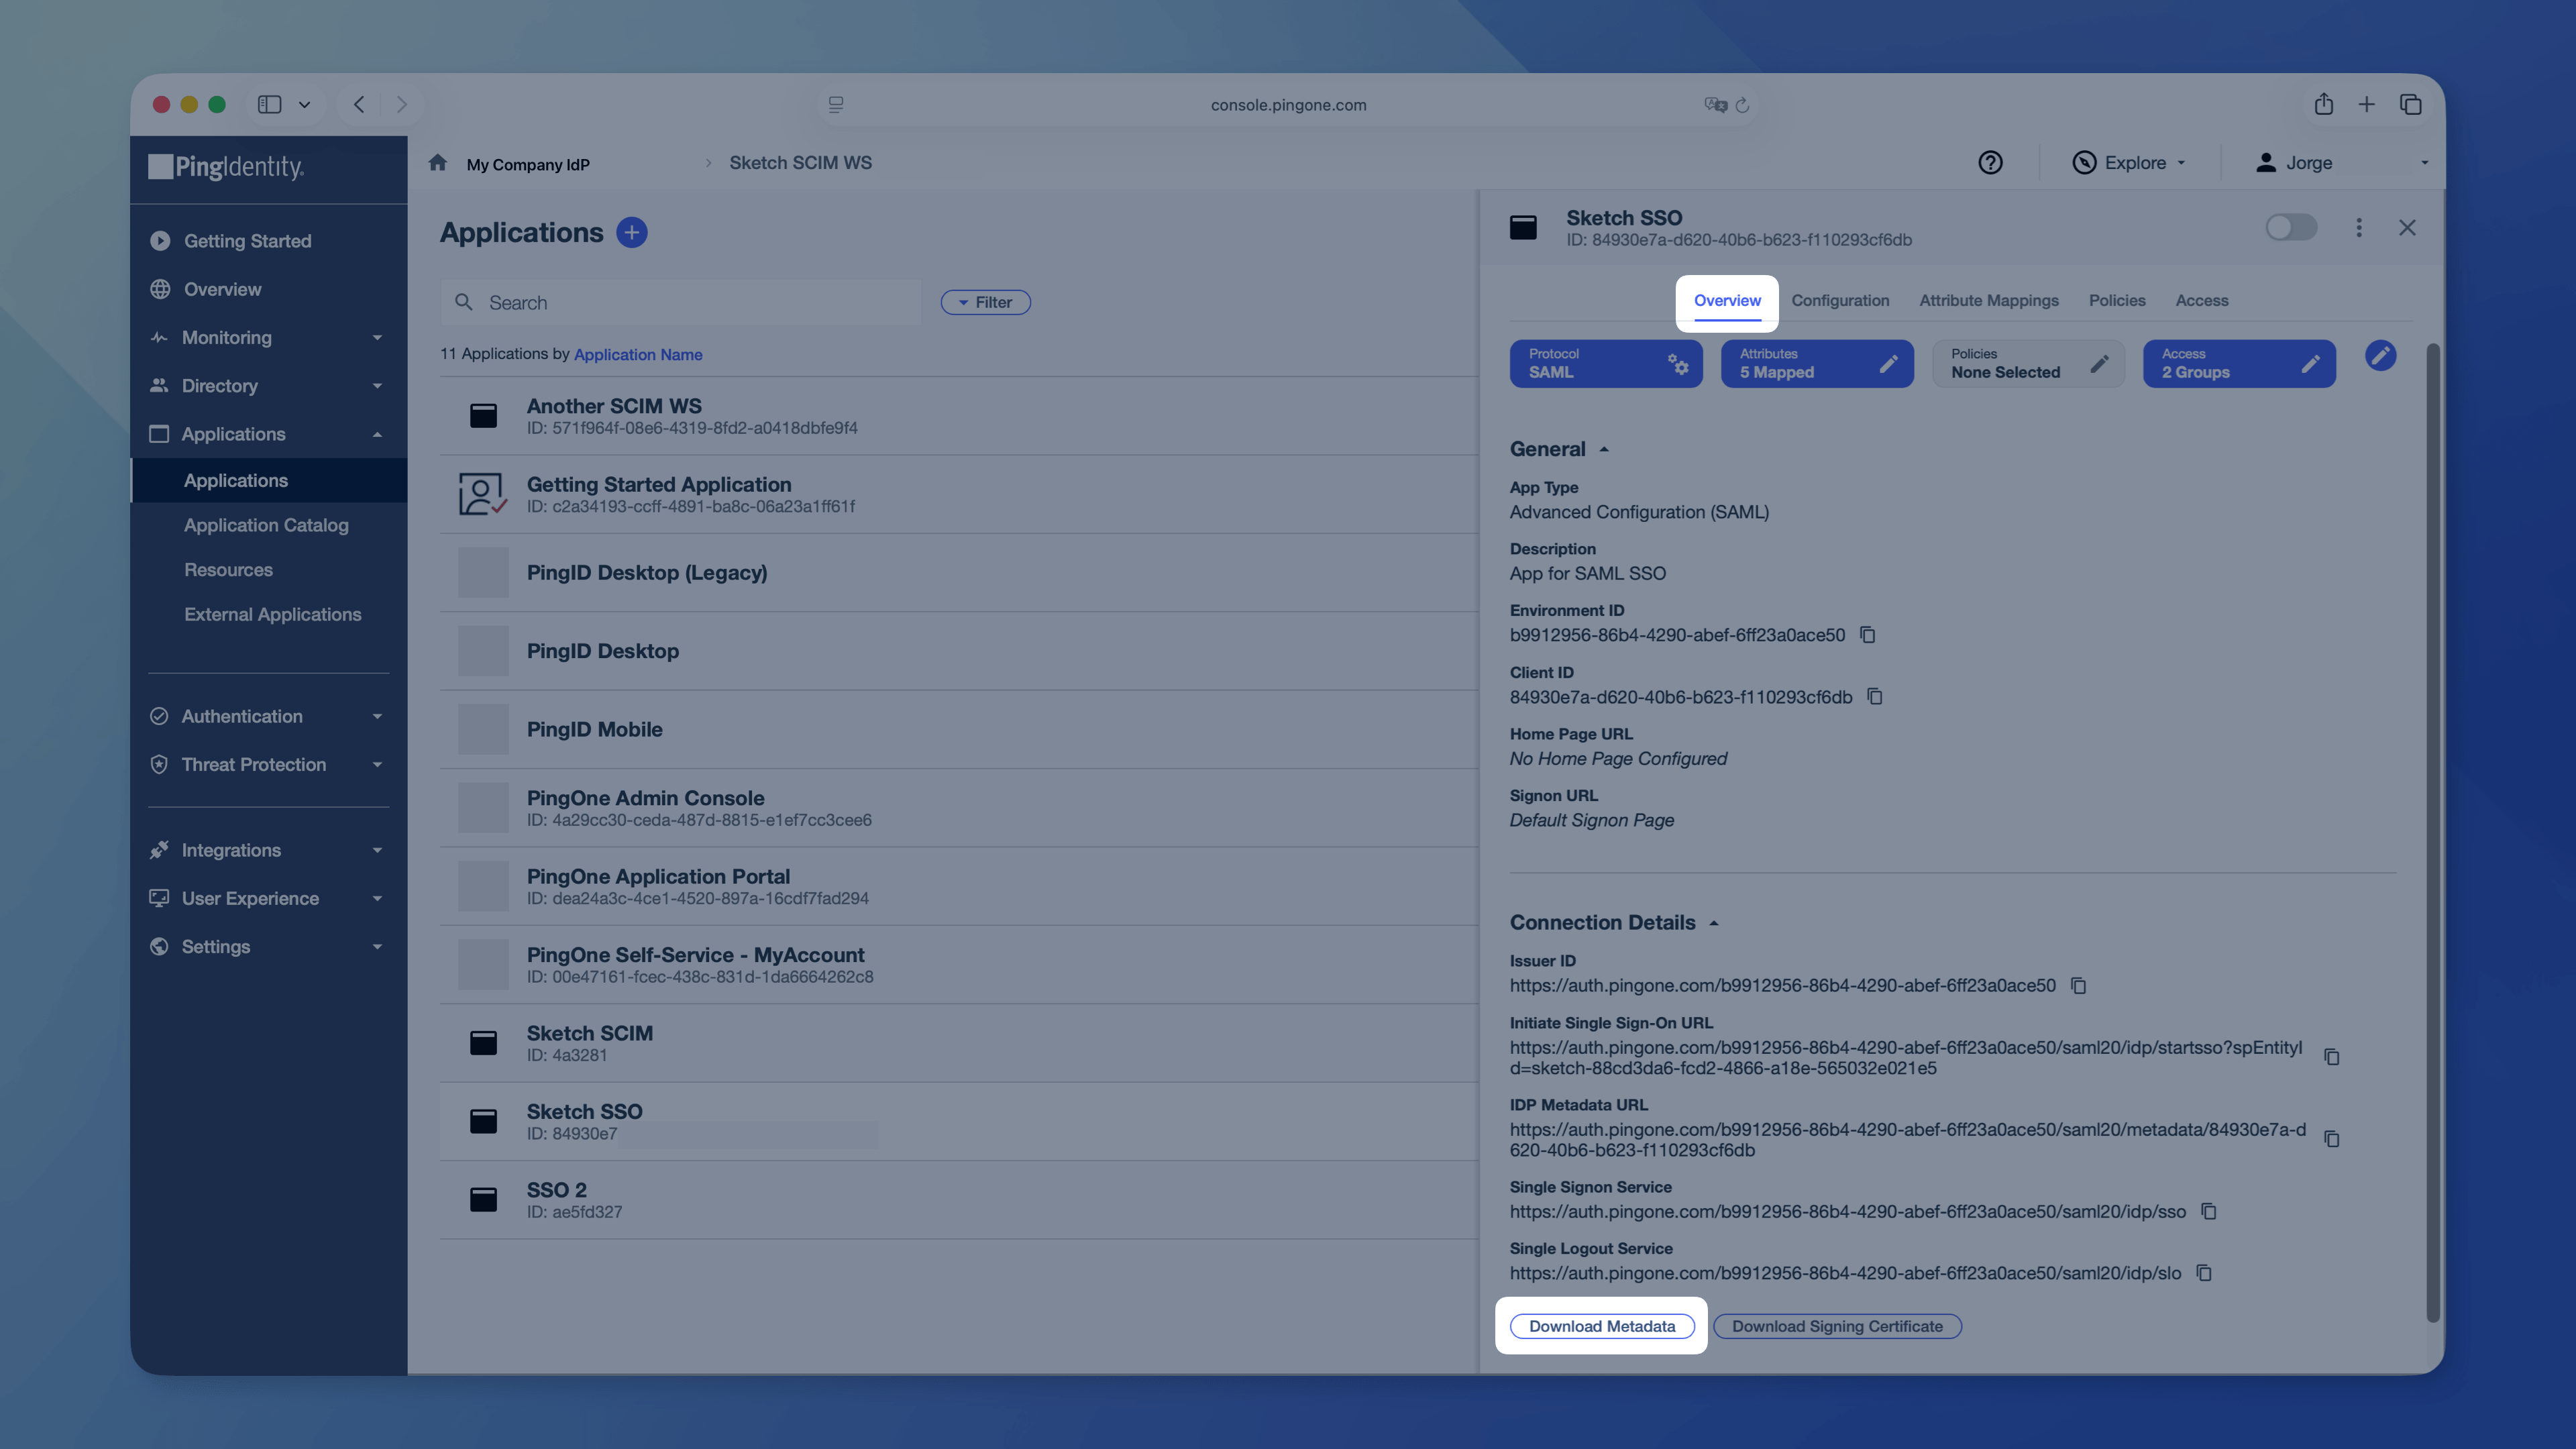
### Configure attribute mappings
1. In the Applications list, click your Sketch application to open it.
1. Go to the **Attribute Mappings** tab.
1. Add the following mappings, then click **Save**:
| Attribute | PingOne mapping |
| --- | --- |
| `email` | Email Address |
| `first_name` | Given Name |
| `surname` | Family Name |
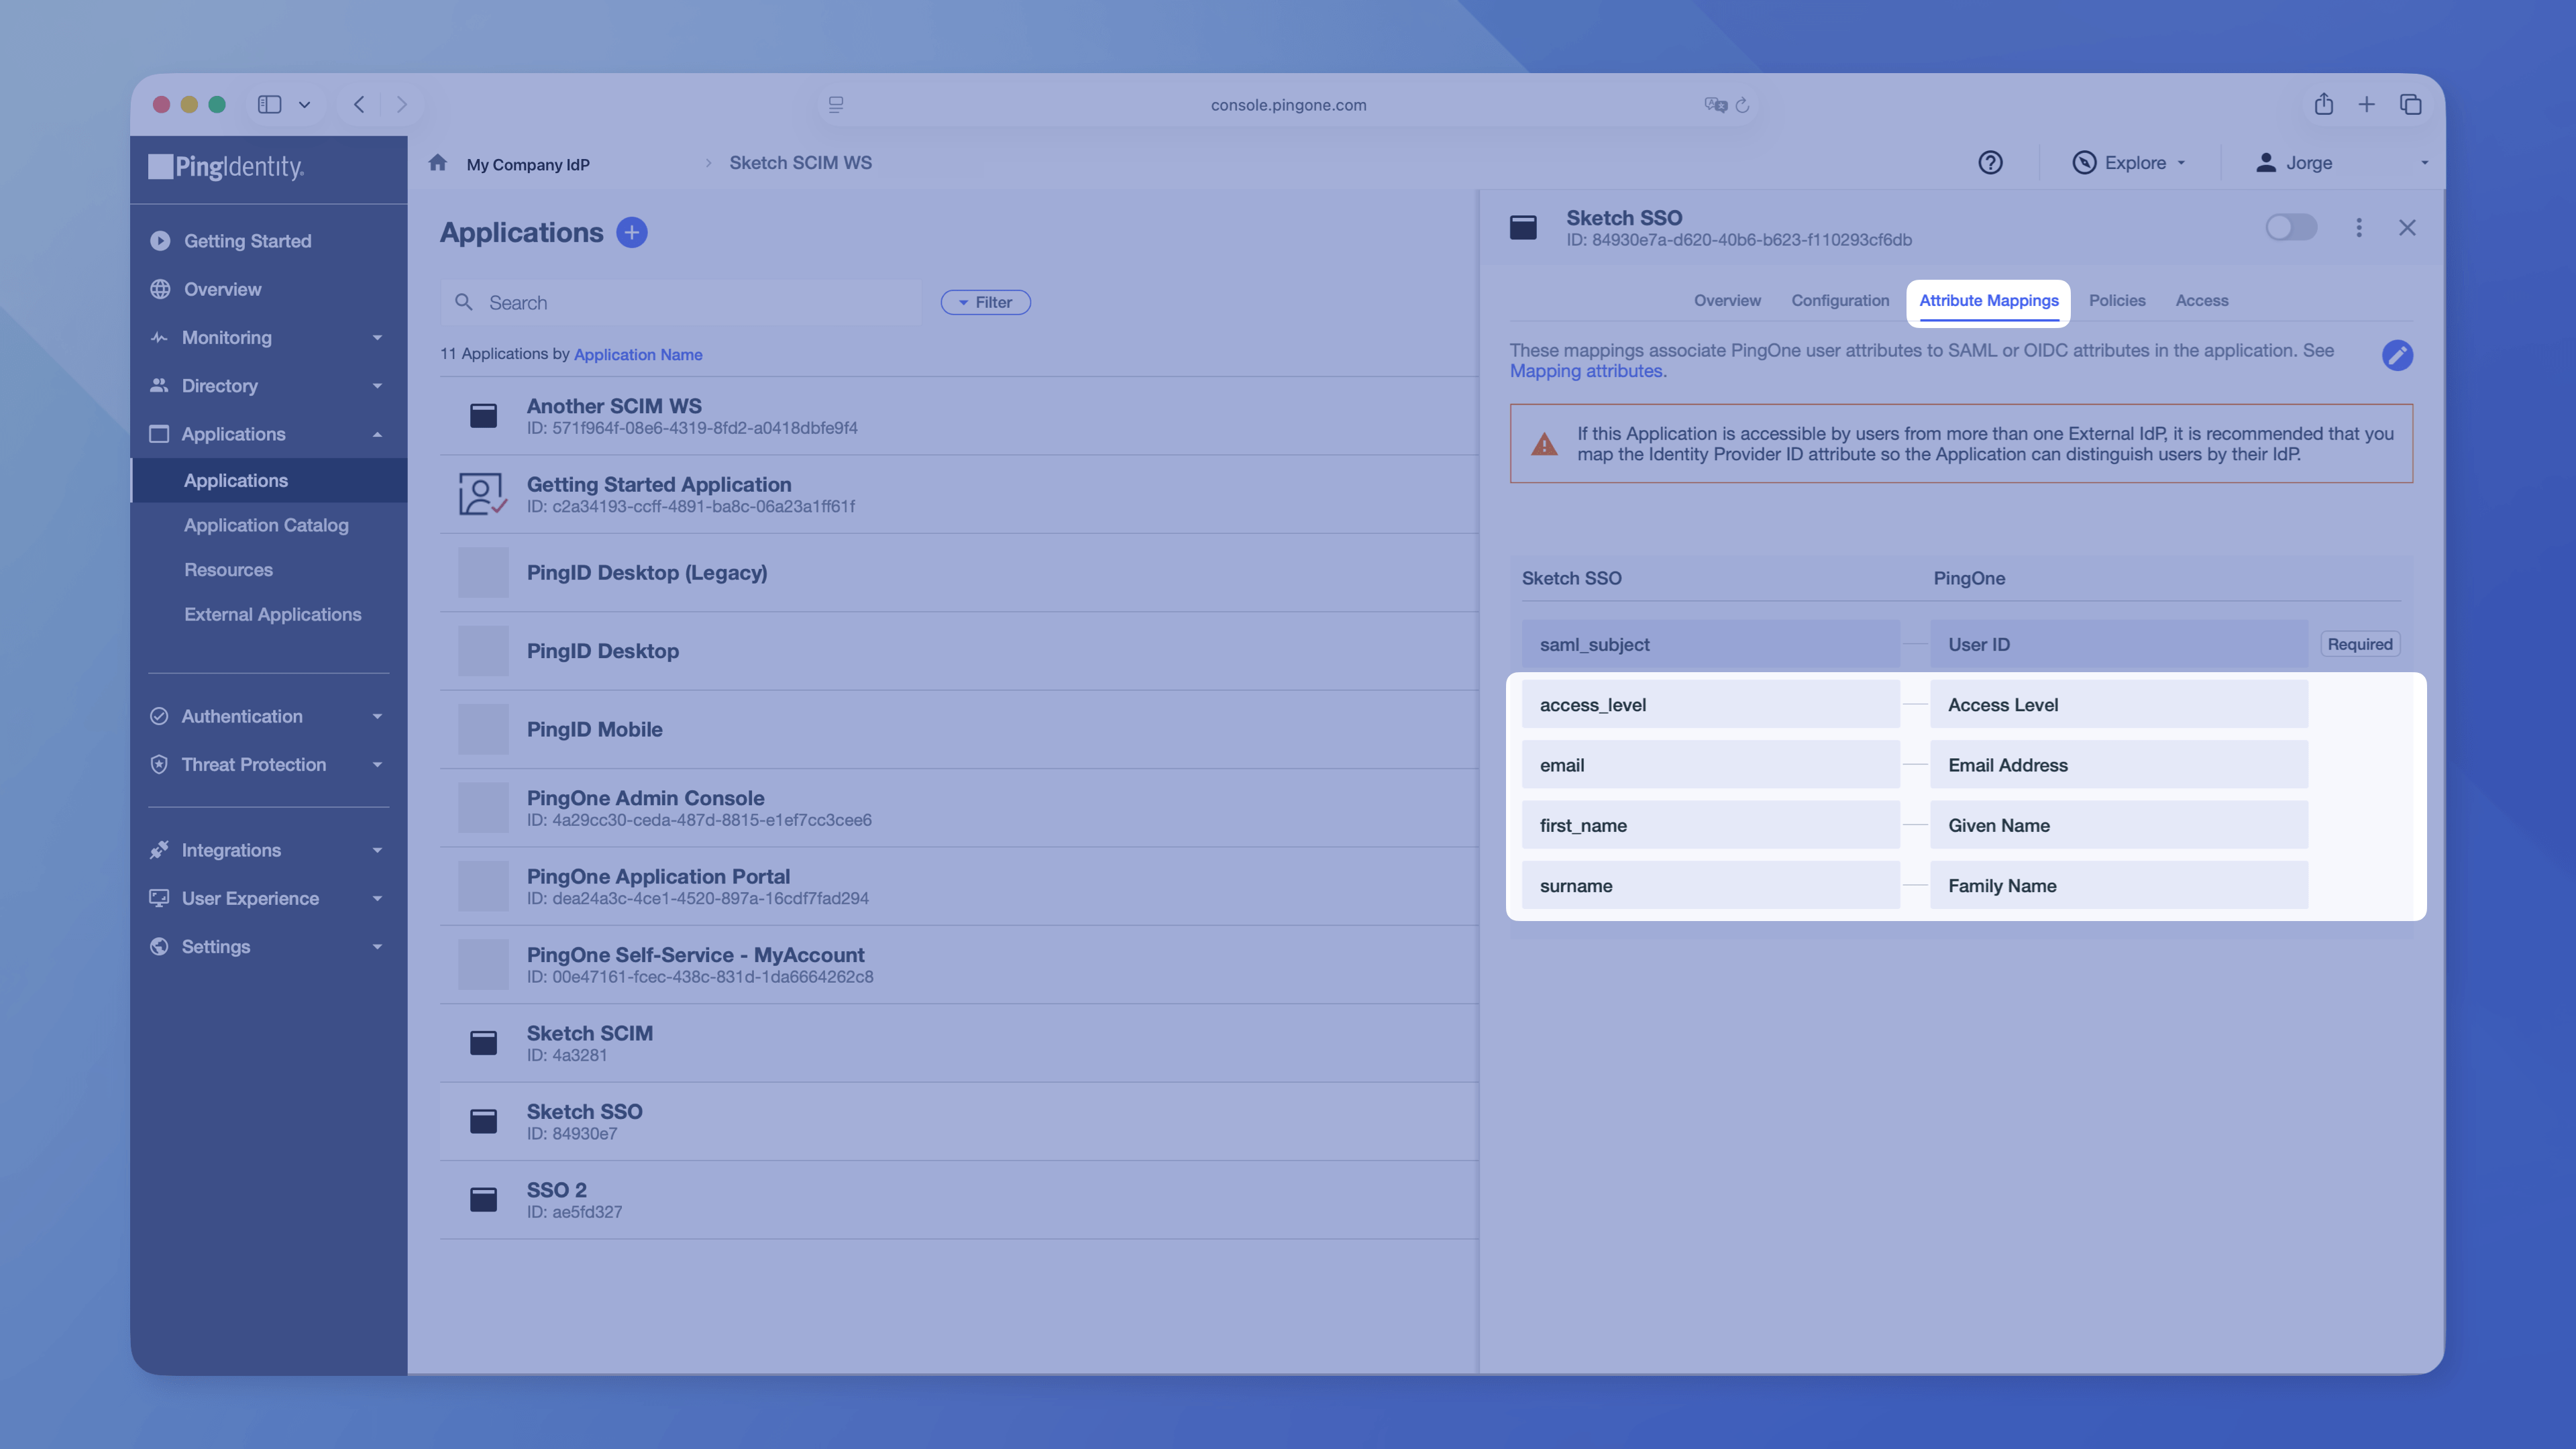
### Set NameID format
1. Go to the **Configuration** tab.
1. Set **NameID Format** to `Email Address` and click **Save**.
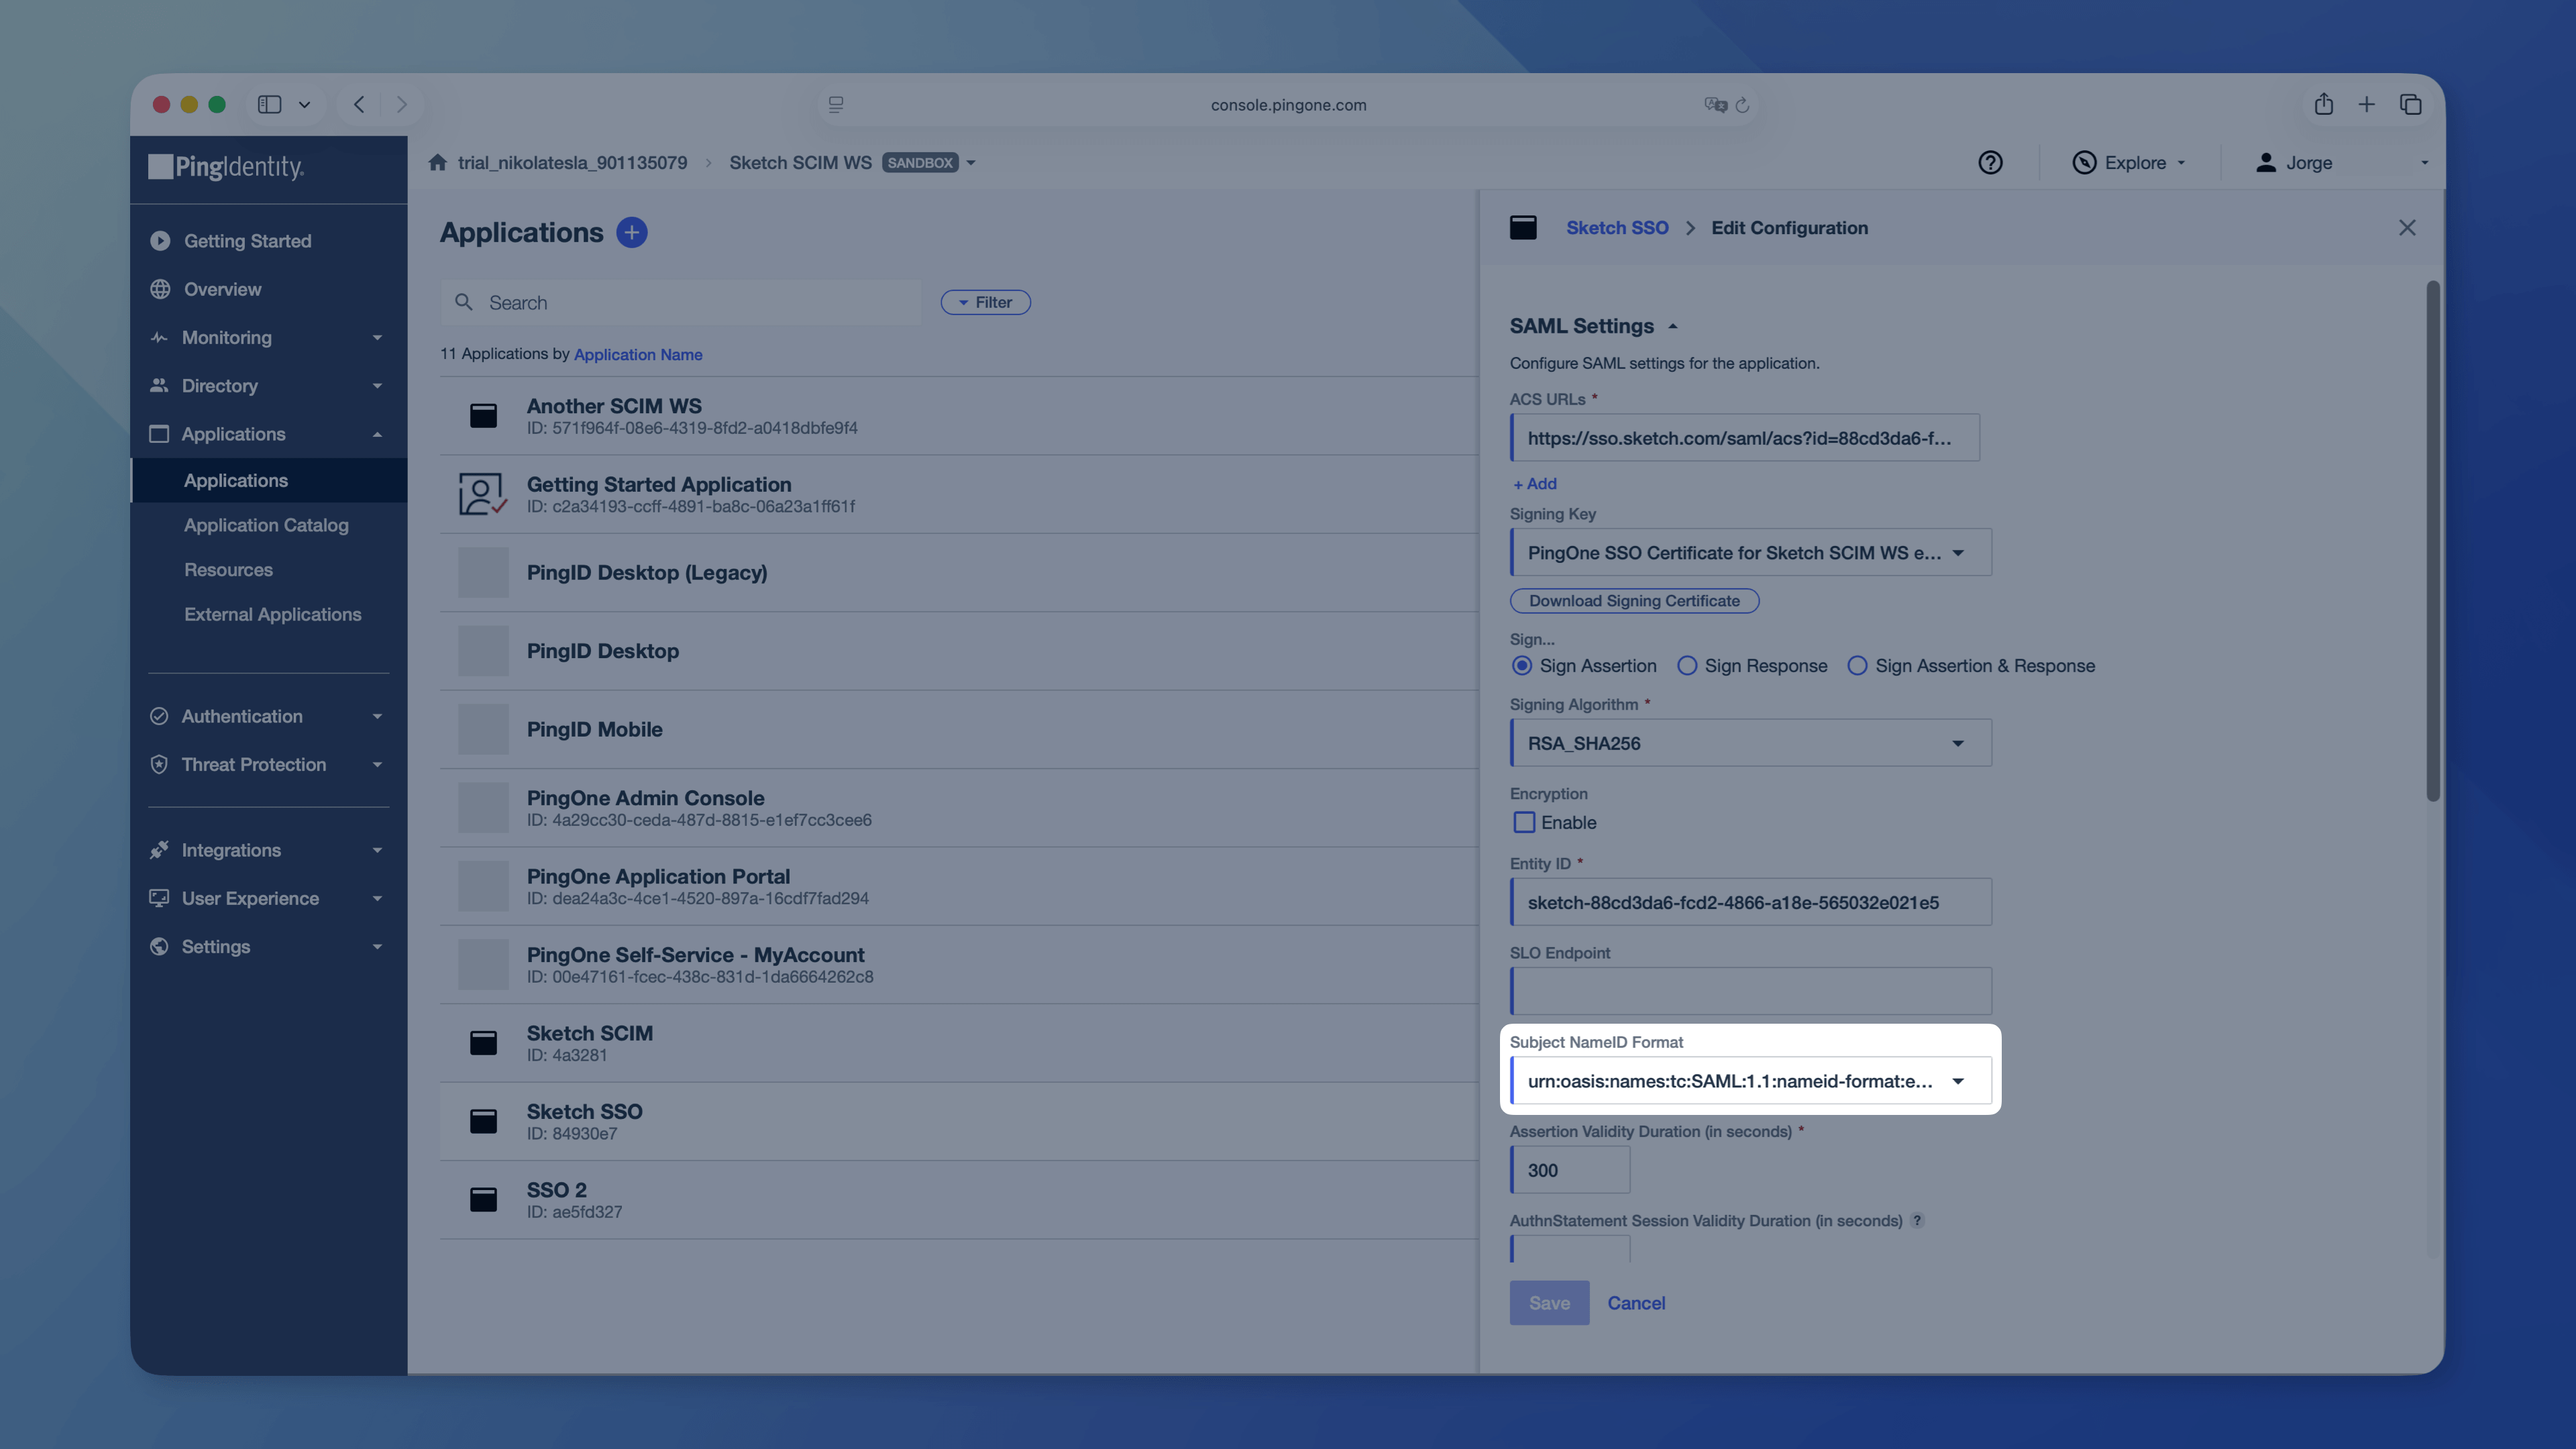
### Enable the application
1. At the top of the application panel, toggle the application **on**. Enable it before users can sign in.
Now head to [How to finish setting up SAML SSO in your Workspace](/docs/getting-started/single-sign-on/setting-up-saml-sso/finish-setting-saml-sso/) and upload the PingOne metadata XML file you downloaded earlier.
If you want to automate user provisioning, follow the [Ping Identity SCIM setup guide](/docs/getting-started/single-sign-on/scim-provisioning/ping-identity/) once SSO is working.
--------------------------------------------------------------------------------
title: "Completing SAML SSO setup"
description: "Learn how to finish setting up SAML SSO for Sketch with the help of our step-by-step guides and video tutorials."
last_modified: "2026-01-23"
url: "https://www.sketch.com/docs/getting-started/single-sign-on/setting-up-saml-sso/finish-setting-saml-sso/"
--------------------------------------------------------------------------------
## Completing SAML SSO setup
1. In your Workspace’s settings, head to the **Set up Sketch** tab in the Single Sign-On section.
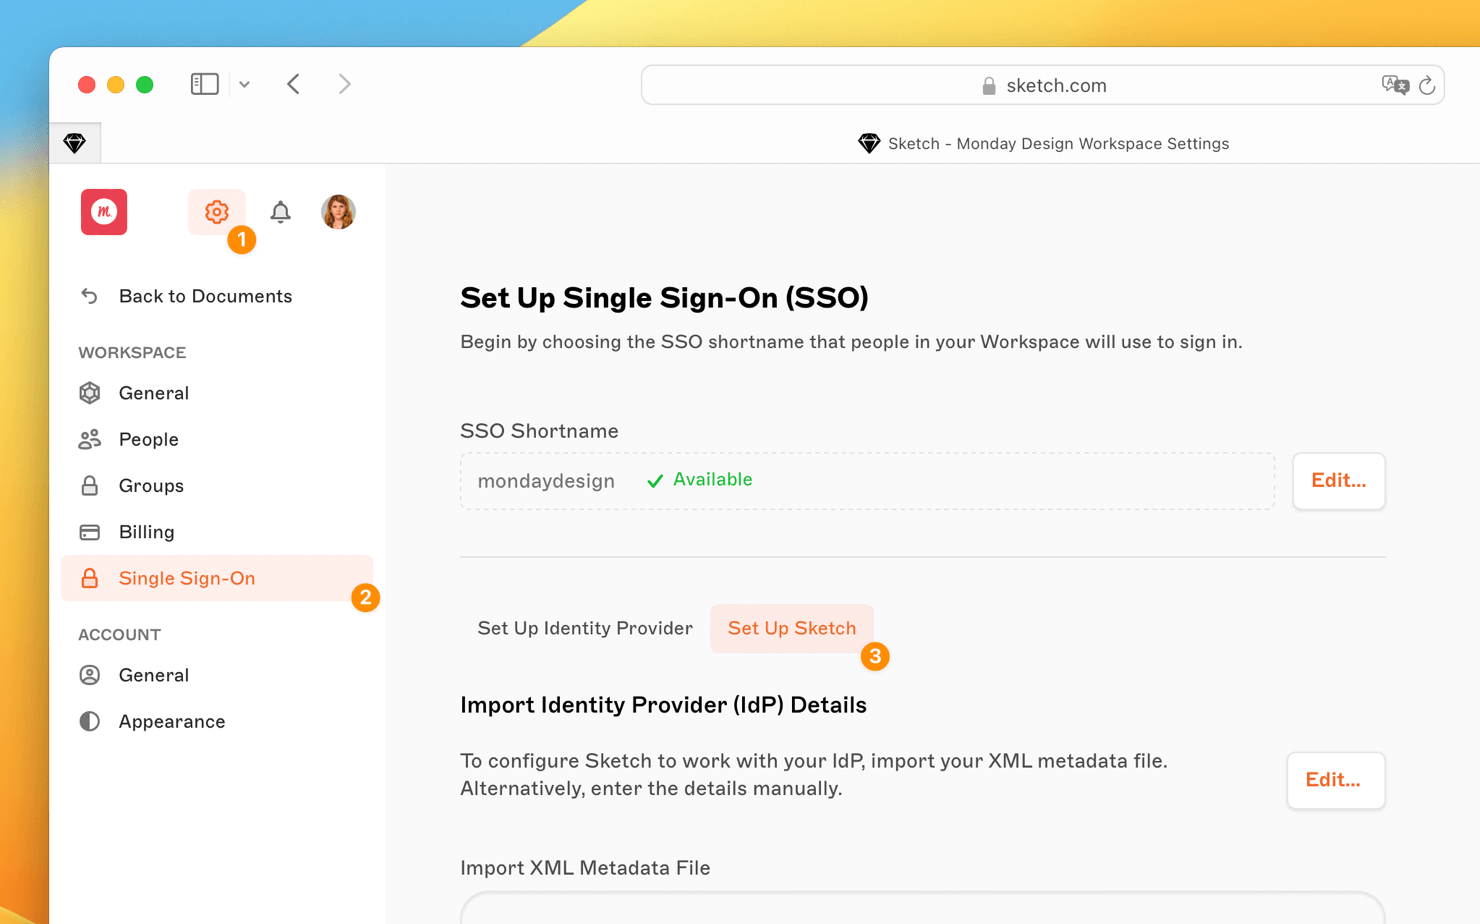
You can either upload the XML file directly, or apply any manual configuration.

1. Log out.
1. Click **Sign in with SSO**
1. Enjoy Sketch! 🎉
Check our [Other](/docs/getting-started/single-sign-on/sso-and-provisioning/) section to learn more about initialized SSO, inviting other people to the SSO Workspace, or changing a name or email.
--------------------------------------------------------------------------------
title: "Interface and settings"
description: "We’ve designed Sketch’s interface to show what you need, when you need it — leaving you to concentrate on what matters most: your creative process.
In this section you’ll find out where to find every single tool and setting in the Mac and web app UI, as well as document settings and details on how to use plugins."
last_modified: "2026-04-07"
url: "https://www.sketch.com/docs/interface-and-settings/"
--------------------------------------------------------------------------------
## Interface and settings
We’ve designed Sketch’s interface to show what you need, when you need it — leaving you to concentrate on what matters most: your creative process.
In this section you’ll find out where to find every single tool and setting in the Mac and web app UI, as well as document settings and details on how to use plugins.
--------------------------------------------------------------------------------
title: "The Mac app interface"
description: "Get to know the Sketch interface like the back of your hand. Learn everything you need to know to take your designs to the next level."
last_modified: "2026-01-23"
url: "https://www.sketch.com/docs/interface-and-settings/the-mac-app-interface/"
--------------------------------------------------------------------------------
## The Mac app interface
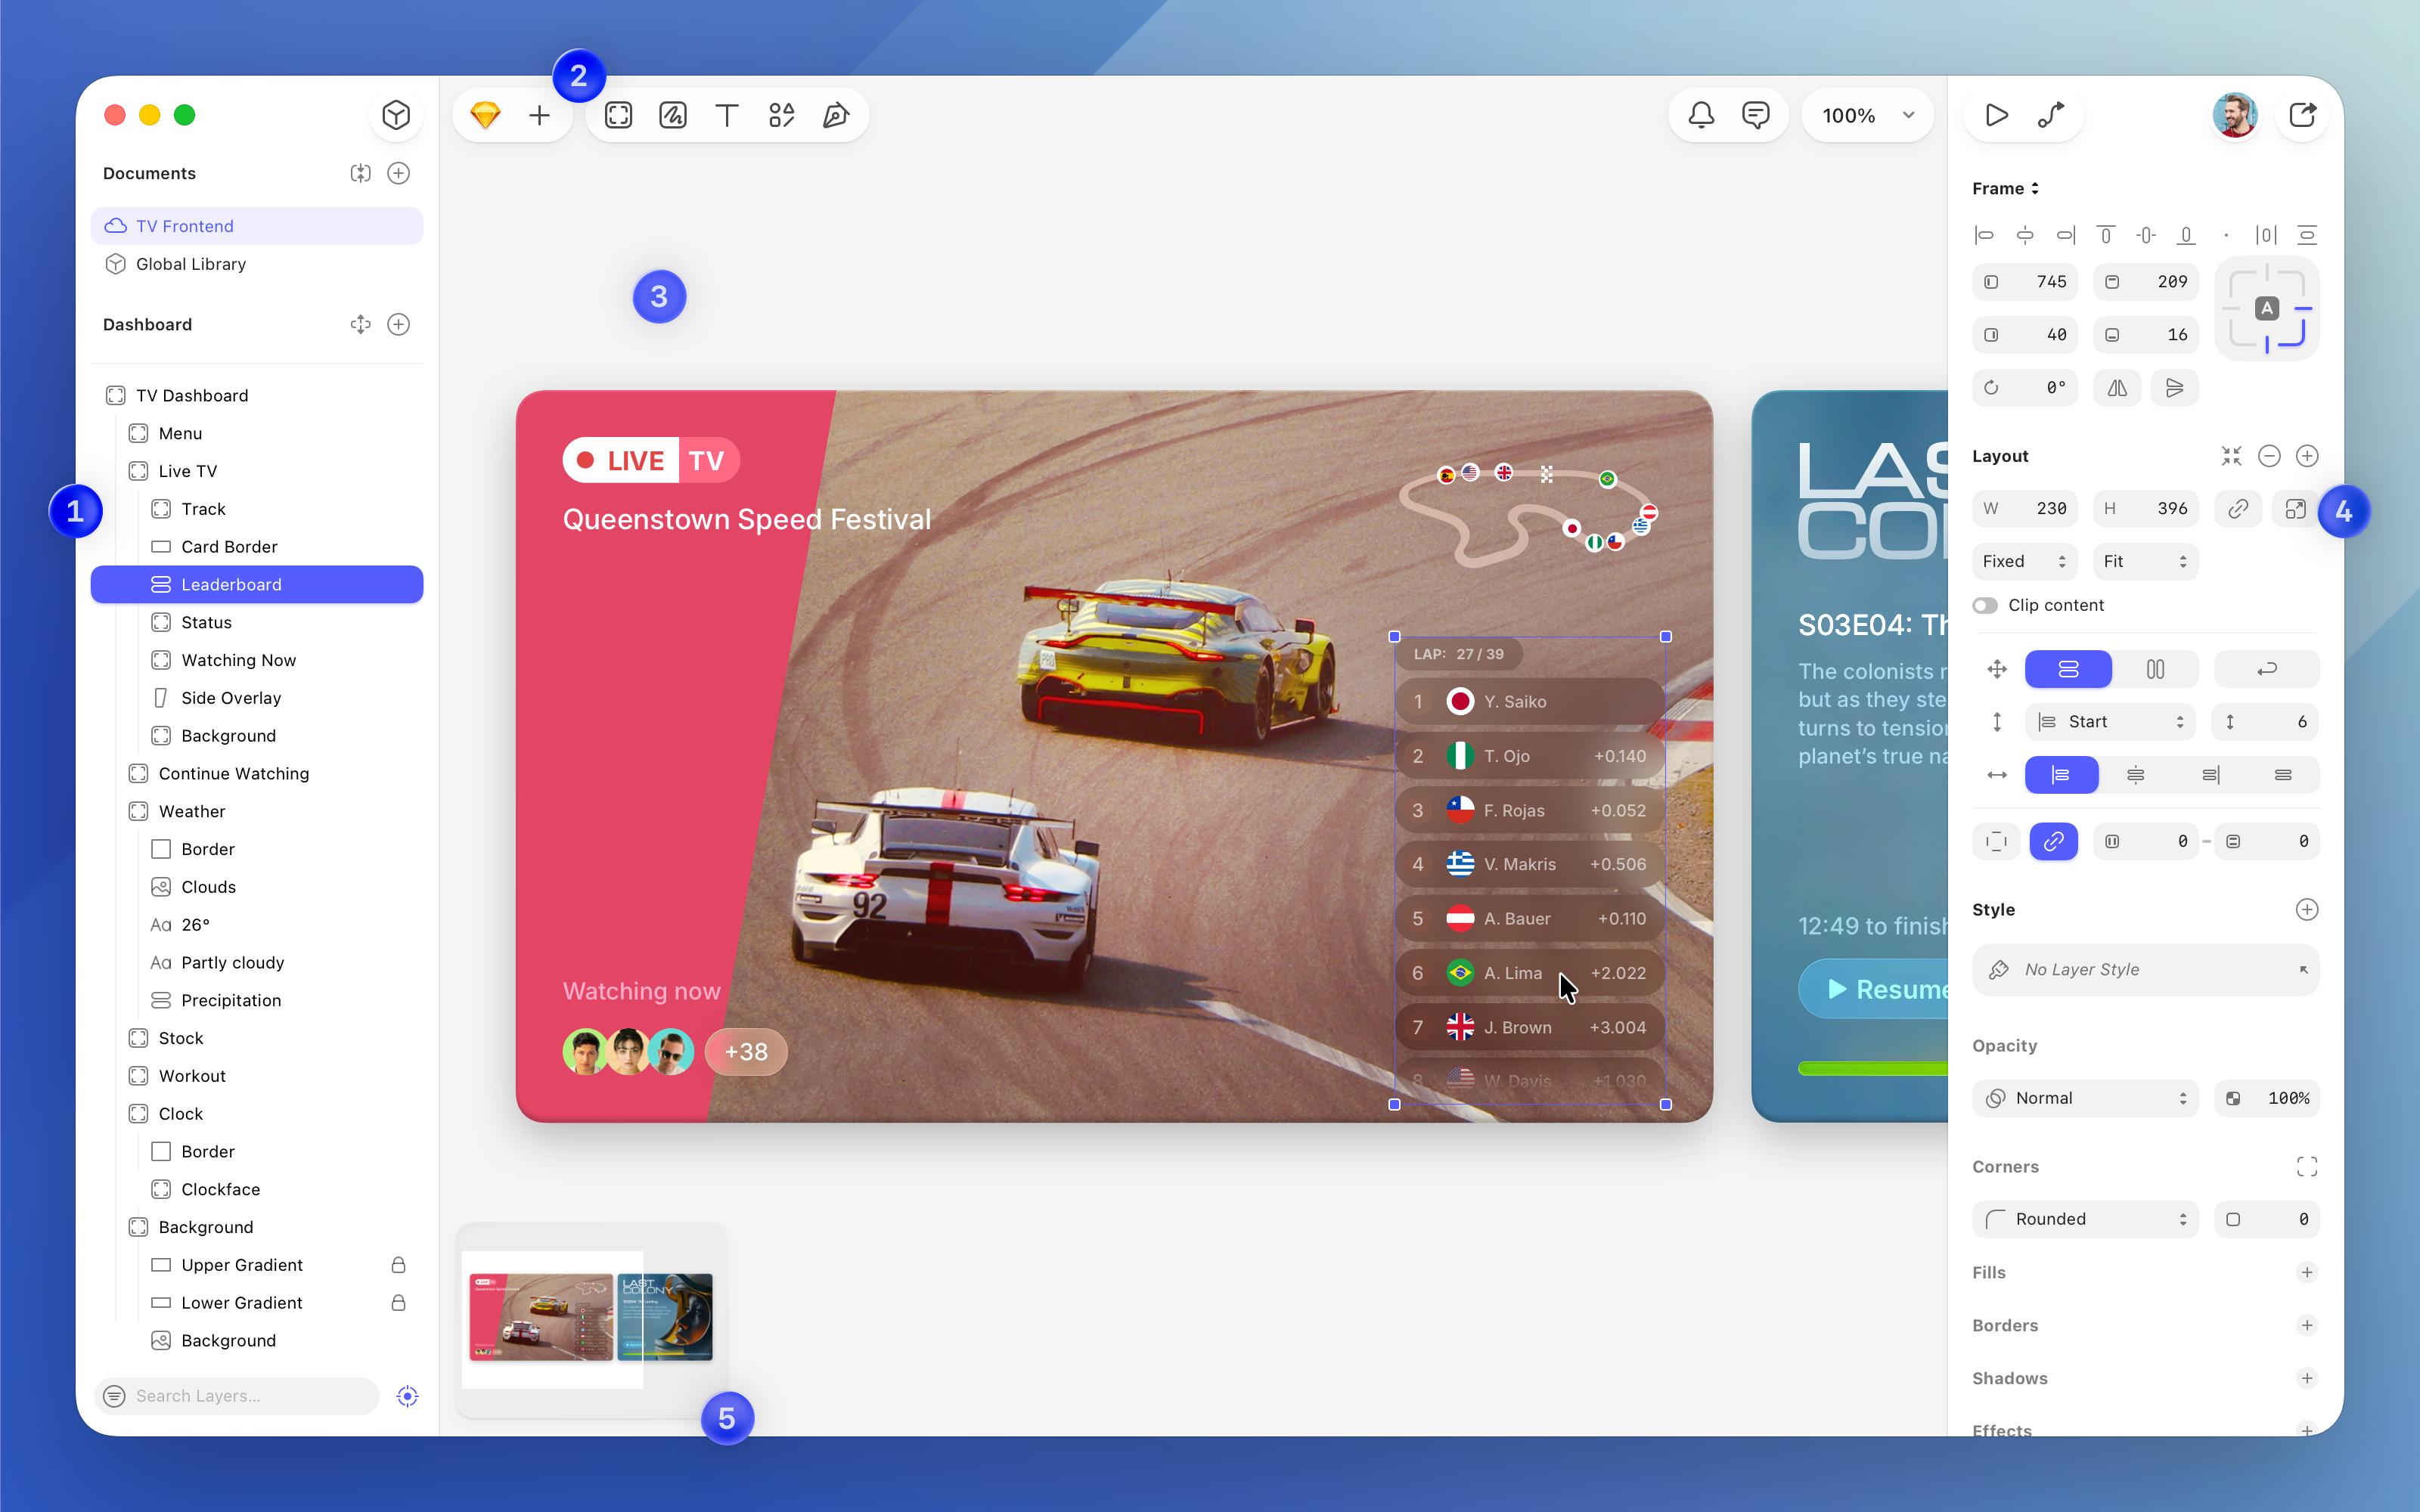
*The Mac app interface*
1. **[The Layer List](/docs/interface-and-settings/the-mac-app-interface/the-layer-list/)** shows all the pages in a document along with all frames and layers on the selected page. With Search Layers field, you can quickly search for a layer using the search bar at the bottom of the Layer List. The order in which layers appear in the list defines their relative visibility on the canvas.
1. **[The Toolbar](/docs/interface-and-settings/the-mac-app-interface/the-toolbar/)** gives you quick access to the tools and actions you use most in the Mac app. It’s contextual, meaning it automatically updates to show the options that are most relevant to what you’re working on.
1. **[The Canvas](/docs/interface-and-settings/the-mac-app-interface/the-canvas/)** is where you create your designs. It’s infinite, so you can set things up however you like and work directly on the canvas itself without worrying about running out of space. If you’d prefer to work within a fixed container, you can add frames to your canvas.
1. [**The Inspector**](/docs/interface-and-settings/the-mac-app-interface/the-inspector/) shows the design properties for any layers you’ve selected, or controls for the tool or feature you’re using.
1. **The Minimap** makes it easier to find your way around a large canvas. Whenever you have layers outside your current view, the minimap will appear at the bottom right of your canvas. Click on the minimap to jump anywhere on the canvas, or drag the highlighted viewport area to pan around. Hovering over the minimap will display names of objects too. You can hide the minimap via the **View** menu, the **Zoom** menu (in the toolbar), or by pressing ⌃M.
> **Note:** To focus on the Canvas and hide the interface, go to **View** > **Show Interface** or press ⌘. to toggle the interface on or off.
--------------------------------------------------------------------------------
title: "The Canvas"
last_modified: "2026-06-22"
url: "https://www.sketch.com/docs/interface-and-settings/the-mac-app-interface/the-canvas/"
--------------------------------------------------------------------------------
## The Canvas
## Zooming and navigating the Canvas
You can hold the spacebar, click and drag to pan around the Canvas, or use the arrow keys if you haven’t selected any layers.
There are a few ways to zoom in and out:
- Hold the ⌘ key and use your mouse’s scroll wheel. We’ll scroll in by default when you scroll up, but you can change this at any point by checking the **Invert scroll direction** checkbox in the [Canvas tab](/docs/interface-and-settings/mac-app-settings/canvas/) in your Settings.
- Use the pinch gesture on a trackpad or use the Zoom menu in the toolbar.
- Use the Zoom tool by pressing Z and either click to zoom in or hold ⌥ and click to zoom out. With the Zoom tool enabled, you can click and drag a selection to zoom into a specific area.
There are also a few Zoom shortcuts:
| Action | Shortcut |
|--------|----------|
| Zoom in | ⌘+ |
| Zoom out | ⌘- |
| Zoom to 100% | ⌘0 |
| Zoom to fit all layers in the Canvas | ⌘1 |
| Zoom to fit selection | ⌘2 |
| Center selection in the Canvas | ⌘3 |
## Changing the Canvas color
To change the canvas color, click on an empty area of the Canvas to deselect all layers and display the **Add canvas color** option in the Inspector. Use the color picker to choose a color. You can also use the eyedropper tool in the color picker or press ⌃C to select the canvas color.
## Showing pixels on the Canvas
By default, you’ll view the Canvas in vector mode. It’s resolution independent and you can zoom infinitely to work at any level of detail. The Mac app measures layers in points, and when you export, you can scale things to different resolutions.
If you’re working on a design where it’s important to be able to see individual pixels, select **View > Canvas > Show Pixels on Zoom** or press ⌃P to enable Pixel Zoom and view individual pixels when you zoom in past 100%.
### Points, pixels, and resolution
Sketch uses the macOS coordinate system, which measures everything in points rather than raw physical pixels. On an **@1x** display, one point maps to one physical pixel. On an **@2x** Retina display, one point maps to four physical pixels, and on an **@3x** display it maps to nine.
That’s why dimensions in Sketch stay the same even though exported assets and screen hardware can use different pixel densities. For example, a frame that measures 390 × 844 points in Sketch can still represent a much higher-resolution iPhone display in physical pixels.
When you export layers or frames at **@2x** or **@3x**, Sketch multiplies the physical pixels in the exported asset, while the point measurements in your document stay unchanged. If you copy CSS from Sketch, the exported `px` values map directly to Sketch points.
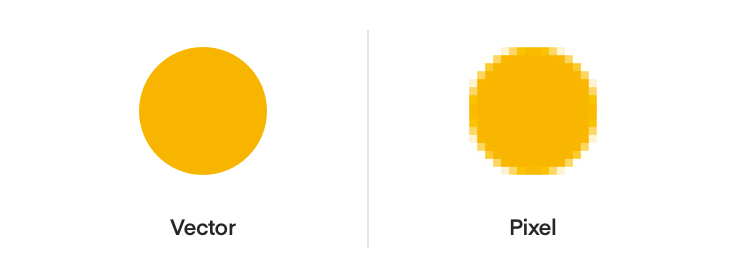
*Differences between Vector and Pixel rendering*
### Showing the pixel grid
Select **View > Canvas > Show Pixel Grid on Zoom**, or press ⌃X, to see any edges of your layers that don’t align with the Pixel Grid once you zoom in past 600%.
### Pixel Fitting
When Pixel Fitting is on, layer coordinates snap to whole pixel values as you move or resize them.
To toggle it, go to **Arrange > Fit Layers to Pixel Bounds**, press ⌃⌘X, or search for _Fit Layers to Pixel Bounds_ in the Command Bar.
To round a specific layer’s position and size to the nearest whole pixel without affecting the global setting, select it and click **Round to Pixel** at the top of the Inspector, next to the layer name, or press ⇧⌘P. The button only appears when Pixel Fitting is enabled and rounding is possible for your current selection.
In vector editing, **Round to Pixel** rounds any selected points using your current pixel snapping setting: full, half, or quarter pixel.
## Using Rulers
The Mac app hides rulers by default, but you can show them by selecting **View > Canvas > Show Rulers** or pressing ⌃R. Insert guides by clicking on the ruler. If you select a layer, its dimensions will be highlighted on the rulers.
## Creating Guides
You can click anywhere on a ruler to create a guide. Guides will be visible when your rulers are and if you move a layer on your Canvas it will snap to the nearest guide.
You can move a guide by clicking and dragging on it inside a ruler. To remove a vertical guide completely, drag it right towards the Layer List or Inspector until your cursor changes and the guide disappears. To remove horizontal guides, drag them to the top or bottom of the current window.
To remove all of your guides together, Control-Click one of the rulers and select **Remove Vertical Guides** or **Remove Horizontal Guides**, respectively.
## Creating Grids
The Mac app supports two types of grid; a regular (square grid) and a layout grid. You can view both at the same time if you need to.
#### Square grids
To set up a square grid, choose **View > Canvas > Show Grid** or press ⌃G. To change its settings (the size of the cells, how often thicker lines appear and the color of the lines), choose **View > Canvas > Grid Settings** or press ⌃⌘G.
> **Note:** **Tip:** To hide and show regular grids, press ⌃G on your keyboard.
#### Layout grids
To set up a layout grid, choose **View > Canvas > Layout Settings…** or press ⌃⌘L and use the options that appear to choose the number of columns and rows, their widths, gutter widths and colors.
You can only apply grids to top-level frames, or to the Canvas if there aren’t any frames on it. You can edit the layout options for multiple frames at the same time.
When you have a layout grid set up, layers will snap to it and ignore the Mac app’s Smart Guides.
> **Note:** **Tip:** To hide and show layout grids, press ⌃L on your keyboard.
## Snapping and Smart Guides
As you move or insert layers and Symbols on the Canvas, the Mac app will automatically show you measurements against nearby layers, as well as Smart Guides that help you snap to a nearby layer’s centre or edges.
If you have two or more layers next to each other, and move another near to them, we’ll highlight their distance and automatically snap that layer to distribute them all equally.
When you resize a layer, if there are similar layers nearby we’ll show you if they have a similar width or height. This also works when you’re resizing a layer that’s overlapping another.
Finally, when you insert or move text layers, they’ll snap to the height or width of nearby layers. Adjust the height of a text layer will also snap the bounding box to the last line of text.
--------------------------------------------------------------------------------
title: "The Command Bar"
description: "The Command Bar gives you quick keyboard access to almost any action you’d find in the menu bar, including those from plugins. Over time, the Command Bar will learn your preferences and bring the actions you use regularly to the top of the results."
last_modified: "2026-07-15"
url: "https://www.sketch.com/docs/interface-and-settings/the-mac-app-interface/the-command-bar/"
--------------------------------------------------------------------------------
## The Command Bar
The Command Bar gives you quick keyboard access to almost any action you’d find in the menu bar, including those from plugins. Over time, the Command Bar will learn your preferences and bring the actions you use regularly to the top of the results.
> **Note:** You can also open a Command Bar in the [web app](/docs/sharing-and-collaborating/using-your-workspace/#using-the-command-bar) with ⌘K (or CtrlK on Windows and Linux).
## Accessing the Command Bar
Press S, or ⌘K,in a document to launch the Command Bar. You’ll see a list of the default actions and their shortcuts. You can navigate items in the Command Bar using arrow keys and hit Enter to action them. You can also click on any action or use its shortcut.
If you see actions grayed out as you type it means the action is not available with the current selection or conditions. For instance, if you have no layers selected, actions that need layer selection like grouping, will appear grayed out.
## Using Shortcuts
The Command Bar is designed to work with keyboard shortcuts. You can use the default ones that come with Sketch or create your own in your Mac’s [System Settings](/docs/shortcuts/#creating-custom-shortcuts). To change the default shortcut that triggers the Command Bar, head to **Sketch** > **Settings** > **General** and record your preferred one in the Command Bar section.
These are the default Command Bar shortcuts:
| Action | Shortcut |
|--------|----------|
| Launch the Command Bar | S or ⌘K |
| Insert Symbol | Y |
| Insert Text Style | ⌃T |
| Replace symbol, style, or template | ⌥⌘R |
| Open filter menu | ⌘F |
| Open filter menu at current location | ⌘↓ |
| Go to parent group | ⌘↑ |
| Go to current library | ⌥⌘↑ |
| Go to all components | ⌃⌥⌘↑ |
| Preserve current Symbol dimensions when replacing | ⌘P |
| Hide nested Component when replacing | ⇧⌘H |
## Replacing Components
To replace a Component via the Command Bar, select it and press ⌥⌘R. Then, select the Component you want to replace it with and press ↵, double-click or click the **Replace** button in the top-right side of the window. If you’re replacing Symbols, you can also keep the current Symbol dimensions when replacing it by clicking the button.
If you’re replacing Components via the Inspector, you’ll find [a popover](/docs/symbols-and-styles/replacing/) that works similarly to the Command Bar. To use the Command Bar as the default way to replace Components, head to **Sketch** > **Settings** > **General**, and enable the option **Use the Command Bar for replacing Components**.
--------------------------------------------------------------------------------
title: "The Toolbar"
description: "The toolbar gives you quick access to the tools and actions you use most in the Mac app. It’s contextual, meaning it automatically updates to show options that are relevant to your current selection and what you’re working on."
last_modified: "2026-04-07"
url: "https://www.sketch.com/docs/interface-and-settings/the-mac-app-interface/the-toolbar/"
--------------------------------------------------------------------------------
## The Toolbar
The toolbar gives you quick access to the tools and actions you use most in the Mac app. It’s contextual, meaning it automatically updates to show options that are relevant to your current selection and what you’re working on.

*The default toolbar in the Mac app*
1. Use the **Canvas and Components View switch** to quickly switch between the Components View and the canvas. [The Components View](/docs/interface-and-settings/the-mac-app-interface/the-components-view/) gives you a quick and easy way to create, manage, search, and find local Symbols, Text Styles, Layer Styles, and Color Variables in your document.
1. **Command Bar and Insert**. Click the Sketch logo to open the Command Bar. Use the button next to it to insert new layers onto the canvas.
1. **Tools** gives you quick access to common actions, such as inserting a frame, graphic, or shape.
1. **Notifications and comments** — the icon shows alerts for new Library versions or missing elements in your document. Once you’ve reviewed everything, the icon disappears until there are new notifications. The button displays a badge with the number of unread comments, and clicking it opens the comments panel where you can view and interact with comments in the document.
1. **View** lets you control how your design appears on the canvas and what you’re focused on. It also shows the current zoom level of your document.
1. **Preview and Prototyping** shows your design or prototype in the Preview window. Click on the icon to open the [Prototyping](/docs/prototyping/) panel.
1. **Collaborate** lets you upload a document to your Workspace and shows who’s currently collaborating with you. Its label adapts to show actions like "Save to Workspace" or "Sign In" when relevant. [Find out more about real-time collaboration](/docs/sharing-and-collaborating/real-time-collaboration/).
1. **Share** lets you share your document and manage its permissions. [Learn more about sharing](/docs/sharing-and-collaborating/).
--------------------------------------------------------------------------------
title: "The Inspector"
description: "In the Inspector, you’ll find settings for any layers you’ve selected, or controls for the tool you’re using. The Inspector hides and shows these controls and settings based on what you have selected or what you’re doing."
last_modified: "2026-04-07"
url: "https://www.sketch.com/docs/interface-and-settings/the-mac-app-interface/the-inspector/"
--------------------------------------------------------------------------------
## The Inspector
In the Inspector, you’ll find settings for any layers you’ve selected, or controls for the tool you’re using. The Inspector hides and shows these controls and settings based on what you have selected or what you’re doing.
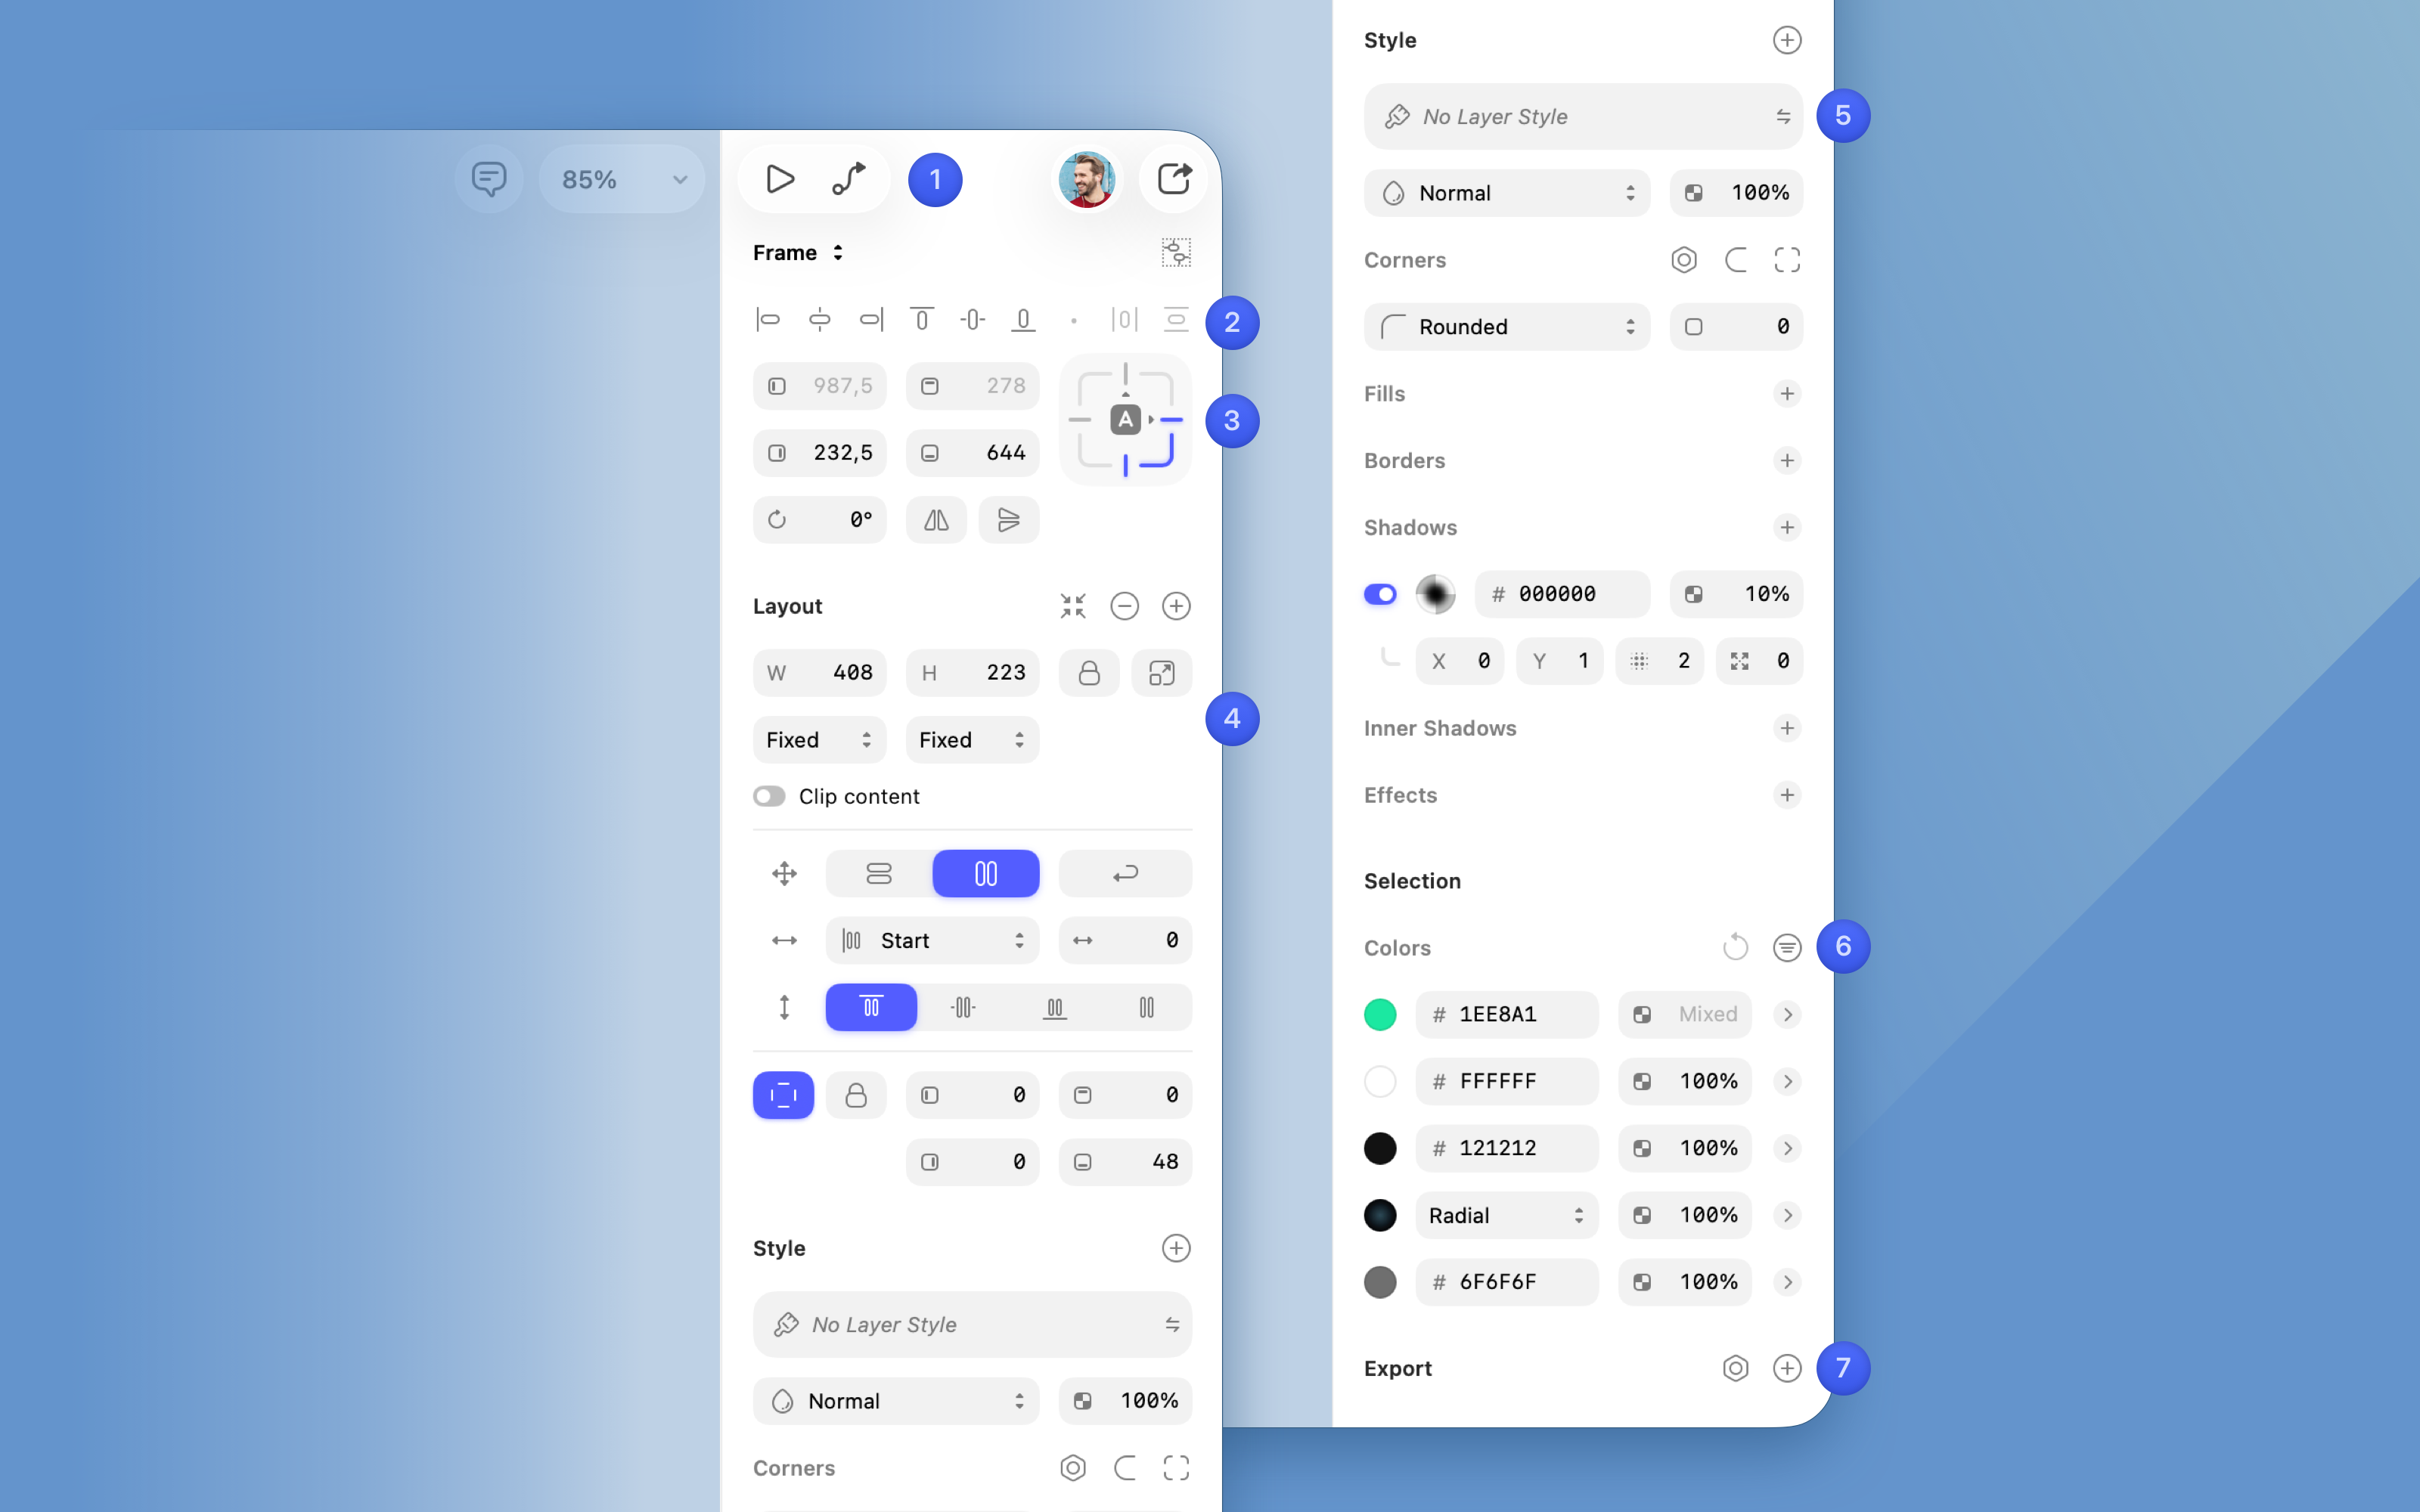
*A closer look at the Inspector — where you adjust everything about a selected layer, from position and size to fills and effects*
1. **[Preview & Prototyping](/docs/prototyping/)** lets you preview your prototypes and define how screens connect. From here, you can add target frames, set animations, and fix layers in place while scrolling.
1. **[Alignment options](/docs/designing/layer-basics/aligning-layers/)** become available when you select one or more layers.
1. **[Layer properties](/docs/designing/layer-basics/resizing-and-rotating-layers/)** allow you to adjust a layer’s position, rotation, and orientation. You can also flip layers horizontally or vertically.
1. **Layout** gives you control over the size of your layers or selection. From here, you can adjust dimensions and define sizing behavior.
1. **Style** lets you apply, create, update, or detach [Layer Styles](/docs/symbols-and-styles/text-and-layer-styles/layer-styles/) as well as set the opacity of your selection. From here, you can also adjust [Corners](/docs/symbols-and-styles/styling/corners/) and add [Fills](/docs/symbols-and-styles/styling/fills/), [Borders](/docs/symbols-and-styles/styling/borders/), [Shadows](/docs/symbols-and-styles/styling/shadows/), and [Effects](/docs/symbols-and-styles/styling/effects/) to your layers.
1. **[Selection colors](/docs/symbols-and-styles/selection-colors/)** shows all the colors in your selection, grouped by type and sorted by frequency. Hover over the color swatch to highlight matching layers on the canvas, or click it to update them all at once. This section only appears when you have layers or a container selected.
1. **[Export](/docs/designing/importing-and-exporting/#exporting-artboards-and-assets)** lets you add export options and presets to your currently selected frame or layer. The fastest way to export is to press ⌘⇧E to open the Export Assets dialog.
--------------------------------------------------------------------------------
title: "The Layer List"
description: "In the layer list, you’ll find your open documents, pages, frames, and layers. You can reorder and rename them directly from here."
last_modified: "2026-06-22"
url: "https://www.sketch.com/docs/interface-and-settings/the-mac-app-interface/the-layer-list/"
--------------------------------------------------------------------------------
## The Layer List
In the layer list, you’ll find your open documents, pages, frames, and layers. You can reorder and rename them directly from here.
## Useful shortcuts
| Action | Shortcut |
|--------|----------|
| Expand a frame, group or Symbol | ⏎ |
| Exit a frame, group, or Symbol | Esc |
| Open Symbol Source | ⌘⏎ |
| Select the next layer or group | ⇥ |
| Select the previous layer or group | ⇧⇥ |
> **Note:** Navigating within a frame or group using ⇥ or ⇧⇥, will only cycle through layers inside that frame or group.
## Documents
At the top of the layer list, you’ll find all currently open documents. This makes it easy to switch between them or create new ones. You can collapse this section into a dropdown menu for a more compact view. You can create a new document by clicking the + button at the top of the Documents section in the layer list, or by pressing ⌘N.
Hover over a document’s name to see a tooltip showing which folder it’s in.
## Pages
Below the document list, you’ll see the Pages section. Here you can view, rename, or create pages for the active document. You can also collapse this section into a dropdown.
You can use as many Pages as you like in your document. They’re handy for organizing your work, for example to create a new page for each iteration, or to split complex designs into multiple pages by dedicating a page to each area. Using multiple pages also improves the Mac app’s performance with complex documents.
To create a new Page, click the + button at the top of the Pages section in the layer list. Click on the Page you want in the layer list to navigate to it, or press Fn↑ or Fn↓ to jump between them.
You can drag Pages to change their order. Once you’ve created pages, you can drag frames or layers within the layer list from one Page to another in the Pages section.
## Layers
The layer list helps you quickly locate and organize content on your Canvas — especially in complex documents with multiple [frames](/docs/interface-and-settings/the-mac-app-interface/the-canvas/#using-frames), [groups](/docs/designing/layer-basics/grouping-layers/), and [Symbols](/docs/symbols-and-styles/symbols/).
The list is fully [searchable](#searching), and giving layers meaningful names makes it much easier to find what you need.
> **Note:** The Canvas won’t move to show your layer when you select it in the layer list. To bring it into view, press ⌘2 to focus right on that layer.
### Renaming layers
To rename a frame or layer:
- Double-click its name and rename it
- Select it and press ⌘R
- Or use the Command Bar and search for _rename_.
### Navigating layers
You can select layers directly from the list, which also highlights them on the Canvas. To expand nested content — such as groups, Symbols , or combined shapes — click the icon next to a layer’s name. Hold ⌥ while clicking to expand all nested layers at once.
You can also right-click a layer in the list to open a context menu with common layer actions like group, transform, align, etc.
To jump to a layer on the Canvas, hold ⌥ and hover over its name in the layer list, then click the arrow that appears.
> **Note:** Symbols appear with a purple icon in the layer list.
If you’ve used boolean operations to create [combined shapes](/docs/designing/shapes/boolean-operations/#combining-shapes), they’ll appear grouped in the layer list. Hover over a boolean operation icon to see a tooltip showing its type (Union, Subtract, Intersect, or Difference).
## Selection
Layers on the Canvas display a distinct selection box based on their properties and hierarchy. Top-level frames or layers show a solid outline when selected, while nested frames or layers display a dotted outline around their parent.
*The types of selection boxes that appear in the Mac app*
The corner handles look different here — to resize a layer inside a Symbol instance, you need to edit the Symbol Source.
## Layer list icons
The layer list displays icons that correspond to the type and form of the layer on the Canvas — for example, a rectangle shape will appear as a small preview next to the layer name.
> **Note:** To quickly focus on a layer, double-click its icon in the layer list. Sketch will pan and zoom to that layer on the Canvas.
**Layer types**
- Frame
- Frame Template
- Graphic
- Horizontal Stack
- Vertical Stack
- Group
- Combined shape
- Union
- Subtract
- Intersect
- Difference
- Text layer
- Symbol (source and instance share the same icon)
- Overlay Frame
- Start Point
**Layer controls**
- Locked layer
- Layer visible
- Layer hidden
Symbols appear in purple. Hidden layers appear in light grey. When layers, groups or combined shapes have a [Text Style](/docs/symbols-and-styles/text-and-layer-styles/text-styles/) or [Layer Style](/docs/symbols-and-styles/text-and-layer-styles/layer-styles/) applied to them they will also appear in the Symbol highlight color.
## Hiding and locking layers
To hide a layer, hover over its name in the layer list and click the eye icon that appears. If the eye icon next to a layer has a line through it before you hover it, the layer is already hidden. You can also use ⇧⌘H to toggle hiding and showing layers.
To lock a layer, hold ⌥, hover over it in the layer list and click the padlock icon . Click the padlock icon to unlock it. Alternatively, you can also press ⇧⌘L to toggle the lock on and off for one or more selected layers.
To prevent unwanted edits, you can’t select a locked layer directly on the Canvas. Select it in the layer list first to move or edit it.
## Searching the layer list
If you have a document with lots of layers, you can use the search bar at the bottom of the layer list to find layers by name or type. You can quickly focus the layer list search bar by pressing ⌥⌘F.
> **Note:** The layer list will truncate long layer names. Hover over them to see a tooltip with the full name.
## Focus mode
Focus mode filters the layer list to show only the layers related to what you’re working on. When it’s enabled, the layer list displays only the layers within the top-level frame of your current selection. If there isn’t a top-level frame, we’ll show all layers on the page. You can toggle focus mode using the icon at the bottom of the layer list or via **View** > **Sidebar** > **Focus Layer List** in the menu.
--------------------------------------------------------------------------------
title: "The Components View"
description: "The Components View is a quick and easy way to create, manage, search, and find local Symbols, Text Styles, Layer Styles, Color Variables, Frame Templates, and Graphic Templates in your document."
last_modified: "2026-04-07"
url: "https://www.sketch.com/docs/interface-and-settings/the-mac-app-interface/the-components-view/"
--------------------------------------------------------------------------------
## The Components View
The Components View is a quick and easy way to create, manage, search, and find local Symbols, Text Styles, Layer Styles, Color Variables, Frame Templates, and Graphic Templates in your document.
## Accessing the Components View
To access the Components View click on the **Components** button on the left side of the toolbar. You can also use ⌃1 and ⌃2 to toggle between the Canvas and the Components View.
The buttons in the toolbar filter the view between all types of Components: Symbols, Text Styles, Layer Styles, Color Variables, Frame Templates, and Graphic Templates.
## Useful shortcuts
| Action | Shortcut |
|--------|----------|
| Show Canvas | ⌃1 |
| Show Components View | ⌃2 |
Use these shortcuts in the Components View to filter components quickly:
| Action | Shortcut |
|--------|----------|
| Symbols | ⌘1 |
| Text Styles | ⌘2 |
| Layer Styles | ⌘3 |
| Color Variables | ⌘4 |
| Frame Templates | ⌘5 |
| Graphic Templates | ⌘6 |
## Working in the Components View
*The Components View in the Mac app*
1. **Switching Views.** Switch between the Canvas and Components View by toggling between the two tabs on the left of the toolbar. Or use ⌃1 and ⌃2.
1. **Duplicate or Create new ** (depending on what filter is selected). To create a new Text Style, Layer Style, Color Variable, Frame Template or Graphic Template click on the toolbar item. You can also duplicate Symbols using the duplicate icon in the toolbar.
1. **Filtering Components.** By default, we’ll show you all the Symbols in your document, but you can use the toolbar controls to switch between Symbols, Layer Styles, Text Styles, Color Variables, Frame Templates and Graphic Templates.
1. **Search .** Filter between Component types using the tabs, then search for the name of the Component.
1. **Contextual Menu**. Control-click on the Component thumbnails to insert, rename, group, duplicate, delete, or copy their CSS attributes. Use insert to add a copy of your selected Component to your Canvas. When you insert a Component, the Mac app switches to the Canvas view, so you can drop your Component into your design. For Symbols and Templates, you can also choose **Edit on Canvas** to jump directly to the source on the Canvas.
1. **Editing in the Inspector.** You can edit, rename or delete any Symbol, Layer Style, Text Style, Color Variable, Frame or Graphic Template using the Inspector. Simply select a component and make your changes.
This view is all about organizing, so it only shows components that are local to the document you have open. It doesn’t show components from Libraries, even if you’ve used them in your document. You’ll need to open the original Library file to manage that Library’s components.
### How to Create a new Component using the Components View
You can quickly create new Text Styles, Layer Styles, Color Variables, and Frame Templates from the Components view. While the process is similar across component types, check each component’s guide for specific steps.
* [How to Create Text Styles](/docs/symbols-and-styles/text-and-layer-styles/text-styles/)
* [How to Create Layer Styles](/docs/symbols-and-styles/text-and-layer-styles/layer-styles/)
* [How to Create Color Variables](/docs/symbols-and-styles/color-variables/#creating-a-color-variable)
* [How to Create Templates](/docs/interface-and-settings/the-mac-app-interface/the-canvas/#creating-a-template)
While you can’t create a Symbol in the Components View, you can duplicate it. Click on **Edit Symbol Source** in the Inspector to edit on the Symbols page.
## Organizing Components
The Components View makes it easy to organize and manage your Components.
You can select multiple components and group them using ⌘G or Control-click on your selection and choose **Group **. You can also drag and drop components into existing groups in the left sidebar. To rename a group, double-click on the group name in the left sidebar. To rename a single component, click on it, and rename it using the name field in Inspector.
## Expanding and collapsing groups
You can quickly collapse all open groups by choosing **View > Sidebar > Collapse All Groups**. For more granular control, you can hold ⌥ when you click on a disclosure arrow next to a group’s name to open and collapse all contents within that group (including sub-groups).
--------------------------------------------------------------------------------
title: "Mac app settings"
description: "Learn how to change Canvas settings and presets; add Libraries, data sources or plugins; enable experimental features — and more. Press ⌘, from anywhere in the Mac app, or choose **Sketch > Settings** to bring up the Settings panel."
last_modified: "2026-04-07"
url: "https://www.sketch.com/docs/interface-and-settings/mac-app-settings/"
--------------------------------------------------------------------------------
## Mac app settings
Learn how to change Canvas settings and presets; add Libraries, data sources or plugins; enable experimental features — and more. Press ⌘, from anywhere in the Mac app, or choose **Sketch > Settings** to bring up the Settings panel.
--------------------------------------------------------------------------------
title: "General"
description: "Configure the Mac app’s appearance, canvas, tabs, auto-save, and other general preferences."
last_modified: "2026-02-06"
url: "https://www.sketch.com/docs/interface-and-settings/mac-app-settings/general/"
--------------------------------------------------------------------------------
## General
The General tab gives you control over the Mac app’s appearance, behavior, and default preferences.
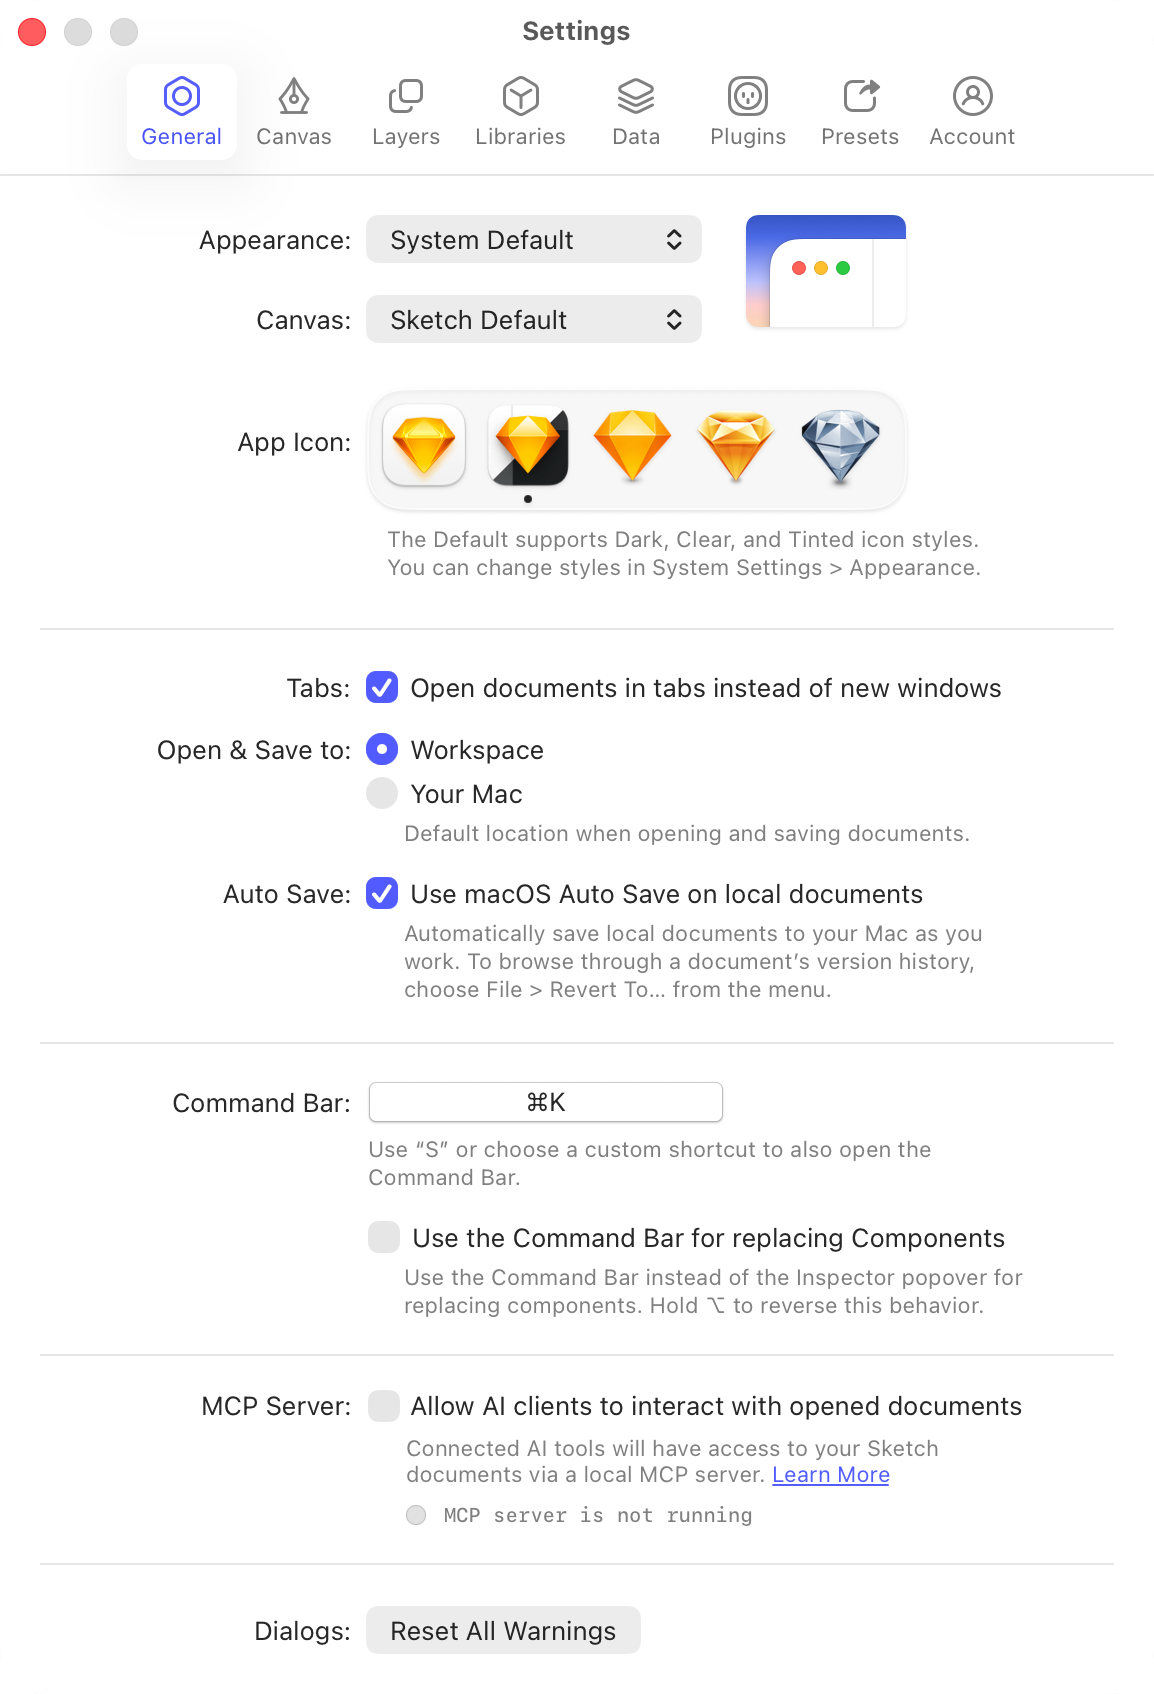
*The General settings panel displaying Appearance, Canvas, App Icon, Tabs, and other preference options*
1. **Appearance** gives you the option to use a light or dark UI for the Mac app, regardless of your system settings (macOS Mojave 10.14 or later).
1. **Canvas** sets the canvas to light or dark, independent of your Appearance setting.
1. **App Icon** changes the app icon for Sketch.
1. **Tabs** controls whether documents open in tabs (document list) or in separate windows.
1. **Open & Save to** defines whether documents open and save to a Workspace or locally by default.
1. **Auto Save** is enabled by default and saves documents automatically as you work. For local documents, this also provides access to previous versions using the macOS Versions feature.
1. **Command Bar** sets a custom shortcut and determines whether the Command Bar is the default way to replace Components.
1. **[MCP Server](/docs/mcp-server/)** gives you the option to allow AI clients to interact with your open documents.
1. **Dialogs** gives you the option to reset all warning dialogs so they appear again the next time you perform those actions.
--------------------------------------------------------------------------------
title: "Managing your Sketch Canvas Settings"
description: "Configure color profiles, zoom behavior, nudging, and guide colors in Sketch."
last_modified: "2026-02-06"
url: "https://www.sketch.com/docs/interface-and-settings/mac-app-settings/canvas/"
--------------------------------------------------------------------------------
## Managing your Sketch Canvas Settings
The Canvas tab lets you control how documents render, zoom, and behave while you work on the Canvas.
*The Canvas Settings in the Mac app*
1. **Color Profile** gives you different [color profile](/docs/designing/color-profiles/) options for the Mac app to render your documents with. If you want to set a different color profile in specific document you can do so in the [Document Settings window](/docs/interface-and-settings/document-settings/color-profile/). To learn more about color profiles and the difference between assigning and converting color profiles, read our documentation on [color profiles](/docs/designing/color-profiles/)
1. **Animate Zoom** applies a transition when zooming, helping you keep context as you move around the Canvas.
1. **Zoom In On Selection** zooms into your current selection instead of the center of the Canvas.
1. **Zoom Back to Previous Canvas Position** zooms back to your previous Canvas position instead of zooming out from the center.
1. **Invert scroll direction** changes how zooming works when you hold ⌘ and scroll. By default, scrolling up zooms in. When enabled, scrolling up zooms out.
1. **Nudging** controls how far layers move when you nudge them with the arrow keys, including the distance used when holding ⇧.
1. **Colors** customizes how [guides](/docs/interface-and-settings/the-mac-app-interface/the-canvas/#creating-guides) look, as well as [prototyping](/docs/prototyping/) links.
--------------------------------------------------------------------------------
title: "Layers"
description: "Configure layer behavior for drawing, editing, importing, duplicating, and exporting in Sketch."
last_modified: "2026-06-22"
url: "https://www.sketch.com/docs/interface-and-settings/mac-app-settings/layers/"
--------------------------------------------------------------------------------
## Layers
The Layers tab controls how layers behave when drawing, editing, importing, duplicating, and exporting content in Sketch.
*The Layers settings panel displaying Pixel Fitting, Drawing, Importing, and Export options*
1. **Pixel Fitting** rounds layers to the nearest whole pixel and ensures they don’t sit on fractional pixels when you draw, move, or resize them.
1. **When Distributing** determines what happens when layers can’t be distributed to full pixels.
1. **New [Text Styles](/docs/symbols-and-styles/text-and-layer-styles/text-styles/)** gives you the option to include text alignment and color as part of the style in new Text Styles.
1. **New [Layer Styles](/docs/symbols-and-styles/text-and-layer-styles/layer-styles/)** gives you the option to include corner radius values when you create a Layer Style. This option is on by default.
1. **Importing** gives you the option to scale down images to fit inside frames and import PDFs as vector paths.
1. **Frame Export** gives you the option to choose how frames are ordered when exporting them as a PDF.
1. **Drawing Layers** locks the proportions of new layers when you hold ⇧ while drawing.
1. **Editing Shapes** determines whether clicking on the first or last end point closes an open path.
1. **Duplicating** offsets duplicated layers by 10px, and automatically renames them to keep layer names unique.
1. **Flatten Bitmaps** sets the resolution for flattened bitmap images to **@2x** by default.
--------------------------------------------------------------------------------
title: "Libraries"
description: "Add, manage, restore, disable, and remove Libraries in the Sketch Mac app."
last_modified: "2026-04-07"
url: "https://www.sketch.com/docs/interface-and-settings/mac-app-settings/libraries/"
--------------------------------------------------------------------------------
## Libraries
This page explains how to add, manage, restore, disable, and remove Libraries in the Mac app.
> **Note:** If you are looking for information on how to create, share, or update library components, head over to the [Libraries](/docs/libraries/) section.
## How to add a new Library
- To add a new Library, click the **Add Local Library** button in the bottom right, and select the `.sketch` Library document.
- You can also enable a Library from the list of available Libraries in your Workspace.
*The Libraries tab of the Settings window in the Mac app.*
1. **Enable/Disable**: Toggle Libraries on or off using the checkboxes. This is handy when you have lots of Libraries to manage.
1. **Library info** shows when a Library was last updated and if it uses a [starred version](/docs/sharing-and-collaborating/sharing-and-viewing-documents/creating-starred-versions/). If an enabled Library has an update available and automatic updates are off, you’ll see an update button.
1. **Filter** shows only your enabled Libraries.
1. **Control-click** opens options to show a Library in Finder or the web app (depending on its type), open it, or remove it.
1. **Workspace**, **Third Party**, and **Local** lists Libraries in separate categories.
1. **Automatically download and update Libraries** downloads a Library update whenever one is available.
1. **Add Local Library** opens the standard macOS Open dialog to add Libraries from your computer.
## How to restore missing Libraries
If you see a warning in your Library settings about a missing Library, this means the Mac app can’t find that `.sketch` Library document. This usually happens when:
- The original `.sketch` file was moved or renamed
- An Admin removed the Library from the Workspace
- Your access to the Workspace was revoked.
1. **Missing Library warning** appears when Sketch can’t locate the Library file.
1. **Disable or Remove** disables the Library to check whether it moved to a new location, or remove it and add it again from your Workspace or your Mac.
## Removing and disabling Libraries
To delete a Library, control-click the Library you want to uninstall and select **Remove Library**. You can’t delete Workspace Libraries from Settings, but you can disable them at any time.
**Note:** Removing or disabling a Library doesn’t unlink its Symbols — they remain intact in your document. If you try to edit a Symbol from a missing Library, Sketch shows a dialog with options to **Replace anyway** (using Components from enabled Libraries) or **Open settings** (to re-enable the Library).
To permanently convert a Library Symbol to a local Symbol, select it, then click **Unlink from Library** in the Inspector.
When you disable a Library, it no longer appears in the Insert menu or Components View. This helps keep your workflow focused by showing only the Libraries you’re currently working with. You can enable the Library again at any time, as long as you don’t delete it.
--------------------------------------------------------------------------------
title: "Adding and removing Sketch Data sources"
description: "Manage, enable, disable, and add data sources in Sketch."
last_modified: "2026-02-06"
url: "https://www.sketch.com/docs/interface-and-settings/mac-app-settings/data/"
--------------------------------------------------------------------------------
## Adding and removing Sketch Data sources
The Data tab lets you manage, enable, disable, and add data sources that you can use across your documents.
1. **Toggle visibility** of your data sources using the checkboxes. This is useful when managing multiple sources.
1. **Control-clicking** a data source opens options to show it in Finder, remove it, or display any connected Data plugins (not available for built-in plugins).
1. **The menu** offers the same actions for the selected data source as control-clicking it.
1. **Add Data** lets you add data sources from anywhere on your computer using the standard macOS open dialog. You can also drag data sources directly into the Settings window.
1. **Help** opens the [data documentation](/docs/designing/data/) page.
## How to Create Data Sources
For information on creating data sources, take a look at the [Data ](/docs/designing/data/) section.
--------------------------------------------------------------------------------
title: "Disabling and uninstalling Plugins"
description: "Enable, disable, update, and uninstall Plugins in the Mac app."
last_modified: "2026-04-20"
url: "https://www.sketch.com/docs/interface-and-settings/mac-app-settings/plugins/"
--------------------------------------------------------------------------------
## Disabling and uninstalling Plugins
The Plugins tab gives you control over installed plugins, including enabling, disabling, updating, and uninstalling them.
*The Plugins tab showing installed plugins with checkboxes, menu options, and update controls*
1. **Checkboxes**: Quickly enable or disable plugins without uninstalling them.
1. **Control-click** opens options to disable, uninstall, or show a plugin in Finder.
1. **More menu** disables plugins or opens the plugins folder in Finder.
1. **Get Plugins** opens the [Plugins & Integrations page on sketch.com](/plugins/#all-plugins).
1. **Update All** updates all installed plugins with available updates.
--------------------------------------------------------------------------------
title: "Presets"
description: "Create, manage, and set default export presets for your Sketch documents."
last_modified: "2026-02-06"
url: "https://www.sketch.com/docs/interface-and-settings/mac-app-settings/presets/"
--------------------------------------------------------------------------------
## Presets
Use the Export Presets tab to create, manage, and set default export presets for your documents.
In the Export Presets settings tab, you’ll see a list of available presets that you can apply when [making a layer or frame exportable](/docs/designing/importing-and-exporting/#using-export-presets):
*The Export Presets panel showing the preset list, add/remove buttons, and configuration fields*
1. **Radio button**: Sets the default export preset.
1. **Add button**: Adds a new preset to the list.
1. **Remove button**: Removes the selected preset.
1. **Name field**: Sets the preset’s name.
1. **Preset fields**: Behave the same way as the fields in the [Make Exportable section](/docs/designing/importing-and-exporting/#using-export-presets) in the Inspector.
--------------------------------------------------------------------------------
title: "Account"
description: "Sign in, manage accounts, and view your Workspace memberships in Sketch."
last_modified: "2026-04-07"
url: "https://www.sketch.com/docs/interface-and-settings/mac-app-settings/account/"
--------------------------------------------------------------------------------
## Account
Use the Account tab to sign in, manage your account, and view details for any Workspaces you belong to.
In the Account tab, you can sign in or out of your account and view details for any [Workspaces](/docs/interface-and-settings/workspace-and-account-settings/) where you’re a member or Guest.
*View and edit your account settings*
1. **Information area**: Shows basic details about your account.
1. **Account Settings**: Opens your Workspace settings in your default browser.
1. **Workspace section**: Shows all Workspaces you belong to for quick access.
1. **Role field**: Shows your access level within each Workspace.
> **Note:** You can start a paid subscription at any point during your trial from your account settings — you’ll see a banner showing how many days are left on your trial in the Workspace Window.
--------------------------------------------------------------------------------
title: "Document settings"
description: "Manage document-specific settings like Libraries, fonts, and document type in Sketch’s Document Settings window."
last_modified: "2026-04-07"
url: "https://www.sketch.com/docs/interface-and-settings/document-settings/"
--------------------------------------------------------------------------------
## Document settings
The Document Settings window brings together document-specific settings and preferences, such as Document Libraries and embedded fonts, so you can manage everything in one place.
To open the Document Settings window, choose **File** > **Document Settings…** or press ⌘⇧,. From there, you can switch between the General, Embed Fonts, and Libraries settings for that document.
*The Document Settings window in the Mac app*
From the **General** tab in the Document Settings window, you can rename your document and change its document type. By default, a document is saved as a standard Sketch document. You can also convert it into a **Library**, making its Components reusable in other documents, or into a **Template**, which acts as a starting point for new designs.
--------------------------------------------------------------------------------
title: "Color Profile"
last_modified: "2026-05-19"
url: "https://www.sketch.com/docs/interface-and-settings/document-settings/color-profile/"
--------------------------------------------------------------------------------
## Color Profile
Even if you’ve set a color profile for all your documents in [Settings](/docs/interface-and-settings/mac-app-settings/canvas/), you can also change the color profile of a specific document.
To set the color profile of your document, make sure nothing is selected on the Canvas — the option will then appear in the Inspector. You can choose between the **sRGB IEC61966-2.1** and **Display P3** color profiles.

*You can change a document’s color profile in the Inspector or in the Canvas tab in your document’s settings.*
When you change a color profile in an existing document, we’ll ask you whether you want to apply the RGB values to the color profile you choose or convert them. To learn more about color profiles and the difference between assigning and converting colors, read our documentation on [color profiles](/docs/designing/color-profiles/).

*Change color profiles and choose color conversion options in your document’s settings.*
--------------------------------------------------------------------------------
title: "Fonts"
description: "In the Fonts tab you can manage different font settings in your document, such as missing fonts or embedded fonts."
last_modified: "2026-04-07"
url: "https://www.sketch.com/docs/interface-and-settings/document-settings/fonts/"
--------------------------------------------------------------------------------
## Fonts
In the Fonts tab you can manage different font settings in your document, such as missing fonts or embedded fonts.
## Missing fonts
To replace a missing font in a document, choose the **Replace…** button next to any missing font you want to replace. From here, you’ll need to select a replacement font family and weight. When you’ve made your selection, choose **Replace** to finish. Text layers that use the missing fonts will now show your chosen replacement font instead.

## Embedded fonts
**Important**: We respect and value the work of font creators in the design community. So, before you embed any font, you must make sure you own the correct license, including the rights to distribute it. Please be aware that some font vendors do not allow users to transfer, display or distribute their fonts — and our terms of service prohibit embedding fonts without the correct license.
If you find that someone has embedded your font into a document in your Workspace without the proper rights, please contact us and we’ll remove it from our systems.
### How to embed a font in the Document Settings
To embed a font, choose **File > Document Settings…** from the menu bar and head to the Fonts tab. You’ll see a list of all non-system fonts in your document. To embed one of them, enable the checkbox next to a font.

### How to embed a font from a document
When you save a document to a Workspace for the first time, Sketch will automatically embed the fonts in use in your file. Press ⌘S and everything will be in place.
If you want to embed new fonts to an existing Workspace document, we‘ll show you the embedding fonts menu after you‘ve saved your document so you can pick which fonts you want to embed. Even if you don‘t embed any font, we‘ll still create an update with your latest changes.

### How to un-embed a font
Open your document with an embedded font and choose **File > Document Settings…** from the menu bar and head to the Fonts tab. Disable the checkbox next to the name of the font you wish to un-embed.
Fonts will un-embed automatically if you delete the text layers that use them from your document. You will also need to un-embed and re-embed fonts that have received updates, as we cannot detect updates automatically.

### Embedding fonts from Libraries
You can embed fonts in Libraries like any regular document so everyone that uses that Library will be able to access those fonts. If you use a Symbol or style from a Library with embedded fonts, you’ll need to embed them manually by following the steps above.
If you remove Library Symbols and Text Styles with embedded fonts from a document you’re working on, the fonts they use will un-embed automatically.
## Managing fonts
You can manage missing or embedded fonts in the [Document Settings window](/docs/interface-and-settings/document-settings/fonts/) by heading to **File>Document Settings…** and choosing the Fonts tab.
### Missing fonts
When you open a document that does not have fonts embedded, and you don’t have a font it uses installed on your Mac, you’ll see a **Missing Fonts** notification in the top-right of the document window.
You’ll still be able to see text layers that use any missing fonts in your document (because we show you a PDF preview instead), but you won’t be able to edit those text layers unless you change the font they use or replace that font in the Document Fonts sheet.
To replace missing fonts click on the **Missing Fonts** notification or head to the [Document Settings window](/docs/interface-and-settings/document-settings/fonts/) via **File > Document Settings…**
### Embedding fonts
You can embed individual font files in documents, which is handy when you’re sharing your document with collaborators who may not have the right fonts installed and ensures that documents you upload to your Workspace will display text layers accurately. This feature supports most OpenType and TrueType formats, but only applies to non-system fonts.
You can embed (and un-embed) individual fonts in documents from the Fonts tab in the [Document Settings window](/docs/interface-and-settings/document-settings/fonts/) via **File > Document Settings…**.
If the **Replace** button is disabled in the Document Settings panel, the missing font is usually coming from a Library — not from your document. You’ll need to embed or replace the font in the Library file itself (and you’ll need edit access to do that).
If a Library contains fonts that you don’t have installed, Sketch may show a missing font coming from that Library. In that case, embed (or replace) the font in the Library file, save it, then update the Library in any documents that use it.
Variable fonts can show missing font notifications if a document uses variable font settings like custom weights or styles. If you run into this, use standard, pre-defined weights (for example, Light, Regular, or Bold) instead of custom values.
Duplicate fonts usually happen when two versions of the same typeface end up in the same document — for example, one person uses a variable font and someone else uses a static version, or collaborators have different versions of the same font installed.
If fonts are embedded in the document:
1. Un-embed the fonts affected by duplicates.
2. Save and close the document.
3. Quit Sketch (Sketch keeps fonts in memory until it fully quits).
4. Remove duplicates from your installed fonts (and ask collaborators to do the same).
5. Re-open the document, embed fonts again, then save and close it.
--------------------------------------------------------------------------------
title: "Document Libraries"
description: "With Document Libraries, you can enable a Library for a specific document rather than having it available for every document. This is helpful to keep those Components you really need at hand instead of having to go through every Component in every single Library you have installed."
last_modified: "2026-04-07"
url: "https://www.sketch.com/docs/interface-and-settings/document-settings/document-libraries/"
--------------------------------------------------------------------------------
## Document Libraries
With Document Libraries, you can enable a Library for a specific document rather than having it available for every document. This is helpful to keep those Components you really need at hand instead of having to go through every Component in every single Library you have installed.
## How to enable your Document Libraries
In the Document Settings (⇧⌘,), head to the Libraries tab. There, you’ll see all available Libraries in your Workspace. Tick one or more checkboxes against any listed Libraries to automatically add them to the document you currently have open. You’ll need to manually enable Document Libraries unless you click on **Edit in Library** on a Symbol — in this case, we’ll automatically enable the Library containing the Symbol.

Note: We’ll automatically update Document Libraries if you have the 'Automatic download and update Libraries' setting enabled — otherwise, you’ll have to manually update them. You can manage these Settings in **Settings > Libraries**.
## Working with Document Libraries
Document Libraries work just like [Libraries enabled at an app level](/docs/libraries/), but only for the documents they’re enabled in – you can browse and insert components as you like.
You can insert components from your Document Libraries via the Insert button in the toolbar or the Insert menu — you’ll find them in the 'Document Libraries' section.
--------------------------------------------------------------------------------
title: "Workspace and account settings"
description: "With the web app, you can inspect designs, export assets, share feedback, manage Members and invite Guests — in any browser.
Here you’ll learn how to change your account settings, permissions, and general Workspace settings in the web app."
last_modified: "2026-04-07"
url: "https://www.sketch.com/docs/interface-and-settings/workspace-and-account-settings/"
--------------------------------------------------------------------------------
## Workspace and account settings
With the web app, you can inspect designs, export assets, share feedback, manage Members and invite Guests — in any browser.
Here you’ll learn how to change your account settings, permissions, and general Workspace settings in the web app.
--------------------------------------------------------------------------------
title: "Inviting people to your Workspace"
description: "In the web app, head to the **People** tab of the Workspace settings by clicking on **Settings** > **People** in the sidebar. From here:"
last_modified: "2026-04-07"
url: "https://www.sketch.com/docs/interface-and-settings/workspace-and-account-settings/inviting-people-to-your-workspace/"
--------------------------------------------------------------------------------
## Inviting people to your Workspace
In the web app, head to the **People** tab of the Workspace settings by clicking on **Settings** > **People** in the sidebar. From here:
1. Press the **Invite Members…** button.
2. In the modal that appears, enter the email address of the person you’d like to invite to your Workspace.
3. Assign an [Editor or Viewer](/docs/interface-and-settings/workspace-and-account-settings/editors-viewers-and-guests/) role using the drop-down menu next to the email field, then press **Add to List**.
4. Once you are finished adding people to your list, press **Add Members**.
Once you’ve sent an invite, we’ll show you the name and email of the people you’ve invited along with a *Pending* badge next to their role. This badge will disappear once they accept the invitation email. We’ll charge you from the date the invite is sent to the member, not when they accept the invite.

You can also add empty Editor seats to your Workspace and assign them later on. Read more about how to [add empty editor seats](/docs/interface-and-settings/workspace-and-account-settings/managing-your-workspace-settings/#managing-workspace-members).
**Note**:
- If you’ve created a Workspace, you’ll be an Editor and Admin by default.
- You can change your role to Viewer, but your subscription will always include the cost of at least one Editor.
- As the Workspace’s creator, you cannot remove your Admin rights.
If you already have a Sketch account, click **Join** in the invitation email, then sign in to accept the invitation.
If you don’t have a Sketch account yet, click **Join** in the invitation email, choose **Create an account**, then sign up. Once you’ve signed up, we’ll add you to the Workspace automatically.
If you’re using the Mac App Store version, or you’re on an Education plan, some billing and seat management actions may require help from our Support team. If you can’t add or remove Editor seats in your Workspace settings, [contact Support](/support/contact/) and we’ll help you.
--------------------------------------------------------------------------------
title: "Editors, Viewers and Guests"
description: "There are three types of members that can collaborate together in your Workspace: Viewers, Editors and Guests. You can give different members different roles depending on what they need to do in your Workspace."
last_modified: "2026-04-07"
url: "https://www.sketch.com/docs/interface-and-settings/workspace-and-account-settings/editors-viewers-and-guests/"
--------------------------------------------------------------------------------
## Editors, Viewers and Guests
There are three types of members that can collaborate together in your Workspace: Viewers, Editors and Guests. You can give different members different roles depending on what they need to do in your Workspace.
### Viewers
**Viewers** can access your Workspace from any browser and on any device. This role is great for project managers, stakeholders and anyone in your Workspace that doesn’t need to edit documents. While they don’t have access to the Mac app, Viewers can:
- View documents in your Workspace
- Browse through starred versions
- Share their feedback with comments
- Inspect designs
- Download assets
**Note:** You can add unlimited Viewers to your Workspace for free
### Editors
**Editors** can do everything Viewers do, plus they have access to the Mac app. This role is great for designers and anyone else that needs access to the Mac app to make changes in design files. Editors can:
- Edit documents on the Mac app
- Create and collaborate on documents, prototypes and Libraries
- [Star versions](/docs/sharing-and-collaborating/sharing-and-viewing-documents/creating-starred-versions/) so that they are visible to Viewers
- [Manage Libraries](/docs/libraries/sharing-libraries/)
- [Share documents](/docs/sharing-and-collaborating/sharing-and-viewing-documents/) with other people inside and outside of the Workspace
Although Editors can always view all the documents in a Workspace, they can [limit editing permissions for individual documents](/docs/sharing-and-collaborating/document-permissions/#restricting-edit-rights-for-individual-documents). This feature allows Editors to disable editing rights for other Editors so that they’ll only be able to view specific documents.
> **Note:** Admins can [manage Workspace members' settings](/docs/interface-and-settings/workspace-and-account-settings/managing-your-workspace-settings/#managing-workspace-members), add or remove Editor seats, or schedule empty Editor seats at any point.
### Guests
Workspace Guests can only see documents that you invite them to. The Guest role is ideal when you need to collaborate with people outside your organization, or people you’re working with that don’t need full access to every document in your Workspace. Some frequent examples of Guests include:
- Freelancers
- Clients
You can also decide which document versions Guests see with [starred versions](/blog/welcome-to-workspaces-staying-in-sync/#libraries-and-stars), limit their [permissions](/docs/sharing-and-collaborating/sharing-and-viewing-documents/managing-share-settings/) and, just like with Viewers, you can invite as many as you want for free.
Learn more about [inviting Guests and accessing documents as a Guest](/docs/sharing-and-collaborating/document-permissions/#accessing-documents-as-a-guest).
### Finance role
Admins can assign a Finance role to any existing Workspace member, giving them control of billing, seats and subscription settings. Anyone with the Finance role can download invoices, add or schedule seats, and review Workspace storage.
> **Note:** Assigning the Finance role to a member will remove all access to documents in the Workspace, including any they created. If they’re an Editor, they will also be downgraded to a Viewer and their My Drafts will become a private project that only Admins can access.
To assign the Finance role head to **Settings > People** and click on the **···** next to the person you want to assign it to. Click **Assign as Finance** and confirm. To remove the Finance role, follow the same steps and select **Remove as Finance**. Once you remove the Finance role from a member, they’ll become Viewers in the Workspace. If they were an Editor before, you’ll need to upgrade them to Editor to restore their access.
No. Guests are free and only have access to documents you invite them to.
If you give a Guest edit permission for a document, they can only edit if they already have access to the Mac app through their own subscription (for example, in another Workspace), or they have a valid license.
Any Workspace member can invite Guests to a document via the document’s share settings in the web app, and choose whether the Guest can view, inspect, or edit.
--------------------------------------------------------------------------------
title: "Managing your Workspace settings"
last_modified: "2026-04-08"
url: "https://www.sketch.com/docs/interface-and-settings/workspace-and-account-settings/managing-your-workspace-settings/"
--------------------------------------------------------------------------------
## Managing your Workspace settings
### General settings
#### Updating the Workspace name and logo
Admins and Workspace owners can change the Workspace name at any point. In the web app, head to the Workspace settings by clicking **Settings** > **General** in the sidebar. In the Workspace section, enter the new name and click **Save** when you’re done.
To change the Workspace logo, click on the avatar and select **Upload Image**. Choose an image and click **Upload**. To remove the logo, click on **Remove Current Image**.
#### Enabling support access
If you’re [troubleshooting](/support/troubleshooting/) an issue that’s difficult to describe or reproduce, you may find it useful to give Sketch temporary [support access](/support/troubleshooting/contacting-customer-support/support-access/) to your Workspace.
With support access enabled, our Support Team can access your Workspace, view documents — and even move them to other Workspaces, if necessary.
Support access expires after seven days by default, after which the Support Team can no longer access your Workspace. However, you can disable it earlier if you like.
#### Choosing light or dark mode
You can easily change the web app’s appearance to light or dark mode, or have it adopt your system’s settings.
To do so, open the web app, click on the **Account menu** (that shows your profile image) at the bottom of the left sidebar, then click on **Appearance**. From there, select **Light** or **Dark** mode, or **System Default** to use your system’s (or when available, your browser’s) settings.
Changing to light or dark mode is purely a local setting — it won’t affect other Workspace Members.
#### Deleting a Workspace
If you want to delete the whole Workspace, along with _all_ documents and Members it contains, head to the Workspace settings in the web app and click **Settings** > **General** in the sidebar. Then click **Delete Workspace**. You can’t undo this, so we’ll ask you to confirm before deleting the Workspace.
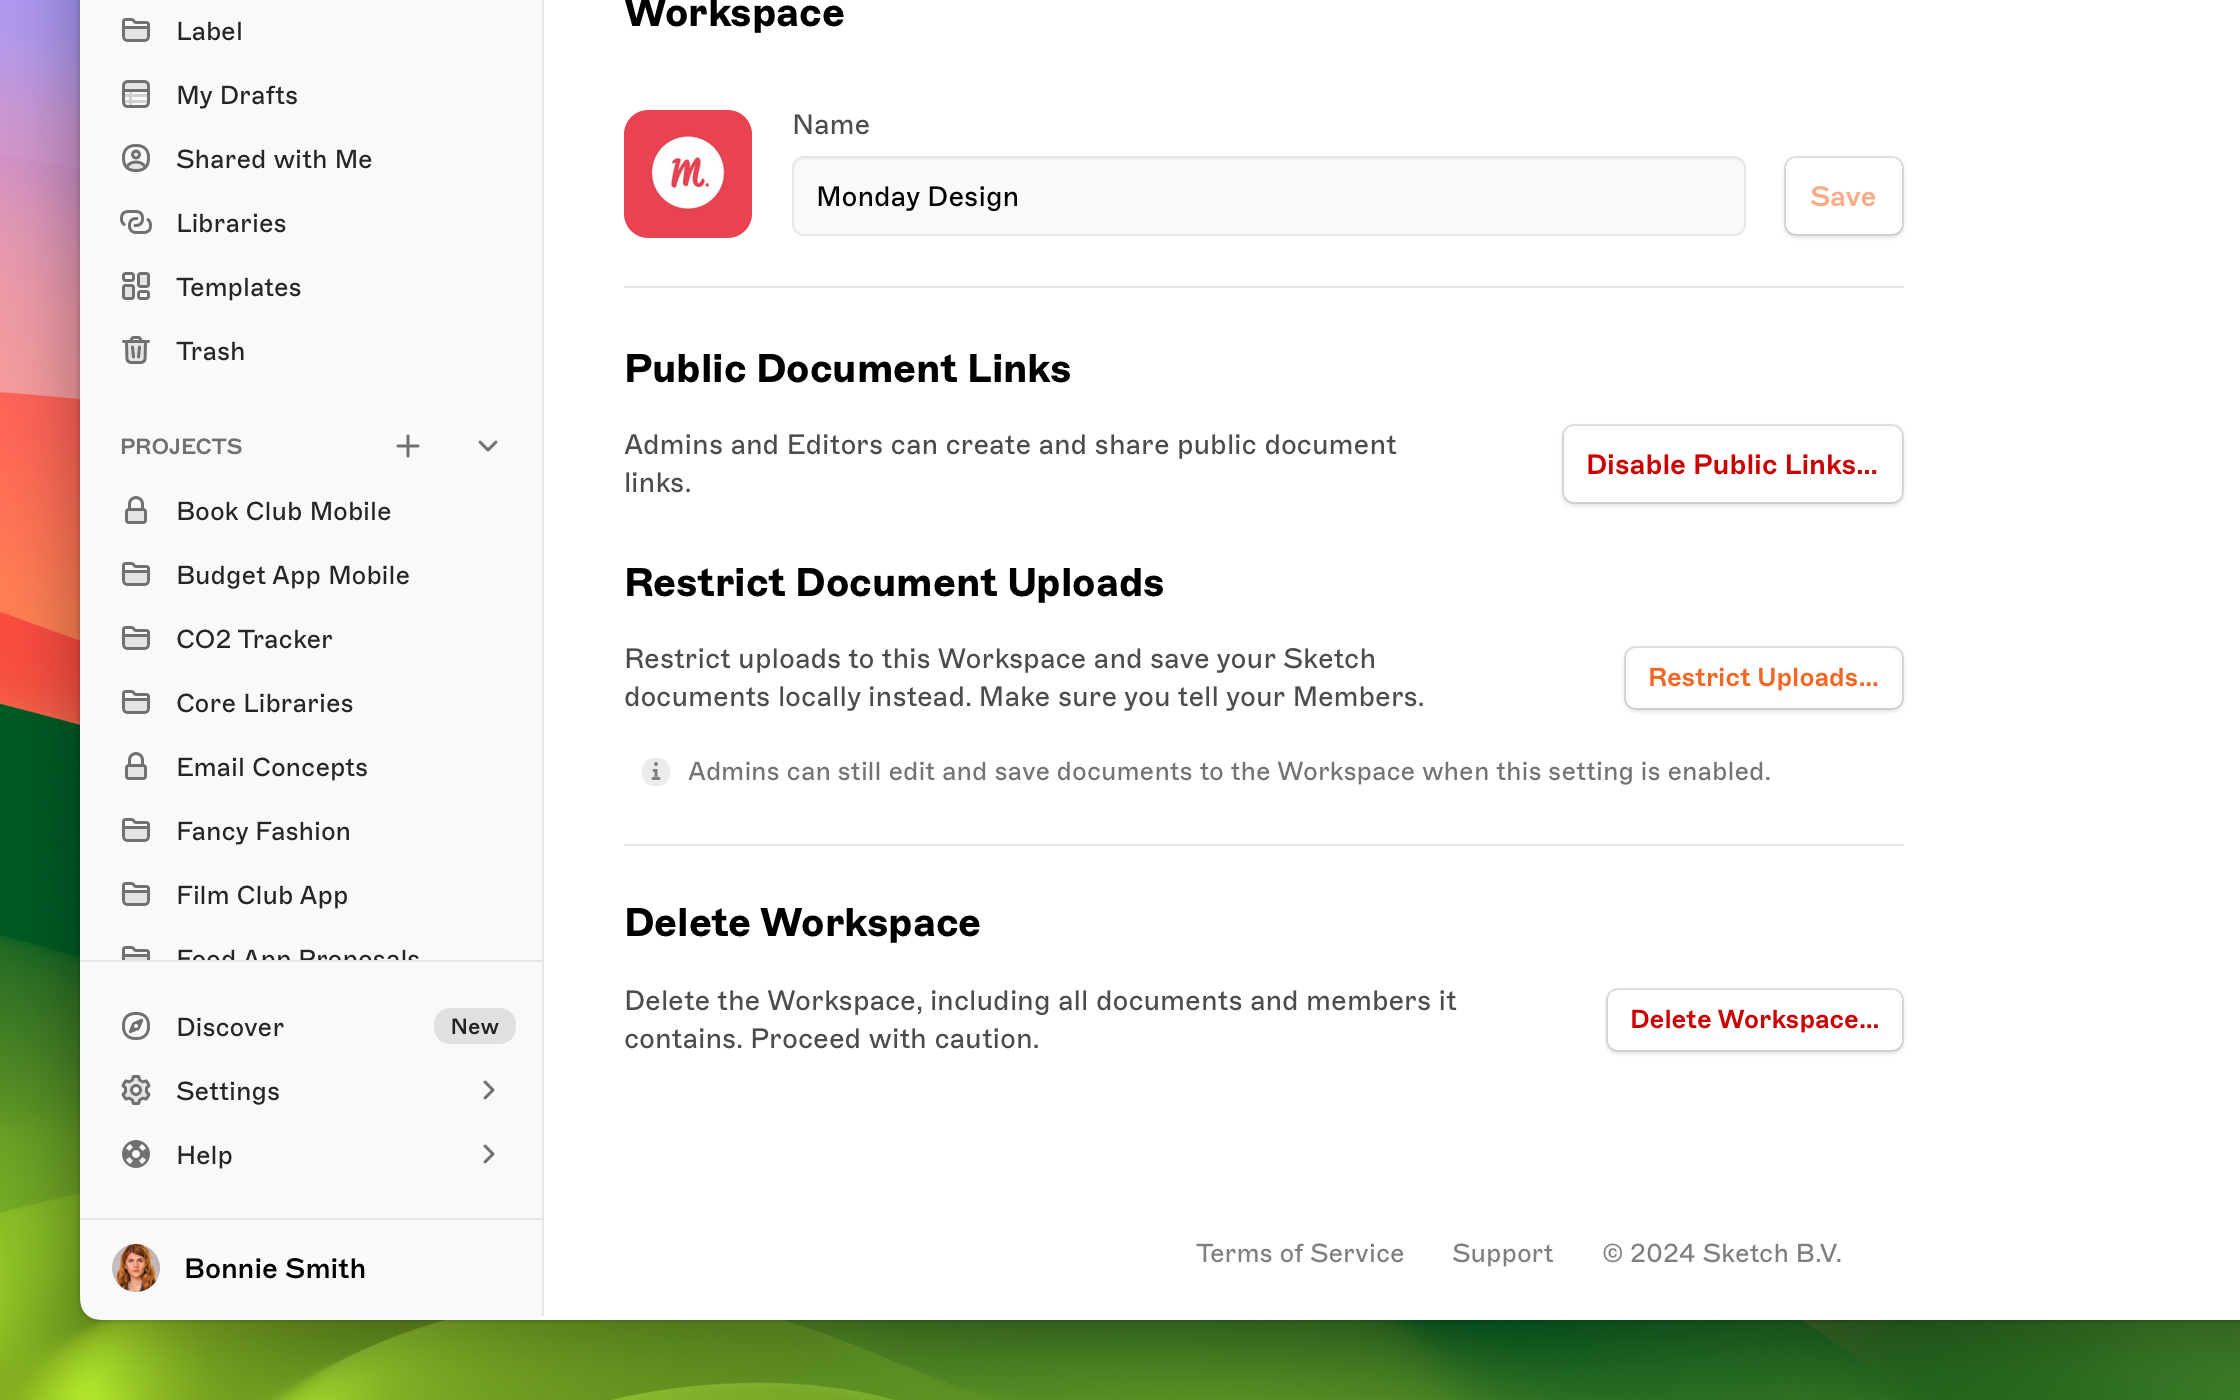
*You’ll find the option to delete a Workspace in Settings > General*
### Managing Workspace Members
#### Viewing and filtering Members
In the web app, head to the **People** tab in Workspace settings by clicking **Settings** > **People** in the sidebar. Here you’ll see a list of everybody who has access to the Workspace, including all Admins, Editors, Viewers and Guests. You can also filter the list to show people with specific roles, such as only Editors or Viewers.
> **Note:** Workspace Admins on a Professional plan can also download a full list of all Workspace Members. Simply click on the **Download CSV** button to download a Comma Separated Value (CSV) file that you can edit with spreadsheet applications.
#### Adding empty Editor Seats
If you have a set annual budget or have freelancers joining and leaving your team often, it might be useful to have empty Editor Seats in your Workspace that you can assign as people come and go. Editor Seats give you more control and predictability with your billing, even if the number of Editors in your Workspace changes.
To add an Editor Seat, head to the **People** tab in the web app’s Workspace settings by clicking **Settings** > **People** in the sidebar. Then click on **Add Seats**. Choose the number of Seats you want to add and click **Pay and Add Seats** when you’re ready. We’ll instantly add the new Seats to your Workspace and charge you pro rata until the end of your billing cycle.
#### Scheduling Editor Seat Changes
You can schedule to add or remove Editor Seats at the start of the next billing cycle. In the web app, head to the **Billing** tab in the Workspace settings by clicking **Settings** > **Billing** in the sidebar. In the **Plan Overview** section, select **Schedule Seat Changes**.
Choose the number of Seats you want to have at the start of the next billing cycle. You’ll also see how the change in Seats affects your next billing cycle and whether it will affect any Workspace Members. When you’re ready, select **Schedule Editor Seat Changes** to confirm.
Any scheduled changes you make to Editor Seats will override the current number of Seats the Workspace has at the end of the current billing cycle. This will include any Seats you add during that same billing cycle. If you want to cancel a scheduled Editor Seat change, select the **Cancel scheduled change?** link that appears in the **Next Billing Date** section.
#### Editing Workspace Member access
To change a Workspace Member from Viewer to Editor, head to the **People** tab in web app’s Workspace settings by clicking **Settings** > **People** in the sidebar. Click **…** next to the Member’s name, and choose **Change to Editor**. Alternatively, to change someone from Editor to Viewer, click **Change to Viewer**. If this change has any impact on your subscription cost, we’ll let you know before completing the action.
**Note:** If you upgrade a Workspace Member’s role to Editor but don’t have empty Editor Seats, we’ll add the Seat and charge you on a pro rata basis up until your next billing cycle. If you downgrade an Editor to a Viewer, this will open up an empty Editor Seat. This Seat will remain open unless you remove it.
You can also turn Guests into Viewers or Editors by clicking **…** and selecting **Change to Member (Viewer/Editor)…**
#### Removing Workspace Members
To remove a Workspace Member, head to the **People** tab in the web app’s Workspace settings by clicking **Settings > People** in the sidebar. Click **…** next to the name of the Member you want to remove from your Workspace, then click **Remove from Workspace**. When you remove someone, all their documents will remain in the Workspace.
### Managing Admin settings
- If you want to make a Workspace Member an Admin, head to the **People** tab in the web app’s Workspace settings by clicking **Settings** > **People** in the sidebar. Then click **…** next to the Member’s name. Select **Make Admin**.
- If you want to remove an Admin, click **…** next to their name in the **People & Settings** tab and choose **Remove as Admin**.
- If you need to transfer Workspace ownership, contact [Support](/support/contact/) with the Workspace name, the current owner’s email address, and the new owner’s email address. You can only transfer ownership to another Admin in the Workspace.
Note: If you don’t see **Settings** in the left sidebar in the web app, it probably means that you’re not an Admin in the Workspace. Only the **People** option will be visible to you.
## Workspace storage
Each Workspace gets 50 GB of shared storage per Editor. For example, two Editor Seats gives you 100 GB total — shared across however your team uses it.
To check your current storage, sign in as an Admin and go to **Settings > Billing**. You’ll find storage details in the **Workspace Storage** section.
For tips on managing storage — including how to free up space, find large documents, and what counts toward your limit — see [How do I manage my Workspace storage?](/support/subscriptions/manage/storage/)
--------------------------------------------------------------------------------
title: "Managing your account"
last_modified: "2026-04-07"
url: "https://www.sketch.com/docs/interface-and-settings/workspace-and-account-settings/managing-your-account/"
--------------------------------------------------------------------------------
## Managing your account
### How to manage sessions
In the Sessions section of your [Settings](/settings/), we’ll show you detailed information for each sign in, including the time, location and device used, so you can easily review and manage them.
To manage your sessions, select **Account** in your account menu at the bottom left of the sidebar. You’ll find a chronological list of all your sessions in the **General** tab, right below the Workspaces section.
- To sign out of all sessions at once, click on **Sign Out of All**. If you choose to sign out of all sessions, we’ll also sign you out of your current one.
- To close an individual session, click on the **Sign Out** button next to it.
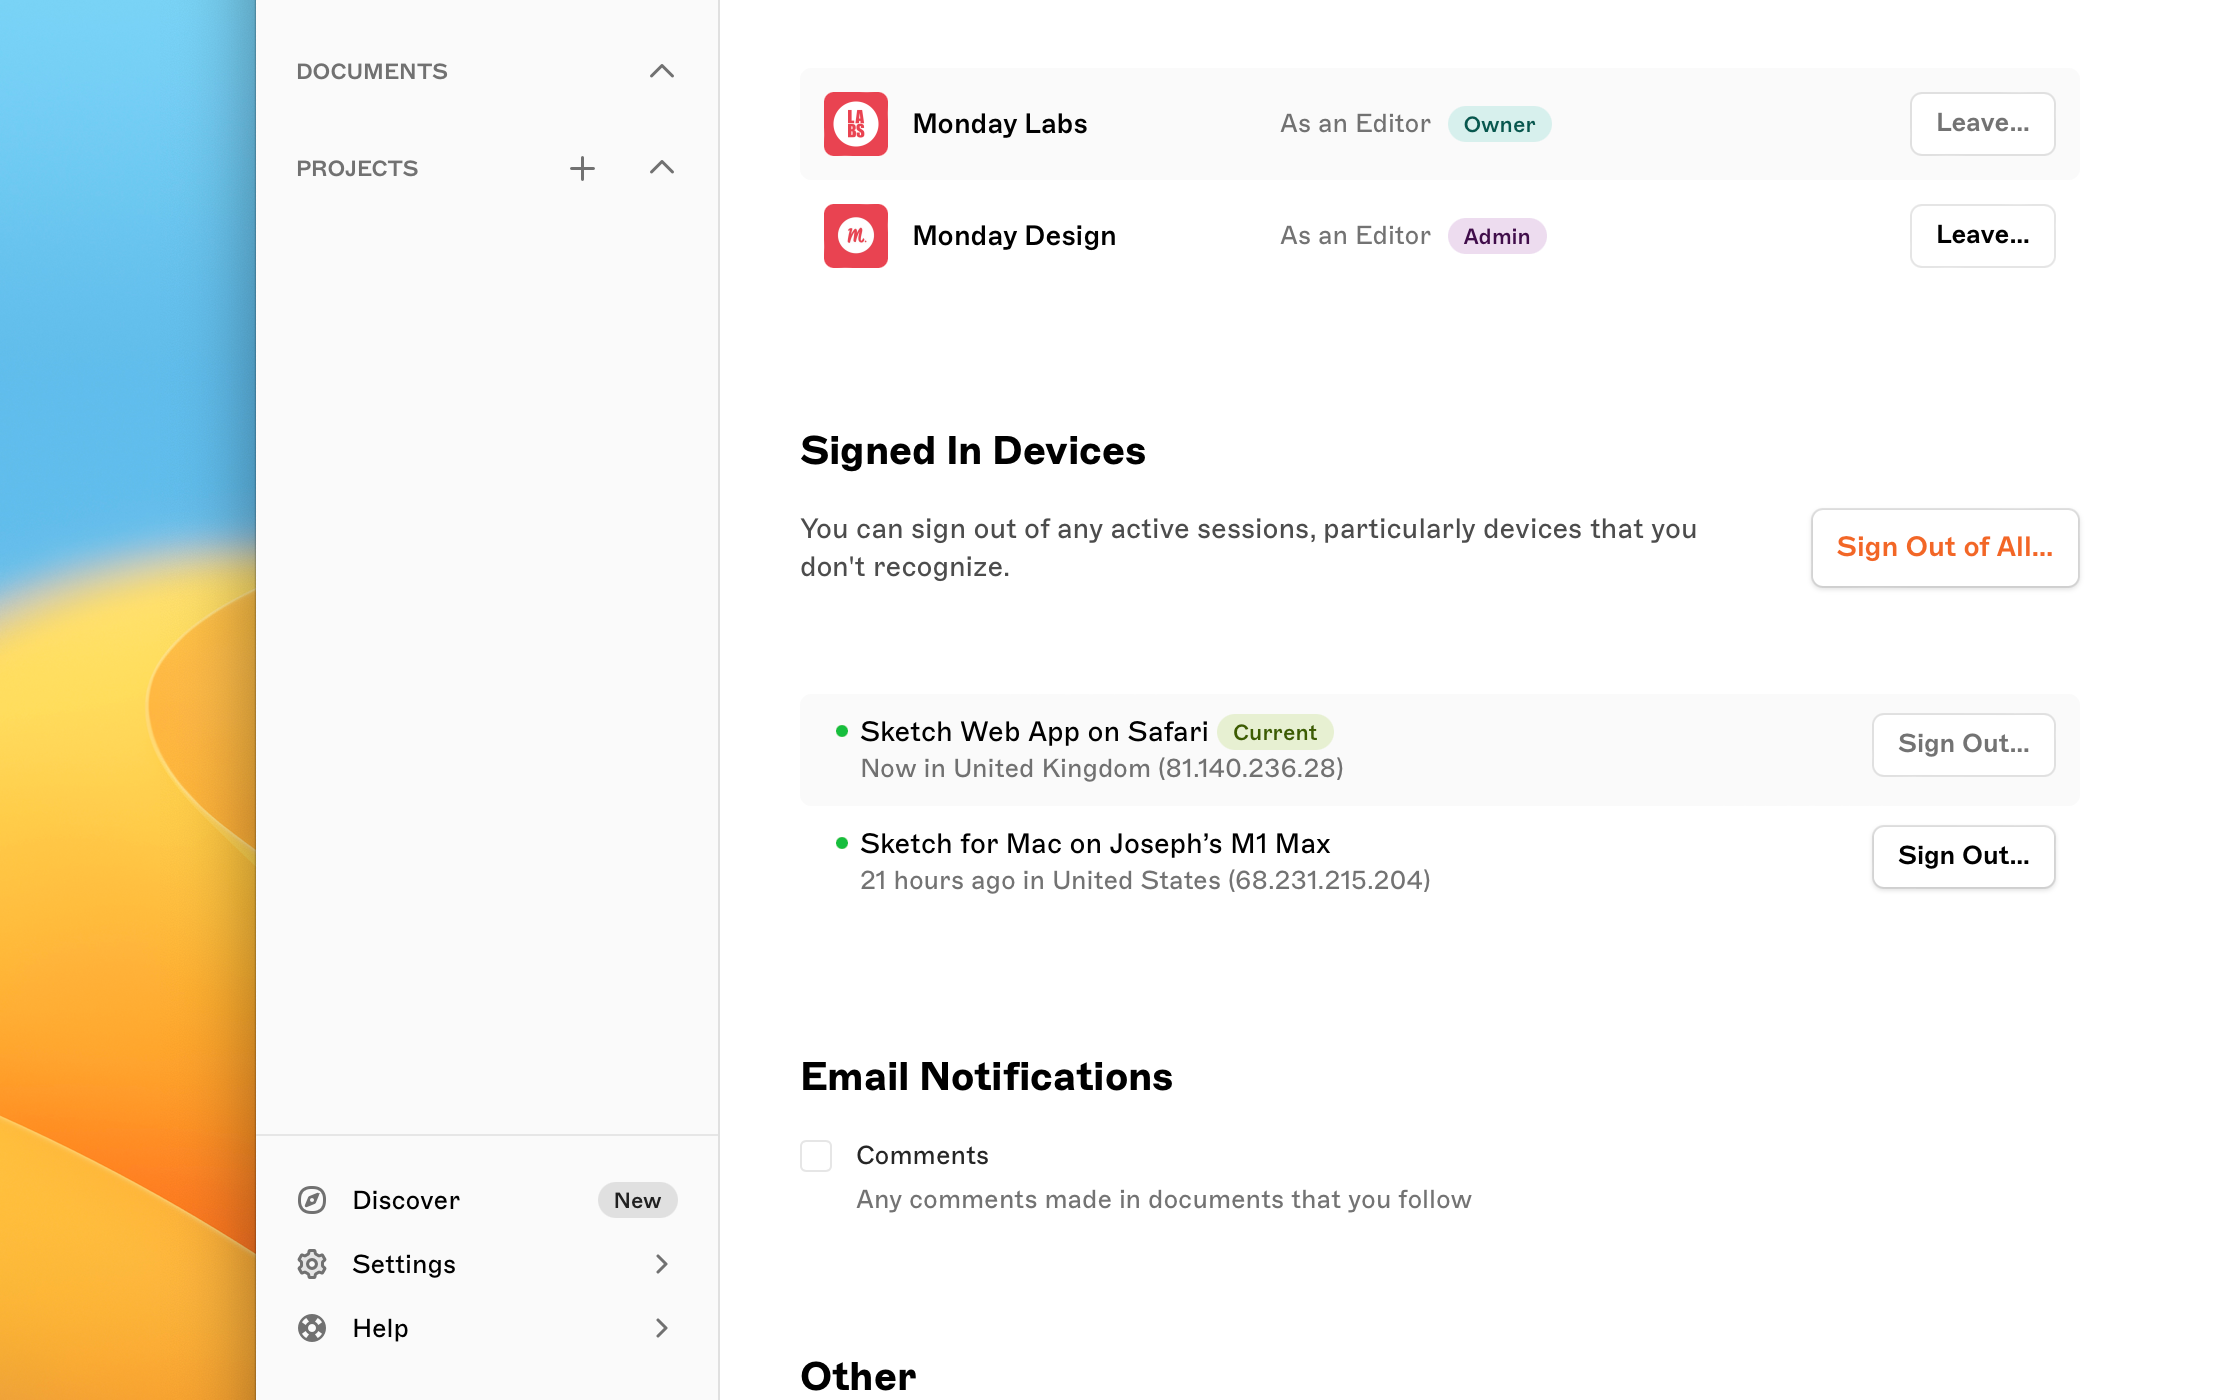
## Updating your email address
To update your email address, sign in to Sketch and head to **Settings > General** under **Account**. Click **Edit** next to your email address, enter the new one, confirm your password, and click **Change email**.
## Deleting your account
To delete your Sketch account, you must first delete your Workspace:
1. Sign in to Sketch as the Workspace Owner.
1. Head to **Settings > General** under **Workspace**.
1. Scroll to the bottom and click **Delete Workspace**.
If there are documents stored in the Workspace, download them first. Once you delete a Workspace and account, you can’t recover them.
After deleting your Workspace:
1. Sign in to Sketch again as the Workspace Owner.
1. Head to **Settings > General** under **Account**.
1. Under **Other**, click **Delete account**, enter your password, and confirm.
## Two Factor Authentication (2FA)
### What is 2FA?
Two Factor Authentication, also known as 2FA or MFA (multi-factor authentication) adds an extra layer of security to your Sketch Account by requesting a code from a 2FA application when you sign in to Sketch. When you sign in, we’ll ask you to enter your email and password. You’ll then need to open your preferred 2FA app and enter a code into Sketch to complete the sign-in process.

### How to set up 2FA in your Sketch account
#### Step 1: Head to your Account page
Head to your [Sketch Account](/settings ) and click on **Enable 2FA…**.
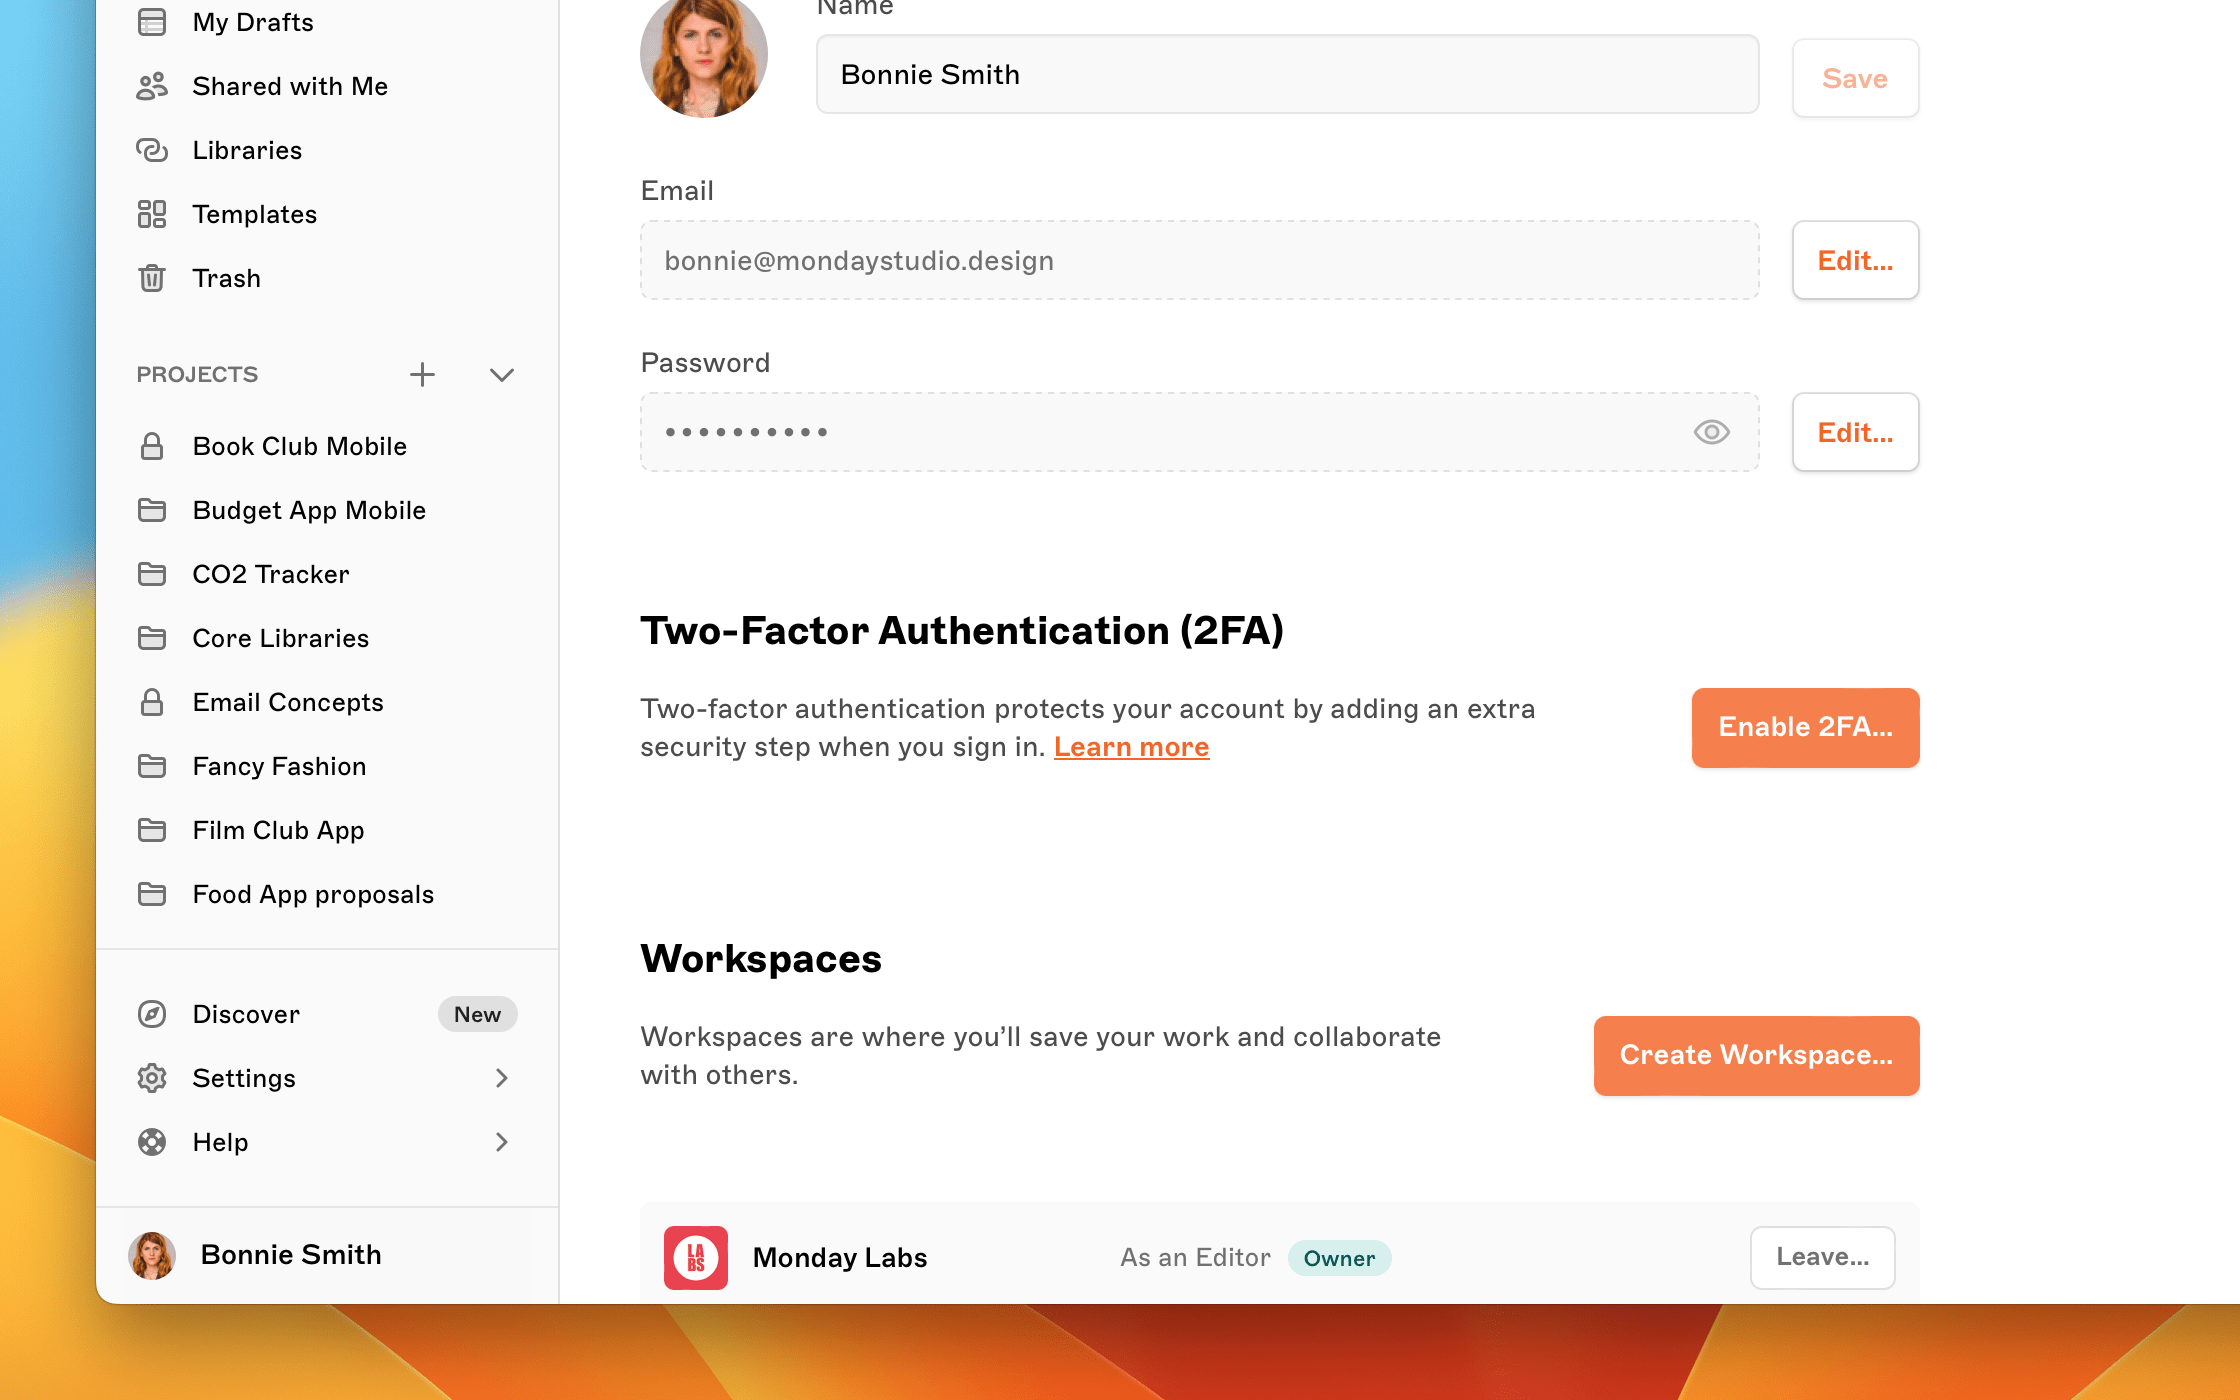
#### Step 2: Choose an authenticator app
We’ll then ask you to download an authenticator app on your phone in case you don’t have one already. You can pick one from the options we suggest or use the one you prefer. Here’s how to get yourself set up in the following apps:
- [Google Authenticator](https://support.google.com/accounts/answer/1066447?hl=en&co=GENIE.Platform%3DiOS&oco=0)
- [Authy](https://support.authy.com/hc/en-us/articles/115001945848-Installing-Authy-apps/)
- [Microsoft Authenticator](https://support.microsoft.com/en-us/account-billing/download-and-install-the-microsoft-authenticator-app-351498fc-850a-45da-b7b6-27e523b8702a)
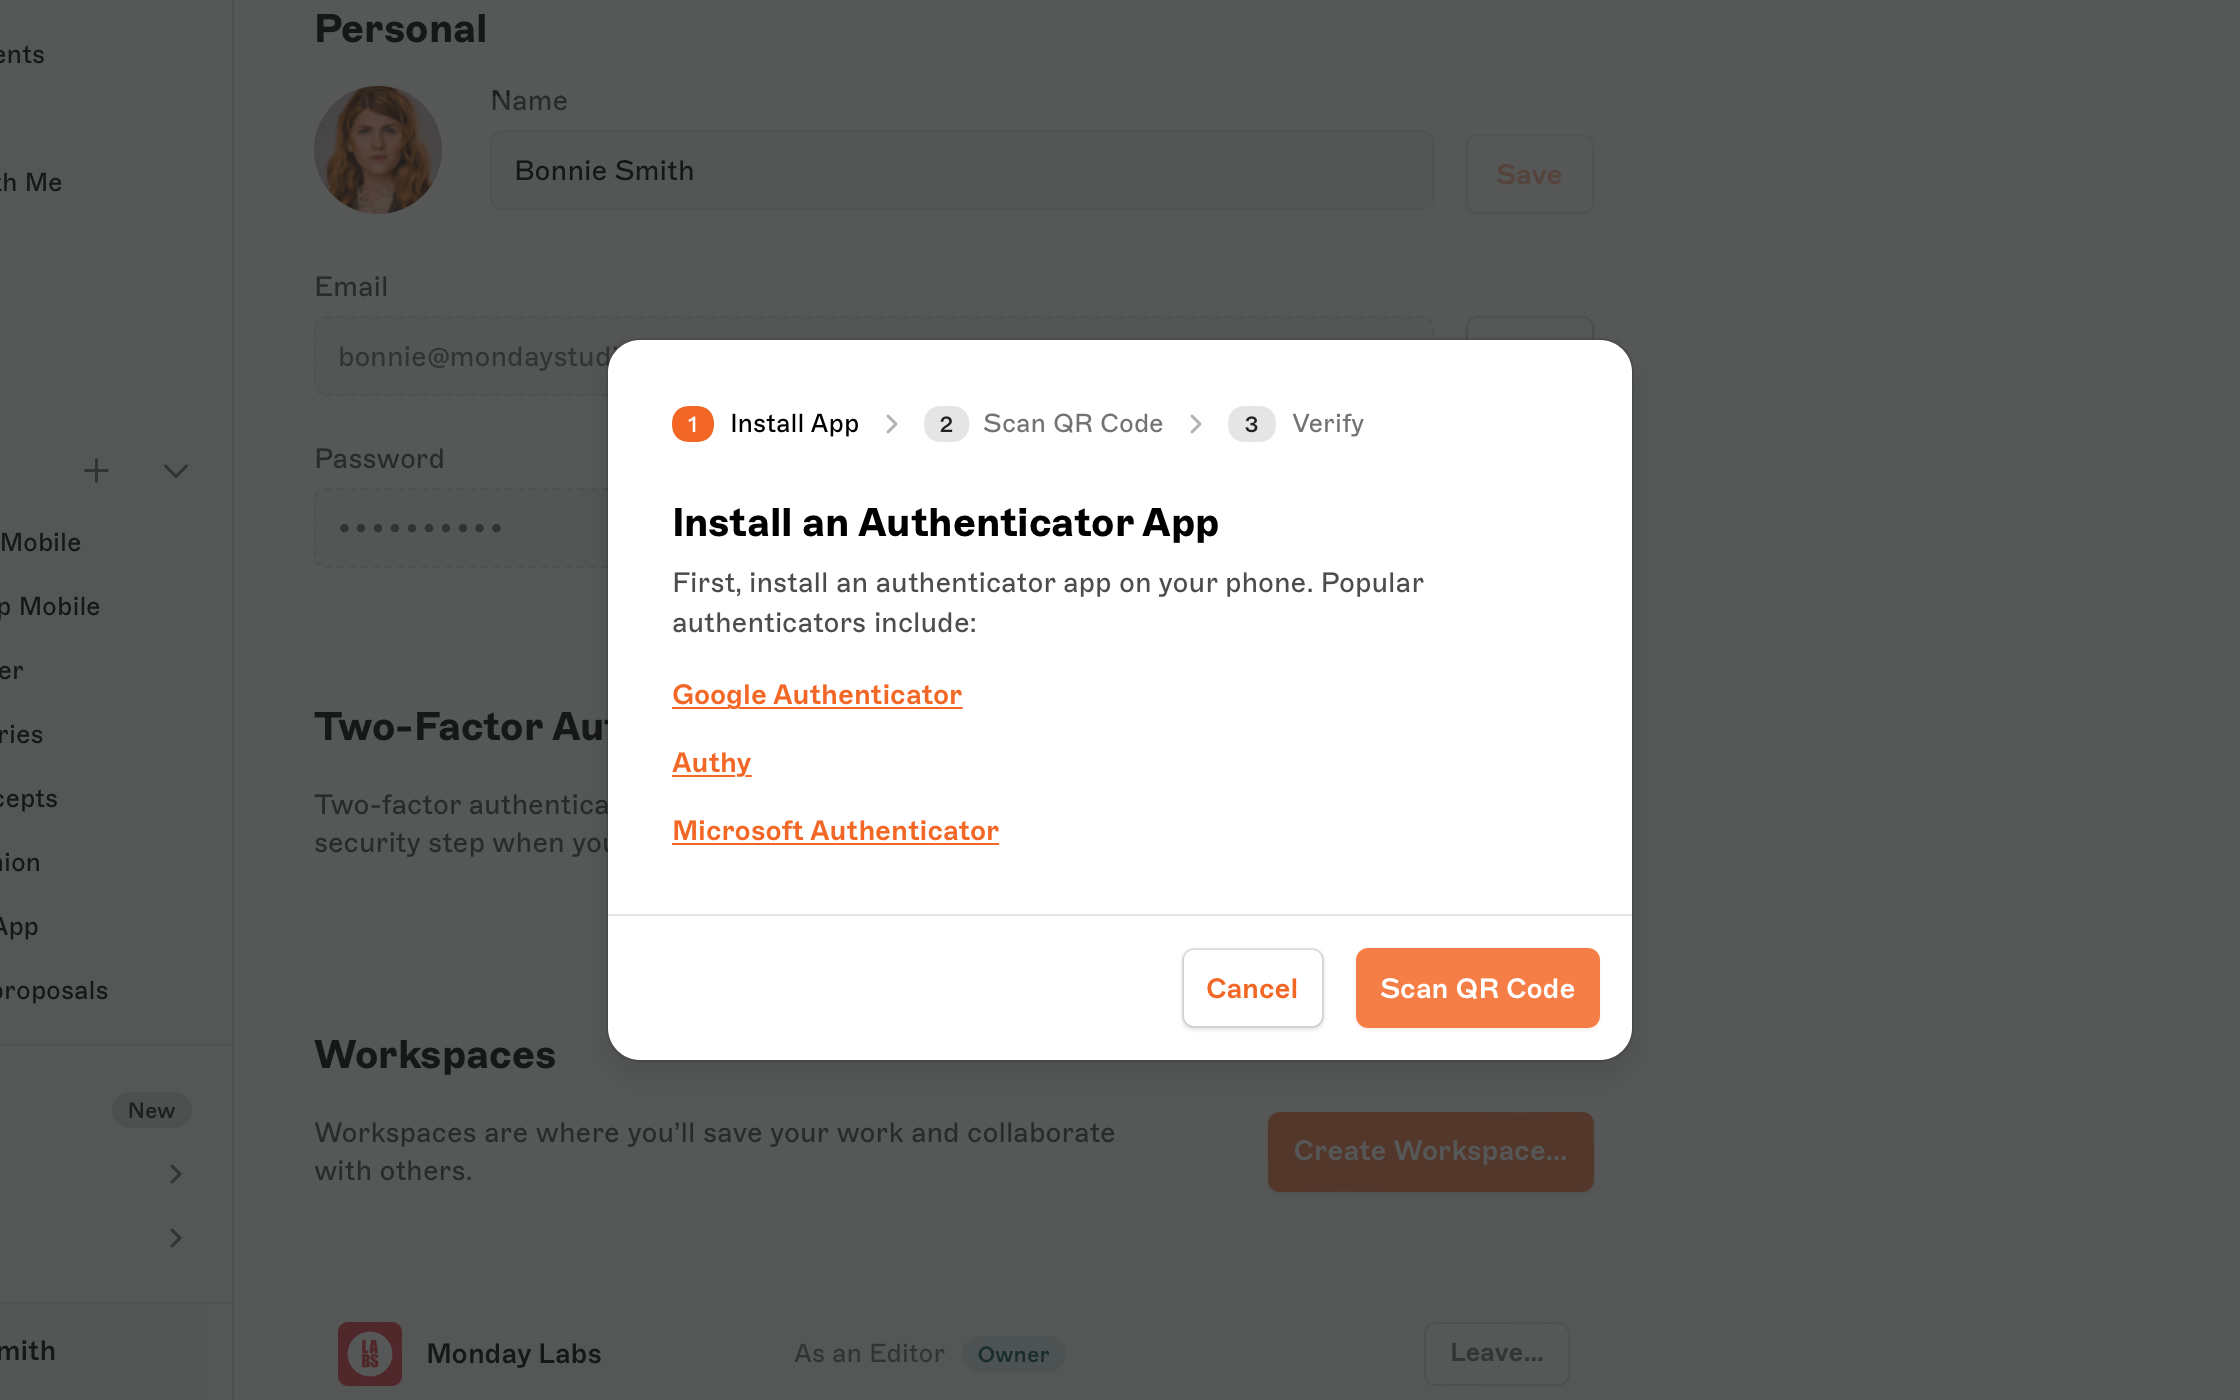
#### Step 3: Link your Sketch account to the authenticator app
Once you are all set in your autenticator app, get your phone ready and click **Scan QR code**. Open your authenticator app, tap **Scan a QR code** and scan the code with your camera. Alternatively, you can manually type in the code in your app by clicking **Or type in the code** link under the QR.
s´
Then, click on **Enter Verification Code**. Open your authenticator app and enter the code before it expires — no worries, you can always wait for a new one to appear.
**Note**: 2FA is tied to your Sketch account, not to your Workspace. This means that if you’re part of multiple Workspaces, we’ll enable 2FA for you in all of them. In the case of Workspaces with SSO enabled, your IdP will handle the authentication.
#### Step 4: Save your recovery codes
Once you’ve entered the code, we’ll show you your recovery codes — make sure you keep them somewhere safe. These recovery codes allow you to sign in to Sketch if you lose access to your authenticator app. Instead of typing the code you’d normally get from your authenticator app when signing in, you’ll have to pick one of the recovery codes.
**Note**: Once you use a recovery code, it’ll automatically expire and you’ll no longer be able to use it to sign in.
*You can print your recovery codes, save them as a PDF, or copy them to your clipboard and paste them where you usually save important information.*
If you lose your recovery codes, you can generate new ones. Head to your [Account page](/settings) and click on **Generate New** under the Two-Factor Authentication (2FA) section. However, once you generate new codes the old ones will stop working.
### How to disable 2FA
Head to the Two-Factor Authentication section in your [Account page](/settings) and click **Disable 2FA…**. Type your password to confirm this action and click **Disable 2FA**. You can enable 2FA again whenever you want.
### Troubleshooting
- [I lost my phone and I have 2FA enabled, how can I access Sketch?](/support/manage-account/account-access/two-factor-auth/#i-lost-my-phone-and-i-have-2fa-enabled-how-can-i-access-sketch)
- [I lost my phone and my recovery codes, how can I sign in?](/support/manage-account/account-access/two-factor-auth/#i-lost-my-phone-and-my-recovery-codes-how-can-i-sign-in)
- [I‘m using an older version than 82, can I still use 2FA?](/support/manage-account/account-access/two-factor-auth/#im-using-an-older-version-than-82-can-i-still-use-2fa)
- [I can’t find my 2FA recovery codes (but I’m logged in)](/support/manage-account/account-access/two-factor-auth/#i-cant-find-my-2fa-recovery-codes-but-im-logged-in)
--------------------------------------------------------------------------------
title: "Managing plugins"
description: "Learn how to install Sketch plugins, expand Sketch’s functionality and customize your workflow with a whole range of great plugins for Sketch."
last_modified: "2026-04-20"
url: "https://www.sketch.com/docs/interface-and-settings/plugins/"
--------------------------------------------------------------------------------
## Managing plugins
Plugins allow you to do even more with the Mac app by extending the app’s functionality. Most plugins are made by third-party developers — some are free to download, while others need to be purchased directly from the developer.
## Finding and installing Plugins
The best place to find plugins is on our [Plugins & Integrations](/plugins/) page. When you find a plugin you want to use, download and double-click on it to install it.

Once you’ve installed a plugin, you can access its features from the **Plugins** menu.
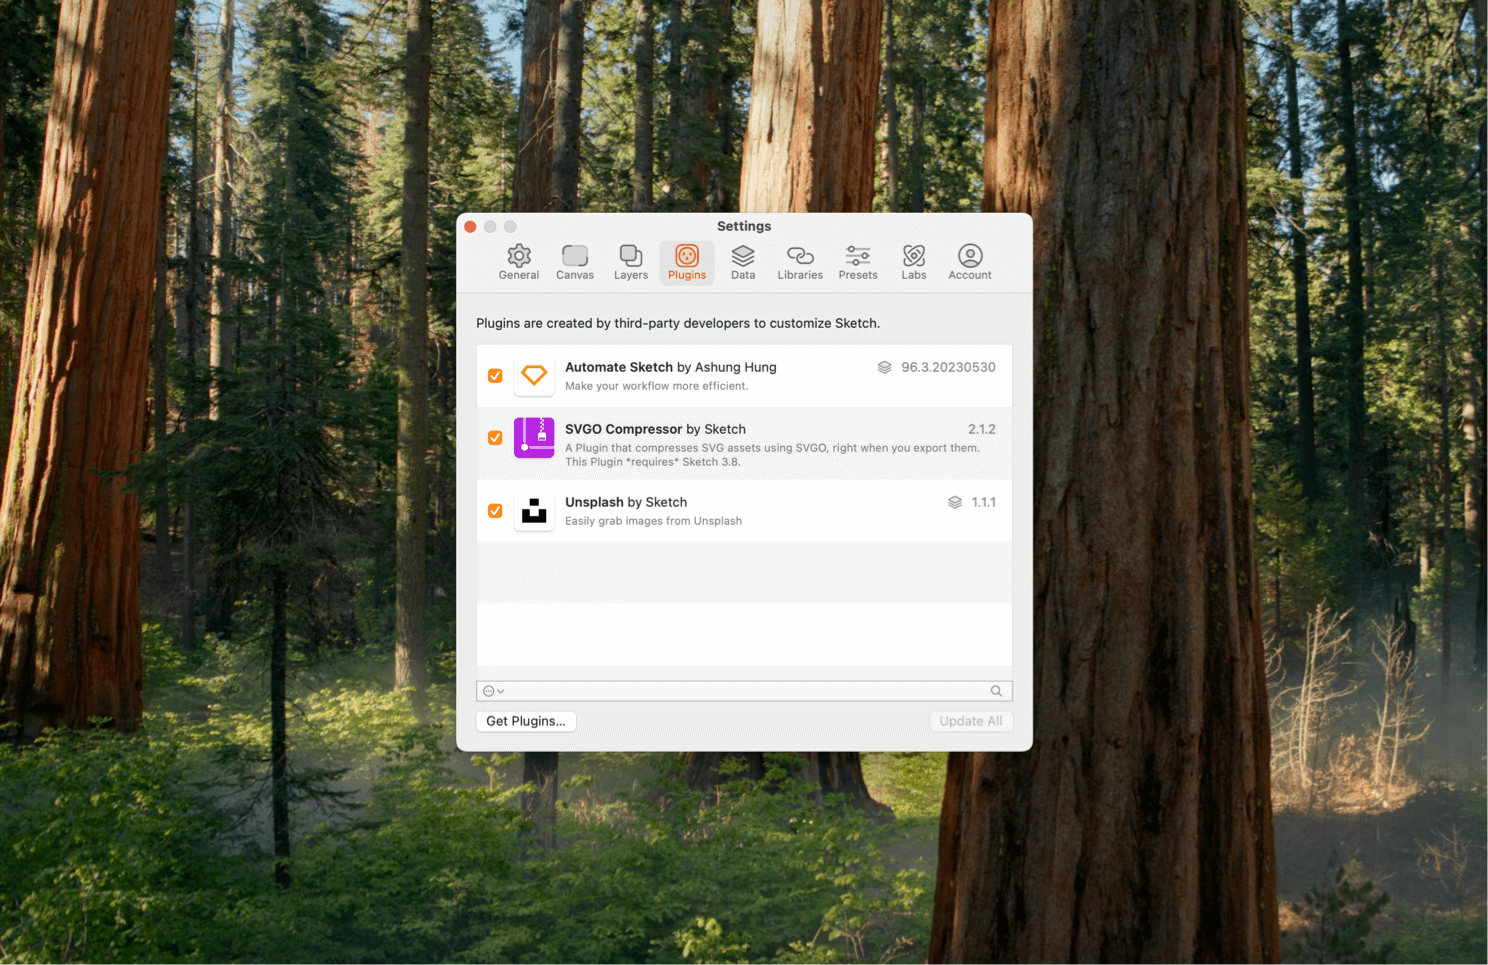
## Managing and uninstalling Plugins
> **Note:** If you have downloaded Sketch from the Mac App Store, you won’t be able to install, enable or use plugins due to security restrictions.
Choose **Plugins > Manage Plugins…** to open up the [Plugins tab in the Mac app’s settings](/docs/interface-and-settings/mac-app-settings/plugins/). From there you can view a plugin’s documentation, disable it, or remove it completely.
### Disabling plugins with safe Mode
Sometimes, after updates or bug fixes in the Mac app, Plugins can behave unexpectedly or cause the Mac app itself to hang or crash. To see if this is the case, restart the Mac app while pressing ⇧. This will launch the Mac app in Safe Mode and disable any plugins you have installed. Restart The Mac app again to reenable all of your plugins.
## Creating a Plugin
To find out more about how you can create your own plugins for the Mac app, take a look at our [developer site](https://developer.sketch.com/).
## Integrations
There’s also a huge number of third party apps that integrate with the Mac app. You’ll find integrations for Developer handoff, version control, user testing and more on our [Plugins & Integrations page](/plugins/#all-plugins).
--------------------------------------------------------------------------------
title: "Your guide to designing in Sketch · Documentation"
description: "Discover how to do your best design work in Sketch, with our design documentation. Get started in UI/UX/app/web design here."
last_modified: "2026-01-23"
url: "https://www.sketch.com/docs/designing/"
--------------------------------------------------------------------------------
## Your guide to designing in Sketch · Documentation
With Sketch, you can turn complex concepts into ready-to-ship products within minutes, thanks to our set of intuitive and powerful tools. Here you’ll learn how to harness Sketch’s power — from the simplest tools to the most advanced features it has to offer.
--------------------------------------------------------------------------------
title: "Layer basics"
description: "Layers are the building blocks for creating designs in Sketch. In this section, you’ll learn how to quickly create and manipulate layers — which includes all shapes, groups and frames on a Canvas."
last_modified: "2026-04-07"
url: "https://www.sketch.com/docs/designing/layer-basics/"
--------------------------------------------------------------------------------
## Layer basics
Layers are the building blocks for creating designs in Sketch. In this section, you’ll learn how to quickly create and manipulate layers — which includes all shapes, groups and frames on a Canvas.
--------------------------------------------------------------------------------
title: "Adding layers"
description: "Learn how to add layers in Sketch with the help of our step-by-step guides and video tutorials."
last_modified: "2026-02-02"
url: "https://www.sketch.com/docs/designing/layer-basics/adding-layers/"
--------------------------------------------------------------------------------
## Adding layers
To add a layer, click the **Insert ** button in the toolbar or open the **Insert** menu in the Menu Bar. Select the type of layer you want to add, such as a shape, text or image.
--------------------------------------------------------------------------------
title: "Selecting layers"
description: "Learn how to select layers in Sketch with the help of our step-by-step guides and video tutorials."
last_modified: "2026-01-23"
url: "https://www.sketch.com/docs/designing/layer-basics/selecting-layers/"
--------------------------------------------------------------------------------
## Selecting layers
> **Note:** You’ll find a full list of selection commands and their keyboard shortcuts under **Edit** > **Select** in the Menu Bar.
## Selecting individual layers
You can select individual layers directly on the Canvas, or via the Layer List.
To select a layer on the Canvas, simply click on its visible area. You’ll see selection handles appear around that layer (if you can’t see these, head to **View** > **Canvas** > **Show Layer Selection**).
As you hover over layers on the Canvas, you’ll see their corresponding name highlighted in the Layer List.

*Click in any layer on the Canvas to select it*
If you have a hollow shape (with a border, but no fills) that you’ve already selected, you can click on the area with no fill to select a layer behind it. You can still drag within a shape’s hollow area to move it.

*How to select a layer that sits behind a hollow shape*
> **Note:** To select a frame, click on its on-Canvas title or hold ⌘ and click on an empty space within the frame itself.
You can select any layer by clicking on its name in the Layer List. As you hover over layer names, you’ll see them highlighted on the Canvas.

*Hover over a layer name to see it highlighted on the Canvas, and click to select it*
You can change your selection within the Layer List, and navigate in and out of groups and Symbols, with [keyboard shortcuts](/docs/shortcuts/#selecting-layers).
## Selecting multiple layers
Like selecting layers, you can select multiple layers both on the Canvas and in the Layer List.
Select your first layer, hold ⇧, then click on another to add it to your selection. Clicking on a layer you’ve already selected while holding ⇧ will remove it from your selection.

*Select a layer, then hold Shift and click to select additional layers*
You can also click-and-drag on an empty space on the Canvas to create a marquee and select multiple layers. To start your marquee from a non-empty space (such as on a large background layer), press X and then click and drag your marquee.

*Hold X to drag a marquee across a non-empty space*
Hold ⌥ while you drag a marquee to only select layers and frames that are completely within your selection area. Hold ⌘ to ignore groups (and frames) in your selection and only select the layers within them. You can also combine these two actions.
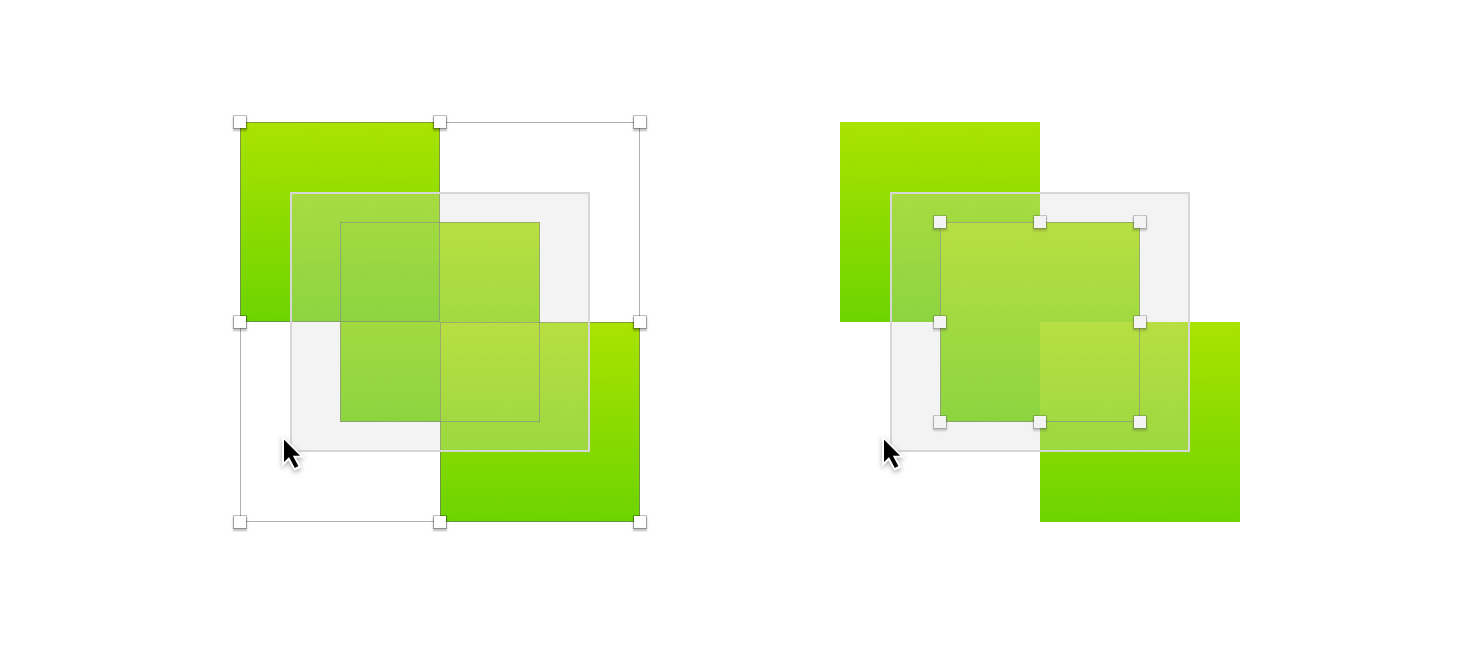
*On the left: Shift-drag. On the right: Shift-Option-drag*
> **Note:** If you press and hold ⌥⌘ when you have already selected layers, this won’t affect your selection and will instead move them on the Canvas, even if your cursor isn’t positioned over them.
Hold ⌘⇧ while you drag a marquee to remove any currently selected layers from your selection and add any unselected layers within your selection area.
There are a few different ways you can select multiple layers in the Layer List.
Click and drag across layer names to select adjacent layers. For more accuracy, you can click the first layer in your intended selection, hold ⇧ and click the final layer in your selection. This will include all layers between the first and final selection.
Selecting a layer in the Layer List and pressing ⌘A selects all layers inside its parent group.

*Select a layer, then press ⌘A to select all layers inside the parent group.*
Selecting a layer in the Layer List and pressing ⌘A selects all layers inside its parent group.

*Select a layer, then press ⌘A to select all layers inside the parent group.*
To select multiple, non-adjacent layers, click each layer individually while holding ⌘. Clicking a selected layer again while continuing to hold ⌘ will remove it from your selection.

*As well as selecting consecutive layers by holding Shift, you can hold Command to select/deselect non-consecutive layers*
## Selecting overlapping layers
If you have two or more layers overlapping, hold ⇧ and right/secondary-click on them to bring up the quick layer selection contextual menu. From here, you can select from any of the overlapping layers immediately below your cursor. As you hover over the menu options, you’ll see a highlight around the corresponding layer on the canvas.

*Use the contextual menu to highlight and select from a group of selected layers*
## Measuring distances between layers
To measure distances between different layers on the Canvas, select the first layer, hold ⌥, and hover over the layer you want to measure against. To measure against a layer that’s inside a group, you’ll need to hold ⌘ as well.

If you’re measuring the distance to a text layer, holding ⌥ will measure to the text’s bounding box. Holding ⌃⌥ will measure to the text’s baseline (from the bottom) or cap height (from the top).

*How to measure between text layers*
You can also hold ⌘⌥ to measure distances between a layer you selected against a layer inside a Symbol. Similarly, hold ⌥ to measure between layers inside Symbols.

*How to measure between layers inside a Symbol*
> **Note:** You can change the colors of the measuring guides via the **Canvas** tab in [Settings](/docs/interface-and-settings/mac-app-settings/canvas/).
--------------------------------------------------------------------------------
title: "Grouping layers"
description: "Learn to group and ungroup layers in Sketch with the help of our step-by-step guides and video tutorials."
last_modified: "2026-02-02"
url: "https://www.sketch.com/docs/designing/layer-basics/grouping-layers/"
--------------------------------------------------------------------------------
## Grouping layers
## Grouping layers
Grouping multiple layers makes it easier to move and resize them all at the same time, toggle their visibility together, or adjust their properties.
To create a group, select two or more layers on the canvas and press ⌘G. Alternatively, open the Menu Bar and select **Arrange** > **Group** .
## Ungrouping layers
Select the group you’d like to ungroup and press ⇧⌘G. You can also choose **Arrange** > **Ungroup** from the Menu Bar.
## Selecting a layer in a group
Groups of layers are treated as a single layer when you select them. To select an individual layer in a group, double-click on the group, then click on the layer you want to select. You can also hold down ⌘ while hovering over the group and click on a specific layer.
For groups with multiple nested layers, you can double-click once on the group and then quickly follow up with single clicks to dive deeper and select the layer you want.
To select additional elements to a layer or group already you’ve already selected, press ⇧ and click on the elements to add them.
If you want to select a layer within a group while maintaining your original selection, hold ⇧ and double-click on the layer you want to select in the group.
When you delete a layer within a group, we’ll automatically select the layer that comes after it in the Layer List’s hierarchy. If you then insert a new layer it will be automatically added to the group — above the layer you previously deleted.
--------------------------------------------------------------------------------
title: "Moving layers"
description: "Learn how to move layers in Sketch with the help of our step-by-step guides and video tutorials."
last_modified: "2026-02-02"
url: "https://www.sketch.com/docs/designing/layer-basics/moving-layers/"
--------------------------------------------------------------------------------
## Moving layers
## Moving a single layer
To move a layer, simply click and drag it. If you want to restrict its movement to a particular axis, hold ⇧ as you drag.
To move a layer that’s underneath another layer, make sure you’ve selected it. You can do this by selecting it from the **Layer List**, hold ⌘⌥, then click and drag anywhere on the Canvas.
When you move a layer without a fill, you can click inside the empty space and drag it anywhere. If you click and drag on the layer’s border, you may end up resizing rather than moving it.
To move a locked layer, first select it in the **Layer List**. From there, you can move, resize and rotate it just like any other layer. Any selections you make on the Canvas won’t include locked layers, to save you from making accidental edits.
> **Note:** As you move any layer(s), you should see alignment guides relative to adjacent layers. If you don’t see the guides, check if they’re enabled in **View** > **Canvas** > **Show All Guides**.
## Moving multiple layers
If you have [selected multiple layers](/docs/designing/layer-basics/selecting-layers/) you can click and drag anywhere inside the outer selection box to move them — whether that’s on the layers themselves, or the empty space between them. Hold ⇧ and click on more layers to add them to your selection.
If you prefer, you can also group layers together in the **Layer List** (or by pressing ⌘G) and move the entire group.
--------------------------------------------------------------------------------
title: "Duplicating and copying layers"
description: "Learn how to duplicate, copy, and paste layers in Sketch with the help of our step-by-step guides and video tutorials."
last_modified: "2026-06-22"
url: "https://www.sketch.com/docs/designing/layer-basics/duplicating-layers/"
--------------------------------------------------------------------------------
## Duplicating and copying layers
## Duplicating a layer
To duplicate a layer on your Canvas, hold down ⌥ and drag the layer. The original layer will stay in its place.
> **Note:** Releasing ⌥ simultaneously or slightly before releasing your mouse (or trackpad) will duplicate the layers instead of moving them.
Duplicating a layer with a default name increments the number — for example, "Frame 1" becomes "Frame 2" or "Oval 3" becomes "Oval 4". If you’ve renamed the layer, the copy keeps the same name.
You can also press ⌘D to duplicate a layer. Where the duplicate appears will depend on whether you have the **Offset duplicated layers** option enabled, which you’ll find in **Sketch** > **Settings** > **Layers**.
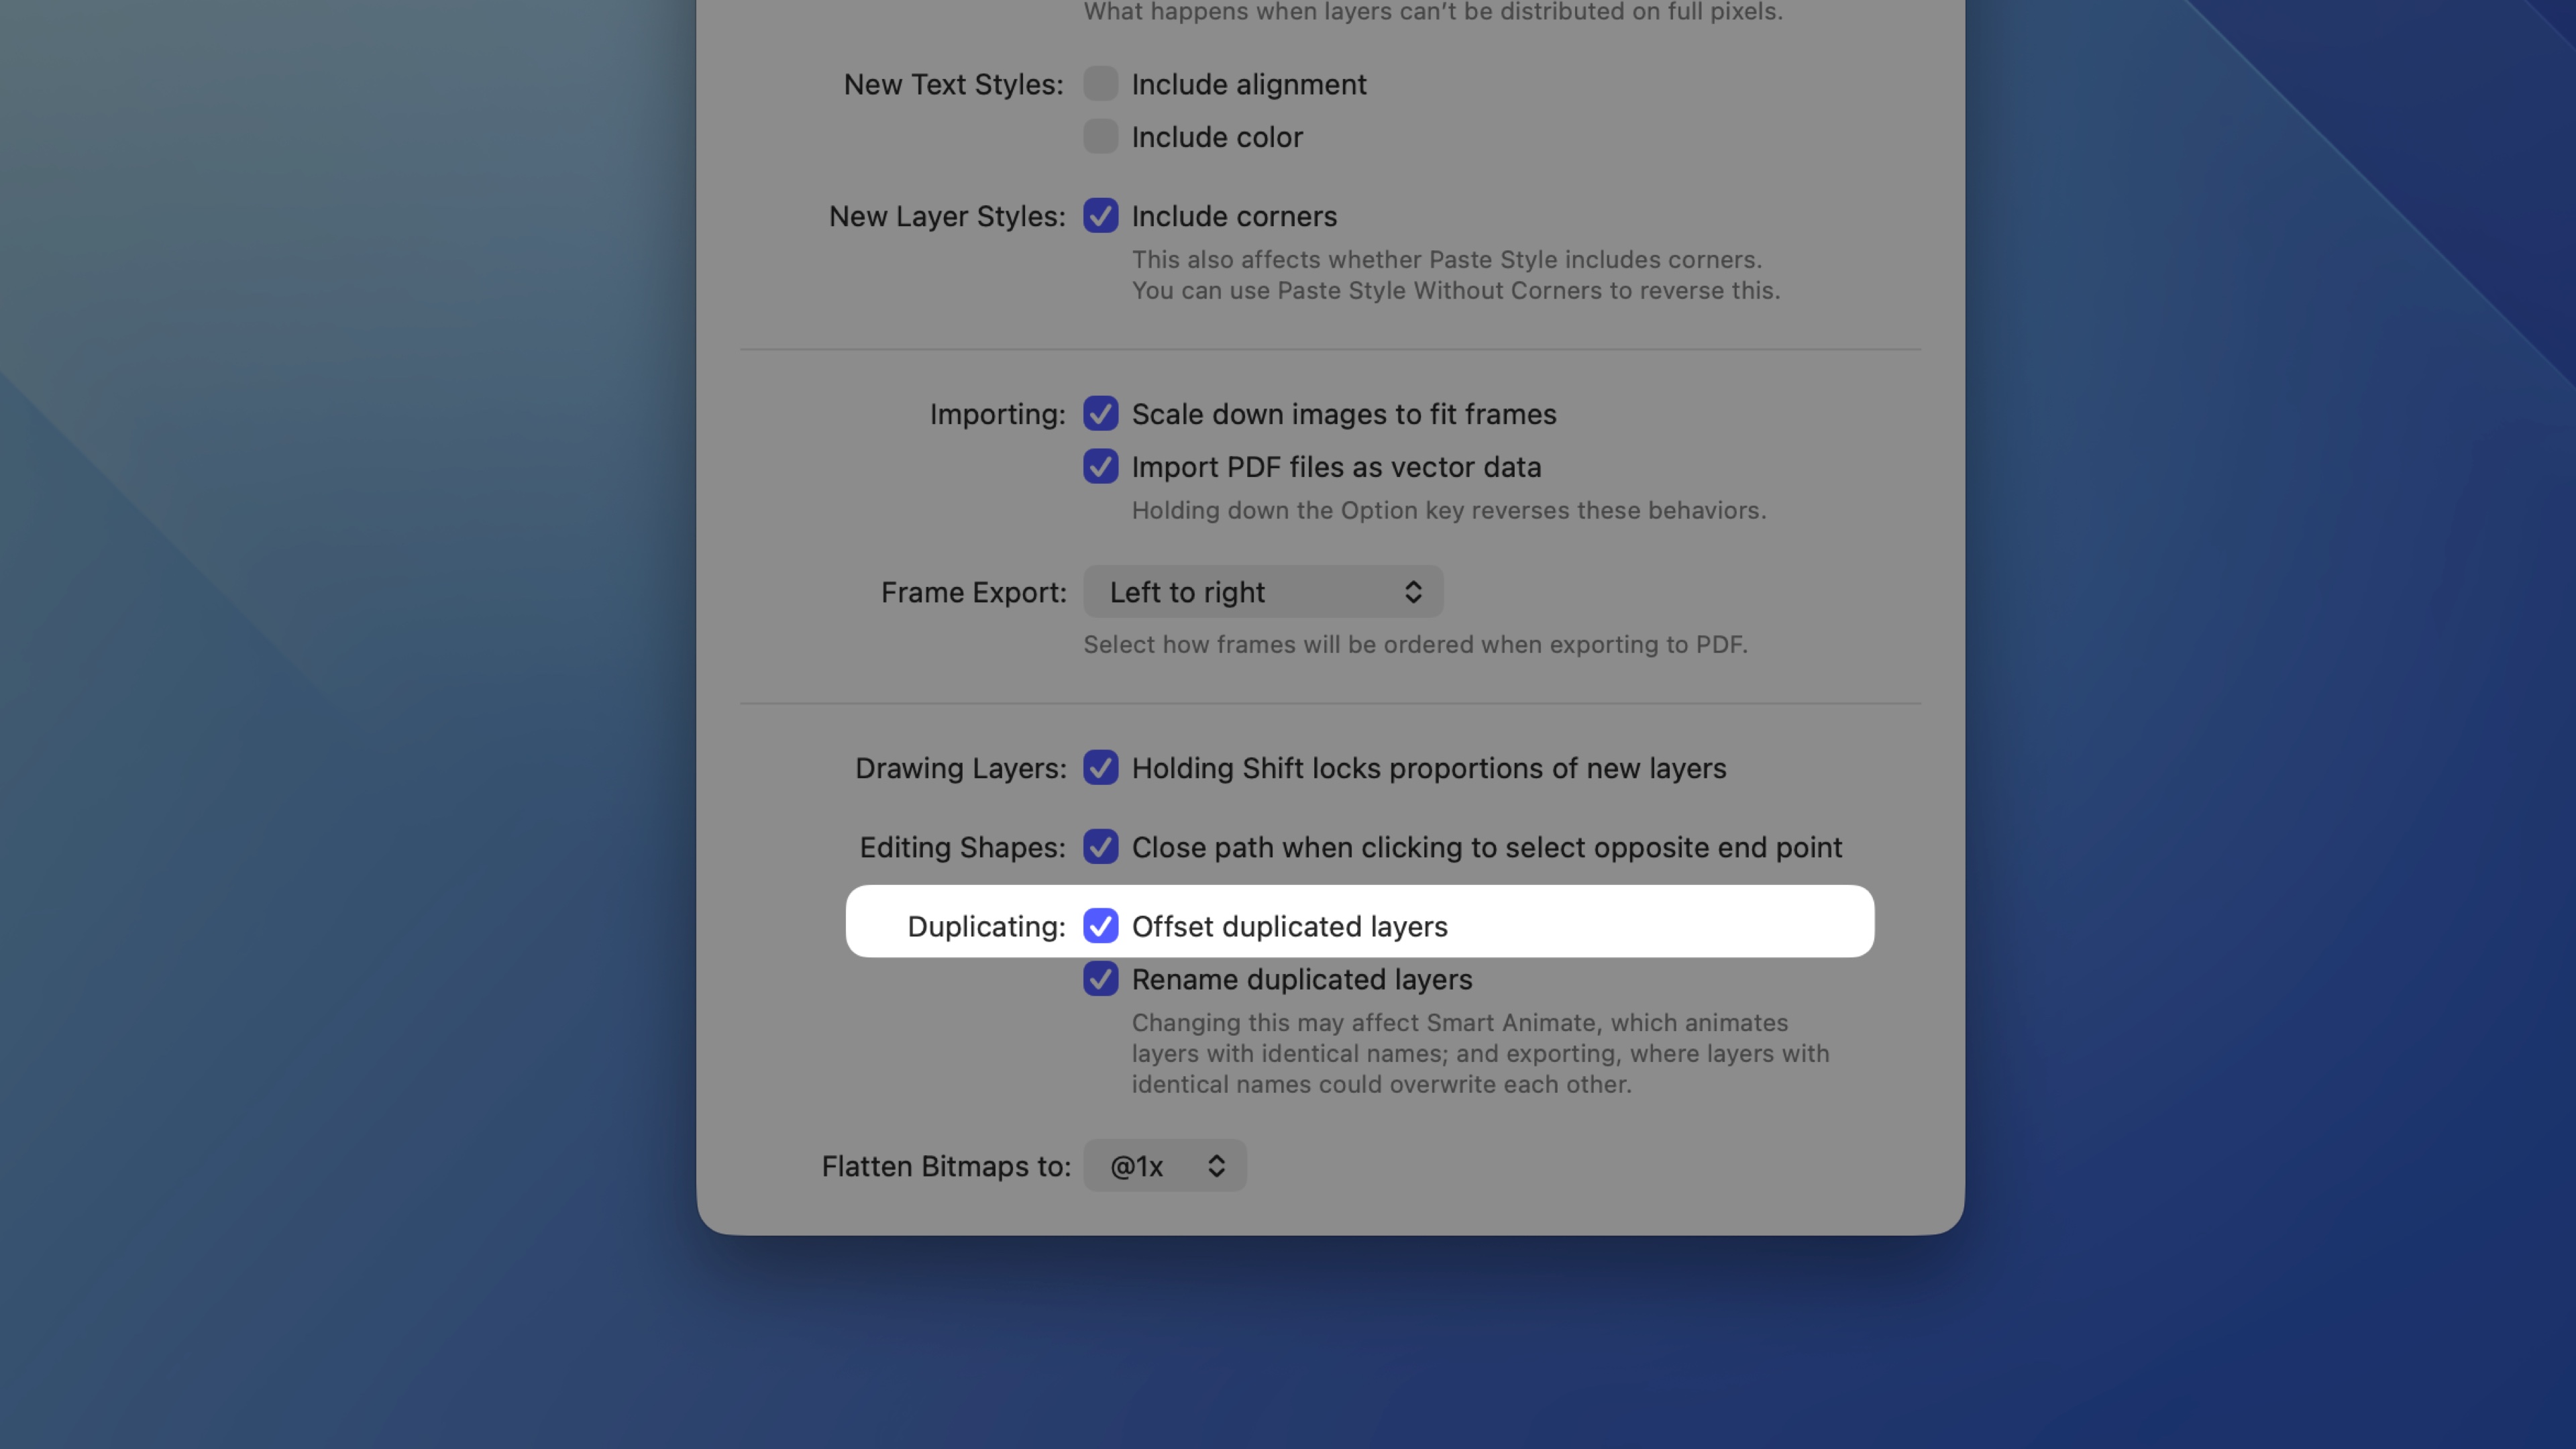
*Find the Offset duplicated layers option in Sketch > Settings > Layers*
After duplicating a layer or group by holding ⌥ and dragging it to a new position, you can press ⌘D to create further duplicates at the same offset — based on the distance between the previous layer and the one before that. Your duplicates will always follow the most recent offset.
By default, duplicates are placed above the original layer. Holding ⇧ when using either ⌘D or selecting the **Edit** > **Duplicate** menu option will place the new layer below the original layer.
If a layer has prototyping interactions, duplicates include them by default. To duplicate without carrying over interactions, choose **Edit** > **Duplicate Without Interactions**, or search for _Duplicate Without Interactions_ in the Command Bar.
## Copying and pasting
Select a layer and press ⌘C to copy it, then ⌘V to paste. When you paste with one or more frames or groups selected, each container receives its own copy of the pasted content.
To paste a copy directly on top of the selected layer, press ⇧⌘V or right-click and choose **Paste Over** from the context menu. When you select multiple layers, it pastes a copy over each one.
--------------------------------------------------------------------------------
title: "Aligning layers"
description: "Learn how to align layers in Sketch with the help of our step-by-step guides and video tutorials."
last_modified: "2026-02-02"
url: "https://www.sketch.com/docs/designing/layer-basics/aligning-layers/"
--------------------------------------------------------------------------------
## Aligning layers
You can align layers using the six alignment buttons in the top row of the **Design** tab in the Inspector.
*From left to right: align left, align to horizontal center, align right, align top, align to vertical center, align bottom (v91 August 2022)*
The following video shows the basic alignment options for a single layer on a frame. You won’t be able to use the alignment tools if you have selected a single layer outside of a frame.
Hovering over any of the alignment buttons previews how your selected layers will align. This can be particularly useful if you have selected multiple layers.
Elements in the Canvas always align to their immediate parent. An example of a parent is a frame containing a single layer - in this case, the frame is the parent. However, if you have a frame with a group that contains the layer you want to align, the group is the parent.
In the example below, the frame is the parent of all of the layers within it, so selecting the green circle and aligning it to the top left will align it to the top left of the frame.
*A layer will left align to the edge of its parent frame (v91 August 2022*
In this next example, the green circle, pink rectangle and orange triangle are part of a group within the frame, so aligning the green circle will align it within the group’s bounds, rather than to the edge of the frame.
*A single layer aligning to its parent group (v91 August 2022)*
frames, groups and combined shapes are all parents to any layer they contain.
To align a single layer to an frame rather than its parent group or combined shape, select the layer and hold down ⌥ and click the alignment button you want to use.
## How to align multiple layers
If you select two or more layers and apply alignment options, their alignment will be based on the edges of your selection’s bounds. For example, if you choose to align layers to the left, all layers will be aligned to the leftmost edge of the layer that is furthest to the left, and vice versa for right alignment. Using the Center option will calculate the central point of all the layers combined and align them along it.
In the example below, all of the layers are selected and then aligned top left. This aligns all the layers to the top and left extent of the original selection, not the frame:
*An example of multiple aligned layers.*
To override this behavior and align multiple selected layers to the frame they are on, select your layers, hold down ⌥ and click the alignment button you want to use.
## Aligning to a reference layer
To align objects to a specific reference layer, select all the layers you want to align (including the reference layer). Click again on the reference layer — which will show thicker outline — then use the align option you want.
> **Note:** You can also use frames as a reference object.
> **Note:** Before Version 91 you could achieve the same outcome by selecting a reference layer and locking it with ⌘⇧L. Hold ⇧ to keep your locked layer selected, and then select the objects you want to align to the locked layer.
## Distributing layers horizontally and vertically
You can evenly distribute layers horizontally or vertically using the first two buttons in the top row of the **Design** tab in the Inspector. To do so, select more than three layers then select a distribute layers option.
When you distribute layers and you’re using [Pixel Fitting](/docs/interface-and-settings/mac-app-settings/layers/) there will be occasions when Sketch cannot place the layers evenly while still adhering to the pixel level alignment. In these cases, you’ll have the choice to:
- **Distribute Unevenly:** maintain alignment at the pixel level, which may cause slight variations in how the layers are distributed
- **Place on Sub-pixels:** make the distribution exact, which means placing the layers with sub-pixel level alignment
The following example shows a preview of four horizontally distributed layers.
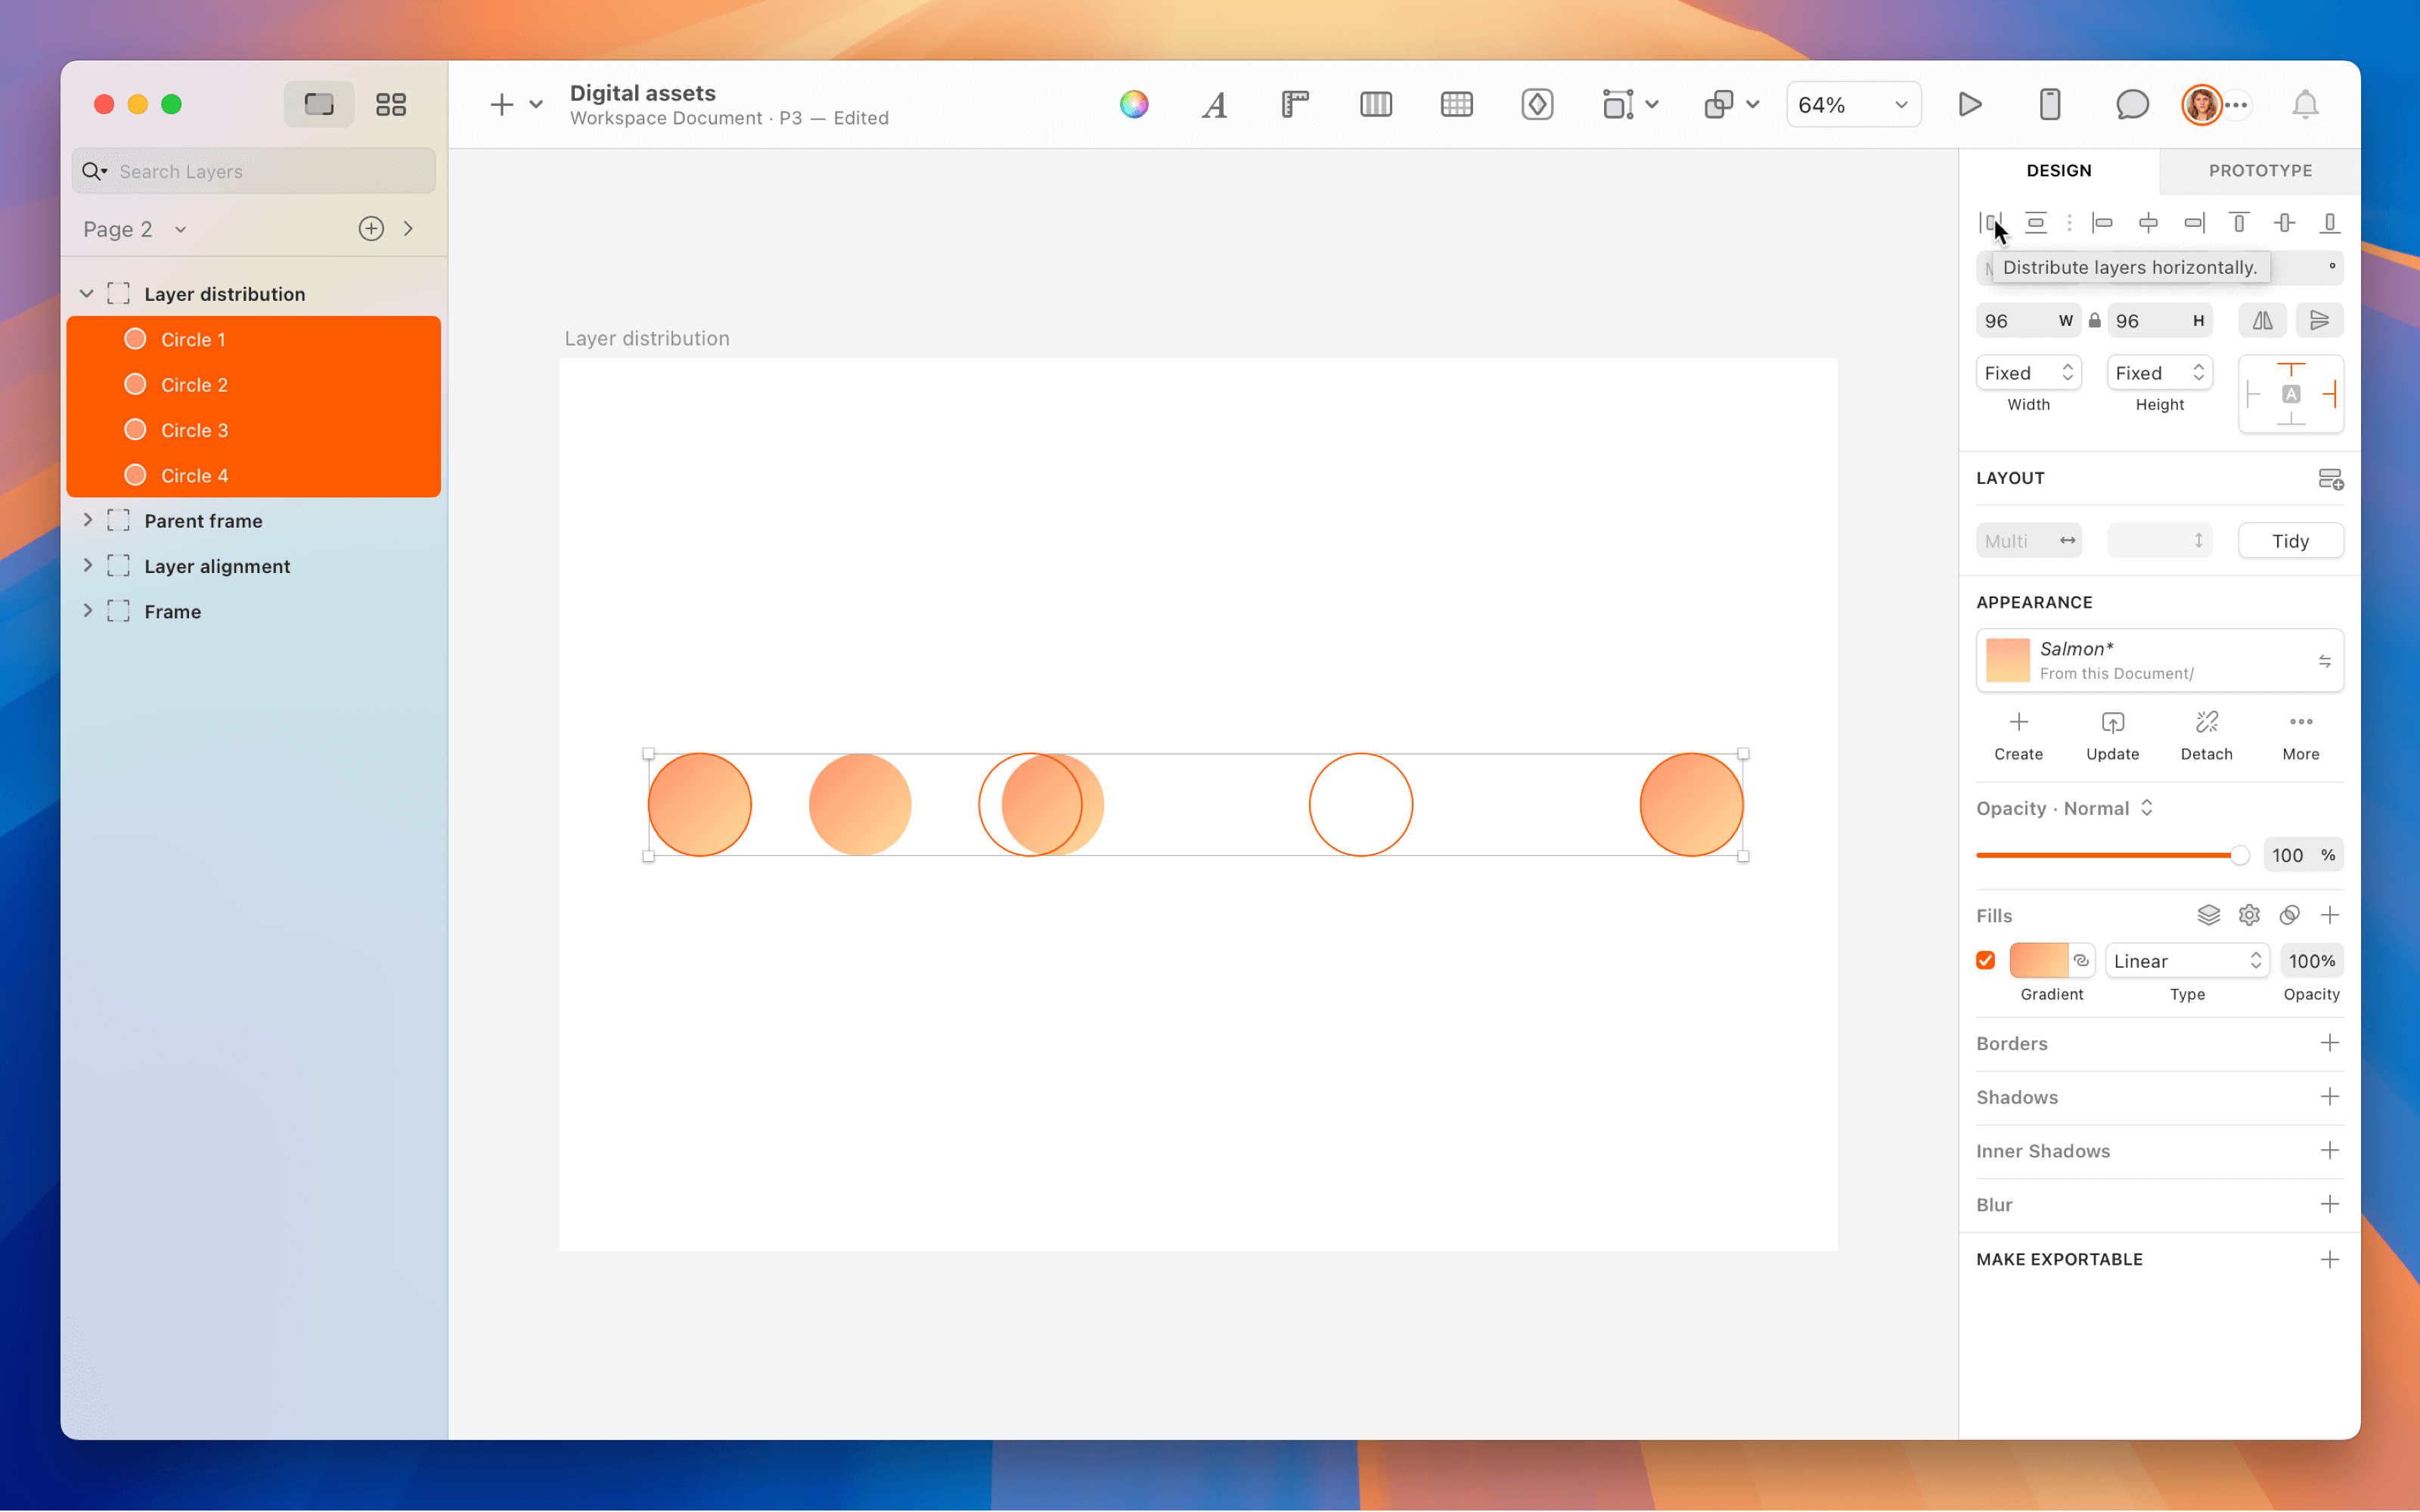
*An example of horizontal distribution applied to multiple layers (v91 August 2022)*
## Using Tidy to align layers
You can quickly align multiple layers into a neat grid of evenly distributed rows and columns using the **Tidy** button, which you’ll find on the top right of the Inspector, in the Design tab.
Select the layers you want to align and click on the **Tidy** button — or first hover over the button for a preview of how the changes will look. Your grid will fill the space of your selection and Sketch will attempt to arrange layers evenly in rows and columns. Tidy works on both the horizontal and vertical axis.
If the layers are roughly in a single column or row you can also enter your preferred vertical or horizontal spacing in the fields next to the **Tidy** button without having to use Tidy first.
## Make Grid
To make a grid, select a layer and head to **Arrange** > **Make Grid** — or drag the handle in the bottom-right corner — to edit the number of columns and rows in your grid. Use the handles to edit the spacing between layers. You can also use the controls in the Inspector to edit the number of cells and spacing in your grid.
You can make grids out of several layers. Make sure your layers are evenly aligned, select them and drag the bottom-right handle to make your Grid.
> **Note:** The Mac app will use the last layer of your selection to create the grid.
## Moving multiple layers with Smart Distribute
With Smart Distribute you can quickly adjust even spacing between multiple layers, horizontally or vertically. To do this, select two or more layers, then click and drag on the handle that appears between them. If you have layers arranged in a grid, you can adjust the spacing between each layer in a horizontal row, as well as the vertical spacing between rows themselves.
Smart Distribute won’t appear if your layers aren’t evenly distributed. To fix this, you can either evenly distribute your layers manually or use the **Tidy** button.
For very small selections, or when you’re zoomed far out from your selection, Smart Distribute handles will be hidden, making it easier to see the layers. Try zooming in if you can’t see a set of Smart Distribute layers for your selection.
> **Note:** From version 67 onwards, Smart Distribute and Tidy work with layer selections that are inside and outside of different groups.
## Reordering layers within a Smart Distribute selection
When you’ve selected a set of layers with even spacing between them, you can click and drag on the circular handle that appears in the centre of any layer to move it within that selection. The layers around it will automatically reorder to accommodate the one you move.
This also works for entire frames, making it handy for rearranging entire flows on the Canvas.
## Reordering layers in grid-like layouts
You can reorder layers in your grid layouts without changing the number of rows or columns in your grid. Select all the layers in your grid, then drag on the circular handle that appears in the centre of any layer to swap it with another.
When you select a single layer which is part of a group with even spacing, you can move it with the Smart Distribute controls and adjust the spacing.
## Positioning layers relative to the frame’s edge
You can precisely position a layer relative to an frame’s edge by using operators in the X or Y field. Add a l, r, t, b, or c/m operator in the X or Y fields to position them at the exact number of pixels from the left, right, top, bottom, and center/middle of the frame they’re in.
--------------------------------------------------------------------------------
title: "Resizing and rotating layers"
description: "Learn how to resize and rotate layers in Sketch using the canvas, Inspector, and keyboard shortcuts."
last_modified: "2026-04-07"
url: "https://www.sketch.com/docs/designing/layer-basics/resizing-and-rotating-layers/"
--------------------------------------------------------------------------------
## Resizing and rotating layers
## Resizing layers
To adjust a layer’s height or width, drag any of its edges. To adjust both the height and width at once, you can use the corner handles.
Holding ⇧ and dragging will resize the layer proportionately, keeping its height and width at the same ratio. If you want to resize a layer from its center, hold ⌥ and drag.
> **Note:** Keep in mind that resizing will be affected by any [Resizing constraints](/docs/designing/layer-basics/resizing-and-rotating-layers/) you’ve applied.
## Resizing layers in the Inspector
You can also resize a layer by selecting it and typing new dimensions in the Inspector. As you type, you’ll see a preview of how your layer will look. When you’re done, press ⏎ to apply your changes.
By default, resizing is anchored to the top-left corner. You can change this by entering these keyboard operators after a dimension in the Inspector’s [Layer Properties](/docs/interface-and-settings/the-mac-app-interface/the-inspector/) fields:
| Action | Shortcut |
|--------|----------|
| Resize from the left | `…l` |
| Resize from the right | `…r` |
| Resize from the top | `…t` |
| Resize from the bottom | `…b` |
| Resize from the center/middle | `…c` or `…m` |
You can also use the operators w,h,x, andy as stand-ins for the width, height, X, and Y of a selected layer. For example, if you set a rectangle’s height tow it will turn it into a square.
The Inspector also lets you use math to resize or move layers:
| Action | Shortcut |
|--------|----------|
| Add (e.g. 50+10r) | `+` |
| Subtract (e.g. 45-5) | `-` |
| Multiply (e.g. 128*2) | `*` |
| Divide (e.g. 960/2) | `/` |
You can resize any layer using percentage values to make it scale relative to its parent container. This works whether the parent is a frame, group or graphic.
When you enter a percentage for a layer’s width or height in the Inspector, it will resize relative to the bounds of the closest parent container. For example, if you set a layer’s width to 100% inside a group, it will stretch to match the group’s full width.
Keep in mind that for groups with multiple layers, the group’s bounds are defined by the combined positions of those layers. So, if a layer sits inside a group, within a graphic, and you set it to 50% width, it will resize to half the width of the group, not the graphic.
You can click the lock icon that’s between the width and the height values or use the shortcut ⌥⌘L to make sure the layer resizes proportionately.
## Resizing layers with keyboard shortcuts
For precise adjustments, use these keyboard shortcuts:
| Action | Shortcut |
|--------|----------|
| Resize by 1px | ⌘← → ↑ ↓ |
| Resize by 10px | ⇧⌘← → ↑ ↓ |
You can set your own increment values for these shortcuts using the **Nudging** options in the [Canvas tab](/docs/interface-and-settings/mac-app-settings/canvas/) of the Settings window.
## Rotating layers
To rotate a layer, click and drag the rotation handle that appears near the corners when you select a layer. Hold ⇧ while dragging to constrain the angle to 15° steps.
When layers overlap, you can still work with the one underneath. Hover over a corner of the selected layer until the rotation handles appear — clicking once will select the layer behind it, while clicking and dragging will rotate the selected layer. You can also hold ⌘ and click-and-drag to ignore rotation entirely, selecting the layer behind and moving it in one action.
--------------------------------------------------------------------------------
title: "Scaling layers"
description: "Learn how to scale layers in Sketch with the help of our step-by-step guides and video tutorials."
last_modified: "2026-04-07"
url: "https://www.sketch.com/docs/designing/layer-basics/scaling-layers/"
--------------------------------------------------------------------------------
## Scaling layers
By default, any styles you’ve applied such as a strokes, border radius or shadow sizes will stay the same when you resize a layer. If you want to scale them proportionately with your layer size, head to **Layer** > **Transform** > **Scale**, right-click and choose **Transform** > **Scale**, or press K.
In the **Scale Layers** controls in the Inspector’s **Details** tab, you can choose whether your layer will resize from its center, sides or corners. Your layer will automatically scale as you change its properties.
When you’re done, simply click on your Canvas to exit scaling. Alternatively, click **Finish** or press ⏎.
--------------------------------------------------------------------------------
title: "Renaming layers"
description: "Learn how to rename layers in Sketch with the help of our step-by-step guides and video tutorials."
last_modified: "2026-04-07"
url: "https://www.sketch.com/docs/designing/layer-basics/renaming-layers/"
--------------------------------------------------------------------------------
## Renaming layers
## Renaming a single layer
Naming your layers can help to keep your Sketch files organized and make them easier for others to work with.
When you create a layer, Sketch will automatically give it a name based on its type or content, but it’s often necessary to rename them to something more descriptive.
When you select a layer in the Layer List, you can use **Edit** > **Rename** or press ⌘R to rename it, like you would with a file in Finder. Type a new name, then press **Enter** ⏎ to confirm. You can also rename pages using the same shortcut.
## Renaming multiple layers
For complex documents, or simply to save some time, you can select multiple layers and quickly rename them in just a couple of clicks.
Start off by [selecting the layers](/docs/designing/layer-basics/selecting-layers/) you want to rename, then use **Edit** > **Rename** or press ⌘R. Alternatively, you can right/secondary-click on your selected layers and choose **Rename** from the contextual menu.
To rename all layers on your current page without selecting them first, you can use **Edit** > **Rename All**.
In the dialog that appears, you can (optionally) match a specific part of a name to rename, change their case, and add numbering, alphabetical sequencing, and dimensions. If you choose to rename all layers on a page, you can also filter the list of layers to only rename layers with certain words or phrases.
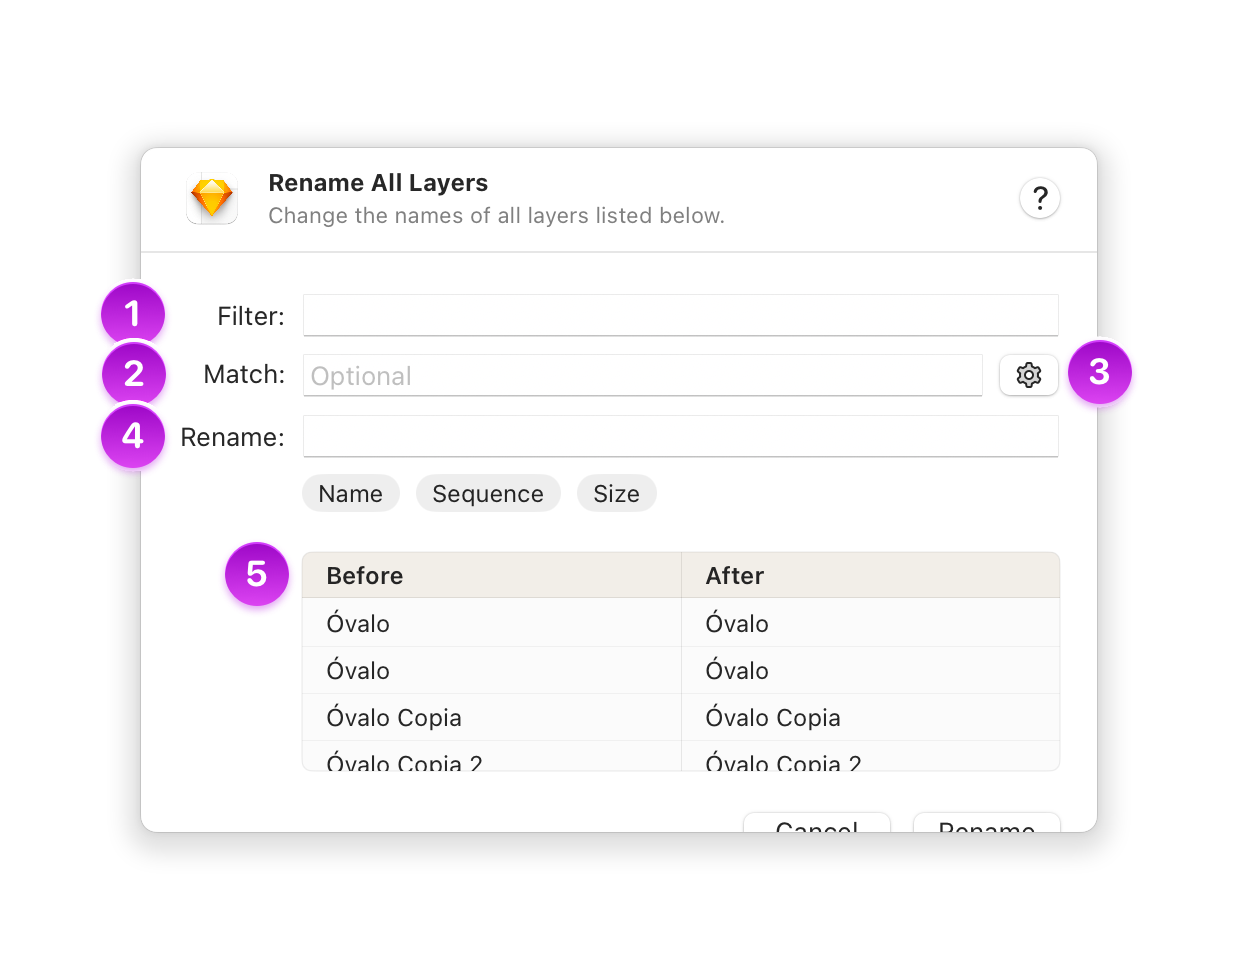
*The different options in the Rename All Layers dialog*
1. The **Filter** field only appears if you’ve opted to rename all layers on the current page. You can use this to include and rename only layers whose existing names contain a specific word or phrase.
2. **Match** works much like Find and Replace, where you can change whole words or fragments within current layer names. Layers that don’t match your input will appear faded in the preview pane. You can also use Match without Rename if you simply want to remove specific fragments from your layer names.
3. Optional Match settings include using **Regular Expression** syntax, as well as **Match Case**, which makes matches case sensitive. For example, if you have layers named **Oval**, then **oval** won’t be counted as a match.
4. Use the **Rename** field to define what your layer names (or matched fragments) will change to. You can also use the dropdown + to add different modifier token combinations. Drag them forward or backward in any order that suits you — or remove them entirely.
Modifier tokens include:
* **Name** adds the current name of the layer in full, either as you originally wrote it, or changed to uppercase or lowercase.
* **Sequence** adds an ascending or descending sequence to the name, either numerical or alphabetical.
* **Size** represents the layer’s size as width, height, or both. Note that, for ease of use, we add the letter x between width and height — not the multiplication symbol ×.
5. The preview pane shows the layers you selected or filtered for renaming (before), and how they’ll change depending on what renaming options you choose (after). You can drag layers in the preview pane to reorder them, or click the reverse button to flip the order of all layers in the list.
Once you’ve finished renaming your layers, press the **Rename** button to confirm your changes. You can always undo any changes you’ve made by pressing ⌘Z.
> **Note:** Want to speed up future layer renaming? You can rename another set of layers using the last renaming format you used via **Edit** > **Rename with Last Format**.
--------------------------------------------------------------------------------
title: "Layer opacity"
description: "Learn how to use opacity modes in Sketch with the help of our step-by-step guides and video tutorials."
last_modified: "2026-04-07"
url: "https://www.sketch.com/docs/designing/layer-basics/layer-opacity/"
--------------------------------------------------------------------------------
## Layer opacity
Layer opacity controls how transparent or opaque a layer is. A layer with 0% opacity is completely transparent —and invisible— while a layer with 100% opacity is completely opaque. Lower it to reveal and blend with content behind it.
You can change the opacity of any layer: shapes, text, frames, groups or symbol instances. Select one or more layers, then drag the opacity slider in the **Style** section of the Inspector — or enter a value from 1 to 100 in the input field.
You can also separately adjust the opacity of [Fills](/docs/symbols-and-styles/styling/fills/#adding-a-new-fill), Borders, Shadows, Inner Shadows, Tints and Text colors.
To apply a gradient-style fade to a layer, use the Fade effect instead. You can find it under [Effects](/docs/symbols-and-styles/styling/effects/) in the Inspector, or via **Layer > Style > Add Fade**.
--------------------------------------------------------------------------------
title: "Vector editing"
description: "Learn how to create and edit vector shapes in Sketch with the help of our step-by-step guides and video tutorials."
last_modified: "2026-06-22"
url: "https://www.sketch.com/docs/designing/vector-editing/"
--------------------------------------------------------------------------------
## Vector editing
## Drawing a new shape using vectors
Press V or click on the Insert menu in the toolbar and select **Vector** to draw a new shape. Click anywhere on your Canvas to create your first point, then click again to create another point.
The line that connects points in your shape is called a path. The part of the path between two points is called a segment. You can add as many points as you like to draw the shape you want. To close the path, click the first point again.
If you click and drag when creating a point, you’ll create a mirrored point with a curved path (or Bézier curve), which you can control using the handle that appears connected to the point.

*How to create a simple vector shape using the Vector tool*
> **Note:** Hold ⇧ to snap a point at 45° angle increments from the previous point.
## Editing an existing shape
To edit an existing shape in vector mode, double-click on the shape layer, or select it and press **Return** ⏎. You can also select multiple shapes and edit them at the same time — or select a group of shapes and press ⌘⏎ to enter vector editing for all the shapes in it at once.
### Selecting points
Press **Return** ⏎ on a vector shape to enter vector editing mode, then click on any point on the shape to select it.

*Selecting and editing points in a vector shape*
To select multiple points in a shape, hold ⇧ and click on each point. To deselect, click on a selected point again.
> **Note:** To jump from one point to the next, press Tab — or ⇧Tab to jump to the previous point.

*Multiple points of a vector shape being selected and deselected*
While in vector editing mode you can also click and drag from outside of a shape to select points inside it. Press ⇧ as you drag to deselect any selected points or add new points to your selection.

*Multiple points of a vector shape being selected and deselected by dragging*
To select points in open shapes while in vector editing mode, press X and then click or drag over the points, or click the Selection button in the toolbar.
You can also select multiple points across different shapes by clicking and dragging, so long as you’ve selected them all and are in vector editing mode.

*Multiple points being selected and edited across multiple vector shapes*
To select all points in a shape while in vector editing mode, press ⌘A, or select **Edit** > **Select** > **Select All** from the Menu Bar.
### Moving points
To move a point, select and drag it. You can also use the arrow keys on your keyboard, or change its X and Y values in the Inspector. You can hold shift to move points along a single axis, just like moving layers.
You can also use the [Distribute and Align tools](/docs/designing/layer-basics/aligning-layers/) to equally distribute or align multiple vector points.
### Changing point types
When you select a point, you can change how it affects the path by selecting from four different point types in the Inspector:
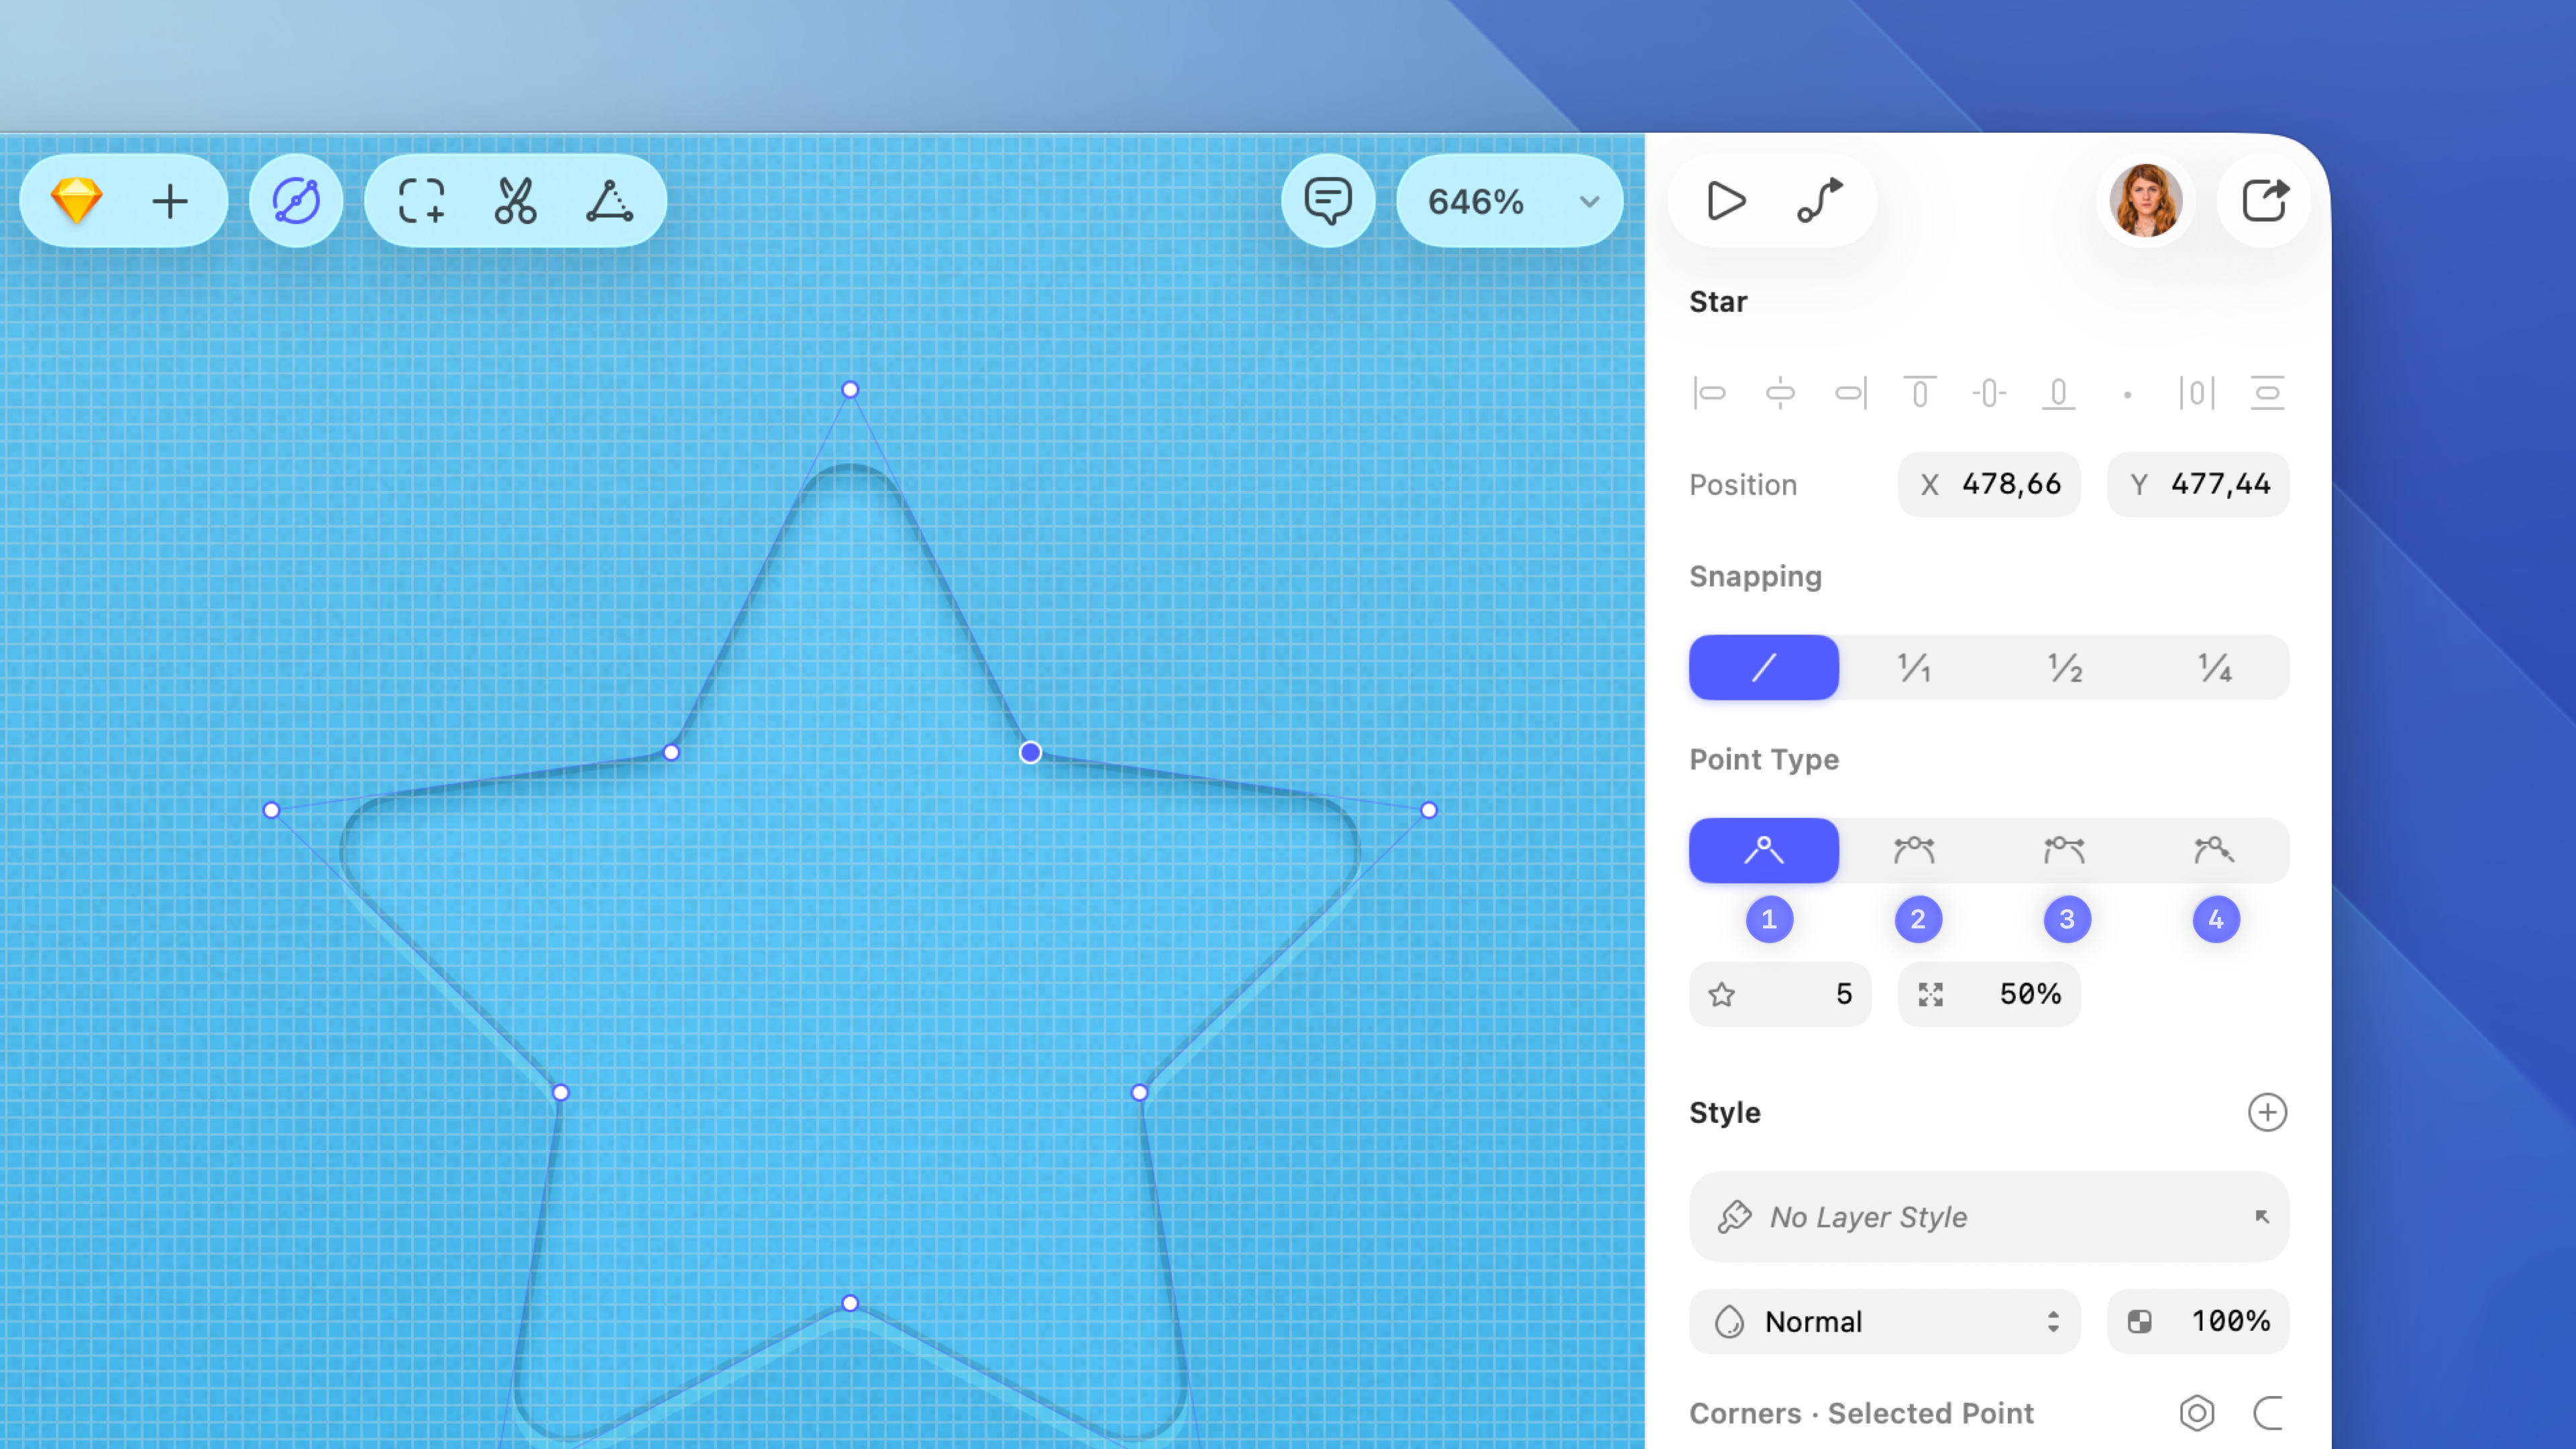
*The four point types you can use in vector editing mode*
1. **Straight ** is the default point type which gives you a straight path without any handle control points. If you want to create rounded corners on a Straight point, drag the Radius slider. You can set individual corner radii for every point on your shape.
1. **Mirror angle and length ** points create curved paths (or Bézier curves) and have two handle control points. You can drag a control point to adjust your curve, which the other point will mirror. To create a Mirror angle and length point, click and drag with the Vector tool , or double-click on any existing Straight point.
1. **Independent ** points have handles that are completely independent of each other. To change your curve into a straight line, select either handle control point and press **Backspace** ⌫ to delete it. You can disconnect any point by holding ⌘ while you drag one of its handle control points. When you hold ⌘ and create a new point after a Mirror angle and length or Mirror angle point, you’ll make that point Independent. This won’t affect the curve leading to it.
1. **Mirror angle ** points have handles that can be different distances from the vector point, but share the same angle.
> **Note:** If you’re on a version prior to [Dublin](/changelog/dublin/), these point types were called Mirrored, Disconnected, and Asymmetric.
Holding ⇧ while you drag a handle control point will change its distance from the vector point without changing its angle, which is handy for fine-tuning your curves.
You can quickly change the point type of any point you’ve selected by pressing:
| Action | Shortcut |
|--------|----------|
| Straight | 1 Mirror angle and length |
To quickly see all the handles that control curved points in a vector shape, select it and hold ⌥.
## Inserting points
You can insert a new point anywhere along a path by clicking on it. Alternatively, click and drag to create a curved path . To create a point in the exact center of two existing points, hold ⇧.

*How to add a new point exactly in the middle of two existing points*
### Bending a segment
Hold ⌘ then click and drag on any segment (the path between two points) to bend it. This will add handle control points to the points either side of it.

*How to add a curved path to a vector shape*
### Opening and closing paths
A shape’s path can either be closed or open. When a shape is closed, the path connects the first and last points. Open paths have a gap between the first and last points.
To close a path by connecting the first and last points, click **Close Path** in the toolbar, choose **Layer** > **Path** > **Close Path** in the Menu Bar, or press ⌘⌥O. You can use the same method to open a closed path.
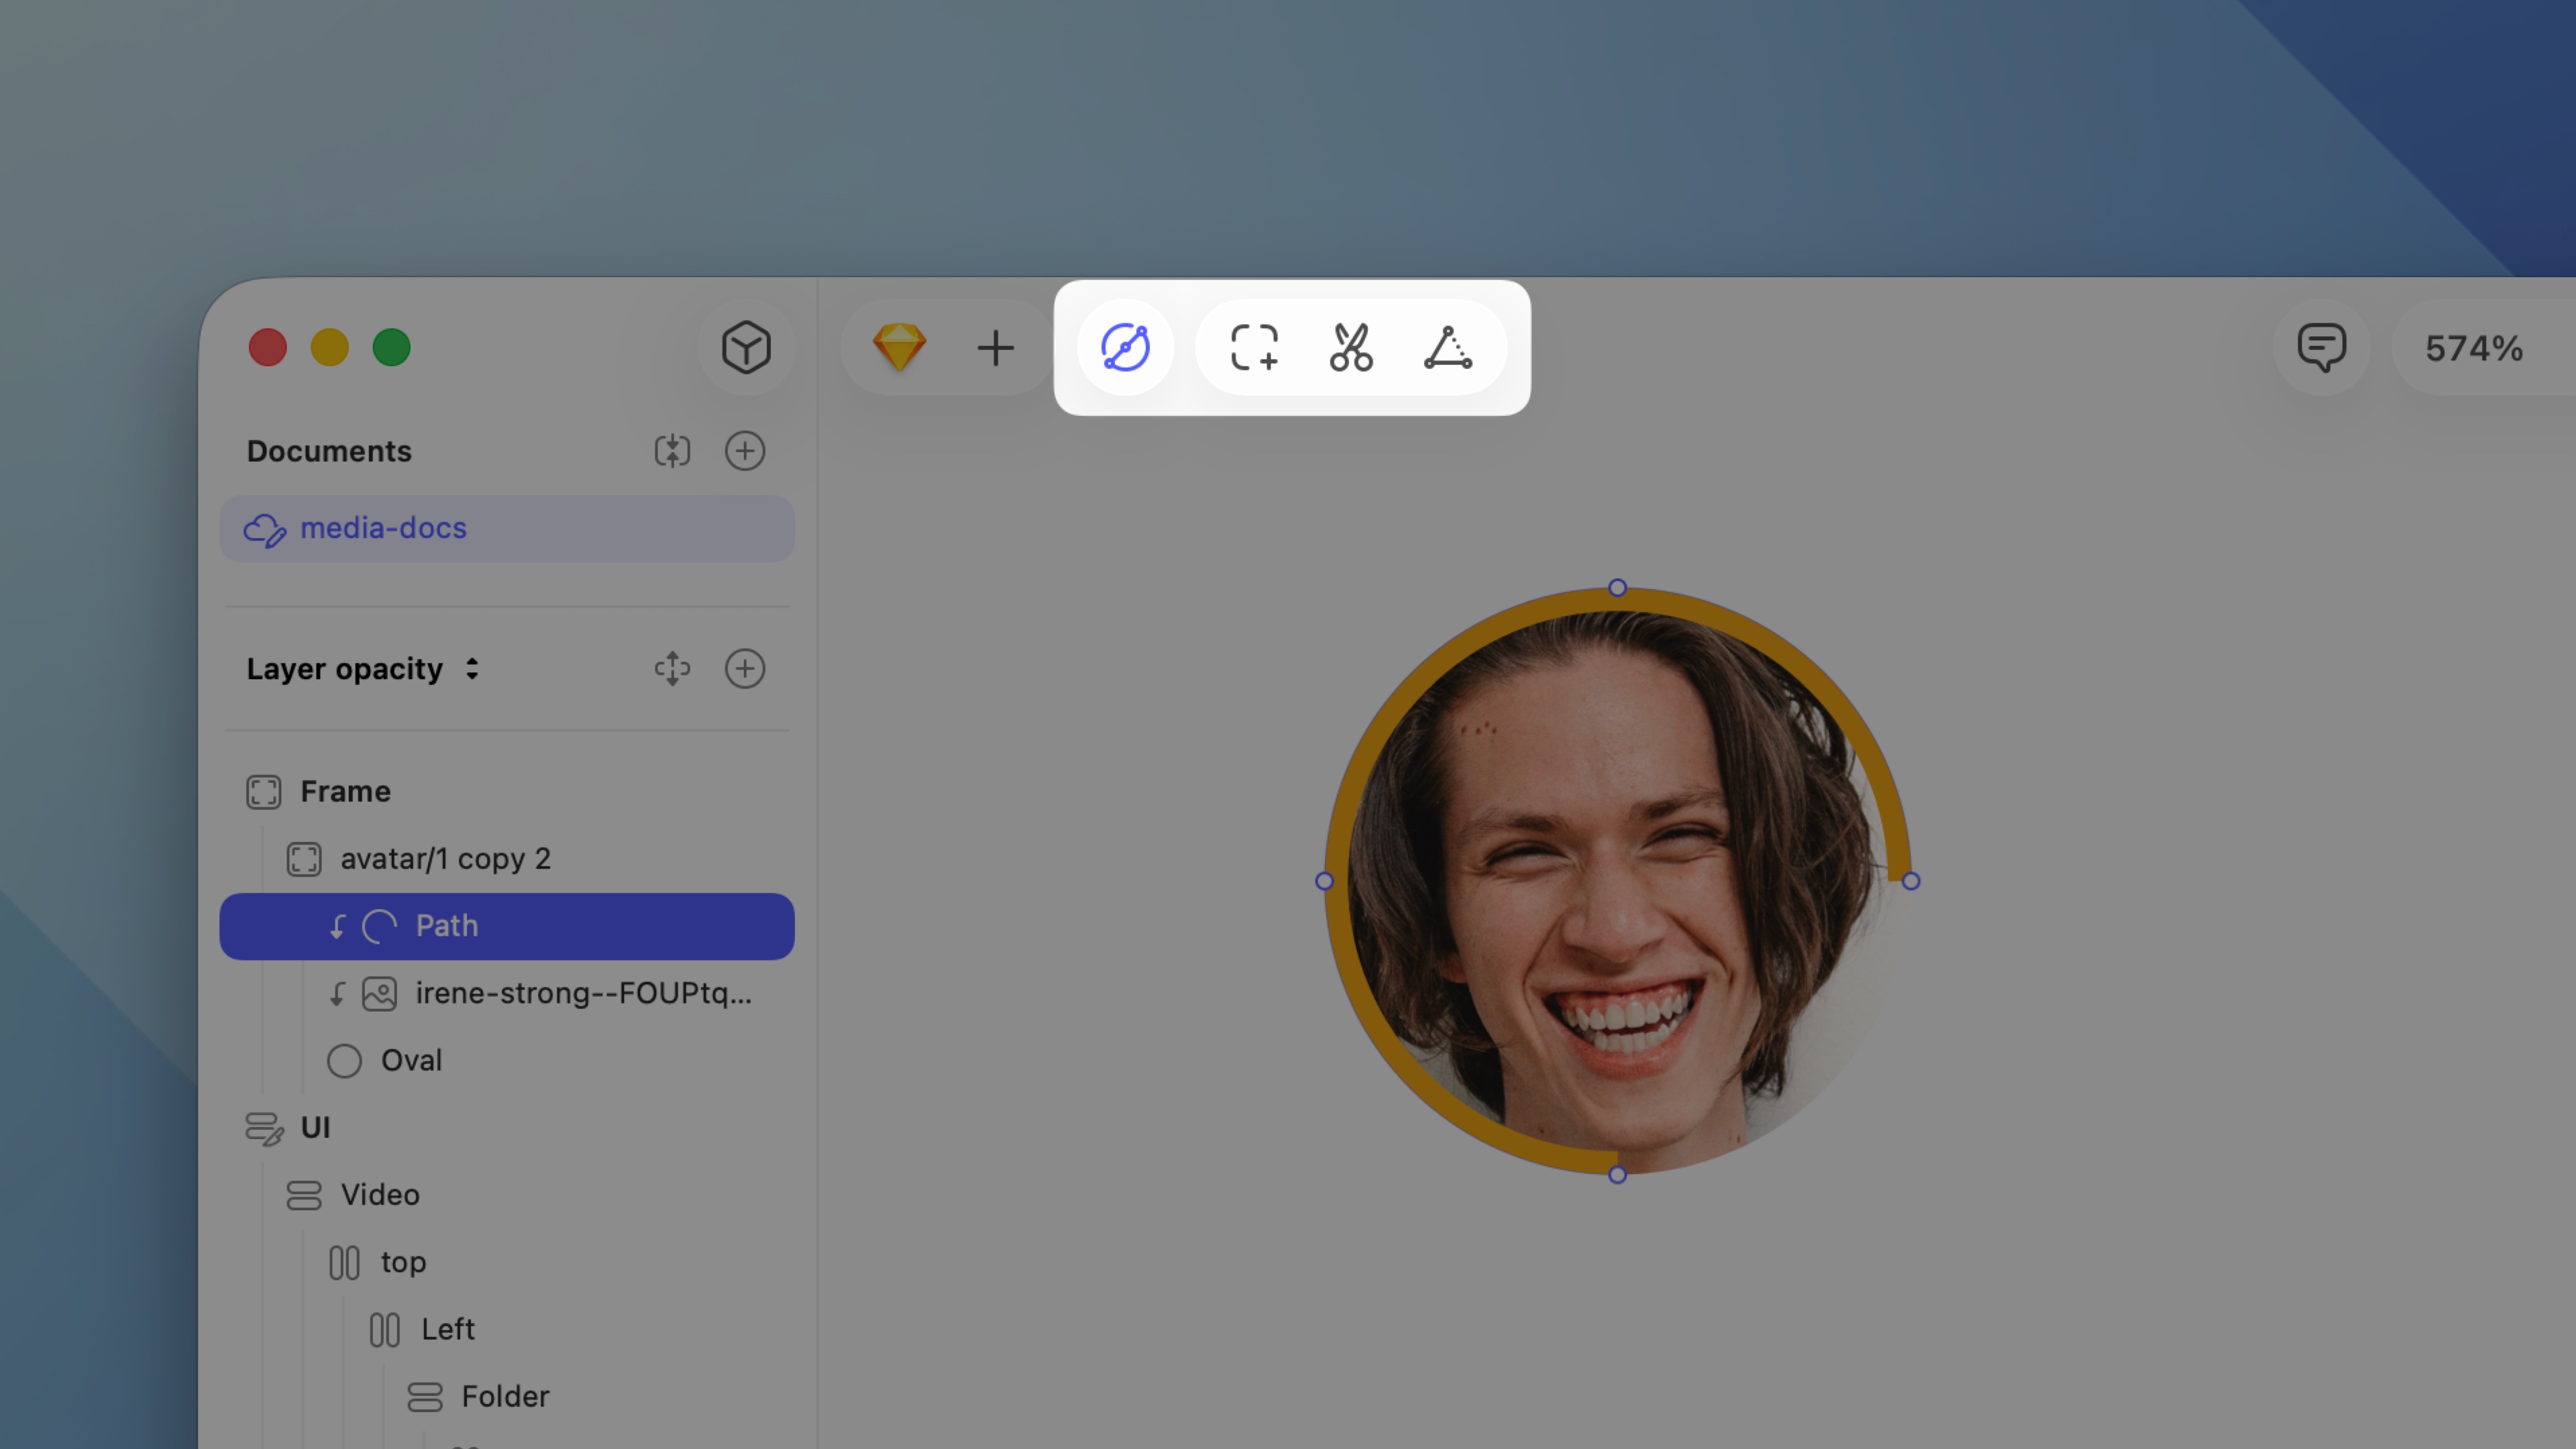
*Click Close Path in the toolbar to close an open path*
To create an open path, add your points, then choose **Layer** > **Edit** in the Menu Bar or press **Return** ⏎ to leave vector editing mode. The next time you edit this shape, you can continue where you left off and place your next point after the last or before the first point.
You can also use the [Scissors tool ](/docs/designing/shapes/editing-shapes/#using-the-scissors-tool) to open a path and cut away a segment between two points.
When you’re editing an open path and click on the opposite end point, you can choose in [Settings](/docs/interface-and-settings/mac-app-settings/) > **Layers** whether that closes the path or selects that point.
> **Note:** If you add a fill to a shape with an open path, the fill will still act as if the path was closed.
### Joining paths
Select two or more open paths and choose **Layer** > **Path** > **Join** from the Menu Bar to combine them into a single path. The bottom-most path will stay in position while the paths above it may move slightly to fit together.
### How points snap to pixels
When you’ve selected a vector shape, you can click the vector snap icons near the top of the Inspector to select whether vector points snap to full pixel edges , half pixels , quarter pixels — or choose not to snap them at all .
To get a better idea of where your points are snapping to, zoom in and enable the Pixel Grid by selecting **View** > **Canvas** > **Show Pixel Grid on Zoom**, or pressing ⌃X. When you zoom in, you’ll see points snap to the pixel level you selected as you move them.
### Turning a border into outlines
Select any shape with a border and select **Layer** > **Convert to Outlines** or press ⌥⌘O to turn that border into a shape with its own fill.
For open paths, converting to outlines only creates a shape group when the result requires one.
### Offset Path
To expand or contract a shape’s outline, select it and choose **Layer** > **Path** > **Offset**, or select **Offset** from the **Tools** dropdown in the toolbar. A separate panel opens where you can drag the slider to preview the offset on the Canvas. You’ll also see an outline of the original shape to help you compare your changes to its original size. You also have the option to make your offset a duplicate layer.
### Reversing the order of a path
If you have a shape with an open path, it has a clear direction from its start point to its end point. To reverse that direction, choose **Layer** > **Path** > **Reverse Order** from the Menu Bar. That means you can now add a new point at the newly created end point, or reverse the direction of an arrow that can appear as part of a border.
--------------------------------------------------------------------------------
title: "Frames"
description: "Learn how to create and edit Symbols in Sketch with the help of our step-by-step guides and video tutorials."
last_modified: "2026-06-22"
url: "https://www.sketch.com/docs/designing/frames/"
--------------------------------------------------------------------------------
## Frames
If you’re designing screens for a mobile app, pages of a website, or putting together a UI, you’ll want to use Frames to organize your work. Frames are a container for interface design and other layout work. They can hold both an entire design and individual parts of it.
## Useful Shortcuts
| Action | Shortcut |
|--------|----------|
| Insert a frame | F |
| Group selection in a frame | ⌘F |
| Auto-pin selected layers | ⇧A |
| Auto-pin contents of a frame | ⌥⇧A |
| Resize frame without adjusting contents | ⌘ while resizing |
| Resize frame without adjusting contents | ⌥⌘← → ↑ ↓ |
## Inserting frames
Press F to use the Frame tool. You can also go to **Insert** > **Frame** in the menu, toolbar, or look for _frame_ in the Command Bar. When you insert a top-level frame, it gets a white fill by default.
With the Frame tool you can:
- Click and drag on the Canvas to draw a new frame.
- Select a template from the Inspector to create a new frame from it.
- Click on the Canvas to insert a new frame with the dimensions of the last top-level frame you interacted with.
## Clip contents
Hides any part of a layer that extends beyond the frame’s bounds. Only drawn frames have **Clip content** enabled by default.
## Styling frames
Frames support all types of appearance properties like opacity, corners, fills, borders, shadows, inner shadows, effects, and tints. You can also apply [Layer Styles](/docs/symbols-and-styles/text-and-layer-styles/layer-styles/) to frames.
## Nesting frames
Frames can contain other layers, including other frames. By nesting frames you can separate and organize parts of your design individually, and bring them all together later on. This is particularly useful when working with [Stacks](/docs/designing/stack-layout/).
You can also wrap your current selection in a new frame. Press ⌘F, or choose **Arrange** > **Group as Frame** in the menu, or select **Group** > **Frame** in the toolbar. Wrapping your selection will give it no fill.
When you insert or draw new layers, we’ll highlight the parent frame on the Canvas to show where they’ll be placed. If you draw a new frame around existing layers, these will be reparented to the new frame.
When you draw a nested frame we automatically give it a distinctive blue fill to help distinguish it from its parent. Press ⇧F to toggle it, or change it in the Inspector.
Dragging a layer out of its parent frame or onto another frame will reparent it, but dragging onto a smaller frame will not. Moving a frame or layer with the arrow keys also does not change its parent. If you want to avoid reparenting while dragging, hold Space as you move the layer. This keeps the layer inside its current parent, even if you drag it over another frame.
## Sizing
Frame sizing options include the following, with some options available only in certain contexts:
- **Fixed**. The frame will have a specific size defined on the Canvas or in the Inspector.
- **Relative**. The frame will resize relative to the size of its parent.
- **Fit**. The frame sizes itself to fit its contents. This option is available for [stacks](/docs/designing/stack-layout/) and text elements.
- **Fill**. The frame will always size to fill its container. You can use this options with Stacks.
By default, layers in frames use fixed width and height, so they won’t resize when their container changes. You can adjust these settings using the **Width** and **Height** dropdowns at the top of the Inspector, just below the size fields.
Double-click the edge of any frame to resize it to fit its contents. If you double-click on the corner handle you will resize to fit both width and height simultaneously. In the **Layer** menu, **Size to Fit** (⇧⌘F) shrinks or grows frames, text and Symbols with layout to wrap tightly around their contents. For images and Symbols without layout, the action is called **Size to Original Size** and snaps the layer back to the size it had when you placed it.
## Resizing
Resizing a frame adjusts its contents according to their sizing and pinning properties. Hold ⌘ to resize a frame without changing the size of its nested layers, regardless of their resizing options. Alternatively, use ⌥⌘-arrows [shortcuts](/docs/shortcuts/mac/#move-and-resize) to resize without changing the contents.
Use **Edit mode** to resize a frame without adjusting its contents, you can also move the frame using the keyboard arrows to change the position of the frame without changing the position of its contents. To enable Edit mode, use the button in the toolbar, head to **Layer** > **Edit** in the menu bar, or use the ⌘⏎ shortcut.
You can change the orientation of a layer by holding ⌥ in the **Layout** section of the Inspector. This switches the Lock Proportions button to **Change Orientation**. Click it to swap the layer’s width and height.
## Pins
By default, layers are pinned to the top and left edges of their container. This keeps them positioned relative to those edges when the container is resized.
Use the **Layer** > **Pin** menu, or right-click the pin control in the Inspector to assign, remove, or clear all pinnings on a selection.
- **Pin All** assigns pinnings to every edge of the selection’s container so it stays fixed on all sides when the container resizes.
- **Pin None** removes all pinnings, allowing the selection to move freely within the container.
Manually setting pins can be time-consuming. To speed things up, you can auto-pin a layer by clicking the “A” icon in the pinning controls in the Inspector. You can also head to **Layer** > **Pin** > **Auto Pin**, or press ⇧A. This will apply the most relevant pins based on that layer’s position within a frame (e.g. a layer in the bottom-right of the frame will get bottom and right pins).
Alternatively, to speed things up further, you can auto-pin all the contents in a frame by choosing **Layer** > **Pin**> **Auto Pin Contents** in the menu bar or ⌥⇧A.
Auto Pin is a one-time action, not a persistent setting. You’ll need to repeat it whenever you want to auto-pin newly added layers to a frame, or after moving a layer within a frame so that it’s closer to another edge.
Pins apply in more scenarios than only resizing the layer’s parent container. When you edit a layer’s width and height values, resize it with arrow keys, swap Symbols, and use different paste actions — we’ll respect where your layer is pinned, so your design remains laid out as you have it.
## Coordinates & Rulers
Frames define the coordinate space for their contents. This means that if you select a layer in a nested frame, its coordinates will reflect the distance to the top-left of the nested frame, not the top-level frame.
Rulers automatically update their origin to the closest frame when selecting a layer.
### Creating a template
To save any frame as a template, select it and choose **Arrange** > **Container** > **Set as Template** in the menu.

*How to create a Frame Template*
Any content, grids or guides you include within the frame itself will become a part of the template. If you update the original frame it will automatically update the template but not frames created from the original template. The frame will now appear under the **Current Document** dropdown option of the templates Library.

*How a template appears in the Library*
You can create custom preview thumbnails for your templates by adding a frame with the name `Previews/Frame_Template_Name` in the same document or Library.
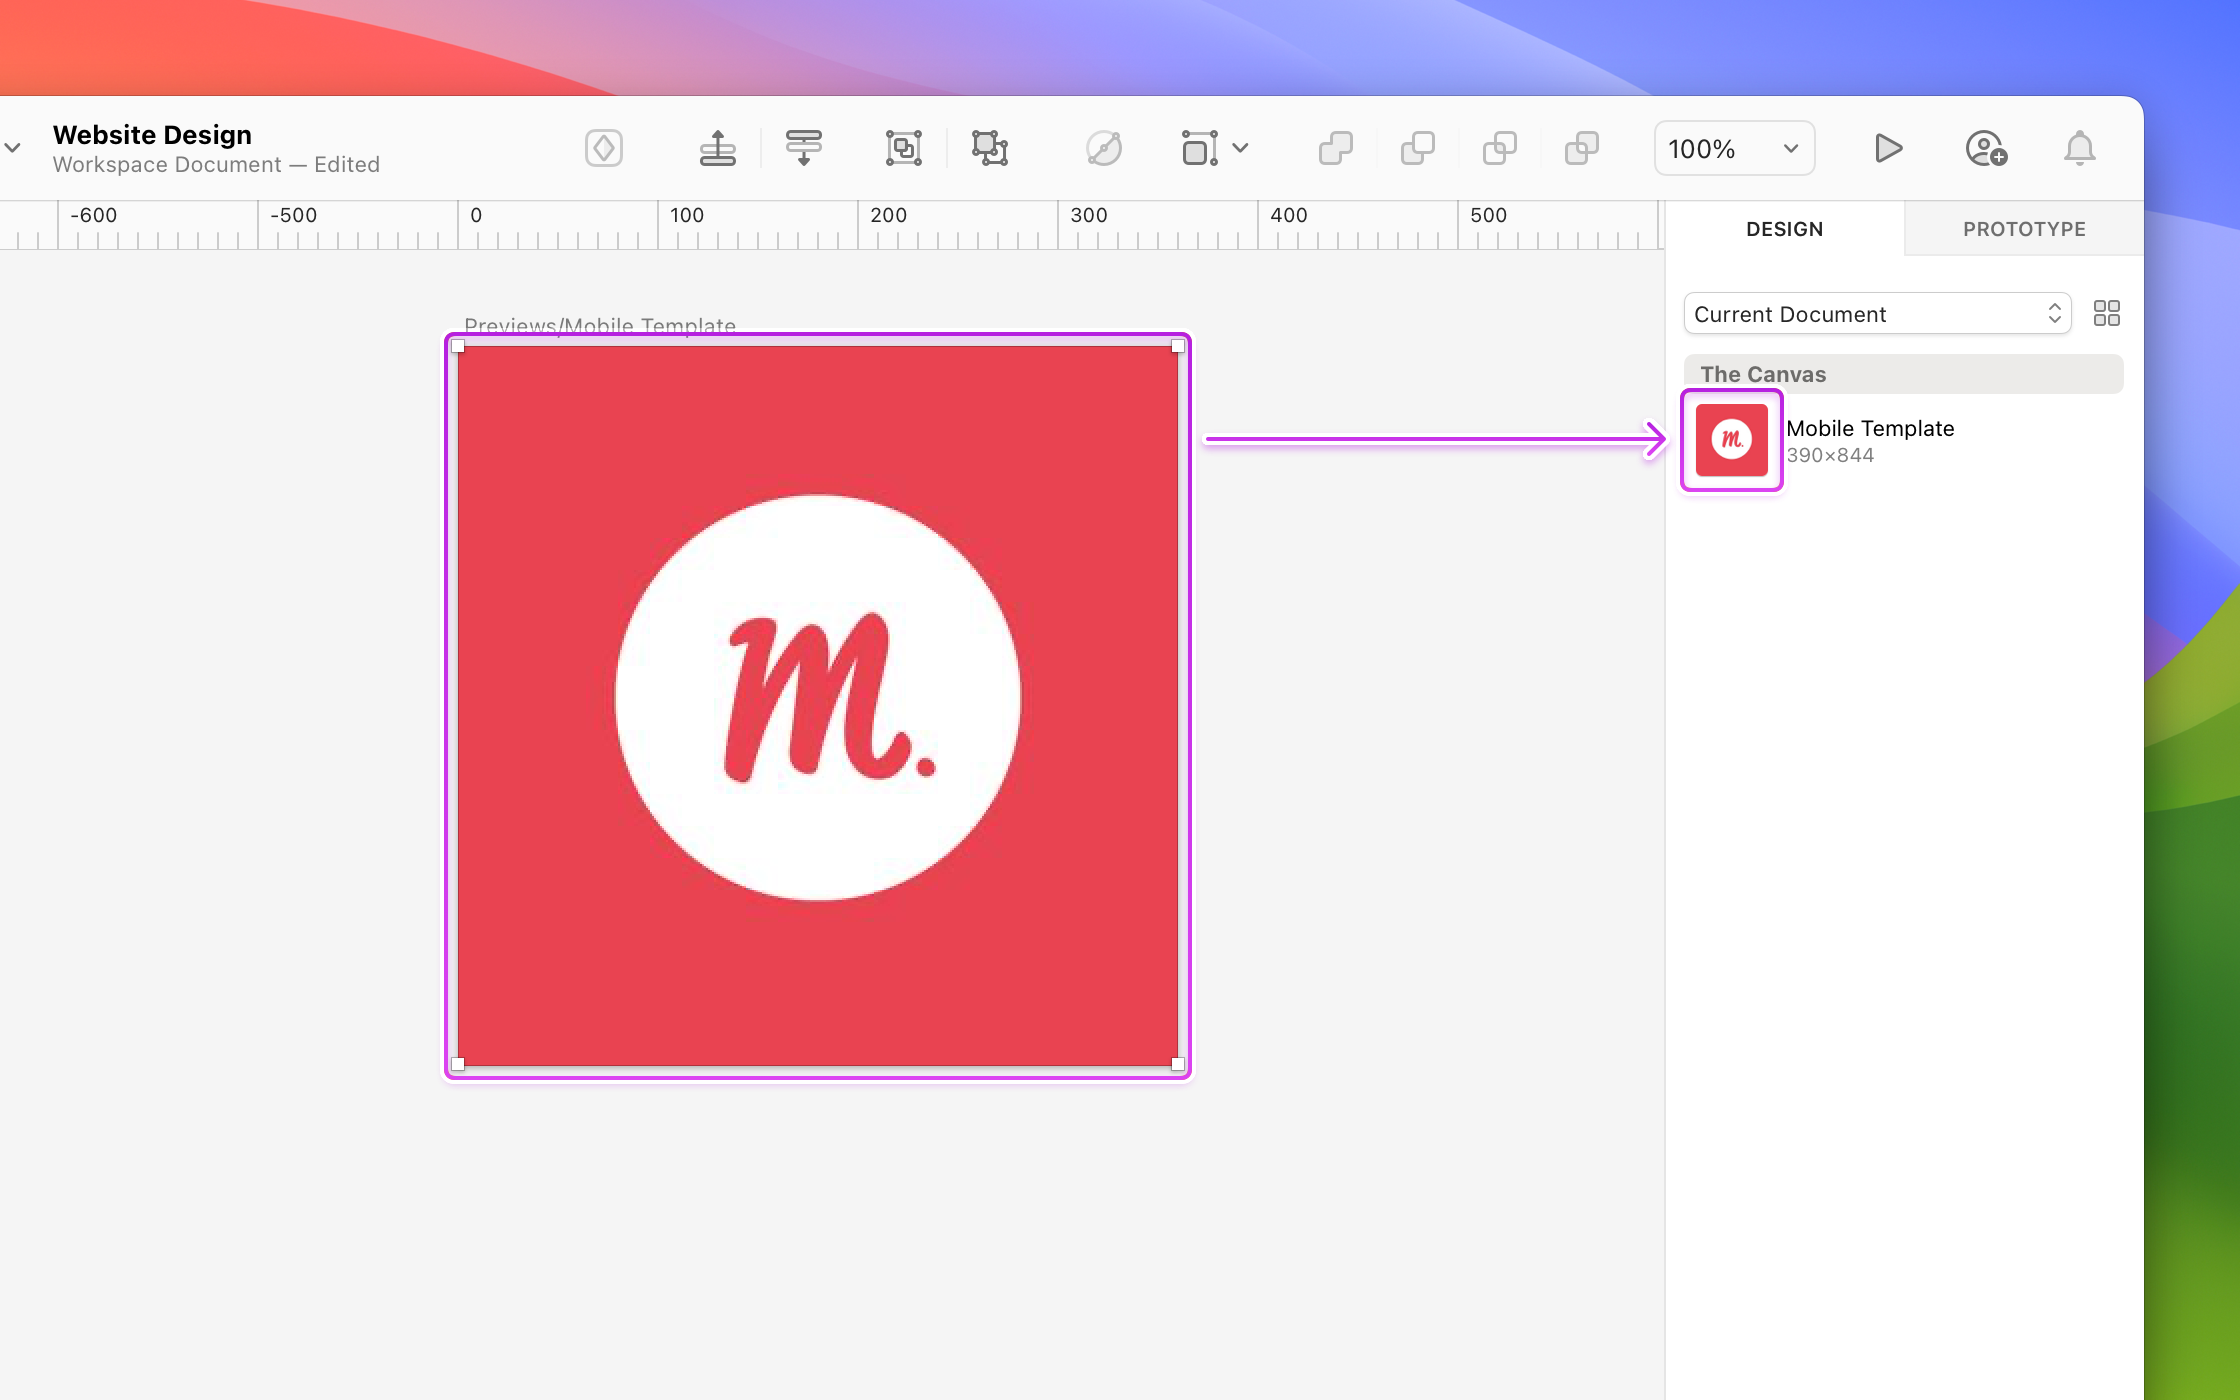
*Creating a Frame Template Preview*
Frame Templates can be included as part of a [Library](/docs/libraries/) to make them available for other documents.
## Working with frames
- Apply a fill to frames instead of using rectangle shapes as background layers in groups and frames.
- Press F to insert a frame equal in size as the last one you interacted with (top-level frame) on the Canvas. You’ll see a dashed line to indicate the size of the frame.
- When you drag a layer around, it will be nested in and out of frames as you move it.
- We’ve expanded the layer selection overlay to include dashed lines for its pinned edges, and a dashed box around its parent frame.
- To temporarily hide all selection highlights, just hold Space when idle.
- Use ⌥⌘ and press the arrow keys to resize a layer by your default nudge amount. Use ⇧ to resize by the larger nudge amount.
- Select a top-level frame and press ⇧⌘C to copy a link to it. You can share the link or click the arrow in the toast at the bottom of the Canvas to open it in your browser. Otherwise, it copies a link to the current page to your clipboard. This only works for Workspace documents.
--------------------------------------------------------------------------------
title: "Graphics"
description: "Learn how to create and edit Symbols in Sketch with the help of our step-by-step guides and video tutorials."
last_modified: "2026-01-23"
url: "https://www.sketch.com/docs/designing/graphics/"
--------------------------------------------------------------------------------
## Graphics
Graphics are a container for icons and illustrations. Unlike frames, graphics resize proportionally and their contents have no pinning or sizing properties.
Graphics share many of the same behaviors as frames. For more context, make sure to read the [Frames](/docs/designing/frames/) documentation.
## Inserting graphics
Press G to insert a graphic. Alternatively, you can use the Insert Menu or the [Command Bar](/docs/interface-and-settings/the-mac-app-interface/the-command-bar/). You can also wrap your selection in a graphic via **Arrange > Container > Graphic**, or the Group icon in the toolbar.
You can also convert a frame to a graphic using the container type dropdown at the top of the Inspector, just above the X and Y position fields.
Alternatively, you can insert a graphic using one of the Graphics Templates in the Inspector. To create your own, select a graphic, then choose **Arrange** > **Container** > **Set as Template** from the menu bar.
Pasting or dragging an SVG into the Canvas will insert it as a Graphic. This is useful when importing icon sets, they’ll be placed in a container more suited for their use as graphics allow for easier scaling and resizing of their contents.
## Working with graphics
By default, graphics use Fixed sizing. This means their dimensions and position stay the same, even if you make changes to the surrounding frame. When resized, a graphic’s contents resize proportionally.
> **Note:** To truly scale a graphic, enlarging or shrinking all internal elements, use the Scale tool.
--------------------------------------------------------------------------------
title: "Stack Layout"
description: "Learn how to use Stack layout in Sketch to create designs that adapt to content changes and resizing"
last_modified: "2026-06-22"
url: "https://www.sketch.com/docs/designing/stack-layout/"
--------------------------------------------------------------------------------
## Stack Layout
With Stacks, you can control how designs shrink or grow to fit contents and how they fill the space available. Use Stacks to build everything from buttons that resize automatically to full interfaces you can reuse in different sizes.
## Creating a Stack
Stacks are frames with layout properties. You can add a stack to empty frames, groups, frames that contain other layers, a selection of multiple layers, or a single layer.
To add a stack:
- Select a frame or layer and press ⌘L or ⇧S.
- Select a frame or group multiple layers and click the **Add Stack** button in the Layout section of the Inspector. The button won’t appear if you select a single layer.
- Head to **Arrange** > **Stack** > **Add Stack Layout** in the menu bar.
- With the [Command Bar](/docs/interface-and-settings/the-mac-app-interface/the-command-bar/): search for _Add Stack Layout_
To remove a stack:
- Select a stack and press ⌥⌘L or ⌥⇧S.
- Select a stack and click the trash icon in the Layout section of the Inspector.
- Head to **Arrange** > **Stack** > **Remove Stack Layout** in the menu bar.
- Search for _Remove Stack_ in the [Command Bar](/docs/interface-and-settings/the-mac-app-interface/the-command-bar/).
## Stack layout settings
You’ll find stack controls in the Layout section of the Inspector. Here’s what you can change:
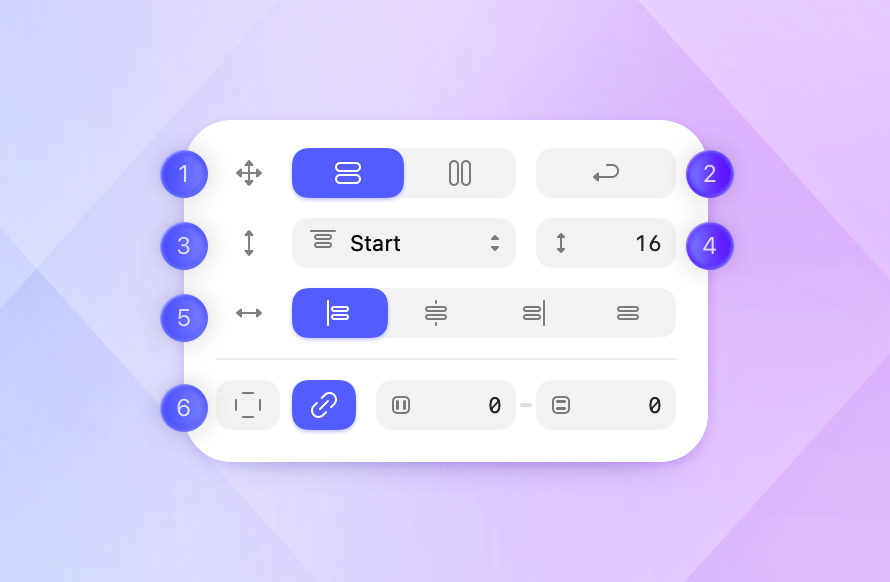
1. **Direction** can be horizontal or vertical. The horizontal direction arranges layers in a row, and the vertical direction in a column — great for things like lists or cards.
1. **Wrap** lets content move onto a new line, or column, when it runs out of space in their container frame. It helps you build responsive layouts that adapt naturally as you resize, add, or remove elements.
- Set the container to a Fixed Width (for horizontal wrap), or Height (for vertical wrap), so the content knows when it has reached its boundary and needs to wrap.
1. **Alignment and Distribution** control how layers are positioned within a stack as its content changes.
- Alignment lets you choose to place all items at the Start, Center, or End of the stack.
- Distribution spreads items across the stack using one of these options: Space Between, Space Evenly, or Space Around.
1. **Spacing** defines the distance between layers in a stack and is related to the alignment or distribution option you choose.
- With alignment options, you can set the spacing manually.
- With distribution options, spacing is set automatically, and the input field changes to Auto.
1. **Cross-axis alignment** is determined by the stack direction. You can cross-align horizontal stacks vertically to the top, middle or bottom. Similarly, you can cross-align vertical stacks horizontally to the left, center or right.
1. **Padding** defines how much space is between the stack edges and its contents. When you add a stack layout to a set of layers, a group or a frame, the layers’ positions determine the padding and you can adjust as needed.
- **Uniform padding** sets the same value for all edges of the stack.
- **Paired padding** sets the same value for each pair, top-bottom and left-right.
- **Individual padding** sets a different value for each edge of the stack.
You can also adjust padding directly on the canvas by clicking and dragging. Select a stack, hover over it, then click and drag the padding handles to make adjustments. As you hover, both the padding handles and padding area are highlighted on the Canvas.
Your padding settings — Uniform, Paired, or Individual — also affect how padding adjusts on the Canvas. For example, if you’ve set Paired padding, dragging the top padding will also adjust the bottom padding.
> **Note:** You can override cross-axis alignment for individual stack items. Select a layer, hold ⌥ and select an alignment option at the top of the Inspector.
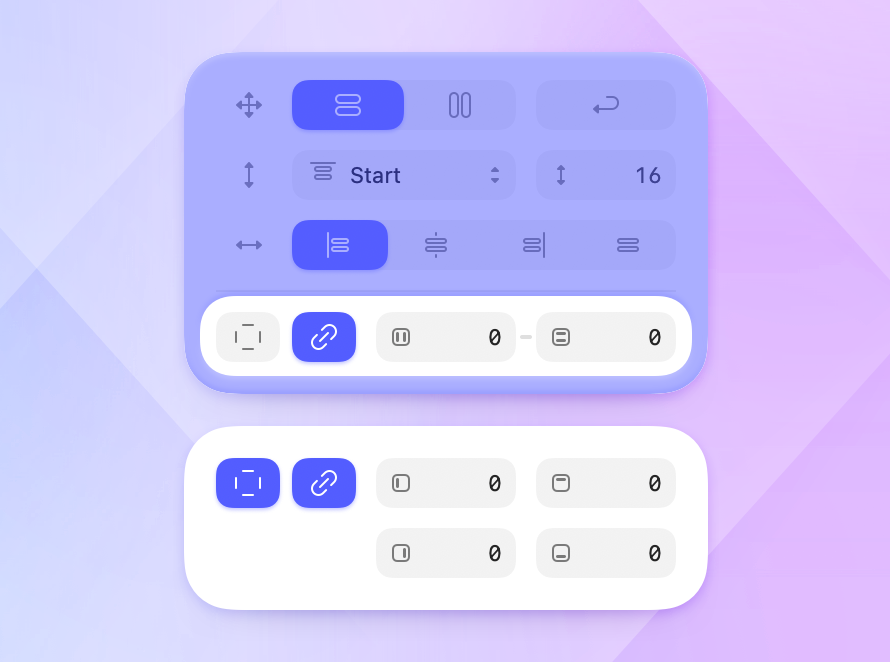
*How the stack padding settings appear on the Mac app.*
> **Note:** Sizing options also affect how paddings are adjusted. If a stack is set to Fit and you change the padding, the stack will shrink or grow accordingly. If a stack is set to Fixed, padding will increase or decrease within the stack’s dimensions.
## Sizing options for Stacks
You can set different sizing options for both the width and height of stacks in the Inspector. These define how stacks resize.
### Nested stacks
- **Fixed.** The stack will take the size you set in the Inspector. The parent stack can also adapt to fit the contents or keep its dimensions, depending on the selected sizing options.
- **Fill.** The stack will grow to take all the space available in the stack. If there are multiple nested stacks and all are set to Fill, each one will take an equal part of the space available.
- **Fit.** The stack will shrink or grow to fit its contents.
> **Note:** Select a layer or nested stack and press ⌥. Then, double-click on the stack edge to change it from Fixed or Fit to Fill.
By nesting stacks, you can create complex designs that mix directions and adapt to different sizes. Each nested stack has its own layout and sizing settings, giving you full control over item positioning, resizing behavior, and how content fills the available space.
### Non-nested stacks
These are stacks that are not inside another stack — although they can be inside frames, groups, or graphics.
- **Fixed.** The stack takes on the size you set. This applies both when you set the size on the Inspector or when you resize the stack directly on the Canvas.
- **Fit.** The stack automatically shrinks or grows to fit its contents. If you resize a stack set to Fit manually, it will switch to Fixed.
- **Relative.** The stack will resize with its parent frame or group.
> **Note:** Double-click the edge of a stack to change it from Fixed to Fit.
## Working with stack items
Stack items are the layers inside a stack: shapes, text, or even nested stacks. You can apply sizing options to these items to control how they resize within the stack.
### Sizing options for stack items
Stack items can be set as **Fixed** or **Fill**, and these settings work in the same way as with nested stacks.
> **Note:** You cannot set a stack item to Fit, except text layers. Any other layers inside a stack will be set to Fixed or Fill.
Stack items have two additional options in the Inspector:
1. **Ignore stack layout** lets you position an item anywhere you want within a stack. You can apply it at any time — even before creating the stack. Right-click a layer and choose **Ignore Stack** from the menu, or use the Command Bar. Layers with this setting show an [X] icon in the Layer List.
1. **Preserve space when hidden** keeps a stack item’s space even when the layer is hidden.
### Adding layers
You can add new layers to a stack in different ways:
- Select a layer, then drag and drop it in the stack.
- Paste a stack or a stack item. The new layer will appear next to the selected item — or at the end if you selected the entire stack.
> **Note:** When you hover over a stack, you’ll see guides that show where the new layer will be placed.
### Resizing layers
Resizing or scaling layers has a different effect on the parent stack depending on the selected sizing options:
- If the stack is set to **Fit**, resizing will also make the stack shrink or grow to fit its contents.
- If the stack is set to **Fixed**, layers will resize inside the stack’s dimensions and other layers may be moved out of the way depending on the resizing you apply.
### Removing layers from a stack
Select the layer you want to remove and press ⌫. Alternatively, you can drag the layer outside the stack.
### Rearranging layers in stacks
Select the layer you want to move, then drag it over another layer to swap their positions. You can only reorder sibling items within the same stack. The order in the Layer List will update accordingly.
--------------------------------------------------------------------------------
title: "Smart Layout (Legacy)"
description: "Learn how to use the Smart Layout tool in Sketch with the help of our step-by-step guides and video tutorials."
last_modified: "2026-04-07"
url: "https://www.sketch.com/docs/designing/smart-layout/"
--------------------------------------------------------------------------------
## Smart Layout (Legacy)
> **Note:** Since the launch of Athens, we’ve introduced a more flexible feature called **Stacks**. While Smart Layout remains available as a legacy feature, we encourage you to explore Stacks to take full advantage of the latest layout capabilities.
Smart Layout is a tool that automatically keeps spacing and padding in place while you edit, resize and remove elements in your layout. With Smart Layout, you don’t need to manually adjust whole layouts every time you make a change. Smart Layout takes care of it all, saving you time and effort.
## Why use Smart Layout?
When you apply Smart Layout to your designs they’ll automatically adapt to the changes you make while staying true to the rules that you apply to your layout. Smart Layout can dramatically speed up your design workflow, especially when you’re working with common UI elements with horizontal or vertical layouts, such as buttons, menus or input fields.
You can apply Smart Layout at the very start of your design workflow, or later when you’re tweaking more mature layouts.
## How to apply Smart Layout properties
Smart Layout works with groups, frames and symbols. You can apply and edit Smart Layout properties via the Menu Bar:

*Smart Layout direction icons in the Layer List*
### Via the Menu Bar
Select the elements you want to apply Smart Layout to and head to **Menu** > **Arrange** and select Smart Layout (legacy) — then you can choose **Choose Smart Layout** followed by the shortcuts (these will appear at the bottom of your screen).
### Pausing Smart Layout
From time to time you may want to want to work on elements without Smart Layout affecting their layout — such as when making an image shorter while keeping the text in the same position, for example. In such cases, you can easily pause Smart Layout by heading over to **Arrange** > **Smart Layout (legacy)** > **Pause Smart Layout**.
### Smart Layout settings
Smart Layout resizes your layouts vertically or horizontally, and will also follow a direction of your choosing:
**Vertical**
Smart Layout will resize content from:
- Top to Bottom - Bottom to Top - Middle **Horizontal**
Smart Layout will resize content from:
- Left to Right - Right to Left - Center 
*Depending on whether you choose a horizontal or vertical layout, the properties row will show different options.*
### Combining different layout directions
You can apply Smart Layout with both a horizontal layout and a vertical layout. To do this, select the layers that you want to resize in a different direction, and group them. Now you can apply a separate set of Smart Layout properties to that group under the **Smart Layout (legacy)** menu option the **Arrange** menu.

*This card Symbol has a vertical layout and resizes from the top down. But the two buttons at the bottom are also grouped, have a horizontal layout and resize from right to left*
## Where to apply Smart Layout
Smart Layout works with:
**Groups and Frames:** Use the Menu Bar to apply Smart Layout.
Smart Layout will trigger with groups when you:
- Resize, delete, cut, scale or paste layers in a group
- Add a layer(s) or symbol from your document by dragging it over a group with Smart Layout.
- Duplicate a layer (if the layer is part of an evenly-spaced group, the same spacing will apply to the new duplicate too)
- Adjust spacing between a nested group’s (evenly spaced) layers using Smart Distribute handles in the parent group where Smart Layout is active
- Edit the content or font properties of any text layers within the group
- Swap Symbols within a group.
**Symbols:** When you [create a new Symbol](/docs/symbols-and-styles/symbols/#creating-a-symbol), you can immediately apply Smart Layout via the Create Symbol sheet. And if you create a new Symbol from a group or frame that already uses Smart Layout, it will follow the same layout direction.
To apply Smart Layout to an existing Symbol, head to its Source by selecting any instance of that Symbol and pressing ⌘↵ — after which you can apply Smart Layout properties using the **Arrange** menup in the top menubar.

*A basic button Symbol with Smart Layout properties, resizing horizontally from the middle when the button label text changes*
### Using resizing constraints with Smart Layout
You can also apply [Resizing Constraints](/docs/designing/layer-basics/resizing-and-rotating-layers/) to a selection that uses Smart Layout. This gives you extra control over how your selection will behave, such as by ensuring it never grows or shrinks.
Keep in mind that when you apply Smart Layout to text layers, their alignment should be either auto height (for vertical layouts) or auto width (for horizontal layouts).
> **Note:** Smart Layout will adjust your layout if you delete a layer in a group or frame, or if you hide a nested Symbol in a Symbol.
### Smart Distribute and Smart Layout
Aside from resizing elements, another way to trigger Smart Layout is to adjust the spacing between them using [Smart Distribute](/blog/speed-up-your-workflow-with-smart-distribute/). Evenly spaced layers need to be contained in their own group, nested inside the Smart Layout group.
## Smart Layout in Symbols
Smart Layout can dramatically speed up your design workflow because it helps make your Symbols more reusable while keeping their appearance consistent.
When you choose Smart Layout properties for a Symbol, you’ll see a field for minimum height (for vertical layouts) or minimum width (for horizontal layouts) under the Layout panel in the Inspector. Adding dimensions to these fields will stop your Symbol shrinking below a minimum size, regardless of its override content. If you leave these fields blank, your Symbol will shrink to any size to fit its content.

*This button’s short label with its Smart Layout settings mean it resized to be too small — but by setting a minimum width of 100 it stays a reasonable size*
If you detach a Symbol with Smart Layout, Sketch will apply those same properties to the resulting group.
Keep in mind that if you change existing Smart Layout properties for a Symbol Source, instances of that Symbol may look wrong. In most cases, using the _Size instance to fit content_ button in the Inspector will fix this.

*Example of using the _Size instance to fit content_ button in the Inspector to adjust a Symbol instance*
--------------------------------------------------------------------------------
title: "Shapes"
description: "Learn how to work with shapes in Sketch with the help of our step-by-step guides and video tutorials."
last_modified: "2026-01-23"
url: "https://www.sketch.com/docs/designing/shapes/"
--------------------------------------------------------------------------------
## Shapes
Shapes are the foundation of any design. In this section you’ll learn how to add, edit and mask basic, pre-made shapes like rectangles and circles — as well as how to use Boolean operations to create more complex designs.
--------------------------------------------------------------------------------
title: "Adding shapes"
description: "Learn how to add pre-made shapes in Sketch with the help of our step-by-step guides and video tutorials."
last_modified: "2026-01-23"
url: "https://www.sketch.com/docs/designing/shapes/adding-shapes/"
--------------------------------------------------------------------------------
## Adding shapes
Shapes are a commonly used type of layer in Sketch documents — and because they’re vector-based, they’re incredibly flexible too.
An easy way to get started is to add and edit pre-made shapes. If you want to create a custom shape, try out the [vector editing](/docs/designing/vector-editing/) tool or combine multiple shapes using [Boolean operations](/docs/designing/shapes/boolean-operations/).
### Adding pre-made shapes
You can add a new shape to the Canvas using the **Insert** button in the Toolbar, the **Insert** menu in the Menu Bar, or via [The Command Bar](/docs/interface-and-settings/the-mac-app-interface/the-command-bar/).
Pre-made shapes include the rectangle, oval, line, arrow, triangle, star and polygon.
You can use keyboard shortcuts to quickly add pre-made shapes:
| Action | Shortcut |
|--------|----------|
| Rectangle | R Oval |
After you’ve selected a shape, click and drag anywhere on the Canvas or frame to add it. As you drag, you’ll see the shape’s dimensions next to your cursor.

*Click and drag to draw a pre-made shape*
To create a shape with even proportions (such as a perfect square or circle), hold ⇧ as you click and drag. If you’re creating lines or arrows, holding ⇧ will constrain the line’s path by 45° increments.

*Hold ⇧ as you drag to draw a shape with even proportions*
To draw a pre-made shape from its center instead of from the top left, hold ⌥ as you click and drag. You can hold ⌥⇧ to draw from the center and preserve proportions.

*Hold ⌥ as you drag to draw a shape from its center*
To move a shape as you’re adding it, hold the Space bar ␣ as you drag — this is handy if you started drawing the shape in the wrong area and quickly need to place it elsewhere.

*Hold ␣ as you drag to quickly move a shape*
### Drawing freeform shapes with the Pencil tool
To draw a freeform shape, press P or choose the **Pencil tool ** from the **Insert ** menu. When you’ve finished drawing, Sketch will smooth curves and simplify the path you’ve created.

*Use the Pencil tool to draw a freeform shape*
### Adding shapes from SVG Code
To add a shape using SVG code, simply select the code and paste it anywhere on the Canvas. SVG shapes will be added as a Graphic.

*Select the SVG code and paste it anywhere on the Canvas*
--------------------------------------------------------------------------------
title: "Editing shapes"
description: "Flip, rotate, skew, and cut shapes in Sketch — including the Transform tool, Scissors tool, and Rotate Copies."
last_modified: "2026-04-07"
url: "https://www.sketch.com/docs/designing/shapes/editing-shapes/"
--------------------------------------------------------------------------------
## Editing shapes
## Editing shapes in the Inspector
Some shapes come with unique customization options, which you’ll find in the Inspector. For example, you can choose different start and end point styles with arrow shapes. Or, if you added a polygon or a star shape, you can adjust the number of sides and points respectively using the sliders.
## Flipping and rotating shapes
### Flipping shapes
You can flip shapes horizontally or vertically using the two buttons in the Inspector, or with the keyboard shortcuts ⇧H and ⇧V. The flip buttons stay active until you flatten the shape using **Layer** > **Combine** > **Flatten**, so you can click again to reverse the change.
### Rotating shapes
You can quickly rotate any shape you’ve selected by placing your cursor near its corner handles and dragging when the rotate cursor appears. If you click without dragging in the rotation area, it will select the layer behind instead. Clicking and dragging rotates the selected layer. Hold ⌘ and drag to skip rotation entirely — this selects and moves the layer behind in one action.

*Quickly rotate a shape by holding the Command key while dragging a selection handle*
Hold ⇧ while rotating to snap to 15° increments.
To rotate a shape, you can enter a value in degrees in the Inspector. Use positive values to rotate clockwise, or negative for counter-clockwise.
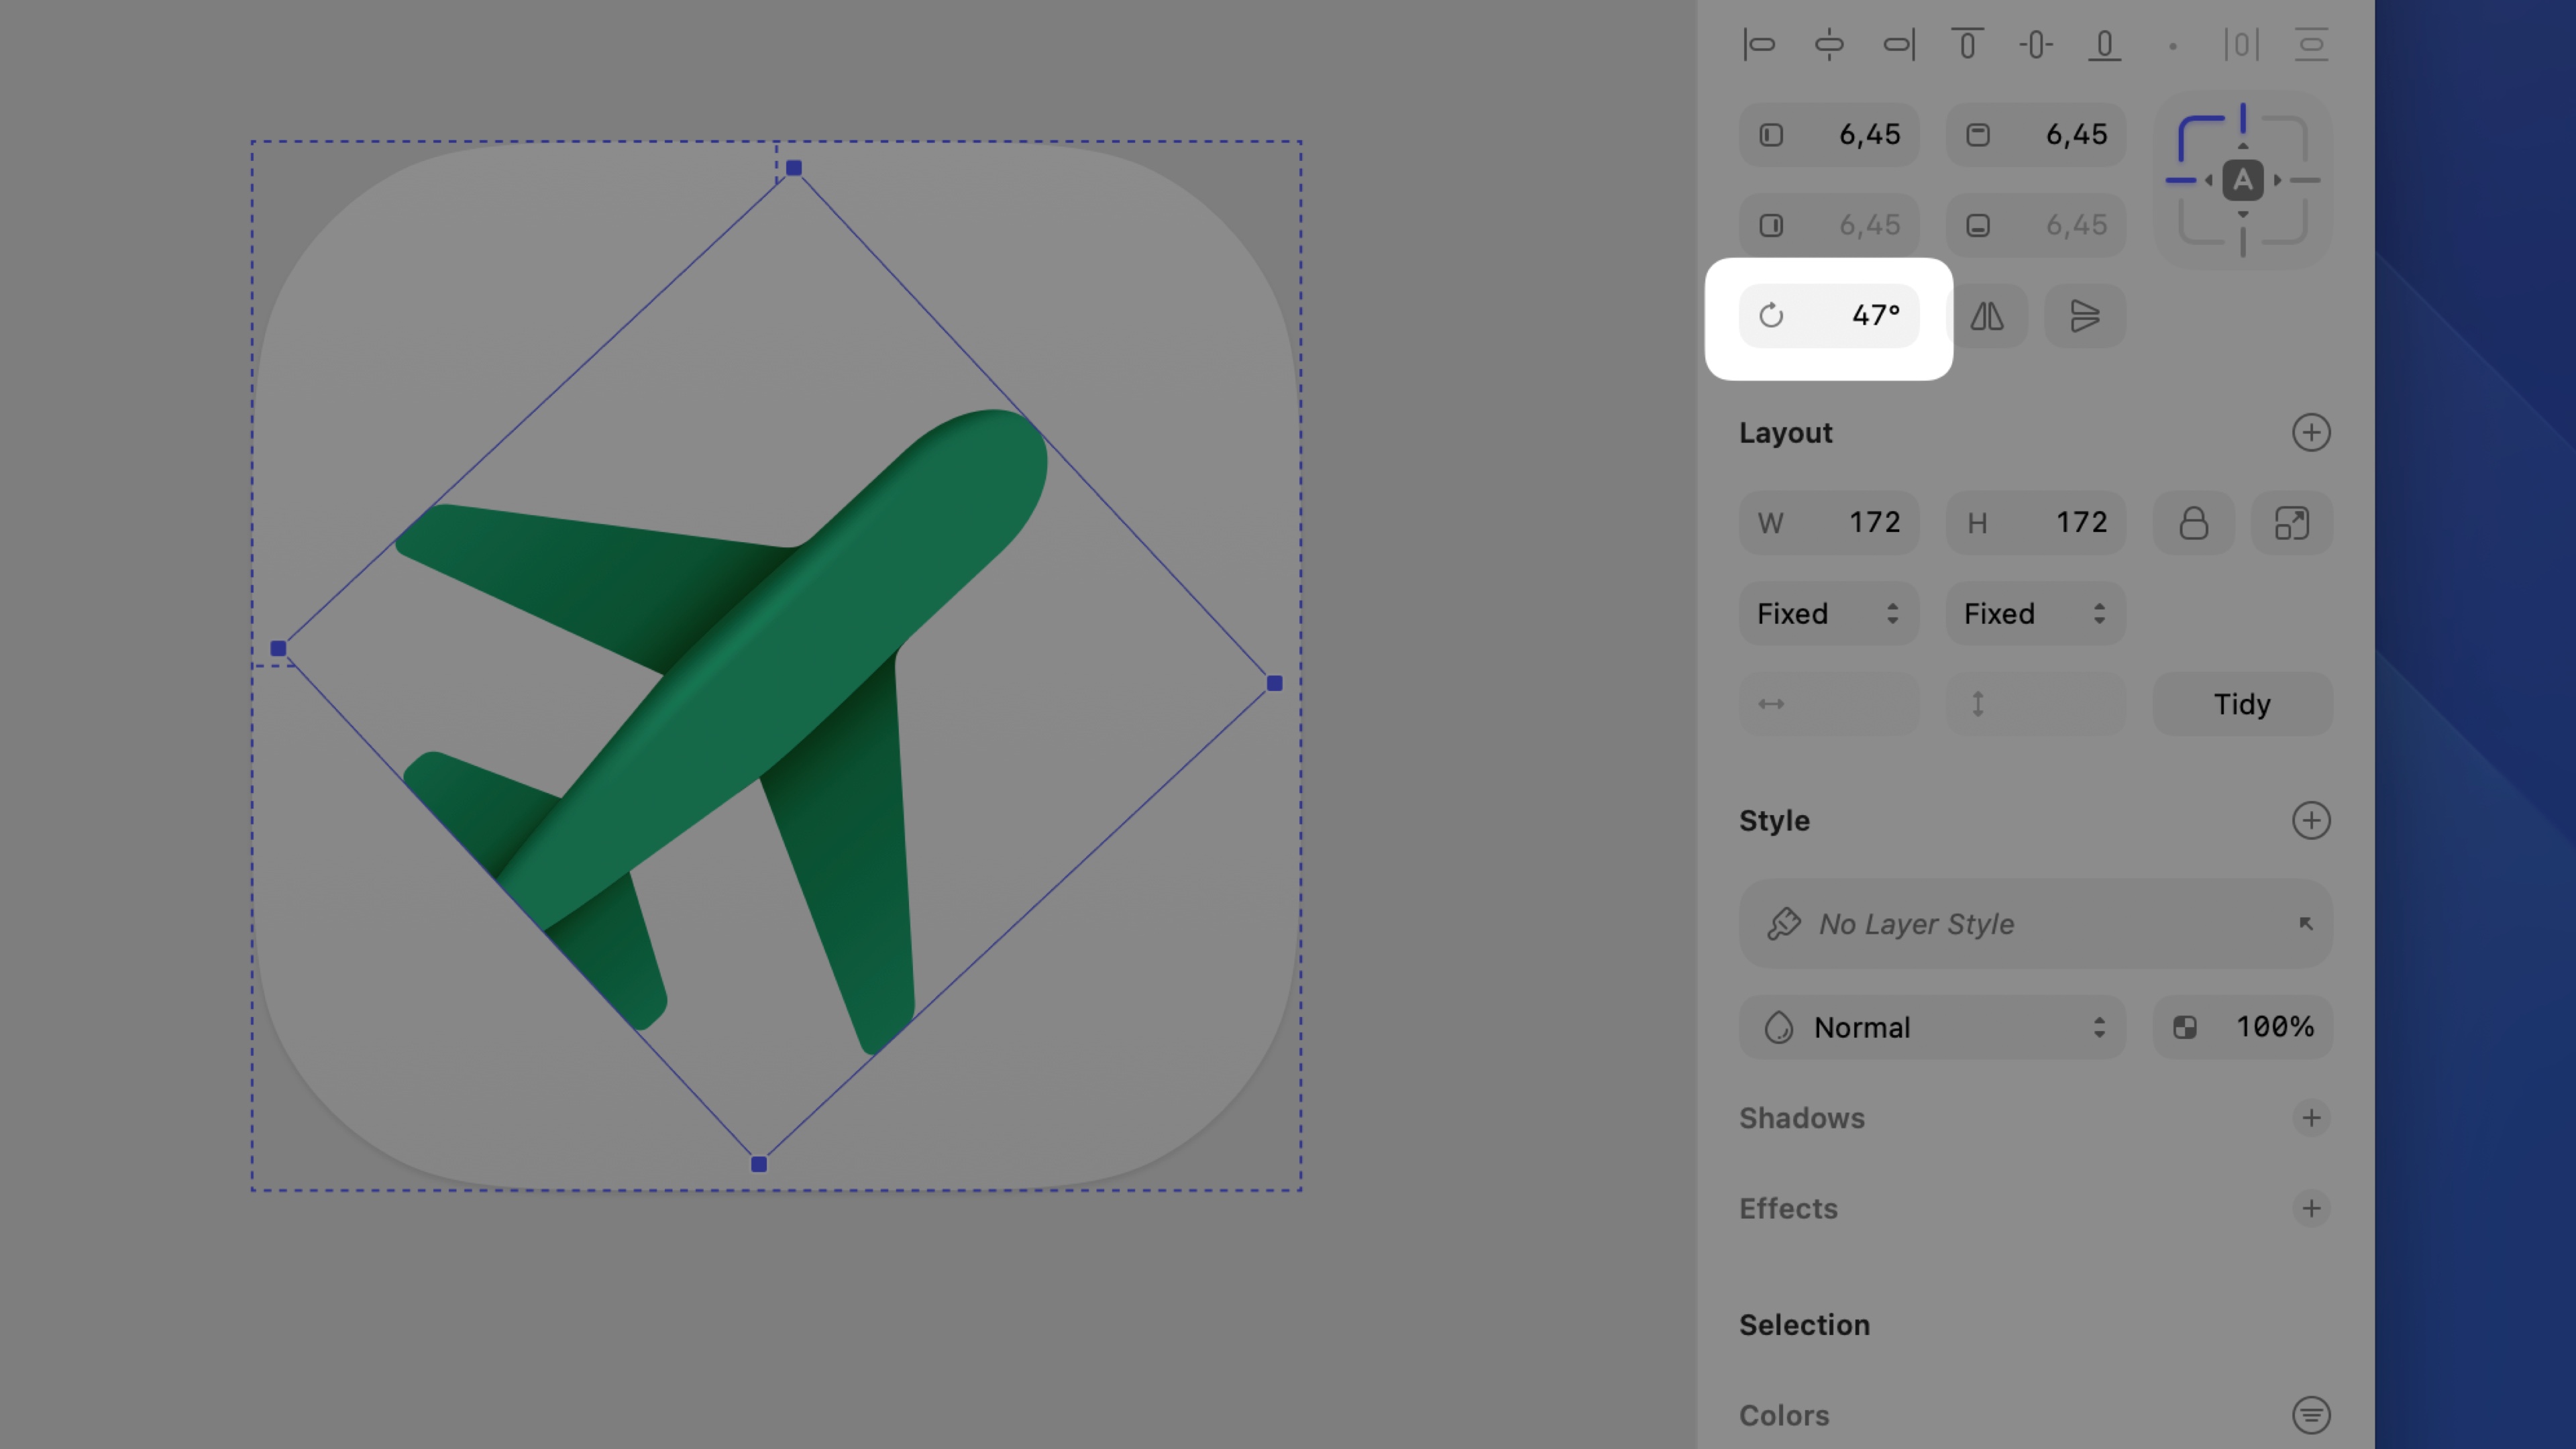
*Enter a value in the rotation field in the Inspector to rotate a layer to an exact angle*
Alternatively, select a shape and press ⌃⌘R, then click and drag anywhere outside the shape to rotate it.
To change the axis on which your shape rotates, click and drag the crosshair at its center to the point you want to rotate around. To reset the center point, select your shape again.

*Click and drag a shape’s center point crosshairs to change its rotational axis*
You can apply your changes and reset the rotation value to 0° by flattening the shape with **Layer** > **Combine** > **Flatten**.
## Editing shapes in vector editing mode
> **Note:** For the full guide on using the vector editing tool, head over to the [vector editing](/docs/designing/vector-editing/) section.
To edit a shape in vector editing mode, either double-click on it, or select it and press the **Return** ↵ key.
When you enter vector editing mode, you’ll see circular points connected together by paths. Click on any of the points and drag them to change a layer’s shape.

*While in vector editing mode, click and drag on a point to change a layer’s shape*
To insert a new point, enter vector editing mode, hover over a path and click. To delete a point, select it and press the **Delete** ⌫ key.

*While in vector editing mode, click on a shape’s path to insert a new point*
When you select one or more points in vector editing mode, the Inspector shows a **Corners · Selected Point** section with three controls: **Corner settings** to adjust smoothing, **Toggle maximum corner radius** to set the radius to its maximum value, and a **Corner radius** field to enter a precise value.
The paths between your shape’s different points can be straight lines or Bézier curves, depending on the point type. Double-click on a straight point to change it to a Bézier curved point.
When you change a point to create a curved path, you can use the two handle control points that appear to adjust the curve.

*Use the handle control points to adjust a Bézier curve*
To create points at each end of the curve, flatten your shape with **Layer** > **Combine** > **Flatten**.
## Using the Transform tool
Use the Transform tool to skew or otherwise change a shape.
Select one or more shapes and head to **Layer** > **Transform** > **Transform**, or open the **Tools** menu in the toolbar and select the Transform tool from there. You can also use the keyboard shortcut ⌃⌘T.
The Transform tool adds points to each corner of your shape(s), as well as points between each corner. Click on a point and drag it to transform and skew your shape(s).

*Use the Transform tool or skew or otherwise change a shape*
If you click and drag on a point between two corners, you’ll move both corners at the same time.

*Click and drag on a point between two corners to move them together*
When you drag a corner point, the opposite corner moves in the opposite direction. This depends on whether you’re dragging horizontally or vertically. To control a single corner only, hold ⌘.
## Using the Scissors tool
Use the Scissors tool to cut away paths from shapes.
Select the shape you want to edit, enable the Scissors tool via **Layer** > **Path** > **Scissors** and click on any paths to remove them. Alternatively, select the shape and open the **Edit** menu in the toolbar, then select the Scissors tool from there.
> **Note:** Keep in mind that the Scissors tool only affects lines or borders — and not fills.
When you’re done cutting paths, click outside of the shape, or press Escape Esc or Return ↵.
## Using the Rotate Copies tool
The Rotate Copies tool takes a single shape and rotates copies of it around a point.
Select a shape and head to **Layer** > **Path** > **Rotate Copies**, enter how many copies you want to create, then click **Rotate**. Alternatively, select the shape and open the **Tools** menu in the toolbar, then select the Rotate Copies tool from there.
Use the handle that appears in the center to position your copies. When you’re done, press Escape Esc or Return ↵.
--------------------------------------------------------------------------------
title: "Boolean operations"
description: "Learn how to create shapes using Boolean operations in Sketch with the help of our step-by-step guides and video tutorials."
last_modified: "2026-04-07"
url: "https://www.sketch.com/docs/designing/shapes/boolean-operations/"
--------------------------------------------------------------------------------
## Boolean operations
Boolean operations are how you build complex shapes from simple ones. Overlap two or more shapes, then combine, subtract, or intersect them — the originals stay intact, so you can keep adjusting until it’s right.
## Using Boolean operations
Select overlapping shapes on the Canvas, then select one of the Boolean operations in the toolbar.
* **Union :** creates a shape that’s the sum of multiple shapes' areas.
* **Subtract :** removes the area of a shape from the one underneath it.
* **Intersect :** creates a new shape from the areas where the selected shapes overlap.
* **Difference :** creates a shape from the areas where the original shapes don’t overlap (the opposite of Intersect).
* **Add :** combines paths together without performing a boolean operation. It’s useful for open paths, or when you want to combine closed paths with better performance than Union. You’ll find it in the Toolbar, Layer menu, and Command Bar alongside the other operations. You can also apply it via ⌥⌘A.
> **Note:** In versions prior to [Dublin](/changelog/dublin/), **Add** was called ‘None’.
Boolean operations apply from the top layer down. For example, if you draw a smaller circle inside a larger circle and apply Subtract , you get a donut shape.

*How to create a donut shape using the Subtract operation*
## Combining shapes
When you apply a Boolean operation to two or more shapes, the original shapes are grouped together in a new combined shape.
You can also create a combined shape directly in the Layer List by dragging one shape over another — the Union operation applies automatically.
Combined shapes are non-destructive, so you can edit the original shapes and change the result at any time. You can also bring two or more combined shapes together with a new Boolean operation.
> **Note:** You can use Frames and Symbol instances as part of a combined shape or mask. They behave like regular shapes within the group, so you can combine them with other layers using Boolean operations or use them as mask sources.
## Editing combined shapes
You can expand a combined shape in the Layer List just like a normal group. The group contains all the shapes that make up your combined shape, along with the Boolean operation applied to each.
To change the operation on a specific shape, click the Boolean operation icon next to it in the Layer List and pick a different one — including **Add**.
To hide one of the original shapes in a combined shape, Control-click it in the Layer List and select **Hide Layer**, or press ⌘⇧H. Keep in mind that hiding a shape changes how the combined shape looks on the Canvas.
## Styling combined shapes
### Fills and borders
Select the parent layer and update its fill or border in the Inspector to change the combined shape’s color. The visual result is controlled by the parent — fills and borders on individual sub-layers don’t appear independently, though a sub-layer’s border thickness does affect the overall shape geometry.
If the shapes you combine only have borders and no fill, the border color becomes the fill for the new combined shape.
### Corners
You can apply rounded corners to a combined shape, just like you would with a rectangle or other basic shape. Select your combined shape and set a radius value in the **Corners** section of the Inspector.
Rounded corners apply to the outer edges of the combined shape — the result of the Boolean operations — so you don’t need to edit the paths manually. To adjust corners on individual shapes within a combined shape, expand it in the Layer List, double-click the shape to enter editing mode, then adjust its corners independently. [Learn more about corners.](/docs/symbols-and-styles/styling/corners/)
> **Note:** If your Mac has a Touch Bar, you’ll find the four Boolean operations there when you select two or more shapes.
--------------------------------------------------------------------------------
title: "Masking shapes"
description: "Learn how to mask shapes in Sketch with the help of our step-by-step guides and video tutorials."
last_modified: "2026-06-22"
url: "https://www.sketch.com/docs/designing/shapes/masking-shapes/"
--------------------------------------------------------------------------------
## Masking shapes
Masks are shape layers that you can use to hide or show parts of other shapes.
There are a few different ways to create masks, but they all follow the same rule: we’ll use the shape that’s lowest in the Layer List as the mask. Sketch supports two specific types of masks modes: outline and alpha, which you can use to mask image or shape layers.
### Creating a simple Mask
A mask in outline mode only shows parts of one or more layers that fall within its shape. You can apply outline mask mode to both image and shape layers.
Select a shape on your Canvas and choose **Layer** > **Mask** > **Use as Mask**. Alternatively, Control-click on the shape and select **Use as Mask**, or use the ⌃⌘M shortcut. If you want to clip an image with a shape, place the shape above the image in the Layer List first — applying **Use as Mask** to an image directly makes the image itself the mask.
> **Note:** Because masks affect *all* layers that lie above them, we recommend grouping the mask layer with the layers you want to mask.

*How to create a simple mask using an oval shape*
When you create a mask, you’ll see a masked icon next to any layer or group the mask affects. The masking layer icon in the Layer List doesn’t show a fill.
> **Note:** Keep in mind that masks will affect any new layer or group that you create above it unless the mask is grouped.
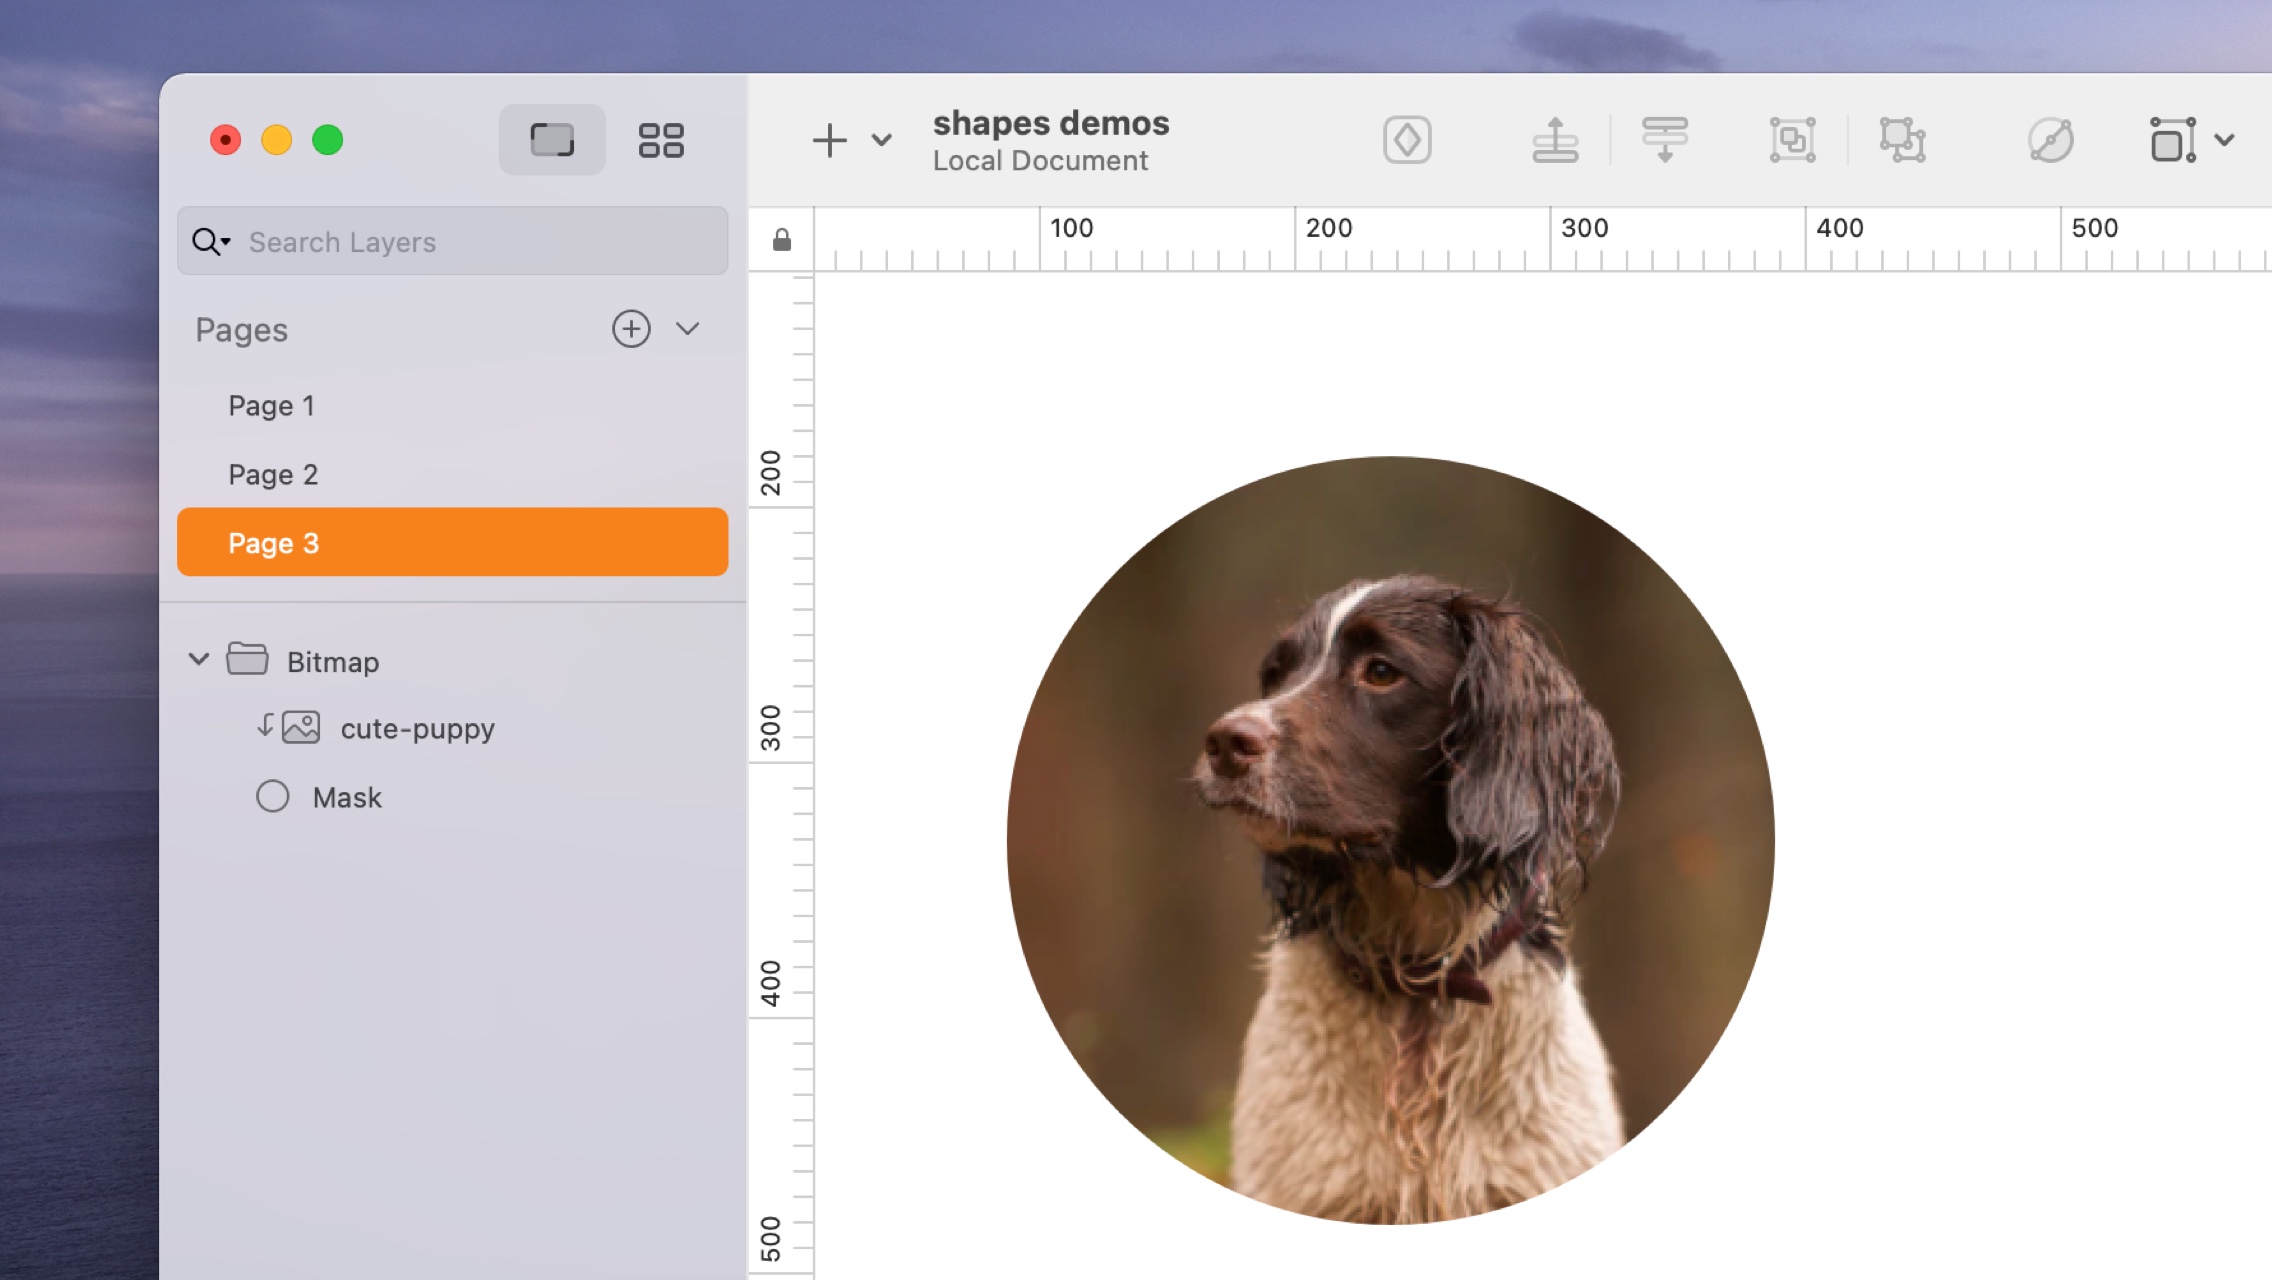
*In the Layer List, the mask layer always affects the layer above it*
To remove a mask from a layer, you can toggle it off. Select the mask layer in the Layer List (or directly on the Canvas), Control-click and select **Use as Mask** from the contextual menu. You can also toggle the mask off by unchecking **Layer** > **Mask** > **Use as Mask** in the Menu Bar.
> **Note:** While it can be useful to have a mask with a fill as you position or resize it, you can toggle off the fill in the Inspector afterwards. Even without a visible fill, the mask will still affect other layers as usual.
If you want to place a layer above your mask layer but don’t want them to be included in the mask, select it and choose **Layer** > **Mask** > **Ignore Underlying Mask**. You can also group your masked layers and the mask itself so that anything outside of that group isn’t affected.
### Masking with multiple selections
If you select multiple layers, you can mask them all at once by choosing **Layer** > **Mask** > **Mask Selection**. This will automatically change the last of your selected layers into a mask, as well as group them all.

*You can group multiple layers, with the last layer acting as a mask*
An exception to this is if you want to mask an image with a specific shape. In this case, you can draw a shape and place it above your image in the Layer List, then select both the shape and image and use **Layer** > **Mask** > **Mask Selection**. Sketch will mask the image with the shape, and automatically create a group with the mask layer underneath the image.
> **Note:** If the image contains any alpha (transparency) values and is the lowest layer, Sketch will assume that you want to use the image as the mask.
You can also select multiple layers and control-click to bring up the **Mask Selection** option in the contextual menu.
Selecting a layer within a mask group and choosing **Layer** > **Mask** > **Ignore Underlying Mask** will keep the layer within the group, but stop it from being affected by the mask.
### Using image masks
You can also create masks just for images. Select an image (without any alpha transparency) and use **Layer** > **Mask** > **Mask Image** from the Menu Bar or the contextual menu. This adds a masking layer and groups the image with the mask — which comes in handy if you want to crop images quickly.
### Creating an alpha mask
> **Note:** While this method below is still available, you might find it easier and faster to use the [Fade](/docs/symbols-and-styles/styling/effects/fade/) effect.
In older versions of Sketch, an alpha mask was the only way to hide anything falling outside of a shape — also controlling the opacity of any layer it was masking, based on the mask layer’s opacity.
To create an alpha mask, create a mask as usual, then select it and choose **Layer** > **Mask** > **Mask Mode** > **Alpha Mask**.
In the Inspector, check that the mask layer’s fill has an **Opacity** / **Alpha** value, or a gradient fill that includes an Alpha. Sketch will apply these values to any masked layers. You can also add a blur for a smoother look.

*A video showing how to use a blur alpha mask*
### Alpha vs outline mask modes
The best way to understand the difference between these two masks is to experiment with them. The core difference is how the mask layer affects the layers it’s masking.
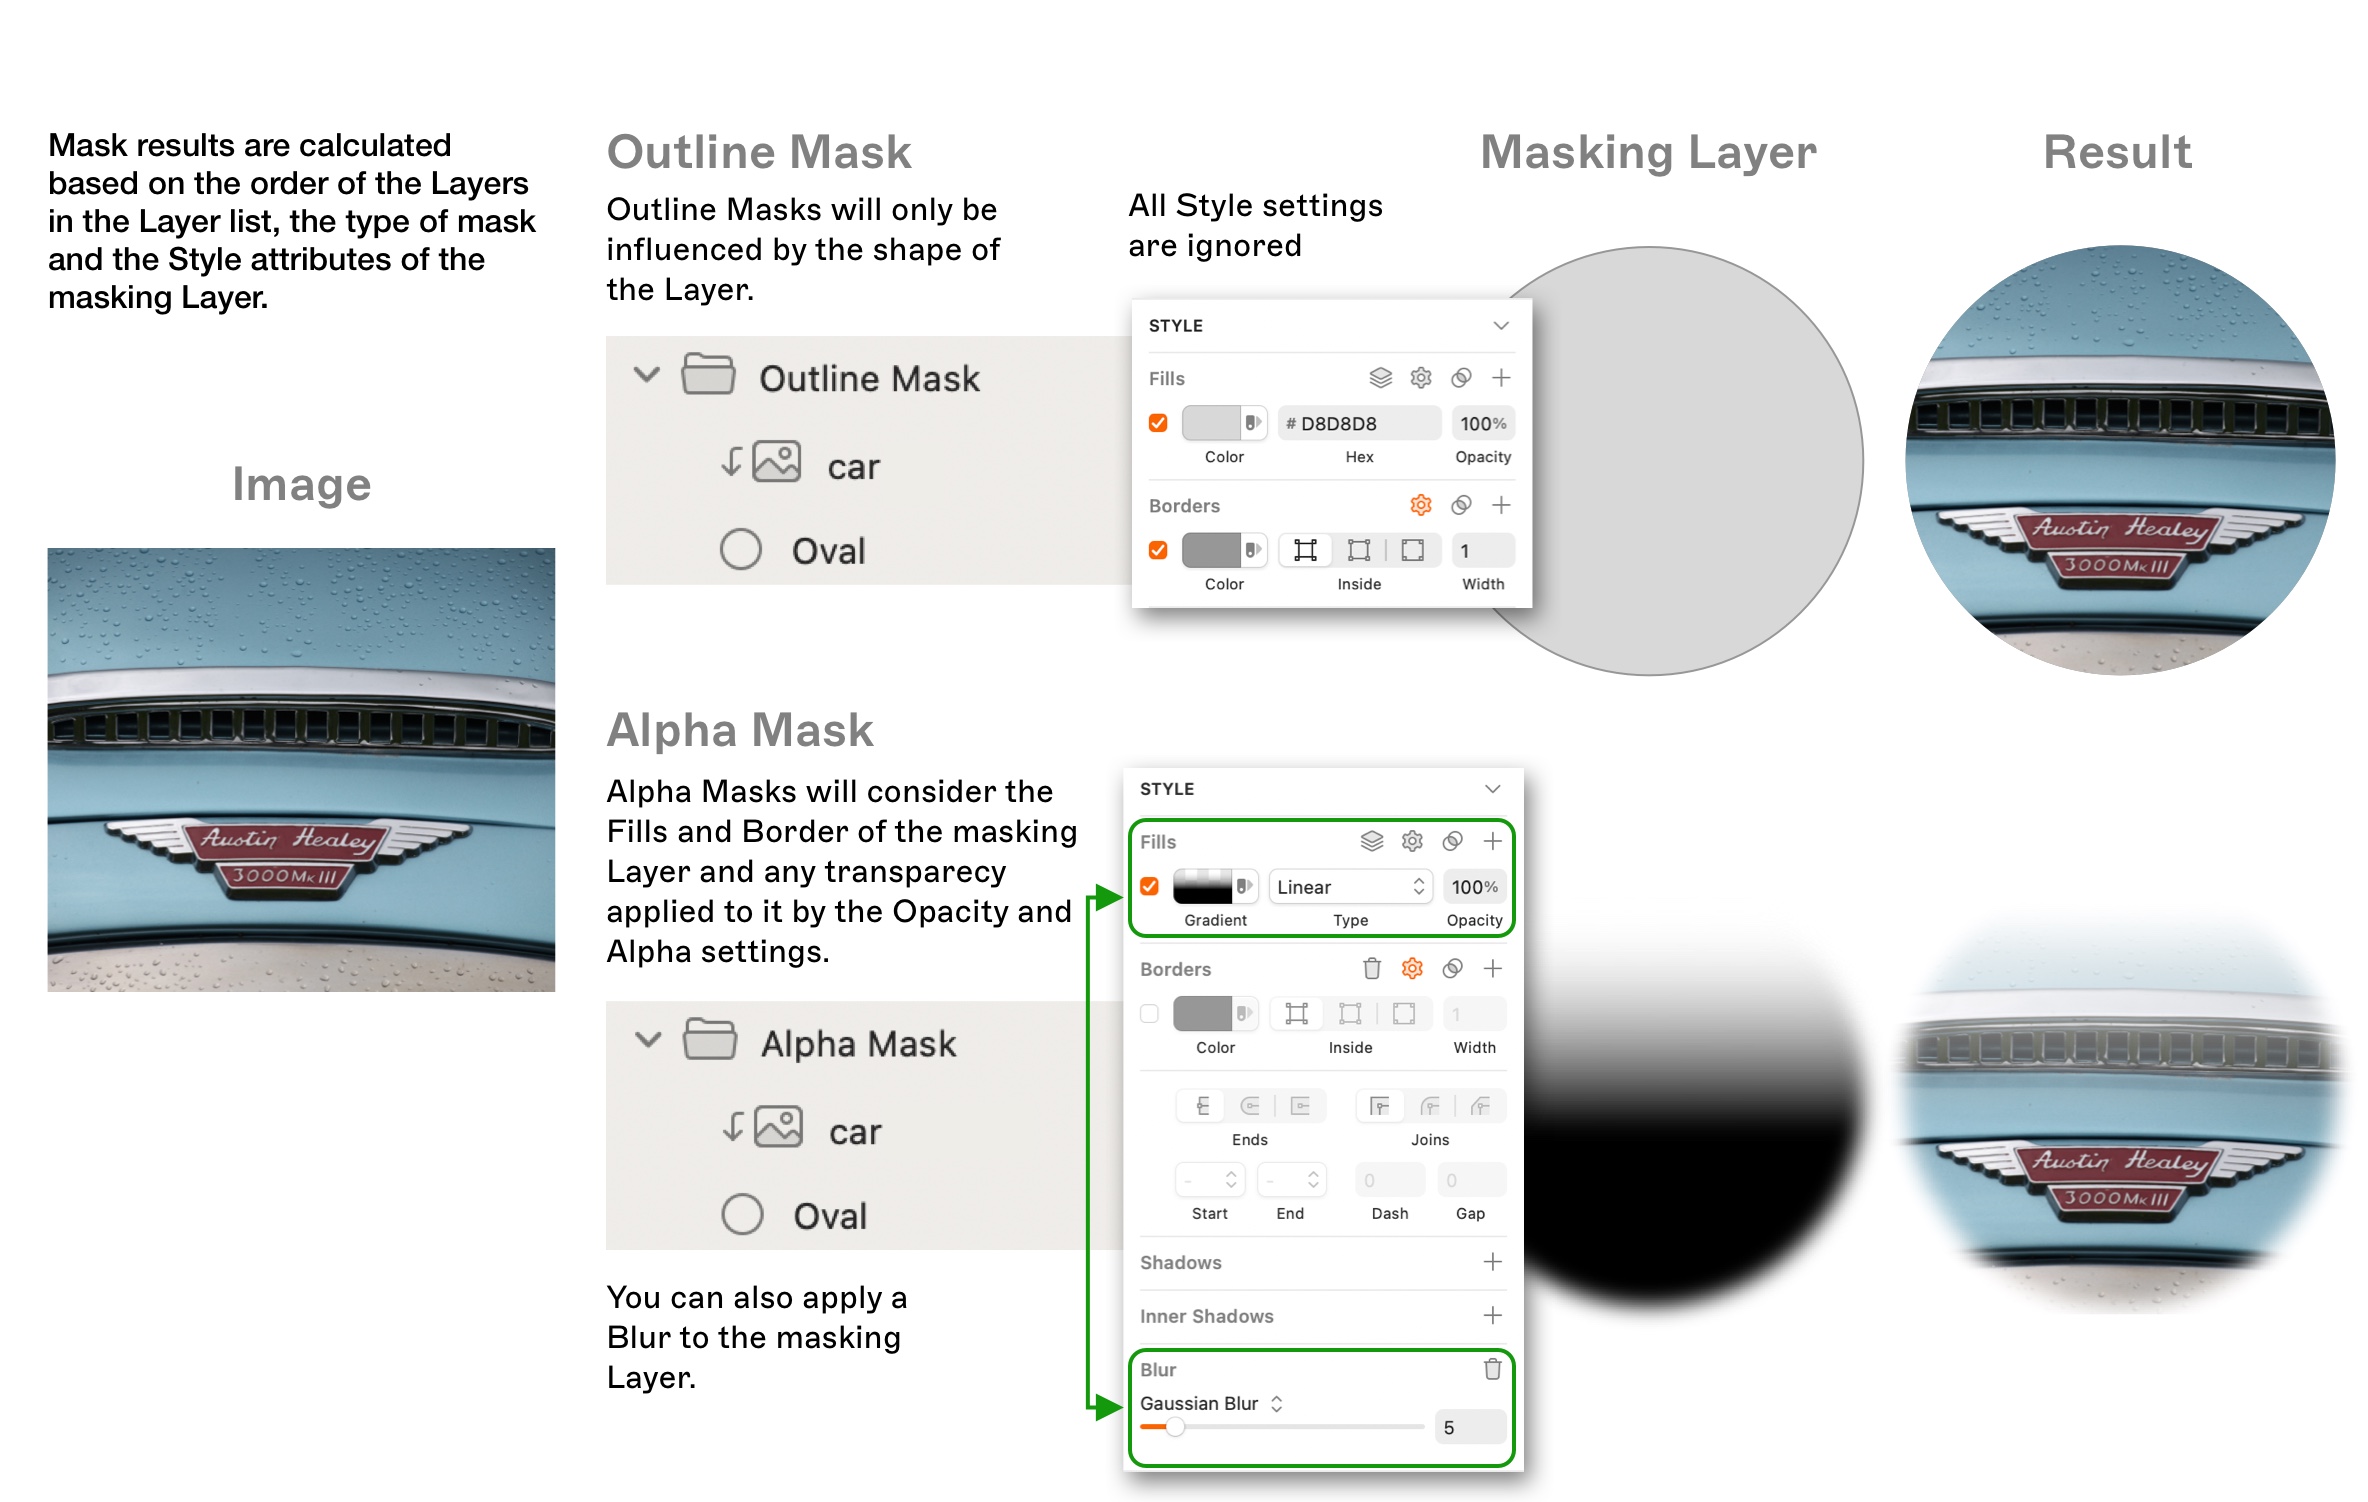
*A comparison of outline and alpha masks*
An alpha mask uses a layer’s transparency to define what’s visible, making it ideal for creating soft edges, fades, or using gradients and images with transparent backgrounds.An outline mask uses a layer’s shape as a hard boundary, resulting in an all-or-nothing, sharp-edged cut-out.
--------------------------------------------------------------------------------
title: "Color profiles"
description: "Learn how to choose the right color profile in Sketch with the help of our step-by-step guides and video tutorials."
last_modified: "2026-02-06"
url: "https://www.sketch.com/docs/designing/color-profiles/"
--------------------------------------------------------------------------------
## Color profiles
Color profiles define how colors in your designs appear, helping maintain accurate and consistent color across different displays.
## Choosing between sRGB and Display P3
Depending on your project and the devices you’re designing for, you may want to work in sRGB or Display P3.
### sRGB
Using sRGB as your default color profile is a good choice if you’re mostly designing for web, or for a wide variety of displays. Modern web browsers follow W3C standards and use sRGB as their color profile. All phones, Macs, and most screens can display these colors.
### Display P3
Display P3 is better if your work contains many videos or photos. You can also use more vibrant colors when designing for devices that support the Display P3 color profile (like all modern iPhones).
> **Note:** Keep in mind that you’ll need a wide gamut display to see Display P3’s brighter and more vibrant colors. [What are color profiles?](/blog/what-are-color-profiles/)
## Setting a default color profile
Sketch supports sRGB and Display P3 color profiles. Sketch uses sRGB by default, but you can switch to Display P3 by heading to **Sketch** > **Settings** > **Canvas** and selecting **Display P3** from the Color Profile dropdown menu.
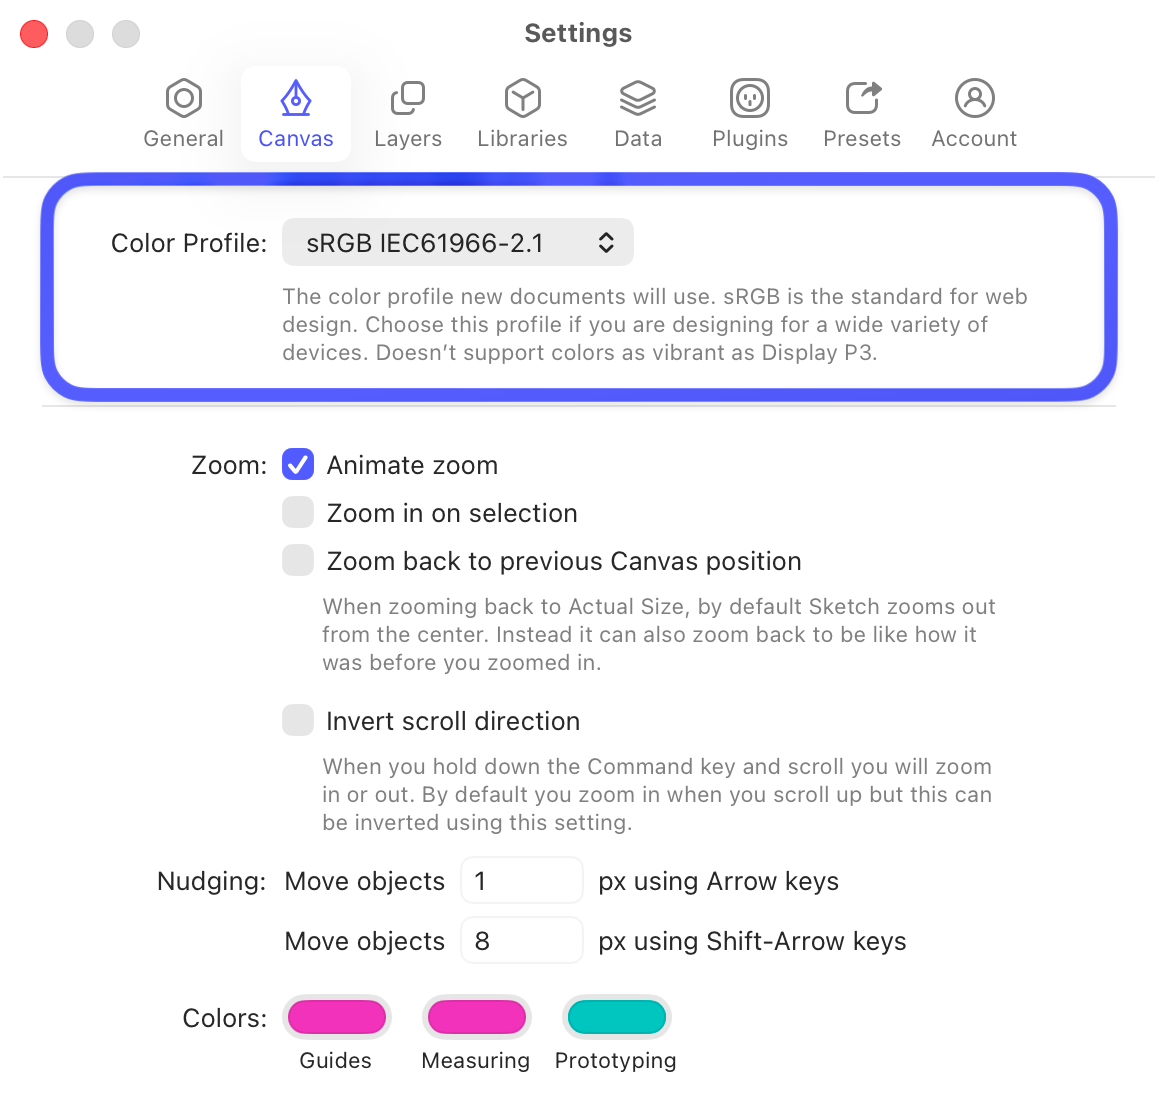
*You can change your default color profile in the Canvas section in Settings.*
## Changing a document’s color profile
You can change a document’s color profile from the Inspector. Click an empty area of the Canvas, then go to the **Color Profile** section, click the icon, and choose whether to **Assign** or **Convert** the new color profile.
### Assigning vs converting color profiles
When you select a different color profile for a document, you can either **Assign** or **Convert** it.
If you **Assign** a new color profile to a document, Sketch will keep the same RGB values between color profiles. Some colors in your document may change slightly, especially the brighter colors.
Unlike the Convert option, this won’t change the underlying RGB values, which means you can switch back and forth as often as you like without losing color data.
If you choose to **Convert** your document to a new color profile, its underlying RGB values will change but the output will look as similar as possible on the Canvas and exported images.
> **Note:** Take extra care when you convert a document from Display P3 to sRGB, because the Display P3 color profile renders brighter colors than sRGB. If you convert to sRGB, some colors will look less bright — and converting from sRGB back to Display P3 won’t bring this brightness back.
--------------------------------------------------------------------------------
title: "Images"
description: "Learn how to work with images in Sketch with the help of our step-by-step guides and video tutorials."
last_modified: "2026-04-07"
url: "https://www.sketch.com/docs/designing/images/"
--------------------------------------------------------------------------------
## Images
Aside from working with vector-based shapes, you can also add and edit images directly in Sketch.
## Inserting images
The simplest way to add an image to a Sketch document is to drag it straight from your Mac or a browser window (or right-click to copy, then paste it into Sketch). Alternatively, choose **Insert** > **Image** from the Menu Bar and select an image, or choose **Image** from the Toolbar.
> **Note:** Do you use Sketch in full screen mode but want to quickly insert an image from your Mac? As you drag an image from Finder, press ⌘⇥ to quickly bring Sketch to the foreground again, then drop your image.
When you drag and drop multiple images onto the Canvas, they automatically arrange in a grid. If the images vary in size, they fall into a masonry-style grid to reduce empty space.
## Replacing images
If you’ve resized and styled an image layer in your document but want to replace the image itself, select it, control-click and choose **Replace Image** in the contextual menu.
You can also hold ⌘ while dragging an image from your Mac to replace an existing image layer or image fill, or to add a new image fill to a shape or frame.
If you’ve resized an image and want to restore its original dimensions, control-click on the image layer and choose **Reset to Original Size**.
## Reducing image size
Adding lots of images to a document will increase its file size and ultimately start to slow down the Mac app. To help prevent this, try to reduce an image’s size using **Layer** > **Image** > **Minimize File Size** from the Menu Bar. Sketch will also tell you if it can’t reduce the file size any further.
> **Note:** If your document contains lots of images, try **File** > **Reduce File Size** as a quicker alternative to reducing image sizes one by one.
## Editing images
To edit an image you added to the Canvas, double-click on it to bring up the image edit tools in the toolbar. Alternatively, select the image and press ⏎ on your keyboard.
Image editing tools include:
- **Selection:** Drag a rectangular selection on the image.
- **Magic Wand:** Click and drag anywhere on the image to select a specific area. The further you drag, the greater the selection tolerance.
- **Crop:** Crop the image to the area you’ve selected.
- **Fill:** Replace the selected area with a solid color. Make a selection first, then click **Fill** in the toolbar and choose a color.
After you’ve selected an area, you can hold ⇧ to add more selections — or hold ⌥ and drag over selections to remove them.
*The options you’ll see when you make a selection marquee on an image.*
When you’re done editing, click anywhere outside the image, or press Esc or ⏎. If the image has a transparent background, the app automatically trims any transparent edges when you exit.
In addition to image editing tools, you can apply various **Styles** to your image in the Inspector, including [Fills](/docs/symbols-and-styles/styling/fills/#adding-a-new-fill), inner and outer [Shadows](/docs/symbols-and-styles/styling/shadows/), as well as various types of [Effects](/docs/symbols-and-styles/styling/effects/).
You can make non-destructive color adjustments to images using the **Color Adjust** effect in the Inspector. Select an image, apply the effect, then use the sliders or enter values to change hue, saturation, brightness, or contrast.
To reset a slider to its default value, double-click it.
To restore the original colors, toggle the effect off in the Inspector, or hold ⌥ to remove it completely.
You can turn off Effects and Color Adjust changes entirely by pressing the button in their respective panels in the Inspector.
## Removing an image background
You can automatically remove the background from any image in your document, whether it contains a person or an object. This makes it easy to isolate subjects and blend them smoothly into your designs without relying on external tools.
When you use background removal, it removes the background and keeps the main subject intact. The process runs locally and may take a few moments depending on the size and complexity of the image.
To remove the background from an image:
1. Insert an image onto your canvas
1. Click the **Remove Background** button.
You can also use **Layer** > **Image** > **Remove Background**, or open the [Command Bar](/docs/interface-and-settings/the-mac-app-interface/the-command-bar/) and search for _Remove background_.
> **Note:** You can remove the background from multiple images at once, although processing several large images together may take a bit longer.
Background removal doesn’t automatically trim the resulting transparent edges. To trim them, click **Trim Transparency** in the toolbar, choose **Trim Transparent Pixels** from **Layer** > **Image**, or control-click the image and choose **Trim Transparent Pixels** from the contextual menu.
## Trimming transparent pixels
**Trim Transparent Pixels** removes the invisible empty space around an image so the layer boundary matches what you see. This keeps alignment and spacing accurate.
Select an image and click **Trim Transparency** in the toolbar, or choose **Trim Transparent Pixels** from **Layer** > **Image**. You can also control-click the image and choose **Trim Transparent Pixels** from the contextual menu. The option only appears when the image has transparent edges.
--------------------------------------------------------------------------------
title: "Text"
description: "Learn how to edit text in Sketch with the help of our step-by-step guides and video tutorials."
last_modified: "2026-06-22"
url: "https://www.sketch.com/docs/designing/text/"
--------------------------------------------------------------------------------
## Text
## Adding text
Press ⌘T and click anywhere on the Canvas to add a text layer. Alternatively, click on the Insert menu in the toolbar and select **Text**.

*Press ⌘T or select Text from the Insert menu on the Toolbar *
You can also click, then drag to create a fixed size text box where text will wrap to a new line instead of expanding the size of the text box.

*Click and drag to created a fixed size text box*
### Editing text
To edit a text layer, double-click it on the Canvas, or select it and press ↵ or ⌘↵. When you enter edit mode, all text is pre-selected so you can start typing to replace it. If you’re already editing text and click another text layer, the text cursor moves to where you click.
### Adding rich text
Rich text preserves your formatting, like bold or italic styles, when you insert text in Sketch. Press ⇧⌥⌘V to paste as rich text or press S to launch the Command Bar and type _Rich text_.

*Paste rich text with the shortcut or with the Command Bar*
### Adding text to a vector path
To add text to a vector path, you’ll need both a text layer and a shape layer below it in the Layer List. Select the text layer and then select **Text** > **Text on Path** from the Menu Bar. Finally, drag your text layer towards your shape layer and let it snap into place.

*How to add text to a vector path*
To remove text from the path, select **Text** > **Text on Path** again.
## Formatting text
You’ll find many ways to change how your text looks in the Inspector, along with a few more advanced options in the Text menu in the Menu Bar.
> **Note:** Sketch measures all layers (including text) using the macOS coordinate system’s points, where one point equals one pixel on the Canvas by default. [Learn more](/support/features/mac-app/points-vs-pixels/).
### Formatting text in the Inspector
Select a text layer on your Canvas to see most formatting options and properties in the Inspector.
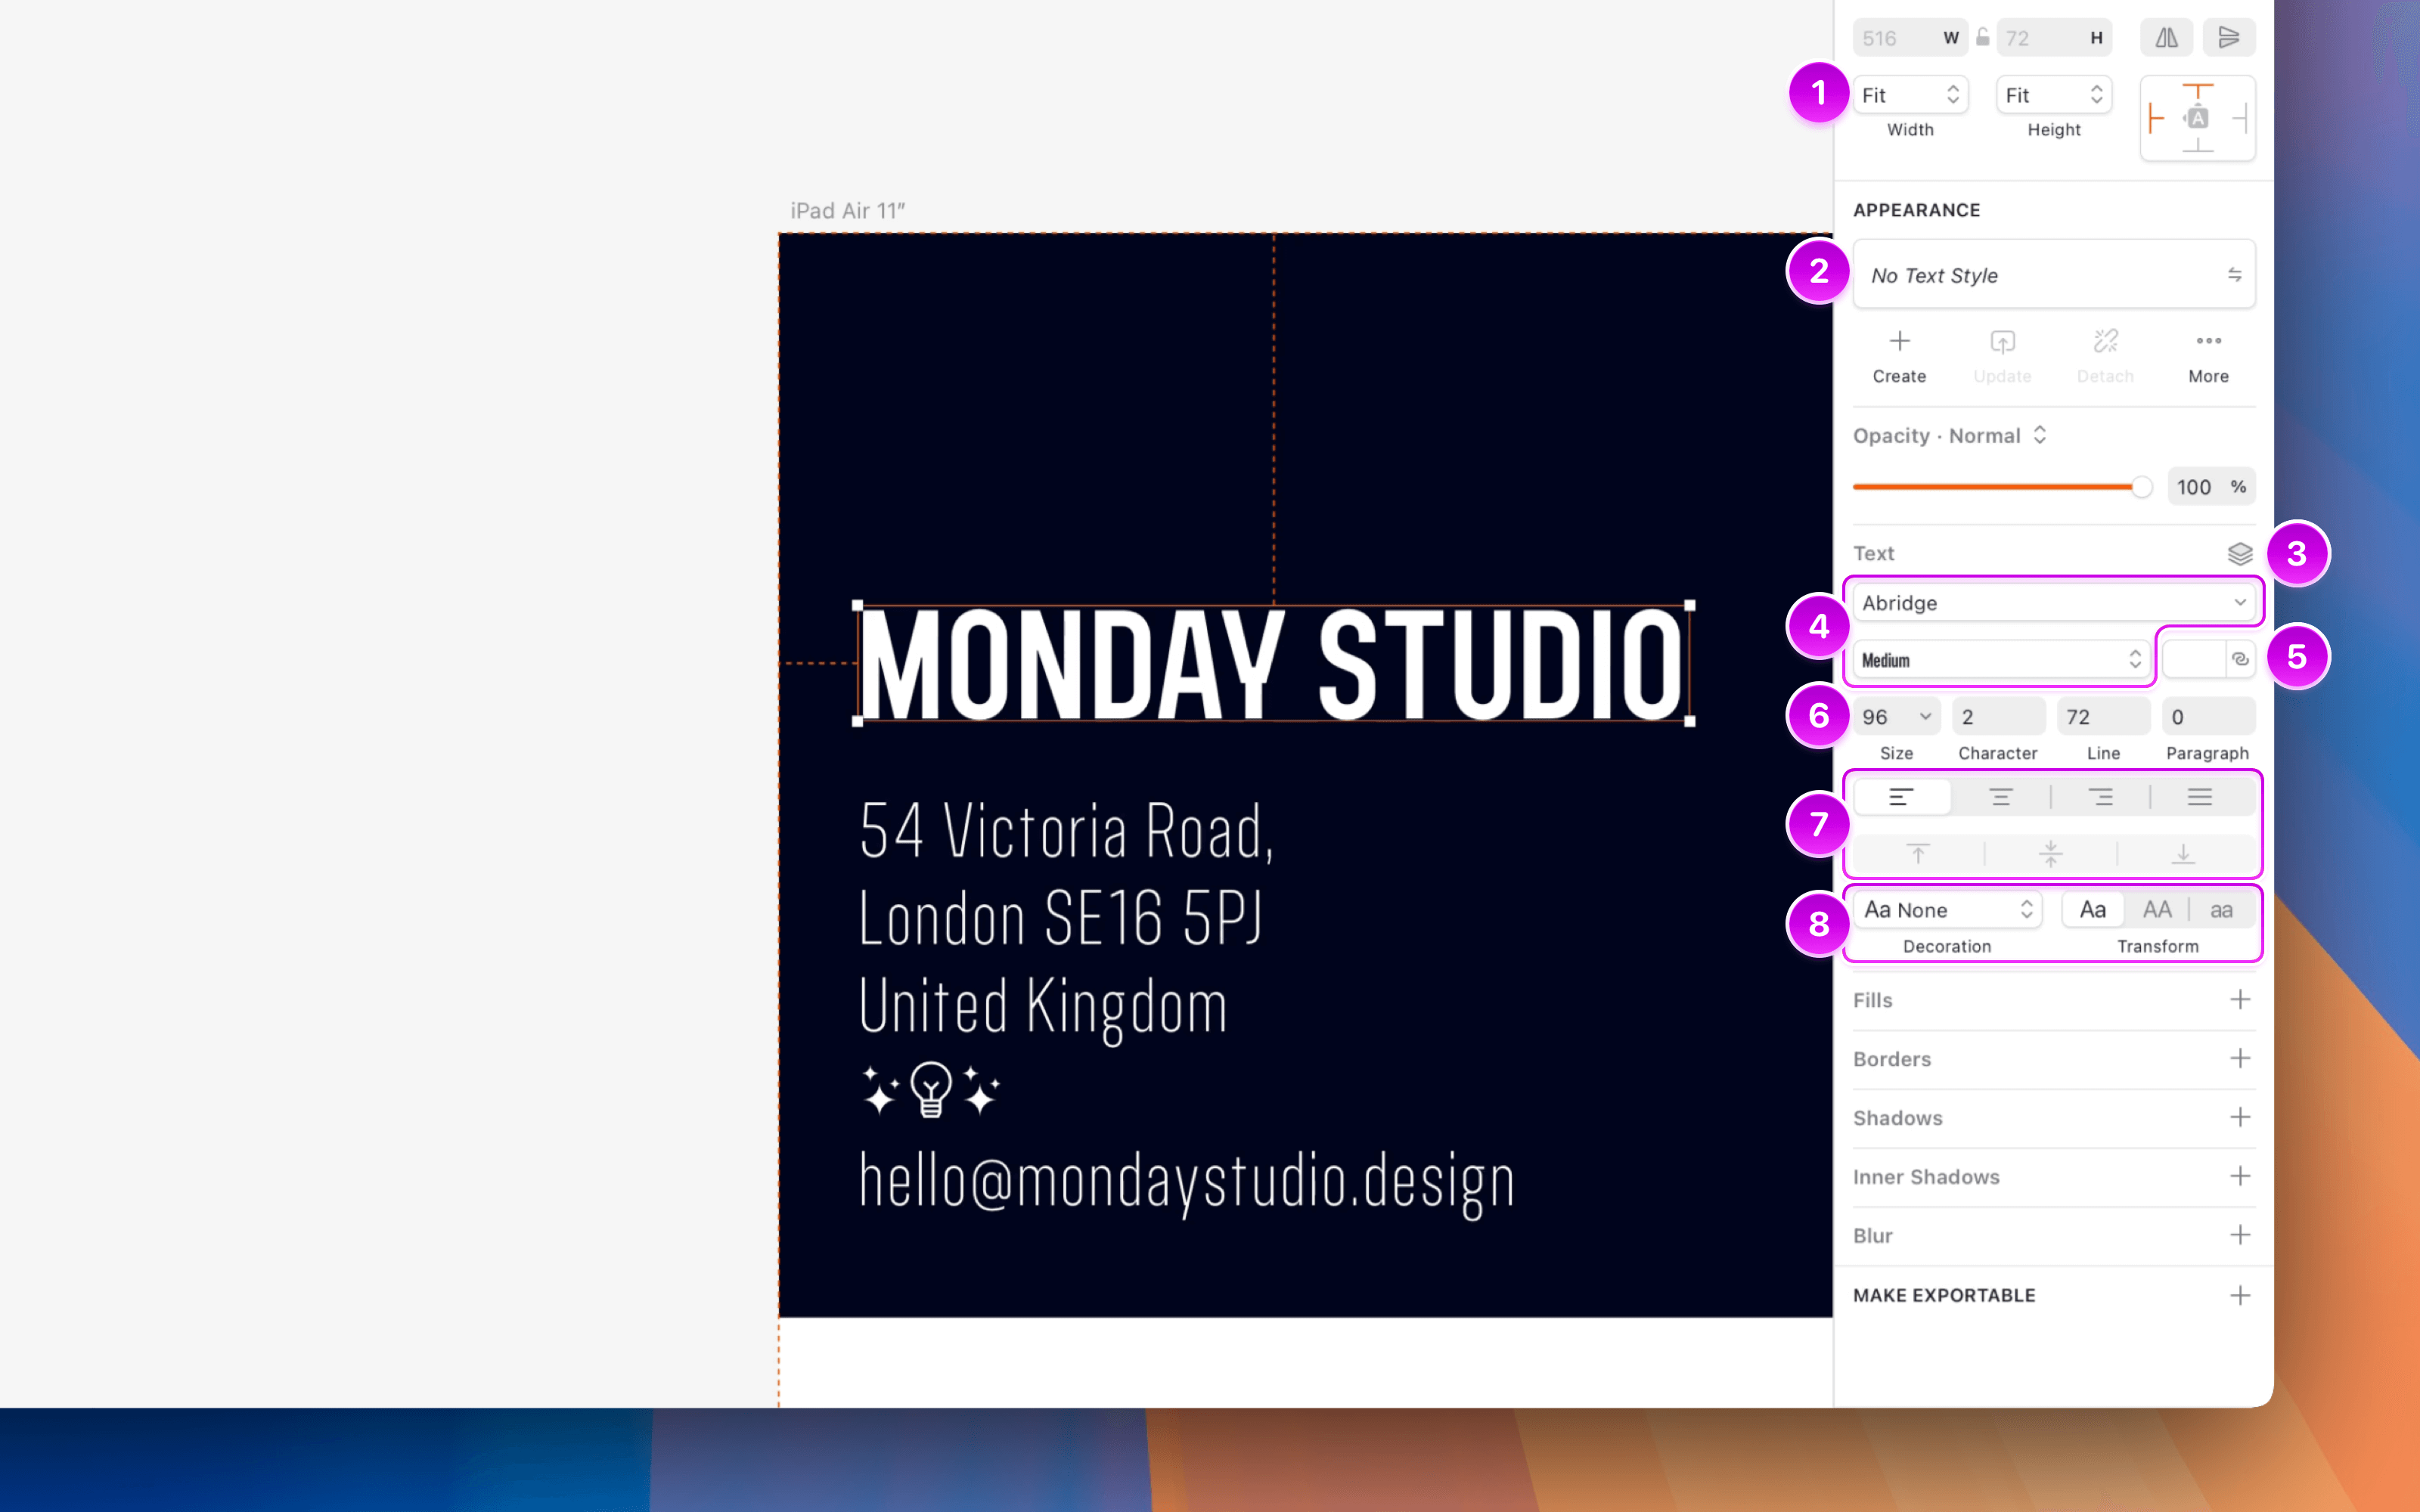
*Text formatting options in the Inspector*
1. Use the Width and Height selectors to control how text layers resize. You can choose from Fit, Fixed, or Relative:
– **Fit** adjusts the layer to match the size of its content.
– **Fixed** keeps the layer at a set size, wrapping the text within it.
– **Relative** resizes the layer based on its parent.
1. Apply [Text Styles](/docs/symbols-and-styles/text-and-layer-styles/text-styles/) using the pop-up menu located below the Appearance section in the Inspector.
1. Use the **Data** button to populate text layers with a [data source](/docs/designing/data/).
1. Use the font family and font weight dropdowns to set your text layer’s typeface and weight. Click the dropdown to open the **Fonts panel**, which has two tabs: **In Use** shows every font used in your current document, and **All Fonts** shows everything available on your system.
1. Click the color well to apply a solid color, or use the icon to apply a Color Variable.
1. Enter values for size, character spacing, line height, and paragraph spacing.
1. Use the alignment controls to adjust horizontal and vertical text alignment.
1. Use the **Decoration** options to underline or strikethrough .
1. Use **Text transform** to set text to uppercase or lowercase . These options are non-destructive, so you can switch formats without losing the original formatting.
**Note:** The Mac app measures all layers (including Text) using the macOS coordinate system’s points — where one point equals one pixel on the Canvas. [Read more about measurements in the Mac app](/support/features/mac-app/points-vs-pixels/).
> **Note:** If the font you’ve selected supports OpenType features you’ll find them at the bottom of the **Text** menu. If the font has variable options, you’ll find these in the Inspector.
### Formatting text using the Text menu
Open the **Text** menu in the Menu Bar to find additional text formatting options, including:
* **Bold**, **Italics** and **Underline**
* **Bigger** or **Smaller** text
* **Transformations**, including uppercase and lowercase
* **Lists**, including unordered and ordered lists
* **Kern**, **Ligature** and **Baseline** options.
### Editing multiple text layers
To edit more than one text layer at the same time, hold ⇧ and select every text layer that you want to edit — either on the Canvas, or from the Layer List. Use the **Text** menu in the Inspector to change the styling of your text.

*How to edit multiple text layers at the same time*
### Customizing lists
To create a list, select a text layer with line items separated by returns, then go to **Text** > **List Type** and choose either **Numbered** or **Bullet**.

*How to create a list*
You can customize your list’s appearance, starting number (for numbered lists), prefixes, suffixes, and bullet or number type by highlighting your list and choosing **Text** > **List Type** > **List Options**.

*How to change a list’s style*
### OpenType features
If you’re using a font that supports OpenType features, select your text and choose **Text** > **OpenType Features** from the Menu Bar, then select and enable the OpenType features you want to use.
### Changing text color
You can apply different colors to different parts of your text using the **Color Picker** in the Inspector’s **Text** panel.
Right-click the color preview to copy its value in different formats, including HEX, RGB, HSL, and SwiftUI.

*You can change text color using the Color Picker in the Inspector*
Alternatively, you can apply a fill from the **Fills** panel in the Inspector — as well as apply different types of [gradients](/docs/symbols-and-styles/styling/gradients/). Keep in mind that fills will override any text color you’ve previously set with the Color Picker.

*Add gradients to text using the Fills option in the Inspector.*
### Adding borders to text
To add borders to text layers, go to the Borders section in the Inspector and click the icon next to a border to explore more options. For more details, see [Border options](/docs/symbols-and-styles/styling/borders/#customizing-borders).
### Adjusting line height
When you create a new text layer, its line height will automatically adjust to match its font size.
If you manually adjust the line height, typeface or font size of a text layer, the text will reposition itself so that the first baseline will always stay in place. Similarly, if you change the typeface or font weight in a paragraph, the line height will stay consistent.
> **Note:** To revert to the text’s default line height, simply delete the custom value in the **Line** field in the Inspector and press ⏎ on your keyboard.

*The text baseline stays consistent, regardless of manual adjustments to line height, typeface or font size*
## Converting text to outlines
Select a text layer and choose **Layer** > **Convert to Outlines** from the Menu Bar. Alternatively, use the Command Bar or press ⌥⌘O. Each character in the text is converted into a vector shape and grouped together.
> **Note:** Converting text to outlines is a destructive process — you won’t be able to edit the text itself again. Also, keep in mind that converting lots of text to outlines can slow down Sketch.

*How to convert text into vector shapes*
If you apply a Boolean operation to a text layer, it will have the same effect as converting it to outlines, except you can still edit the text.

*You can still edit text after applying a Boolean operation to a text layer*
--------------------------------------------------------------------------------
title: "Data"
description: "Learn how to use text, image and linked data in Sketch with the help of our step-by-step guides and video tutorials."
last_modified: "2026-04-07"
url: "https://www.sketch.com/docs/designing/data/"
--------------------------------------------------------------------------------
## Data
With the Data tool, you can add different images and text to your designs to create realistic mockups and prototypes.
Sketch comes with several types of data sources by default, including:
* **Text Data:** names and cities.
* **Image Data:** a diverse set of profile pictures for avatars and tiles.
* **Linked Data:** a set of user profiles that include a picture and a short bio.
The [Unsplash](https://github.com/sketch-hq/unsplash-sketchplugin) plugin comes pre-installed with Sketch, which you can use to search for and insert images from the Unsplash library or an image at random. You can also use data sources using third-party Data plugins.
## Adding data to layers
To quickly add data to your Canvas as a new layer, open the **Insert** + menu in the Toolbar and select **Data** , or choose **Insert** > **Data** from the Menu Bar. Then, select the the text, image or linked data you want to add.
To add data directly into an existing layer, first select your layer, open **Layer** > **Data** in the Menu Bar, then choose a **Text** or **Image** data type (Sketch will always insert **Linked** data as its own group of layers).
> **Note:** Keep in mind that you can only add image data to an existing shape or image layer. Similarly, you can only add text data to an existing text layer.

*You can quickly add or update image and text data using the Data tool*
By default we’ll show random data from your data source. However, you can toggle off the **Insert Data at Random** checkbox in the **Data** menu to show data in the same order as it is in your source.

*Toggle off the Insert Data at Random checkbox to insert data in the same order as your data source*
### Refreshing and disconnecting data
To refresh images or text from a data source, select one or more data layers, open the **Insert** + menu in the Toolbar, then choose **Data** > **Refresh Data**. Alternatively, choose **Layer** > **Data** > **Refresh Data** in the Menu Bar, or press ⇧⌃D (version 87 and earlier: ⇧⌘>D).
To disconnect a data source, select one or more data layers, open the **Insert** + menu in the Toolbar, choose **Data** > **Disconnect from Data Source**. Alternatively, choose **Layer** > **Data** > **Disconnect from Data Source** in the Menu Bar.
Keep in mind that disconnecting a layer from a data source won’t restore its original contents.
### Using data with Symbols
You can add multiple data sources to different layers within a [Symbol](/docs/symbols-and-styles/).
To refresh all images or text data that you already have in a Symbol, select it and head to **Layer**, **Data**, then choose either **Images** or **Text** in the Menu Bar.
You can also add or refresh text data in a Symbol using the **Data** button in each Symbol override in the Inspector.
When you select a Symbol instance, the **Images** section in the Inspector lists all image layers in the Symbol. From there you can:
- **Replace an image**: click **Replace Image** next to any image to upload a new file in its place.
- **Refresh data**: click the refresh icon next to the **Images** heading to refresh all images at once, or next to an individual image to refresh just that one. Make sure the image layer in the Symbol Source has data connected.

*You can easily add or refresh data via Symbol overrides*
## Adding new data sources
You can create your own data sources and add them to Sketch via **Sketch** > **Settings** > [**Data**](/docs/interface-and-settings/mac-app-settings/data/).

*How to add a new data source via Settings*
### Creating a new data source
To create your own text data source, create a plain text (.txt) file with each data value on a new line, for example:
```
Afghanistan
Albania
Algeria
Andorra
Angola
...
```
For a new image data source, all you need to do is create a folder containing all the different images you want to use, then add it via the **Data** tab in [Settings](/docs/interface-and-settings/mac-app-settings/).
You can use JPG, PNG, TIFF, GIF, and (from v90 onwards) WebP file formats for image data.
> **Note:** Save your data sources in a location that won’t change. If you move a data source elsewhere, you’ll need to add it to Sketch again with the updated location.
## Using linked data
For linked data you can use JSON files that combine different sets of data in meaningful ways, making it easier to stress test your designs more realistically.

*Use linked data to update different types of data all at once*
### Creating a JSON file with linked data
To get started, you’ll need a JSON file that contains data formatted like this:
```json
[
{
"Photo": "baobab.jpeg",
"Location": "Menabe, Madagascar",
"Title": "Avenue of the Baobabs",
"Trees": "20 trees",
},
{
"Photo": "laurel.jpeg",
"Location": "Madeira, Portugal",
"Title": "Laurel Forest",
"Trees": "300 trees",
},
{
"Photo": "bamboo.jpeg",
"Location": "Kyoto, Japan",
"Title": "Sagano Bamboo Forest",
"Trees": "2000 trees",
}
]
```
You can also include nested data structures in your JSON files and use them in Symbols and groups. Use the group’s name as a nested group in the JSON structure. The nested data will appear in a group within each set of data.
```json
[
{
"name": "Anje Keizer",
"avatar": "/Faces/109.jpg",
"location": "Bangkok",
"bio": "Dog lover 🐕, mahjong champion 🀄️, and traveler 🗺 ",
"social": {
"handle": "@akeizer01",
"bio": "Loving life and living in Dallas, go Mavs!"
}
},
]
```
Add your JSON file via **Sketch** > **Settings** > **Data** > [**Add Data**](/docs/interface-and-settings/mac-app-settings/data/), as you would with any other data source.
> **Note:** Save your JSON file locally on your Mac — and keep both the JSON file and the images in the same folder. We also recommend [resizing your images](/docs/designing/images/#reducing-image-size) for better performance.
### Using linked data in an existing design
In the Layer List, name layers in a group or Symbol with exactly the same names you’ve used in your JSON data file. Once you’ve done that, select your group or Symbol and choose your new JSON data source from **Data** in the Toolbar, or via the contextual menu when you Control-click your selection.
> **Note:** If you select a group of layers or multiple Symbols, you won’t be able to apply Linked Data from the Inspector. Instead, apply linked data using **Data** in the Toolbar, or the contextual menu (Control-click).

*How to add linked data to an existing design*
### Using linked data on a blank Canvas
You can also use linked data to add a new set of layers directly to the Canvas. From the **Insert** menu, choose **Data** and select the linked data source you want to use. You can then [arrange your linked data as a grid](/docs/designing/layer-basics/aligning-layers/#make-grid) to add more entries, and choose [Refresh Data](#refreshing-and-disconnecting-data) to refresh each layer with new information.

*How to add linked data to a blank Canvas*
### Linking with data plugins
You can also install data plugins just like regular [plugins](/docs/interface-and-settings/plugins/), which will open up a whole new range of data sources for you to use.
If you’re interested in creating a data plugin, check out our [developer documentation](https://developer.sketch.com).
--------------------------------------------------------------------------------
title: "Importing & exporting"
description: "Learn how to import and export assets in Sketch with the help of our step-by-step guides and video tutorials."
last_modified: "2026-06-22"
url: "https://www.sketch.com/docs/designing/importing-and-exporting/"
--------------------------------------------------------------------------------
## Importing & exporting
With Sketch you can easily export presets, slices, export CSS and SVG code [from any browser](/docs/developer-handoff/#exporting-assets), and import other files.
## Importing images
The quickest way to import files into Sketch is to drag and drop them onto the dock icon or directly onto the Canvas. You can import:
- PNG, JPG, GIF, TIFF and WebP bitmap images
- SVG files
- SVG code (copy the code and paste to create a layer)
- PDF documents (each page will be imported as its own frame)
- AI and PSD files (limited support, only as a flattened layer)
> **Note:** If you’re importing an animated GIF or WebP image, Sketch will only import the first frame. Note that Sketch [no longer supports EPS files](/support/troubleshooting/mac-app/import-eps-files/) since Apple dropped built-in support for PostScript files in macOS Sonoma — which includes EPS documents.
## Importing Figma files
Open the Mac app and press ⇧⌘O or select **File** > **Open from your Mac** from the menu bar to open the Figma file (.fig) from Finder.
Alternatively, open Finder, find the Figma file you want to import, control-click it, and choose **Open With** > **Sketch**.
> **Note:** The Figma importer isn’t available in the Mac App Store version of Sketch. If you need to import `.fig` files, download Sketch directly from our [releases page](/releases/mac/).
## Unsupported file formats
If another design tool uses a closed or proprietary format that Sketch can’t open directly, try exporting it from the original app to a supported format first, or use a trusted third-party converter before importing it into Sketch.
## Exporting frames and assets
To export frames or assets in different sizes or formats (and allow others to [export all assets from the web app at once](/docs/developer-handoff/#exporting-assets)), select them and click **Make Exportable** at the bottom of the Inspector. Then, press the **Export Selected** button.
**Note:** Developers can export individual layers without any set up in the Mac app.
Alternatively, choose **File** > **Export** > **All Assets** in the menu bar — or press ⇧⌘E to bring up the Export dialog. Select the items you want to export, then click **Export** to open the MacOS save dialog. This option will only export frames that are marked as exportable.

*You can select which items to export before saving them to your Mac*
Once Sketch has exported your assets, you’ll see an `X Files successfully exported` confirmation message at the bottom of the Canvas, where X is the number of created files. If you export just a single file, you’ll see its filename instead.
> **Note:** Click the arrow in the confirmation message to open the folder where your items were saved to.
### Exporting layers as PNGs
To export one or more layers as PNGs, select and drag them from the Layer List to your desktop (remember to make them exportable via the Inspector first), or select your layers and press ⌘E.

*You can quickly export a layer by dragging it to your desktop*
You can copy any layer or frame and paste it directly into another app as an image. If the application you’re pasting into supports vector data, then your pasted layer will stay as a vector that you can safely scale up. If the app doesn’t support vector data, then Sketch will paste your layer at 2x the resolution.

*You can copy and paste high-quality images directly from Sketch*
### Exporting frames and layers in PDF
To export layers as PDFs, select them in the Layer List, then press and hold ⌥ before dragging your layers.
To export a selection of (or all) frames as a PDF, choose **File** > **Export** > **Export Frames to PDF** and select your frames. You can then choose to include frames’ titles, render them as bitmaps or include frames’ comments (only Workspace documents). You can also export comments from Workspace documents in CSV format by heading to **File** > **Export** > **Comments to CSV**. To choose the order in which frames export, head to the Layers panel in [Settings](/docs/interface-and-settings/mac-app-settings/layers/).
If you want to download assets and inspect designs from any browser, head to our [developer handoff documentation](/docs/developer-handoff/).
### File formats for exporting
**Bitmap**
Bitmap images are flattened versions of anything you export in the Mac app, so they’ll open in other apps as a single layer. Sketch can export to PNG, JPG, HEIC, TIFF and WebP.
Depending on the file format you choose, you may also see further export options:
- **Save for the web:** Strips out additional file data from some images, such as EXIF metadata and color profiles.
- **Interlace PNG:** On the web, interlaced PNGs will load at their full size as soon as possible and download more data until they reach full quality.
- **Progressive JPG:** Similar to interlaced PNG, Progressive JPGs are blurry when they start loading and gradually become sharper.
- **Quality:** For JPG and WebP images, lower quality images will have a smaller file size.
**Vector**
Vector formats like SVG, PDF and EPS preserve paths, so they scale cleanly and are easy to edit after export. Use the Size dropdown in the Export panel to set the Canvas size, and adjust the scale when exporting SVG layers. Unlike bitmap formats, changing the scale won’t affect image quality — vectors look sharp at any size.
> **Note:** Some effects aren’t supported in all file formats, including transparent gradients in PDFs, and inner and outer borders in SVGs.
### Printing frames or slices
Choose **File** > **Print** and select the frames you want to print. If you don’t have any frames yet, you can print slices instead.
### Using export presets
The Mac app exports everything as a PNG at its actual size (1x) by default, but you can assign different export settings from the [Export Presets](/docs/interface-and-settings/mac-app-settings/presets/) panel in the Inspector:

*Image export options in the Inspector*
1. **Preset Sets** — Click the to choose a set of pre-defined presets. You can also create new sets of presets and remove them from here.
1. **Create a Slice** — Click the to create a slice directly on the layer you’ve selected with the export presets you’ve set.
1. **Add Preset** — Click the **+** to add another preset for this layer to your export settings.
1. **Size** — Select a size from the drop-down menu, or create your own by typing directly into the Size field. You can scale up (2x, 3x, etc.) and down (0.5x, 0.25x) infinitely, or define a specific height or width in pixels (128h or 128w, respectively).
1. **Prefix/Suffix** — If you’re exporting the same image at different scales, you can add a prefix or suffix to differentiate between each of them using the **Prefix/Suffix** dropdown, and add custom text in the filename field.
1. **Format** — Pick a [file format](#file-formats-for-exporting) from the drop-down menu. Switching from an image format to a vector format (SVG, PDF, or EPS) resets the scale to 1x, unless you had already changed it from the default.
1. **Remove Preset** — Click the **X** to remove an export preset.
1. **Preview** — Shows you how your layer will look when you export it. You can also drag and drop this directly onto your desktop or into another app for a quick export.
1. **Export Selected** — Click to export a particular layer using the presets above.
1. **Sharing** — Click for standard options to share via Mail, Messages, AirDrop, etc.
1. **[Trim transparent pixels](/docs/designing/images/#trimming-transparent-pixels)** — Depending on your selection, you can remove transparent pixels that surround content in groups or slices that you export.
### Using slices
Slices are a type of layer you can draw on your Canvas that will export anything within them as an image. You can select, resize, move, hide, and group slices just like other layers.
**Inserting slices**
Choose **Insert** > **Slice**, or press E. Then, click and drag anywhere on your Canvas to draw a new slice or click on any layer to create a slice around it.

*How to insert a slice*
> **Note:** It’s worthwhile giving a slice a descriptive name in the Layer List because Sketch will use it as the file name for any exports you create. And if you include a `/` in its name, Sketch will use anything you write before it as a folder name, and anything after as a file name within that folder.
As with other layers, you can set multiple [export presets](/docs/interface-and-settings/mac-app-settings/presets/) for slices.
**Customizing slices**
When you select a slice you’ll find a few additional options in the Inspector.
Checking **Trim Transparent Pixels** will remove any empty pixels around the edges of your slice’s content.
If you place a slice within a group, checking **Export Group Contents Only** will make sure that the export only includes content from within that slice’s group.
Finally, you can check **Background Color** and choose a color to apply a background color to your slice exports.
### Exporting CSS and SVG code
Select one or more layers in your document, then choose **Edit** > **Copy** > **Copy CSS Attributes** from the menu bar. Here’s an example of what a simple shape’s CSS looks like:
```css
/* Rectangle: */
background: #6dd400;
border-radius: 5px;
/* Rectangle: */
```
Copying SVG code works in a similar way. Select a shape layer, then choose **Edit** > **Copy** > **Copy SVG Code** from the menu bar..
--------------------------------------------------------------------------------
title: "Symbols and Styles"
description: "Styles are a means to change your design components in just about any way you like. Similarly, Symbols are reusable components that you can easily apply across all your designs.
In this section you’ll discover how styling can bring your designs to life, and how Symbols can optimize your workflow."
last_modified: "2026-04-07"
url: "https://www.sketch.com/docs/symbols-and-styles/"
--------------------------------------------------------------------------------
## Symbols and Styles
Styles are a means to change your design components in just about any way you like. Similarly, Symbols are reusable components that you can easily apply across all your designs.
In this section you’ll discover how styling can bring your designs to life, and how Symbols can optimize your workflow.
--------------------------------------------------------------------------------
title: "Styling"
description: "You can add and edit style properties in the Inspector for layers like shapes and text, as well as containers like Frames and Graphics."
last_modified: "2026-06-22"
url: "https://www.sketch.com/docs/symbols-and-styles/styling/"
--------------------------------------------------------------------------------
## Styling
You can add and edit style properties in the Inspector for layers like shapes and text, as well as containers like Frames and Graphics.
--------------------------------------------------------------------------------
title: "Corners"
description: "Learn how to adjust corner radius and styles in Sketch, including individual corners, corner types, and Auto corners."
last_modified: "2026-06-22"
url: "https://www.sketch.com/docs/symbols-and-styles/styling/corners/"
--------------------------------------------------------------------------------
## Corners
Corners let you round, cut, or curve the edges of any shape — with six [corner styles](#choosing-corner-styles) to choose from and control over each corner individually.
## Editing corners in the Inspector
On the Canvas, drag any circular corner handle to adjust all corners equally. Hold ⌘ and drag to adjust a single corner independently.
> **Note:** Don’t see any corner handles? Your shape could be too small to display the handles. Try zooming in to your shape.
You can also use the **Corners** section in the Inspector for precise control. It contains five controls:
- **[Corner settings](#corner-settings)** — Opens a panel to adjust corner smoothing
- **[Toggle maximum corner radius](#toggle-maximum-corner-radius)** — Sets the corner radius to its maximum value. Click again to set back to 0
- **[Toggle individual corners](#toggle-individual-corners)** — Toggles between Uniform and Individual corner modes
- **[Corner style](#choosing-corner-styles)** — Dropdown to choose the corner style
- **[Corner radius](#corner-radius)** — Displays and edits the corner radius value
### Corner settings
Click **Corner settings** to adjust the **Smoothing** slider. This option is only available when the corner style is set to [Smooth](#smooth-corners). Drag the slider from 0 to 100 for progressively smoother curves.
### Toggle maximum corner radius
Click **Toggle maximum corner radius** to set the corner radius to its maximum possible value, useful for creating capsules (for rectangles) or circles (for squares). Click again to set back to 0. Unlike a fixed value, Max adjusts dynamically as you resize the layer — a capsule stays a capsule at any size.
In Individual mode, if you focus on a specific corner field in the Inspector, the button sets only that corner to max instead of all corners.
You can also double-click a corner handle on the Canvas to toggle between 0 and the maximum radius, go to **Layer** > **Corners** > **Max**, or use the Command Bar.
### Toggle individual corners
Click **Toggle individual corners** to switch between:
- **Uniform mode**: Adjusts all corners with a single radius value. If corners have mixed values, the input shows _Mixed_.
- **Individual mode**: Shows four separate input fields so you can set each corner independently (top-left, top-right, bottom-right, bottom-left). This lets you control pairs of corners at the same time, or single out a corner and edit the other three.
On the Canvas in Individual mode, you can drag each corner independently. If two corners share the same value, dragging one adjusts both — hold ⌘ to adjust just one. Hold ⌥ to adjust all corners at once.
### Corner radius
Click the **Corner radius** field to enter a value or drag the slider. The slider ignores zero values — if two corners are set to 8 and two are set to 0, it adjusts only the non-zero corners.
> **Note:** If you set a radius larger than the shape can fit, corners scale proportionally to fit without overlapping.
### Corner style {#choosing-corner-styles}
Use the **Corner style** dropdown in the **Corners** section, or head to **Layer** > **Corners**. You can also reset corners to default via **Layer** > **Corners** > **Reset to Default** or use the Command Bar.
Choose from six corner styles:
- **[Auto](#auto-corners)** — Matches the corner radius and style of the nearest container automatically
- **Rounded** — Classic circular corners
- **[Smooth](#smooth-corners)** — Extra-smooth corners that create a ‘squircle’ effect. It includes a reference point that matches Apple’s system corner style, making it easy to align your corners with native macOS UI
- **Angled** — Corners with a straight diagonal cut
- **Inside Square** — Square corners that cut inward
- **Inside Arc** — Rounded corners that curve inward
## Smooth corners {#smooth-corners}
Smooth corners create the 'squircle' shape [Apple uses in its interfaces](https://hackernoon.com/apples-icons-have-that-shape-for-a-very-good-reason-720d4e7c8a14). They work on any angle, including angles greater than 90° (polygons, stars, and complex shapes), and adapt automatically when a shape lacks room for a full smooth curve.
To control how far the curve extends along the edges of your shape, use the **Smoothing** slider in the [Corner settings](#corner-settings) panel. Lower values keep corners closer to a standard rounded arc, while higher values spread the curve further for a softer, more continuous shape.
## Auto corners
Auto makes a layer’s corners follow its container. It calculates the radius from how far the layer sits from each edge, so the corners always look concentric — and stay that way as the container changes. When corner values differ, it picks the largest radius and the shortest distance.
Shapes with Auto corners don’t show corner handles on the Canvas, but the **Corner radius** field is still active. The automatic radius appears as placeholder text, so you can see what value Auto is applying at any time.
To override it, type a new value — the layer exits Auto mode and uses your value from then on. You can also click **Toggle maximum corner radius** to jump straight to the maximum radius, which switches the layer out of Auto too.
Symbol instances with Auto corners calculate their own concentric corner radius from their position in the parent container, rather than inheriting the radius from the source Symbol.
## Corners on shape groups
You can apply corner styles to shape groups created with [boolean operations](/docs/designing/shapes/boolean-operations/). Select the combined shape and adjust the corner radius in the **Corners** section — the corners apply to the combined shape, not to the individual shapes inside it.
To adjust corners on an individual shape within the group, expand the combined shape in the Layer List and select the shape you want to edit.
--------------------------------------------------------------------------------
title: "Fills"
description: "Add solid colors, gradients, images, and Color Variables as fills to your layers and frames. Apply multiple fills, adjust opacity, and swap fills and borders."
last_modified: "2026-06-22"
url: "https://www.sketch.com/docs/symbols-and-styles/styling/fills/"
--------------------------------------------------------------------------------
## Fills
Fills let you add color, gradients, or images to your shapes and layers. You can apply multiple fills to create depth and texture, adjust their blending, and control how they interact with other layer styles.
By default, new layers and frames have a single, solid color fill.
## Fill types
There are four different fill types you can use:
- **Solid fill** : a flat, single color.
- **Gradient**: a blend between two or more colors. See [Gradients](/docs/symbols-and-styles/styling/gradients) for more detail. There are three gradient types:
- **Linear** : blends along a straight line.
- **Radial** : radiates outward from a center point.
- **Angular** : sweeps colors around a center point.
- **Image fill** : uses an image as the fill, with options to scale, fit, stretch, or tile it.
- **Color Variable** : links the fill to a [Color Variable](/docs/symbols-and-styles/color-variables), so it updates across your document when the Color Variable changes.
## Adding and removing fills
To add a new fill, click in the **Fills** section on the Inspector. You can add as many fills as you like to a single layer and they’ll stack on top of each other. You can reorder fills by clicking any empty area of a fill in the Inspector, then dragging it to a new position in the list.
To remove a fill, turn off its toggle and click next to the **Fills** section title.
For each fill you create, you’ll have the following options:
1. **Enable/Disable toggle.** You can enable or disable all the fills of a frame or layer by pressing ⇧F.
1. **Color preview.** Click on it to open the [color panel](/docs/symbols-and-styles/styling/the-color-panel/) and choose a different color or change the fill type.
1. **Hex code.** If you’re using a solid color fill, you’ll see its HEX value here for easy copying. If you’re using a gradient or image fill, this area shows options to change its type. You can also right-click a fill row to copy its color value in popular formats — [learn more](/docs/symbols-and-styles/styling/the-color-panel#copying-color-values).
1. **Opacity.** You can change a fill’s opacity to combine and show two or more fill types.
> **Note:** You can paste a hex code with an alpha value into the Hex field, which will apply the correct opacity. For example, `#FF000080` will become a color with a hex value of `#FF0000` and an opacity of 50%. The last two characters are the opacity value. Opacity values are base-16, which is why 80 becomes 50% — and not 80%.
## Adding an image fill
Open the color panel and select the Image fill . Choose your own image using **Choose Image** in the preview, or pick one from the presets at the bottom of the panel. You can also drag an image file directly onto the fill’s color preview in the Inspector to apply it as an image fill. Click the Data icon to use an image from a [data source](/docs/designing/data).
You can then choose from four scaling modes:
- **Fill** adjusts the size of the image to fit the layer’s width.
- **Fit** adjusts the size of the image to fit the layer’s height.
- **Stretch** fits the image to the layer’s height and width ratio by stretching it.
- **Tile** keeps the image at its original size (unless you adjust it) and repeats it to fill the layer.
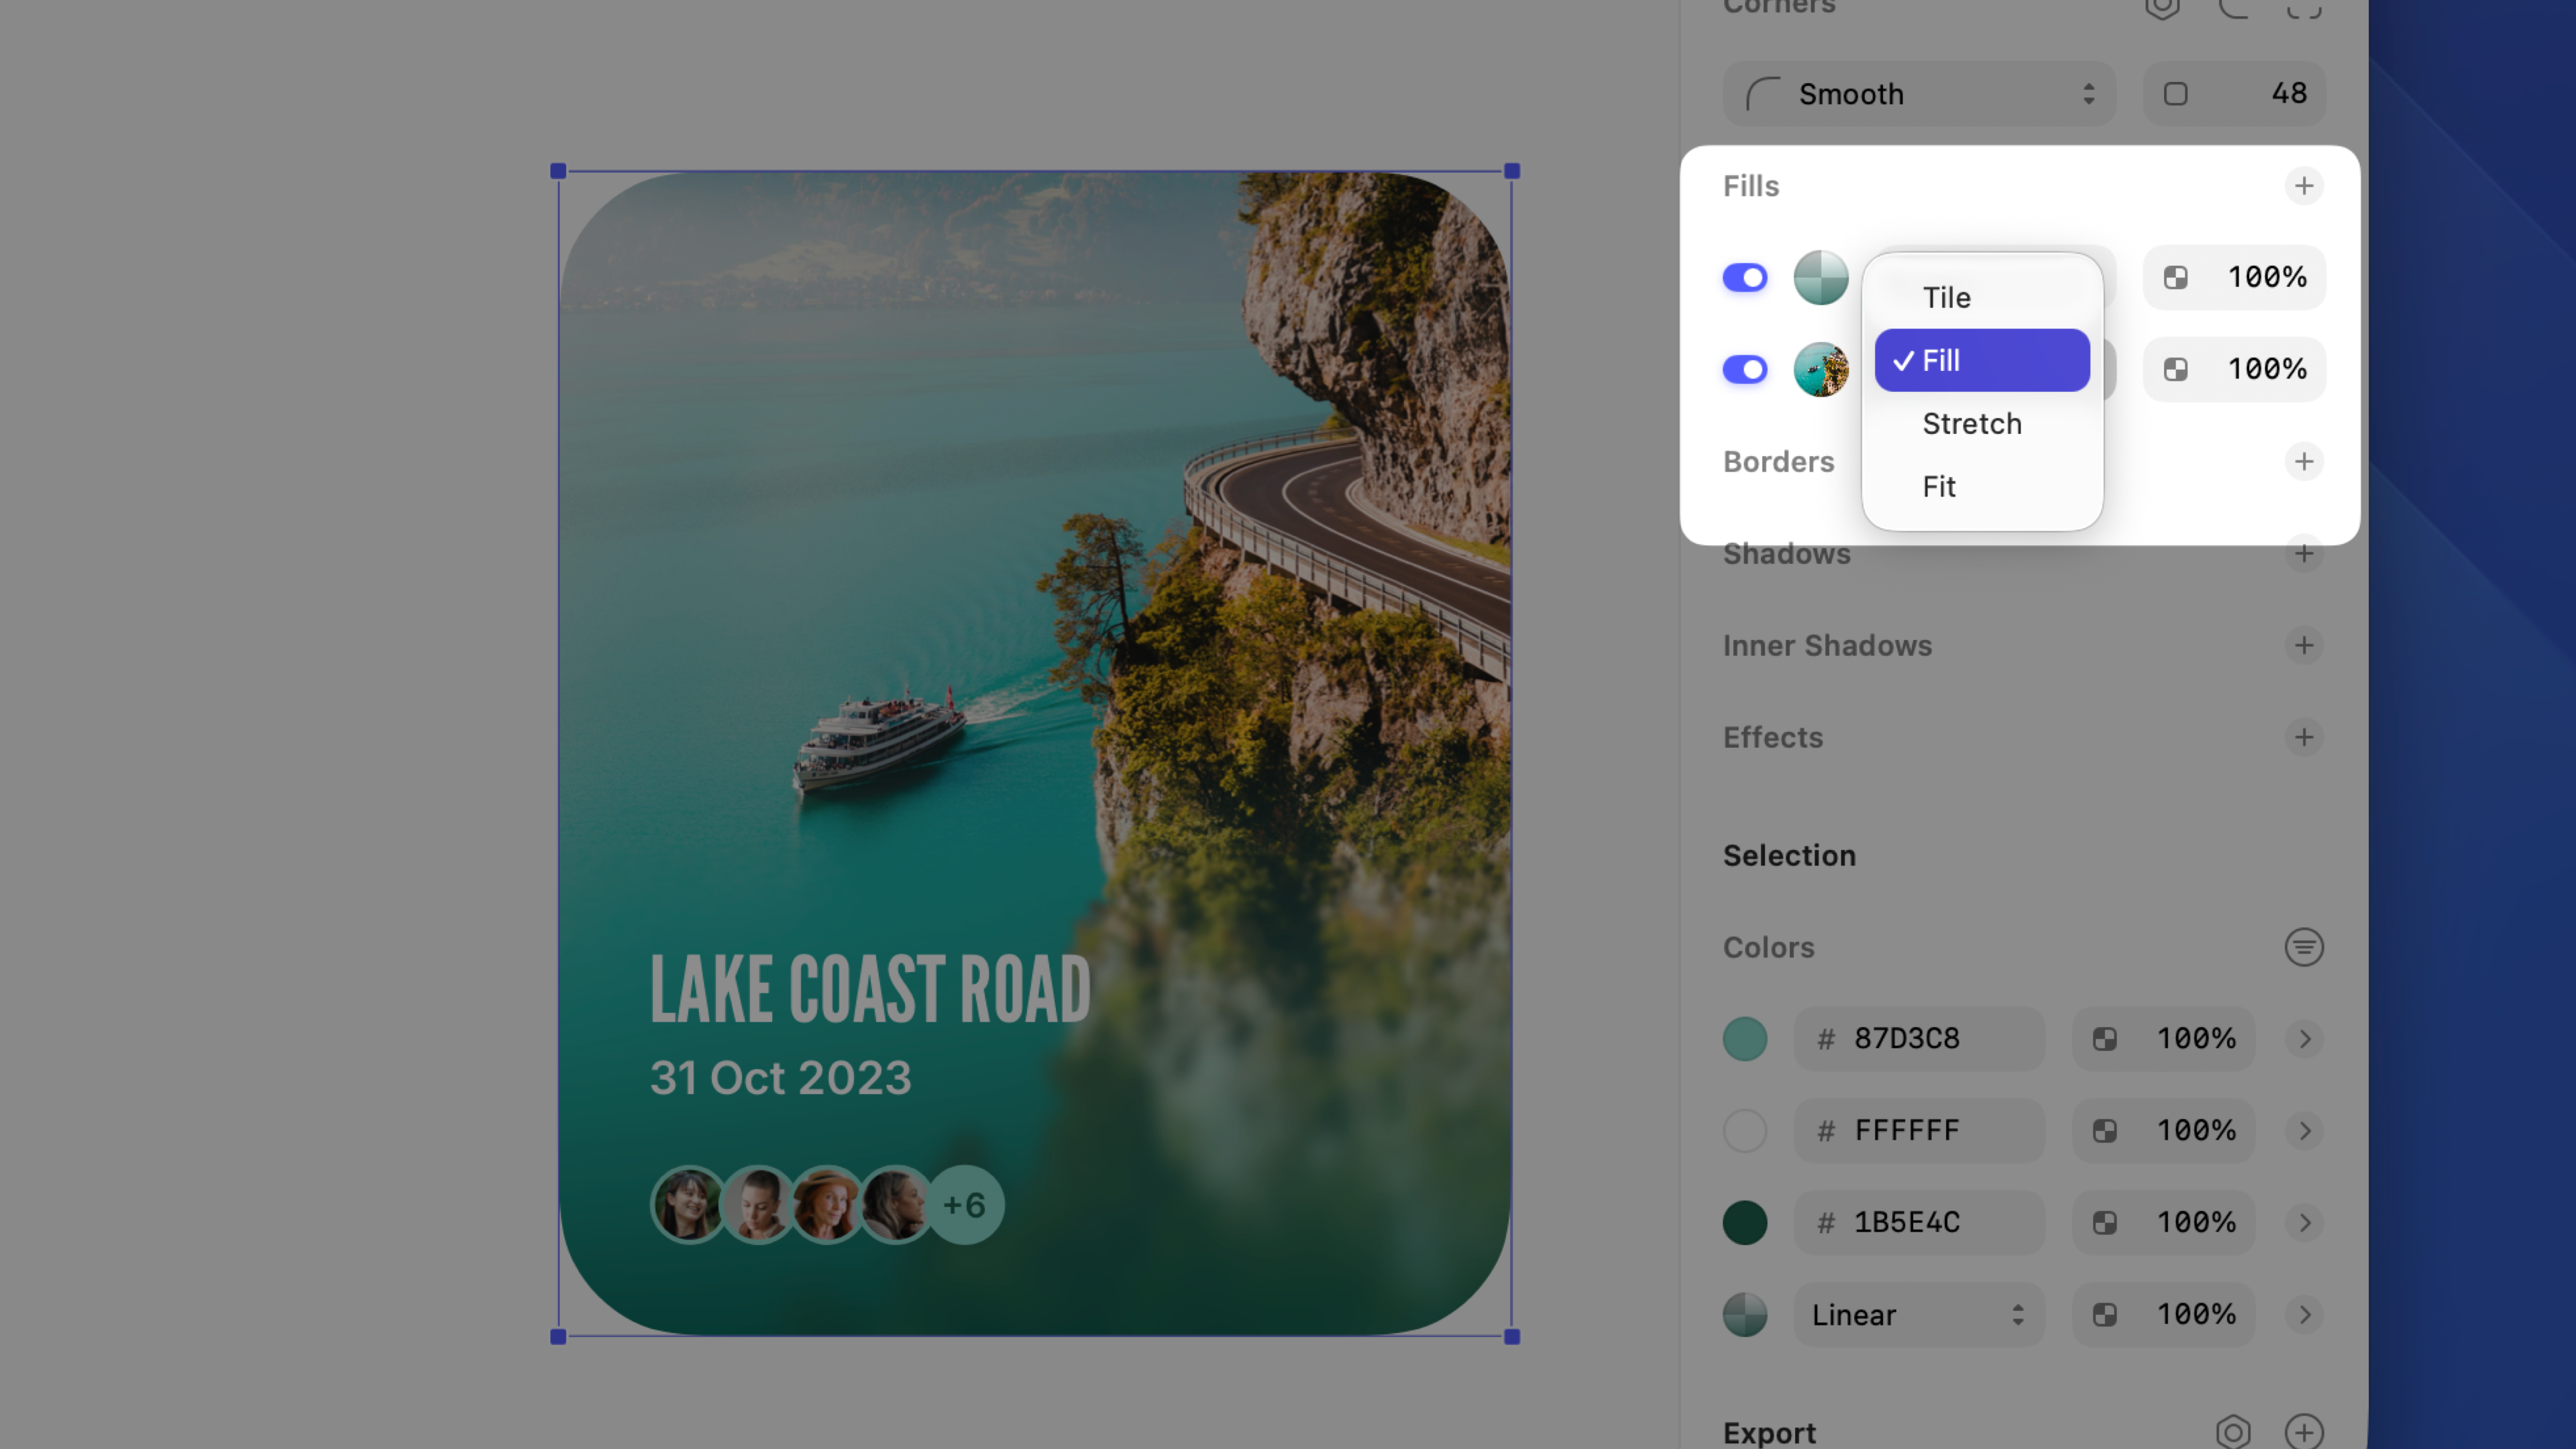
You can also click the clock icon above the image preview to see frequently used images in your document, or choose a basic pattern or noise fills from the global presets at the bottom.
> **Note:** You can paste an image from outside Sketch directly as a fill using **Paste Image as Fill**. Copy the image, select a layer, then press ⌃, click the fill preview and choose **Paste Image as Fill**. This option appears only when your clipboard contains a compatible image.
## Swapping fills and borders
Select a layer or frame, then press ⇧X to swap its fills and borders. You can also right-click the **Fills** or **Borders** section header in the Inspector and choose **Swap Fills and Borders**, or find the action in **Layer** > **Style** and the Command Bar.
When you swap fills and borders:
- Colors swap between enabled fills and borders, from top to bottom.
- Border positions and widths don’t change.
- If there are more fills than borders (or the other way around), any extra styles use default settings.
- Image fills don’t swap — borders don’t support them.
- Gradient fills with less than 100% opacity turn fully opaque when applied as borders.
## Changing fill settings for overlapping paths
When you’ve applied a fill to a shape, use the [Command Bar](/docs/interface-and-settings/the-mac-app-interface/the-command-bar/) to choose between the Non-Zero or Even-Odd fill rules, based on the [winding rule](https://en.wikipedia.org/wiki/Nonzero-rule). You can search for _fill rule_ in the Command Bar to access this option quickly.
## Including fills as content
Frames and graphics let you use fills as content. When enabled, the fill is included in asset exports and when playing prototypes. For example, in Symbol Sources, a fill can help highlight the frame’s contents, but you usually don’t need it when inserting Symbol instances.
This option is enabled by default for frames and disabled for graphics. You’ll find it in the Export section of the Inspector.
## Adjusting a layer’s opacity
As well as dragging the opacity slider, or typing a percentage in the field next to it, you can quickly set a layer’s opacity by selecting your layer and pressing 0-9 (e.g. 3 for 30% opacity). Pressing two numbers quickly will set a more exact opacity (e.g. 2 and 5 for 25% opacity).
You can also [copy and paste properties](/docs/symbols-and-styles/styling/managing-style-properties/#copying-and-pasting-properties) or [reorder style properties](/docs/symbols-and-styles/styling/managing-style-properties/#organizing-style-properties) across any style type.
## Setting a default style for new layers
You can set a default style for every new layer instead of the one Sketch applies by default — for example, a specific fill, a gradient and a shadow, but no border. Create a layer, adjust its styles, then go to **Layer** > **Style** > **Set as Default Style**.
--------------------------------------------------------------------------------
title: "The Color Panel"
last_modified: "2026-04-07"
url: "https://www.sketch.com/docs/symbols-and-styles/styling/the-color-panel/"
--------------------------------------------------------------------------------
## The Color Panel
Click the color well for any fills, borders, or shadows to reveal the color panel.
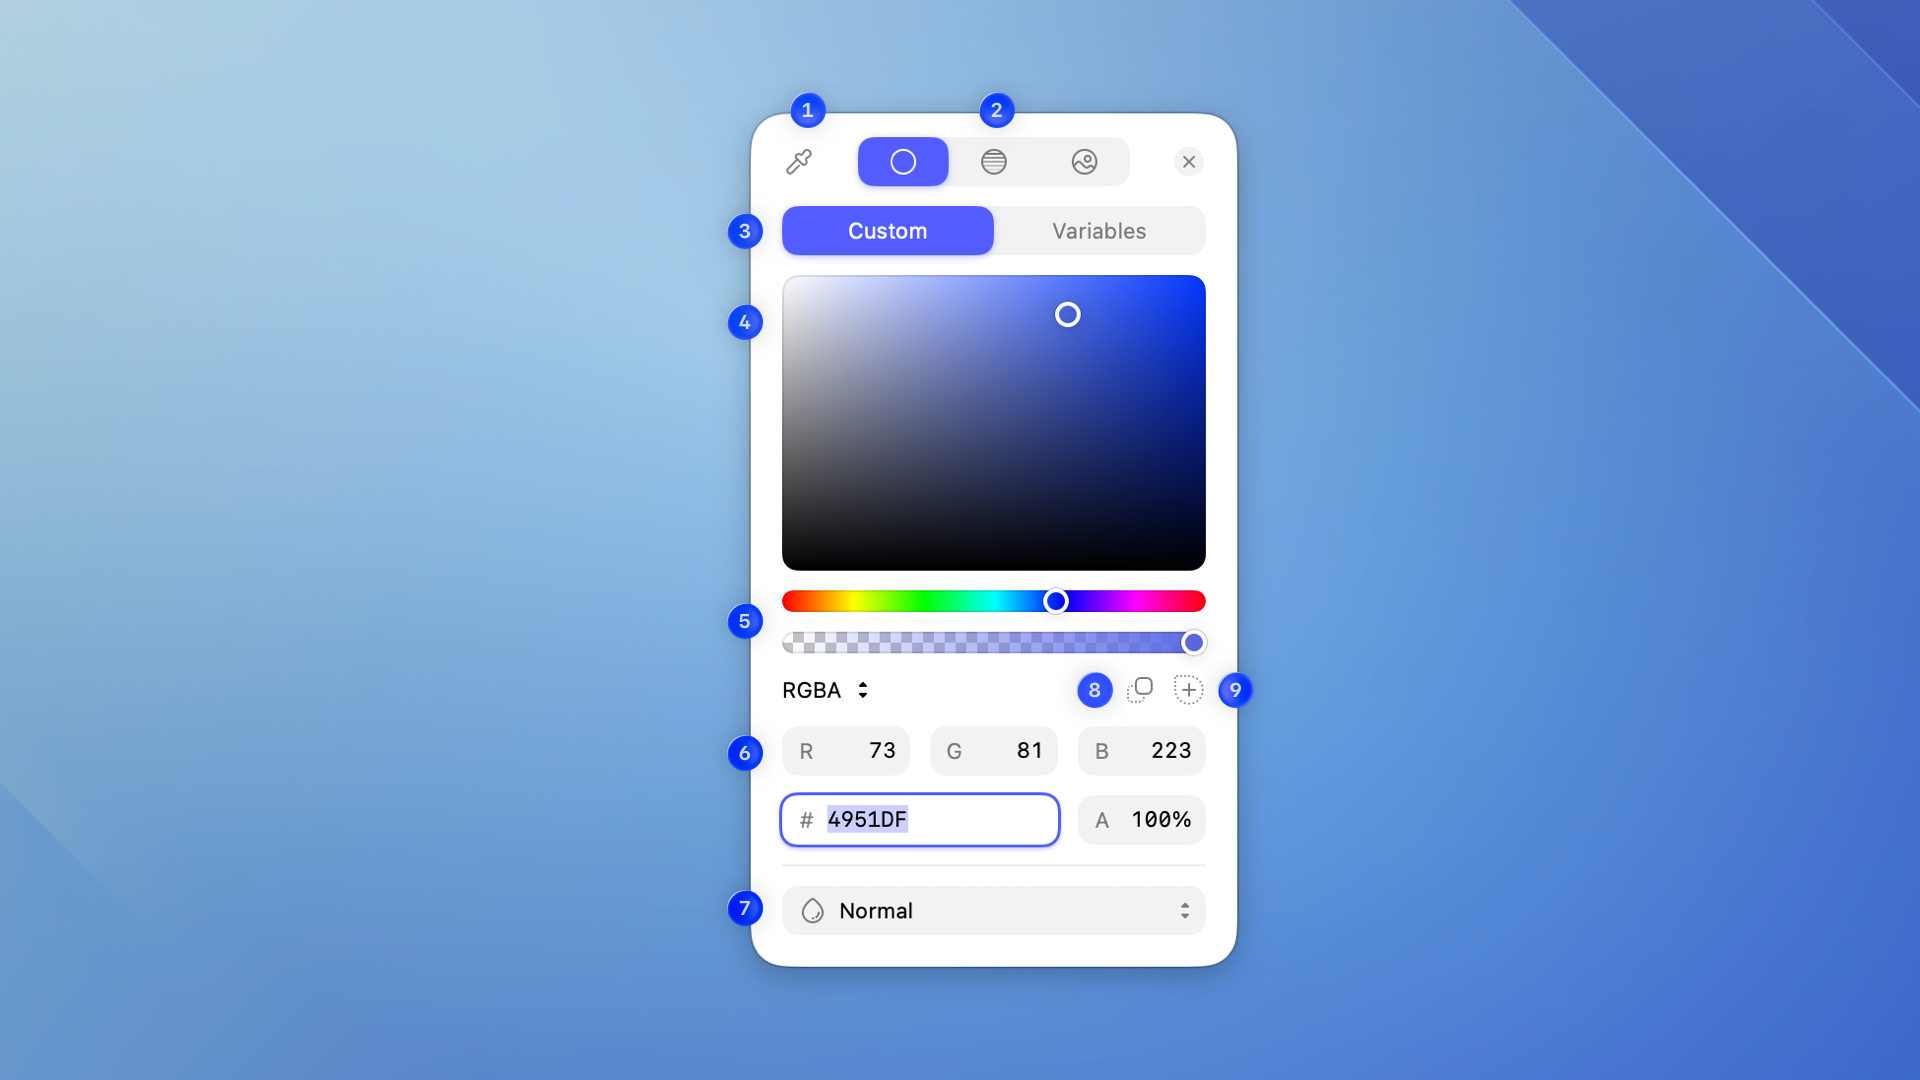
1. **The eyedropper ** lets you pick any color from your display, inside or outside of the Mac app. You can quickly access it by pressing ⌃C.
1. **Fill types**: Switch between solid, [gradient](/docs/symbols-and-styles/styling/gradients/), and image fills.
1. **Custom / Variables**: Toggle between custom colors and your saved [Color Variables](/docs/symbols-and-styles/color-variables/).
1. **The color picker** uses the HSB (hue, saturation, brightness) color model. Drag the point left to right to change a color’s saturation, and up or down to change its brightness.
1. **The sliders** control your color’s hue (color) and alpha (opacity).
1. **Color model and values**: Switch between color models (HSB, HSL, RGB) and enter values directly, including the HEX value.
1. **Blending mode** defines how your color will interact with other colors beneath it.
1. **Copy** copies the current color value to your clipboard.
1. **Add Color Variable** lets you save a new [Color Variable](/docs/symbols-and-styles/color-variables/).
## Gradient fills
When the color panel is in gradient mode, it has two views: the stop editor and the presets list. For a full guide to creating and editing gradients, see [Gradients](/docs/symbols-and-styles/styling/gradients/).
### Editing gradient stops
Click a stop in the gradient bar to select it — the color section updates to show that stop’s color. Use the pop-up button in the header to switch between Linear, Radial, and Angular gradient types.
Click **Custom** or **Variables** to set a custom color or apply a saved [Color Variable](/docs/symbols-and-styles/color-variables/) to that stop. When browsing Color Variables, use the list/grid toggle next to the search field to switch views.
### Gradient presets
Click in the panel header to switch to the gradient presets view. You’ll see all your saved gradient presets, organised by source. Click any preset to apply it to your layer.
To save the current gradient as a preset, click in the panel header and add a name — just like when you create a Color Variable or layer style.
## Picking colors with the eyedropper
Press ⌃C or click the eyedropper to open the eyedropper’s loupe to magnify the area under your cursor. Labels next to the loupe show the pixel color’s hex and RGB values.
> **Note:** The first time you use the eyedropper to pick colors outside Sketch, macOS may ask for permission to record your screen. Sketch only needs this permission so the eyedropper can sample colors from other apps or anywhere else on your display.
To resize the loupe, scroll with your mouse, use a two-finger swipe, or pinch on a trackpad. Right-click or ⌃-click to reset it to its default size — the loupe remembers the size you set.
Click anywhere to pick the raw color (the exact pixel value) under the cursor. To preview colors first, hold and drag around the canvas, then release when you find the one you want.
### Picking Color Variables with the eyedropper
When you hover over a layer that uses a [Color Variable](/docs/symbols-and-styles/color-variables/) with the loupe, the labels show the variable name and library too. Hold ⇧ and click to apply the Color Variable directly to your layer — your layer stays linked to it and updates automatically if the Color Variable changes.
You can pick Color Variables from:
- Solid fills and borders (including dashed borders).
- Gradient fills and borders (the nearest gradient stop determines the Color Variable).
- Text layers (including text color, fills, and borders). If a text layer uses different Color Variables in different parts of the text (for example, one color for the heading and another for a highlighted word), the loupe picks up the Color Variable applied exactly where you place your cursor.
- [Tints](/docs/symbols-and-styles/styling/tints/).
**Note:** You can’t pick Color Variables from text-on-path layers, shadows, or other layer effects (except tints).
## Copying color values
Right-click a fill, border, or shadow row in the Inspector to copy its color value in popular formats — HEX, RGB, HSL, SwiftUI, NSColor, and UIColor. The last format you used appears at the top of the menu next time.
## The Colors section in the Inspector
When you select multiple layers, the **Colors** section appears in the Inspector and shows every color used across your selection. Click any color to open the Color Panel and change it across all matching layers at once. [Learn more about Selection colors](/docs/symbols-and-styles/selection-colors/).
--------------------------------------------------------------------------------
title: "Gradients"
description: "Gradients blend two or more colors across a layer. There are three types: Linear, Radial, and Angular."
last_modified: "2026-06-22"
url: "https://www.sketch.com/docs/symbols-and-styles/styling/gradients/"
--------------------------------------------------------------------------------
## Gradients
Gradients blend two or more colors across a layer. There are three types: Linear, Radial, and Angular.
## How to apply a gradient fill
Click the color well in the **Fills** section of the Inspector to open the [Color panel](/docs/symbols-and-styles/styling/the-color-panel/), then choose a gradient type from the fill type buttons at the top of the panel. Use the pop-up button in the panel header to switch between gradient types.
## Useful shortcuts
You can use the following shortcuts to adjust the color stops on the gradient bar:
| Action | Shortcut |
|--------|----------|
| Place gradient stop between 0% and 100% | 0-9 |
| Place gradient stop halfway between adjacent stops | = |
| Switch between stops | Tab |
| Adjust the stop position by 1% | ← → |
| Adjust the stop position by 10% | ⇧← → |
## Creating linear gradients
With a linear gradient , Sketch adds a gradient line with movable start and end points to your layer.
To change a stop’s color, click it in the gradient bar in the Color panel — the color section updates to show that stop’s color. You can pick a custom color or click **Variables** to apply a saved [Color Variable](/docs/symbols-and-styles/color-variables/) to that stop. To add another color, click anywhere on the gradient line on the Canvas to add a new stop.
Drag a stop to change the look of your gradient, or select one and press backspace to delete it. Stop positions are expressed as a percentage value relative to the start and end points.
## Creating radial gradients
Editing radial gradients is similar to editing [linear gradients](#creating-linear-gradients), except that one point sets the center of the effect and the opposite point sets where it ends. Drag the non-color Ratio point to control the size of the effect — its position is expressed as a percentage value relative to the start point.
## Creating angular gradients
Angular gradients place color stops on a circle based on the maximum height or width of a layer. Drag the stops to adjust their position or click on the circle to add new ones. Stop positions are expressed as a percentage value relative to the end point.
## Editing gradient stops
Along with the gradient handles on your layer, you can use the gradient bar in the Color panel to adjust your gradient. Click a stop to select it and change its color, drag a stop to reposition it, click anywhere on the bar to add a new stop, or select a stop and press ⌫ to remove it. Right-click a stop for more options: copy its color value, place it at the midpoint between its neighbors, or remove it.
Double-click a stop to center it between its adjacent stops — this is the same as pressing = or choosing **Place at Midpoint** from the context menu. To evenly space all stops between the first and last, right-click any stop and choose **Distribute Stops**, or hold ⌥ over the invert button .
Click to invert the gradient, swapping the order of all stops. Click to rotate the gradient direction by 90°.
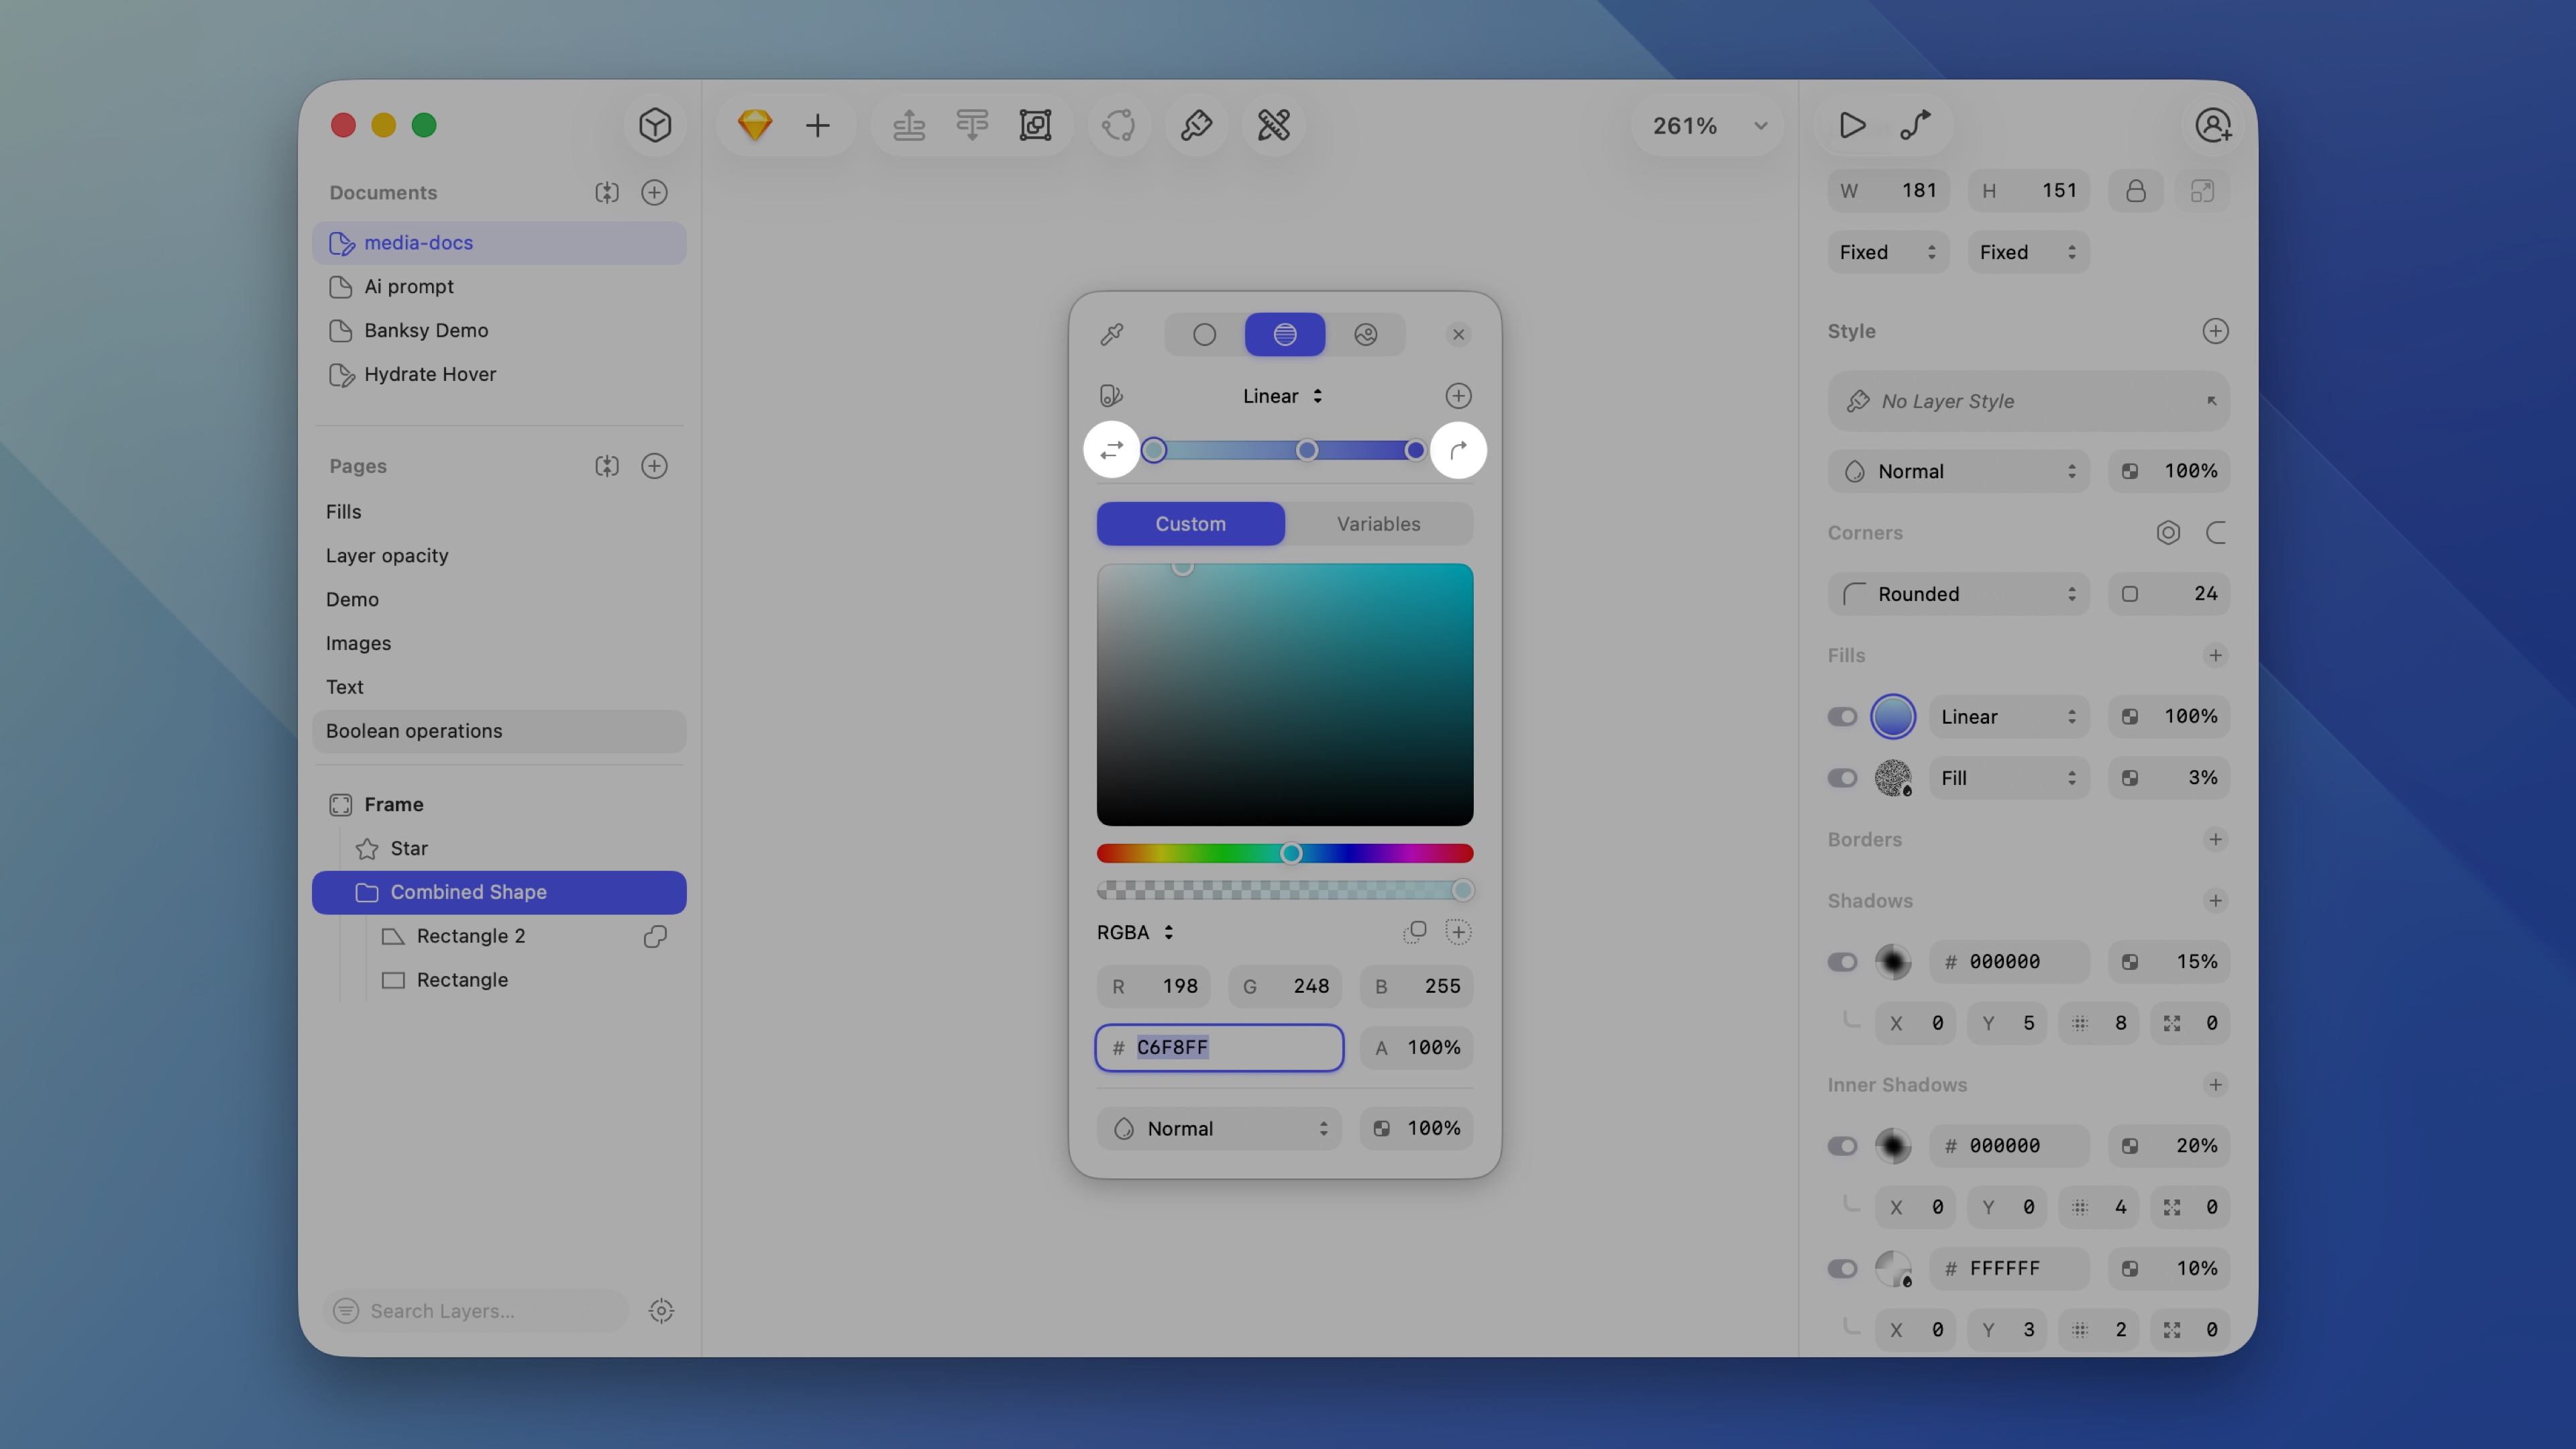
*Click invert to swap all stop colors, or rotate to shift the gradient direction by 90°*
## How colors blend
Click the pop-up at the top of the Color panel to choose how colors blend between stops. It shows the current gradient type and interpolation method, such as **Linear · Classic**. You can mix any gradient type with any interpolation method.
- **Classic** is the default interpolation method.
- **Perceptual (Oklab)** keeps midpoints vivid, so gradients between contrasting colors stay saturated rather than going dull or grey.
- **Vibrant (Oklch)** often takes a more colorful path between stops.
New gradients use whatever mode you last picked, and copying as CSS gives you the right color-space syntax.
In the web app, Perceptual and Vibrant gradients show their interpolation method under the gradient type in the Inspect panel, and the CSS output uses the correct `oklab()` or `oklch()` syntax automatically.
## Gradient presets
Click in the Color panel header to switch to the gradient presets view. You’ll see all your saved gradient presets, organised by source — global presets and document presets. Click any preset to apply it to your layer.
To save the current gradient as a preset, click in the panel header and give it a name — just like when you create a Color Variable or layer style.
To rename a preset, control-click it and choose **Rename**. You can also control-click to move or copy it between global and document locations, reorder presets by dragging them, or delete one by control-clicking and choosing **Delete**.
## Gradient presets in Libraries
When you save a document preset and make that document a [Library](/docs/libraries/), it appears below the global and document presets to anyone who’s added the Library. If a Library preset is updated, a dot appears next to it to let you know.
You can also [copy and paste properties](/docs/symbols-and-styles/styling/managing-style-properties/#copying-and-pasting-properties) or [reorder style properties](/docs/symbols-and-styles/styling/managing-style-properties/#organizing-style-properties) across any style type.
--------------------------------------------------------------------------------
title: "Tints"
description: "Learn how to apply Tints in Sketch with the help of our step-by-step guides and video tutorials."
last_modified: "2026-01-13"
url: "https://www.sketch.com/docs/symbols-and-styles/styling/tints/"
--------------------------------------------------------------------------------
## Tints
Tints apply a single color to an entire frame, graphic, group or Symbol. Unlike fills, Tints take into account semi-filled elements with different opacities and borders. Tints are great for things like complex icons or tabs in a navigation bar — or anywhere you want to show different states through a change in color.
## Applying a tint
To apply a Tint, select a frame, graphic, group or Symbol instance then click on the **Effects** section header, or **+** icon and select Tint. Tints work in a similar way to fills, where you can use the Color Picker or enter a hex code and change the overall opacity. However, you can only select a solid color as a tint.
## Using tints as overrides
To use tints as overrides with nested Symbols, you first need to apply a default tint to any Symbol instances on the Symbol Source you’re working with.
Now, when you select a Symbol instance , you’ll see the tint override as a color override in the Color section in the Inspector. Clicking on the color icon will bring up the Color panel so you can easily override the default tint.
--------------------------------------------------------------------------------
title: "Borders"
description: "Add borders to any layer in Sketch and customize their position, width, fill, and more — including per-side borders and gradient borders."
last_modified: "2026-06-22"
url: "https://www.sketch.com/docs/symbols-and-styles/styling/borders/"
--------------------------------------------------------------------------------
## Borders
You can add as many borders as you like to your layers, frames, or graphics — each with different thicknesses, colors, and blurs.
## Adding and removing borders
Select a layer, frame or graphic and head to the **Borders** section in the Style panel of the Inspector. Click to add a border. Set the thickness using the number field in the border row and choose a solid color or apply a gradient — see [the color panel](/docs/symbols-and-styles/styling/the-color-panel) for more detail.
> **Note:** You can right-click a border row to copy, paste, duplicate, or remove it. Choose **Copy Value** to copy the border’s color in popular formats — see [The Color Panel](/docs/symbols-and-styles/styling/the-color-panel#copying-color-values) for more detail.
To remove a border, disable its toggle switch, then click next to the **Borders** section title.
**Reordering and swapping borders**
If you have more than one border, you can drag borders to reorder them in the list. You can also swap all your fills and borders at once. Right-click the **Borders** section title and choose **Swap Fills and Borders**, or press ⇧X. See [Swapping fills and borders](/docs/symbols-and-styles/styling/fills#swapping-fills-and-borders) for more detail on how it matches colors and styles during a swap.
> **Note:** You can quickly show or hide borders on any layer by pressing ⇧B.
## Setting a border position
In the border row, click the position dropdown to choose where the border sits, whether that’s **Inside** , **Center** , or **Outside** the shape’s outline. For [open paths](/docs/designing/vector-editing/#opening-and-closing-paths), you can only use Center.
*Choose to place your border Inside, Center, or Outside the layer’s outline.*
## Setting individual borders
For frames, rectangular shapes, and image layers, click the sides dropdown in the border row, next to the position dropdown, and choose between **All**, **Top**, **Bottom**, **Left**, **Right**, or **Custom**.
- **Top, Bottom, Left, Right:** The border applies its existing thickness and settings to that side only. This is useful when you want a border on just one side — for example, a bottom border to create a divider.
- **Custom:** Set a different thickness for each side independently. You’ll see four fields below the border row — one per side. Set a side’s thickness to 0 to disable it.
> **Note:** You can only use per-side borders on rectangular layers — frames, rectangles, and image layers. If you edit the path so it’s no longer rectangular, per-side borders revert to a single border around the entire path.
## Customizing borders
Click the settings icon next to the **Borders** section title to open the border settings panel. Here you can set cap and join styles, add arrowheads, and create dashed lines.
*Use the Border Settings panel to control ends, joins, arrowheads, and dashes*
> **Note:** These border settings also work on text layers — so you can apply caps, joins, and dashes to text borders too.
For line layers and open paths, you can choose from three types of border end:
- **Butt cap **: Draws the border exactly to the vector point
- **Round cap **: Adds a rounded, semi-circular end that extends past the vector point
- **Projecting cap **: Similar to the butt cap, but extends the border past the vector point with straight edges
For paths with corners, you can choose from three types of join:
- **Miter join **: Creates a sharp corner by extending the edges of the border until they meet
- **Round join **: Creates a rounded corner with a radius relative to the border thickness
- **Bevel join **: Creates a flat corner by cutting off the tip of the join
For line layers, choose arrowheads for the start and end of the path using the drop-down menus in **Points**. To switch which end they appear on, choose **Layer > Path > Reverse Order**.
To create dashed lines, enter a value in the **Dash** field to set the length of the dashes. The **Gap** field sets the distance between dashes and automatically matches the dash length unless you set it to something different. To reset it, clear the **Gap** field.
To make dashes fall neatly on corners, check **Center on corners**. This adjusts the dash spacing so each corner gets a complete dash instead of a gap or partial dash — it’s enabled by default on new layers.
> **Note:** To create a dotted line, set the end type to a round cap , then set the dash value to 0. Adjusting the gap distance will change the look of your dotted border.
You can also [copy and paste properties](/docs/symbols-and-styles/styling/managing-style-properties/#copying-and-pasting-properties) or [reorder style properties](/docs/symbols-and-styles/styling/managing-style-properties/#organizing-style-properties) across any style type.
--------------------------------------------------------------------------------
title: "Shadows"
description: "Shadows and Inner Shadows appear as separate sections in the Inspector. They have the same controls but work in different ways — Shadows render outside a layer, while Inner Shadows render inside."
last_modified: "2026-06-22"
url: "https://www.sketch.com/docs/symbols-and-styles/styling/shadows/"
--------------------------------------------------------------------------------
## Shadows
Shadows and Inner Shadows appear as separate sections in the Inspector. They have the same controls but work in different ways — Shadows render outside a layer, while Inner Shadows render inside.
You can apply shadows to shapes, text, frames, graphics, and groups. You can also apply multiple shadows to the same layer and control their colors, blending modes, X and Y positions, blur radius, and spread.
In groups you can only apply one shadow, and it applies to the layers inside the group, not to the group itself.
## Adding and removing shadows
Select a layer, frame, or group, then head to the **Shadows** or **Inner Shadows** section in the Style panel of the Inspector. Click to add a shadow.
To remove a shadow, disable its toggle switch, then click next to the section title.
*Stack multiple inner shadows on one layer to build up depth and detail*
## Shadow controls
Each shadow has these controls:
- **X** and **Y** offset the shadow from the layer and can be positive or negative.
- **Blur** sets the blur radius in pixels.
- **Spread** (+ or -) sets the distance in pixels to expand or contract the shadow in all directions.
You can right-click a shadow row to copy its color value in popular formats — [see which formats are available](/docs/symbols-and-styles/styling/the-color-panel#copying-color-values).
## Changing shadow types
To change a Shadow to an Inner Shadow (or vice versa), right-click on the shadow in the Inspector and choose **Change to Inner Shadow** or **Change to Drop Shadow**.
You can also [copy and paste properties](/docs/symbols-and-styles/styling/managing-style-properties/#copying-and-pasting-properties) or [reorder style properties](/docs/symbols-and-styles/styling/managing-style-properties/#organizing-style-properties) across any style type.
--------------------------------------------------------------------------------
title: "Effects"
description: "Effects add depth, atmosphere, and movement to your layers. You can use Glass, Fade, Layer blur, Background blur, Motion blur, and Zoom blur — each with different visual results and controls."
last_modified: "2026-06-22"
url: "https://www.sketch.com/docs/symbols-and-styles/styling/effects/"
--------------------------------------------------------------------------------
## Effects
Effects add depth, atmosphere, and movement to your layers. You can use Glass, Fade, Layer blur, Background blur, Motion blur, and Zoom blur — each with different results and controls.
## Adding an effect
Click next to **Effects** in the Inspector and choose an effect type from the menu. You can apply effects to any shape (including vector shapes), image, text, frame or graphic — but not to Symbol instances or groups. You can stack effects on the same layer in the order you add them — though some effects limit which others are available.
*The Effects menu lists every effect type — pick one to add it to the selected layer*
## Effect types
**[Glass](/docs/symbols-and-styles/styling/effects/glass)** gives a layer the look of frosted glass, blurring and tinting the content behind it. Use it for overlays, cards, and macOS or iOS UI designs.
**[Fade](/docs/symbols-and-styles/styling/effects/fade)** applies progressive transparency to a layer, fading it from opaque to transparent. Choose Linear (in a direction) or Radial (from a central point). Useful for blending layers into a background or creating soft edges.
**[Layer blur](/docs/symbols-and-styles/styling/effects/layer-and-background)** blurs the layer’s own content.
**[Background blur](/docs/symbols-and-styles/styling/effects/layer-and-background)** blurs everything behind a layer without affecting the layer itself. Useful for panes, sheets, and overlays.
**[Motion and Zoom blur](/docs/symbols-and-styles/styling/effects/motion-and-zoom)** Motion blur streaks a layer in one direction, creating the impression of movement. Zoom blur spreads outward from a point, creating a focus or zoom effect.
> **Note:** Applying multiple or large blurs can slow down the Mac app, as they require more memory and processing power to render.
You can also [copy and paste properties](/docs/symbols-and-styles/styling/managing-style-properties/#copying-and-pasting-properties) or [reorder style properties](/docs/symbols-and-styles/styling/managing-style-properties/#organizing-style-properties) across any style type.
--------------------------------------------------------------------------------
title: "Glass"
description: "Glass softly blurs content behind a layer and lets background colors show through. Use Auto for Apple platforms or Custom to fine-tune every parameter."
last_modified: "2026-04-07"
url: "https://www.sketch.com/docs/symbols-and-styles/styling/effects/glass/"
--------------------------------------------------------------------------------
## Glass
The Glass effect gives a frosted-glass look, softly blurring what’s behind and letting background colors and shapes show through while keeping foreground content clear. To apply it, click next to **Effects** in the Inspector and choose **Glass**.
## Auto
Auto applies a standard frosted-glass appearance that closely matches what you’ll see in Apple’s operating systems. Use it when designing for Apple platforms.
## Custom
Custom gives you full control over all the parameters that make up the effect, so you can match a specific aesthetic or fine-tune the look.
> **Note:** Use Auto when designing for Apple platforms. Switch to Custom when you need to match a specific visual or go beyond the default appearance.
With Custom you can control:
- **Blur:** controls how much the background is blurred behind the element.
- **Distortion:** adds a subtle waviness to the blurred content, as if viewed through uneven glass.
- **Depth:** simulates the perceived thickness of the glass by affecting how sharp or diffuse the blur edges appear.
- **Chromatic aberration:** introduces a slight color fringing along edges, mimicking the optical imperfections of real glass.
- **Brightness:** increases or decreases the luminosity of the glass surface, making it lighter or darker. To reset the slider to its default value, double-click it.
- **Saturation:** controls how vivid or muted the colors of the background content appear through the glass. To reset the slider to its default value, double-click it.
- **Specular highlights:** adds a subtle reflective sheen to the surface, giving it a more polished, three-dimensional appearance.
--------------------------------------------------------------------------------
title: "Fade"
description: "Fade gradually reduces a layer’s opacity from opaque to transparent — choose Linear for a directional fade or Radial for one that spreads outward from a central point."
last_modified: "2026-04-07"
url: "https://www.sketch.com/docs/symbols-and-styles/styling/effects/fade/"
--------------------------------------------------------------------------------
## Fade
Fade gradually fades a layer’s opacity from fully opaque to fully transparent — without needing to set up a separate mask layer. It’s useful for blending layers into a background, creating soft transitions between elements, or fading out an image at its edges.
To apply it, click next to **Effects** in the Inspector and choose **Fade**. You can choose from two styles:
- **Linear:** fades the layer in a straight line in a single direction.
- Drag the handles on the canvas to reposition the start and end of the fade.
- Drag a stop to reposition it, or click anywhere along the line to add a new one.
- Select a stop to adjust its opacity in the **Opacity** field.
- Use to invert the fade, and to rotate its direction by 90°.
- **Radial:** fades the layer outward from a central point.
- Drag the center handle on the canvas to reposition the fade, and drag the outer handle to resize it.
- Drag a stop to reposition it, or click anywhere on the line to add a new one.
- Select a stop to adjust its opacity in the **Opacity** field.
- Use to invert the fade.
--------------------------------------------------------------------------------
title: "Layer and Background Blur"
description: "Apply blur to a layer’s own content or to everything behind it. Layer blur and Background blur both come in Uniform, Linear Progressive, and Radial Progressive styles."
last_modified: "2026-04-07"
url: "https://www.sketch.com/docs/symbols-and-styles/styling/effects/layer-and-background/"
--------------------------------------------------------------------------------
## Layer and Background Blur
Layer blur softens the layer’s own content, and Background blur, blurs what’s behind it. Both come in three styles — Uniform, Linear Progressive, and Radial Progressive — so you can control not just the intensity, but the shape and direction of the blur.
## Layer blur
Layer blur applies a blur to the layer’s content — useful for creating soft, out-of-focus effects or adding visual depth.
To apply it, click next to **Effects** in the Inspector and choose **Layer Blur**. Then click the icon next to its name to open the blur panel and use the blur slider or input field to set the intensity. [See Blur styles](#blur-styles) for details on each style options.
## Background blur
Background blur replicates the blurs behind overlays and panes in macOS and iOS. Unlike Layer blur, it doesn’t affect the layer itself — it blurs everything behind it.
To apply it, click next to **Effects** in the Inspector and choose **Background Blur**. Then click the icon next to its name to open the blur panel, where you can adjust two settings:
- **Blur:** use the slider or input field to set the blur intensity.
- **Saturation:** adjusts the vibrancy of the blurred content. Reducing it desaturates, and increasing it makes colors more vivid. Double-click the slider to reset it to its default value.
> **Note:** If you have any fill styles on this layer, they’ll need to be transparent to see the blur. A transparent color fill is also a great way to tint it.
## Blur styles
Both effects come in three styles: Uniform, Linear Progressive, and Radial Progressive.
- **Uniform Blur** : affects the entire layer. You can control the intensity of the blur using the slider, or the input field in the panel.
- **Linear Progressive Blur** : the blur increases (or decreases) gradually across the layer. Click the effect name in the Inspector to show the stops on the canvas — drag them to adjust the direction, or click along the line to add new stops.
Use to invert the blur and to rotate its direction by 90°.
*Fade blur gradually across a layer by dragging the stops on the canvas*
- **Radial Progressive Blur** : the blur radiates outward from a central point. Click the effect name in the Inspector to show the stops on the canvas — drag them to adjust the size and position, or click along the line to add new stops.
Use to invert the blur and to rotate its direction by 90°.
--------------------------------------------------------------------------------
title: "Motion and Zoom Blur"
description: "Motion blur blurs a layer in one direction to imply movement. Zoom blur radiates outward from a point to create a zoom or focus effect."
last_modified: "2026-04-07"
url: "https://www.sketch.com/docs/symbols-and-styles/styling/effects/motion-and-zoom/"
--------------------------------------------------------------------------------
## Motion and Zoom Blur
Motion blur and Zoom blur share a single panel with a toggle to switch between both — Motion blur streaks in one direction, and Zoom blur radiates outward from a point.
## Motion blur
Motion blur streaks a layer in one direction to imply movement — useful for conveying speed, a swiping gesture, or an animation frame.
To apply it, click next to **Effects** in the Inspector and choose **Motion & Zoom Blur**. Then click the icon next to its name to open the panel and select **Motion**.
The effect has two controls:
- **Blur:** sets the intensity. Use the slider or input field to adjust it.
- **Angle:** sets the direction in degrees. An angle of 0° blurs horizontally to the left. Increasing the value rotates the direction clockwise. Double-click the slider to reset it to its default.
## Zoom blur
Zoom blur spreads a layer outward from a single point, creating the impression of zooming into or out of it — useful for focus effects or drawing attention to a specific area.
To apply it, click next to **Effects** in the Inspector and choose **Motion & Zoom Blur**. Then click the icon next to its name to open the panel and select **Zoom**.
The effect has two controls:
- **Blur:** sets the intensity. Use the slider or input field to adjust it.
- Drag the center point on the canvas to reposition where the blur radiates from.
--------------------------------------------------------------------------------
title: "Blurs"
description: "To add a blur, click the **Blur** section in the Inspector, then choose a blur type from the drop-down menu. To switch an existing blur to a different type, click the type name in the blur row or right-click it and choose from the menu."
last_modified: "2026-06-22"
url: "https://www.sketch.com/docs/symbols-and-styles/styling/blurs/"
--------------------------------------------------------------------------------
## Blurs
To add a blur, click the **Blur** section in the Inspector, then choose a blur type from the drop-down menu. To switch an existing blur to a different type, click the type name in the blur row or right-click it and choose from the menu.
> **Note:** You can apply a blur to any shape (including vector shapes), image, text, frame or graphic. You cannot blur to Symbol instances or groups.
**Gaussian Blur** applies a blur in all directions. You can set the blur amount using its slider.

**Motion Blur** blurs in one direction to imply motion. You can set both the blur amount and the angle using the sliders. To reset the angle to its default value, double-click the slider.

**Zoom Blur** will blur from one point outwards. You can set both the blur amount and the point where it starts from.

**Background Blur** replicates the blurs behind overlays and panes in macOS and iOS. Content underneath your layer will blur and you can set that content’s saturation and a blur amount in the Inspector. To reset the saturation slider to its default value, double-click it. If you have any fill styles on this layer, they’ll need to be transparent in order to see this blur. A transparent color fill is also a great way to tint it. You can stack multiple background blurs on the same layer — the blurs layer on top of each other, so you can see the effect of one through another.

**Note:** Applying lots of blurs (or large blurs) can cause the Mac app to slow down as they require lots of memory and processing power to render them.
--------------------------------------------------------------------------------
title: "Managing style properties"
description: "Learn how to reorder, enable, remove, and copy style properties like fills, borders, and shadows between layers in Sketch."
last_modified: "2026-06-22"
url: "https://www.sketch.com/docs/symbols-and-styles/styling/managing-style-properties/"
--------------------------------------------------------------------------------
## Managing style properties
You can reorder, enable, remove, and copy style properties — like fills, borders, and shadows — across any layer. These actions work the same way regardless of which style type you’re working with.
## Organizing style properties
Click and drag a style property row to reorder it above or below other properties.
Use the toggle next to each style property to enable or disable it.
To remove a style property altogether, click and drag it out of the Inspector, Control-click on it and choose **Remove**, or click on at the top of the panel (if it’s disabled).
## Copying and pasting properties
**Copy Properties** lets you copy any combination of styles and properties from a layer and paste them onto another.
1. Select a layer and use **Copy Properties** to copy its fills, borders, shadows, inner shadows, effects, size, position and prototyping interactions:
- Press ⌥⌘C
- Right-click and choose **Copy** > **Copy Properties**
- Search for "copy" in the [Command Bar](/docs/interface-and-settings/the-mac-app-interface/the-command-bar/) (⌘K)
2. Select the layer you want to paste onto, then choose what to paste:
- Right-click the **Fills**, **Borders**, **Shadows**, **Inner Shadows** or **Effects** section header in the Inspector
- Open the context menu and go to **Paste** to choose the action you need
- Search for "paste" in the [Command Bar](/docs/interface-and-settings/the-mac-app-interface/the-command-bar/) (⌘K)
> **Note:** **Paste Layout** only works if you copied with **Copy Properties** (⌥⌘C). Copying with ⌘C doesn’t include layout properties.
Holding ⌥ when you paste fills, borders or shadows will **Paste and Replace** existing styles instead of adding them.
To paste all styles at once, use **Paste Style** (⌥⌘V) — or right-click the **Style** header in the Inspector.
--------------------------------------------------------------------------------
title: "Organizing Styles"
last_modified: "2026-04-07"
url: "https://www.sketch.com/docs/symbols-and-styles/styling/organizing-styles/"
--------------------------------------------------------------------------------
## Organizing Styles
## Creating style groups
To group styles together in the Components View and Command Bar, name them using the format: `Group-name/Style-name`. For example, two Symbols named `Background/Light` and `Background/Dark` will be placed in a group called `Background`.
## Organizing styles in the Components View
You can organize your Text, Layer Styles and Color Variables in the Components View. To group several styles together hold ⇧ and select the styles you want to group. Control-click on any of the styles and choose **Group** in the contextual menu. Give a name to the new group by double-clicking on the new group that you’ll find in the left sidebar of the Components View.
To group styles together in the Components View and Command Bar, name them using the format: `Group-name/Style-name`. For example, two Symbols named `Background/Light` and `Background/Dark` will be placed in a group called `Background`. You can also add a style to an existing group by dragging it into the group icon in the left sidebar.
You need to have two or more styles in a group before they’ll appear in their own submenu.

To rename a specific style, select the style and give it a new name in the Inspector. To rename an entire group, double click on the group name in the left sidebar and add a new name to the group.
Styles are ordered alphabetically in the Components View.
--------------------------------------------------------------------------------
title: "Text and layer Styles"
description: "When you select a layer in the Mac app, you can create and edit its style properties in the Inspector."
last_modified: "2026-04-07"
url: "https://www.sketch.com/docs/symbols-and-styles/text-and-layer-styles/"
--------------------------------------------------------------------------------
## Text and layer Styles
When you select a layer in the Mac app, you can create and edit its style properties in the Inspector.
--------------------------------------------------------------------------------
title: "Text Styles"
description: "Our Text Styles tool makes styling your text easy. Store a set of tools and reuse them across different text layers within your designs."
last_modified: "2026-01-23"
url: "https://www.sketch.com/docs/symbols-and-styles/text-and-layer-styles/text-styles/"
--------------------------------------------------------------------------------
## Text Styles
With Text Styles, you can store a set of styles and reuse them across different text layers within your designs. When you make changes to a layer that you’ve applied a Text Style to, you can choose to update the Text Style itself so that all text layers with that Text Styles change as well.
## Creating a Text Style
Select a text layer that you’ve applied styles to and click the **Create** button in the **Appearance** panel in the Inspector. Type in a name for your new Text Style and press enter to save it.
You can also create a Text Style from the Components View. Select the Text Styles tab and click on the in the Toolbar and edit the style properties in the Inspector.
### Alignment and color are optional
Once you’ve created a Text Style, you can choose whether to include color and alignment as part of the style. This option is off by default for new Text Styles, but existing ones will include these properties. You can change the default setting in **Sketch > Settings > General**.

## Applying a Text Style
Select a layer and choose the pop-up menu that reads _No Text Style_ under the **Appearance** panel in the Inspector and select the Text Style you want to apply. You can use the search bar at the top of the popover to help you find the style you need.

## Inserting a Text Style as a new layer
You can insert a Text Style from the Components View by selecting a Text Style and choosing **Insert Text with Style** in the Inspector. You can also [insert Text Styles with the Command Bar](/docs/interface-and-settings/the-mac-app-interface/the-command-bar/) using the same steps for [Layer Styles](/docs/symbols-and-styles/text-and-layer-styles/layer-styles/#inserting-as-a-new-layer-with-the-command-bar).
## Editing a Text Style
Select a Layer and make sure it has a Text Style applied, make changes to the style properties like size or font-weight. Once you’ve modified the style, you’ll see an asterisk (\*) appear next to the Text Style’s name. From here, you can click on one of the following buttons in the Appearance panel:
- **Update** will add any changes you made to the source style and it will update all layers using that style.
- **Create ** will create a new, separate Text Style.
- **Detach ** will keep the changes you’ve made to that layer but remove the Text Style.
- **More (…)** lets you discard any changes you made when resetting and gives you the option to rename the style.

You can also Edit Text Styles in the [Components View](/docs/interface-and-settings/the-mac-app-interface/the-components-view/). Switch to the Components View and click on the Text Styles tab in the toolbar. Choose the style that you want to edit and make your changes in the Inspector. Any changes you make will automatically apply across layers that use that Text Style in your document.

> **Note:** You can include Text Styles as part of a [Library](/docs/libraries/) for sharing with others. Take a look at [Library Styles](/docs/libraries/library-styles/) for more details.
## Deleting a Text Style
To delete a Text Style, switch to the Components View in the Mac app. Head to **View > Components** in the menu bar, or use the keyboard shortcut ⌃2. Then, click on the Text Styles tab. Select the style you want to delete and press the backspace key.
--------------------------------------------------------------------------------
title: "Layer Styles"
description: "Layer Styles work in exactly the same way as Text Styles. The only difference is that they work with shape layers, while Text Styles work with text layers."
last_modified: "2026-04-07"
url: "https://www.sketch.com/docs/symbols-and-styles/text-and-layer-styles/layer-styles/"
--------------------------------------------------------------------------------
## Layer Styles
Layer Styles work in exactly the same way as Text Styles. The only difference is that they work with shape layers, while Text Styles work with text layers.
## Creating a text or layer style
To create a Layer Style, select a shape layer with styles applied, then click the **Create** button in the **Appearance** panel of the Inspector. Alternatively, open the Components View, click on the Layer Styles tab on the toolbar and then on the button. Creating, editing, and applying Layer Styles works the same way as Text Styles.
If your Layer Style has corners, you can choose whether to include them in the style or not. Corners are included by default in any new Layer Styles you create, but they’re disabled for existing ones.

*How to create a Layer Style in Sketch.*
> **Note:** You can include Layer Styles as part of a [Library](/docs/libraries/) for sharing with others. Take a look at [Library Styles](/docs/libraries/library-styles/) for more details.
## Applying Layer Styles
You can apply Layer Styles to almost anything — shapes, vectors, Frames, graphics, or groups. You can’t apply them directly to Symbol instances, but if the Symbol Source includes styles, you’ll be able to override them in the instance.
To apply a Layer Style, select the layer you want, then click the style button under the **Appearance** section in the Inspector. Choose the style you need and click to apply it.

## Inserting a text or layer Style as a new layer
### Inserting as a new layer with the Command Bar
Press S or click the Sketch icon in the toolbar to open the Command Bar and select Layer Styles to view all available styles from your Libraries and current document. Choose the style you want, press ⏎, and click on the Canvas to insert it as a new layer.
You can also double-click or click and drag a Layer Style from the Command Bar to insert it as a new layer.

### Inserting as a new layer from the Components View
To insert a Layer Style or Text Style from the Components View, select the component you want to insert as a new layer and click on **Insert Shape with Style** or **Insert Text with Styles** in the Inspector.

## Deleting a layer Style
To delete a Layer Style, switch to the Components View in the Mac app. Head to **View > Components** in the menu bar, or use the keyboard shortcut ctrl2. Then, click on the Layer Styles tab. Select the style you want to delete and press the backspace key.
--------------------------------------------------------------------------------
title: "Color Variables"
description: "Learn how to create, apply, and manage Color Variables in Sketch to keep colors consistent across your document and Libraries."
last_modified: "2026-05-19"
url: "https://www.sketch.com/docs/symbols-and-styles/color-variables/"
--------------------------------------------------------------------------------
## Color Variables
With Color Variables, you can set colors and gradients that synchronize across your document. When you make changes to a Color Variable, those changes appear across all of the layers that use it. You can create Color Variables that are local to a specific document or share them in a Library to use across different documents.
- Color Variables let you sync colors across your document. Change a Color Variable once and it updates every layer that uses it.
- You can export Color Variables as [Color Tokens](/docs/developer-handoff/#exporting-color-variables-as-color-tokens) or [copy their individual values](/docs/developer-handoff/#how-to-export-individual-assets) from the web app inspector.
Color Variables are also [available in the web app Inspector](/docs/developer-handoff/#copying-colors-and-color-variables), useful during handoff.
## Creating a Color Variable
You can create a new Color Variable from the color well in the Inspector, from the Components View, or from **Edit** > **Find and Replace Color**.
### Creating a Color Variable from the Inspector
Select any layer and click on the color well in the Inspector. Select the solid color you want to use, then click to add a Color Variable. Type a name and click **Add** or press ↵ to save. You can also use the eyedropper tool to create Color Variables from your display, inside or outside of the Mac app.
### Creating a Color Variable from the Components View
1. Switch to Components View 1. Click the **Color Variables** tab in the toolbar, then click 1. Set the color you want in the color panel that appears in the Inspector, then type a name
1. Press ↵ or click anywhere in the Previews Grid to save
## Organizing Color Variables
### Grouping Color Variables
To group your Color Variables:
1. Switch to Components View and click the **Color Variables** tab
1. Hold ⇧ and click the Color Variables you want to group
1. Control-click your selection and choose **Group** from the context menu
1. Double-click the group title in the left sidebar to rename it
You can also drag Color Variables into existing groups in the left sidebar.
Like Symbols or Text Styles, you can also group Color Variables by using a `/` in their names. Anything before `/` will become the group name, and anything after will be the name of the Component within that group. For example, Primary/light and Primary/dark will become part of a group named Primary.
### Organizing Color Variables in the Components View
Color Variables and groups will organize automatically in alphabetical order. You can use numbers in front of Color Variables so they appear in the order that works best for you. For example, `1 Primary` or `2 Secondary`. You can also add numbers to the end of similarly named variables, such as `Neutral-100`, `Neutral-200`.
## Applying Color Variables
### Applying a Color Variable from the Inspector
Color Variables appear in the Inspector wherever a color is applied — fills, borders, etc. They also show up in the [Colors section](/docs/symbols-and-styles/selection-colors/), so you can quickly spot them and change them across your whole selection at once.
Select a layer, then apply a Color Variable in one of these ways:
- Click any color well to [open the color picker](/docs/symbols-and-styles/styling/the-color-panel/), then switch to the **Variables** tab. To stop using a Color Variable, switch to **Custom** in the color picker — it picks up the variable’s current value, so you can modify it independently.
- Click a color in the [Colors section](/docs/symbols-and-styles/selection-colors/) to open the color picker, then switch to the **Variables** tab.
- Click a color override in a Symbol instance to open the color picker, then switch to the **Variables** tab.
You can switch between Color Variables from your document or any enabled Library.
**Note:** When you use a Color Variable for the color of a text layer and then create a new text layer in the same document, your new text layer will also use that Color Variable.
### Picking a Color Variable with the eyedropper
You can apply a Color Variable by picking it [directly from the Canvas with the eyedropper](/docs/symbols-and-styles/styling/the-color-panel/#the-eyedropper):
1. Press ⌃C or click the eyedropper in the color panel.
1. Hover over a layer that uses a Color Variable — the loupe labels show the variable name alongside the color value.
1. Hold ⇧ and click to apply the Color Variable. Without ⇧, you’ll pick the raw color value instead.
### Applying a Color Variable from the Find and Replace menu
In the **Find and Replace** menu, click on the color well next to "Replace with", and select the Color Variable you want to apply. Click anywhere to close the color picker, and hit **Replace** to update the colors.
## Editing Color Variables
You can edit Color Variables from the Inspector, the Components View or Find and Replace menu.
You can Control-click on any Color Variable and choose **Copy Value** to copy its value as HEX, RGB, HSL, Objective-C, Swift or SwiftUI.
### Editing Color Variables from the Inspector
Select any layer, and click on a color well in the Inspector. In the color picker, click **Edit** and pick a new color. Choose **Update** to save. Keep in mind you can only edit Color Variables that are local to your document. If you want to edit Color Variables from a Library, you will have to edit them in their Library document.
### Editing Color Variables from the Components View
Switch to the [Components View](/docs/interface-and-settings/the-mac-app-interface/the-components-view/) and click on the **Color Variables ** tab. Click on the color swatch you want to edit and choose the new color using the Inspector. Changes will preview and save automatically.
## Renaming a Color Variable
To rename a Color Variable, switch to the Components View and click on the **Color Variables** tab. Select the color swatch you want to rename, then type the new name in the **Name** field at the top of the Inspector. Your changes save automatically. You can also Control-click the color swatch and choose **Rename**.
## Deleting a Color Variable
To delete a Color Variable, switch to the Components View, and click on the **Color Variables ** tab. Select the swatch of the Color Variable you want to delete and hit backspace. You can also Control-click on the color swatch and select **Delete**.
## Find and replace a specific color or Color Variable
Choose **Edit > Find and Replace Color** to bring up the Find and Replace Color menu, or open the [Command Bar](/docs/interface-and-settings/the-mac-app-interface/the-command-bar/) and type "replace" to find it quickly. From there, select the color or Color Variable you want to find within your design and the color or Color Variable you want to replace it with.
Enable “Include all opacities of this color” to find all colors with different alphas, but the same RGB or HEX values.
Enable “Preserve original opacity” to keep those different alphas intact when you replace the color.
**Note:** We built [a plugin to help you migrate to Color Variables](https://github.com/sketch-hq/color-variables-migrator). They’ve been around for a while, but this plugin makes it easier to apply them consistently across your documents. It automatically assigns Color Variables to any layers, Text Styles, or Layer Styles using the same color — even if they weren’t using a Color Variable before.
## Using Color Variables in developer handoff
Color Variables keep colors consistent between design and code projects. You can download Color Variables as [Color Tokens](/docs/developer-handoff/#exporting-color-variables-as-color-tokens), as CSS variables or in JSON format, or even generate a URL that dynamically updates with the latest values. You can also copy values for individual Color Variables from the [web app Inspector](/docs/developer-handoff/#copying-colors-and-color-variables).
--------------------------------------------------------------------------------
title: "Selection colors"
description: "Use the Colors section in the Inspector to view and swap colors across a selection of layers with different colors — whether you’re working with Symbol instances, plain layers, or a mix of both."
last_modified: "2026-04-07"
url: "https://www.sketch.com/docs/symbols-and-styles/selection-colors/"
--------------------------------------------------------------------------------
## Selection colors
The Colors section in the Inspector shows every color used across multiple layers or a container — so you can swap any color across your whole selection at once, without touching each layer individually. It works with Symbol instances, plain layers, or a mix of both.
## Colors in the Inspector
The Colors section appears in the **Selection** section of the Inspector when you select a container — such as a group, frame, or Symbol instance — that has layers with colors inside it, or when you select two or more layers with different colors.
> **Note:** If a layer sits inside a hidden group, its colors still appear as long as you select it directly — you don’t need to unhide the parent group first.
You’ll see fills (including gradients), borders, text colors, and tints. When you select a container, you’ll see colors from every layer nested inside it. If you select a shape group created with [boolean operations](/docs/designing/shapes/boolean-operations/), you’ll see only the group’s own colors, not those of the individual shapes inside it. Gradients appear as their type — for example, **Linear** or **Radial** — with a gradient preview swatch.
By default, colors are sorted by frequency — the most common color first, with [Color Variables](/docs/symbols-and-styles/color-variables/) listed before plain colors. To sort by hue instead, click in the Colors section header.
The same color at different opacities appears as separate rows by default, so you can edit each opacity independently. You can also [combine them into one row](#combining-opacity) to edit them all at once.
## Working with colors
In the Colors section, you can edit colors, highlight matching layers on the Canvas, or select those layers in the Layer List.
- **Click any color** to open the [Color Panel](/docs/symbols-and-styles/styling/the-color-panel/) — any change you make applies to every layer in the selection that uses that color, while keeping each layer’s opacity intact.
- **Hover over the color swatch** to highlight matching layers on the Canvas.
- **Click the chevron** on a color row to select only the layers using that color in the Layer List.
- **Hover over a color row and hold ⌥** to show a **Reset Overrides** button — click it to reset that color’s overrides across all Symbol instances in your selection, for that color only.
When your selection includes a mix of Symbol instances and plain layers, their colors all appear together in the same Colors section — so you can change a color once and it updates across both.
If your selection includes Symbol instances, you’ll also find a **Reset Overrides** button in the Colors section header — click it to reset all color overrides at once. See [Resetting overrides](/docs/symbols-and-styles/overrides/#resetting-overrides) for details.
## Combining opacity
If the same color appears at different opacities across your selection, you’ll find a separate row for each opacity value by default — so you can edit each one on its own.
If you’d rather treat them as one color, click in the Colors section header and turn on **Combine Opacity**. You’ll see all rows for that color merge into one — the opacity field shows **Mixed**. Any color change you make applies to all those layers at once. If you drag the opacity slider, each layer shifts by the same amount — though opacity is capped at 0% and 100%. If you type a value directly, all layers are set to that exact opacity.
To go back to editing each opacity separately, click again and turn off **Combine Opacity**. Combine Opacity works with solid colors and gradients, but not with Color Variables.
*The Combine Opacity option in the Colors section filter menu.*
--------------------------------------------------------------------------------
title: "Symbols"
description: "Learn how to create and edit Symbols in Sketch with the help of our step-by-step guides and video tutorials."
last_modified: "2026-04-07"
url: "https://www.sketch.com/docs/symbols-and-styles/symbols/"
--------------------------------------------------------------------------------
## Symbols
Symbols can speed up your workflow by giving you a way to save and reuse common elements across your designs. When you make changes to a Symbol, those changes appear everywhere you use it in your designs. You can also create [overrides](/docs/symbols-and-styles/overrides/#customizing-instances-with-overrides-in-symbols) for specific parts of individual Symbols.
## Creating a Symbol
To create a Symbol, select a layer, frame, graphic, group, or multiple layers and choose **Create ** in the toolbar, **Layer** > **Symbol** > **Create Symbol** in the Menu Bar, or press ⌘Y. Give your Symbol a name and choose whether to send its Source version to a separate Symbols page, or keep it on the page you’re currently looking at.
### Symbol Sources and Instances
When you create a Symbol, we’ll create both a _Source_ and an _Instance_ of it. You can create as many instances of the same Symbol as you like, but you’ll only ever have one Source. If you make a change to a Source this will also show in any instances of that Symbol in your document.
If you choose **Send Symbol to Symbols page**, you’ll see a new page above the Layer List called _Symbols_. In here, you’ll find your Source.
If you didn’t choose to send the Symbol to the _Symbols_ page when you created it, it will stay on the current page, with a purple highlight and name to make it clear it’s a Symbol Source.
### Turning a Symbol back into layers
To turn a Symbol back into regular layers, select the Symbol’s Source in the Layer List and choose **Layer** > **Symbol** > **Remove Symbol Source**, or press ⌘⇧Y. Any instances related to it will become groups and editing the Source will no longer change those instances.
### Replacing a layer with a Symbol
To replace any regular layer with a Symbol, Control-click it and choose **Replace with Symbol**, head to **Layer** > **Symbol** > **Replace with Symbol** in the Menu Bar, or search for _Replace with Symbol_ in the [Command Bar](/docs/interface-and-settings/the-mac-app-interface/the-command-bar/). Choose a Symbol from the list — the instance will resize to fit the layer’s bounds.
## Creating nested Symbols
Nested Symbols give you finer control over complex designs. For example, a nested Symbol can take the place of a design element, such as a logo, within a larger Symbol like a banner. This way, any edits you make to your logo will automatically reflect on your banner’s Symbol Source.
There are two ways to create nested Symbols:
- **Insert an instance into a Source** — go to your Symbols page and insert a Symbol instance inside another Symbol. When you edit that instance’s Source, it’ll update everywhere, including inside the parent Symbol.
- **Convert existing Sources** — select two or more Symbol Sources on the Canvas and choose **Create Symbol** in the toolbar, or press ⌘Y.
There’s no limit to how many Symbols you can nest within a Symbol Source. However, you can’t use a Symbol instance inside its own Source.
> **Note:** If you have selected a nested Symbol, or a layer inside another Symbol, you can select the parent Symbol using **Edit** > **Select** > **Select Containing Symbol** (⇧⎋).
### Using nested Symbol overrides
For even greater customization, you can create other versions of your nested Symbol to use as overrides. For example, you can turn several icons into nested Symbols. Then, whenever you want to swap one icon with another, you can select it from the **Nested Symbols** section of the Inspector.
To focus on a nested Symbol’s overrides, click the chevron next to it in the Inspector.
Overrides for nested Symbols reflect the structure of the nesting. The **Selection** section organizes overrides by type using tabs — **Colors**, **Nested Symbols**, **Text & Text Styles**, and **Images**. You can [override](/docs/symbols-and-styles/overrides/#customizing-instances-with-overrides-in-symbols) these by selecting the entire Symbol instance, or selecting the individual nested Symbols or layers within the Symbol to override specific elements.
## Inserting Symbols
To browse and insert Symbols, you can either:
1. Switch to the [Components View](/docs/interface-and-settings/the-mac-app-interface/the-components-view/) 2. Press Y to launch the [Command Bar’s](/docs/interface-and-settings/the-mac-app-interface/the-command-bar/) Symbols view.
### Components View
Switch to the **Components View** by clicking on the tab in the top-left of the toolbar (you can also use ⌃1 and ⌃2 to toggle between the Canvas and the Components View , respectively).
By default, you’ll see all the Symbols in your document. You can filter this view by clicking on any groups you’ve created for your Symbols in the left sidebar. You can also use the search bar at the top right of the Components View to quickly find the Symbol you’re looking for. Once you’ve found the Symbol you want, click **Insert** in the toolbar or Control-click on it and choose **Insert** to place it onto your Canvas.
## Editing Symbols
There are two main ways to edit a Symbol. You can edit the contents in the Symbol Source, or you can edit individual instances with overrides.
### Editing a Symbol Source
To edit a Symbol Source, select any instance on the Canvas and press ⌘⏎ or click ** Edit Source** in the Inspector. You can also go directly to the Symbol Source’s frame on the Canvas or Symbols page and edit the layers there.
Press ⌘ and click inside a Symbol to instantly select a nested Symbol or a shape you’re using as a background. After doing so you’ll see a **Back to Parent** button on the top left of your selection — click the button, or press ⎋, to return to the parent Symbol again.
Any edits you make to the Source will sync to any instances of it in your design. If you navigated here from an instance, click **Return to Instance** when you’re done to go back and see your changes reflected there.
### Overriding prototyping Hotspots
The Inspector also shows all available **Hotspots** in the **Interactions** section. If you’ve added a [Hotspot](/docs/prototyping/adding-hotspots/) to your Symbol Source or instance as part of a prototype, you can override its target frame, or select _None_ to disable it.
### Detaching a Symbol Instance from a Symbol Source
To make edits to an individual Symbol instance without using overrides, you’ll need to detach it from its Source by choosing **Layer** > **Symbol** > **Detach from Symbol** from the menu or pressing ⌘⇧Y. You can also Control-click on a Symbol instance and choose **Detach from Symbol** there.
Right-click on any instance to detach all contents from the Symbol Source. This will convert any instance, and any nested Symbols it contains, to a frame. You can also detach content from a Symbol by pressing ⌥⇧⌘Y or heading to **Layer** > **Symbol** > **Detach all Contents from Symbol** in the Menu Bar.
*Detaching converts the instance to a frame, leaving the Source and other instances untouched.*
### Swapping Symbols
You can swap Symbols [using the popover](/docs/symbols-and-styles/replacing/) in the Inspector. Choose a Symbol from the list or search for the Symbol you’re looking for and click to swap it with the currently selected Symbol.
By default, swapping a Symbol will resize the instance you‘ve selected to fit its new Symbol Source. To keep the instance size the same when you swap Symbols, deactivate the "Preserve current dimensions when replacing" option in the Replace popover.
### Scaling and resizing Symbols
You can scale and resize Symbols like any other layer using the Scale command. Choose **Layer** > **Transform** > **Scale** from the menu (or press K). Styles and properties like borders will increase or decrease in proportion with the Symbol Instance itself, without affecting the Source.
## Organizing Symbols
### Creating Symbol groups
To group Symbols together in the Components View and [Command Bar](/docs/interface-and-settings/the-mac-app-interface/the-command-bar/), name them using the format: `Group-name/Symbol-name`. For example, two Symbols named `Button/Normal` and `Button/Pressed` will become part of a group named `Button`.
> **Note:** You will need to have two or more Symbols in a group before they’ll appear in their own submenu.
### Organizing Symbols in the Components View
You can also organize your Symbols via the [Components View](/docs/interface-and-settings/the-mac-app-interface/the-components-view/) . To group several Symbols together, hold ⌘ and select the ones you want to group. Control-click on any of them and choose **Group** in the contextual menu. Give the new group a name by double-clicking on it in the left sidebar of the Components View.
To rename a single Symbol, click on it and rename it using the Inspector. To rename a group, double-click on the group name in the left sidebar.
You can also add a Symbol to an existing group by dragging it to the left sidebar.
Symbols in the Components View are ordered alphabetically. You can also assign search keywords to any component to make it easier to find without knowing its exact name.
### Using the Symbols page
Sending Symbol Sources to the _Symbols_ page can help keep things organized, especially with complex designs. It also helps to reduce confusion between using a Symbol Source or instance.
To manually move a Symbol Source, drag it onto the _Symbols_ page title in the Layer List, or Control-click on it and choose _Send to "Symbols" Page_.
--------------------------------------------------------------------------------
title: "Overrides"
description: "Customize Symbol instances using overrides for colors, text, images, Styles, and nested Symbols."
last_modified: "2026-04-07"
url: "https://www.sketch.com/docs/symbols-and-styles/overrides/"
--------------------------------------------------------------------------------
## Overrides
Overrides let you easily change the content or style of Symbol instances without affecting other instances or the Symbol Source. You can apply and manage overrides for nested Symbols, colors, text properties, images, and Layer Styles.
## How to apply overrides
Select a Symbol instance to see all the available overrides in the **Selection** section of the Inspector. Each type appears in its own section:
- Any nested **Symbols** within the Symbol and **Hotspots** that they contain
- The **Text** values you can set for the Symbol, along with any applied [Text Styles](/docs/symbols-and-styles/text-and-layer-styles/text-styles/)
- **Text Attributes** like font weight, size, and alignment
- Any [**Layer Styles**](/docs/symbols-and-styles/text-and-layer-styles/layer-styles/) applied to layers in the Symbol
- All the **Images** used within the Symbol, so you can replace them in one place
- All the **Colors** used in the Symbol — with [Color Variables](/docs/symbols-and-styles/color-variables/) shown first, making it easier to update them across all matching layers
Hover over any override to highlight every layer that uses it on the Canvas — so you can see every affected layer before you make a change.
The Inspector only shows the overrides you’ve added in your Symbol Source. For example, if a Symbol doesn’t include any images, the Images section won’t appear. Since the Inspector groups overrides by type, you can make bulk changes to colors, Styles, text, and images throughout a Symbol.
If you want to override something in a specific layer inside a Symbol, hover over the layer on the Canvas, hold ⌘, and click. This lets you select the layer, no matter how deeply it’s nested in the Symbol. Alternatively, you can double-click the Symbol instance on the Canvas to step into its layer hierarchy.
As you change your selection, the Inspector updates to show only the overrides that match the selected layer.
### Hiding layers in Symbol instances
You can hide any layer inside a Symbol instance. It’s useful to adapt the same Symbol to different scenarios. For example, if you only need 4 menu items instead of the 5 items set in the Symbol source.
There are several ways to hide layers. Select an instance and expand it in the [Layer List](/docs/interface-and-settings/the-mac-app-interface/the-layer-list/) by clicking the next to its name. Find the layer you want to hide and select any of these options:
- Hover over the layer you want to hide and click the eye icon to hide it.
- Use the contextual menu: select the layer you want to hide, ⌘-click it, then select **Hide layer**.
- Use the shortcut ⇧⌘H to toggle the layer’s visibility.
Hidden layers show this icon on the Layer List.
## Text overrides
You can change the contents of text overrides in a couple of ways. You can double-click a text layer in a Symbol instance on the Canvas and type new content, or type into the override field in the Inspector. Clearing the field resets it to the text in the Symbol Source. You can also use [Data](/docs/designing/data/) to populate text Overrides by clicking the Data icon .
### Styling text overrides
You can use Markdown-like syntax in Symbol instance text overrides:
- Use two asterisks `**` for **bold**
- Use two underscores `_ _` for _italic_
- Use two angle brackets `[ ]` for underlined text
Alternatively, you can select the text on the Canvas and use the shortcuts ⌘B, ⌘I, and ⌘U respectively.
> **Note:** To escape Markdown formatting, place a backslash (`\`) directly before the first formatting character.
## Overriding Text and Layer Styles
If you’ve set up [Text Styles](/docs/symbols-and-styles/text-and-layer-styles/text-styles/) or [Layer Styles](/docs/symbols-and-styles/text-and-layer-styles/layer-styles/) in your design, you’ll find these in the **Text Attributes** and **Layer Styles** sections in the Inspector. The drop-down lets you quickly swap a Style across the whole Symbol. If you want to override text properties like weight, color, or alignment for a specific layer, select the layer in the Layer List or by double-clicking through the Symbol on the Canvas, then adjust those properties in the Inspector.
## Image overrides
You can override any image layer or shape with a fill in the Inspector. You can either drag an image onto the preview, or choose **Choose Image…**. You can also use Data to populate individual image Overrides by clicking the Data icon .
## Color overrides
The **Colors** section in the Inspector lists all the colors used within a Symbol instance. Click any color to open the [Color Panel](/docs/symbols-and-styles/styling/the-color-panel/) — the change applies to every layer in the Symbol that uses it. You can also hover over the color swatch to highlight matching layers on the Canvas, or click the chevron on a color row to select them.
*The Colors section in the Inspector for a Symbol instance.*
You can reset individual color overrides or the entire section at once — see [Resetting overrides](#resetting-overrides) for details.
The Colors section also works outside Symbols — for plain layers or mixed selections. [Learn more about Selection colors](/docs/symbols-and-styles/selection-colors/).
## Resetting overrides
You can reset overrides at different levels, depending on how much you want to undo.
### Resetting a whole section
Click the **Reset Overrides** button next to the **Selection** section header in the Inspector. This removes every override in that section and restores the original values.
### Resetting individual overrides
For more control, hold ⌥ to reveal a **Reset Overrides** button on each override row. Hover over it to preview which layers will change on the Canvas, then click to reset just that override.
## Managing overrides
Select a Symbol Source and click the gear icon in the Inspector next to Manage Overrides — the panel shows all available overrides. By default, all overrides are enabled.
To restrict certain overrides, uncheck the box next to their name. To disable all overrides at once, turn off the **Allow overrides** option at the top.
## Overriding nested Symbols
The **Nested Symbols** section lists which [nested Symbols](/docs/symbols-and-styles/symbols/) your Symbol contains — you can swap them as you wish. Hover over any nested Symbol in the list to highlight it on the Canvas.
When you swap a nested Symbol inside another Symbol that uses a Stack layout, the new Symbol preserves the dimensions of the previous one. This means you don’t need to manually adjust sizes when swapping.
You can use the chevron to select specific nested Symbol instances and apply overrides to them.
--------------------------------------------------------------------------------
title: "Replacing Components"
description: "To replace a Component, select it on the Canvas and click its name in the Inspector. Use the arrow keys in the popover to select the Component you want to replace it with, then press ⏎. Or, click a Component’s name or preview to replace it instantly."
last_modified: "2026-04-07"
url: "https://www.sketch.com/docs/symbols-and-styles/replacing/"
--------------------------------------------------------------------------------
## Replacing Components
To replace a Component, select it on the Canvas and click its name in the Inspector. Use the arrow keys in the popover to select the Component you want to replace it with, then press ⏎. Or, click a Component’s name or preview to replace it instantly.
1. **Opens the [Command Bar](/docs/interface-and-settings/the-mac-app-interface/the-command-bar/)** to replace a Component while maintaining the position and search query. This gives you bigger previews and makes it easier to navigate the Library. Alternatively, you can open the Command Bar to replace Components by pressing ⌥⌘R.
2. **Group filter**: Shows which group or Library the selected Component is in. Press ⌘↑ to navigate the Library structure.
3. **Preserve dimensions when replacing** replaces a Component while keeping the same dimensions as the one selected on the Canvas. When replacing a nested Symbol, a toggle appears to show or hide the Component or layer instead.
4. **Clear filter**: Shows all available Components of the same type across all Libraries.
5. **Search Bar**: Find specific Components within a group.
> **Note:** **Tip:** You can set the Command Bar as the default way to replace Components in **Settings > General**.
### Useful shortcuts
Use these shortcuts to navigate a Library’s structure:
| Action | Shortcut |
|--------|----------|
| Open filter menu | ⌘F |
| Go to parent group | ⌘↑ |
| Go to current library | ⌥⌘↑ |
| Go to all components | ⌃⌥⌘↑ |
## Filtering Components
Filtering helps you quickly find and replace Components within groups and Libraries. Use the filter menu to move up and down the Library structure for any selected Component.
You can filter Components in two ways:
- Press ⌘F to bring up the filter menu.
- Type a Component name in the search bar.
Combine both methods for more precise results. Start by typing the Component name in the search bar, then press ⌘F to filter by group in the Library. This narrows the results to Components within the selected group.
--------------------------------------------------------------------------------
title: "Templates"
description: "Templates are a great way to start a new project — rather than starting with a blank canvas you can start with a document that already includes frames, placeholder content and more. They’re also a great way to give everyone a head start on repeatable work, while improving consistency across your design documents.
By default Sketch includes templates with [ready-to-go designs](/profile/sketch-templates/) for presentations, social posts, mockups, business cards and so much more.
You can also turn any of your own documents into templates, which will make them available for anyone in your Workspace."
last_modified: "2026-04-07"
url: "https://www.sketch.com/docs/symbols-and-styles/templates/"
--------------------------------------------------------------------------------
## Templates
Templates are a great way to start a new project — rather than starting with a blank canvas you can start with a document that already includes frames, placeholder content and more. They’re also a great way to give everyone a head start on repeatable work, while improving consistency across your design documents.
By default Sketch includes templates with [ready-to-go designs](/profile/sketch-templates/) for presentations, social posts, mockups, business cards and so much more.
You can also turn any of your own documents into templates, which will make them available for anyone in your Workspace.
## Creating Templates
To create a document from one of these templates, head to the Workspace window (⌘O), and click **Templates** in the sidebar. You’ll see a grid view of templates — double-click on any of them to create a new document from that template and start editing.

To turn a Workspace document into a Template, go to the Document’s Settings **File > Document Settings** or press ⇧⌘,. In the General tab, set the document as a Template.
For local documents, you’ll first have to upload it to your Workspace. To do so, drag your local document into the Templates section of the Workspace window.
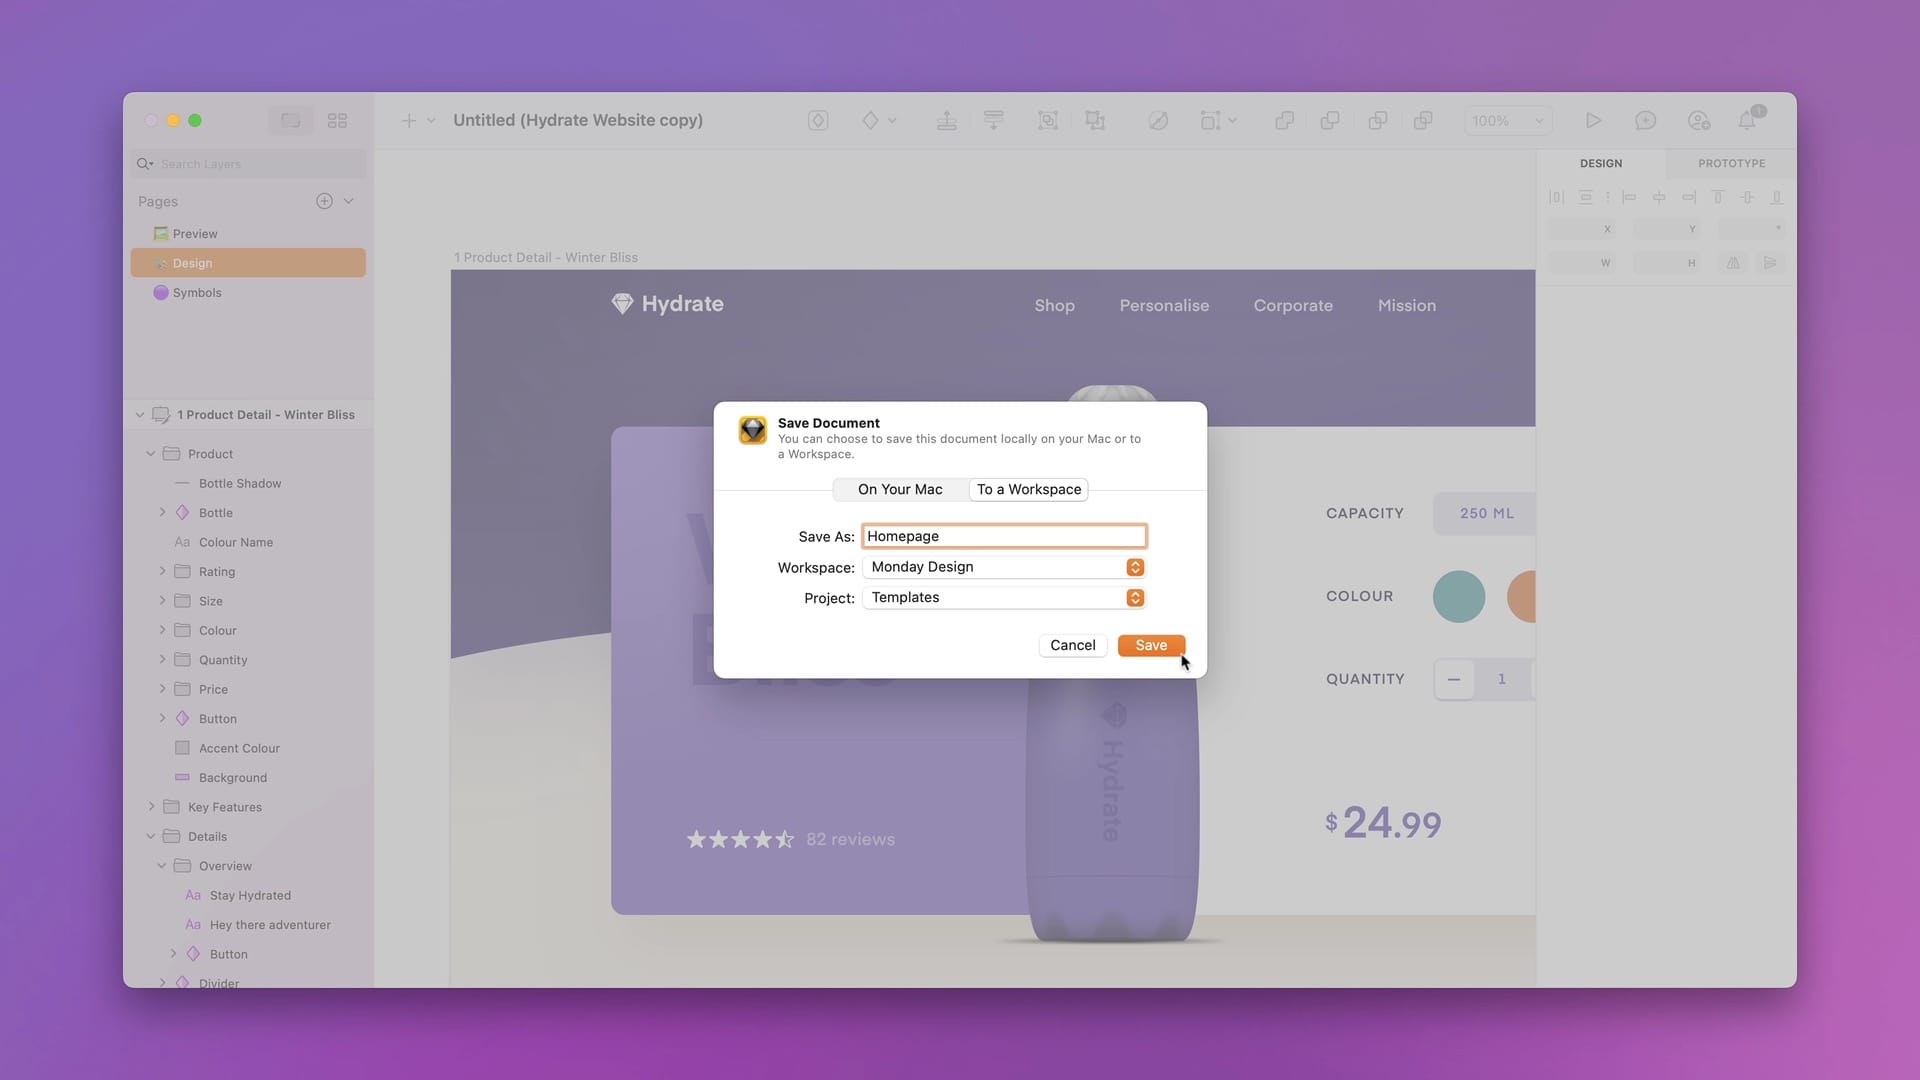
## Getting the most out of Templates
There’s lots of ways in which Templates can be useful for you and your team, but here are a few general tips:
### Working with images
The built-in templates make extensive use of images, but can also add your own photos. Simply, drag and drop an image from the Finder or Photos app onto any layer. Sketch will replace either the image fill or resize the image layer to fit the new proportions.
### Working with Libraries
[Libraries](/docs/libraries/) are a great way to reuse existing elements and give yourself a headstart. However, you may not always want all your libraries to be enabled at all times. For example, if you design for both iOS and Android you likely have different libraries for each platform. Set up the right libraries for each document and then save it as a Template. From now on, each iOS or Android project will have the right libraries enabled from the start.
This way, you no longer need to remember whether you enabled or disabled the right Library when switching documents — Sketch will do the work for you.
### Creating custom previews for your template
You can give your document a custom preview that will appear the web app and Workspace Window. By default, we’ll use the first frame in the document, but you can change this at any point. In the Mac app, right-click on the frame you want to set as thumbnail and choose 'Set as Thumbnail' from the menu.
--------------------------------------------------------------------------------
title: "What are Sketch Libraries? Information and guides"
description: "Learn how to use Libraries in Sketch with the help of our step-by-step guides and video tutorials."
last_modified: "2026-01-23"
url: "https://www.sketch.com/docs/libraries/"
--------------------------------------------------------------------------------
## What are Sketch Libraries? Information and guides
Libraries are Sketch documents containing components that you can share with multiple teams, and reuse across all documents.
Libraries help you organize your components (Symbols, Text Styles, Color Variables, Layer Styles and frame templates) and reuse them across documents. When you update components in a Library, any documents using these components will get an update notification. You can review those changes and confirm them to make sure you’re always using the most up-to-date components in your work. You can even [enable a Library for a single document](/docs/interface-and-settings/document-settings/document-libraries/), if you prefer.
Libraries are handy for teams working on designs that share components like icons, UI elements or branding. But they’re just as useful if you’re working solo. With Libraries, you can quickly insert common components (like [Apple’s iOS UI](https://developer.apple.com/design/resources/) elements) into your designs and be sure they’re always up to date.
--------------------------------------------------------------------------------
title: "Creating and Adding Libraries"
description: "Learn how to create and add Libraries in Sketch with the help of our step-by-step guides and video tutorials."
last_modified: "2026-06-22"
url: "https://www.sketch.com/docs/libraries/creating-and-adding-libraries/"
--------------------------------------------------------------------------------
## Creating and Adding Libraries
You can change any Sketch document into a Library: simply open a local or Workspace document and choose **File** > **Add as Library**.

*How to add a Workspace document as a Library*
If you open a document that’s been set up as a Library, choose **File** > **Enable Library** to add it.
In the **Settings** window (**Sketch** > **Settings**) you can also browse all the available Libraries in your Workspace. To add a Library, scroll through the list and enable the checkboxes for those you want to use. When you’ve enabled a Library, you’ll see if you’re using a [starred version](/docs/sharing-and-collaborating/sharing-and-viewing-documents/creating-starred-versions/#how-to-star-a-version) and when it was created or updated.
To add a library from a local document, open the Settings window or press ⌘,. Click on the [Libraries](/docs/interface-and-settings/mac-app-settings/libraries/) tab. Then, drag the Sketch document you want to use as a Library into the window. You can also use the **Add Local Library** button on the bottom left of the same window to browse in Finder for the document.
To find out more about the options in the Libraries tab, take a look at the [Settings section](/docs/interface-and-settings/mac-app-settings/libraries/).
To turn a regular document into a Library, click on , select **Settings**, then choose the option to set the document as a **Library**. Doing so will mark your document as a Library for everyone in your [Workspace](/docs/interface-and-settings/workspace-and-account-settings/).
You can add a Library from the Web app by clicking on and selecting **Add Library** from the list. From here, you’ll be prompted to open the Mac app, where you’ll see the Library added and enabled.

*How to enable any document as a Library in the web app*
## Libraries in My Drafts
Libraries you create in My Drafts will only be available for you. This is handy for elements you use frequently in your designs but that the rest of the team may not necessarily need. This way, your team will only see relevant Libraries.
--------------------------------------------------------------------------------
title: "Renaming and replacing Libraries"
description: "Learn how to rename and replace Libraries in Sketch with the help of our step-by-step guides."
last_modified: "2026-01-26"
url: "https://www.sketch.com/docs/libraries/renaming-and-replacing-libraries/"
--------------------------------------------------------------------------------
## Renaming and replacing Libraries
## Renaming a Library
You can easily rename a Library in the web app, just as you would rename any document. From them Mac app, you can rename Workspace or local Libraries. If you’re renaming a local library you’ll need to remove it first and then rename it using Finder.
### Renaming a local Library
1. Head to **Sketch** > **Settings** or press ⌘, and click on the **Libraries** tab.
1. Right click the local Library you want to rename, and select **Show in Finder**
1. Choose **Remove Library**
1. Rename the Library using Finder
1. Add the Library again via **Sketch** > **Settings** > **Libraries** (see [Creating and Adding Libraries](/docs/libraries/creating-and-adding-libraries/))
### Renaming a Workspace Library
1. Press ⌘O to open the Workspace window
1. Locate the library document
1. Righ-click on the document thumbnail and select **Rename**
1. Edit the name and press ⏎ when done
To rename a Library in the web app, click on on the Library’s thumbnail and select **Rename** from the menu. Enter a new name and save by clicking the **Rename** button.
## Replacing a Library
You can replace Libraries in your documents, which can help you save a lot of time when you’re doing things like theming. When you replace a Library, Components with the same name and location will swap their equivalent in the replacement Library. You can choose to replace all Components, just a specific type or even a custom selection.
To replace a Library, head to **Edit** > **Replace Library** in the menu bar, choose **All Components** to replace all Components with the same name or select the Component type. Finally, choose the Replacement Library (make sure it’s already part of your installed Libraries).
For more control, you can select specific Components on the Canvas and head to **Edit** > **Replace Selected Components** in the menu bar to swap out the Library for just those specific elements.
--------------------------------------------------------------------------------
title: "Sharing Libraries"
description: "Learn how to share Sketch Libraries with the help of our step-by-step guides and video tutorials."
last_modified: "2026-01-23"
url: "https://www.sketch.com/docs/libraries/sharing-libraries/"
--------------------------------------------------------------------------------
## Sharing Libraries
Sharing Libraries via your Workspace is the best way to make sure everybody uses the right components in their designs. You can also upload a Library to a server and use RSS for updates.
## Sharing via your Workspace
Open the document you want to use as a library and click on **File** > **Document Settings** > **General**. Select (Set As) **Library** and close the window.
Once this is done, you’ll find the Library in **Sketch** > **Settings** > **[Libraries](/docs/interface-and-settings/mac-app-settings/libraries/)** alongside other Libraries from any Workspace you belong to. Scroll or search to find the Libraries you need and click on the checkbox to enable them.
Find the document you want to use as a Library, hover over its thumbnail, click the button and select **Settings**. Set the document as a Library and click **Update**.
The Library will now appear in the Libraries section on the Workspace’s sidebar and it can be added from the web app by hovering over the Library thumbnail, clicking on the button and selecting **Add Library** to add it to Sketch.
## Sharing a Library publicly
You can share your Workspace Libraries publicly. Anyone with the library link will be able to install it and use its Components and get notified of available updates.
[Adjust the document permissions](/docs/sharing-and-collaborating/sharing-and-viewing-documents/managing-share-settings/#sharing-a-document-via-public-link/) so anyone can access it. Once this is done your Library will be publicly available.
## Hosting a Library on a server
You’ll first need to host your Library document on a server, then create a JSON file that looks like this:
```json
{
"versionID" : "0.5.1",
"downloadURL" : "https://my.server.com/TemplateLibrary.sketch",
"downloadFileSize" : 68487516,
"creationDate" : "Wed, Mar 17 2022 14:00:00 +0000",
"itemName" : "Template Library",
"imageURL" : "https://my.server.com/TemplateLibrary.png"
}
```
Save the JSON, making sure you add the `.json` file extension to the filename. For the example above we have named it `TemplateLibraryUpdate.json`.
In the JSON file, edit the following fields as necessary using the dictionary keys and values below as a reference.
**Important:** Your JSON file, Library document, and thumbnail image **must** be served via `https`.
Use a tool like the Meyerweb URL encoder to encode your JSON file URL and append it to the Sketch app link as in the following:
`sketch://add-library?url=https%3A%2F%2Fmy.server.com%2FTemplateLibraryUpdate.json`
The two parts of the example above are the Sketch app link to add a Library, `sketch://add-library?url=`, and the encoded Library document URL:
`https%3A%2F%2Fmy.server.com%2FTemplateLibraryUpdate.json`
To verify that everything’s working, enter the full URL (from `sketch://` through to the end your encoded URL) into your browser. Sketch should now launch and add your Library.
#### Dictionary keys and values
* `itemName` string: the Library’s display name. If it wasn’t provided, the final path component of the `downloadURL` with the file extension removed will be used instead. **Not required**
* `versionID` string: a unique version identifier **Required**
* `downloadURL` string: a URL as a string pointing to the Library document to download. **Required**
* `downloadFileSize` integer: the file size **in bytes** of the Library document described by `downloadURL`. **Required**
* `creationDate` string: a date as a string (conforming to the RFC822 date and time text format) describing when the Library version was created. **Not required**
* `imageURL` string: a URL as a string pointing to an image file that you can use to represent the Library in the Sketch UI until it’s downloaded and installed. **Not required**
**Note:** The `versionID` value doesn’t check whether one Library is newer than another. Sketch considers an update to be available if this value differs to the one that’s stored locally by Sketch.
--------------------------------------------------------------------------------
title: "Library Symbols"
description: "Learn how to use Library Symbols in Sketch with the help of our step-by-step guides and video tutorials."
last_modified: "2026-01-23"
url: "https://www.sketch.com/docs/libraries/library-symbols/"
--------------------------------------------------------------------------------
## Library Symbols
## Browsing and Inserting Library Symbols
### Browsing Library Symbols
Browse Library Symbols with the Command Bar. Press ⌘K to open it and select the Symbols option — or press ⌃Y to insert Symbols directly. Command Bar will show all available Symbols or the group where you last inserted Symbols from. Press ⌘F within the Symbols view to browse through your Libraries.
Type a Symbol’s name or use [Command Bar shortcuts](/docs/interface-and-settings/the-mac-app-interface/the-command-bar/) to navigate Symbols in a Library or switch between Libraries.
### Inserting Library Symbols
To insert a Symbol, click its thumbnail and press ⏎, or click and drag it onto the Canvas. You can also use the arrow keys to move between thumbnails.
To insert multiple Symbols, hold ⇧ and click on any other Symbol thumbnails you want to insert.

*How to insert Library Symbols using the Command Bar.*
In the Inspector panel, under the Symbol section, you’ll find a dropdown menu that either opens the Command Bar or [a popover for replacing Symbols](/docs/symbols-and-styles/replacing/), depending on which option you’ve enabled.
## Editing Library Symbols
To edit a Library Symbol, select an instance on the Canvas and choose one of the following options:
- Head to **Layer** > **Edit Symbol** in the menu bar.
- Press ⌘⏎.
- Click **Edit in Library** in the Inspector panel.
The first two options will open a dialog where you can choose to either edit the Symbol in its source Library or unlink the instance to create and edit a new local Symbol.
The third option opens the Library document and takes you straight to the Symbol Source you want to edit.

*Options to edit a Library Symbol.*
If the Symbol belongs to a third-party Library or you don’t have edit permissions for the Library document, you’ll only be able to unlink the instance from the Library.
> **Note:** If you’re using a Library as part of a team, take extra care when editing its Symbol Sources. Everyone using that Library will receive any changes you make.
You can star specific Library versions. Anyone using that Library will receive all changes included in the starred version. Changes in newer, unstarred versions won’t be available or shared with others — so you can continue working safely until you’re ready to share updates by creating a new [starred version](/docs/sharing-and-collaborating/sharing-and-viewing-documents/creating-starred-versions/).
--------------------------------------------------------------------------------
title: "Library Styles"
description: "Learn how to use Library Styles in Sketch with the help of our step-by-step guides and video tutorials."
last_modified: "2026-01-23"
url: "https://www.sketch.com/docs/libraries/library-styles/"
--------------------------------------------------------------------------------
## Library Styles
As with Symbols, you can share and sync Text and Layer Styles using Libraries.
## Inserting Library Styles
You can insert Library Styles from the [Command Bar](/docs/interface-and-settings/the-mac-app-interface/), using the Inspector under **Appearance**, or through the **Insert** menu in the Toolbar.
Press ⌘K to launch the Command Bar and double-click on the Text or Layer Styles options. Type to search for a specifc Style or navigate the list with the arrow keys or mouse. Select a Style, double click it or press ↵ to insert it on the Canvas.
To insert Styles from the Inspector, select a shape or text layer and click on the Style menu under **Appearance** to display the available Styles. Click on a Style to insert it or navigate the list with the arrow keys and then press ↵.

*Inserting Library Styles via the Command Bar and the Inspector.*
When viewed in the Inspector, Library Styles will display the name or the Library they belong to or _From this Document_ in case it’s a local Style.
You can also click on the button on the Toolbar, then select the Text or Layer Styles options to see the available Styles and insert them by navigating the groups and clicking on a specific Style.
## Replacing Library Styles
You can replace Styles with the Command Bar or the Inspector.
To replace a style with the Command Bar, select a layer that has a Style and press ⌘⌥R. Find the Style you need and once you’ve selected it press ↵, double click it or click on the **Replace** button to replace it.
To replace a Style using the Inspector, select a layer and click on the Styles menu under **Appearance**. Use the popover to replace Styles.

*Inserting Library Styles with the Command Bar and the Inspector.*
## Working with Library Styles
There are different options to manage the changes you make to layers that have Library Styles applied. You can create a new local Style, detach the layer or edit the Style in its source Library. All these options are available in the **Inspector** under the **Appearance** section.
When you make changes to a Style, its name will appear on the Inspector menu in _italics_ and with an asterisk.
1. Click on to create a new local style from your selection. The Library Style will be unaffected.
1. Click on to detach the Style from your selection. The detached layers will have all the styling options from the original Style.
1. Click on and select **Reset Style** to revert all the changes from your selection.
1. Click on and select **Edit Style in Library** to open the Library document that this style belongs to. You’ll need Edit permissions to do this.
> **Note:** Editing a Style in the original Library document will update the Style for anyone using that Library.
## Creating Library Presets
As well as Symbols, Text Styles, and Layer Styles, you can use Libraries to sync and share gradient or image fill presets. To create a Library Preset for a gradient or image fill, for example, select a gradient in the fill popover of your Library document and add it as a preset under **Document Colors**.
You can also create, share and sync solid colors in your Libraries using [Color Variables](/docs/symbols-and-styles/color-variables/#creating-a-color-variable).

*How to add, rename and delete color presets in the Mac app*
When you’re working in a document that uses that Library, click on the title above the presets in the fill popover and select the Library’s name to view all available Library Presets.

*How to use Library Presets in the Mac app*
--------------------------------------------------------------------------------
title: "Updating Library components"
description: "Learn how to update Library components in Sketch with the help of our step-by-step guides and video tutorials."
last_modified: "2026-06-22"
url: "https://www.sketch.com/docs/libraries/updating-library-components/"
--------------------------------------------------------------------------------
## Updating Library components
When you make changes to a Library, any documents connected to it will be ready to pull in the changes. If a library has updates available, you’ll see a **Library Update Available** notification on the toolbar. Click it to open the [Settings window](/docs/interface-and-settings/mac-app-settings/) and update the Library to get its latest version.
If there are updates for any Components in your document (Symbols, Text Styles, Color Variables, Layer Styles or frame templates), you’ll see a **Component Updates Available** notification on the toolbar as well. Clicking on it will display the Component updates dialog to review the changes. Select a component to see what’s changed, and if you don’t want to update a specific Component, uncheck it. When you’re done, click **Update Components**.
> **Note:** If your Library has a starred version, creating a new version won’t send updates to anyone using it unless you star it too. [Learn how to control Library updates with starred versions.](/docs/sharing-and-collaborating/sharing-and-viewing-documents/creating-starred-versions/#controlling-library-updates-with-stars)
> **Note:** You can resize the Component updates dialog to get a better look at component previews.

*Updating Library components involves saving a new version and then downloading it and reviewing the changes available for Components.*
> **Note:** If you prefer not to update Libraries and their components manually, head to **Settings** > **Libraries** and check the **Automatically download and update Libraries option**.
If you want to make changes to a Symbol without affecting or being affected by changes to the Library it comes from, select any instance of it and click **Make Local** in the Inspector. This creates a local Symbol in your document for you to edit freely. Alternatively, select any Symbol instance, press ⌘⏎ and select **Unlink from Library**.
For information how to unlink Text and Layer Styles, take a look at [How to Edit Library Styles](/docs/libraries/library-styles/#how-to-edit-library-styles).
--------------------------------------------------------------------------------
title: "Custom Library thumbnails"
description: "Learn how to create custom Library thumbnails in Sketch to identify them easily when browsing through your Libraries."
last_modified: "2026-01-23"
url: "https://www.sketch.com/docs/libraries/create-a-custom-library-thumbnail/"
--------------------------------------------------------------------------------
## Custom Library thumbnails
Adding a custom thumbnail image for your Library can make it easier to identify it at a glance.
## Creating a custom Library thumbnail
Create a square (1:1) frame anywhere in your Library. Then, create your thumbnail design, right-click anywhere on the frame and select **Set as Thumbnail**.
If you haven’t set a custom thumbnail within your Library, Sketch will use the first frame on the first page of the document instead (provided the frame is 250x250 px or larger).
> **Note:** You can also [set a custom thumbnail for regular documents](/docs/getting-started/saving-and-managing-documents/#adding-a-preview-thumbnail-to-documents).
--------------------------------------------------------------------------------
title: "How to use Sketch prototyping tools · Documentation"
description: "Learn how to create prototypes in Sketch with the help of our step-by-step guides and video tutorials."
last_modified: "2026-06-22"
url: "https://www.sketch.com/docs/prototyping/"
--------------------------------------------------------------------------------
## How to use Sketch prototyping tools · Documentation
With Sketch’s prototyping tools, you can bring your designs to life using a range of simple to advanced interactions. With features like overlays, hover, press and toggle triggers, and scrolling areas, you can accurately show how your designs would work in the real world — and on any device.
## An overview of prototyping tools
With prototyping in Sketch you can:
* **[Create links or Hotspots](/docs/prototyping/adding-links/)** to navigate between different **frames** or trigger Overlays.
* **[Show Overlays](/docs/prototyping/overlays/)** (e.g. menus, dropdowns or dialogs) that appear when you click, press or hover over another layer.
* **[Create scroll areas](/docs/prototyping/creating-scrolling-effects/)** inside frames to scroll through content vertically, horziontally or in multiple directions.
* Set **[custom layer visibility](/docs/prototyping/customizing-layer-visibility/)** options that change how and when layers appear in a prototype.
* Pin **[fixed elements](/docs/prototyping/creating-fixed-elements/)** to a scrolling prototype (e.g. menu bars, toolbars, or footers).
* Use frame templates to create **[Scrolling Frames](/docs/prototyping/creating-scrolling-effects/#creating-scrollable-frames)** and [maintain scroll position](/docs/prototyping/) between frames, too.
* **[Set multiple Start Points](/docs/prototyping/using-starting-points/)** to choose where a prototype will start playing from.
* **[Preview prototypes](/docs/prototyping/previewing-prototypes/)** in the Mac app, via the web app, or using our [iOS app](/docs/getting-started/sketch-for-ios/).
--------------------------------------------------------------------------------
title: "Adding Links"
description: "Learn how to add Links to your Sketch prototypes with the help of our step-by-step guides and video tutorials."
last_modified: "2026-04-07"
url: "https://www.sketch.com/docs/prototyping/adding-links/"
--------------------------------------------------------------------------------
## Adding Links
Links let you connect frames and create prototypes to add interactivity to your designs. You can add links from any layer and connect them to any frame.
## Adding a link
There are different ways to add a link. Start by selecting a frame or layer and choose one of these options:
- Press I and drag to create a link, then click a target frame.
- Click the icon in the Navigate section of the Prototyping panel.
- Select the menu option **Prototype** > **Interaction** > **Create Interaction**.
- Launch the [Command Bar](/docs/interface-and-settings/the-mac-app-interface/the-command-bar/), search for _Interaction_ and press ⏎.
The key concept behind links is simple: a layer triggers the interaction when you tap or click it, and a frame is the target it links to.
You can link to any frame in your document — even ones on other pages. You can also link multiple frames at once and they’ll all share the same target.
Frames in prototypes can appear in two ways: as a Screen or an Overlay.
- Screens show one at a time — each new frame replaces the previous one.
- Overlays appear on top of the current frame, and can even [stack on top of other Overlays](/docs/prototyping/overlays/).
The first frame you link in a document automatically becomes the [Start Point](/docs/prototyping/using-starting-points/) of your prototype. A Start Point icon appears next to the frame’s name on the Canvas and in the corner of its icon in the Layer List. You can set any frame as a Start Point, and add as many Start Points as you need.
## Automatically linking frames
To quickly link frames, choose **Prototype** > **Interaction** > **Auto Link to Right Frame** to create a link from the selected frame to the one immediately to its right. Similarly, you can link to the frame on the left using **Prototype** > **Interaction** > **Link to Previous Frame**. You can also set Auto Link by dragging a link and hovering over the **Go to Frame** icon in the top-right or top-left corner of your frame.
If there are no frames to the left or right, but there’s one below, the Auto Link option will target the frame below instead.
Auto Links update automatically when you reorder frames — perfect for prototypes with linear navigation, like presentations or onboarding experiences.
Auto Link direction is based on the **Frame Export** option in [**Settings > Layers**](/docs/interface-and-settings/the-mac-app-interface/the-layer-list/). This determines whether Auto Link targets frames to the right or left first. The default is left to right.
## Editing links
You can edit two link properties: the **Target**, which is where the interaction links to, and the **Animation** which controls how the transition between frames looks when you play the prototype.
### Editing a link’s target
- Select a layer with a link and drag the connecting arrow to a new target. You can also use the **Go to Frame** icons that appear when you click and drag the link and hover over the upper left or right sides of the Frame containing the link.
- Select a layer with a link, switch to the Prototype tab of the Inspector and click on the Target dropdown menu to select a new target.
- Select a Symbol instance with link overrides, then choose a new target from the **Nested Symbols** section in the Inspector.
> **Note:** Set a link’s target to **None** to disable it without deleting it.
### Editing a link’s animation
Open the Prototyping panel and click the Animation dropdown menu to change the [Animation type](/docs/prototyping/animating/).
### Linking back to the previous frame
Select **Previous Frame** in the **Target** dropdown menu to return to whichever frame you were previewing before the current one. This is helpful when you have lots of links leading to a single frame — like a settings screen that multiple screens can open. Instead of creating separate links back to each origin, a single "Previous Frame" link handles all cases.
### Maintaining scroll position after click
When you enable this option, the target frame opens at the same scroll position as the layer that triggered the interaction. You’ll find this setting at the bottom of the Prototyping panel when editing a link.
## Removing a link
There are several ways to remove a link:
- In the Menu Bar, choose **Prototype** > **Remove Interaction** to remove the interaction from the selected layer, or **Remove All Interactions** to also remove interactions from all layers inside it.
- Use the [Command Bar](/docs/interface-and-settings/the-mac-app-interface/the-command-bar/) to find and run either action.
- Select a [Hotspot](/docs/prototyping/adding-hotspots/) or layer with a link and click the **-** icon in the **Interaction** section.
- Click and drag the arrow end that connects a link to its target frame and drop it anywhere outside a target frame on the Canvas.
## Using links with Symbols
You can add interactions directly to a Symbol Source. That way, every instance of that Symbol will include the interactions you’ve set — like a home button that always links to the same screen.
You can also override interactions set in the Symbol Source for any instance — or set the target to None to disable the interaction when needed. You’ll find these overrides in the Interactions section in the Inspector.
--------------------------------------------------------------------------------
title: "Adding Hotspots"
description: "Learn how to use Hotspots and create Interactions in your Sketch prototypes with the help of our step-by-step guides and video tutorials."
last_modified: "2026-01-29"
url: "https://www.sketch.com/docs/prototyping/adding-hotspots/"
--------------------------------------------------------------------------------
## Adding Hotspots
Hotspots offer more control than Links and are useful if you want to create a clickable area that’s larger than a single layer.
## Adding Hotspots
To add a Hotspot , make sure nothing is selected on the canvas, then choose **Prototype** > **Interaction** > **Create Interaction** or press I and click-and-drag to draw your Hotspot area. After that, click on the frame you want your Hotspot to link to.
You can edit your Hotspot’s animation and target frame in the Prototyping panel, just like you can with [Links](/docs/prototyping/adding-links/#editing-links).
## Turning a Link into a Hotspot
Select any link and click the **Create Hotspot layer** icon in the **Navigate** section of the **Prototype** panel to turn it into a Hotspot.
## Using Hotspots with Symbols
If you include a Hotspot as part of a Symbol, you can reuse that same Symbol but individually override its Hotspot’s target. You can also override the Hotspot’s target to **None** if you don’t want it to link to another frame.
--------------------------------------------------------------------------------
title: "Adding animations"
description: "Learn how to add animations with our step-by-step guides and video tutorials."
last_modified: "2026-01-29"
url: "https://www.sketch.com/docs/prototyping/animating/"
--------------------------------------------------------------------------------
## Adding animations
Animations help define how interactions in your design should feel and create smooth and realistic transitions between frames.
## Types of animation
There are four types of animations to choose from:
- **Instant.** This transition immediately jumps to the target frame and has no easing or duration options.
- **Slide.** This transition slides one frame over another.
- **Dissolve.** Gives a crossfade effect between two frames, and is a great transition when you’re looking for something simple with no movement.
- **Smart Animate.** Automatically animates changes in the position, size, rotation or shape of layers with matching names.
## How to set up an animation
1. [Create an interaction](/docs/prototyping/adding-links/) between two frames or a layer and an frame.
1. In the Prototype panel, head to **Animation** in the Navigate section. Choose between **Instant**, **Dissolve**, **Smart Animate** or **Slide**.
### How to set up Smart Animate
Just like with the rest of animations, to set up Smart Animate, head to the Prototype panel and select **Smart Animate** in the **Animation** dropdown. You can apply Smart Animate on properties like: position, shape or size.
However, there are a few other things to keep in mind when setting up Smart Animate:
- Ensure that the layers you want to animate are inside a frame.
- Make sure both layers you want to animate share the same name and type. Smart Animate will recognize the changes in properties between these layers on both frames and animate them automatically.
- If there are changes in color, blending modes, or filters (such as shadows or blurs) alongside changes in position, shape, or size, Sketch will automatically apply a dissolve animation to the former and keep Smart Animate for changes in position, shape, or size.
- Unfortunately, you can’t apply Smart Animate to paths, borders, shapes with different amount of vector points, type, gradients or Overlays.
### Easing, duration and direction
For Instant, Slide and Smart Animate animations you can customize:
**Easing**. Control the speed of the animation to create a more realistic transition. With easing you can create effects like starting slowly, speeding up, and then slowing down again. You can choose between different types of easing:
- **Linear**: The animation will progress at a constant speed from start to finish.
- **Ease In**: The animation will start slowly, accelerate towards the end and come to a sudden stop.
- **Ease Out**: The animation will start quickly, decelerate towards the end and come to a gradual stop.
- **Ease In and Out**: The animation will start slowly, accelerate in the middle, and slow down towards the end.
- **Ease In Back/Ease Out back/Ease In and Out back**: Once the animation goes past its target, it’ll then bounce back into place.
**Duration**. Choose how long you want the animation to take from start to finish.
If you’re using a Slide animation, you can choose which direction your frame will slide from. You’ll find it in the **Direction** section under **Animation**.
--------------------------------------------------------------------------------
title: "Customizing layer visibility"
description: "Learn how to customize layer visibility in your Sketch prototypes with step-by-step guides and video tutorials."
last_modified: "2026-01-29"
url: "https://www.sketch.com/docs/prototyping/customizing-layer-visibility/"
--------------------------------------------------------------------------------
## Customizing layer visibility
Custom layer visibility shows or hides a layer when you hover, tap, or press it — which is especially useful when you want to add buttons, menus, or similar interactive elements to your prototype.
## Set a layer’s visibility
To customize how a layer appears in a prototype, set custom visibility settings in the Prototyping panel.
1. Select a layer.
1. Open the **Prototyping panel**.
1. In the **Visibility** section, click the icon.
1. Choose an **Action** (Show, Hide, or Toggle) and a **Trigger** (Hover, Press, or both).
Use **Action** to set what happens to the layer’s visibility: **Show**, **Hide**, or **Toggle**. The **Toggle** option changes the layer’s visibility every time you press it in the prototype.
Next, choose **Hover** or **Press** as a trigger — or select both:
- **Hover** changes a layer’s visibility when the cursor is within its bounds.
- **Press** changes a layer’s visibility when you press the layer with your cursor or finger (if you’re playing a prototype on the iOS app, for example).
Once you’ve added custom visibility to a layer, [preview your prototype](/docs/prototyping/previewing-prototypes/) to see the result.
--------------------------------------------------------------------------------
title: "Using Overlays"
description: "Learn how to create Overlays for your Sketch prototypes with the help of our step-by-step guides and video tutorials."
last_modified: "2026-06-22"
url: "https://www.sketch.com/docs/prototyping/overlays/"
--------------------------------------------------------------------------------
## Using Overlays
Overlays are a type of frame that will appear on top of another frame when you preview a prototype. You can use Overlays to create menus, modals, messages, and many other common interface elements in your prototypes.
## Creating Overlays
You can create an Overlay in two ways:
1. Select an existing frame and toggle **Set as overlay** in the **Prototyping** panel. Click **Aligned to View** to open the **Overlay Options** panel and set its default position, backdrop, and interaction behavior. You can also override these on the Link or Hotspot that points to the Overlay.
1. Create a link or Hotspot to any type of layer or Symbol that’s outside of the frame and smaller than its parent. Sketch will assume you want to use it as an Overlay, and will create a frame around it and set it as an Overlay for you.
## Overlay options
Once you’ve toggled **Set as overlay** on in the **Prototyping** panel, click **Aligned to View** to open **Overlay Options**. From there, click to preview the Overlay.
*The Overlay Options panel: set the frame’s default position, backdrop, and what happens when you tap outside it*
1. **Include fills as content:** When enabled, the Overlay frame’s fill is visible when playing the prototype. You can also change this in the **Export** section of the Inspector.
1. **Align to:** Determines where the frame will appear as an Overlay when you target it, which can be either:
* **View:** Always displays in the same position, as determined by the horizontal and vertical **Offset** from the underlying frame
* **Layer:** Displays in a position relative to the layer targeting the Overlay. Use the **Origin** control to set its position and specify an offset
1. **Origin:** A nine-point grid that sets the anchor point of the Overlay relative to the view or trigger layer.
1. **Offset:** The horizontal and vertical offset to apply to the Overlay, relative to the view or layer.
1. **Backdrop:** Set the styling to apply behind the Overlay:
* **Color:** Enable and set a backdrop color and its opacity
* **Blur:** Enable a blur behind the Overlay and set its opacity and radius
1. **Interactions:** Determines what happens when you click or tap outside the Overlay:
* **None:** Nothing happens when you click or tap outside the Overlay
* **Closes Overlay:** The Overlay closes when you click or tap outside it
* **Allow All:** Any Links or Hotspots not hidden by the Overlay stay active
> **Note:** Changing an Overlay’s default options will update any existing Links or Hotspots that point to it — unless you’ve already overridden the settings for a specific Link or Hotspot.
## Using Links and Hotspots with Overlays
Any Link or Hotspot can target an Overlay, and you can set specific options to the Link or Hotspot to override the default Overlay behavior:
*The Prototyping panel with a Navigate interaction targeting an Overlay: target frame, trigger, animation, and position override*
When you add an interaction from a Link or Hotspot you can set the following additional options:
1. **Target:** Has a dropdown of all frames so you can change the target.
1. **Trigger:** Sets what action shows the Overlay — Tap, Hover, Press, or Toggle on Tap.
1. **Animation:** Sets which animation will bring the Overlay onto the prototype.
1. **Target Overlay:** Click **Aligned to View** or **Aligned to Layer** to open [**Overlay Options**](#overlay-options) and set a custom position for this specific interaction.
1. **Close existing overlays:** Toggle this option to close all other active Overlays when this specific Overlay appears.
If you select a Layer that targets an Overlay while the **Prototype** tab is active in the Inspector, a low-opacity version of the Overlay will appear on the Canvas to help you adjust its positioning — either using the inspector controls or dragging it directly.
## Using Hover, Press, and Toggle triggers
By default, Overlays appear when you tap/click on the trigger layer. To change this, select the trigger layer, open the **Prototyping** panel, and choose from the following options in the **Trigger** menu:
* **Tap** — The default for all new interactions. A single tap or click will show the Overlay.
* **Hover** — The Overlay will only appear whenever a cursor is hovering over the trigger layer.
* **Press** — The Overlay will only appear when the trigger layer is being pressed.
* **Toggle on Tap** — Tapping or clicking shows the Overlay; tapping or clicking again hides it.
--------------------------------------------------------------------------------
title: "Creating scrolling effects"
description: "Learn how to create scrollable areas and frames for your Sketch prototypes with the help of our step-by-step guides and video tutorials."
last_modified: "2026-01-23"
url: "https://www.sketch.com/docs/prototyping/creating-scrolling-effects/"
--------------------------------------------------------------------------------
## Creating scrolling effects
With scrolling effects, you can build prototypes that feel closer to a finished product. For example, you can prototype scrolling lists, a row of cards, or even maps that move in any direction.
## Creating scrollable frames
Press F to draw a frame or select a [Frame Templates](/docs/interface-and-settings/the-mac-app-interface/the-canvas/#creating-a-template) in the Inspector.
Switch to the Prototype tab in the Inspector and choose the scroll direction for your frame.

Once you enable scrolling on a top-level frame, you can set it to:
- **Frame:** The viewport matches the frame’s size, and any content beyond its bounds becomes scrollable. This is the default.
- **Custom:** Set a custom scroll viewport size (or use a template), and any taller or wider frame will scroll within it.

> **Note:** Using a custom frame without defining the viewport will prevent scrolling in the app, web app, and iOS app.
You can [create and add fixed elements](/docs/prototyping/creating-fixed-elements/) to your scrolling prototypes, such as tabs and menu bars.
## Creating scroll areas
Insert a frame and resize it to define the scroll area, then choose a scroll direction in the Inspector. Nested frames will scroll automatically when their content extends beyond the visible area.

> **Note:** When opening older documents, Sketch automatically assigns a scroll direction and viewport.
--------------------------------------------------------------------------------
title: "Creating fixed elements"
description: "Fixed elements keep layers in place as your prototype scrolls — handy for tab bars, navigation headers, or floating buttons."
last_modified: "2026-06-22"
url: "https://www.sketch.com/docs/prototyping/creating-fixed-elements/"
--------------------------------------------------------------------------------
## Creating fixed elements
Fixed elements keep layers in place as your prototype scrolls — handy for things like a tab bar at the bottom of an app, or a floating button on a webpage.
To create a fixed element, select a Layer or Hotspot and check the **Fix position when scrolling** option in the **Prototype** tab of the Inspector. Alternatively, choose **Prototype** > **Fix Layer Position when Scrolling** in the Menu Bar.
Fixed layers use one of two methods to stay in place when you play a prototype:
1. **Proximity:** Layers fixed at the top or bottom of a frame pin to the top or bottom of the prototype window. Layers fixed elsewhere display relative to where they sit in the frame.
1. **Pinning:** Use the **Pin to Edge** options in the **Resizing** section of the **Design** tab to set exactly which edge a fixed layer sticks to.
Pinning always takes priority over proximity.
--------------------------------------------------------------------------------
title: "Using Start Points"
description: "Set a Start Point to decide exactly where a prototype begins — add multiple ones to create separate prototypes within the same document."
last_modified: "2026-06-22"
url: "https://www.sketch.com/docs/prototyping/using-starting-points/"
--------------------------------------------------------------------------------
## Using Start Points
Set a Start Point to decide exactly where a prototype begins — add multiple ones to create separate prototypes within the same document.
## Setting a start point
To set a Start Point, open your prototype in the Preview window, select a frame from the drop-down menu, and click . You can also set a Start Point for a prototype in the **Prototype** tab of the Inspector by selecting the **Set as prototype start point** checkbox. Sketch will also automatically create a Start Point when you add your first Link.
Whenever you preview your prototype, you’ll always start with the frame you’ve set as your Start Point.
To remove a Start Point, select the frame in the Preview window and click again, or deselect the **Set as prototype start point** checkbox in the **Prototype** tab of the Inspector.
When nothing is selected on the Canvas, the Inspector shows all Start Points in your document, so you can see and navigate to them without hunting through the layer list.
## Setting multiple Start Points
You can set more than one Start Point to guide your users through different aspects of more complex designs, such as a sign-up or user settings flow, for example.
Every time you set a new Start Point, it’ll appear as a different prototype in the same document in the web app or the iPhone app.
--------------------------------------------------------------------------------
title: "Previewing prototypes"
description: "Preview your Sketch prototypes in the Mac app, web app, or on iOS — and test how your designs feel before sharing them."
last_modified: "2026-06-22"
url: "https://www.sketch.com/docs/prototyping/previewing-prototypes/"
--------------------------------------------------------------------------------
## Previewing prototypes
Preview your prototypes in the Mac app, web app, or on your iOS device — and test how your designs feel before you share them.
## Prototype player controls
To start a preview in the Mac app, click the **Preview** button in the toolbar or press ⌘P. If you’ve set a [Start Point](/docs/prototyping/using-starting-points/), your prototype will start from there. If not, it’ll start from the currently selected frame.
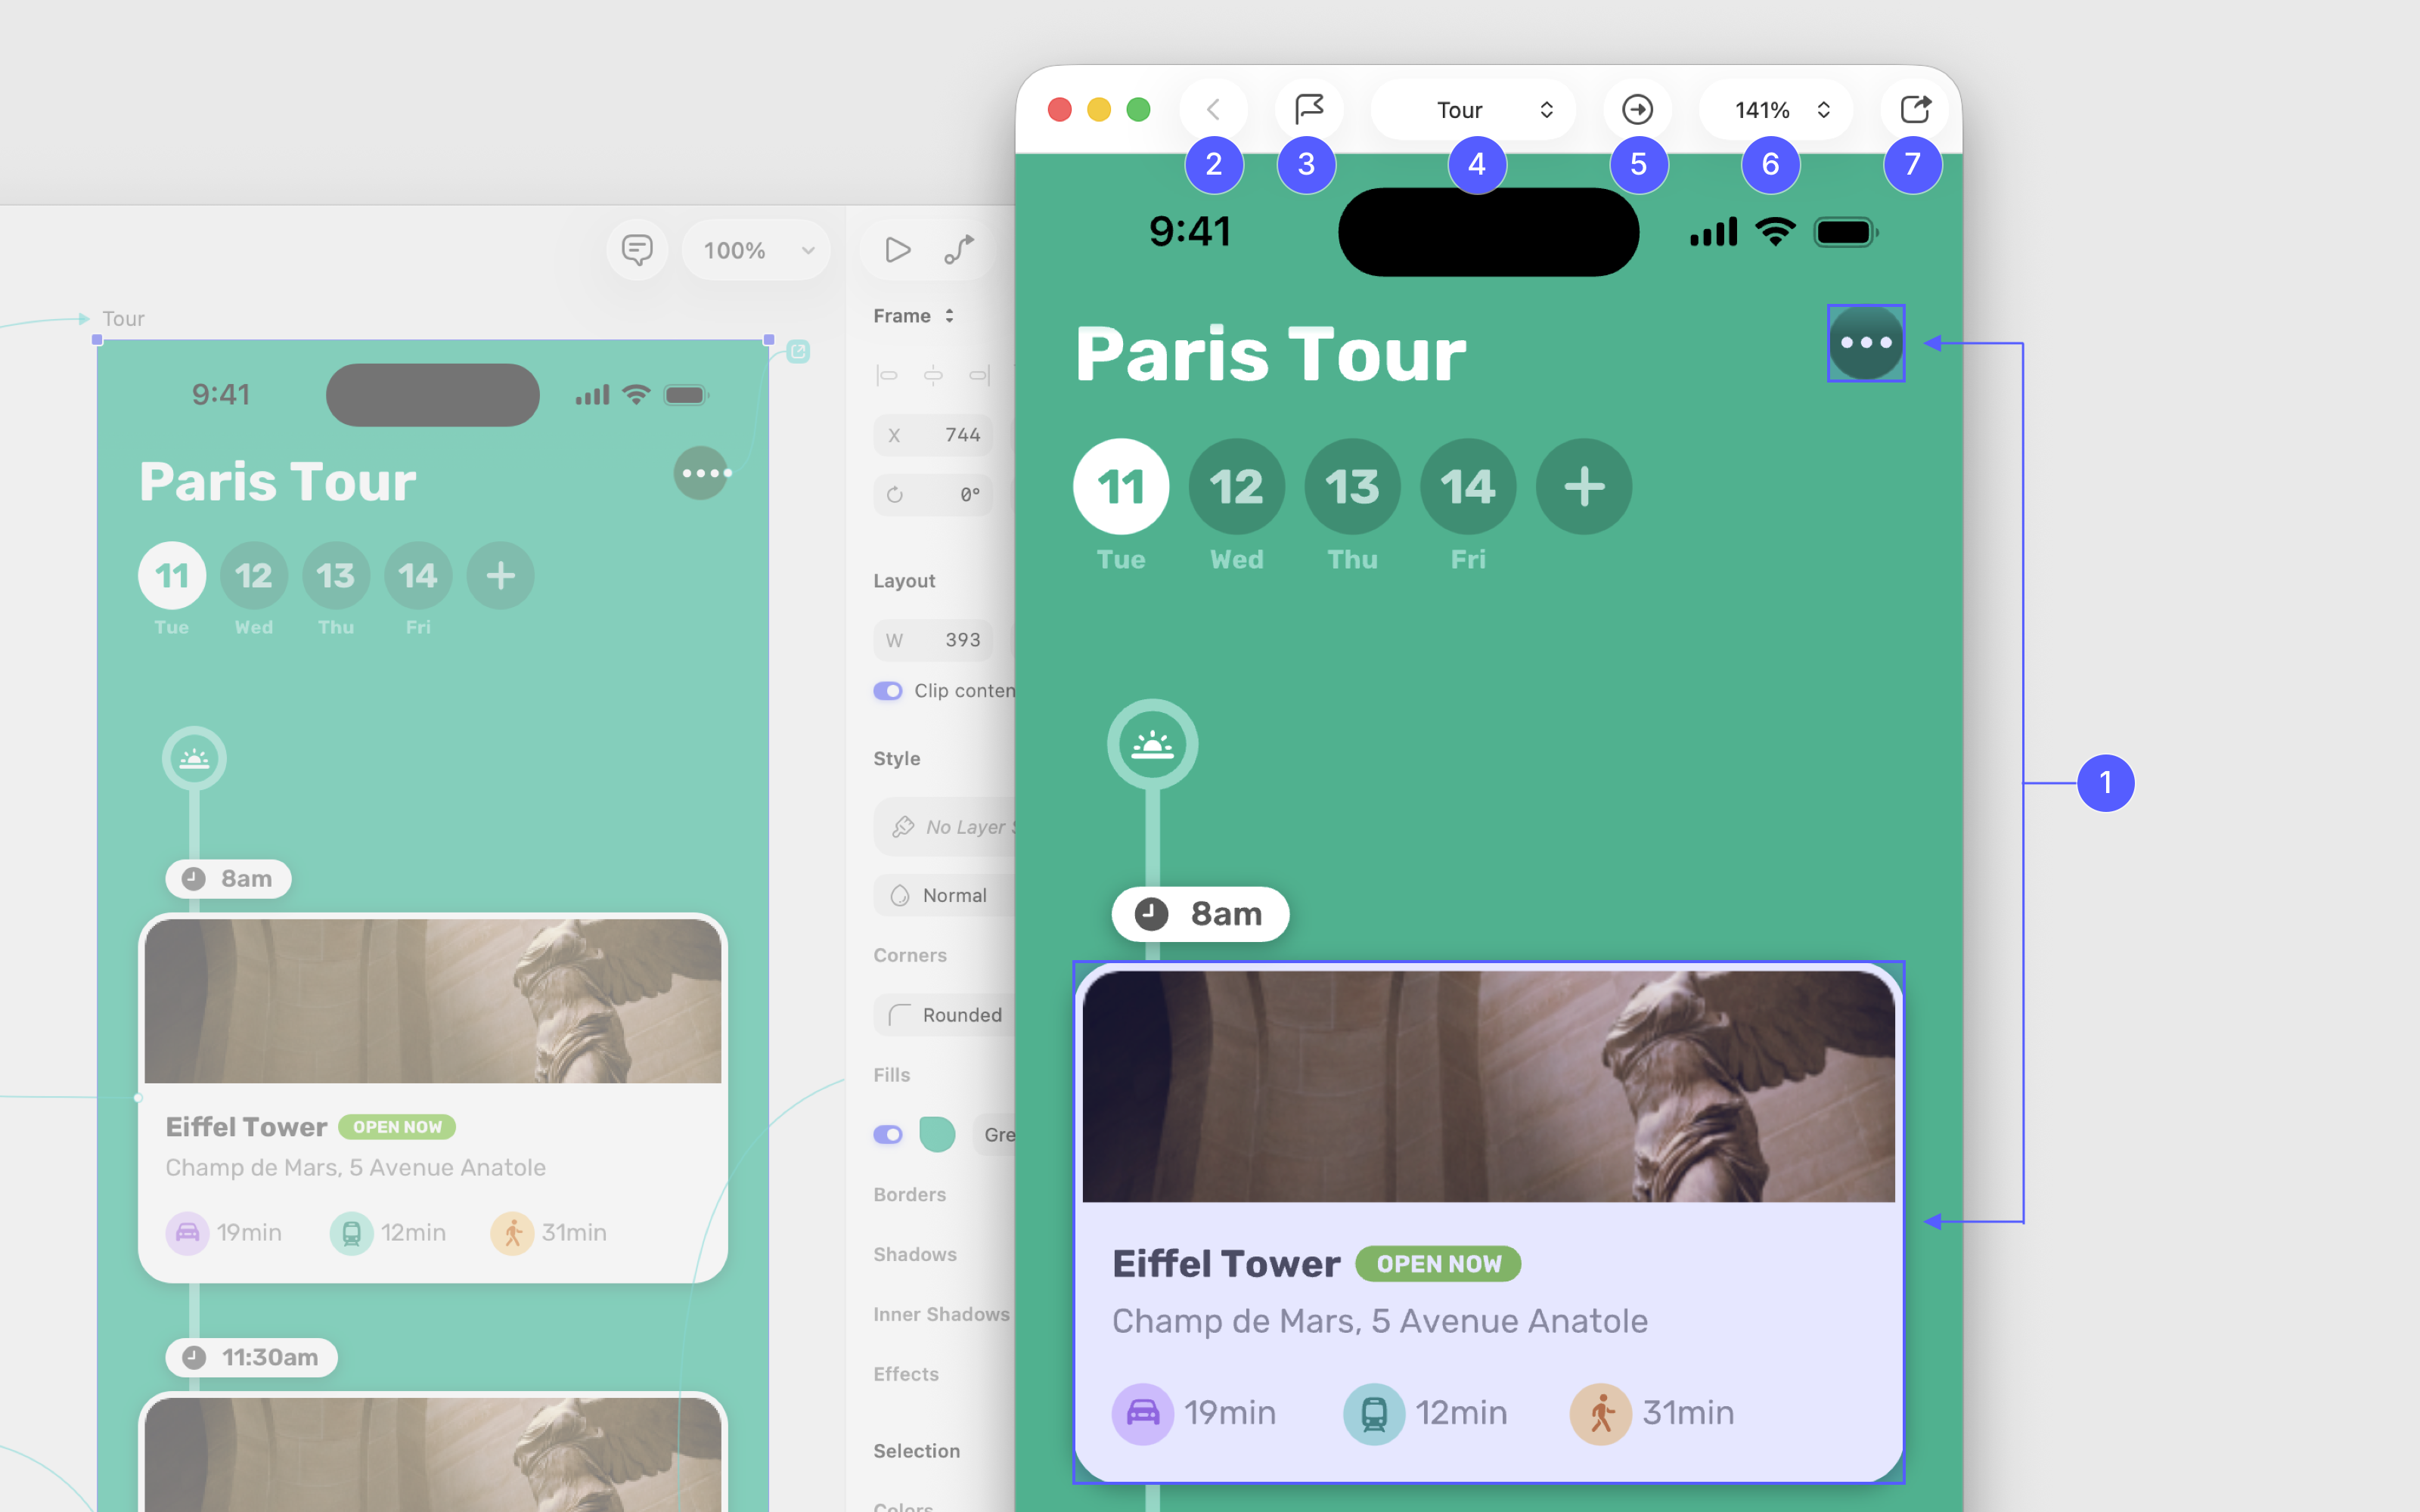
*Prototype preview controls in the Mac app*
1. Click anywhere in the Preview window to see hints that show you where Links and Hotspots are on the current frame.
1. **The back button** takes you back a step to the previous frame in your prototype.
1. **The flag icon** ( ) sets the frame you’re currently viewing as a [Start Point](/docs/prototyping/using-starting-points/).
1. **The Frames menu** lets you jump to any frame in your prototype. Frames on the current page are listed below any start points; other pages appear as submenus.
By default, the Preview window updates to show whatever frame you select on the Canvas. Open the menu and turn off **Follow Selection** to pin the preview to a specific frame — you can then select other frames or Symbols without the Preview window changing. Turning it back on immediately updates the window to match your current selection. Next time you open Preview, it’ll use whichever option you last chose.
1. **The View Frame in Canvas icon** opens the Mac app and takes you to the frame you’re previewing.
1. **Display Mode** lets you choose how the prototype displays: Fit, Fill Width, or Actual Size. The menu also includes **Float on Top** — turn it on to keep the Preview window above all other windows, including those from other apps, while you work. It’s off by default, and the setting carries over across documents and relaunches.
1. **The Share icon** copies a link to your prototype to your clipboard instantly. You can also share it via AirDrop, email, or other apps on your Mac.
When the Preview window is narrow and items don’t fit in the toolbar, you can still access everything from the overflow menu.
When you open a document in the web app, you can view any prototypes it contains by clicking the **Prototypes** link in the **About** tab of the sidebar. Click on a prototype’s thumbnail to open and preview it in your browser.
Hovering over the prototype’s thumbnail and clicking the gives you a couple of options for showing or hiding hints as you play your prototype.
> **Note:** If the prototype isn’t appearing, make sure you’ve set a [Start Point](/docs/prototyping/using-starting-points/) on at least one frame. Save the document again and reload your browser.
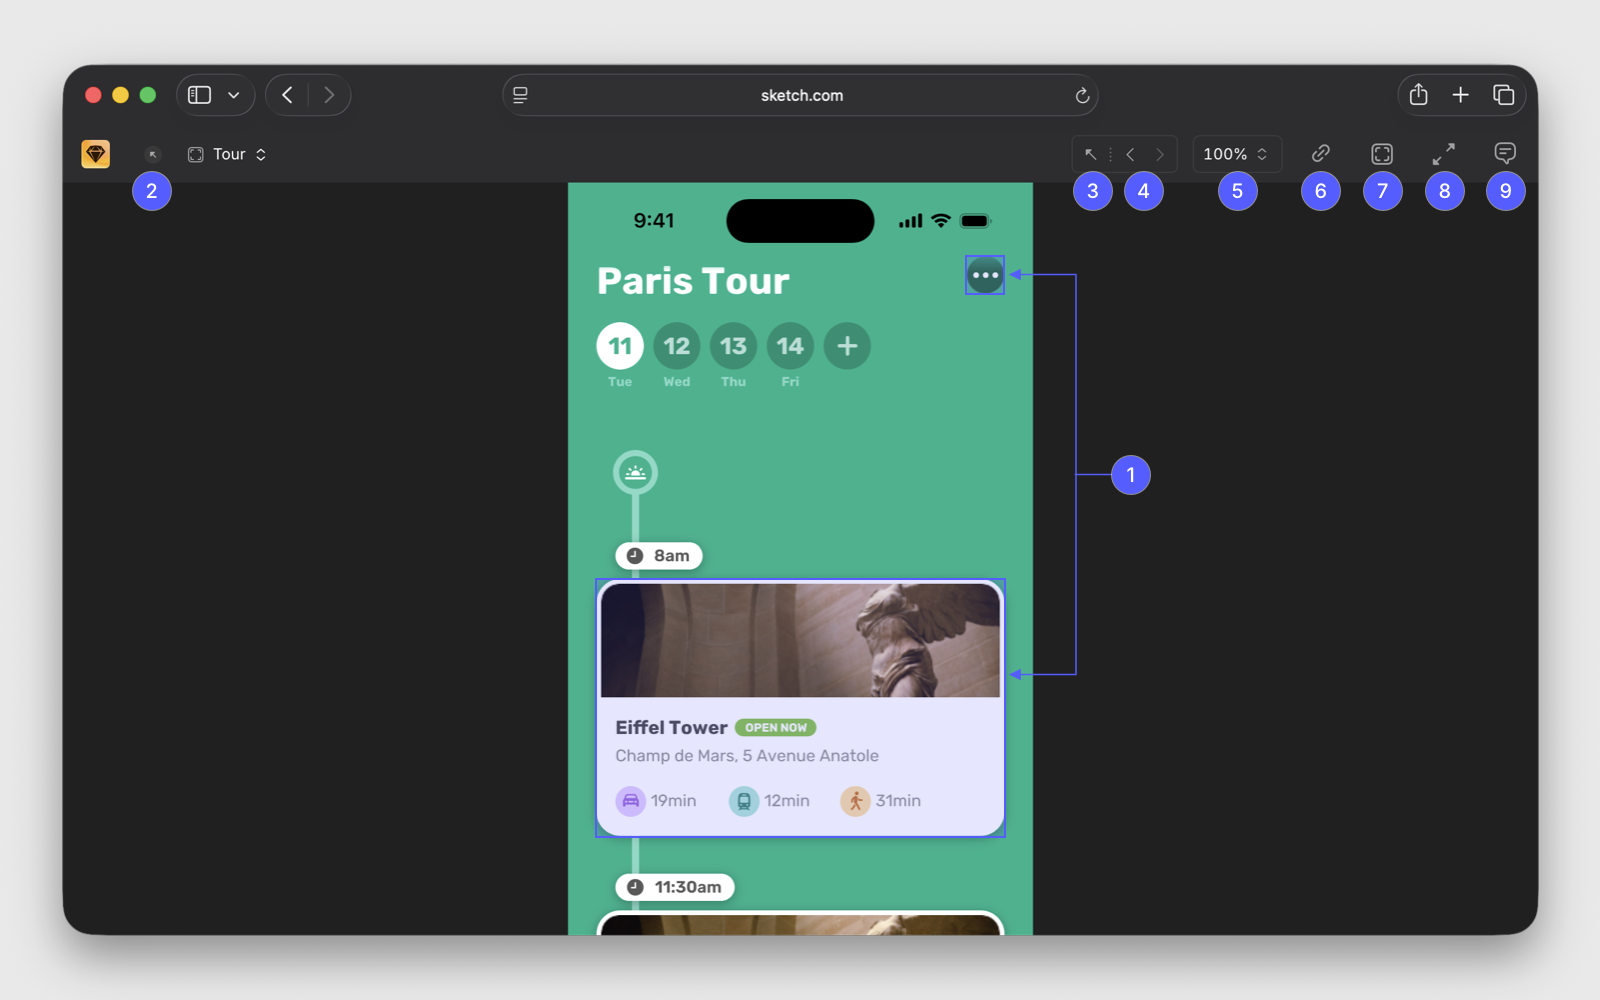
*Prototype preview controls in the web app*
1. Click anywhere in the Preview window to see clickable targets (Links and Hotspots) on the current frame.
2. Click to close the prototype and return to the document overview.
3. **Restart Prototype** takes you back to the prototype’s [Start Point](/docs/prototyping/using-starting-points/).
4. The **Back** and **Forward** buttons will step through frames that you’ve linked.
5. **View options** control how frames display in the browser window. The web app remembers your last setting:
- **Fit** ⇧0: Resizes frames to fit your browser’s viewport.
- **Fill Width** ⇧1: Automatically resizes to fill the browser width, keeping the prototype responsive as you resize the window.
- **Actual Size** z: Shows frames at their original size.
6. Click **Copy Link** to share a link to the prototype, with options to show or hide navigational elements.
7. The **View Frame** button opens the frame being previewed in the web app.
8. The **Full Screen** button makes the window full screen. Press esc to exit full screen.
9. Click the **Comment** icon to view and add comments as you navigate the prototype.
When viewing a document, swipe up on the sheet at the bottom of the screen to see any prototypes below the frame thumbnails. Tap a prototype to open it in the prototype player.
As you test a prototype, tapping outside of Hotspots and links on the screen will reveal hints.
To exit a prototype, tap and hold anywhere on the screen to return to the document view.
When you’re viewing a document, tap on the (play) button in the top-right corner of the screen to start playing its prototype. If there are multiple prototypes in the document, tap on the one you want to play from the list that appears.
As you test a prototype, tapping outside of Hotspots and links on the screen will reveal hints.
To exit a prototype, tap and hold anywhere on the screen to return to the document view.
## Changing how a prototype fills the screen
Use the **View options** menu in the prototype player toolbar to switch between **Fit**, **Fill Width**, and **Actual Size**. You can also use these shortcuts at any time:
- ⇧0 for **Fit**
- ⇧1 for **Fill Width**
- Z for **Actual Size**
These shortcuts also work while the toolbar is hidden.
## Hiding toolbar controls and Hotspots
When you share or preview a prototype, you can hide Hotspots, toolbar controls, and navigation for a cleaner presentation. For the full steps across the Mac app, web app, and iPhone app, see [Sharing prototypes](/docs/prototyping/sharing-prototypes/#how-to-share-prototypes).
## Hiding prototype links while editing
Prototype links only appear on the Canvas when you’re working in the **Prototype** tab, or when you have an artboard selected while using the **Design** tab. Prototype links can make the Canvas noisy when you’re not actively working on your prototype. Deselect artboards or switch to the **Design** tab to show links for the selected artboard only.
--------------------------------------------------------------------------------
title: "Sharing prototypes"
description: "Learn how to share your Sketch prototypes with the help of our step-by-step guides and video tutorials."
last_modified: "2026-04-07"
url: "https://www.sketch.com/docs/prototyping/sharing-prototypes/"
--------------------------------------------------------------------------------
## Sharing prototypes
The more eyes you get on your prototype, the better. With Sketch, you can easily share your prototypes with colleagues and clients — and add comments as you review it, from any web browser.
## How to share prototypes
In the prototype’s [Preview window](/docs/prototyping/previewing-prototypes/), click the **Share** icon in the top-right corner. From there, you can copy a link to the prototype to your clipboard or share it using other apps installed on your Mac, such as AirDrop or email.
When sharing a link, first make sure your prototype is shareable by [setting the link’s permissions to View](/docs/sharing-and-collaborating/sharing-and-viewing-documents/sharing-a-document/) in the document’s **Settings**.
From the sharing options you can toggle the check boxes to hide **[Hotspots](/docs/prototyping/adding-hotspots/) and hints** or the **toolbar and navigation**, which helps create a more client-friendly and distraction-free experience in your prototype.
> **Note:** Keep in mind that you can only share prototypes from Workspace documents.
Click the **Copy Link** icon on the upper right. From here you can also toggle the check boxes to hide **[Hotspots](/docs/prototyping/adding-hotspots/) and hints**, and/or the **toolbar and navigation**, which helps create a more client-friendly and distraction-free experience in your prototype.
You can also directly copy and share a prototype’s URL from the [Preview window](/docs/prototyping/previewing-prototypes/) in your browser.
To share a prototype from the [iPhone app](/docs/getting-started/sketch-for-ios/) tap the **Share** icon in the document’s title when viewing the document sheet.
### Commenting on prototypes
Clients or colleagues can comment on your prototypes using only a web browser, which can be a handy way to collaboratively review your work.
To **show comments** in the Prototype Player, click the **Comment** icon on the upper right. The comments you’ll see here only apply to the currently visible frame.
To **add new comments**, click the or press N, drop your comment pin anywhere on the frame, and start typing.
> **Note:** When you share a prototype, everyone will see any existing comment threads.
When you comment on an [Overlay](/docs/prototyping/overlays/), you’ll see the comment pin highlighted when you hover over it to show that you’re commenting on a different frame.
Once you’ve finished viewing or adding comments, click the **Comment** icon again to continue interacting with the prototype.
Prototypes in the web app are rebuilt every time you save a change in a Workspace document. When you open a prototype in the web app, you may briefly see a “Rendering Prototype” message and a black screen while it loads.
Once a prototype has been built, you can usually reload it or open new tabs and keep using the same version — as long as you’re in the same browser session.
To see the latest changes after saving the document, close the prototype player (use the back button in the top-left) and then open the prototype again from the latest version of the document.
If you copy a prototype’s link from your browser’s address bar and paste it into a new tab in the same browser session, you may still see the same built prototype. Closing the player and opening the prototype again from the latest version of the document should update it.
--------------------------------------------------------------------------------
title: "Sharing and collaborating"
description: "From designers to developers and anyone else who needs project updates, our real-time collaborative design tools mean you choose what to share, when to share it and how you work together.
Here you’ll discover how to accelerate collaborative design and share your work with ease, from the smallest component to entire projects."
last_modified: "2026-04-07"
url: "https://www.sketch.com/docs/sharing-and-collaborating/"
--------------------------------------------------------------------------------
## Sharing and collaborating
From designers to developers and anyone else who needs project updates, our real-time collaborative design tools mean you choose what to share, when to share it and how you work together.
Here you’ll discover how to accelerate collaborative design and share your work with ease, from the smallest component to entire projects.
--------------------------------------------------------------------------------
title: "Real-time collaboration"
description: "With real-time collaboration, you can work together on the same document, see everyone’s changes instantly, and never have to wonder about whether you’re editing the right version of a document again."
last_modified: "2026-05-19"
url: "https://www.sketch.com/docs/sharing-and-collaborating/real-time-collaboration/"
--------------------------------------------------------------------------------
## Real-time collaboration
With real-time collaboration, you can work together on the same document, see everyone’s changes instantly, and never have to wonder about whether you’re editing the right version of a document again.
## Real-time collaboration requirements
To edit documents collaboratively, you’ll need:
* **A subscription**, which automatically includes all real-time collaboration features, along with a shared Workspace. A Mac-only license only includes the Mac app. To check whether you’re on a subscription or license, open the Mac app and head to **Sketch** > **Settings**, then select the **Account** tab. If you have a subscription, you’ll see the [Workspaces](/docs/designing/) that you’re a Member of. Click **Account Settings** for more information.
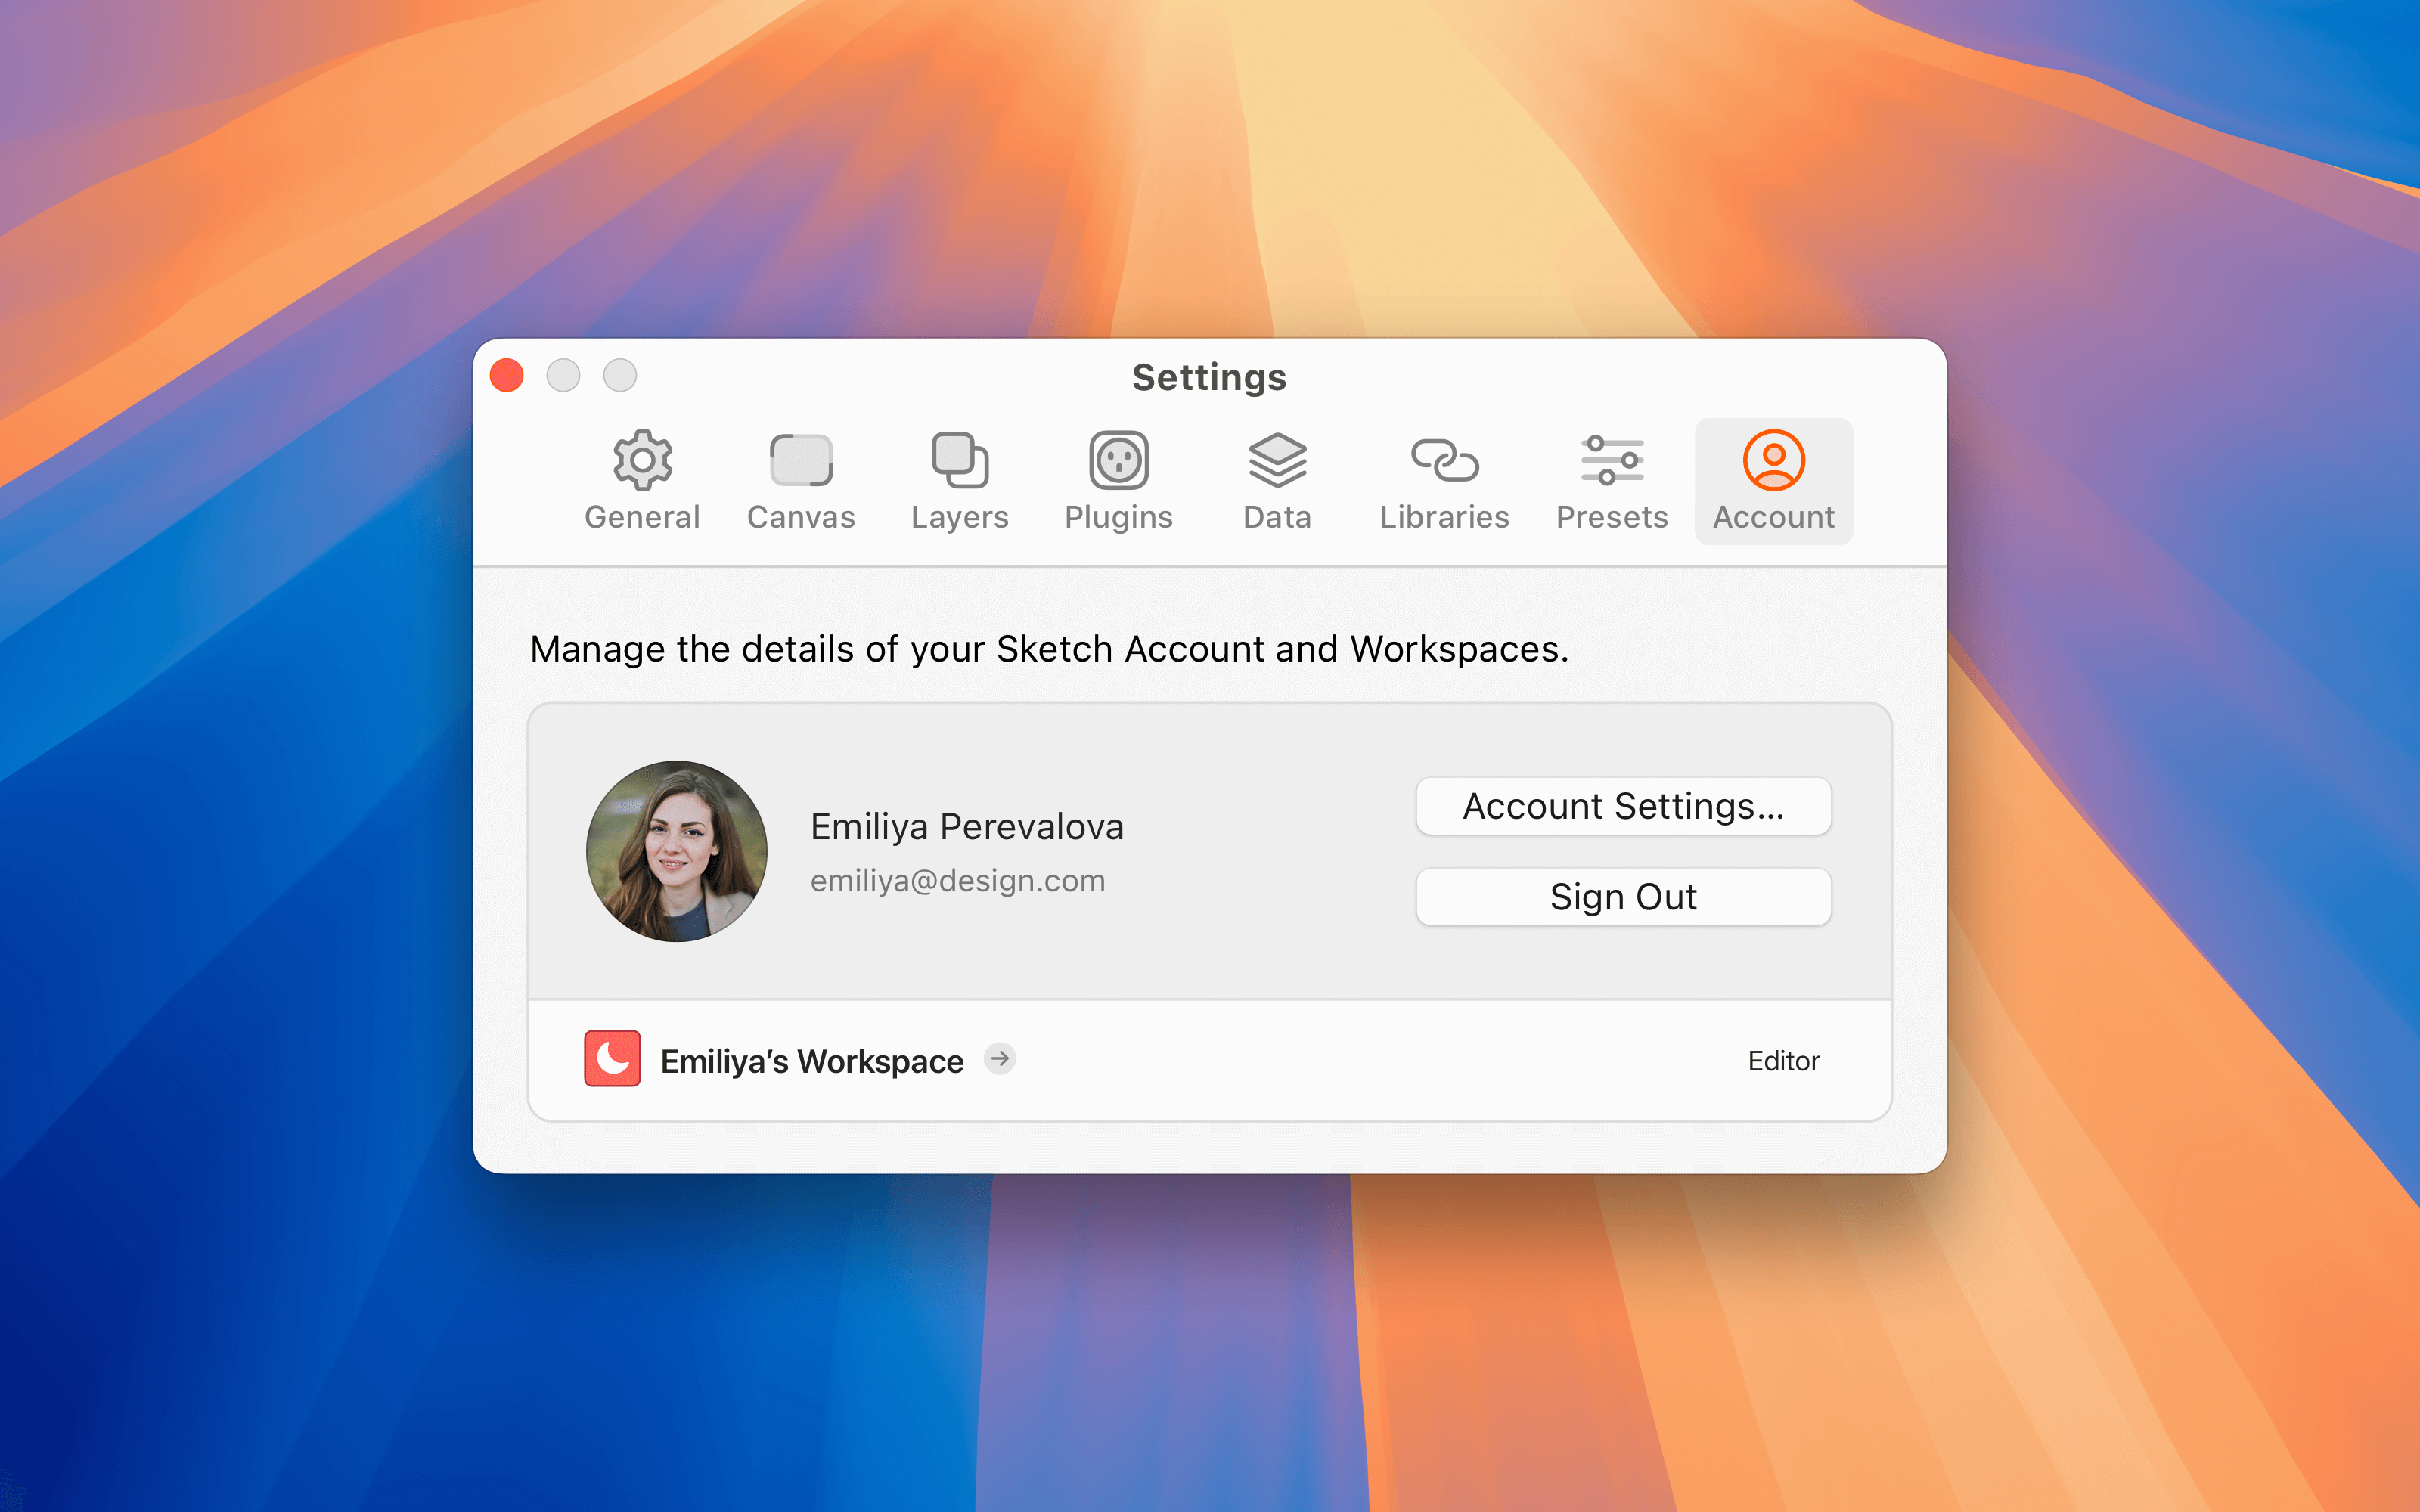
*The Account tab in the Settings window in the Mac app*
* **A document in your shared Workspace**. You can [save a new document](#saving-a-new-document-for-the-first-time) to your Workspace, move existing documents from [My Drafts](/docs/getting-started/saving-and-managing-documents/#my-drafts) to a project (that others have access to), or use the Mac app’s Workspace window to upload a local document. Press ⌘O, then drag your local document into the Workspace window. To upload it to a specific project, drop the document onto a project folder in the sidebar.

*How to move a local file to a shared Workspace*
* **A compatible version of the Mac app:** Make sure everyone’s using the same version of Sketch. Collaborators on older versions might run into issues or be unable to join.
## Getting started with real-time collaboration
To collaborate on a new document, you first need to save it to your Workspace by choosing **File** > **Save** or hit ⌘S. In the save dialog, give your document a name and click **Save**. Alternatively, click the **Collaboration** icon in the toolbar and choose **Save to Workspace** in the popover menu that appears.
> **Note:** If you’re a Member of multiple Workspaces, make sure you’re saving the document to the right Workspace (you can choose a different one from the Workspace switcher on the top left).
### Collaborating on existing documents
Make sure your document is saved to a Workspace and that other Editors have access. If it’s in your Drafts or a restricted project, you’ll need to [update the share settings to collaborate](/docs/sharing-and-collaborating/sharing-and-viewing-documents/managing-share-settings/). To do that, click the Collaboration icon in the toolbar and choose **Share**.
**Note:** [Embed any fonts](/docs/interface-and-settings/document-settings/fonts/#managing-fonts) you use when sharing your document to make sure everyone can edit all text using the right fonts.
## Inviting people to collaborate
When you save your file to a shared Workspace, everyone in that Workspace can see the document, and any Editor can open it in the Mac app to start collaborating. You can also invite people from outside your Workspace to collaborate, they’ll just need an active subscription. If they already pay for Sketch, we won’t charge you anything extra for them. If they’re using a license key, they’ll have to create a Sketch account and you’ll need to [add them as Guests](/docs/interface-and-settings/workspace-and-account-settings/editors-viewers-and-guests/#guests) to the document.
### Inviting people from outside your Workspace
You can invite people from outside of your Workspace to collaborate with you on a document as long as they have a compatible version of the Mac app (71 or later) and a subscription.
Click ** ** in the toolbar and choose **Share Document**. The document will open in the web app, where you’ll see the window described above.
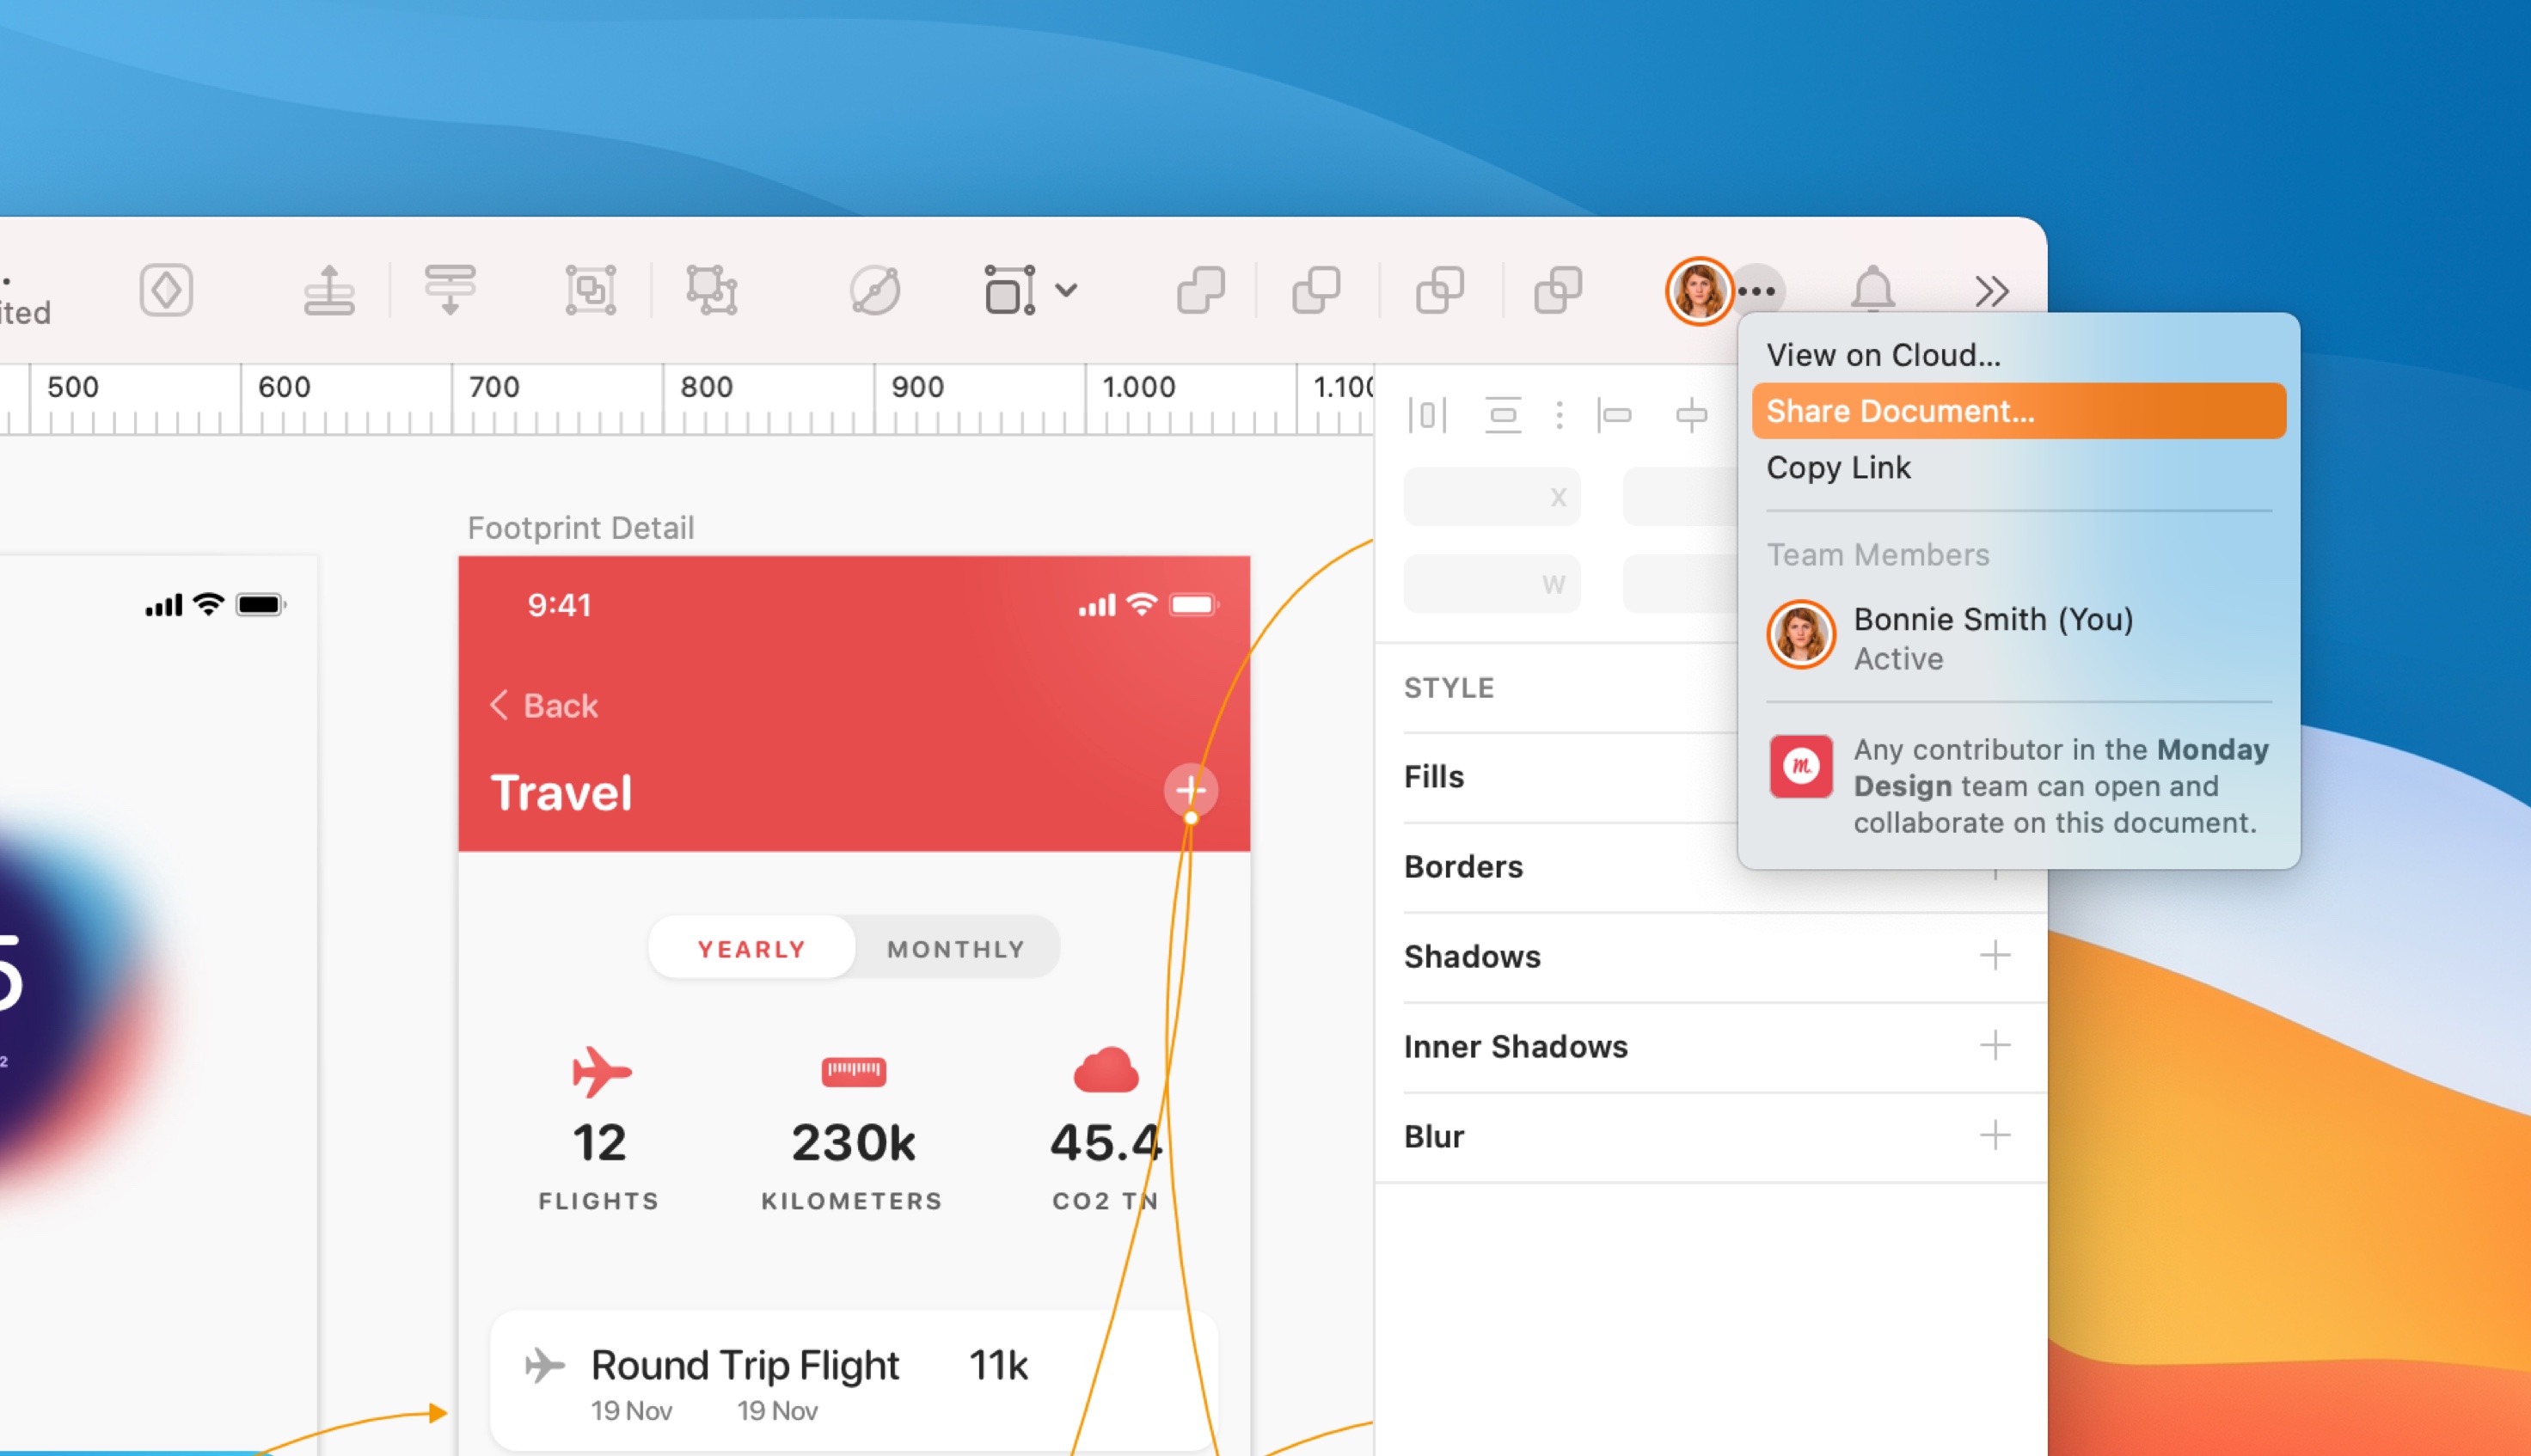
With the document open, click **Share** on the top-right. From the sharing modal you have two options: inviting people as **Guests** by entering their email, or sharing a link that **Everyone** can view. To invite someone to edit with you in real-time you’ll need to set their permissions to **Edit**. Learn more about [managing share settings](/docs/sharing-and-collaborating/sharing-and-viewing-documents/managing-share-settings/).
## Working in real-time with collaborators
When you’re opening a document from the document’s overview in the web app or the Mac app’s Workspace window, you’ll see the name of the last person who worked in the document under the document’s thumbnail. If someone is currently working on a document, you’ll see their name alongside a `Active` status.
> **Note:** If you’re viewing a document in the web app you can also open the **Document Details** panel to see who is currently working on it.
To collaborate in real-time, open a document from the Mac app using **File** > **Open** in the menu bar (or press ⌘O). After the document opens, you’ll see up to three avatars of active collaborators in the toolbar. The colored circles around avatars match the colors of their cursors on the Canvas.
Click the next to the collaboration avatars, which will bring up a list of all Editors who are working on the document — or have done so in the past. You can also see whether an Editor is active (you’ll see a colored ring around their avatar) or away. You’ll find some useful [sharing options](/docs/sharing-and-collaborating/sharing-and-viewing-documents/) here too.
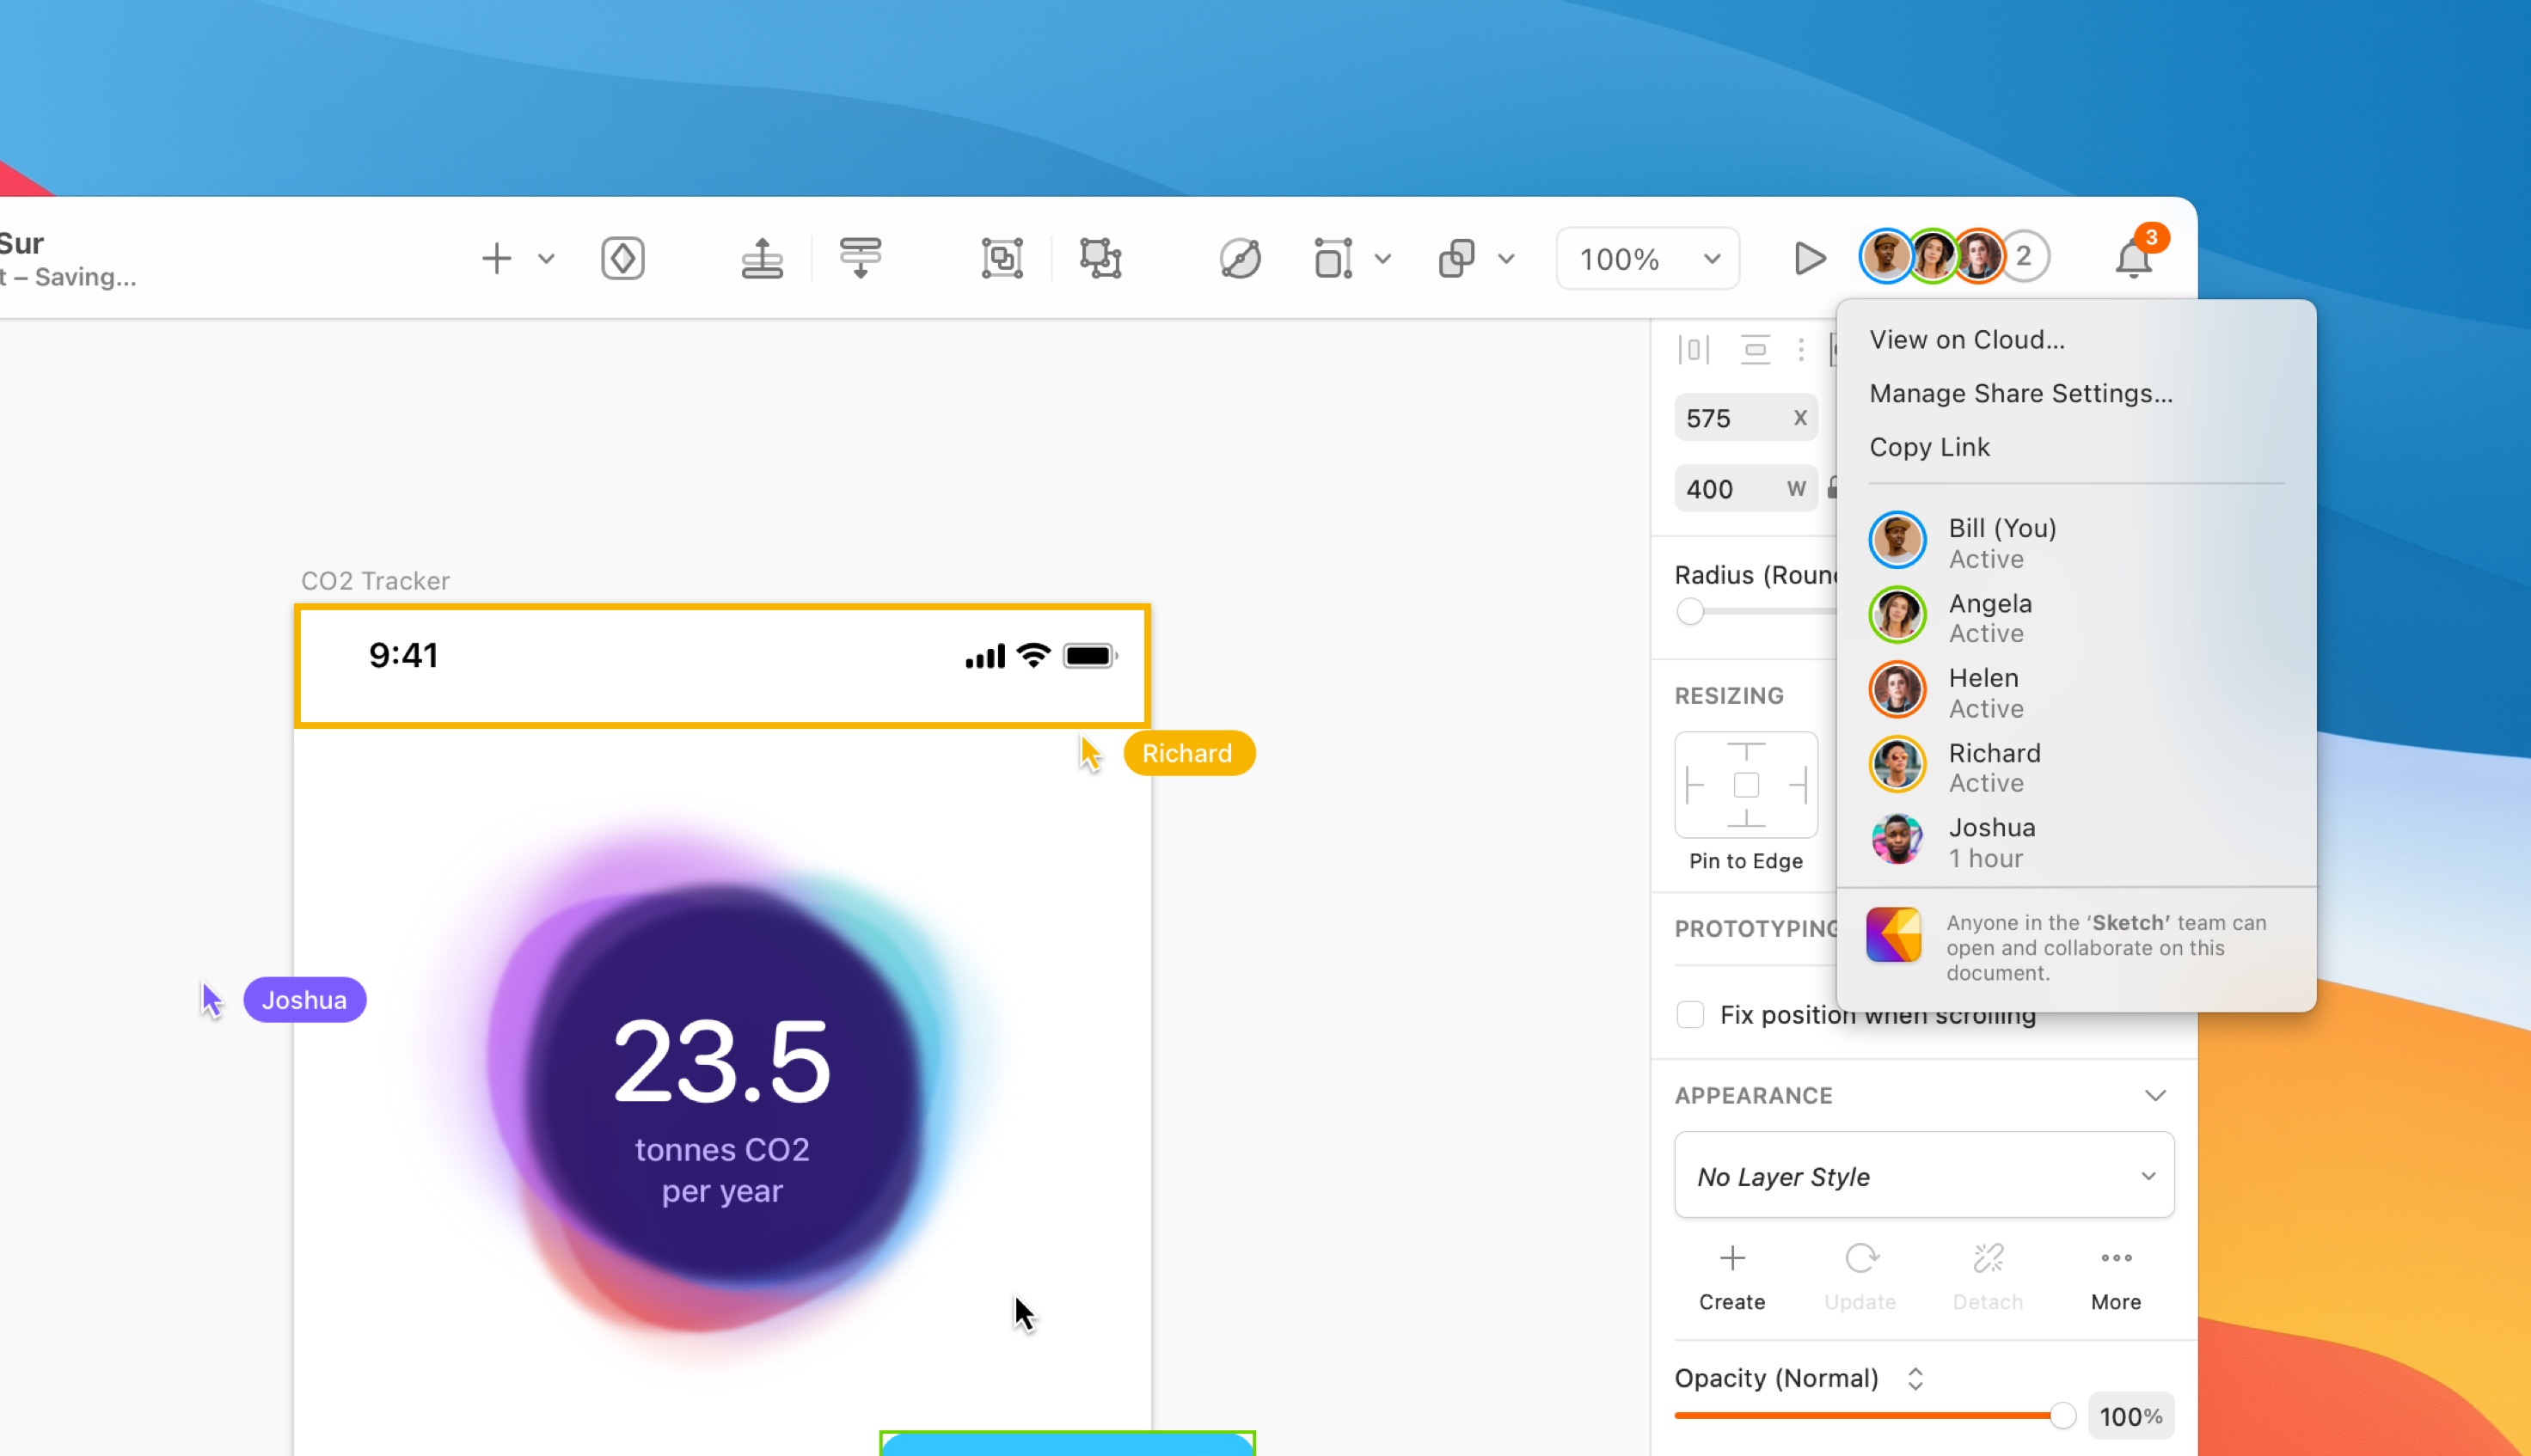
*The collaboration menu shows who is working on a document and includes some sharing options*
To hide or show collaborator cursors or names, click your own avatar in the toolbar and select **Show Collaborator Cursors** or **Show Collaborator Names** to show or hide them, respectively.

*How to hide collaborators’ cursors*
**Note**: The Collaboration button only appears in the toolbar when someone else is viewing or editing the document. Keep in mind that real-time collaboration is only available with a [subscription](/pricing/) and an active Workspace.
### Editing in real-time
When you collaborate real-time in the Mac app, you’ll see the layer a collaborator is working on and where they are in the Canvas (assuming you have the Show Collaborator Selection and Cursor options enabled). However, you’ll only see their edits after they complete an action by clicking out of a layer. This means you won’t see edits happen pixel-by-pixel. Instead, you’ll see the result of an action.

*A collaborator editing a layer, showing only the final result when they’re done*
To keep the work of all collaborators safe, you’ll only be able to undo your own actions.
#### Working on the same object
Two or more collaborators can edit the same layer at the same time, but this might cause issues if you undo and redo edits. While undo and redo commands only affect your own edits, they could override someone else’s changes if they perform an edit immediately after you. To prevent this, it’s best to avoid editing the same layer at the same time by watching out for everyone else’s cursors and selections.
**Tip**: Want to make a note or discuss something while you’re collaborating? Simply leave a comment by dropping a [comment pin](/docs/sharing-and-collaborating/commenting/) anywhere on the Canvas. Click on the **Comment** icon to drop a pin, where you can write, reply to, or resolve comments.

## Follow mode
To follow someone else as they collaborate with you in a document, open the Collaborate menu and click on their avatar. In follow mode, your Canvas will match the view of the person you’re following. We’ll also display their name at the top of the Canvas and outline it using their cursor color. The Mac app will also notify the person that you are currently following them.

If you can’t follow someone, it might be because:
* They are inactive
* They leave a document
* Their settings mean you can’t follow them
* They are following you or someone else
If you follow someone and they become inactive, you’ll stop following them. If they leave the document, you’ll see their Canvas view, but not their cursor.
To stop following someone, zoom or click anywhere on the Canvas.
### Setting your following preferences
You can choose whether or not people can follow you by clicking on your Avatar in the Collaboration menu… and clicking **Allow Users to Follow you.** Alternatively, head to **View > Canvas** > **Allow Users to Follow you**.
## Saving documents during collaboration
When you collaborate, every change you make syncs to everyone else in real-time, and anyone else who opens the document while you’re working will get all the latest updates automatically.
Even though all edits sync automatically, you can save a snapshot of the latest edits as a new version at any time — you can also see who created that version. These versions appear in the document’s Version tab in the web app. You can [star a version](/docs/sharing-and-collaborating/sharing-and-viewing-documents/creating-starred-versions/), to mark it as important, make it visible to viewers or share its updates, if it’s a Library.
While we recommend making your edits to a document in your Workspace, you can download any shared document and work on it locally, then upload the entire document again. When working offline, the Mac app will sync all your changes back to the document in your shared Workspace when you reconnect.
### Saving when you close the Mac app
There is no need to manually save your document before you close a document or quit the Mac app. When you complete either of these actions, the app combines all your latest updates into a new version of the file, and saves it to your Workspace automatically.
### Saving a new update
Manually saving your file by hitting ⌃⌘S or choosing **File > Create Version…** will create a new [version](/docs/getting-started/saving-and-managing-documents/#using-document-versions) of the document in your Workspace. Viewers in your Workspace will be able to view, comment on and inspect these versions for handoff. Find out more about [versions](/docs/getting-started/saving-and-managing-documents/#using-document-versions).
## Getting feedback on collaborative documents
Once you’ve saved your file to your shared Workspace, Viewers and Collaborators can view the document in their browser, add [comments](/docs/sharing-and-collaborating/commenting/) directly on the Canvas, and inspect it for handoff. Find out more about [what you can do in your Workspace](/docs/interface-and-settings/workspace-and-account-settings/).
## Working on a Workspace document locally
When you’re working on a document with other people, you can [download the Workspace document](/docs/getting-started/saving-and-managing-documents/#downloading-documents) to your computer, make your changes locally and manually upload them to your Workspace to create a new update of the document. Click and hit **Update Document**. Before uploading your document, we’ll ask you to confirm this action, as it might overwrite edits from other collaborators.

If someone is working on the same document as you in your Workspace, you won’t be able to push changes until they’re gone.

### Saving real-time collaboration documents offline
If you’re working offline, we’ll store any changes you save locally. When you are back online, we’ll sync the latest update of the document that’s available in your Workspace with all your new changes.
**Note:** If someone deletes an object that you’ve edited while you were offline, we won’t be able to apply changes to that object.
No. Real-time collaboration is a feature of the Mac app. You can still use the web app in your browser to view documents, comment, inspect, and share — but you can’t co-edit a document in real time using only a browser.
You can store copies of documents in third-party storage services, but real-time collaboration only works with documents saved to your Workspace.
It can. If you’re connecting via VPN or on a corporate network, you may need to allow certain domains. See [Can my VPN connection affect Sketch?](/support/troubleshooting/mac-app/network-settings/).
--------------------------------------------------------------------------------
title: "Sharing and viewing documents"
description: "Learn how to share your designs and give the right permissions to other people, whether they are part of your Workspace or not. Not ready to share your work yet? Save it to [My Drafts](/docs/getting-started/saving-and-managing-documents/#managing-documents-in-my-drafts) first."
last_modified: "2026-05-22"
url: "https://www.sketch.com/docs/sharing-and-collaborating/sharing-and-viewing-documents/"
--------------------------------------------------------------------------------
## Sharing and viewing documents
Learn how to share your designs and give the right permissions to other people, whether they are part of your Workspace or not. Not ready to share your work yet? Save it to [My Drafts](/docs/getting-started/saving-and-managing-documents/#managing-documents-in-my-drafts) first.
--------------------------------------------------------------------------------
title: "Sharing a document via link or email"
description: "Share Sketch documents by copying a link or inviting collaborators via email in the Mac or web app."
last_modified: "2026-04-07"
url: "https://www.sketch.com/docs/sharing-and-collaborating/sharing-and-viewing-documents/sharing-a-document/"
--------------------------------------------------------------------------------
## Sharing a document via link or email
Share your Sketch documents by copying a link or inviting people via email. You can also copy a link to a specific page, frame, or Canvas position.
> **Note:** Anyone you invite can view, comment on, and inspect documents from any browser for free — they just need a Sketch account first.
From the Workspace window, right-click any document and select **Copy Link** to copy its URL to your clipboard.
In an open document, click the Share icon in the top-right corner of the Toolbar and select **Copy Link** to copy the document’s URL to your clipboard.
> **Note:** You can find both **Copy Link** and **Share Settings** in the menu bar under **File**.
Any time you copy a link, a new version of the document saves automatically — so anyone who follows it sees the latest design in the web app. This doesn’t affect starred versions that Viewers and Guests in your Workspace see.
**Copy a link to a page or frame**
Press ⇧⌘C to copy a link to the current page. If you have a single top-level frame selected, the shortcut copies a link to that frame instead.
Open a document, click the **Share** button, then click **Copy Link** in the panel to copy the document link. From the same panel, you can invite people by email to edit or view the document, and choose what permissions anyone with the link has.
### How to share your position on Canvas
To share a Canvas position, open the document in the web app, zoom and pan to the area you want to share, then right-click and select **Copy Link from Position**. This copies a URL to your clipboard that preserves the exact position and zoom level, which you can paste into an email or message.
## Custom og:image
To create a custom `og:image` for your document, add a page named **Cover** and create a frame with the same name inside it using a **16:9 aspect ratio**. The contents of this frame appear as the preview image when the document is shared.
> **Note:** We cache `og:images` for **24 hours**. If you update your cover frame, changes may take up to a day to appear when sharing. Social networks may also cache their own versions on different schedules, so updates might not appear immediately across all platforms.
--------------------------------------------------------------------------------
title: "Shared with Me"
last_modified: "2026-04-07"
url: "https://www.sketch.com/docs/sharing-and-collaborating/sharing-and-viewing-documents/shared-with-me/"
--------------------------------------------------------------------------------
## Shared with Me
**Shared with Me** is where you’ll find any document that’s been shared with you via email or mention — whether you’re a Member of the Workspace or a Guest. Shared with Me gathers all the documents you’ve been invited to, making it easy to quickly find any document you’re involved in.
> **Note:** If you share a document from your private My Drafts with someone else, it will also appear in their **Shared with Me**. You need to be a Member of a Workspace or have a valid Mac-only license and Sketch Account to open and edit documents in the Mac app.
You’ll find the **Shared with Me** tab near the top of the sidebar in the Workspace window. For documents where you have only View permissions, you’ll still see thumbnails in the Workspace window but you won’t be able to open them in the Mac app. Instead, you can open these documents in the web app — or ask the person that invited you to change your sharing permissions to Edit.
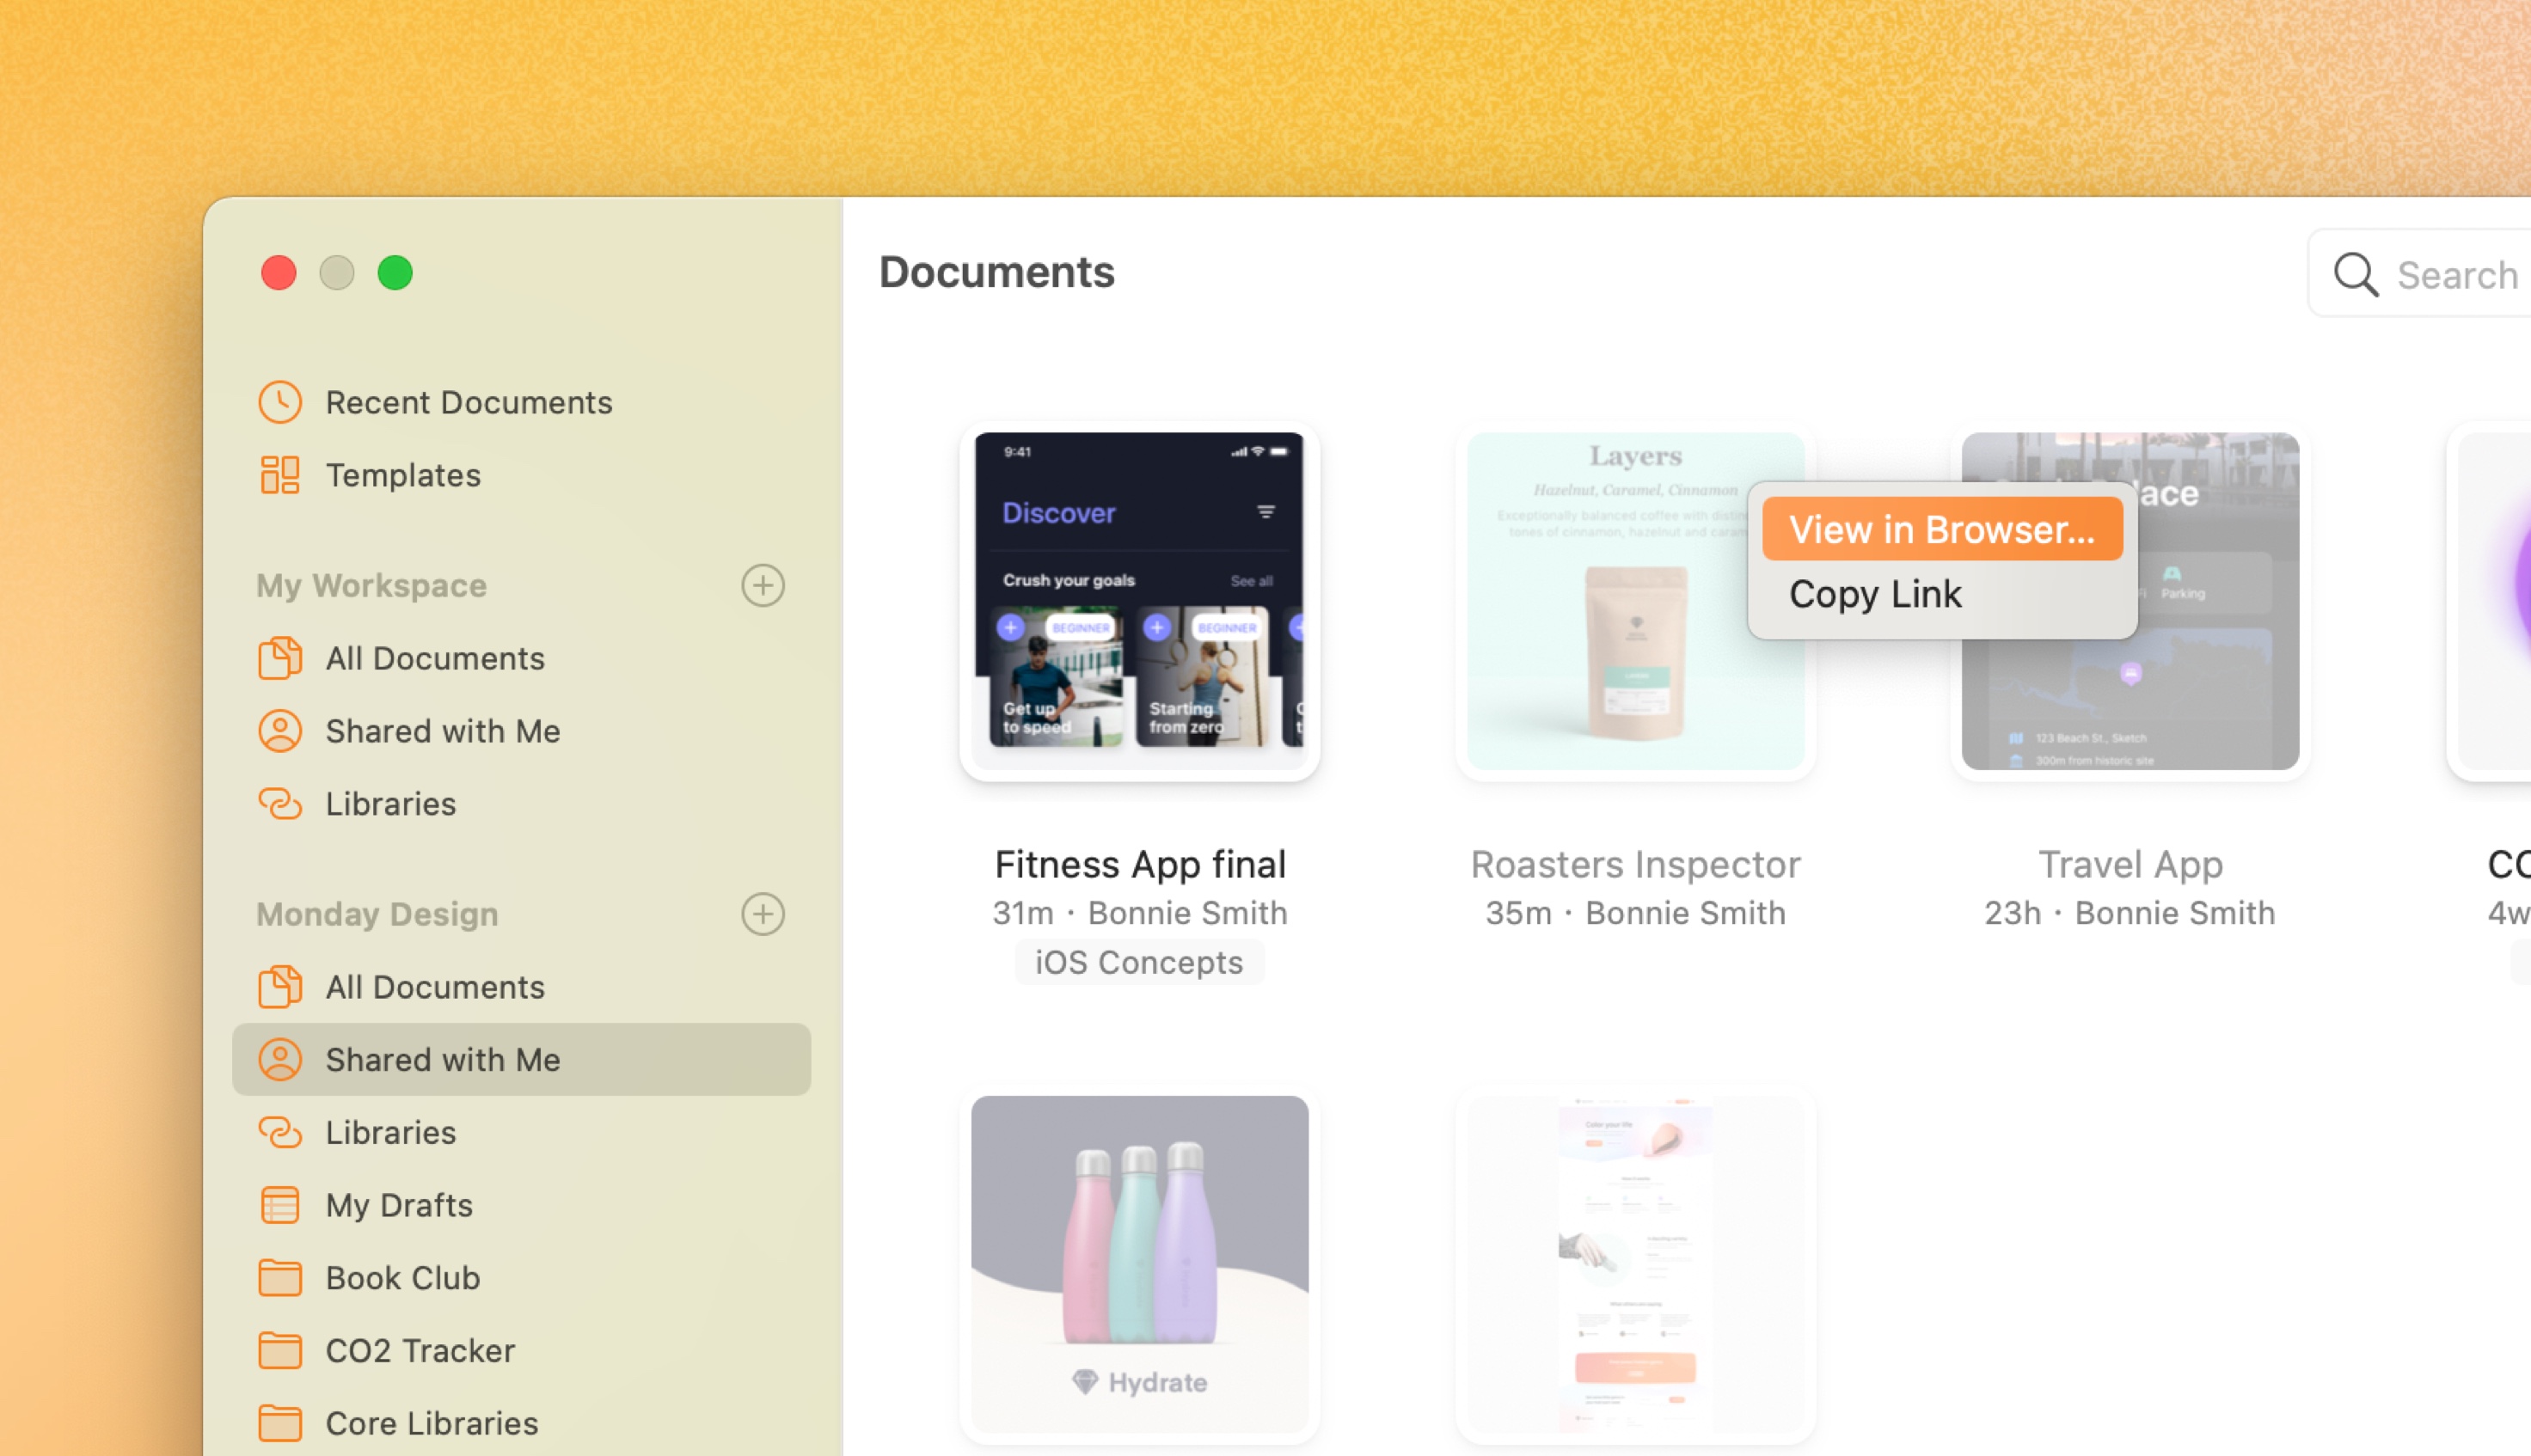
*The Shared with Me tab in the Mac app*
You’ll find **Shared with Me** near the top of the sidebar under All Documents, in any Workspace you’re part of.

*The Shared with Me tab in the web app*
--------------------------------------------------------------------------------
title: "Creating starred versions"
description: "With starred versions, you can indicate important updates in a document’s history, set which versions Viewers and Guests can see, and control which versions become Library updates for Editors."
last_modified: "2026-04-07"
url: "https://www.sketch.com/docs/sharing-and-collaborating/sharing-and-viewing-documents/creating-starred-versions/"
--------------------------------------------------------------------------------
## Creating starred versions
With starred versions, you can indicate important updates in a document’s history, set which versions Viewers and Guests can see, and control which versions become Library updates for Editors.
When you star a version:
* It becomes more prominent in the document’s version history in the web app, indicating a significant milestone or change in the document.
* Viewers in your Workspace and Guests with view permissions can only see starred versions of the document. If there are no starred versions, they’ll see the latest version instead.
* Editors in your Workspace and Guests with edit permissions will continue to see a unstarred versions in the document history.
* If the document is a Library, starring a version will publish any changes as a Library update. Any unstarred versions after that won’t become Library updates.
### How to star a version
To star versions in your document, you’ll first [save your document to a Workspace](/docs/getting-started/saving-and-managing-documents/#saving-documents) or have edit permissions for an existing Workspace document.
Use **File** > **Create Version** (⌃⌘S), enter an optional **description** and select a **Star**. When you’re done, click **Save Version**.
Once you’ve saved, you’ll see a notification in the top-right corner of the Canvas to confirm your starred update has saved successfully. Click on the notification to see that version in your Workspace.
Open a document and select the Version tab in the right sidebar. From here, hover over a version and click on the star that appears.
You can also hover over the version in the timeline, click and select **Star this Version**.
### Controlling Library updates with stars
In Library documents without starred versions, any changes you save will automatically trigger a Library update. This might be fine if you’re working alone, but when others share and edit your Library, it’s helpful to be able to save progress on changes without always sending updates to everyone’s components.
When you star a version in a Library document, anyone using that Library will receive a Library update. After that, you’ll only create Library updates when you star a version. Any versions you create without stars will save your changes in the document without becoming a Library update.
### How to unstar a version
You can only unstar a version in the web app. To do so, open your document and select the Versions tab in the right sidebar. Then click on an existing star next to a version to remove it. Alternatively, hover over the version, click and select **Unstar Version**.
If you unstar your most recent starred versions, Viewers will see the next most recently starred version.

*How to unstar an update in the web app*
--------------------------------------------------------------------------------
title: "Managing share settings"
description: "Learn how to share and view documents in Sketch with the help of our step-by-step guides and video tutorials."
last_modified: "2026-01-23"
url: "https://www.sketch.com/docs/sharing-and-collaborating/sharing-and-viewing-documents/managing-share-settings/"
--------------------------------------------------------------------------------
## Managing share settings
To manage a document’s sharing settings, head to your your Workspace overview, click the icon on your document’s thumbnail and choose **Share**. From there, you can manage the access level of your documents for people inside or outside your Workspace.
- You can invite people outside of your Workspace to view or edit your document as [Guests](/docs/sharing-and-collaborating/document-permissions/#workspace-guests)
- You can restrict permissions for everyone in your Workspace and invite specific people in your Workspace to view or edit
- You can also make the document accessible via a public link
**Note**: Inviting people outside of your Workspace won’t affect the cost of your subscription, but anyone you invite to edit a document will need to be an Editor on another Workspace or have a subscription.
## Sharing a document via email
Type the email address of the person you want to invite and choose the type of access you want to give them using the dropdown menu. If the person you’re inviting is already a Workspace Member, an autocomplete option will let you quickly select their name. If you’re inviting someone from outside your Workspace, type in their full email. Click **Add** to send out an invitation email.
When you share a document with someone, you can choose between two access levels:
- **View:** View the document, inspect layers and frames for handoff, download assets and leave comments in the web app
- **Edit:** The same access as View — but also includes the ability to open and edit the document in the Mac app. This access level requires a subscription
When you share a document with someone, it will appear in their [Shared with Me tab](/docs/sharing-and-collaborating/sharing-and-viewing-documents/shared-with-me/).
After you’ve sent an invitation to a [Guest](/docs/sharing-and-collaborating/document-permissions/#workspace-guests), you’ll see an Invite Pending badge next to their email until they’ve accepted. Permanent Workspace Members won’t have a badge, unless they’re an Admin. You can change anyone’s access level at any point and fully remove their access by opening the drop-down menu and choosing **Remove**.
## Sharing a document via public link
You can share a public link via the **Everyone (No Access)** tab in the sharing settings. You can also set commenting, inspecting and downloading permissions from here. The default level is **Cannot access the document** which makes the public link unavailable and keeps your document private.
**Note:** If you’re viewing an older [version](/docs/getting-started/saving-and-managing-documents/#using-document-versions) of a document in the web app, you can copy and paste its URL to link specifically to that update. The URL in the sharing settings will always link to the most recent version.
When you choose an access level for anyone with a link or email invitation, you can show or hide comments on frames by toggling the checkbox in the dropdown menu.
> **Note:** Keep in mind that you need a Sketch account to comment on shared public documents.
## Disabling public links in your Workspace
Workspace Admins can disable public links at a Workspace level. Head to **Settings** and click **Disable Public Links**. When an Admin disables public links, you’ll only be able to share documents with other Workspace Members and Guests. No one will be able to share a document via public link unless an Admin enables public links again.
When an Admin disables public links, this will also automatically disable any existing public and embedded links in your Workspace — as well as preventing you from creating more.
--------------------------------------------------------------------------------
title: "Previews"
description: "Share specific pages and prototypes from your document using previews."
last_modified: "2026-02-05"
url: "https://www.sketch.com/docs/sharing-and-collaborating/sharing-and-viewing-documents/previews/"
--------------------------------------------------------------------------------
## Previews
With previews, you can share specific pages or prototypes while keeping the rest of the document hidden. This
helps you avoid creating separate presentation-ready files and keeps unfinished work out of sight.
Previews always show the latest version of your document. Any changes you make update automatically at the same URL, so you can share work in progress without duplicating files.
You can include any mix of pages and prototypes in a preview and create as many previews as you need. If you add a prototype, it will include the page containing its frames. When you’re done with a preview, you can [delete it at any point](#editing-and-deleting-previews).
## Creating a preview
To create a preview:
1. Open a document in the web app.
1. Click **Share** > **Create a Preview**.
1. In the modal, add a name, an optional description, and select the pages or prototypes to include.
1. Optionally, set up access settings: enable commenting, inspecting, and asset downloads, add password protection, or set an expiration date.
1. Click **Next**.
1. Once everything looks right, copy the link and share it with others.
When you create a preview, you only need to set a name and choose the content — everything else is optional. Only Admins and Editors can create and edit previews.
> **Note:** Use passwords or expiration dates to control access to shared work. You can edit these settings at any time.
## Embedding previews
You can embed previews via oEmbed, which lets you paste them into apps like Notion, Miro or any other tool that supports it. These embeds are interactive, so you can browse frames, zoom, and toggle dark mode — all without leaving the app.
Open the preview you want to embed. Then:
1. Copy the preview URL from the address bar, or click the link icon next to a preview in the **Share** menu.
2. Paste the URL into a supported app.
3. Depending on the app, you may see options for how to paste the link. In Notion, for example, select **Embed** from the paste options.
If you’re looking to embed a Sketch document, take a look at our [embedding Sketch docs](/docs/sharing-and-collaborating/sharing-and-viewing-documents/embedding-sketch-documents).
## Editing and deleting previews
You can change a preview’s name, description, or selected pages and prototypes at any time, and delete it whenever you want to stop sharing it.
### Editing a preview
To edit a preview:
1. Open the document in the web app.
1. Click **Share**.
1. Click the settings icon next to the preview you want to update.
1. In the modal, use the **Preview contents** tab to change what’s included in the preview, and the **Settings** tab to control commenting and access options.
1. Click **Update Preview**.
### Deleting a preview
To delete a preview:
1. Open the document in the web app.
1. Click **Share**.
1. Click the settings icon next to the preview you want to delete.
1. Click **Remove Preview** and confirm.
> **Note:** Workspace Admins can view, edit, and delete all previews in **Settings** > **[Document Previews](/workspace/settings/previews)** in the web app.
--------------------------------------------------------------------------------
title: "Restricting uploads"
description: "If your team or organization has security or compliance concerns around saving files to our servers, you can completely restrict document uploads in your Workspace."
last_modified: "2026-04-07"
url: "https://www.sketch.com/docs/sharing-and-collaborating/sharing-and-viewing-documents/restricted-uploads/"
--------------------------------------------------------------------------------
## Restricting uploads
> **Note:** This feature is only available on request — to enable it, an Admin in your Workspace will need to contact our customer support team following the steps below.
If your team or organization has security or compliance concerns around saving files to our servers, you can completely restrict document uploads in your Workspace.
This process is only available on request and will [limit the features available](#comparing-functions) to you in your Workspace, but it will mean you can manage Workspace members and Mac app access while enforcing a local-only workflow for everyone except Workspaces Admins.
## Restricting document uploads
To restrict document uploads, head to **Settings** in the web app.
In the **Restrict Document Uploads** section click on **Restrict document uploads**. Fill out the contact form and one of our customer support team members will check your request and enable the feature for you.
Remember, only [Workspace Admins](/docs/interface-and-settings/workspace-and-account-settings/managing-your-workspace-settings/#managing-admin-settings) and Owners can request this feature.
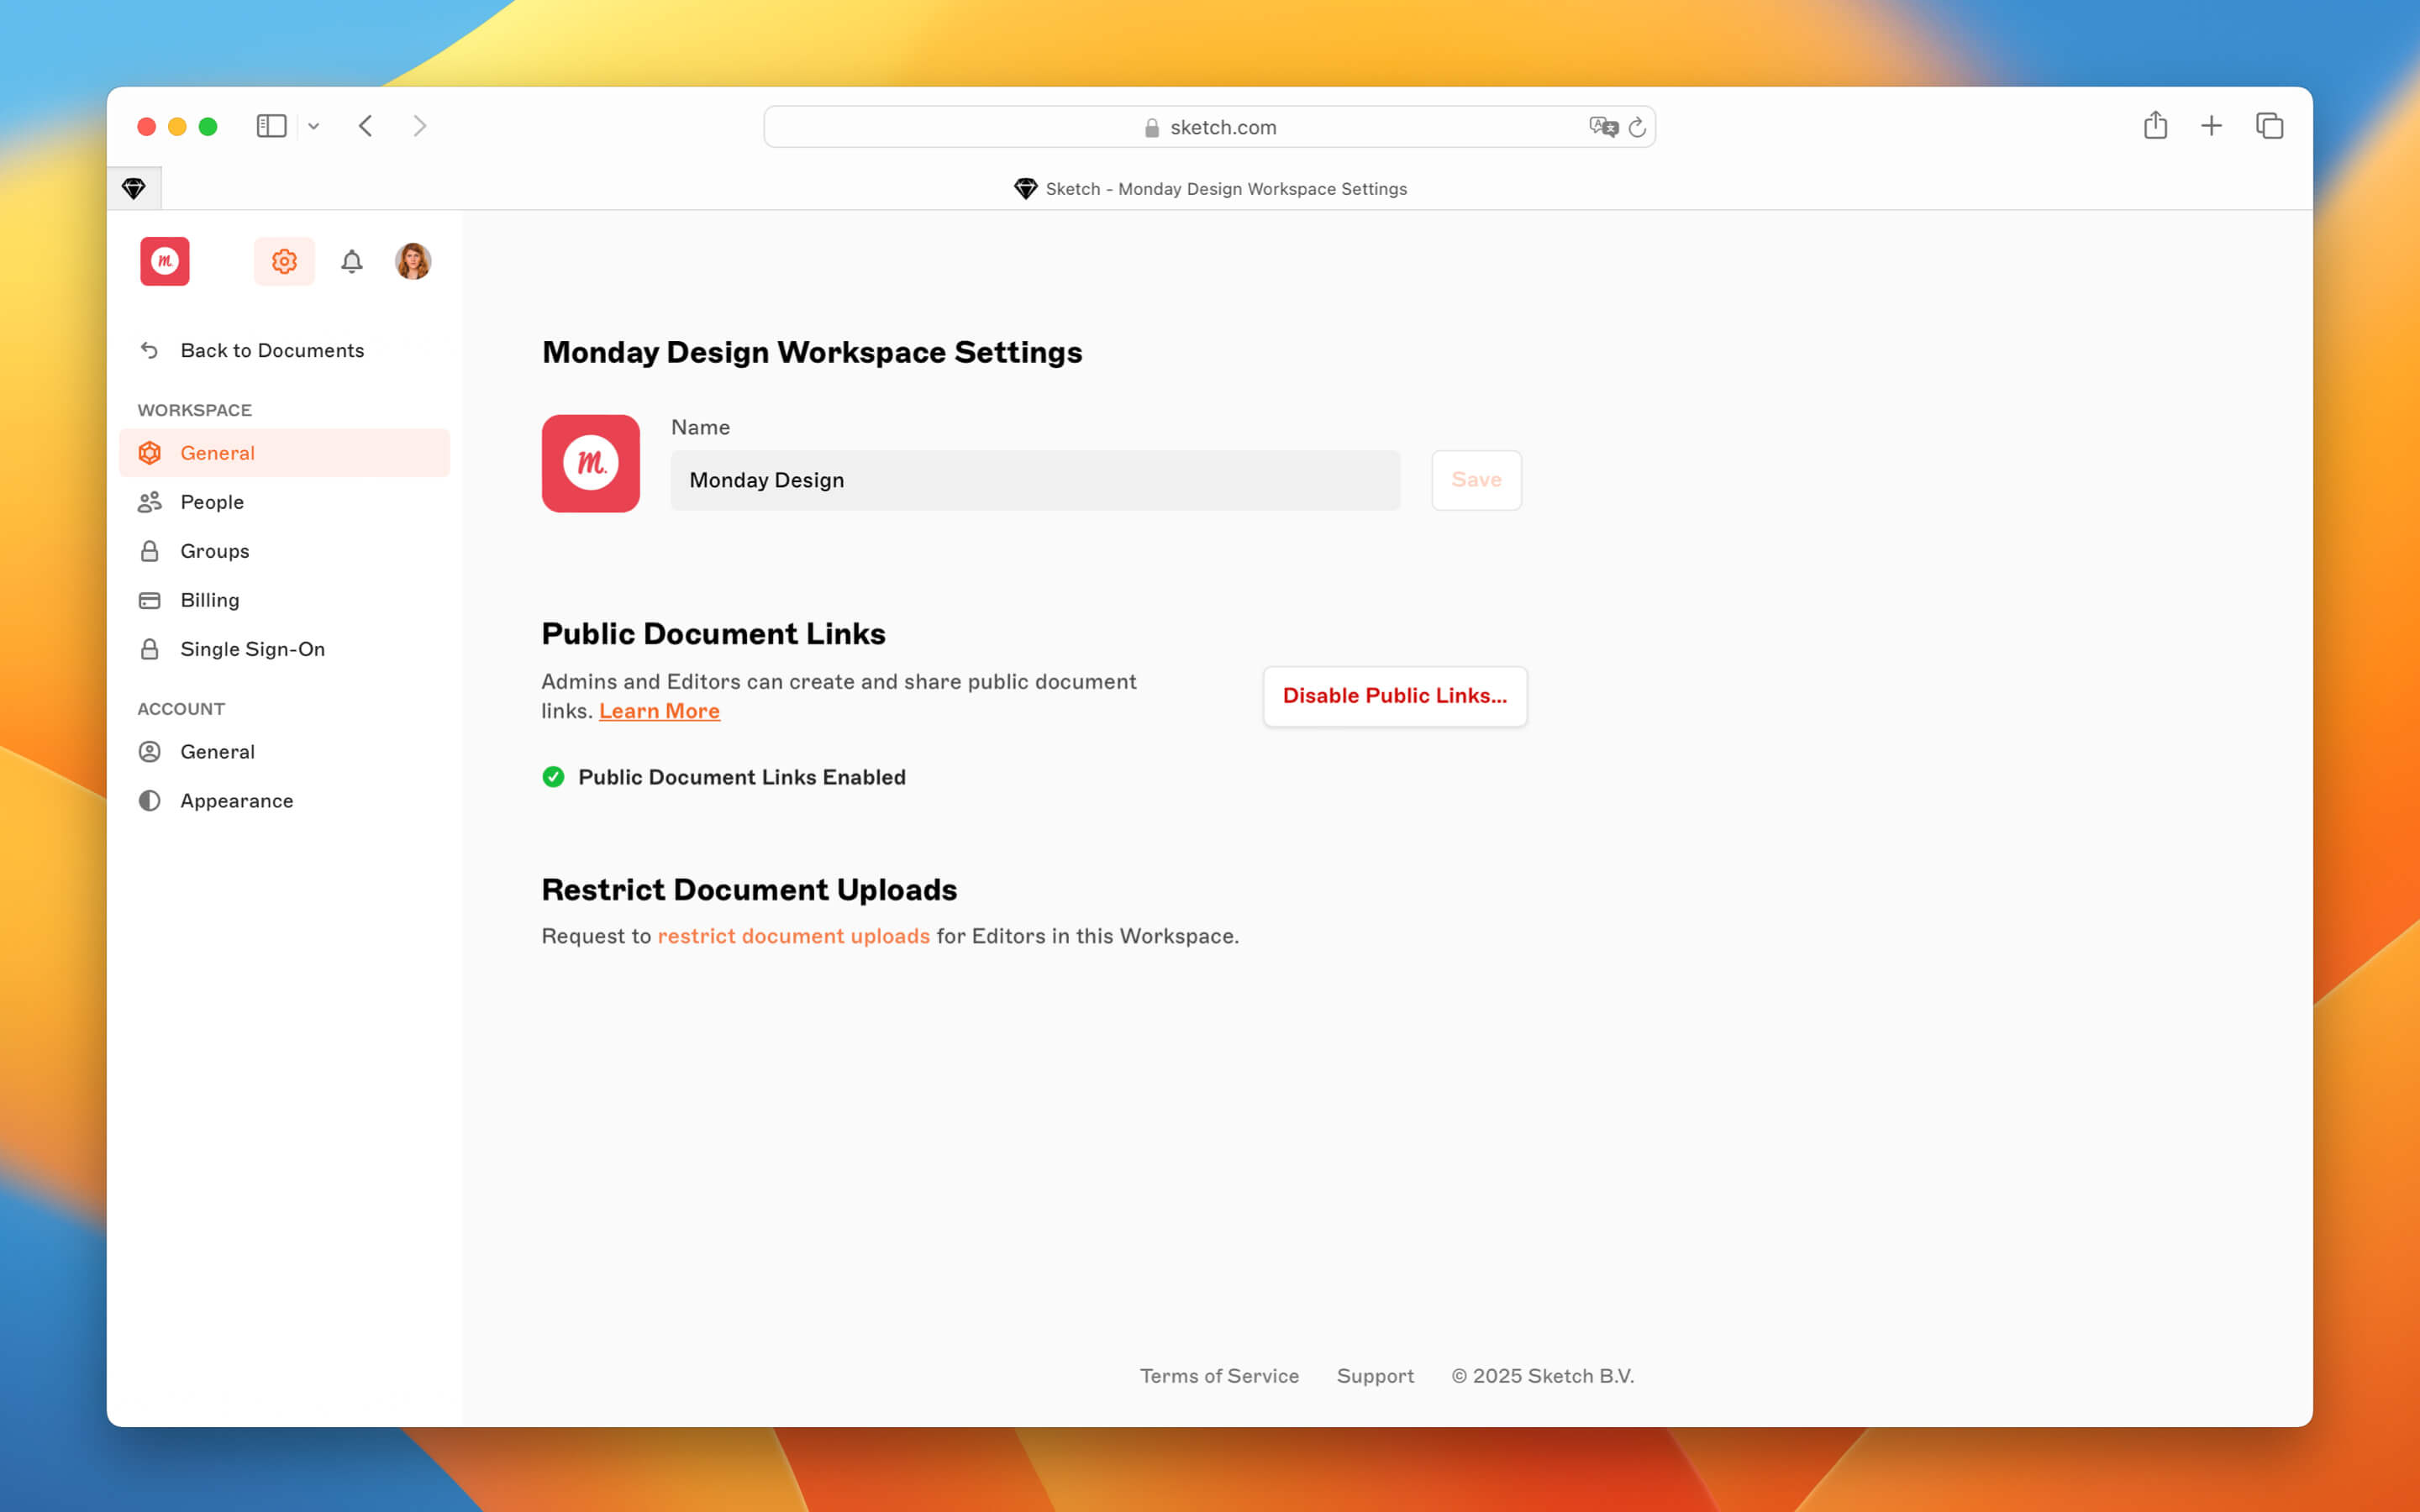
*To restrict document uploads in your Workspace, an Admin will need to request the feature in **Settings**.*
Once we’ve switched the feature on in your Workspace, head to the Settings page and click on the **Restrict Uploads** button. We’ll ask you to confirm your decision. Then, every Admin and Editor in the Workspace will receive a confirmation email.
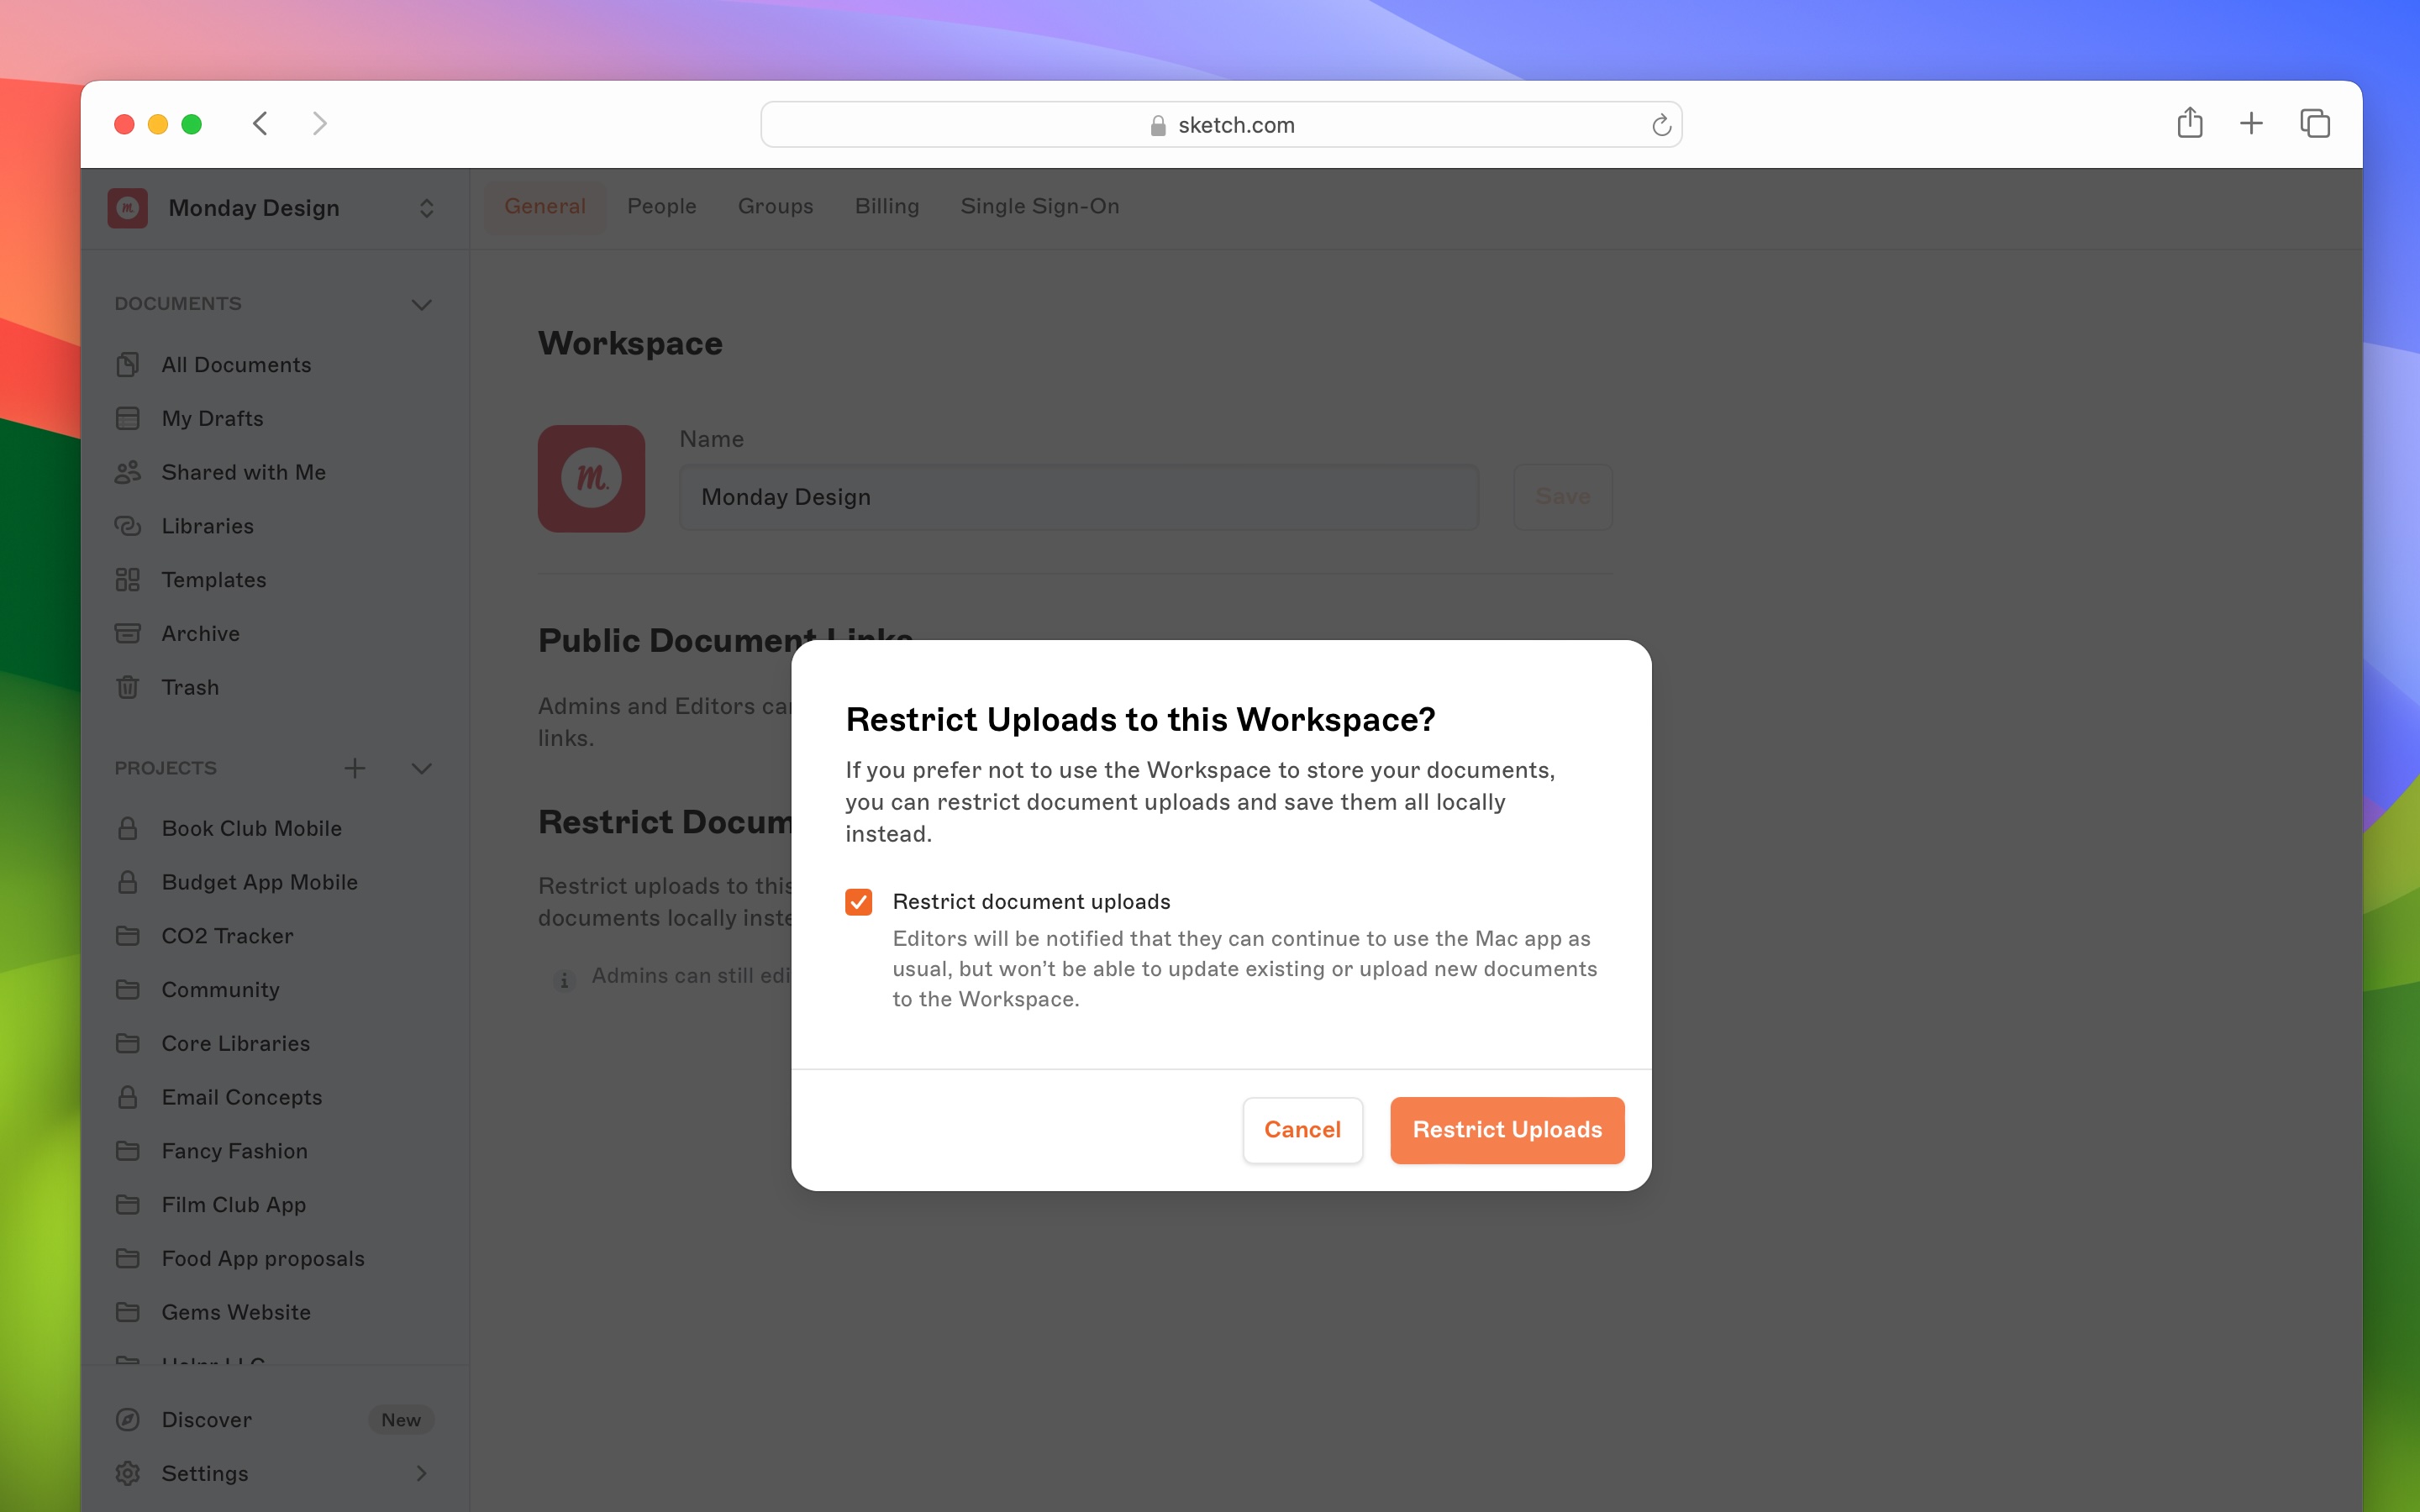
*We’ll ask you to confirm your decision to restrict uploads. When you’re ready, click on the **Restrict Uploads** button.*
Even if you have enabled this feature, Admins in your Workspace will still be able to save documents to your Workspace, making it possible to continue sharing design systems and Libraries for Editors to pick up and use.
## Re-enabling document uploads
Your Workspace Admin can easily re-enable uploads for everyone at any time. That means, if you change your mind later, you can still take full advantage of our [collaborative tools](/docs/sharing-and-collaborating/real-time-collaboration/).
Head to **Settings**, look for **Enable Document Uploads** and click on the **Enable Uploads** button.
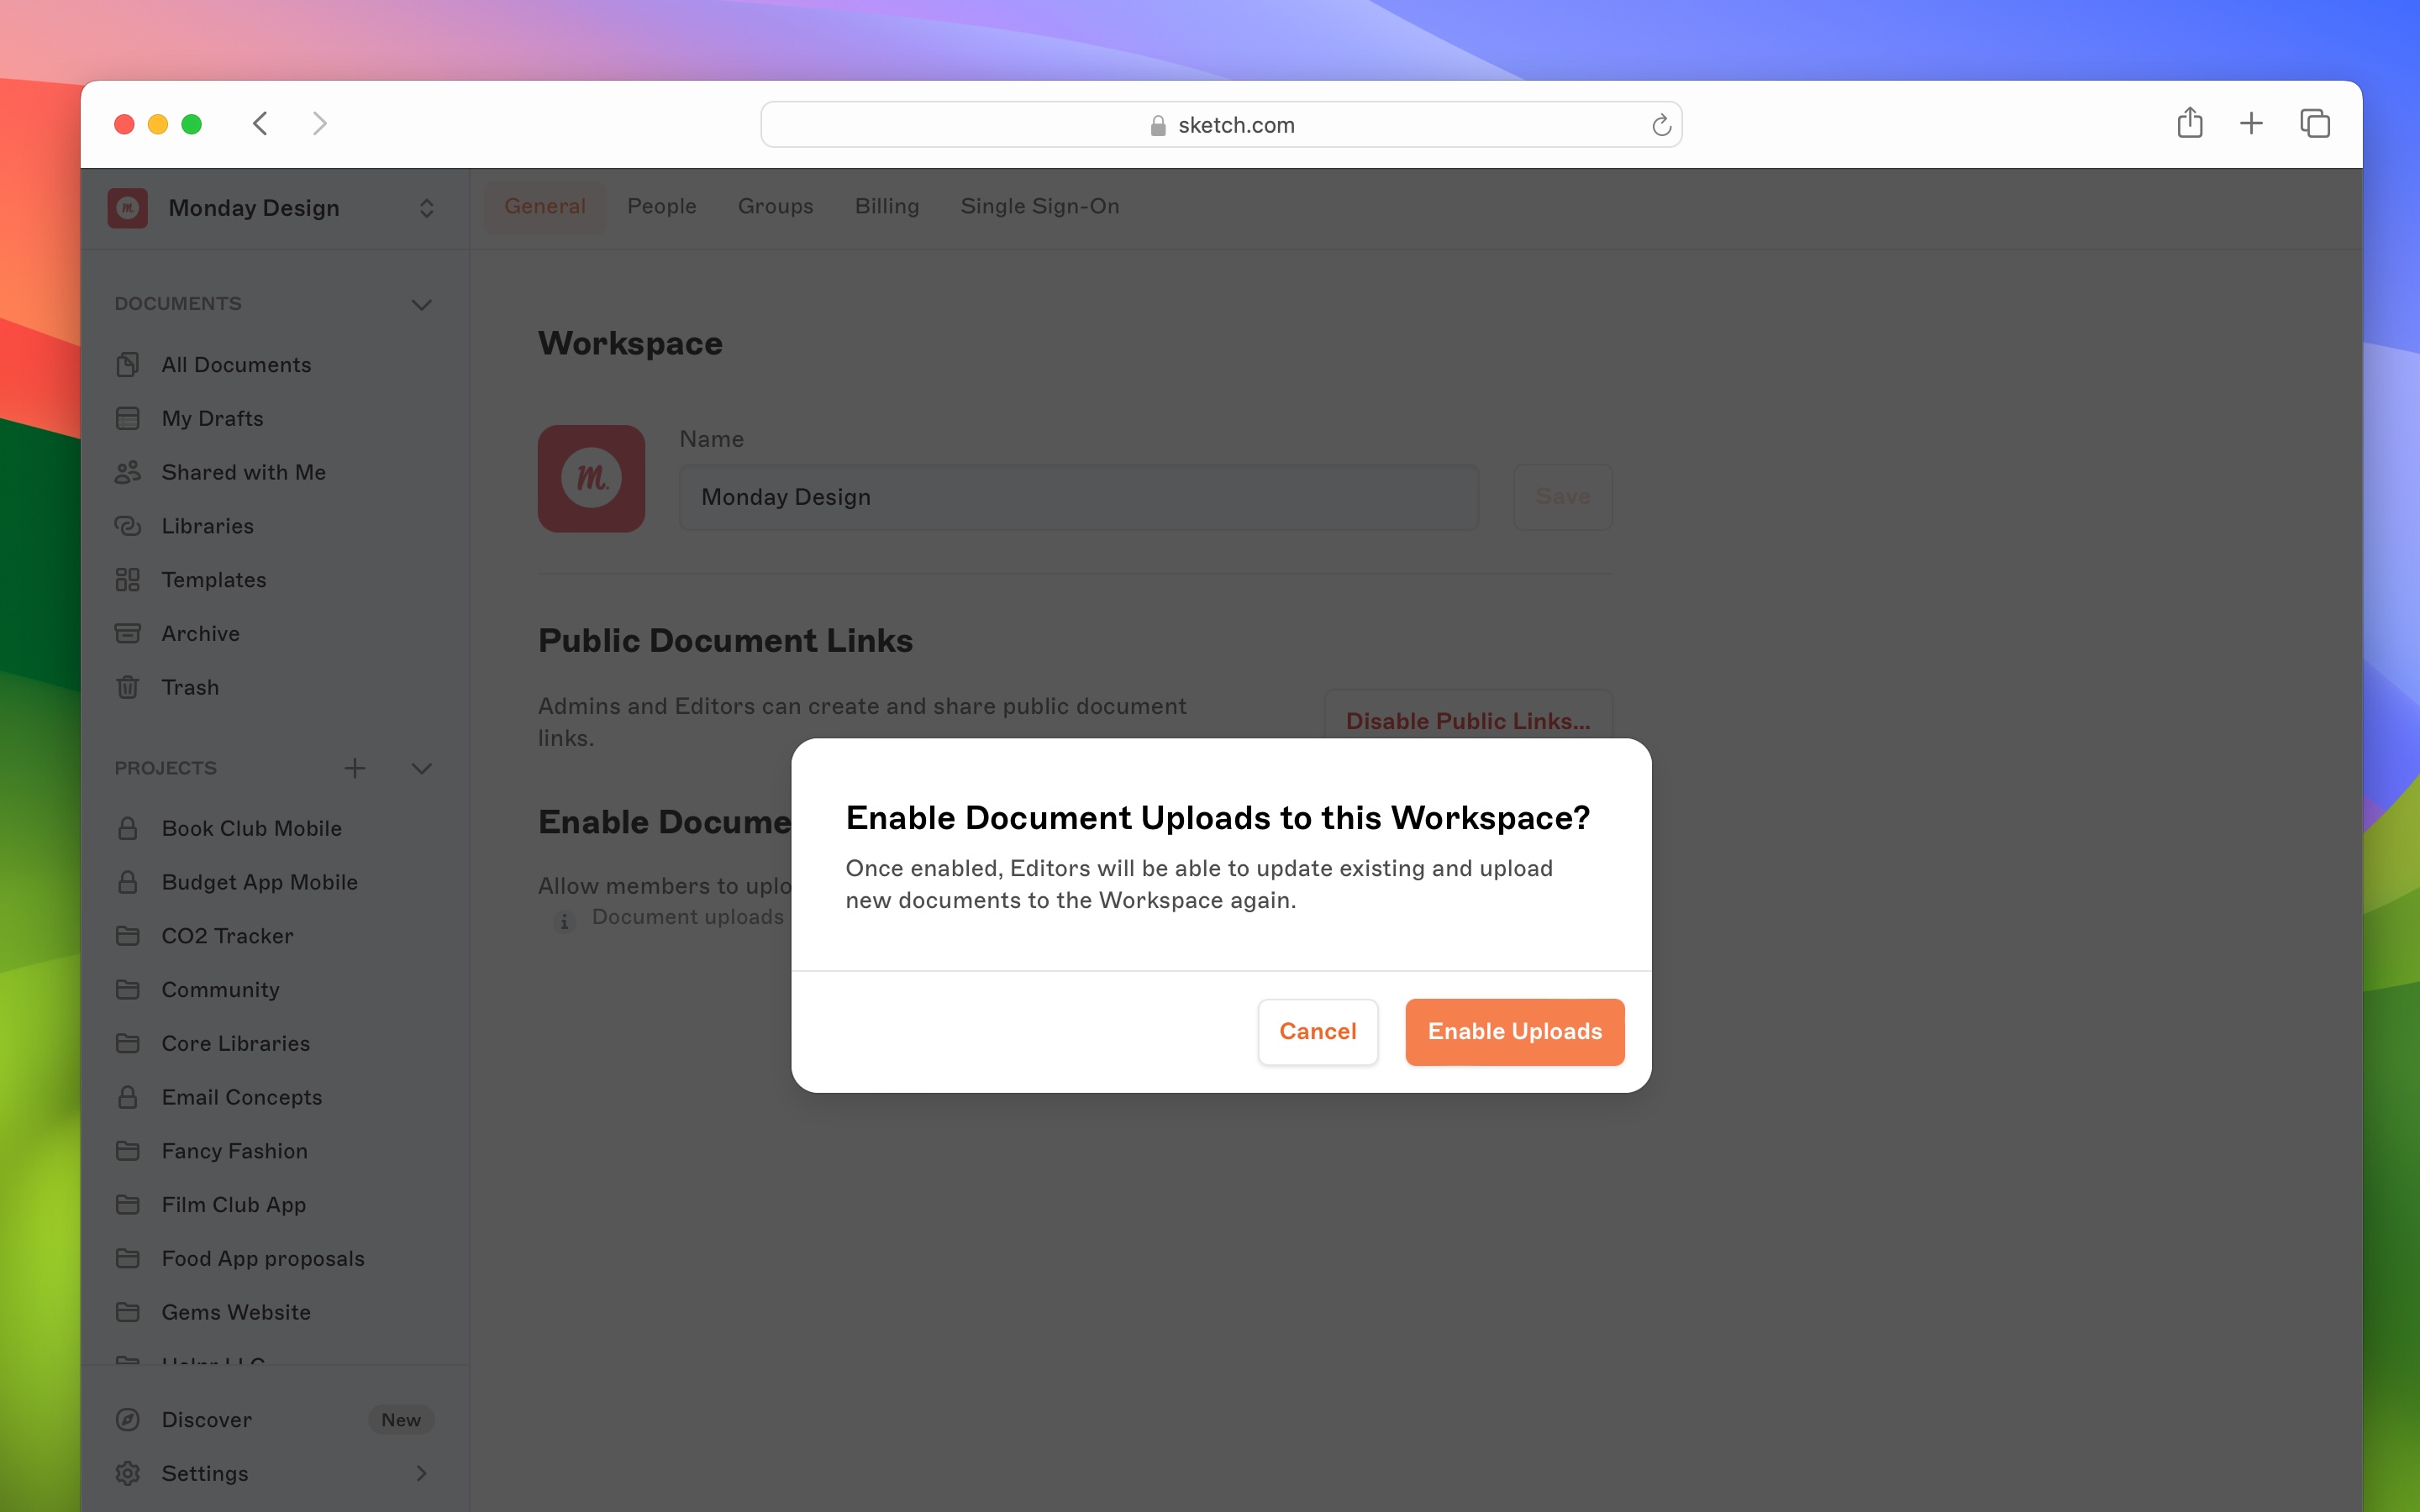
*Your Workspace Admin can re-enable uploads anytime. Head to **Settings** and click the **Enable Uploads** button.*
### Comparing functions
This feature will significantly limit your team’s Workspace features. Restricting document uploads means everyone apart from Workspace Admins will need to save files locally, which will require an alternative way to share work with your teammates and Guests. You won‘t be able to use features like [My Drafts](/docs/getting-started/saving-and-managing-documents/#managing-documents-in-my-drafts) or collaborate in real-time in the Mac app.
Check out the table below for the full picture of how restricting document uploads will affect your Workspace
| feature | editors | viewers |
| --- | --- | --- |
| Edit locally saved documents in the Mac app | **Yes** | **No** |
| View documents and projects on the web app | **Yes** | **Yes** |
| Download documents | **Yes** | **Yes** |
| Inspect documents | **Yes** | **Yes** |
| Comment on documents | **Yes** | **Yes** |
| Copy links to documents | **Yes** | **Yes** |
| View document settings | **Yes** | **Yes** |
| Customize document settings in the web app | **No** | **No** |
| Upload documents to the web app* | **No** | **No** |
| Delete documents and projects in the web app | **No** | **No** |
| Rename documents and projects in the web app | **No** | **No** |
| Share documents with other team members | **No** | **No** |
| Invite or share documents with guests | **No** | **No** |
| Uninvite yourself from a document | **No** | **No** |
| Delete documents or retrieve them from Trash | **No** | **No** |
| Sharing options | **No** | **No** |
| Move documents or projects to another place | **No** | **No** |
| Upload, rename or move Drafts | **No** | **No** |
| Delete and download Drafts | **Yes** | **Yes** |
_* Admins in your Workspace will still be able to upload documents, even if you have restricted uploads._
If you can’t upload documents to your Workspace, check with a Workspace Admin to confirm whether restricted uploads are enabled. If you’re an Admin and you’re still having trouble, [contact Support](/support/contact/).
--------------------------------------------------------------------------------
title: "Embedding Sketch documents"
description: "With embeds, you can share your work in context on platforms like Notion, GitHub or Jira — or even publish your designs on a personal website or blog. That means you can share your documents, frames and prototypes without having to send out individual invitations to your Workspace."
last_modified: "2026-04-07"
url: "https://www.sketch.com/docs/sharing-and-collaborating/sharing-and-viewing-documents/embedding-sketch-documents/"
--------------------------------------------------------------------------------
## Embedding Sketch documents
With embeds, you can share your work in context on platforms like Notion, GitHub or Jira — or even publish your designs on a personal website or blog. That means you can share your documents, frames and prototypes without having to send out individual invitations to your Workspace.
**Before you embed a document, make sure it’s accessible** to people outside of your Workspace. To do this, you’ll need to [manage your document’s share settings](/docs/sharing-and-collaborating/sharing-and-viewing-documents/managing-share-settings/) and give viewing permissions to the document’s link.
1. Select the tab titled as **Everyone**.
1. Set the first option so anyone with the link **Can view the document**.
1. Enable the **Inspect and Download** option.
1. Click **Copy Public Link** to get the link you need to embed the document.
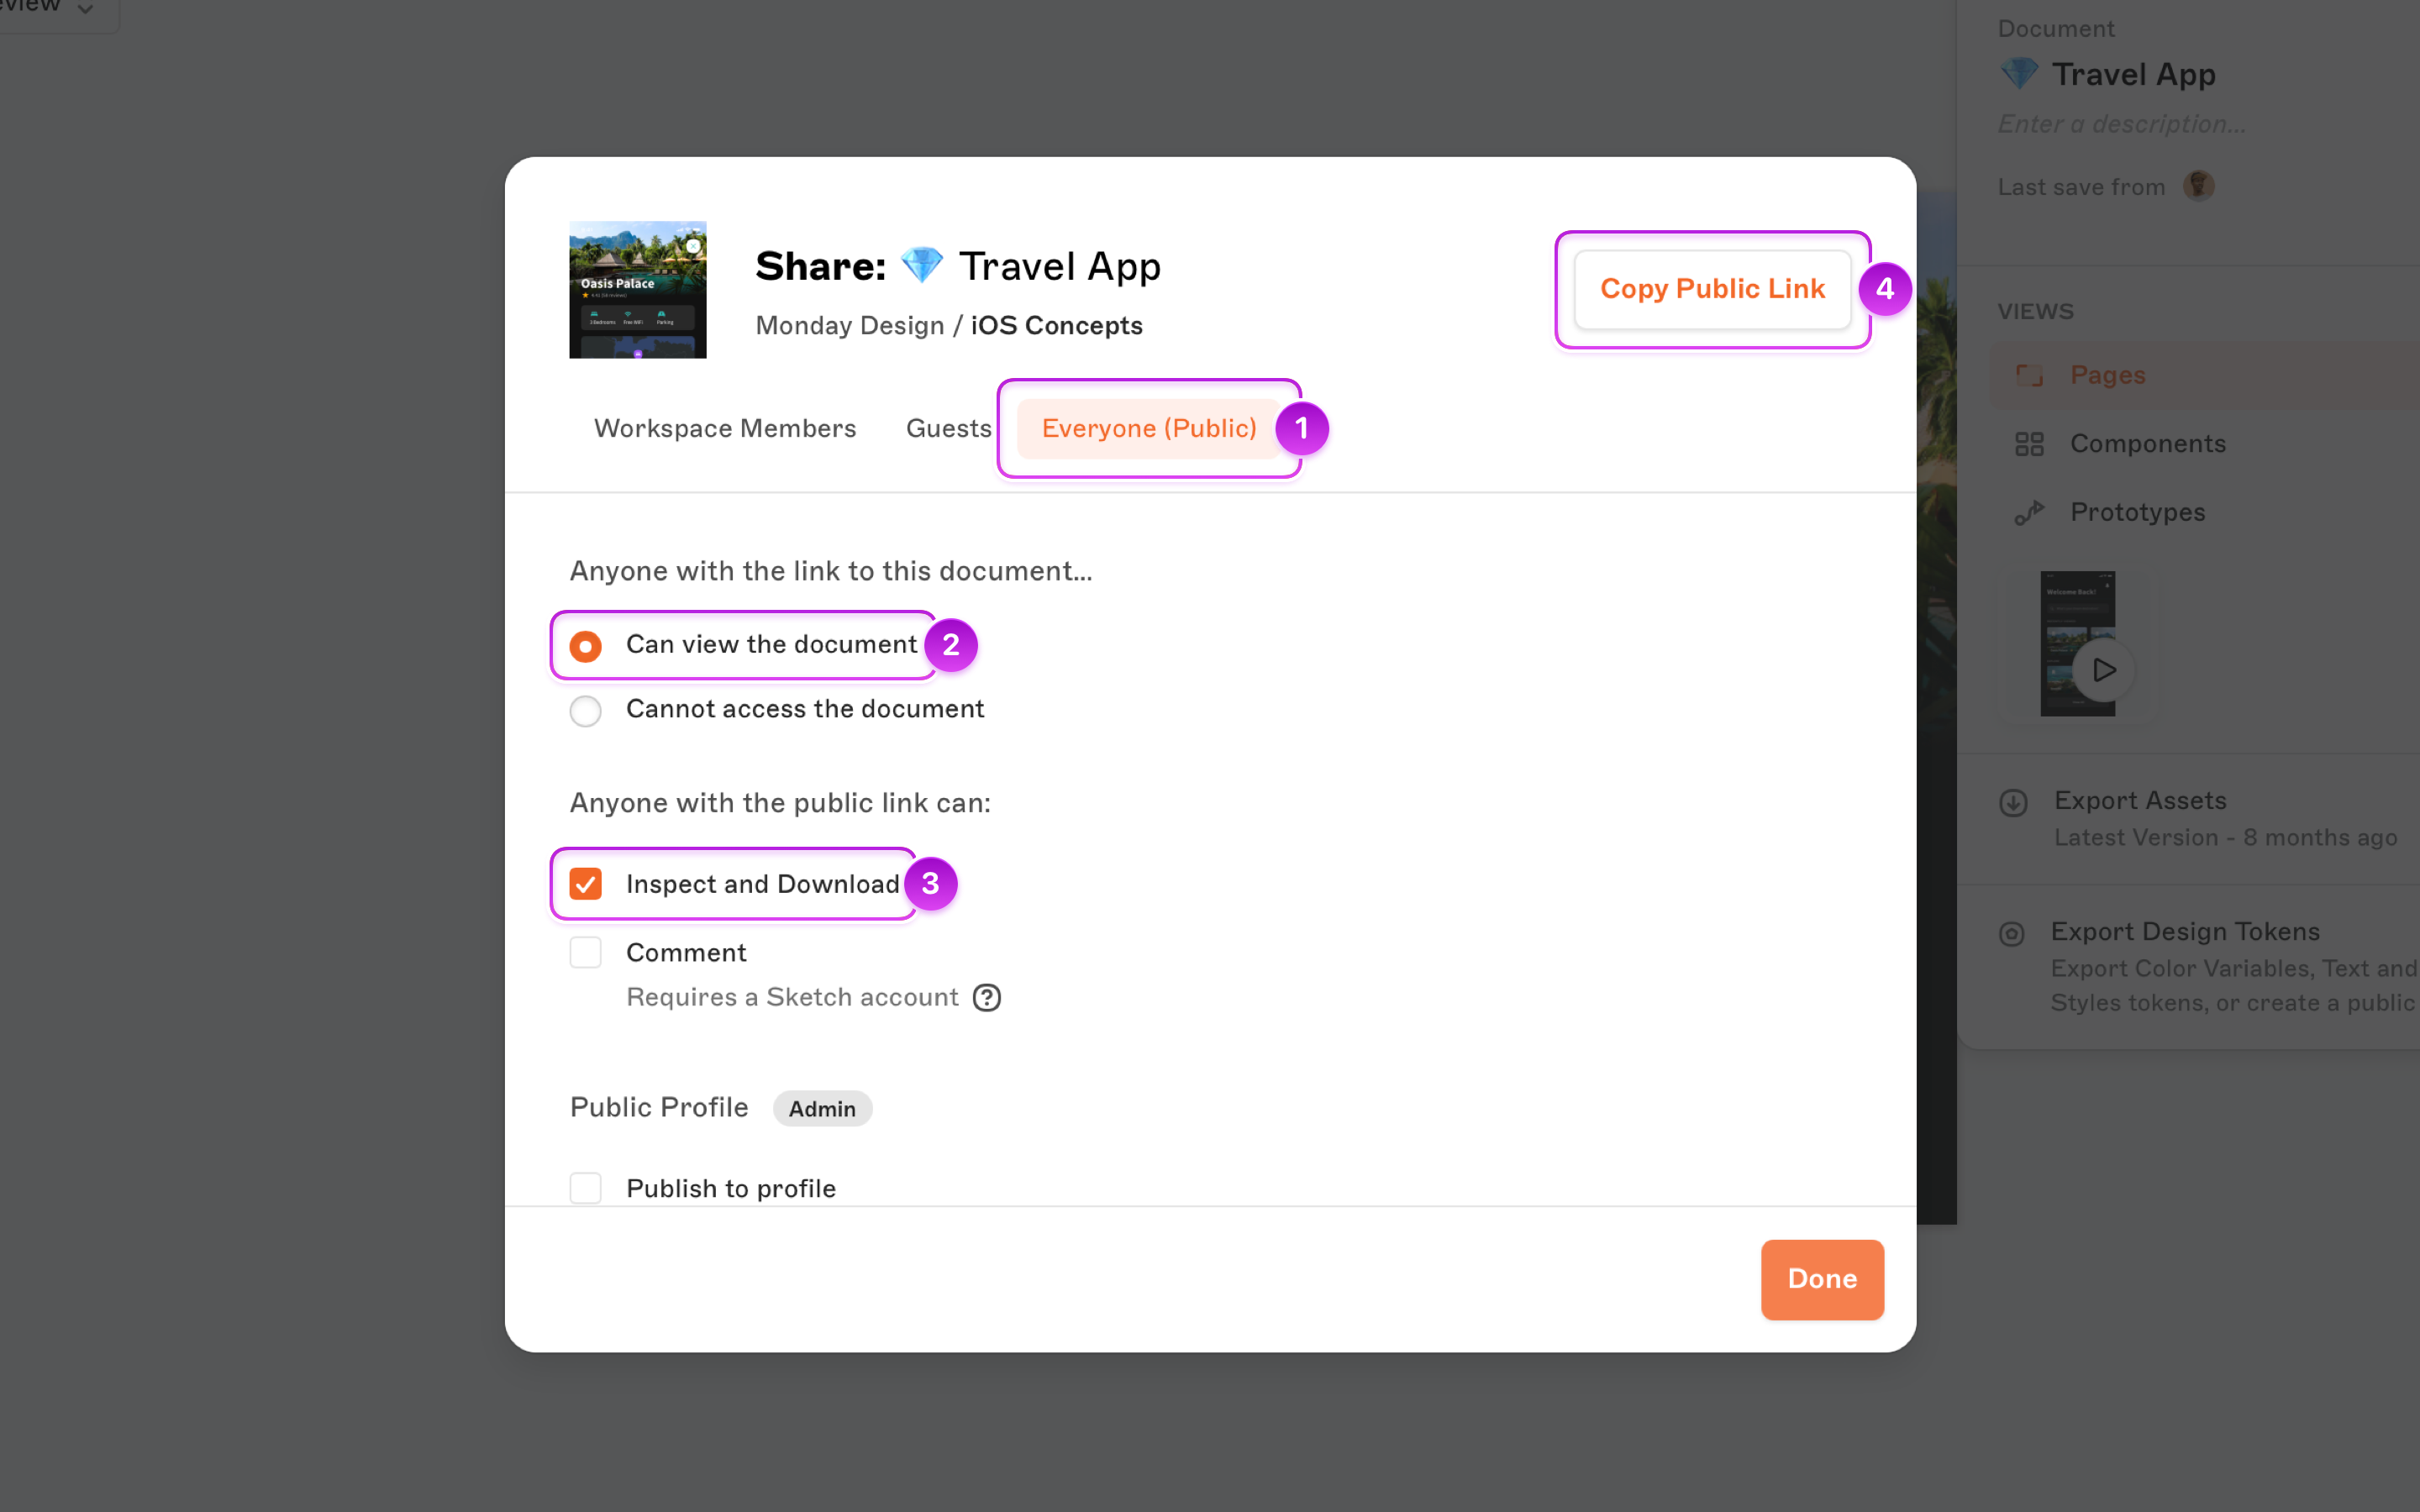
*Setting the permissions for a document to be embedded in other platforms using the Share settings in the web app (January 2025)*
## How embeds work
There are a couple of ways to embed your Sketch documents:
- You can copy the link to your document, frame or prototype and paste it directly into any web page or document that supports [oEmbed](https://oembed.com/), such as [Notion](https://www.notion.so/help/embed-and-connect-other-apps) or [Medium](https://help.medium.com/hc/en-us/articles/214981378-Using-embeds).
- Alternatively, you can **generate a HTML snippet from that same link** using a tool like iFramely. You then need to paste this snippet into your web page’s HTML document.
- [You can also embed previews](/docs/sharing-and-collaborating/sharing-and-viewing-documents/previews) via oEmbed to share specific pages or prototypes while keeping the rest of your document hidden. These embeds are interactive, so you can browse frames, zoom, and toggle dark mode.
**Note:** With embeds, only the latest update of your document, frame, or prototype will display. To display previous versions of a document, you will need to copy the link to that version before embedding it.
## Embedding a document by copying and pasting its link
Platforms like Notion and Medium allow you to embed content by copying your document’s link and pasting it into the page or document where you want it to appear. Copy and paste your link into a Notion document, for example, and your frame will appear in that document as if you were viewing it in the web app in your browser.
**Copy your document’s link.** You can [copy a document’s link](/docs/sharing-and-collaborating/sharing-and-viewing-documents/sharing-a-document/) from the Workspace window in the Mac app, or from your browser’s address bar in the web app.

**Paste your document’s link** into the web page or document where you want it to appear.

*Here’s what embedding a Sketch document in Notion looks like.*
## Embedding documents using a HTML snippet
**To embed your Sketch documents in any other type of web page**, you’ll need to create a HTML snippet for your link. Here’s an example of a HTML snippet for the page you’re currently reading:
```html
```

To generate a HTML snippet, you can use a tool like iFramely. With iFramely, simply copy your document’s link into the field labelled Paste a link here, then press the **Check it** button.
Once you have your snippet, copy it by pressing the **Copy Code** button. You can then paste your code snippet into the HTML document of the page where you want your document, frame or prototype to appear. Don’t forget to paste it between the ```html ``` tags of your document.
--------------------------------------------------------------------------------
title: "Integrations"
description: "Learn about integrations in Sketch and how to enable them in your Workspace."
last_modified: "2026-01-26"
url: "https://www.sketch.com/docs/sharing-and-collaborating/integrations/"
--------------------------------------------------------------------------------
## Integrations
Integrations connect your Workspace with third-party tools. They make it easy to share content, show metadata, and bring Sketch documents, pages, or frames into the places where conversations happen.
You can currently connect your Workspace with Slack, and we’re already working to bring you more integrations.
## Slack
With the Slack integration, your team can share documents, pages, frames, and previews directly in Slack channels and conversations.
- Shows inline previews for links to documents, pages, frames, and [previews](/docs/sharing-and-collaborating/sharing-and-viewing-documents/previews/).
- Displays helpful metadata and preview details.
- It works across your entire Workspace once you enable it.
> **Note:** Documents in restricted folders only show their title in Slack. To show a full preview, move the document to a folder with broader access.
### How to connect your Workspace to Slack
You’ll need to be an Admin to enable the Slack integration.
1. In the web app, head to [Settings](/workspace/settings/)
1. Click [Integrations](/workspace/settings/integrations) in the sidebar
1. Click **Connect** next to the Slack integration
1. Review what permissions the integration needs, and authorize it in your Slack workspace.
Once you enable it, it works across the entire Workspace — no need to enable it for individual members.
### How to unlink Slack
1. In the web app, head to [Settings](/workspace/settings/)
1. Click [Integrations](/workspace/settings/integrations) in the sidebar
1. Click **Settings** next to the Slack integration
1. In the modal, click **Unlink**.
Once you unlink Slack, new Workspace links won’t show embedded previews in Slack.
--------------------------------------------------------------------------------
title: "Document permissions"
description: "Learn how to apply document permissions in Sketch with the help of our step-by-step guides and video tutorials."
last_modified: "2026-05-22"
url: "https://www.sketch.com/docs/sharing-and-collaborating/document-permissions/"
--------------------------------------------------------------------------------
## Document permissions
You’re always in control of who can see your documents. By default, all documents in your Workspace are visible to every Workspace member — but your Workspace is private. Documents are never public unless you choose to make them so. Someone with a document URL can’t open it unless they’re a Workspace member or you’ve invited them as a Guest.
## Restricting edit rights for individual documents
By default all Editors in your Workspace have edit permissions for all documents, but you can restrict editing access for specific Editors — which is handy for important documents, like your design system’s Libraries.
To control who can and cannot edit a document, head over to its **Share** settings. You can access these via:
* The that appears when you hover over a document’s thumbnail
* The in the Nav Bar when you’re viewing a document
### Managing editing rights
In your document’s share settings, you can choose individuals and assign them specific edit rights, or restrict editing rights for everyone in your Workspace (or in a specific project, if your document is part of a project).
Similarly, you can **remove editing permissions** for people. Enter their name or email and set their permissions to **View**. See [Sharing Documents](/docs/sharing-and-collaborating/sharing-and-viewing-documents/).
You can even change an Admin’s permissions to **View** if they don’t need or want to edit the document. However, only Admins can change their own permissions from View to Edit.
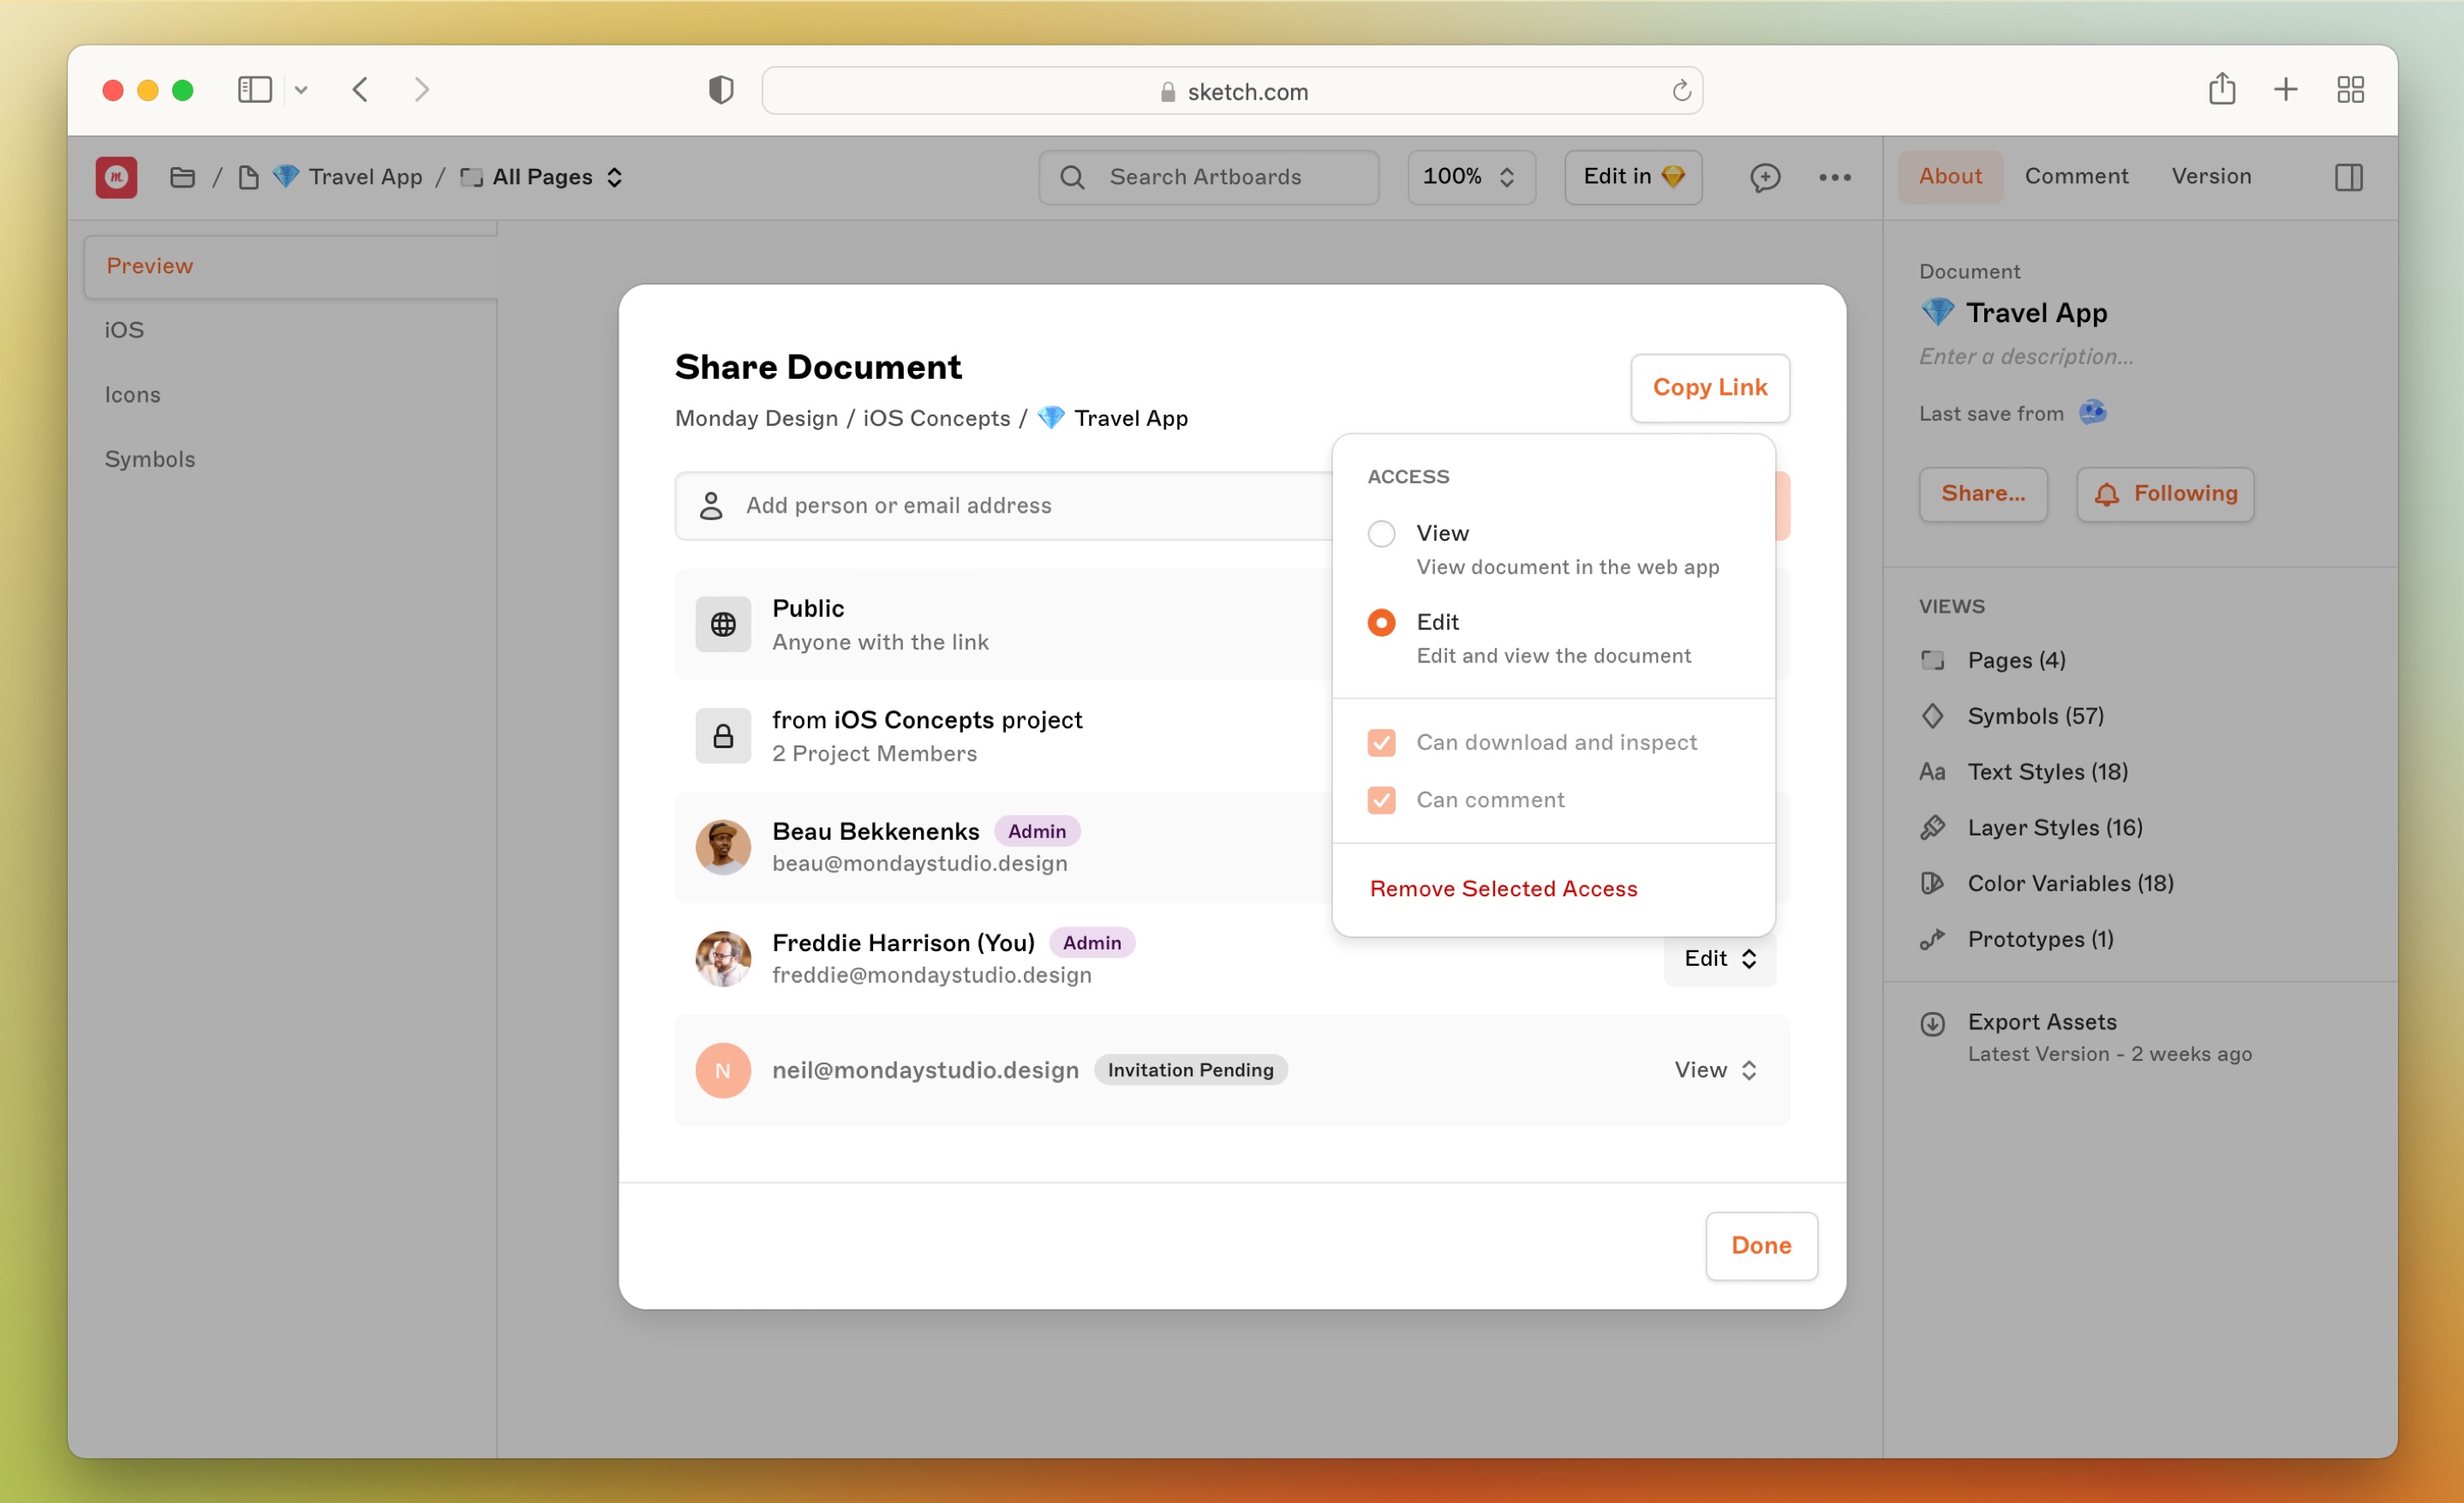
*How to set an Admin’s permissions for documents in the web app*
As an Editor or Admin, you can [restrict access to projects](/docs/sharing-and-collaborating/document-permissions/) for other people in your Workspace in the web app. To do so, open the project’s share settings, head to the **Everyone** tab and select **Cannot access unless invited to this project**.
> **Note:** If you created a document and change your own permissions from Edit to View, you will no longer be able to edit the document or change your permissions. Your Workspace Admin will need to restore your editing permissions.
## Restricting access to projects
By default, everybody in a Workspace can see all projects and documents they contain. However, you might need to restrict access to projects at a Workspace level when working with an NDA or collaborating on a project that’s still under wraps. In such cases you can manually restrict access to a project at a Workspace level and invite people individually instead.
You can manually restrict access to a project through its ***Share** settings and enable individual access for anybody in a Workspace. Keep in mind that Admins in your Workspace will always be able to view all projects, regardless of their share settings. This way, even if all Workspace members leave a project, Admins will always be able to access it.
> **Note:** You can only change project access using the web app.
### Restricting access to new projects
When you create a new project in your Workspace, you’ll see a new dialog where you can enter its name and adjust its sharing settings.
In the project’s share settings, you can restrict Workspace-wide access by changing the drop-down menu option from **Default** to **No Access**. When you do this, only you and Admins in the Workspace will be able to view this project.
You can’t set a different access level for the whole Workspace (e.g. view-only access for everyone). By default, access levels are based on a Member’s role within the Workspace.
You can add individual Workspace Members here as well. When you’re done, choose **Create Project**.
### Restricting access to existing projects
Open the web app, select a project and click **Share** in the top-left corner. You can also access the Share settings by hovering over the project’s name in the sidebar, clicking , then selecting **Share**.
In the project’s share settings, select **Cannot access unless invited to this project**. To restrict access for specific Workspace Members, enter their name or email and click **Add**.
### Restricted projects and access levels
When you add someone to a project via its share settings, their access will be the same as their role within the Workspace by default. This means that an Editor can edit and inspect, while Viewers can only view and inspect. Admins have full access to all projects, regardless of their share settings.
You can still [set document-level permissions](/docs/sharing-and-collaborating/sharing-and-viewing-documents/managing-share-settings/) within a restricted project. For example, you can give a Workspace Member access to a specific document — but not the project as a whole. This way, they’ll only be able to see the document you’ve shared with them instead of the entire project’s contents. If you’re invited to a document within a restricted project, the document will appear in your Shared With Me view, but you won’t be able to see the project itself.
Only full Workspace Members can access restricted projects. However, you can still give Guests access to documents — even if the document is within a restricted project.
## Workspace Guests
You can [invite anyone to a document as a Guest](/docs/sharing-and-collaborating/sharing-and-viewing-documents/managing-share-settings/) and choose whether they can view or edit the document. Unlike normal Workspace Members, Guests can only see specific documents you share with them.
Guests with View permissions can simply open and view and inspect the document in the web app. Guests you add with Edit permissions will need to be a Member of another Workspace or have a valid Mac-only license and Sketch account to edit the document in the Mac app.
You can edit Guests’ permissions by [managing the document’s Share Settings](/docs/sharing-and-collaborating/sharing-and-viewing-documents/managing-share-settings/) in the web app.
### Accessing documents as a Guest
If someone shares a document with you and you’re not a Member of that Workspace, you’ll first need to accept their invitation via email, or by opening the link they share with you.
Once you’ve accepted the invitation, open the web app and sign in with your Sketch account. Open the drop-down menu in the top-left of the screen — here you’ll see any Workspaces that you’re a Member of, along with any Workspaces you’ve been invited to as a Guest. Select the Workspace that holds the document you want to view.
From here, you can [view the document in the web app](/docs/sharing-and-collaborating/using-your-workspace/viewing-documents/). If the person who invited you gave you Edit permissions, you can open the document in the Mac app too.
## Using the permissions directory
If you’re an Admin on a Professional, Enterprise, or Private Cloud plan you’ll have access to the permissions directory, which enables you to gain an overview of all Members and [Guests in your Workspace](/docs/sharing-and-collaborating/document-permissions/#workspace-guests) — and easily manage which documents they have access to.
You’ll find the permissions directory in your web app’s [Settings](/workspace/settings/). Here you can search for specific people, and filter between full Workspace Members or Guests invited to specific documents. For each Member or Guest, you can see an overview of the documents they’re a part of, edit their permissions, or remove them entirely.
To see who has access to what documents, as well as the type of access they have (View or Edit), click the next to their name and choose **Document & Project Access**.
To change a access permissions to a document, click the access level dropdown next to the document name and select your preferred option. From here, you can also remove access altogether by choosing **Remove Selected Access**. When you’ve made your changes, click **Done**.
Removing somebody from your Workspace will also revoke their access to all documents within it. To do this, click the button next to their name on the [People](/workspace/settings/) page and choose **Remove from Workspace** (for Members) or **Remove from All Documents & Workspace** (for Guests).
## Creating and managing permissions groups
If you’re a Workspace Admin on a Professional, Enterprise, or Private Cloud plan, you can create permissions groups. Permissions groups make it far easier to give lots of Workspace Members access to specific projects and documents all at once — instead of manually adding them one by one.
### Creating new permissions groups
In the web app, click on your **Profile** at the top of the sidebar, select **Settings** > **Groups** > **Create Group**.
Give your group a name, then enter a name or email and click **Add**. When you’ve finished adding people, click **Create Group**.
> **Note:** You can only create and edit groups in the web app.
### Viewing and managing permissions groups
To view existing groups, open the web app and click **Settings** at the top of the sidebar, then **Groups**. From here you can create new groups, or view and manage existing groups.
If you have previously created groups, click the to manage access to projects and documents, edit Members, or rename and delete groups.
### Sharing projects and documents with permissions groups
Right-click on a project or document, select **Share**, start entering the group’s name, select it from the list of results and click **Done**.
Click the next to a document or project’s name or thumbnail and select **Share**. In the modal, click the **Group** tab, select the group you want to give access to, then click **Done**.
> **Note:** If you assign somebody to multiple groups that have different document permissions (View and Edit), that Member will have the higher level of access (Edit). For example: if you’re both in Team A with View permissions and Team B that has Edit permissions for the same document, you will have Edit permissions.
--------------------------------------------------------------------------------
title: "Commenting in documents"
description: "Add, view, resolve, and manage comments across your Sketch documents — and get notified when collaborators reply."
last_modified: "2026-07-15"
url: "https://www.sketch.com/docs/sharing-and-collaborating/commenting/"
--------------------------------------------------------------------------------
## Commenting in documents
Bring ideas and feedback together with comments, notifications and threads to get feedback from colleagues, stakeholders or anyone you share your designs with.
## Commenting on documents
When you’re viewing a Workspace document in the web or Mac apps, you can add a comment anywhere on the Canvas or individual frame. To do so:
1. Open the **Comments panel** by clicking or pressing C, then click **Add New Comment** — or press N
1. Place the comment pin by clicking anywhere on the Canvas. If you’re viewing an individual frame in the web app, you can only add the comment within it
1. Type your comment. You can add emoji , mention users and use basic [Markdown](#markdown-support-in-comments) too
1. Click **Send** or hit ⌘↵ to post your comment
Once you’ve added a comment, click anywhere else to minimize the comment thread — leaving behind only the comment pin. To open it again, click on the comment pin.
In the web app, you’ll find all comments in the **Comments** panel, so you can easily navigate through them later on. Click on any comment to jump right to it on the Canvas.
> **Note:** You can also view and add comments in a [shared prototype](/docs/prototyping/sharing-prototypes/#commenting-on-prototypes)
### Markdown support in comments
We currently support the following basic Markdown markup within comments:
```markdown
*italic*
_italic_
**bold**
`code`
code blocks (start every line with 4 spaces)
> quote
1. ordered lists
- unordered lists
```
## Comment threads
Threads make it easy to organize discussions and keep track of different conversations. You can start threads after any comment by adding replies in the comment popover.
On the Canvas, click on the comment pin you want to reply to, then start typing in the **Write a reply** field. Press ⌘Enter to post your response.
Below the original comment, you’ll see the number of replies a comment has. To see all the replies, click on the original comment.
## Viewing comments
Comment pins are color coded:
- **Orange:** The thread contains unread comments left by someone else
- **Blue:** A comment you’ve just added
- **Black:** A comment you’ve read
- **Green with checkmark**: A resolved comment
**In the web app**, you’ll find all your comments in the **Comments** panel . Once you add a comment, it appears for every user who has access to the document and permission to view comments.
**In the Mac app**, you’ll find a badge on the Comments toolbar button showing the number of unread comments in your document. It updates as you read or resolve comments. To mark all comments as read at once, open the Comments panel and click **Mark All as Read**.
## Editing and deleting comments
Each comment contains its own contextual menu. From there, you can **Edit** or **Delete** your own comments, or copy a link to the comment to share via email or chat. You’ll also see options for adding emoji or mentioning users when commenting or replying.
In the web app, the contextual menu also allows you to [follow a comment](/docs/sharing-and-collaborating/commenting/#comment-notifications) by clicking on **Follow**. Following a comment means you will receive notifications on any activity in your [inbox](/docs/sharing-and-collaborating/using-your-workspace/managing-updates-and-notifications/).
**Note:** Only you can edit your comments, although Admins can delete them.
## Resolving comments
Click the checkmark at the top of any open comment to resolve it. You can also hover over any comment in the web app’s sidebar and resolve it from there.
Resolving a comment will change its pin into a green check mark and automatically hide it on the Canvas after you’ve closed it. This also marks any unread replies in that thread as read. You can’t reply to resolved comments unless you reopen them first.
To view resolved comments, open either the **View** menu or **View dropdown** > **Comments** > **Include Resolved**. Alternatively, press ⌃⇧N to show or hide resolved comments.
You can reopen a comment at any time by opening it and clicking on its checkmark again.
Click the checkmark at the top of any open comment to resolve it. You can also hover over any comment in the web app’s sidebar and resolve it from there.
Resolving a comment will change its pin into a green check mark and automatically hide it on the Canvas after you’ve closed it. This also marks any unread replies in that thread as read. You can’t reply to resolved comments unless you reopen them first.
To view resolved comments, use the menu at the top of the **Comments** panel to filter between showing **Open**, **Resolved** and **All** comments.
You can reopen a comment at any time by opening it and clicking on its checkmark again.
## Showing or hiding comments
To hide all comment pins, open **View** > **Comments** and disable the **Show Comments** option. Alternatively, press ^N to toggle between hiding or showing all pins.
To hide all comment pins, click and choose **Hide Comments** from the menu, or press ⇧N. You can still preview them in the **Comments** panel and bring comments back using the same shortcut.
## Comment notifications
You can choose to get notifications for new comments on a specific thread, a single frame (or a selection of them) or for the whole document. By default, we’ll enable notifications for any document you comment on, but you can change this at any time.
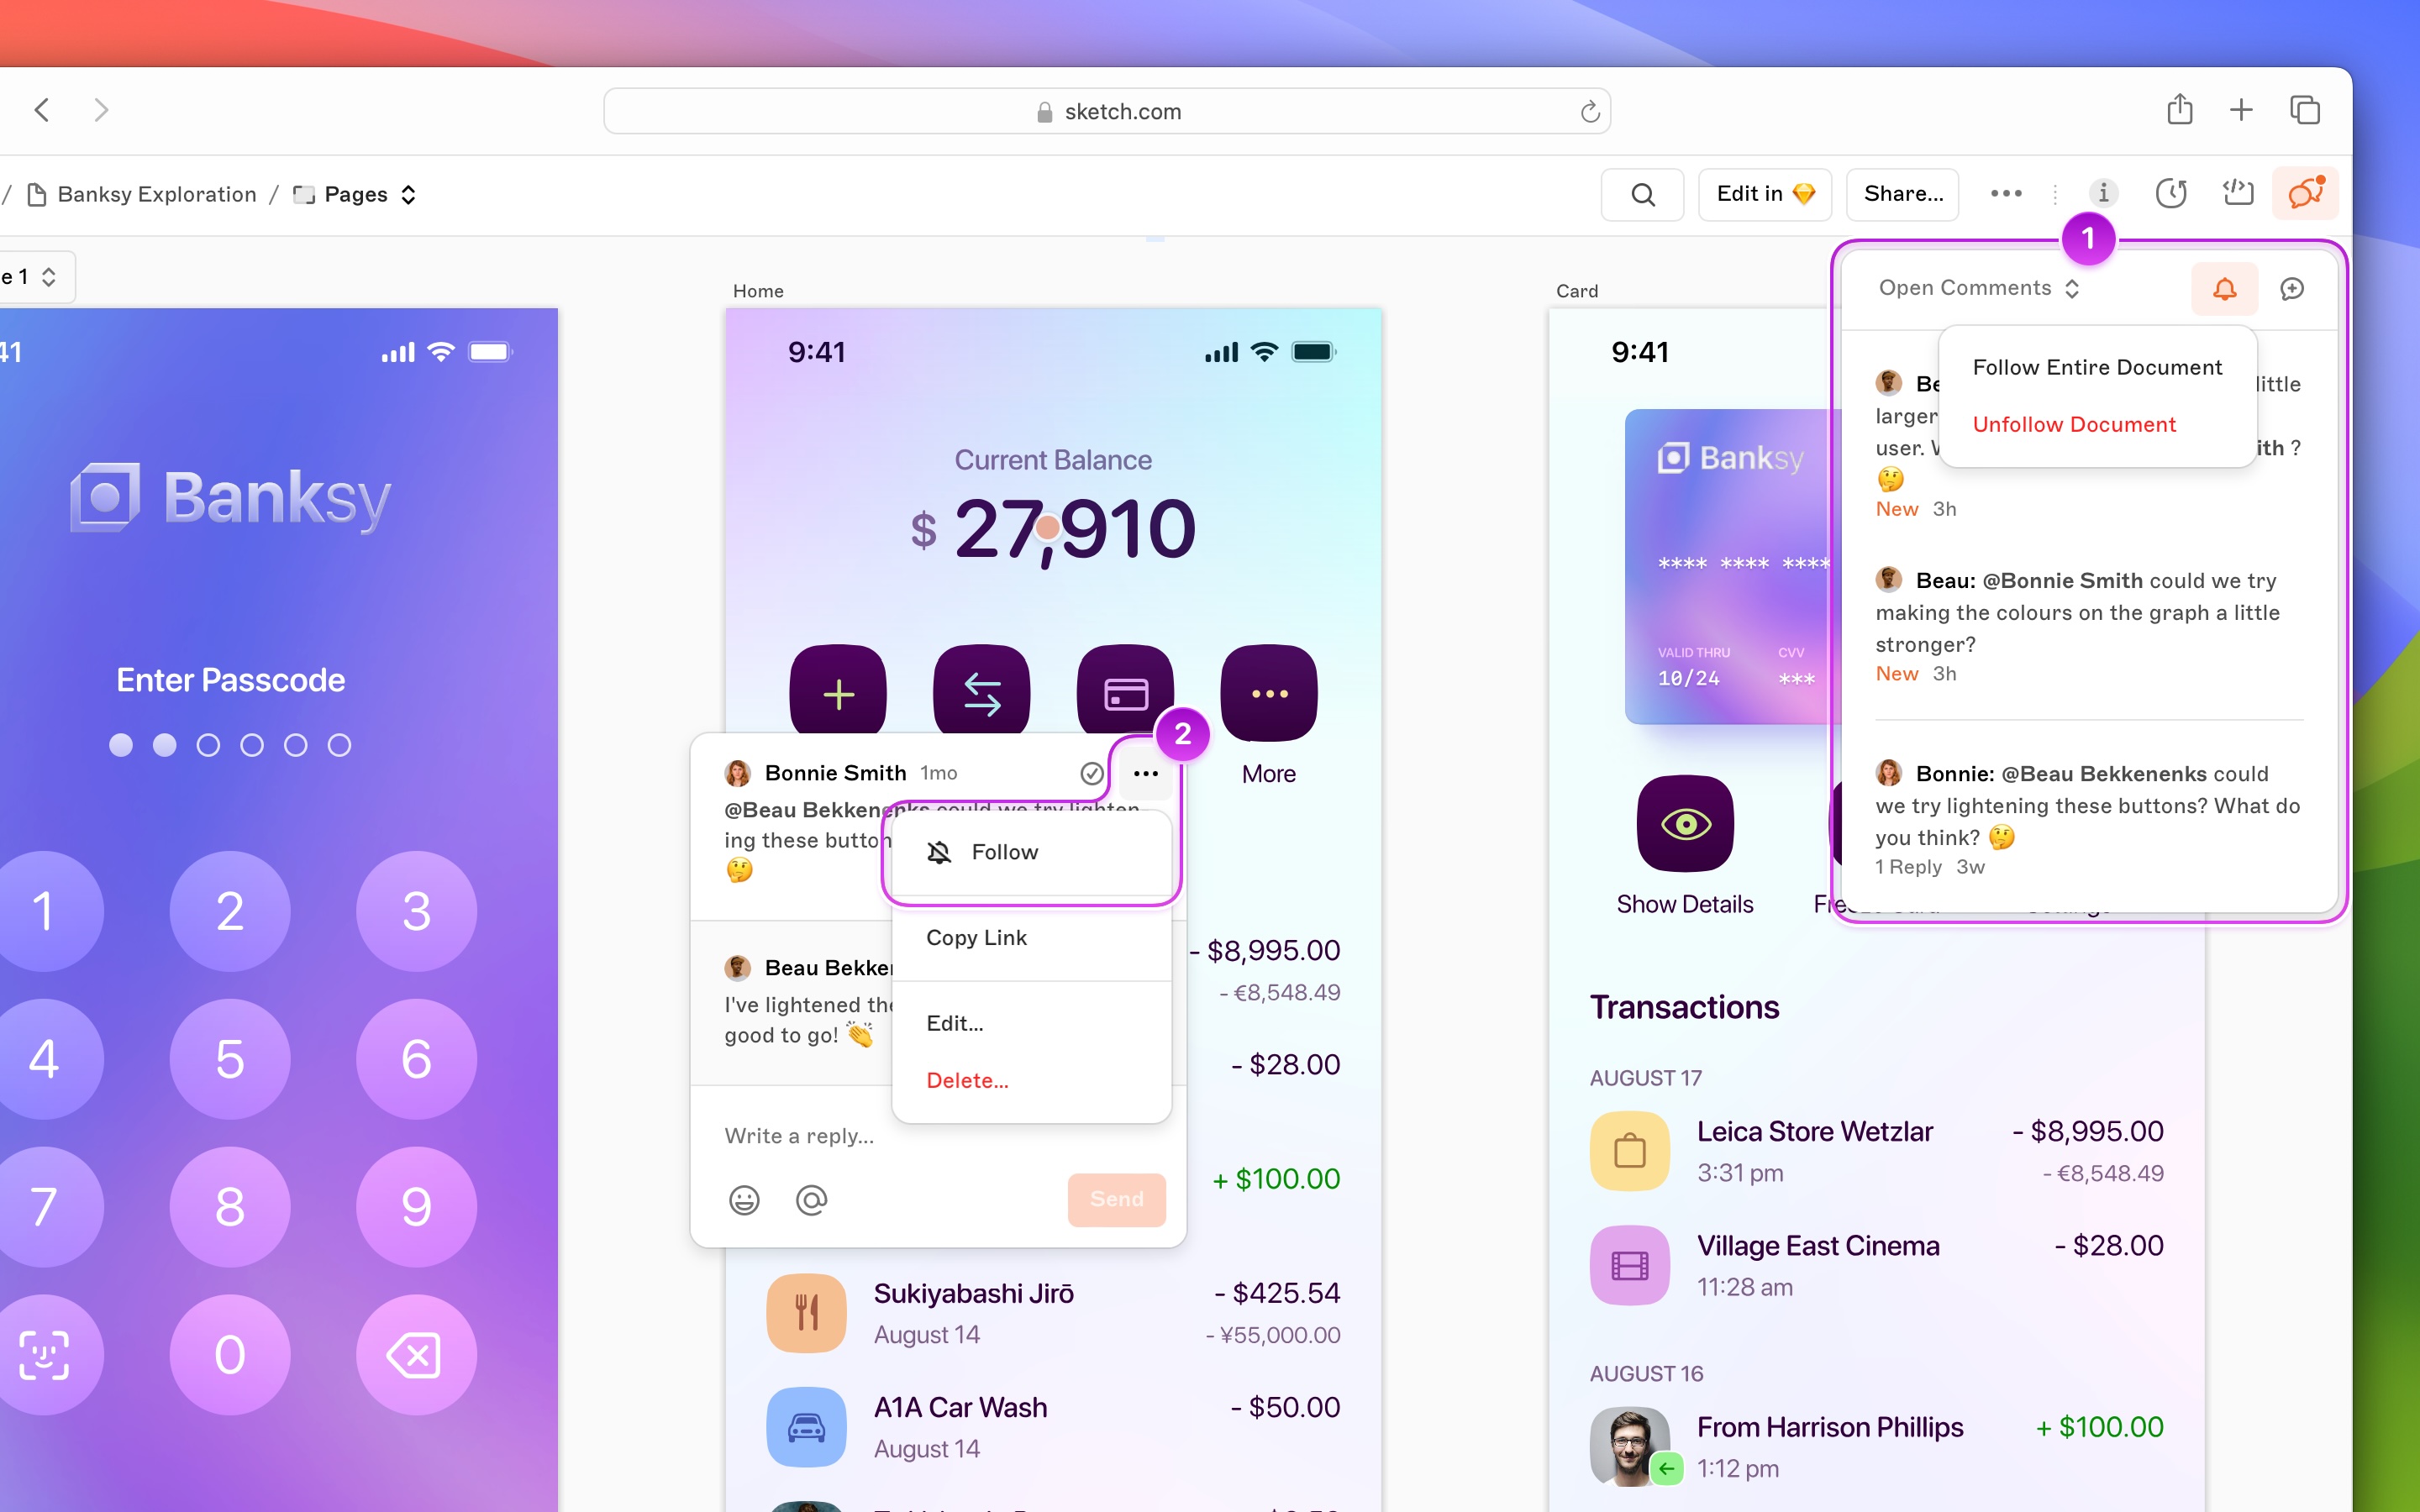
*How to follow a document or a comment thread in the web app*
1. To receive notifications for a whole document, go to the Document Details panel and click the **Following** button. Select the **Follow Entire Document** option. To stop receiving notifications, choose **Unfollow Document**
1. To receive notifications on a single comment thread, open the comment popover. Click and select **Follow** in the contextual menu. To stop receiving notifications, click on it again
If you want to receive notifications for a specific frame, open that frame and click on the icon under the **Comments** panel. You can choose to follow all the frames in a document or just the current one using the menu.

*How to follow comments for a single frame in the web app*
### Viewing notifications
You can access all your notifications from your [inbox](/docs/sharing-and-collaborating/using-your-workspace/managing-updates-and-notifications/). The inbox lists every comment, reply, and mention from the documents you follow, alongside a detail panel where you can read the full thread. Click any comment or mention to open it and reply — or jump straight to the related frame or document.
To mark a comment as read, hover over it in the list and click the read/unread toggle, or mark all notifications as read at once from the [Command Bar](/docs/sharing-and-collaborating/using-your-workspace/#using-the-command-bar).
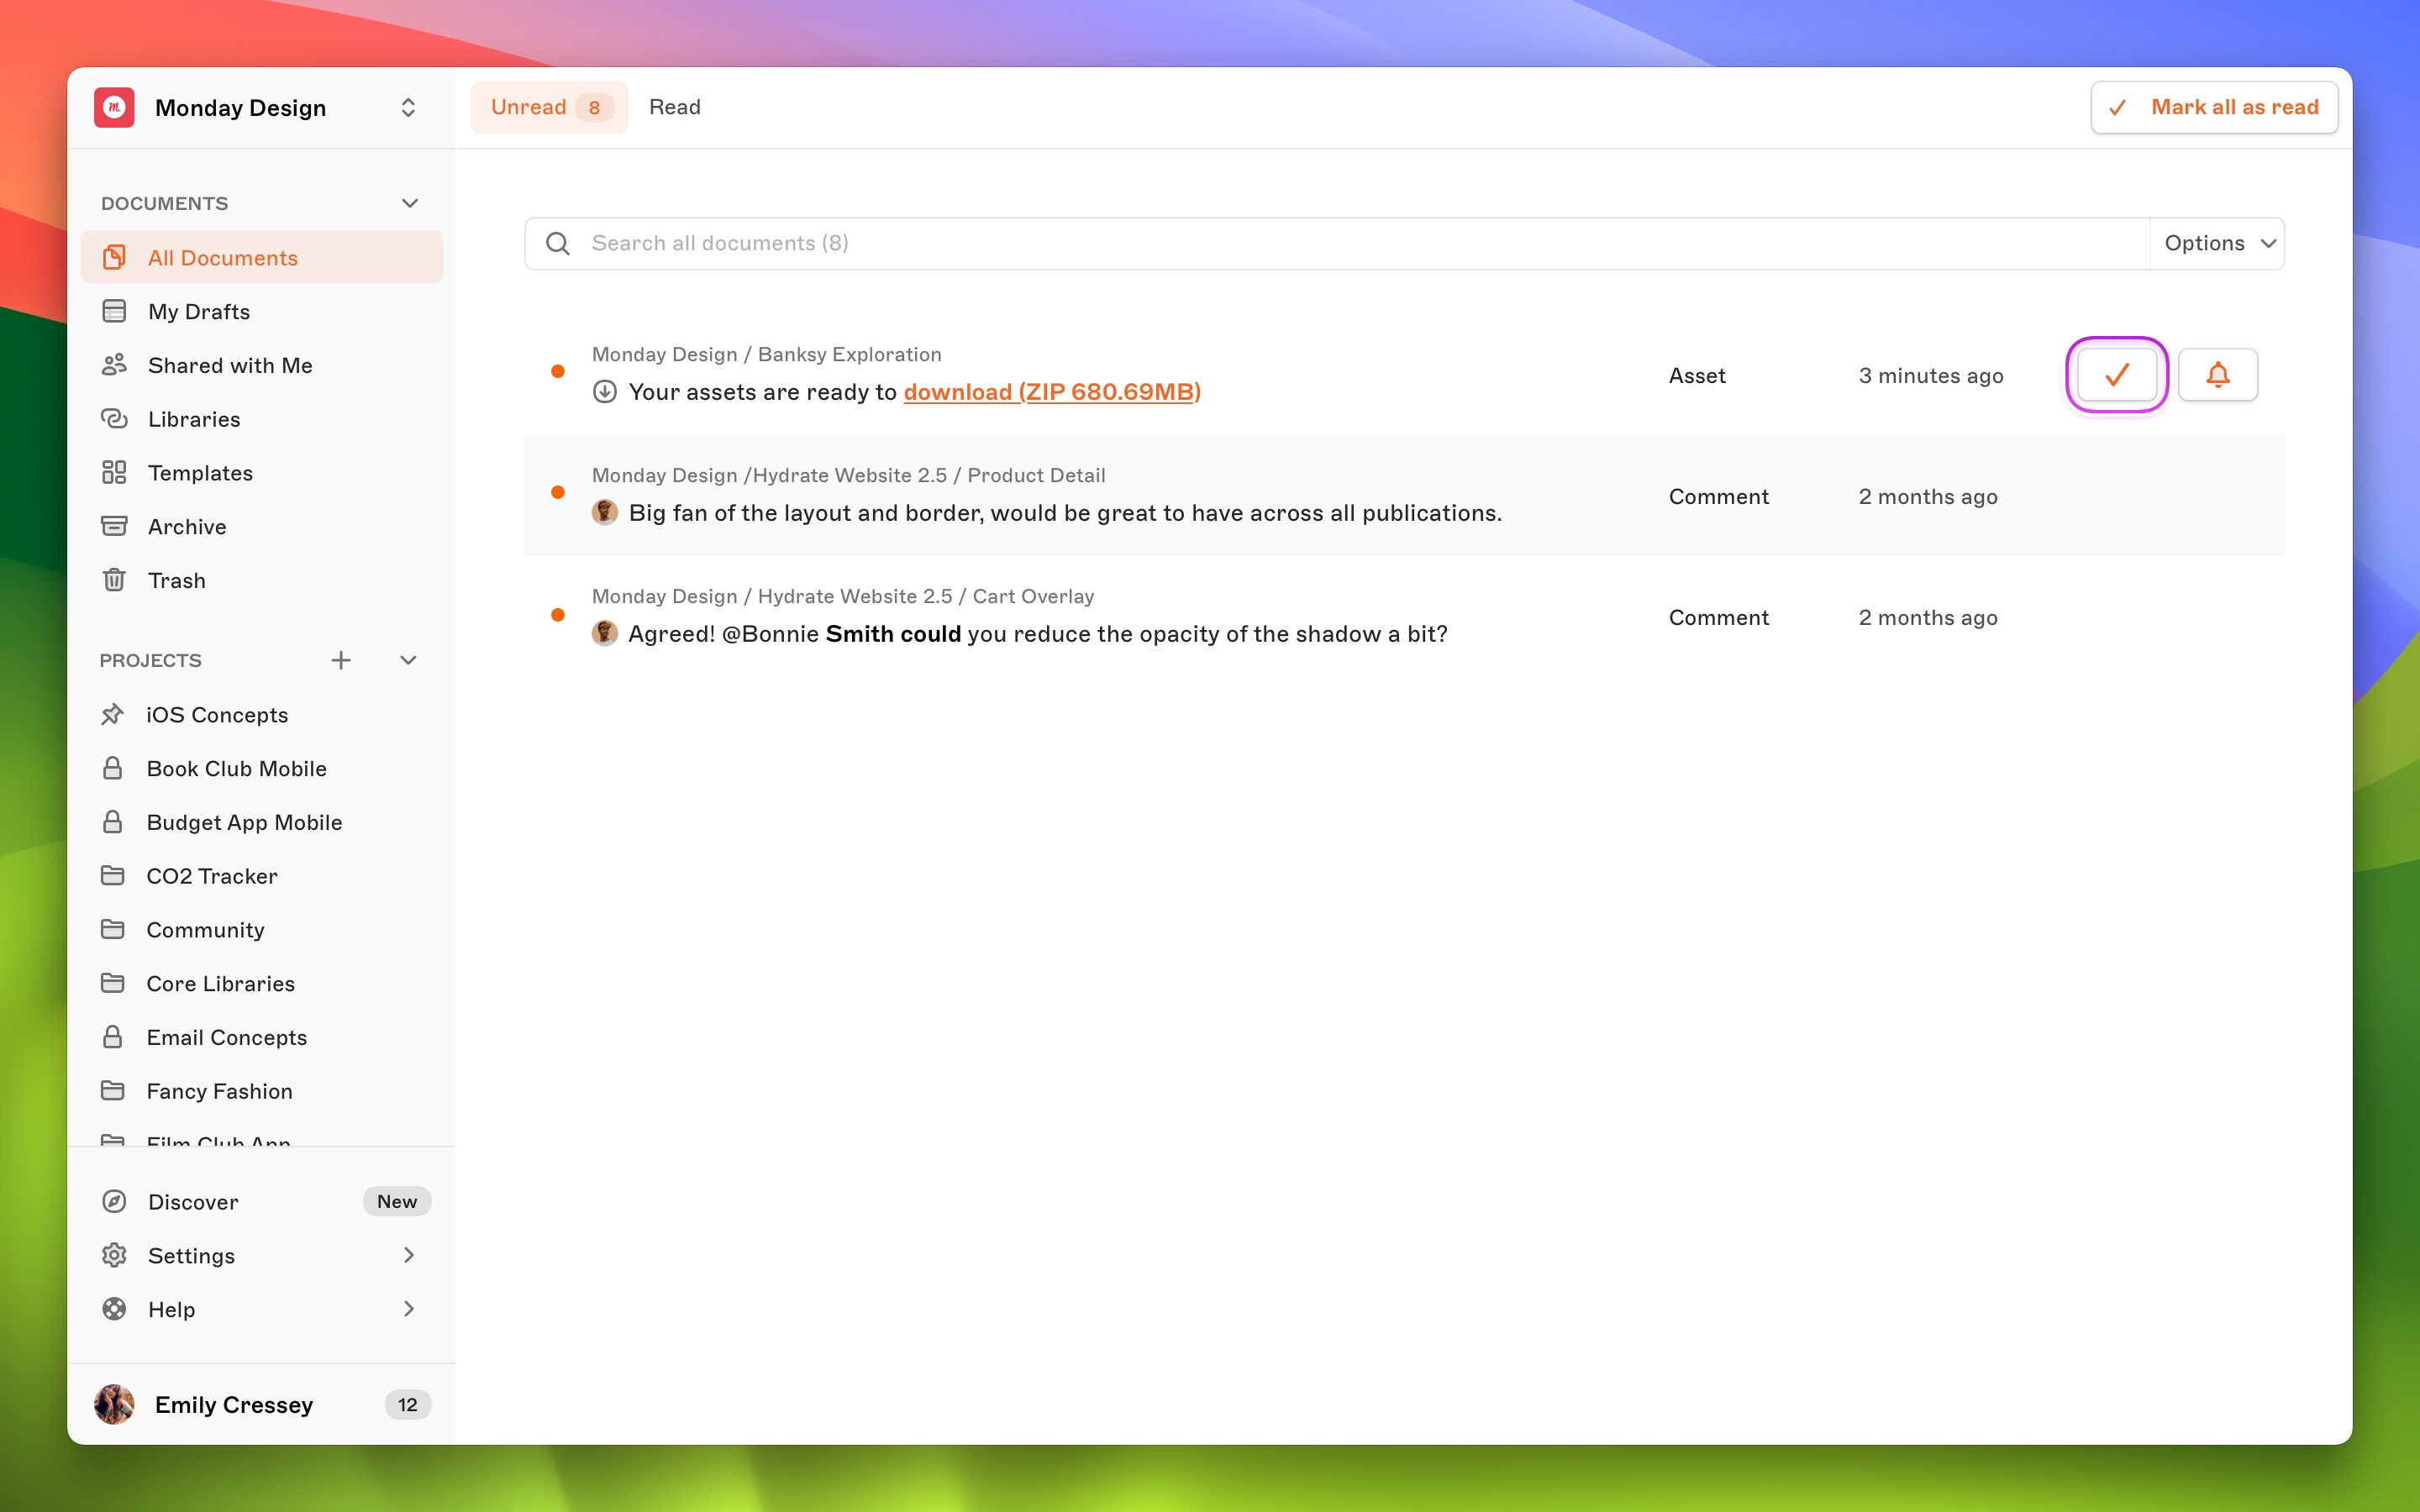
*How to mark a notification as read*
## Who can comment?
When you share a document, we’ll enable commenting by default. If you want to disable commenting for Viewers or Guests on your document, uncheck the **Can comment** option via **Share** > **View**.
Anyone who can access a document using a public link can view the document but will need to sign in to their Sketch account to comment. You can’t remove the ability to comment for Editors.
--------------------------------------------------------------------------------
title: "Using your Workspace"
description: "Your Workspace keeps all your documents together, in sync and available anywhere. From there, you and other Workspace Members can inspect designs, export assets, share feedback, manage Members, invite Guests and much more — and in any browser."
last_modified: "2026-07-15"
url: "https://www.sketch.com/docs/sharing-and-collaborating/using-your-workspace/"
--------------------------------------------------------------------------------
## Using your Workspace
Your Workspace keeps all your documents together, in sync and available anywhere. From there, you and other Workspace Members can inspect designs, export assets, share feedback, manage Members, invite Guests and much more — and in any browser.
> **Note:** Workspaces are a [subscription-only](/pricing/) feature. If you currently have a Mac-only license but are interested in Workspaces, you can [switch to a subscription](/support/general/account/switch-to-subscription/) at any time.
## Using the Command Bar
The Command Bar makes it quick and easy to navigate your Workspace, organize documents, and work with your designs in the web app, all without leaving your keyboard.
To open the Command Bar, press ⌘K (or CtrlK on Windows and Linux). You’ll see a list of relevant commands below the search field — start typing to filter the list, use ↑ ↓ to select a command, then press ⏎ to action it.
You’ll see different available commands depending on where you are in the web app and what you have selected. Some are always present (like switching between Workspaces or toggling Light and Dark mode), while others appear only in specific contexts.
Here are the commands you’ll find in different areas of the web app:
- Navigate to any Workspace
- Go to your inbox
- Switch between Light and Dark mode
With a document or folder selected:
- Move, archive, or trash it
- Rename subfolders in My Drafts
- Search for documents and folders by name
- Toggle between Inspect, Comments, and Versions modes
- Export the selected layer or design tokens
- Copy CSS or an inspect link for the selected element in Inspect mode
- Duplicate the document, edit its settings, create a preview, or move it to the trash
With the inbox open:
- Mark all notifications as read
- Jump to the most recent unread notification
- Sort by newest or oldest first
- Filter by notification type or Workspace
With a notification selected:
- Mark as read or unread, pin or unpin, follow or unfollow
- Open the document, or go to the Workspace
- Open or accept a Workspace invite
- Download an asset
- Close the notification
Some commands open a submenu instead of running immediately. You can navigate back by pressing Esc or Backspace.
## Creating additional Workspaces
To create an additional Workspace, **[sign in to the web app](/signin/)**, select the Workspace switcher menu on the top left, choose **Create a New Workspace**, give it a name and (optionally) upload a Workspace image. You can create more Workspaces during your trial, but you’ll need to pay right away for any additional ones.
Admins can change the name and logo of your Workspace at any point in the **General** section in the Workspace’s settings tab. You’ll need to add a credit card and billing details for every additional Workspace you create.
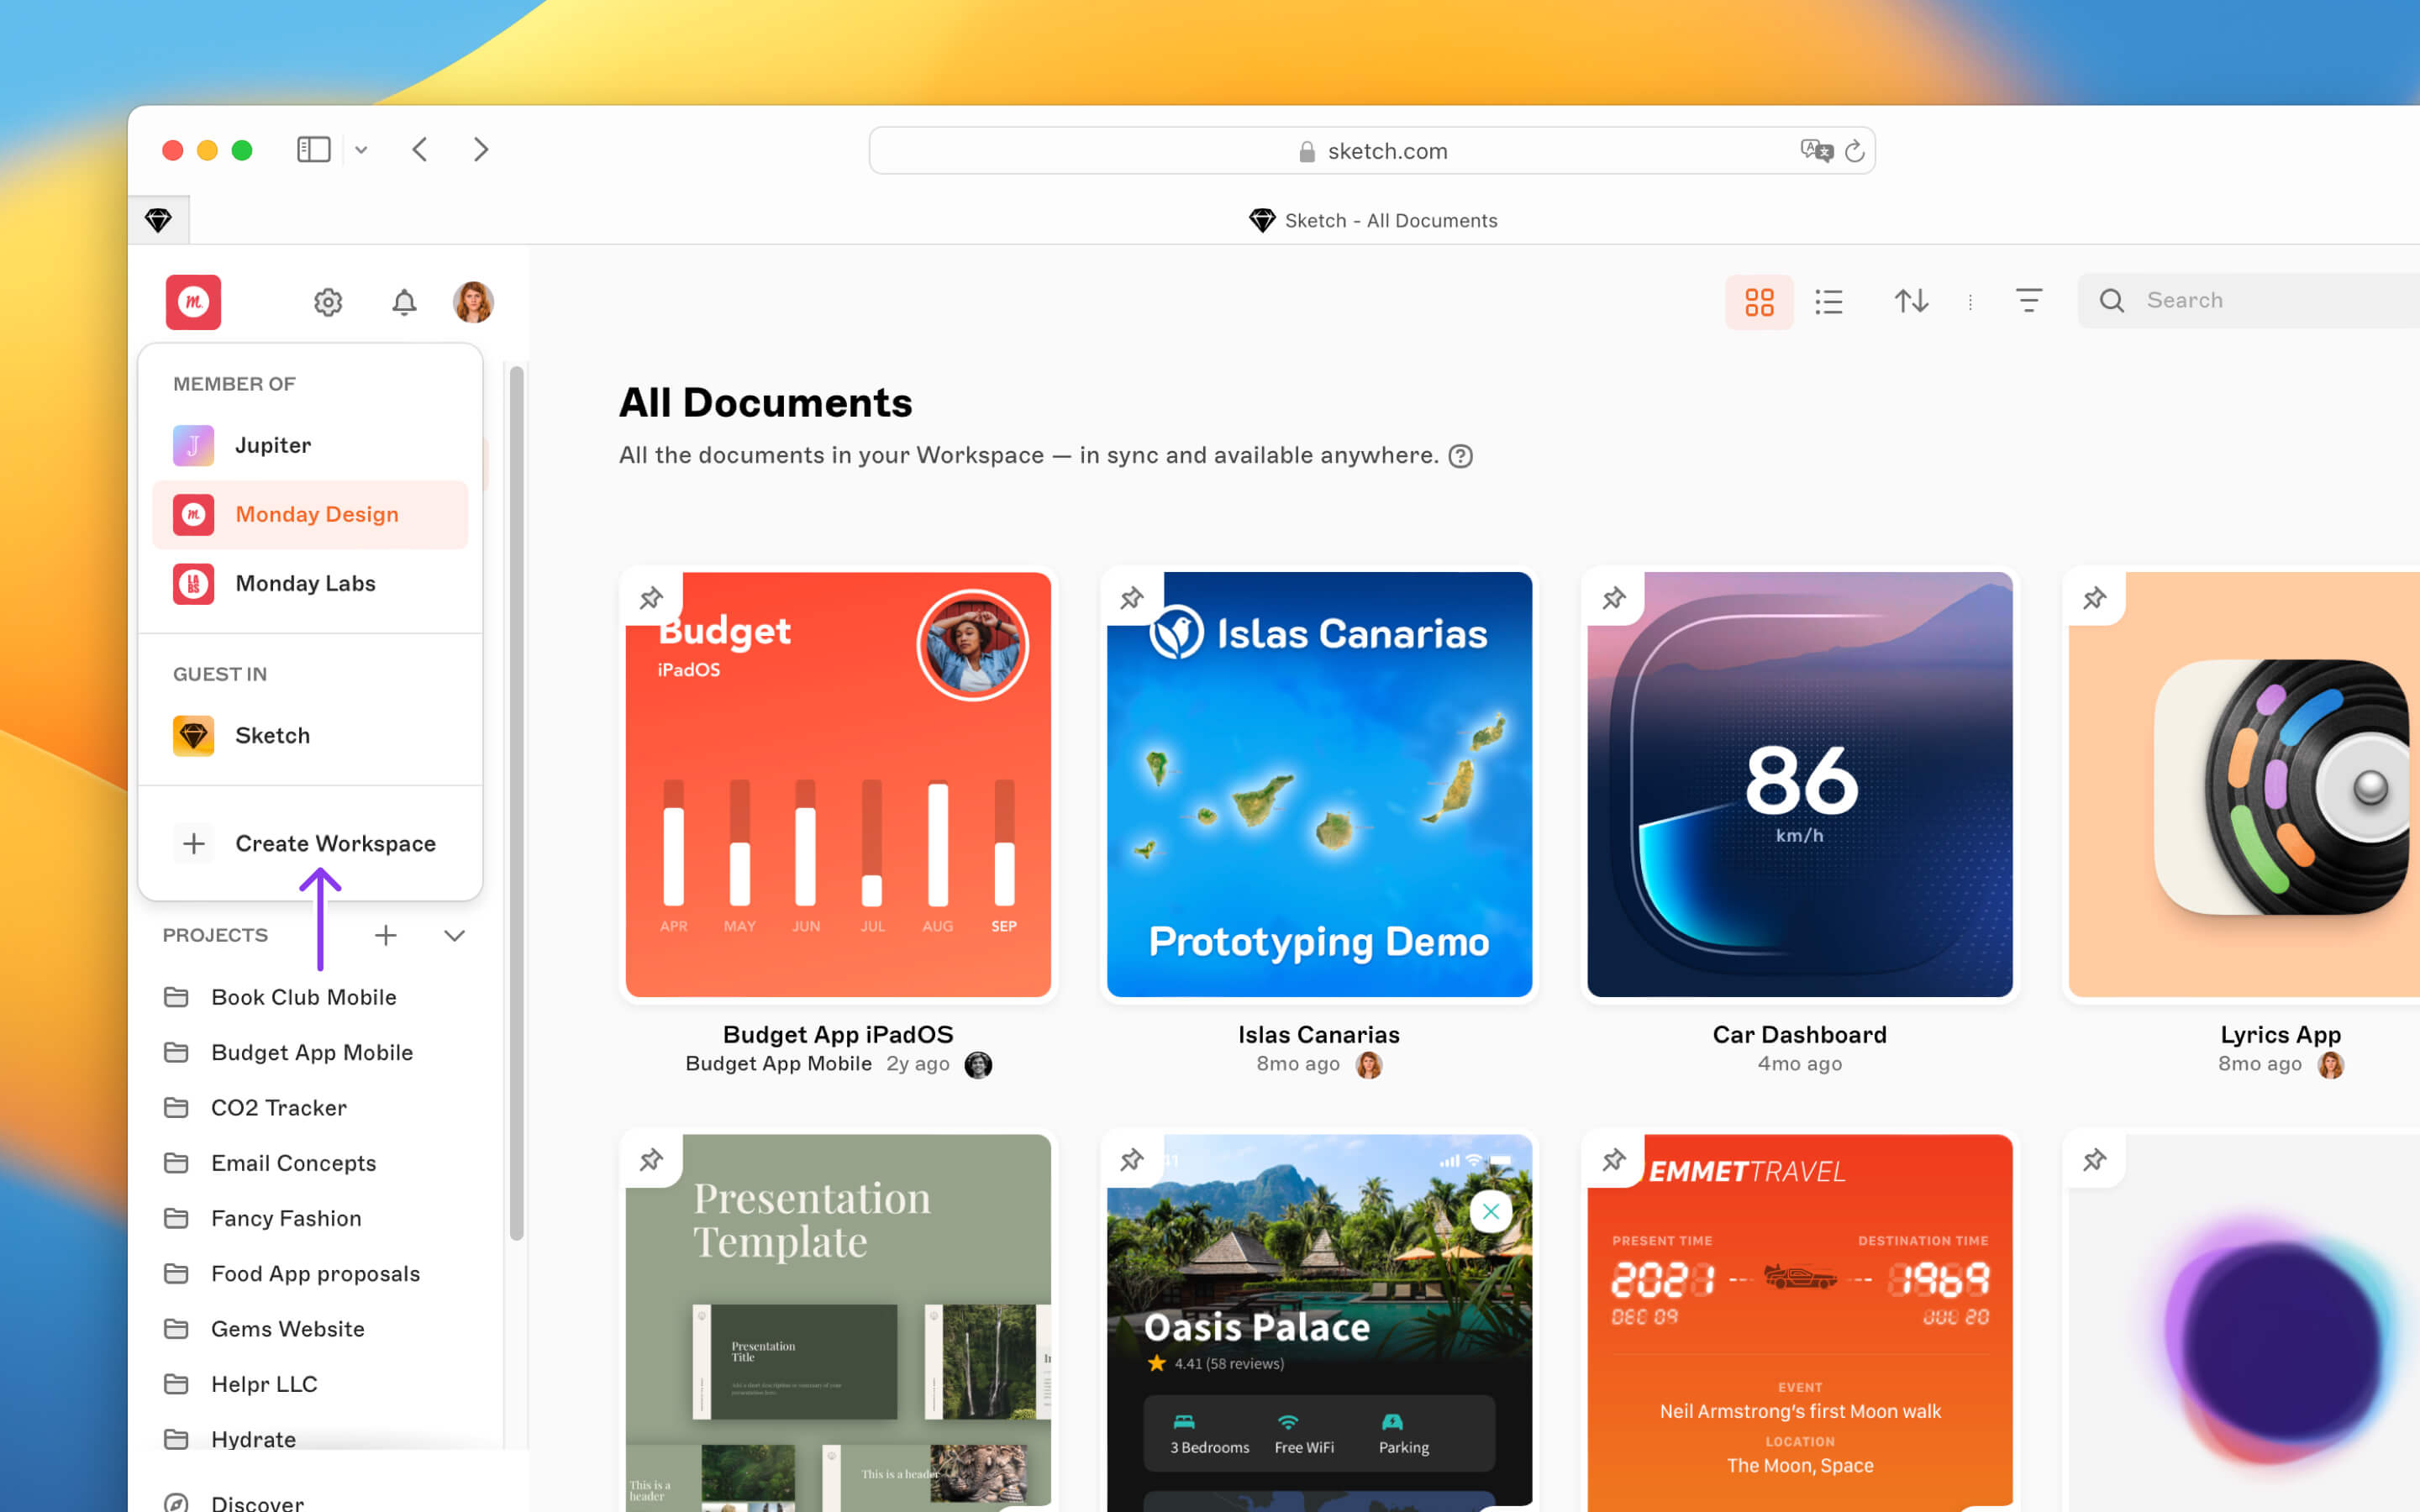
*You can create additional Workspaces with your existing Sketch account*
Aside from our documentation, be sure to check out our useful guides that can help you make the most of your Workspace:
- [Organizing your Sketch documents](/blog/workspaces-get-organized/)
- [Staying in sync](/blog/welcome-to-workspaces-staying-in-sync/)
- [Managing roles and permissions](/blog/welcome-to-workspaces-managing-roles-and-permissions/)
- [Sharing your work](/blog/welcome-to-workspaces-sharing-your-work/)
- [Getting feedback and testing your designs](/blog/welcome-to-workspaces-getting-feedback-and-testing-your-designs/)
- [Making developer handoff work for everyone](/blog/welcome-to-workspaces-developer-handoff/)
--------------------------------------------------------------------------------
title: "Browsing documents"
description: "Learn how to browse documents in Sketch with the help of our step-by-step guides and video tutorials."
last_modified: "2026-07-15"
url: "https://www.sketch.com/docs/sharing-and-collaborating/using-your-workspace/browsing-documents/"
--------------------------------------------------------------------------------
## Browsing documents
In the web app you can browse, search, sort and filter documents with ease, helping you find what you need in just a few moments.
## Recently Opened
The **Recently Opened** tab in the sidebar shows the last 20 documents you’ve opened in the web app, making it easy to pick up where you left off without searching or remembering which project a document is in.
We update this view automatically when you open documents and store it locally in your browser. It doesn’t sync across devices and will reset if you clear your browser data.
## Lists vs grids
You can choose to browse documents in your Workspace either as a **list** or a **grid** . To switch between these two views, click the buttons in the top-right corner of the web app’s menu bar. When you switch between views, your search stays in place so you can easily compare results in both layouts.
## Searching, filtering and sorting documents
### Searching documents
To search for a document, click a project from the left sidebar and enter your search terms. If you’re not sure in which project the document is in, head over to **All Documents** to search the entire Workspace. Search results won’t include documents in the [Trash](/docs/getting-started/saving-and-managing-documents/#deleting-documents), so you may want to take a look there if you can’t find what you’re looking for.
### Filtering documents
If your Workspace has lots of documents, try some sorting and filtering options to help you find what you’re looking for. While you’re viewing or searching for documents, click the **Filter** drop-down next to the search bar and select from the following options:
- **All documents:** Searches all documents in the Workspace, excluding those in the [Trash](/docs/getting-started/saving-and-managing-documents/#deleting-documents)
- **With prototypes:** Includes documents that also have [prototypes](/docs/prototyping/) in search results
- **You can edit:** Shows documents that you can edit in the Mac app
- **Include documents in projects:** Uncheck this option if you think your document is *not* inside a [project](/docs/getting-started/folders/#working-with-folders)
- **Include archived documents:** Includes [archived](/docs/getting-started/folders/#archiving-folders) documents if you have the feature enabled in your Workspace
In addition, when you’re searching for a project you can enable **Hide collections** if you don’t want to see [collections](/docs/getting-started/folders/#organizing-with-collections) in your search results. However, documents that are inside collections will still appear.
To remove all filters, click **Reset** next to the Filter dropdown.
> **Note:** The Mac app’s search in the [Workspace window](/docs/getting-started/creating-opening-and-viewing-documents/#the-workspace-window) doesn’t currently include sorting or filtering options — so you may want to use the web app if you want to refine your search.
### Sorting documents
You can sort documents by **Name**, **Date Created** and **Last Updated** — and view any of them in ascending or descending order by clicking the up or down arrows respectively.
## Switching between Workspaces
If you’re part of two or more Workspaces, the documents you’re looking for might be on another Workspace. You can easily switch between them in just a couple of clicks.
To switch Workspaces from the Mac app, use the drop-down menu in the top-left of the Workspace window and choose another Workspace, or toggle between Workspaces using ⌘1 (or the number that corresponds to your Workspace).
In the web app, click on the Workspace logo in the sidebar and select another Workspace from the list.

*The Workspace switcher in the web app*
> **Note:** If you’re an Admin and Editor across multiple Workspaces, you can also [move documents between them](/docs/getting-started/folders/#moving-documents-to-projects-in-other-workspaces).
--------------------------------------------------------------------------------
title: "Viewing documents"
description: "Learn how to navigate documents in Sketch with the help of our step-by-step guides and video tutorials."
last_modified: "2026-05-22"
url: "https://www.sketch.com/docs/sharing-and-collaborating/using-your-workspace/viewing-documents/"
--------------------------------------------------------------------------------
## Viewing documents
When you view a document in the web app, you’ll see it exactly as it appears in the Mac app. From here, you can leave comments, inspect individual layers, explore your document’s components in more detail, run prototypes, and easily share it with other people.
## Navigating a document in the web app
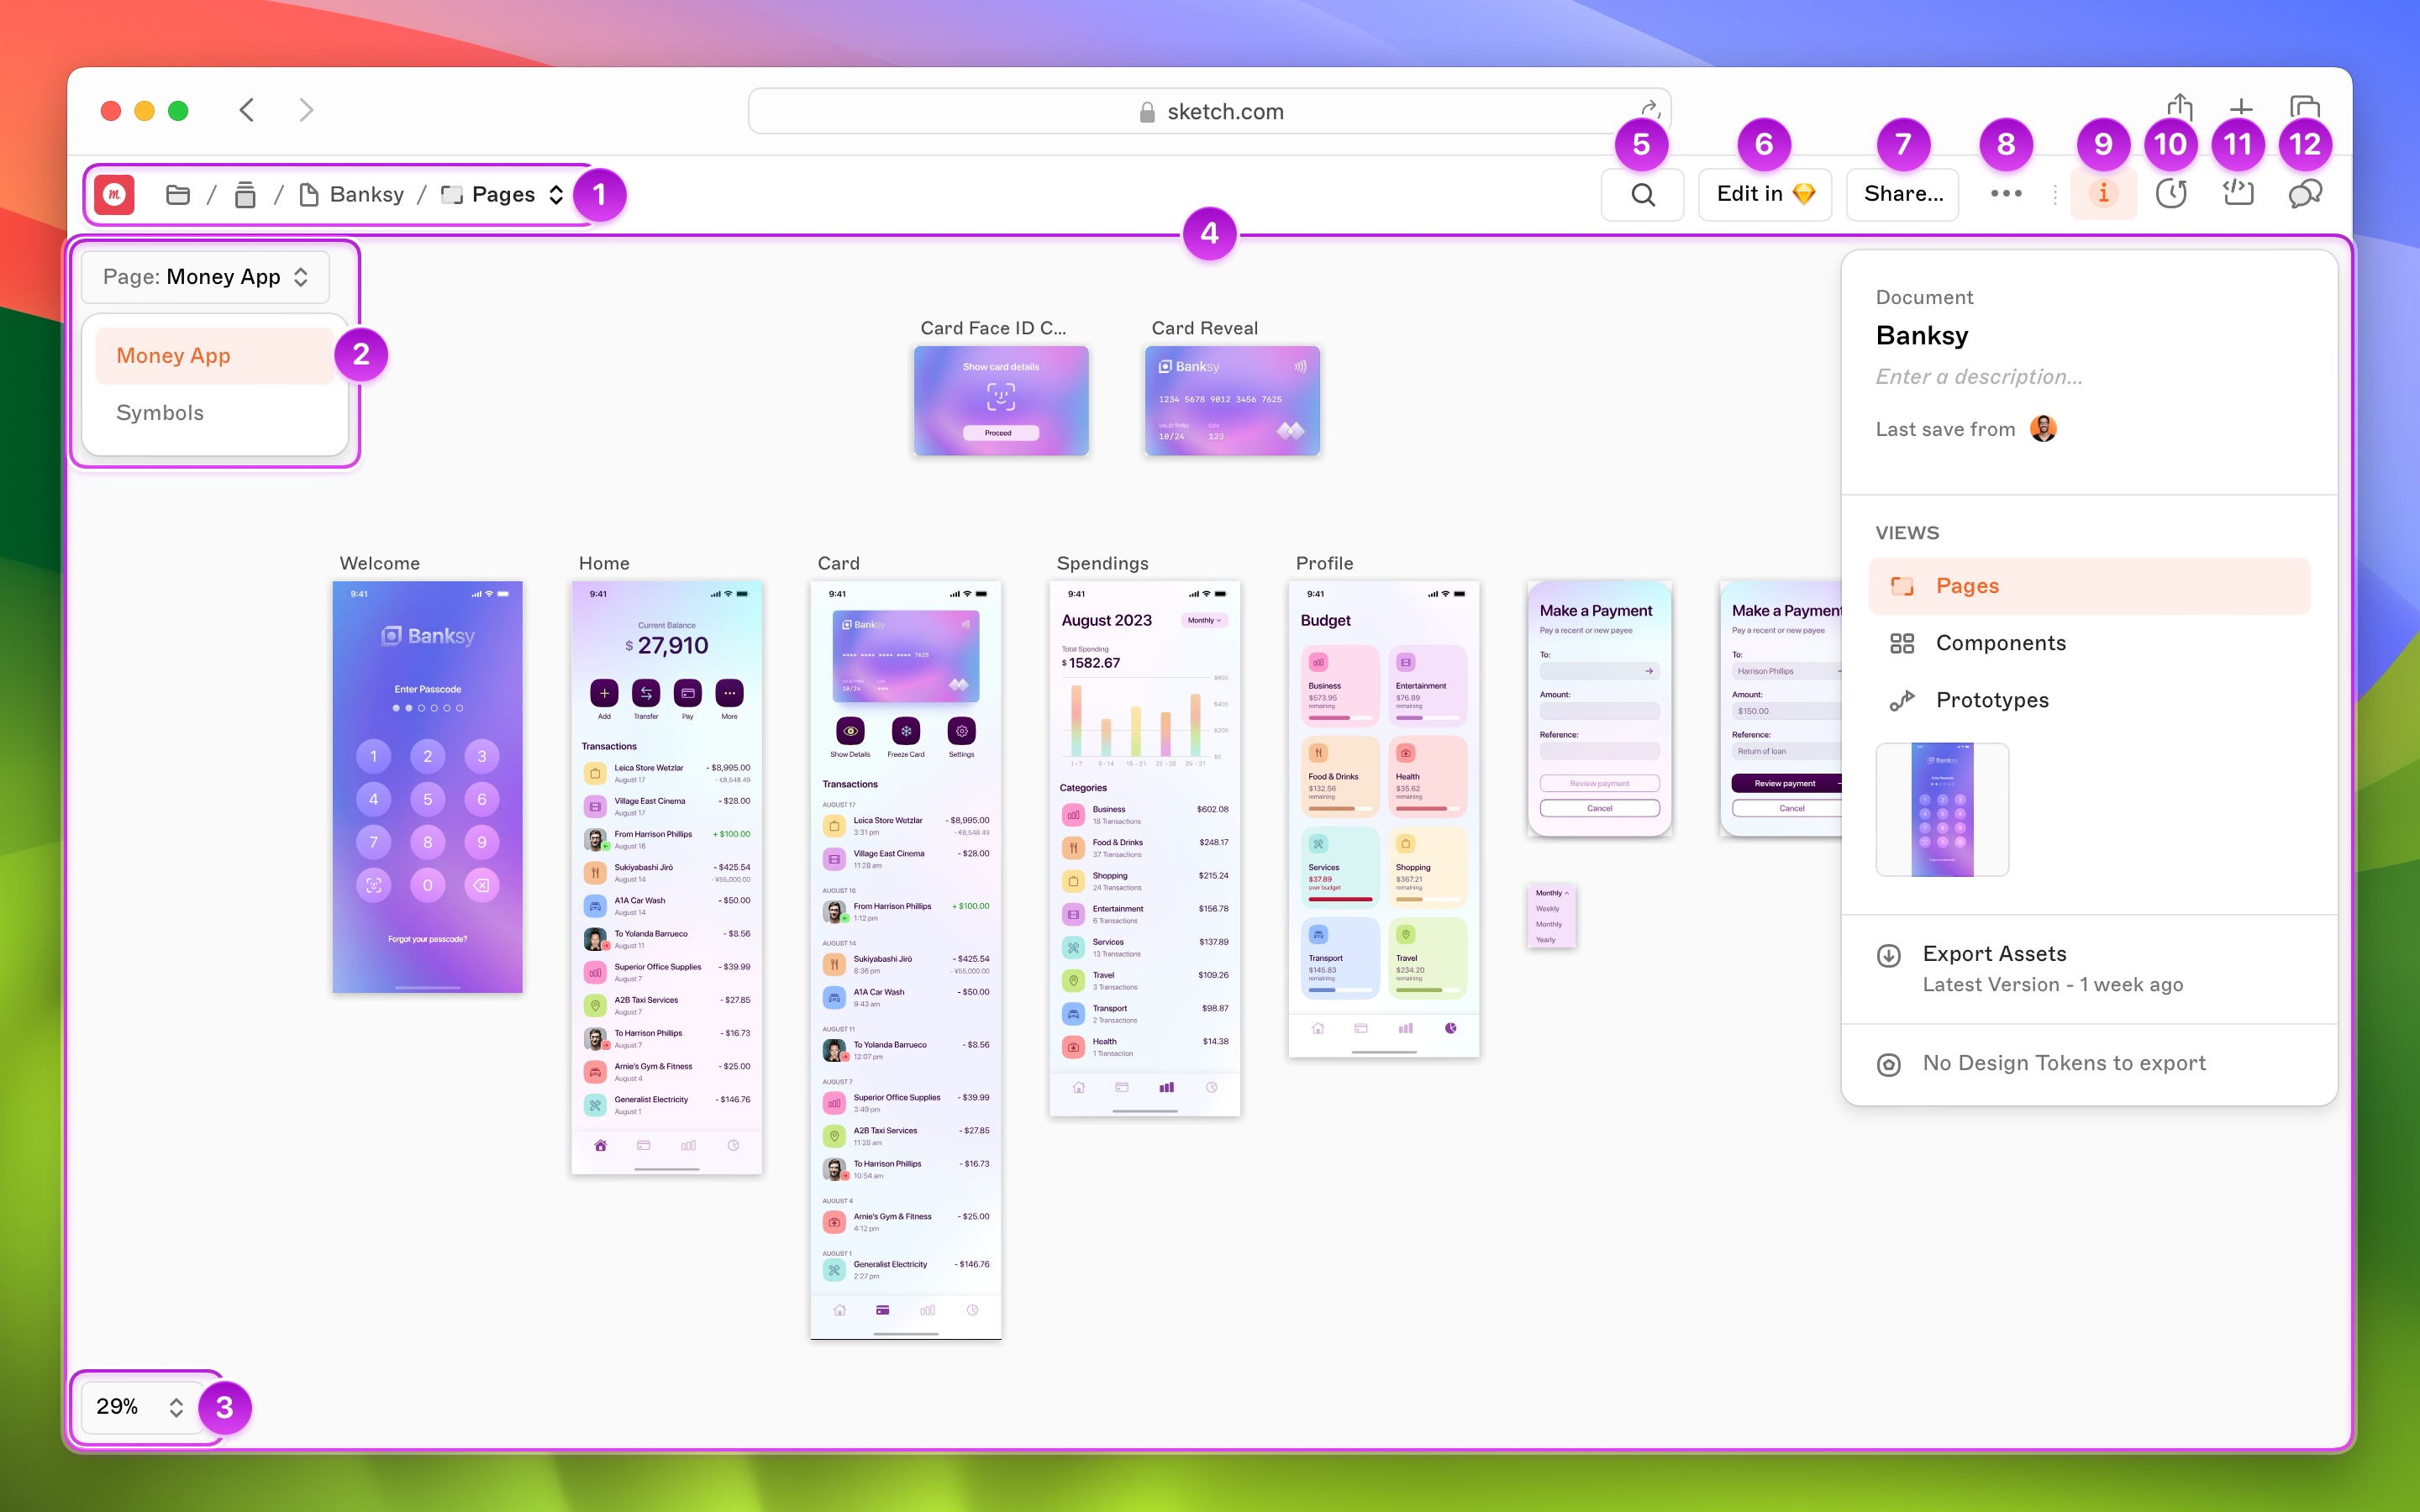
*An overview of the web app’s interface while viewing a document*
1. **Nav Bar:** Contains the Workspace switcher and breadcrumbs to help you navigate the current document.
1. **Pages List:** Shows all the pages in a document. Click a page name to navigate to it.
1. **Zoom / view:** Offers various zooming options.
1. **Canvas:** Shows all frames and any other layers on a page.
1. **Search button:** Gives you a quick way to find specific frames and components in a document.
1. **Edit in Sketch:** Opens the document you’re viewing in the [Mac App](/docs/getting-started/setting-up-sketch/#installing-the-mac-app), where you can make edits.
1. **Share:** Enables you to [share the open document](/docs/sharing-and-collaborating/sharing-and-viewing-documents/) with other Workspace Members, Guests, or as a public link.
1. Displays additional document options, such as renaming, moving, duplicating, and more.
1. **Document details:** Opens the Details panel , where you can view the document description, see who’s working on it, and export [assets](/docs/developer-handoff/#exporting-assets) and [design tokens](/docs/developer-handoff/#exporting-design-tokens).
1. **Versions:** Opens the Versions panel and also shows any [starred versions](/docs/sharing-and-collaborating/sharing-and-viewing-documents/creating-starred-versions).
1. **Inspect:** Opens the [Inspector](/docs/developer-handoff/#inspecting-layers) panel . With the Inspector open, select any layer on the Canvas or frame to show all its properties.
1. **Comments:** Opens the Comments panel, where you can view [comments](/docs/sharing-and-collaborating/commenting/) or add your own, anywhere on the Canvas or frame. Comments relate directly to the current view on the Canvas. For example, if you’re viewing an individual frame, you’ll only see the comments that relate to that specific frame.
> **Note:** Anyone viewing your document will be able to see everything on your Canvas — in both the Mac and web apps. Documents in [My Drafts](/docs/getting-started/saving-and-managing-documents/#managing-documents-in-my-drafts) are only accessible to you by default (unless you choose to share them)
## Viewing the Canvas and frames
You can instantly navigate to different pages in a document using the **Nav bar** or **Pages List**.
You can also double-click on a frame to focus on it, or click its name beside the → on the upper left.

*Double-click on an individual frame to view it in detail*
If you’re viewing a page in Canvas view, simply click and drag to pan around.
> **Note:** To bring back the left sidebar, click the Workspace logo on the top left. Click anywhere on the Canvas to hide the sidebar again.
### Zooming in and out
Whether you’re viewing frames or the whole Canvas, you can hold ⌘ and scroll your mouse wheel to zoom in and out. Alternatively, use the zoom controls on the bottom left, or the following shortcuts:
- + zooms in to a Canvas or frame (= on non-US keyboards)
- - zooms out from a Canvas or frame
- Shift0 zooms to a selected frame’s actual size
- Shift1 fits a selected frame to your screen
Keep in mind that these shortcuts may differ depending on what keyboard you use.
## Searching your document
Use the search bar to quickly find a specific frame or component in an open document. You can search a document in two ways:
1. When you’re viewing the full document Canvas, enter a search term to find frames and components that match it
1. When you’re browsing **[Components view](#viewing-components)**, enter a search term to find matches within the specific component type you’re currently viewing

*How to search for a Symbol in the Components view*
## Viewing components
At the bottom of the **Document Details** panel, you’ll find links to specific views for your document’s components (Pages, Symbols, Text Styles, Layer Styles, Color Variables). These component views are handy for browsing your design system’s Libraries or exploring local components in a design.
Each component has its own preview that you can hover over to zoom and view in more detail. Double-click on Symbols to inspect them and add comments. Click once to [inspect Color Variables, Layer Styles and Text Styles](/docs/developer-handoff/).
### The Symbols view
When you’re viewing a document’s Symbols, the left sidebar shows a list of any groups they belong to. While we’ll show all your Symbols by default, you can click on any group to filter it on the preview grid.
To see a Symbol in detail, click its thumbnail in the preview grid. From here, you can [inspect it](/docs/developer-handoff/) like any other layer in your document. You’ll also be able to [add comments](/docs/sharing-and-collaborating/commenting/#commenting-on-workspace-documents) and see all the versions of that Symbol by switching between the **Comments** and **Version** panels on the upper right. To go back to the preview grid, click on back arrow at the beginning of the breadcrumb nav bar.
### The Styles and Color Variables views
Navigating Layer Styles, Text Styles or Color Variables works in the same way for all three component types. You can navigate groups in the left sidebar or click on a specific component’s preview to [inspect it](/docs/developer-handoff/).
--------------------------------------------------------------------------------
title: "Managing your inbox"
description: "The inbox collects all your notifications: comments, replies, mentions, downloadable assets, and more — all in one place in the web app."
last_modified: "2026-07-15"
url: "https://www.sketch.com/docs/sharing-and-collaborating/using-your-workspace/managing-updates-and-notifications/"
--------------------------------------------------------------------------------
## Managing your inbox
The inbox collects all your notifications: comments, replies, mentions, downloadable assets, and more — all in one place in the web app.
## Opening the inbox
Click the bell icon at the top of the left sidebar to open your inbox. The inbox is split into two panes: a notification list on the left and a detail panel on the right. You can resize the list pane by dragging its edge — we’ll remember the width you set across sessions.
Click any notification to open it in the detail panel. At the top of the panel you’ll see contextual action buttons for that notification — such as **Pin**, **Go to Document**, or **Unfollow** — each showing its keyboard shortcut. Below that, you can read the full thread, reply inline, and see why you received the notification. On mobile, the list and panel stack. Tap a notification to see the detail view, and use the back button to return to the list.
The inbox is available to all Workspace members — Admins, Editors, Viewers, and Partners.
## The notification list
Notifications are grouped into four sections: **Pinned**, **Today**, **This Week**, and **Older**. Unread notifications show a blue dot.
Hover over any notification in the list to reveal quick actions: a primary action (such as **Download** for asset notifications), a read/unread toggle, and a menu with pin/unpin and follow/unfollow options.
## Replying to comments
When you open a comment or mention notification, you’ll see the full annotation thread on the right. To reply, type in the **Write a reply** field and click **Send**. You can also use the emoji picker or @mention a teammate directly from the reply field. To edit one of your own comments, hover over it and click the menu, then select **Edit**.
## Viewing the document
To open the document a notification relates to, click **Go to Document** in the detail panel. To keep the inbox open at the same time, use **Open in new tab** instead.
## Searching, filtering and sorting
Use the search bar at the top of the notification list to find a specific notification. To sort, click the ↑↓ button next to the Inbox title and switch between **Newest first** and **Oldest first**.
You can also filter using the panel on the left:
- **From**: scope notifications to a specific Workspace, or view all at once
- **Show only**: filter by type: Unread, Billing, Comments, Replies, Mentions, Downloadable Assets, or Starred Updates
- **Between**: set a start and end date to narrow results to a specific period. Type a date directly or click the field to pick one from the calendar
Each filter option shows an unread count alongside it. Click **Reset** to clear all active filters and the search at once.
## Pinning notifications
You can pin a notification to keep it at the top of your inbox, in its own **Pinned** section. Pin state is per-user and persists across sessions and devices.
To pin or unpin from the list, hover over a notification and use the menu. With a notification open in the detail panel, press P to toggle it.
## Marking as read or unread
Opening a notification marks it as read automatically. To mark it as unread again, click the menu in the top-right of the detail panel and select **Mark as Unread**. You can also toggle read state from the hover actions in the notification list.
## Accepting invitations
When you’re invited to a Workspace, you’ll get a notification in your inbox. Open it in the detail panel and click **Open invite** or **Accept** to join. When someone accepts an invitation you sent, you’ll get a notification too.
> **Note:** Workspace invitation notifications are new. Previously, invitations only sent an email with no matching entry in the inbox.
You’ll also get a notification when a folder you’re subscribed to is archived or trashed.
## Downloading assets
When someone shares a downloadable asset with you, open the notification and click **Download** in the detail panel to save the file.
## Following and unfollowing
When you comment on or are mentioned in a thread, you automatically follow it and receive notifications for any replies.
To unfollow a thread, hover over its notification in the list and use the menu. You can also open the notification and press U, or click **Unfollow** in the note at the bottom of the detail panel that explains why you received it.
## Live updates
New notifications arrive in real time without a page reload. If you’re scrolled down when new items arrive, a floating badge shows how many are waiting — click it to jump to the top of the list.
## Keyboard shortcuts and Command Bar
With a notification open in the detail panel, you can pin, download, accept, or unfollow it using single-key shortcuts — see the full list on the [web app shortcuts](/docs/shortcuts/web/#inbox) page. Shortcuts aren’t available on touch devices and won’t trigger while you’re typing in the search field.
You can also open the [Command Bar](/docs/sharing-and-collaborating/using-your-workspace/#using-the-command-bar) with ⌘K to act on the open notification without leaving the keyboard.
--------------------------------------------------------------------------------
title: "Discover"
description: "Discover is a curated selection of articles, resources and inspiration — along with the latest Sketch updates — right inside your Workspace. It’s the best way to keep updated on what we are up to or learn something new."
last_modified: "2026-04-07"
url: "https://www.sketch.com/docs/sharing-and-collaborating/using-your-workspace/discover/"
--------------------------------------------------------------------------------
## Discover
Discover is a curated selection of articles, resources and inspiration — along with the latest Sketch updates — right inside your Workspace. It’s the best way to keep updated on what we are up to or learn something new.
## How to access Discover
You’ll find Discover at the top of the Workspace Window’s sidebar. You can bring up the Workspace window by pressing ⌘O.
You’ll find [Discover](/workspace/discover/) near the bottom of the web app’s sidebar.
### Exploring Discover
Whether you want to see what’s new in Sketch, find some inspiration for your next project, or learn everything about a feature, Discover has you covered.
### Learn
In Discover, you’ll find a selection of quick links to our documentation and courses so you can learn everything you need about Sketch. You can also access our hands-on tutorials and guides to get some practice right away.
### Stay in the loop
You can check what’s new in Sketch, download the latest Mac app version or access other handy links to our blog or updates page.
### Get inspired
If you’re finding yourself in a creative rut or looking for inspiration for your next project, take a look at our customer stories where we dive behind the scenes of great projects made with Sketch and reflect on the impact and intricacies of design.
--------------------------------------------------------------------------------
title: "Developer handoff"
description: "Learn how to inspect designs and export assets with the help of our step-by-step guides and video tutorials."
last_modified: "2026-02-03"
url: "https://www.sketch.com/docs/developer-handoff/"
--------------------------------------------------------------------------------
## Developer handoff
With our browser-based handoff tools, any developer can grab the information they need for any part of a design, at any time. You can invite developers to inspect designs in your Workspace for free — they won’t even need the Mac app (or a Mac) as it all happens in a web browser.
All Workspace members can inspect documents. You can also invite [Guests](/docs/sharing-and-collaborating/document-permissions/#workspace-guests) to inspect documents by enabling the "Can download and inspect" option when you set their permissions in a document’s [share settings](/docs/sharing-and-collaborating/sharing-and-viewing-documents/managing-share-settings/).
If you only want to share specific pages or prototypes with developers, you can create a [preview](/docs/sharing-and-collaborating/sharing-and-viewing-documents/previews/) with inspecting enabled.
--------------------------------------------------------------------------------
title: "Inspect"
description: "Learn how to inspect layers to view their properties in the web app"
last_modified: "2026-02-03"
url: "https://www.sketch.com/docs/developer-handoff/inspect/"
--------------------------------------------------------------------------------
## Inspect
To inspect a design in the web app, click the **Inspect** icon in the toolbar to open the Inspector and the Layer List. From here, you can select any layer on the Canvas or the Layer List to view its properties and measurements.
## The Layer List
The Layer List shows all layers in your document and helps you find and select the layers you need to inspect. Where layers overlap, you can use the Layer List to select the layer you want to inspect. Click the ••• icon in the Layer List to show the contextual menu for any layer.
As soon as you select a layer, the Inspector will update to show its properties.
> **Note:** You can ignore groups when inspecting layers by holding ⌘ and hovering over any layer. This way, you can focus on inspecting the properties of those elements within the group.
### Using the Layer List
From the Layer List, you can:
- **Open Symbol Source**: Opens the Symbol Source for a selected Symbol instance in a new browser tab, so you can inspect its contents in detail.
- **Open Frame** or **Open Top-Level Frame**: Right-click a frame in the Layer List to jump straight to its contents.
- **Go to Layer**: Pans and zooms the Canvas to focus on the chosen layer.
- **Copy Link**: Copies a link to that specific layer.
- **Copy CSS**: Copies the CSS rules for the current layer to the clipboard.
- **Export as**: Exports any layer. See [Exporting assets](/docs/developer-handoff/export/#exporting-assets) to learn more.
## Searching layers
At the top of the Layer List, you’ll find the search bar. Use it to filter layers by name. Matching layers appear along with their parent groups or frames, so you can see them in context.
## Inspecting layers
The properties that you see in the Inspector panel will depend on the type of layer you’ve selected and the values for that property. For example, when inspecting [borders](/docs/symbols-and-styles/styling/borders/), we’ll show its basic properties, like color or position, as well as any [border options](/docs/symbols-and-styles/styling/borders/#customizing-borders) like dashes, gaps, cap or join styles.
> **Note:** The Mac app uses the macOS coordinates system, which measures in points. One point is equal to one pixel on an `@1x` display. For handoff, points in the Mac app are largely the same as CSS `px` measurements. [Learn more about measurements in Sketch](/support/features/mac-app/points-vs-pixels/).
## Measuring between layers
Select a layer, then hover over another to display measurements that show the relative distances between them.
## Inspecting Symbols
When you select a layer that belongs to a Symbol, we’ll highlight the Symbol on the frame and show a card for it in the Inspector. To select the Symbol directly (to measure its distance from other layers, for example):
- Use the Layer List
- Right-click a layer on the Canvas, then use **Select** to choose a specific layer.
- Select the Symbol directly on the Canvas.
If a Symbol you’ve highlighted or selected is part of a [Library](/docs/libraries/) in your Workspace, or local to the current document, you can jump to its [Symbol Source](/docs/symbols-and-styles/symbols/). To do this, click the Symbol’s name or arrow icon (→) on the frame, or from the Inspector.
> **Note:** We’ll always show you the latest version of the Symbol Source, even if you’re viewing an older version of a document.
### Nested Symbols
When you select a layer within a [nested Symbol](/docs/symbols-and-styles/symbols/#creating-nested-symbols), or a nested Symbol itself, we’ll highlight it on the Canvas and show you the information relative to the nested Symbol or layer in the Inspector panel. You can head to its Symbol Source from the Symbol card in the Inspector panel, or click its name or the arrow (→) on the frame.
If a Symbol is part of a Library that’s not saved to your Workspace, you won’t be able to inspect its Symbol Source. However, you’ll still be able to see the Symbol’s name as well as the name and path of the Library it’s from.
When you’ve finished viewing or inspecting a Symbol Source, you can return to the frame you were previously inspecting by pressing your browser’s back button.
## Copying layer properties
Select a layer, head to the **Inspector** panel, hover over the property, and click to copy it to your clipboard.
Copying individual properties only copies the value and not the property name to the clipboard. For example: `#000000`
Layer properties with multiple values (such as a gradient with different colors, opacities, an angle and gradient type) will include both the value and the property name to the clipboard, for example:
```
Type: Linear
Angle: 180˚
Color Stop 0
Color: #8763FF
Position: 0%
Color Stop 1
Color: #6236FF
Position: 100%
```
## Copying multiple property values
To copy multiple property values at the same time (such as all the values that make up a text layer, or all the values of a shadow), hover over the heading above the group of values (e.g. Shadows, Borders, Text) and click on it. This will copy all of the values related to that group of properties for the layer you’ve selected.
## Copying colors and Color Variables
Hover over a **Color** label and click to copy its color value to your clipboard. To change the format (to HSL or Objective-C, for example), click the arrow next to the current value and pick your preferred format from the list.
When you click on a Color Variable, you’ll see its whole path (if it’s part of a group or Library), as well as its name and color value. You can copy all of a Color Variable’s values by hovering over the **Color** label and clicking on it. Viewing and copying individual values for Color Variables or gradients works in the same way: hover over the name of the value and then click on it.
You can also export Color Variables as [design tokens](/docs/developer-handoff/export/#design-token-exports). You can choose from HEX, RGB, HSL, NSColor (Objective-C and Swift), and UIColor (Objective-C and Swift) formats.
When you select a color format, the Inspector will save your preference, so when you copy a different color property you’ll see it in the same format as your original selection.
## Copying shared Styles
When you select a Text Style or Layer Style, you’ll see its details in the Inspector panel . There, we’ll show you the full path of the Shared Style you’ve selected and whether it belongs to your current document or another Library.
Copy a Text or Layer Style by hovering over the **Text Styles** or **Layer Styles** heading and clicking on it.
When a Layer or Text Style is out of sync with the original, you’ll see the name of the style in italics with an asterisk (*) next to it.
> **Note:** Copying a Layer or Text Style copies the name and path (which Library and group it belongs to) to your clipboard.
## Copying text
Head to the **Content** section in the Inspector panel, hover over the content and click to copy it to your clipboard.
## Copying CSS properties
To copy CSS properties to your clipboard for any Layer or Text Style and Symbol, select the component and click **Copy CSS** on the top right of the Inspector.
## Viewing designs with Grids and Layouts
Select a layer or frame inside a frame, click the **Inspect** button , then open the Zoom dropdown menu in the canvas controls to toggle **Show Grid** or **Show Layout** options. You can also press ⇧G and ⇧H respectively.
> **Note:** You can view grids and layouts in the web app, but you can only [change their settings](/docs/designing/the-interface/the-Canvas/#how-to-create-grids) in the Mac app.
--------------------------------------------------------------------------------
title: "Export"
description: "Learn how to export assets and styles from the web app."
last_modified: "2026-07-15"
url: "https://www.sketch.com/docs/developer-handoff/export/"
--------------------------------------------------------------------------------
## Export
You’ll need to enable the **Can download and inspect** option in a document so Viewers can export assets.
## Exporting assets
### Exporting individual assets
As well as being able to inspect documents in their browser, developers can export any assets they need, all from the web app. Anyone with View access will need the **Can download and inspect** option checked in their [document permissions](/docs/sharing-and-collaborating/document-permissions/) to export assets.
Open a document in the web app and click the **Inspect** icon . From the Inspector panel, click any layer to bring up its properties.
Click the **Export as** button to preview your export and choose the resolution, prefix/suffix, and file format. You can add multiple Export options and reset them at any point. Click **Export** to download the assets.
### How to export all assets
To export and download assets from the web app, you first need to do the following in the Mac app:
- [Make layers, frames or groups in your document exportable](/docs/importing-and-exporting/#how-to-create-and-use-export-presets) or;
- [Create Slices to export](/docs/importing-and-exporting/#how-to-use-slices)
To export all assets in a document, go to the **Document Details** panel and select **Export Assets**. This will generate a Zip file containing the assets. When your assets are ready, click the **Download Assets (ZIP)** link that appears to download them.
If the **Export Assets** button in the web app is greyed out or individual assets don’t show any export options, it’s because there aren’t any layers or frames set as exportable in the document. You’ll need to add slices or set layers, groups or frames as exportable in the Mac app first.
Depending on the total size of the assets you’re exporting, you may not be able to download all assets straight away. If that happens, you’ll receive both an email notification and a notification in your [inbox](/docs/sharing-and-collaborating/using-your-workspace/managing-updates-and-notifications/) to let you know that your assets are ready for download.
## Design token exports
If your document or Library has [Color Variables](/docs/symbols-and-styles/color-variables/), [Text Styles](/docs/symbols-and-styles/text-and-layer-styles/text-styles/), or [Layer Styles](/docs/symbols-and-styles/text-and-layer-styles/layer-styles/), you can automatically generate design token exports in CSS or JSON formats that stay up to date with any changes you make.
To generate a design token export, click the **Document Details** icon on the upper right, then click **Export Design Tokens** in the Document Details panel. Alternatively, click the on the upper right of the toolbar and select **Export Design Tokens** from the menu.
In addition, you can also generate design token exports from the **Components** view from the sidebar on the bottom left.
### Design token export settings
In the **Export Design Tokens** modal you have the option to export Color Variables, Layer Styles and Text Styles. Use the drop-down menus to switch between CSS or JSON formats, and color formats (RGB, hex or HSL).
> **Note:** You can download color tokens as either CSS or JSON, but Layer and Text Styles will only work in JSON format.
As you change export settings, you’ll see a preview of the code in the right-hand panel (which you can copy if you want to use it right away).
Once you’re ready to export, click the **Download Tokens** button to save your design token export locally.
### Sharing design token exports using a URL
To generate a public URL for your design token exports — useful for referencing in development projects — use the drop-down menu to select from three options:
- **Enabled for latest document update**: Always links to the latest update of the document’s Color Variables, Text and Layer Styles
- **Enabled for latest starred version**: Always links to the latest [starred](/docs/sharing-and-collaborating/sharing-and-viewing-documents/creating-starred-versions/) version of the document. If the document has no starred updates, it will link to the most recent update instead
- **Disabled**: Any links you shared will no longer work.
> **Note:** Only Editors and Admins can enable or disable links, while Viewers can copy and view any enabled link.
### Integrating design token exports with development projects
You can use public design token export URLs with tools like [Storybook](https://storybook.js.org) to bring in the latest changes, although we don’t recommend adding them directly to a production environment.
Here’s a [sample project](https://github.com/sketch-hq/design-tokens-example) to show you how you could integrate design token exports with your development projects. You can also find more information on working with the Amazon Style Dictionary format we use for JSON color tokens in [their documentation](https://github.com/style-dictionary/style-dictionary#design-tokens).
--------------------------------------------------------------------------------
title: "MCP Server"
description: "Learn how to connect your AI tools with Sketch’s MCP Server."
last_modified: "2026-06-24"
url: "https://www.sketch.com/docs/mcp-server/"
--------------------------------------------------------------------------------
## MCP Server
Sketch includes a built-in MCP Server, a lightweight local-only web server that lets AI clients like ChatGPT or Claude interact directly with Sketch. Through the MCP Server, these clients can access or modify data in your Sketch documents using a set of defined MCP commands (also called _tools_).
> **Note:** The MCP Server requires Sketch 2025.2.4 or later and is not available in the Mac App Store version. [Download the Mac app from sketch.com](/releases/mac/).
When an AI client connects to the Sketch MCP Server, it automatically learns which tools are available and how to use them. These details are supplied by the server and injected into the model’s context, allowing it to reason about Sketch-specific actions.
Once you connect it, your AI agent can issue requests such as “_export all icons for developer handoff_” or “_find inconsistencies in the design system_”. The AI then selects the most suitable MCP command and calls it.
Typical use cases include:
- Exporting assets for developer handoff
- Reviewing or auditing design systems for inconsistencies
- Generating new screens from templates using existing components
> **Note:** **Looking for more ways to use our MCP server?** Check out our [agents repo](https://github.com/sketch-hq/agents) and a recent [blog post](/blog/mcp-server-use-cases/) with some MCP server use cases.
## How to start Sketch’s MCP Server
1. In Sketch, press ⌘K to open the Command Bar and type “MCP”.
1. Choose **Start MCP Server**.
1. At this point, a macOS security dialog may ask you to allow Sketch to access your Local Network. This is required for the MCP server to operate. Please choose “Allow”.
1. At the bottom of your Sketch document you should see a confirmation message confirming the MCP server’s address and port.
Alternatively, you can start and stop the MCP Server in **Settings > General > MCP Server**.
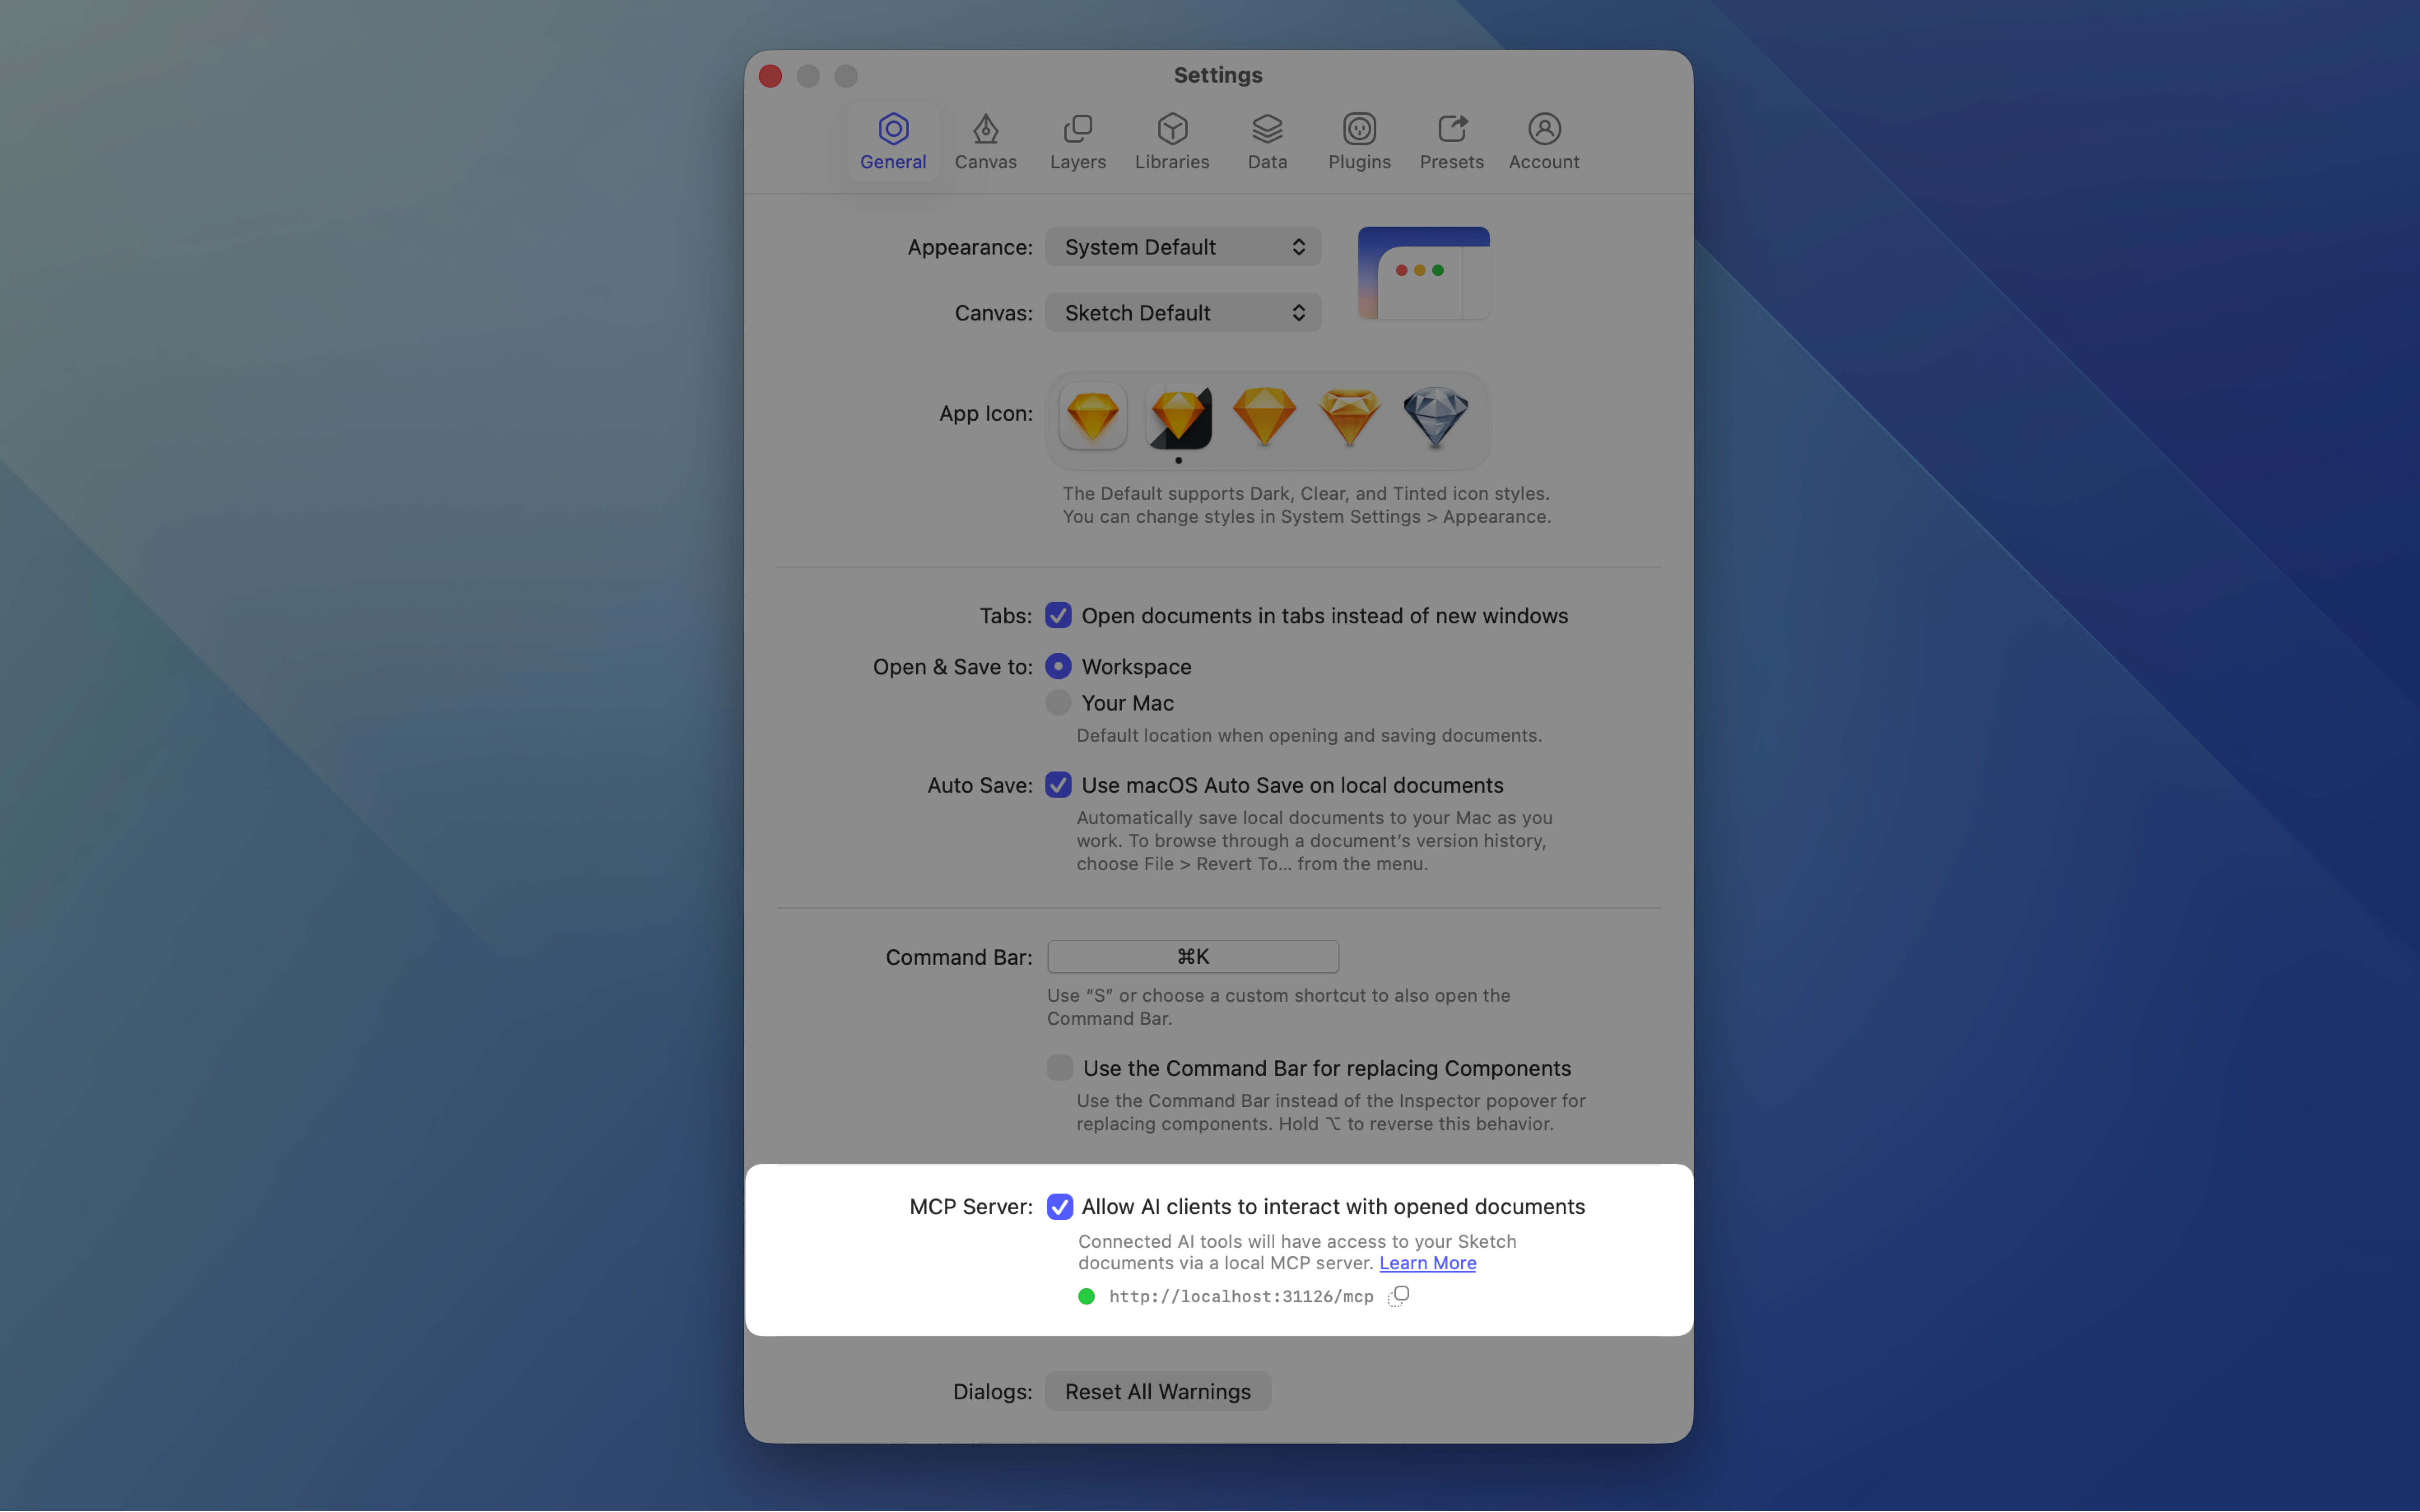
*The General settings panel with the MCP Server toggle highlighted*
> **Note:** If you see an error message when you attempt to start the MCP server, [please let us know](/support/contact/).
## How to connect your AI client
Before you connect your AI client, make sure you’ve [started the MCP server](#how-to-start-sketchs-mcp-server) in Sketch.
> **Note:** You’ll need Claude Code installed and running in your terminal to use the Sketch MCP server. If you haven’t set it up yet, [get Claude Code](https://docs.anthropic.com/en/docs/claude-code/getting-started) before continuing.
1. Run the following command to connect Claude Code to the Sketch MCP server:
~~~bash
claude mcp add --transport http sketch http://localhost:31126/mcp
~~~
1. And then verify that Claude Code is connected to the MCP server:
~~~bash
claude mcp get sketch
~~~
1. In the Claude desktop app, go to **Claude > Settings > Extensions** and click **Browse Extensions**.
1. Search for "Sketch".
1. Click the Sketch connector, then click **Install**.
1. Sketch will appear on the Extensions page under **Installed on your computer**.
To manage tool permissions, click **Configure**. You can choose whether Claude always asks before using the MCP server’s tools, or is always allowed to use them.
1. Press ⌘⇧P to open the Command Palette, type in _MCP Add_.
1. Choose the MCP: **Add Server option**.
1. Select HTTP as the MCP server type when prompted.
1. Paste this URL when prompted:
~~~
http://localhost:31126/mcp
~~~
1. Give this server a name, e.g. _`sketch`_.
1. Press ⌘⇧I to open a new Copilot chat in _Agent_ mode.
1. Go to **Cursor > Settings > Cursor Settings** menu
1. Navigate to the Tools & MCP tab
1. Click **Add Custom MCP**
1. Insert the following text into the auto-generated `mcp.json` file:
~~~json
{
"mcpServers": {
"sketch": {
"url": "http://localhost:31126/mcp",
"type": "http"
}
}
}
~~~
1. Switch back to _Cursor Settings_ tab and make sure there’s a green dot next to the sketch MCP server entry.
1. Add the following lines to your `~/.codex/config.toml` file:
~~~toml
[mcp_servers.sketch]
url = "http://localhost:31126/mcp"
~~~
2. Run `codex`, type `/mcp` and verify that the Sketch MCP server is active:
~~~
/mcp
🔌 MCP Tools
• Server: sketch
• URL: http://localhost:31126/mcp
• Tools: get_design_assets, get_document_info, get_guide,
get_layer_tree_summary, get_libraries,
get_screenshot, get_symbol_overrides, run_code
~~~
1. Open an Agent session in Antigravity.
1. Click the **…** menu at the top of the side panel and select **MCP Servers**.
1. At the top of the MCP Store, click **Manage MCP Servers**, then **View raw config**.
1. Add the following to your config:
~~~json
{
"mcpServers": {
"sketch": {
"serverUrl": "http://localhost:31126/mcp"
}
}
}
~~~
1. Save the file and restart Antigravity to load the MCP Server.
## Sketch’s MCP tools
Sketch’s MCP Server exposes a set of tools that AI agents can call to read from and write to your documents. You generally don’t need to specify which MCP tool to call — an AI agent will decide that on its own. That said, you can still mention a tool explicitly if you want to guide its approach.
### `run_code`
The **`run_code`** tool is especially powerful. Since AI models excel at writing code, they can access the entire [SketchAPI](https://developer.sketch.com/reference/api/) — just like a Sketch plugin would. This means AI agents can automate and control Sketch through scripts with multiple steps, branching, and even error handling
If an AI agent encounters code errors, it can review them, adjust the script, and try again — iterating automatically until the code achieves the intended result. You can watch this process unfold or step in at any point, but an agent can often complete the loop entirely on its own.
### `get_document_info`
Returns a structured overview of the open document: its ID, file name, and a page-by-page breakdown including layer counts and top-level frame names, positions, and dimensions. Useful for orienting an AI agent before it starts working on a specific part of the document.
### `get_layer_tree_summary`
Returns a compact, readable text hierarchy of the layer structure — including layer type, ID, position, dimensions, stack layout settings, inline text contents, and override counts. You can scope it to a specific root layer and limit traversal depth. This gives AI agents a precise structural map without capturing a screenshot.
### `get_design_assets`
Returns design assets from the current document, filterable by kind: symbols, text styles, layer styles, color swatches, frame templates, and graphic templates. Useful when AI agents need to discover reusable components before building or auditing a design.
### `get_screenshot`
Captures a screenshot of a specific layer or the current canvas state. Useful for when an AI agent needs to verify its work with a visual reference.
### `get_libraries`
Returns information about the libraries linked to the current document, including their names and IDs. This helps AI agents identify and adopt reusable assets like Symbols and styles.
### `get_symbol_overrides`
Returns the available overrides for a given symbol instance — the properties that can be customized without detaching the symbol. This helps AI agents understand how to adapt and customize Symbols as they use them.
### `get_guide`
Returns one of Sketch’s built-in reference guides. AI agents can call this tool to load guidance on how to work with specific parts of Sketch before attempting a task.
## How to work with Sketch and your AI tool
Here are some examples of the type of prompts you could use:
- Explain the visual layout of the selected Sketch frame
- Are there any symbol masters in my active Sketch document that don’t have any instances?
- List all design tokens used in my Sketch selection
- Create a vertical stack of four rectangles in Sketch and add a unique gradient pattern to each
- Fix grammar and spelling mistakes on the selected Sketch frame
- Export all Sketch symbols prefixed with “icon/” from the current page as SVGs to my Desktop
- Show the full component hierarchy of my Sketch selection as a tree
- Generate my current Sketch selection in React
- Replace every text layer on the selected frame with a random Apple product name (including text inside symbols).
> **Note:** The prompt ideas above are basic examples. A good prompt would typically include more detail, break the task into well-defined steps, provide some rules for your AI client to follow, and even suggest how to validate the results.
### Referring to specific layers
If you want to point your AI agent to a specific layer, you can copy that layer’s unique ID and paste it into your prompt. To do this, select a layer (or multiple layers), then use the **Copy Layer ID** action in the [Command Bar](/docs/interface-and-settings/the-mac-app-interface/the-command-bar/), under **Plugins > Developer** in the menu bar, or — when the MCP server is running — in the **Copy** submenu of the Canvas or Layer List context menu.
## Troubleshooting
If you’re having trouble setting up or using the MCP Server — for example, if the connection between your AI client and Sketch isn’t working or certain tools don’t respond as expected — try the steps below.
### Can’t start the server
If you can’t start the server, make sure Sketch is enabled in **System Settings > Privacy & Security > Local Network**. If Sketch is already enabled, toggle the switch off and back on again, relaunch Sketch, and try again. If the issue persists, [please let us know](/support/contact/).
### How to change the local port number
If you’re experiencing errors starting the MCP server, you may need to change the local port number it uses. To do this, quit Sketch and then run the following Terminal command:
~~~bash
defaults write com.bohemiancoding.sketch3 mcpServerPortNumber -int 1234
~~~
…where `1234` is any number in the 1024…49151 range. Relaunch Sketch and try to start the MCP server again.
To return back to the default port value, run the following Terminal command and restart Sketch:
~~~bash
defaults delete com.bohemiancoding.sketch3 mcpServerPortNumber
~~~
> **Note:** Make sure the port you choose isn’t already in use by another local service. If Sketch still can’t start the MCP Server after changing ports, try a different number within the recommended range or restart your computer before relaunching Sketch.
### Hide the MCP Server functionality
To hide the MCP server functionality from appearing at all in the Mac app, run this command:
~~~bash
defaults write com.bohemiancoding.sketch3 mcpServerEnabled -bool NO
~~~
## Security
The MCP server is local-only and cannot be accessed remotely. Each call is handled locally by the MCP server — that is, by Sketch itself — and the results are sent back to the AI client for further processing. The server is off by default, and you have full control over when and how external AI clients connect to it.
--------------------------------------------------------------------------------
title: "Shortcuts"
description: "Complete list of Sketch keyboard shortcuts for Mac and web apps. Speed up your design workflow with hotkeys for layers, shapes, text, components, and more."
last_modified: "2026-01-23"
url: "https://www.sketch.com/docs/shortcuts/"
--------------------------------------------------------------------------------
## Shortcuts
Keyboard shortcuts are the fastest way to speed up your workflow. Many of them are depend on what you’ve selected and what you’re doing, but you’ll find the full list of keyboard shortcuts for our Mac and web apps here.
--------------------------------------------------------------------------------
title: "Mac app shortcuts"
description: "Discover the full list of Sketch keyboard shortcuts to speed up your workflow. Start optimizing your time to do better work, faster."
last_modified: "2026-06-22"
url: "https://www.sketch.com/docs/shortcuts/mac/"
--------------------------------------------------------------------------------
## Mac app shortcuts
Listed shortcuts are for the **US English** keyboard layout. If you’re using a different layout, macOS may adapt some shortcuts. If the listed shortcut doesn’t work with your layout, find the corresponding action in the menus — it will show the shortcut for your layout.
## General
| Action | Shortcut |
|--------|----------|
| Open the [Command Bar](/docs/interface-and-settings/the-mac-app-interface/the-command-bar/)1 | S or ⌘K |
| Open [Settings](/docs/interface-and-settings/mac-app-settings/) | ⌘, |
| Open [Document Settings](/docs/interface-and-settings/document-settings/) | ⇧⌘, |
| Open the [Prototype Preview](/docs/prototyping/previewing-prototypes/) window | ⌘P |
| Run script | ⌃⇧K |
| Run the last plugin | ⌃⇧R |
| Open app in Safe Mode (plugins disabled) | Hold ⇧ on launch |
> **Note:** 1. You can change ⌘K to another shortcut in [Settings > General](/docs/interface-and-settings/mac-app-settings/general/).
### Document
| Action | Shortcut |
|--------|----------|
| New document | ⌘N |
| Open workspace document1 | ⌘O |
| Open local document1 | ⇧⌘O |
| Close document | ⌘W |
| Show next tab | ⌃⇥ |
| Show previous tab | ⌃⇧⇥ |
| Save new or local document2 | ⌘S |
| Create a version of workspace document | ⌃⌘S |
| Line break on the description field | ⌥⏎ |
| Duplicate current document2 | ⇧⌘S |
| Save As | ⌥⇧⌘S |
| New page | ⇧⌘N |
| Go to previous/next page | fn↑ ↓ |
| Copy link to page or frame3 | ⇧⌘C |
> **Note:** 1. Setting **[Open & Save](/docs/interface-and-settings/mac-app-settings/general/)** to "Your Mac" swaps the **Open…** shortcuts.
1. Disabling **[Auto Save](/docs/interface-and-settings/mac-app-settings/general/)** replaces **Duplicate** with **Save As** in the menu.
1. Copies a link to the current page. If you have a single top-level frame selected, it copies a link to that frame instead.
### Interface
| Action | Shortcut |
|--------|----------|
| Switch to Canvas View | ⌃1 |
| Switch to [Components View](#components-view) | ⌃2 |
| Toggle interface | ⌘. |
| Toggle full screen | ⌃⌘F |
### Canvas
| Action | Shortcut |
|--------|----------|
| Zoom in | ⌘+ |
| Zoom out | ⌘- |
| Zoom to 100% | ⌘0 |
| Zoom to fit all layers in the Canvas | ⌘1 |
| Zoom to fit selection | ⌘2 |
| Center selection in the Canvas | ⌘3 |
| Zoom to fit top-level frame | ⌘4 |
| Temporarily zoom out to 100% | Hold ~ (or § on some keyboards) |
| Pan Canvas | Hold Space and drag Middle mouse button and drag |
| Hide selection highlights, handles, grids and guides | Hold Space |
| Show/hide minimap | ⌃M |
| Show/hide rulers | ⌃R |
| Show/hide pixels on zoom | ⌃P |
| Show/hide pixel grid | ⌃X |
| Show/hide grid | ⌃G |
| Grid settings | ⌃⌘G |
| Show/hide layout grid | ⌃L |
| Layout grid settings | ⌃⌘L |
### Comments
| Action | Shortcut |
|--------|----------|
| Insert comment | N |
| Submit comment | ⌘⏎ |
| Show/hide comments | ⌃N |
| Show/hide resolved comments | ⌃⇧N |
## Layers
### Insert
| Action | Shortcut |
|--------|----------|
| Frame | F Graphic |
When inserting a layer:
| Action | Shortcut |
|--------|----------|
| Draw layer from the center | ⌥ while drawing |
| Draw layer with square aspect ratio | ⇧ while drawing |
| Move layer before placing it | Space-drag |
### Select
| Action | Shortcut |
|--------|----------|
| Marquee | X |
| Dive deeper into container | ⏎ |
| Select parent container | Esc |
| Select root symbol | ⇧Esc |
| Clear selection | ⌃Esc |
| Select all layers, except hidden/locked | ⌘A |
| Select all layers, including hidden and locked layers | ⌃⌘A |
| Select all top-level frames and graphics | ⇧⌘A |
| Find layer | ⌥⌘F |
| Reveal selection in Layer List | ⇧⌘J |
| Select next/previous layer in container | ⇥ / ⇧⇥ |
| Select previous/next top-level frame | fn← → |
| Open the Select Layer menu | ⇧-secondary-click |
When [selecting](/docs/designing/layer-basics/selecting-layers/) via click:
| Action | Shortcut |
|--------|----------|
| Deep select | ⌘ while selecting |
| Add/remove layer from selection | ⇧ while selecting |
When [selecting](/docs/designing/layer-basics/selecting-layers/) via marquee:
| Action | Shortcut |
|--------|----------|
| Deep select | ⌘ while marqueeing |
| Add/remove layer from marquee selection | ⇧ while marqueeing |
| Only select layers completely within the marquee | ⌥ while marqueeing |
> **Note:** You can combine click and marquee modifiers, e.g. ⇧⌘-click or ⇧⌥-marquee.
### Edit
| Action | Shortcut |
|--------|----------|
| Undo | ⌘Z |
| Redo | ⇧⌘Z |
| Cut | ⌘X |
| Copy | ⌘C |
| Paste | ⌘V |
| Paste over selection | ⇧⌘V |
| Paste and replace selection | ⇧⌘R |
| Duplicate | ⌘D |
| Duplicate behind | ⇧⌘D |
| Rename layer(s) | ⌘R |
| Delete layer | ⌫ |
| Edit frame, group, graphic, symbol, text, image, or shape/vector | ⌘⏎ |
| Replace template, layer, symbol, or style | ⌥⌘R |
| Hide/show layer | ⇧⌘H |
| Lock/unlock layer | ⇧⌘L |
| Rotate | ⌃⌘R |
| Snap rotation to 15º increments | ⇧ while rotating |
| Flip horizontally | ⇧H |
| Flip vertically | ⇧V |
| Use as mask | ⌃⌘M |
| Refresh Data | ⌃⇧D |
### Style
| Action | Shortcut |
|--------|----------|
| Copy properties | ⌥⌘C |
| Paste style | ⌥⌘V |
| Paste style without corners1 | ⌃⌥⌘V |
| Update shared style | ⌃S |
| Reset shared style | ⌃⌥S |
| Toggle fills | ⇧F |
| Toggle borders | ⇧B |
| Swap fills and borders | ⇧X |
| Pick color | ⌃C |
| Pick Color Variable with eyedropper | ⇧-click |
| Change opacity | 0-9 |
When editing a gradient stop between two others:
| Action | Shortcut |
|--------|----------|
| Place gradient stop between 0% and 100% | 0-9 |
| Place gradient stop halfway between adjacent stops | = |
> **Note:** Disabling **[Include corners](/docs/interface-and-settings/mac-app-settings/layers/)** turns this into **Paste Style With Corners**.
### Export
| Action | Shortcut |
|--------|----------|
| Mark as exportable / Export selection | ⌘E |
| Export all assets | ⇧⌘E |
### Move and resize
| Action | Shortcut |
|--------|----------|
| Move without reparenting | Space while moving |
| Move along X or Y axis | ⇧ while moving |
| Move without snapping | ⌃ while moving |
| Move by 1px1 | ← → ↑ ↓ |
| Move by 10px1 | ⇧← → ↑ ↓ |
| Move selection | ⌥⌘ while dragging _anywhere_ |
| Duplicate2 | ⌥ while moving |
| Resize maintaining aspect ratio | ⇧ while resizing |
| Resize from center | ⌥ while resizing |
| Resize without snapping | ⌃ while resizing |
| Resize by 1px1 | ⌘← → ↑ ↓ |
| Resize by 10px1 | ⇧⌘← → ↑ ↓ |
| Resize selection to fit contents | ⇧⌘F Double-click edge |
| Resize layer in a stack to fill parent | ⌥-double-click edge |
| Resize container, without adjusting contents | Hold ⌘ while resizing |
| Resize container by 1px1, without adjusting contents | ⌘⌥← → ↑ ↓ |
| Resize container by 10px1, without adjusting contents | ⇧⌘⌥← → ↑ ↓ |
| Scale layer | K |
| Round layer to pixel | ⇧⌘P |
| Fit layers to pixel bounds | ⌃⌘X |
> **Note:** 1. You can change these values in [Settings > Canvas](/docs/interface-and-settings/mac-app-settings/canvas/).
2. When duplicating with ⌥ you can additionally use Space⇧⌃.
### Organize and arrange
| Action | Shortcut |
|--------|----------|
| Group in a frame | ⌘F |
| Group in a group | ⌘G |
| Ungroup container | ⇧⌘G |
| Bring forward | ⌘] |
| Bring to front | ⌥⌘] |
| Send backward | ⌘[ |
| Send to back | ⌥⌘[ |
| Move up (out of parent container) | ⌥⇧⌘↑ |
### Align and layout
| Action | Shortcut |
|--------|----------|
| Align left, right, top, bottom, horizontally, or vertically | ⌃⌘← → ↑ ↓ H V |
| Align to top-level frame | ⌥-click alignment buttons |
| Auto-pin | ⇧A |
| Auto-pin all children of container | ⌥⇧A |
| Add stack layout | ⌘L or ⇧S |
| Remove stack layout | ⌥⌘L or ⌥⇧S |
| Reorder layer in stack | ← → ↑ ↓ |
| Move layer to start/end of stack | ⇧← → ↑ ↓ |
| Ignore stack layout | ⇧⌘I ⌘ while moving into stack |
| Measure distance to another layer | ⌥-hover layer |
| Measure distance to baseline/cap of text layer | ⌃⌥-hover layer |
## Layer Types
### Shapes
| Action | Shortcut |
|--------|----------|
| Transform shape | ⌃⌘T |
| Add shapes | ⌥⌘A Union shapes |
#### Vector editing
Available when in [vector editing mode](/docs/designing/vector-editing/).
| Action | Shortcut |
|--------|----------|
| Select next/previous point | ⇥ / ⇧⇥ |
| Show all handle control points | Hold ⌥ Set point to Straight |
| Switch point between Straight and Mirror angle and length | Double-click point |
| Change Mirror angle and length/Mirror angle point to Independent | ⌘-drag control handle |
| Move point along X or Y axis | ⇧ while dragging |
| Move point without snapping | ⇧ while dragging |
| Place new point without snapping | ⌃-click |
| Place new point at a 45° angle | ⇧-click |
| Place new point between existing points | ⇧-click segment |
| Curve path segment between existing points | ⌘-click segment |
| No pixel snapping | ⌥1 |
| Snap to full pixels | ⌥2 |
| Snap to half pixels | ⌥3 |
| Snap to quarter pixels | ⌥4 |
### Text
| Action | Shortcut |
|--------|----------|
| Paste as rich text | ⌥⇧⌘V |
| Change typeface | ⌘T |
| Bold | ⌘B |
| Italic | ⌘I |
| Underline | ⌘U |
| Increase font size | ⌥⌘+ |
| Decrease font size | ⌥⌘- |
| Loosen character spacing | ⌃⌥L |
| Tighten character spacing | ⌃⌥T |
| Align left | ⇧⌘{ |
| Align center | ⇧⌘| |
| Align right | ⇧⌘} |
| Convert to outlines | ⌥⌘O |
## Components
| Action | Shortcut |
|--------|----------|
| Insert Symbol | Y |
| Insert Text Style | ⌃T |
| Replace symbol, style, or template | ⌥⌘R |
## Components View
Available in the [Components View](/docs/interface-and-settings/the-mac-app-interface/the-components-view/).
| Action | Shortcut |
|--------|----------|
| Find component | ⌥⌘F |
| Symbols | ⌘1 |
| Text Styles | ⌘2 |
| Layer Styles | ⌘3 |
| Color Variables | ⌘4 |
| Color Variables | ⌘5 |
| Graphic Templates | ⌘6 |
### Browse components
Available when inserting or [replacing components](/docs/interface-and-settings/the-mac-app-interface/the-command-bar/#replacing-components) via the Command Bar or popover.
| Action | Shortcut |
|--------|----------|
| Select component | ← → ↑ ↓ |
| Choose component | ⏎ |
| Open filter menu (only in Command Bar) | ⌘F |
| Open filter menu at current location (only in Command Bar) | ⌘↓ |
| Go to parent group | ⌘↑ |
| Go to current library | ⌥⌘↑ |
| Go to all components | ⌃⌥⌘↑ |
| Preserve current Symbol dimensions (only when replacing) | ⌘P |
### Symbols
| Action | Shortcut |
|--------|----------|
| Create Symbol | ⌘Y |
| Detach from Symbol | ⇧⌘Y |
| Detach all contents from Symbol | ⌥⇧⌘Y |
| Go to Symbol Source | ⌘⏎ |
## More Tips
### Inspector fields
Input fields in the Inspector support a variety of operators and shortcuts.
#### Math operators
Available in any numerical field.
| Action | Shortcut |
|--------|----------|
| Add | `+` |
| Subtract | `-` |
| Multiply | `*` |
| Divide | `/` |
You can also use parenthesis to group operations, e.g. `(200+16)/2`.
#### Numerical fields
Available in any numerical field.
| Action | Shortcut |
|--------|----------|
| Increase or decrease value by 1 | ↑ ↓ |
| Increase or decrease value by 10 | ⇧↑ ↓ |
| Increase or decrease value by 0.1 | ⌥↑ ↓ |
| Adjust value by 1 | Drag label |
| Adjust value by 10 | ⇧ while dragging label |
| Adjust value by 0.1 | ⌥ while dragging label |
#### Width and Height fields
Available in the Width and Height fields, after a numerical value, e.g. `80r`.
| Action | Shortcut |
|--------|----------|
| Adjust width from the left | `…l` |
| Adjust width from the right | `…r` |
| Adjust height from the top | `…t` |
| Adjust height from the bottom | `…b` |
| Adjust width/height from the center / middle | `…c` or `…m` |
| Set size as a percentage of its parent container | `…%` |
#### Export fields
Available in the Size field of the Export panel.
| Action | Shortcut |
|--------|----------|
| Scale multiplier, e.g. `2x`, `3x` | `…x` |
| Specific width, e.g. `512w` | `…w` |
| Specific height, e.g. `512h` | `…h` |
### Creating custom shortcuts
You can change or add custom shortcuts for any item in the menu bar:
1. Open **System Settings** on your Mac.
1. Head to **Keyboard**, click **Keyboard Shortcuts…**, and select **App Shortcuts** on the left.
1. Press **+**, type the menu item for which you want a shortcut, then press the desired shortcut.
When typing a menu item, you don’t need to include the menu name. For example, typing `Auto Link to Right Frame` is enough. In the rare case where multiple menu items share the same name, include the menu path to avoid ambiguity — for example, `Prototype->Interaction->Auto Link to Right Frame`.
If a custom shortcut stops working after an update, check whether the menu item name changed. You can use the **Help** menu in the Mac app to search for the current command name, then update your shortcut in macOS to match it. For example, **Collapse Artboards and Groups** is now **Collapse All Groups**, and **Text > Align Left** is now **Text > Align > Left**.
--------------------------------------------------------------------------------
title: "Web app shortcuts"
description: "Essential keyboard shortcuts for Sketch web app. Navigate documents, zoom canvas, control panels, and use prototype player efficiently with hotkeys."
last_modified: "2026-07-15"
url: "https://www.sketch.com/docs/shortcuts/web/"
--------------------------------------------------------------------------------
## Web app shortcuts
On Windows and Linux, use Ctrl in place of ⌘.
## General
| Action | Shortcut |
|--------|----------|
| Open the [Command Bar](/docs/sharing-and-collaborating/using-your-workspace/#using-the-command-bar) | ⌘K |
## Documents list
| Action | Shortcut |
|--------|----------|
| Toggle search | / |
| Switch to grid view | [ |
| Switch to list view | ] |
## Inbox
These shortcuts are available when you have a notification open in the [inbox’s](/docs/sharing-and-collaborating/using-your-workspace/managing-updates-and-notifications/) detail panel.
| Action | Shortcut |
|--------|----------|
| Pin or unpin | P |
| Go to Document | O |
| Download | D |
| Accept invite | A |
| Unfollow | U |
## Canvas
| Action | Shortcut |
|--------|----------|
| Zoom in (US keyboards) | + |
| Zoom in (Non-US keyboards) | = |
| Zoom out | - |
| Show Canvas at 100% zoom | ⇧0 |
| Fit all contents in the browser’s viewport | ⇧1 |
| Show contextual menu | Secondary-click |
| Navigate frames while in frame view | ← → |
| Show/hide the Document Details panel | D |
| Show/hide the Versions panel | V |
| Show/hide the Inspector panel | I |
| Show/hide the Comments panel | C |
| Show/hide Grid | ⇧G |
| Show/hide Layout | ⇧L |
| Add a new comment | N |
| Show/hide comments | ⇧N |
| Submit a comment | ⌘⏎ |
| Copy link | ⇧⌘C |
## Prototype player
These shortcuts are available when you play prototypes in the web app
| Action | Shortcut |
|--------|----------|
| Restart Prototype | R |
| Go Back / Forward for previously visited frames | ← → |
| Fit prototype in the browser’s viewport | ⇧0 |
| Set prototype display to fill the browser’s width | ⇧1 |
| Display prototype in its actual size | Z |
| Add a new comment | N |
--------------------------------------------------------------------------------
title: "Glossary"
last_modified: "2026-05-22"
url: "https://www.sketch.com/docs/glossary/"
--------------------------------------------------------------------------------
## Glossary
### A {#letter-a}
**[Adjust content on resize](/docs/designing/layer-basics/resizing-constraints/)**
An option found in the Inspector when a frame is selected. Allows you to determine whether the content within should be modified when the frame resizes.
**[Align tool](/docs/designing/layer-basics/aligning-layers/)**
A tool found at the top of the Inspector (the six icons after the divider). Allows you to line up two or more layers against each other, or line up layers to the edges of a frame or group.
**[alpha mask](/docs/designing/shapes/masking-shapes/#creating-an-alpha-mask)**
A type of mask that clips above layers to its shape as well as its opacity.
**[Angular Gradient](/docs/symbols-and-styles/styling/gradients/#creating-angular-gradients) **
A type of fill made up of two or more colors that will sweep around a circumference determined by the layer’s size.
**[Animate](/docs/prototyping/adding-links/#editing-links)**
A prototyping option that lets you define the transition from one frame to another.
**[Arrow tool](/docs/designing/shapes/adding-shapes/) **
A tool that allows you to draw a line with an arrowhead on the Canvas.
**[Asymmetric](/docs/designing/vector-editing/#changing-point-types) **
A type of vector point. Handle control points will appear parallel but be an independent distance from the vector point. Used to create Bézier curves.
**[auto (width)](/docs/designing/text/#formatting-text-in-the-inspector) **
A setting applied to a text layer. Auto enables the text layer’s width to keep on growing until you create a line break.
**[Auto Save](/docs/interface-and-settings/mac-app-settings/general/)**
A macOS feature that will automatically save your Sketch document whenever you make a change.
**[Auto-pin](/docs/designing/frames/#pinning-layers) **
an option to automatically pin layers to their parent frame or group based on their position.
### B {#letter-b}
**[background blur](/docs/symbols-and-styles/styling/blurs/)**
A blur effect that will blur content underneath the layer. Used to replicate the effect seen in macOS and iOS.
**backward**
A command that will move the selected layer towards the bottom of the Layer List.
**baseline**
Refers to the imaginary line in which all characters in a text layer sit on.
**Bézier curve**
Created by handles that extend from a vector point when it is set as either Mirrored, Asymmetric, or Disconnected.
**bitmap**
A type of image that is made up of pixels.
**blending or blend mode**
An option that allows you to adjust the layer, or style’s blend mode. This will affect how it appears on the Canvas.
**[boolean operation](/docs/designing/shapes/boolean-operations/)**
A rule that dictates how combined layers should be displayed.
**[border](/docs/symbols-and-styles/styling/borders/)**
Part of a shape’s style that is applied to a path.
**brightness**
A measurement of the intensity of light. The difference between a darker and lighter color with the same hue.
### C {#letter-c}
**[Canvas](/docs/interface-and-settings/the-mac-app-interface/the-canvas/) **
The main drawing area in the Mac app. It is infinite in size and can be scrolled in any direction.
**[character spacing](/docs/designing/text/#formatting-text-in-the-inspector)**
An option that allows you to define the value between the characters of a text layer.
**child**
A term used to refer to a layer that is contained within a group or frame.
**[click-through](/docs/designing/layer-basics/grouping-layers/#selecting-a-layer-in-a-group)**
An option that can be applied to group layers to select the content within, rather than the group itself. Can also be enabled by holding the Command key.
**[closed path](/docs/designing/vector-editing/#opening-and-closing-paths)**
A vector shape whose first and last vector points are the same as the path loops round.
**Color (blend mode)**
This effect will preserve the brightness of any layers beneath the one with the Color blend mode applied, but will use its hue and saturation.
**[Color (menu)](/docs/symbols-and-styles/styling/the-color-panel/)**
Displays a panel provided by macOS that contains the System’s color picker.
**Color Adjust**
A style attribute that allows you to determine the values of the hue, saturation, brightness, and contrast of a bitmap layer.
**Color Burn (blend mode)**
Will burn the color of the layer with the blend mode applied over the layers beneath it. No part of the layer will become lighter.
**Color Dodge (blend mode)**
The inverse of *Color Burn*. Will dodge the color of the layer with the blend mode applied over the layers beneath it. No part of the layer will become darker.
**color model**
A color model is a system for creating a full range of colors from a small set of primary colors. Examples of color models are HSB, and RGB.
**Color Profile**
A set of data that allows a device or piece of software to correctly interpret color values, such as RGB, and display them as intended.
**[Color Variables](/docs/symbols-and-styles/color-variables/) **
Solid colors that synchronize across your document. Any change to a Color Variable, will appear across all of the layers that use it. Color Variables replace global colors.
**[Combine](/docs/designing/shapes/boolean-operations/#combining-shapes) **
A toolbar item that allows you to perform a boolean operation on selected shapes from a pop-up menu.
**[Command Bar](/docs/interface-and-settings/the-mac-app-interface/the-command-bar/)**
a view that gives you access to almost any action from the menu bar. It also has specialized views designed for inserting or replacing components.
**Components**
The collective name for Symbols, Text Styles, Layer Styles, Color Variables, Frame templates, and Graphic templates.
**[Components View](/docs/interface-and-settings/the-mac-app-interface/the-components-view/#working-in-the-components-view) **
A view where you can create, manage, search, and find local Symbols, Text Styles, Layer Styles, Color Variables, Frame templates, and Graphic templates in your document.
**contrast**
The difference measured between the light and dark colors used. Increasing the contrast value will make light colors lighter, and dark colors darker.
**[Create Symbol](/docs/symbols-and-styles/symbols/#creating-a-symbol) **
A command that allows you to turn any layer into a Symbol Source allowing it to be reused and updated.
### D {#letter-d}
**Darken (blend mode)**
Will blend the darkest colors between the layer that has the Darken blend mode applied, and the layers beneath it.
**[Data](/docs/designing/data/) **
A tool that allows you to apply pre-defined images and text content to shape and text layers.
**dataset**
A source of *Data* which can be applied to either shape or text layers.
**[difference](/docs/designing/shapes/boolean-operations/) **
A type of boolean operation. The result is a vector that is exactly the part where they didn’t overlap. It’s the inverse of an intersect operation.
**Difference (blend mode)**
An effect used to create negative, or inverse colors. Dark parts of a layer will have no effect if those beneath it are also dark, while a white, or light layer inverts the other layer’s color.
**[Disconnected](/docs/designing/vector-editing/#changing-point-types) **
A type of vector point. Handle control points will be completely independent of each other. Used to create Bézier curves.
**Display P3**
A color profile designed for wide gamut displays that can render more vibrant colors than sRGB.
**Distribute tool**
A tool found at the top of the Inspector (first two icons). Allows you to place three or more layers an equal distance from each other horizontally or vertically.
**[document gradient](/docs/symbols-and-styles/styling/gradients/#creating-linear-gradients)**
A defined preset of a type of gradient that can be used only in the current Sketch document.
**[Draft](/docs/getting-started/saving-and-managing-documents/#managing-documents-in-my-drafts)**
A document stored in your Workspace’s My Drafts folder that only you can access by default.
### E {#letter-e}
**Edit tool**
A tool that is used to edit the selected layer. Individual options are available for vector shape, text, and bitmap layers.
**[Ends](/docs/symbols-and-styles/styling/borders/#customizing-borders)**
A type of cap that you can apply to a border on an open path.
**EPS**
A vector file format commonly used in print design.
**[Even-Odd](/docs/symbols-and-styles/styling/fills/#changing-fill-settings-for-overlapping-paths)**
A winding rule that determines how shapes with overlapping paths should fill. Even-Odd preserves the 'holes' created.
**Exclusion (blend mode)**
Behaves much the same way as *Difference*, but there’ll be less contrast between the two layers.
**[export presets](/docs/interface-and-settings/mac-app-settings/presets/)**
An option that allows you to apply pre-defined export sizes to exportable layers.
**[Export tool](/docs/designing/importing-and-exporting/#exporting-artboards-and-assets)**
A tool used to share assets defined as exportable from the Mac app.
**exportable layer**
A layer that can be exported from the Mac app that appears in the Export dialog.
**[external Symbol](/docs/libraries/library-symbols/)**
See *Library Symbol*.
**[Eyedropper tool](/docs/symbols-and-styles/styling/the-color-panel/) **
A tool found in the color panel used to sample a color from the display.
### F {#letter-f}
**[Fill](/docs/designing/stack-layout/#sizing-options-for-stacks) **
a sizing option for Stacks. Stack items set to Fill will take as much space as possible.
**[fill](/docs/symbols-and-styles/styling/fills/#adding-an-image-fill)**
An integral part of a shape’s style
**filter**
An option available at the bottom of the Layer List to search for a layer by its name.
**[Fit](/docs/designing/stack-layout/#sizing-options-for-stacks) **
a sizing option for stacks and stack items. Layers set to fit will be as wide or tall as its contents.
**[Fixed](/docs/designing/frames/#sizing--resizing) **
a sizing option for layers. Fixed layers have a specific size and do not change when the parent is resized. The Fixed option applies to layers inside frames or stacks
**[fixed element](/docs/prototyping/creating-scrolling-artboards/)**
A layer or component that maintains a fixed position when scrolling.
**[Flatten tool](/docs/designing/shapes/editing-shapes/#flipping-shapes) **
A tool that is used to flatten all overlapping subpaths of a vector shape. Can also be used to confirm any transformations.
**[flip](/docs/designing/shapes/editing-shapes/#flipping-shapes) **
A command that will let you flip, or mirror a selected layer horizontally or vertically.
**[Follow Mode](/docs/sharing-and-collaborating/real-time-collaboration/#follow-mode)**
A way to follow another collaborator around the Canvas and observe what they’re working on.
**font**
A specific file from a typeface that is a certain weight.
**Fonts (menu)**
Displays a panel provided by macOS that contains the System’s font picker.
**footer**
A consistent part of a design that sits at the bottom of a screen or webpage.
**Foresight**
A feature to preview the outcome of some actions like resizing or aligning layers.
**forward**
A command that will move the selected layer towards the top of the Layer List.
**fractional pixel**
A sub-pixel value where a layer or vector point can be placed within two decimal places.
**[Frame](/docs/designing/frames/) **
a type of layer that works as a container and supports styling and layout properties. Frames can be grouped, nested or resized.
**Frame template**
A frame that acts like a reusable component. You can turn any Frame into a template and insert a copy of it (and its content) across documents, or even share them as part of Libraries.
**[Frame Tool](/docs/designing/frames/#inserting-frames)**
A tool that allows you to insert frames into the Canvas, either via drawing or selecting a preset from the Inspector. You can select the Frame tool by pressing the F key.
**frequent color**
A color that is recognized by the Mac app as one that is frequently used. Stored within a pop-up menu accessed via the color panel.
### G {#letter-g}
**[Gaussian blur](/docs/symbols-and-styles/styling/blurs/)**
A blur effect common in graphics software. Used to accurately blur a layer in all directions.
**[global gradient](/docs/symbols-and-styles/styling/gradients/)**
A defined preset of a type of gradient that can be used throughout any Sketch document.
**[Graphic](/docs/designing/graphics/) **
a type of frame designed for icons and illustrations.
**Graphic template**
a Graphic that acts like a reusable component in the same way as Frame templates do.
**[Graphic tool](/docs/designing/graphics/#inserting-graphics)**
a tool for inserting Graphics frames into the Canvas. Press G to select the Graphic tool.
**[Grid](/docs/interface-and-settings/the-mac-app-interface/the-canvas/#creating-grids) **
A Canvas overlay used to help align and lay out content.
**[group](/docs/designing/layer-basics/grouping-layers/) **
A type of layer that is used to contain other layers for organizational purposes.
**[Guide](/docs/interface-and-settings/the-mac-app-interface/the-canvas/#creating-guides)**
An overlaid marker that is drawn from the Ruler. Layers dragged towards a Guide will automatically snap to it.
### H {#letter-h}
**handle**
The line that extends from a vector point to create a Bézier curve.
**handle control point**
A point that appears at the end of a handle when editing vector shapes.
**Hard Light (blend mode)**
Similar to *Overlay*. Combines both the Multiply and Screen blend modes, but the final color is the result of Multiply if the layers beneath it are lighter, or Screen if the layers beneath it are darker.
**header**
A consistent part of a design that sits at the top of a screen or webpage.
**[hidden layer](/docs/interface-and-settings/the-mac-app-interface/the-layer-list/#hiding-and-locking-layers)**
A type of layer status. If a layer is hidden, then it is no longer visible in the Canvas.
**[Hotspot](/docs/prototyping/adding-hotspots/) **
A type of layer used when creating a *prototype*. Hotspots can be clicked in the *Preview* window to navigate to the target frame.
**HSB**
Acronym for Hue, Saturation, and Brightness. A type of color model that is broken into those three components.
**HSL**
Acronym for Hue, Saturation, and Lightness. A type of color model that is broken into those three components.
**hue**
An attribute of color perception. Red, green, and blue are all hues.
**Hue (blend mode)**
This effect will preserve the saturation and brightness of any layers beneath the one with the Hue blend mode applied, but will use its hue.
### I {#letter-i}
**[Image Fill](/docs/symbols-and-styles/styling/fills/#adding-an-image-fill) **
A type of fill applied to a shape that is an image or pattern.
**[Image tool](/docs/designing/images/#inserting-images) **
A tool that allows you to insert an image on the Canvas from a location on your computer.
**[imported Symbol](/docs/libraries/library-symbols/)**
See *Library Symbol*.
**Insert**
A toolbar item that allows you to select a tool to insert a layer onto the Canvas.
**[Inspector](/docs/interface-and-settings/the-mac-app-interface/the-inspector/)**
Displays the current settings and properties for the selected layer and is located on the right side of the Mac app window. Options can change depending on the tool or layer selected.
**[instance](/docs/symbols-and-styles/symbols/#symbol-sources-and-instances)**
A flattened representation of a layer. These will update whenever a change has been made to a Symbol Source. Can independently contain overrides.
**interlace PNG**
An option that can be applied when exporting PNG images to determine how the image downloads in a web browser.
**[intersect](/docs/designing/shapes/boolean-operations/) **
A type of boolean operation. The result is a vector consisting of the parts where the original shapes overlapped.
### J {#letter-j}
**[Join tool](/docs/designing/vector-editing/#joining-paths)**
A tool that will allow you to connect open paths together.
**[Joins](/docs/symbols-and-styles/styling/borders/#customizing-borders)**
Options that allow you to determine how borders should appear on a path’s corner.
**JPG**
A common file format associated with large bitmap images and photos. The amount of compression used can be varied. Less compression results in a higher-quality image.
**[justify](/docs/designing/text/#formatting-text-in-the-inspector) **
A type of text alignment. Will attempt to render multiple lines of text (excluding the last) with automatic character spacing so all the lines are roughly the exact length.
### K {#letter-k}
**[kern](/docs/designing/text/#formatting-text-using-the-text-menu)**
An option that allows you to define the value between individual characters in a text layer.
### L {#letter-l}
**[layer](/docs/interface-and-settings/mac-app-settings/layers/)**
A building block for creating designs in the Mac app. There are different layer types but they will all appear in the Layer List.
**[Layer List](/docs/interface-and-settings/the-mac-app-interface/the-layer-list/)**
Contains a list of all layers that have been added to the Canvas. Located on the left side of the Mac app window.
**[Layer Style](/docs/symbols-and-styles/text-and-layer-styles/layer-styles/)**
A saved set of a layer’s style properties that can be re-used and updated across your document.
**[layout grid](/docs/interface-and-settings/the-mac-app-interface/the-canvas/#creating-grids) **
A type of grid that is made up of a series of vertical or horizontal bars. Commonly used for web design.
**[Library](/docs/libraries/) **
A special type of Sketch document which makes its Components available to use in any other document. You can share a Library with others and any updates you make to Components in the original Library document will sync across any other documents that use them.
**[Library Preset](/docs/symbols-and-styles/styling/presets/#creating-library-presets)**
A saved color, gradient, or image in a document that can be used externally as part of a Library.
**[Library Style](/docs/libraries/library-styles/)**
A Text or Layer Style that lives externally and can be edited in a document that is linked as a Library.
**[Library Symbol](/docs/libraries/library-symbols/)**
A Symbol that lives externally and can be edited in a document that is linked as a Library.
**[ligature](/docs/designing/text/#formatting-text-using-the-text-menu) **
A text effect that combines two or more letters (such as 'a' and 'e') into a single character (æ). Certain letter combinations are defined by the typeface.
**Lighten (blend mode)**
The inverse of *Darken*. Will blend the lightest colors between the layer that has the Lighten blend mode applied, and the layers beneath it.
**line break**
Refers to formatting text. A line break can be created by pressing the Enter key when typing to set text onto a new line.
**line spacing**
Also referred to as **line height**. An option that allows you to define the value between the lines of a text layer.
**[Line tool](/docs/designing/shapes/adding-shapes/) **
A tool that allows you to draw lines on the Canvas. You can select the Line tool by pressing the L key.
**[Linear Gradient](/docs/symbols-and-styles/styling/gradients/#creating-linear-gradients) **
A type of fill that is made from two or more colors that will blend, or transition into each other.
**[Link](/docs/prototyping/adding-links/) **
Used when creating a prototype to link a layer or *Hotspot* to a target frame.
**[list](/docs/designing/text/#formatting-text-in-the-inspector)**
An option that can be applied to a text layer that will automatically apply a bullet (•) or number to every new line.
**local style**
A style that lives and can be edited in a single document only.
**[local Symbol](/docs/symbols-and-styles/symbols/)**
A Symbol that lives and can be edited in a single document only.
**[locked layer](/docs/interface-and-settings/the-mac-app-interface/the-layer-list/#hiding-and-locking-layers) **
A type of layer status. If a layer is locked, then it remains visible in the Canvas, but it cannot be clicked on, or selected.
**[lowercase](/docs/designing/text/#formatting-text-in-the-inspector) **
A type of text transform. Will convert a range of text into small letters.
**Luminosity (blend mode)**
This effect will preserve the hue and saturation of any layers beneath the one with the Luminosity blend mode applied, but will use its brightness.
### M {#letter-m}
**[Make Exportable](/docs/designing/importing-and-exporting/#exporting-artboards-and-assets)**
An option in the Inspector to mark a layer with export settings.
**[Make Grid tool](/docs/designing/layer-basics/aligning-layers/#make-grid) **
A tool used to evenly distribute one or more selected layers into a grid.
**[mask](/docs/designing/shapes/masking-shapes/)**
A layer that will clip above contents to fit the shape.
**[Mask tool](/docs/designing/shapes/masking-shapes/) **
A tool that is used to apply a mask to a layer that will clip the contents above it to the shape’s outline.
**[Mirrored](/docs/designing/vector-editing/#changing-point-types) **
A type of vector point. Handle control points will mirror each other to create a Bézier curve.
**Missing Fonts**
A warning that appears when you open a document that contains fonts that cannot be found on your system.
**[motion blur](/docs/symbols-and-styles/styling/blurs/)**
A blur effect that will blur a layer in a defined direction to give the illusion of motion.
**Move Up**
An action found under the Arrange menu that allows you to move the selection out of a group or frame.
**Multiply (blend mode)**
Will leave only the black, and darker colors of the layer if the Multiply blend mode has been applied. Anything that’s white (or light) will become less opaque.
**[My Drafts](/docs/getting-started/saving-and-managing-documents/#managing-documents-in-my-drafts)**
A folder in your Workspace where you can store documents and Libraries that aren’t ready to share with the rest of your Workspace yet.
### N {#letter-n}
**[nested Symbol](/docs/symbols-and-styles/symbols/#creating-nested-symbols)**
A name given to a Symbol that is contained within another Symbol.
**[Noise Fill](/docs/symbols-and-styles/styling/fills/#adding-an-image-fill)**
A type of fill that is an image with a grain pattern. Used to apply a fake texture to other fills.
**[Non-Zero](/docs/symbols-and-styles/styling/fills/#changing-fill-settings-for-overlapping-paths)**
A winding rule that determines how shapes with overlapping paths should fill. Non-Zero will fill the entire shape.
**Normal (blend mode)**
The standard blend mode that displays the layer alone, without mixing its colors with any layers beneath it.
### O {#letter-o}
**opacity**
The level of a layer’s transparency.
**[open path](/docs/designing/vector-editing/#opening-and-closing-paths)**
A vector path whose points are not fully connected. This will create an open shape.
**orientation**
An option that allows you to define whether a frame is portrait or landscape.
**[outline mask](/docs/designing/shapes/masking-shapes/#creating-a-simple-mask)**
A type of mask that clips above layers to its shape only.
**[outlines](/docs/designing/vector-editing/)**
A text layer, or border style property that is its own vector shape.
**[Oval tool](/docs/designing/shapes/adding-shapes/) **
A tool that allows you to draw an oval shape on the Canvas. You can select the Oval tool by pressing the O key.
**Overlay (blend mode)**
Will combine both the *Multiply* and *Screen* blend modes. The final color is the result of Multiply if the layers beneath it are darker, or Screen if the layers beneath it are lighter.
**[override](/docs/symbols-and-styles/overrides/#customizing-instances-with-overrides-in-symbols)**
An option that allows you to replace existing colors, text, images, Styles, Symbols, and Hotspots in an individual Symbol instance.
### P {#letter-p}
**[Padding](/docs/designing/stack-layout/#stack-layout-settings)**
a Stack layout setting. Padding defines the distance between layers inside the stack and its edges.
**Page**
A feature in the Mac app which will create a new Canvas to be used in the document.
**[paragraph spacing](/docs/designing/text/#formatting-text-in-the-inspector)**
An option that allows you to define the value between the paragraphs of a text layer.
**parent**
A term used to relate to a group or frame that contains child layers.
**[path](/docs/designing/vector-editing/#editing-an-existing-shape)**
The outline of a vector shape between two vector points.
**PDF**
A common vector file format that can be widely read.
**[Pencil tool](/docs/designing/shapes/adding-shapes/#drawing-freeform-shapes-with-the-pencil-tool) **
A tool used to create freehand paths. You can select the Pencil tool by pressing the P key.
**[Pin](/docs/designing/frames/#pinning-layers)**
a rule that fixes the distance between a layer and a particular set of edges or corners of its parent based on their position.
**pixel**
One dot in an image. The more pixels in an image, the higher the resolution. Also the unit in which everything in the Mac app is measured in. Values are represented as "px".
**[plugin](/docs/interface-and-settings/plugins/)**
An external file that can be imported into the Mac app to expand its functionality. Can be accessed via the Plugins menu.
**Plus Darker (blend mode)**
Will blend all colors between the layer that has the Plus Darker blend mode applied, and the layers beneath it.
**Plus Lighter (blend mode)**
The inverse of *Plus Darker*. Will blend all colors between the layer that has the Plus Lighter blend mode applied, and the layers beneath it.
**PNG**
A common file format that supports high-quality bitmap images, and transparency.
**[Polygon tool](/docs/designing/shapes/adding-shapes/) **
A tool that allows you to draw a polygon shape on the Canvas. Number of sides can be adjusted.
**[Preview](/docs/interface-and-settings/the-mac-app-interface/the-toolbar/) **
A toolbar item that allows you to control the connectivity to browsers and iOS devices via a popover.
**[Preview (window)](/docs/prototyping/previewing-prototypes/)**
Allows you to play back prototypes that have been created within the Mac app.
**progressive JPG**
An option that can be applied when exporting JPG images to determine how the image downloads in a web browser.
**[project](/docs/getting-started/projects-and-collections/)**
A way to group and organize related documents in your Workspace.
**[prototype](/docs/prototyping/)**
A series of linked frames that can be interacted with to get a feel for a working design.
**[Prototyping](/docs/prototyping/)**
A feature that contains tools used to create interactive prototypes.
**px**
See *pixel*.
### R {#letter-r}
**[Radial Gradient](/docs/symbols-and-styles/styling/gradients/#creating-radial-gradients) **
A type of fill made up of two or more colors in a circular pattern.
**[Radius](/docs/designing/shapes/editing-shapes/#editing-corners)**
An option on Rectangle layers that allows you to round the corners of the shape.
**range**
Refers to the entire selection within a text layer. Also see *subrange*.
**[Rectangle tool](/docs/designing/shapes/adding-shapes/) **
A tool that allows you to draw a rectangle shape on the Canvas. You can select the Rectangle tool by pressing the R key.
**[Reduce Image Size](/docs/designing/images/#reducing-image-size)**
An option that allows you to shrink the file size of images used in your document.
**[Relative](/docs/designing/frames/#sizing--resizing) **
A sizing option for layers inside frames. Relative layers resized based on their parent.
**render**
Refers to the way items on the Canvas are displayed.
**resolution**
Image resolution refers to the number of pixels in an image. Resolution is expressed in terms of the width and height of the image in pixels (for example, 375 × 667 pixels). Higher-resolution images contain more detail but also create larger files that take longer to download. Digital devices also have screen resolution.
**[Reverse Order](/docs/designing/vector-editing/#reversing-the-order-of-a-path)**
An option found when editing a vector shape to reverse the order the points are set up. If used on an open path, you will then be able to place your next point from the other unconnected point.
**revert style**
An option that will allow you to clear un-synced changes made to a layer with a Layer Style or Text Style.
**RGB**
Acronym for Red, Green, and Blue. A type of color model. This is how your computer interprets color values.
**[Rotate Copies tool](/docs/designing/shapes/editing-shapes/#using-the-rotate-copies-tool) **
A tool used to duplicate a shape and to place its copies around a certain point.
**[Rotate tool](/docs/designing/shapes/editing-shapes/#rotating-shapes) **
A tool used for pivoting a selected layer around a certain point in the Canvas.
**[Rounded tool](/docs/designing/shapes/adding-shapes/) **
A tool that allows you to draw a rounded rectangle shape on the Canvas. You can select the Rounded tool by pressing the U key.
**[Ruler](/docs/interface-and-settings/the-mac-app-interface/the-canvas/#using-rulers) **
A tool used to visualize coordinates on the Canvas.
### S {#letter-s}
**saturation**
A measurement of the intensity of color. A color with less saturation will be less vibrant.
**Saturation (blend mode)**
This effect will preserve the hue and brightness of any layers beneath the one with the Saturation blend mode applied, but will use its level of saturation.
**[Scale tool](/docs/designing/layer-basics/scaling-layers/) **
A tool that is used to scale a layer to a certain pixel value or percentage. This will also relatively scale any effects to the layer such as corner radius, border thickness, and shadow size.
**[Scissors tool](/docs/designing/shapes/editing-shapes/#using-the-scissors-tool) **
A tool that is enabled when editing vector shapes. Can be used to cut away the path between two vector points
**Screen (blend mode)**
The inverse of *Multiply*. Will leave only the white, and lighter colors of the layer if Screen has been applied. Anything that’s black (or dark) will become less opaque.
**[shadow](/docs/symbols-and-styles/styling/shadows/)**
An effect that creates an artificial shadow behind a layer.
**[shortcut menu](/docs/shortcuts/#creating-custom-shortcuts)**
A menu you access by holding down the Control key and clicking and item on the screen, or by pressing the right mouse button. Sometimes called a *contextual menu*.
**[Show Pixels](/docs/interface-and-settings/the-mac-app-interface/the-canvas/#showing-the-pixel-grid) **
A view that will magnify the pixels used to create a layer as a bitmap representation when you zoom in.
**size (export)**
Something that can be applied to an exportable layer. This will determine the scale (as a multiplier or a pixel value) on export.
**[Sizing options](/docs/designing/frames/#sizing--resizing)**
rules that define how layers resize when content changes or the parent is resized.
**[slice](/docs/designing/importing-and-exporting/#using-export-presets) **
A type of layer that draws a dashed overlay on the Canvas. Content within the rectangle is marked for export.
**[Slice tool](/docs/designing/importing-and-exporting/#using-export-presets) **
A tool that allows you to draw slice layers on the Canvas. Used to define an area to be exported. You can select the Slice tool by pressing the S key.
**[Smart Guide](/docs/interface-and-settings/the-mac-app-interface/the-canvas/#snapping-and-smart-guides)**
An overlaid marker that appears from a selected layer when the Option key is held, or a layer is moved towards the edges or center of an existing layer.
**[Smooth Corners](/docs/designing/shapes/editing-shapes/#choosing-corner-styles)**
A feature that adjusts the curve of a rectangle’s corner radius to achieve iOS-like corners.
**[snap](/docs/interface-and-settings/the-mac-app-interface/the-canvas/#snapping-and-smart-guides)**
An action that automatically occurs when a layer is dragged towards a Guide or a Grid. This helps line up objects and can be turned on or off.
**Soft Light (blend mode)**
Behaves the same way as *Hard Light*, however the effect is softer. Applying pure black or white does not result in pure black or white.
**[Solid Fill](/docs/symbols-and-styles/styling/fills/) **
A type of fill that is made up of a single color.
**[spread](/docs/symbols-and-styles/styling/shadows/)**
An effect that can be applied to increase the size of the object casting a shadow.
**[square grid](/docs/interface-and-settings/the-mac-app-interface/the-canvas/#creating-grids)**
A type of grid that is made up of repeating blocks.
**sRGB**
A color profile that is a universal standard for displaying colors on the web. All phones and Macs are capable of displaying these colors.
**[Stack](/docs/designing/stack-layout)**
a frame with layout properties. Stacks can shrink or grow to fit contents and are used to build everything from buttons to full interfaces
**[Stack item](/docs/designing/stack-layout/#working-with-stack-items)**
any layers inside a stack, including other stacks.
**[Star tool](/docs/designing/shapes/adding-shapes/) **
A tool that allows you to draw a star shape on the Canvas. Number of points and radius can be adjusted.
**[Starred update](/docs/sharing-and-collaborating/sharing-and-viewing-documents/creating-starred-versions/#how-to-star-a-version)**
A document or Library update that is more relevant than others.
**[Start Point](/docs/prototyping/using-starting-points/#setting-multiple-start-points) **
Can be applied to a frame that is used for prototyping. Prototypes viewed on mobile or the web can be started from here.
**[Straight](/docs/designing/vector-editing/#changing-point-types) **
A type of vector point. Does not contain handles and will give shapes a straight angle.
**Styled Text tool**
A tool used for inserting defined Text Styles directly onto the Canvas.
**[subpath](/docs/designing/shapes/boolean-operations/)**
The name given to a layer that has a boolean operation applied to it that is used to make a more complex shape.
**subrange**
Refers to a selection within a text layer. Can be a single character, or all the words in a sentence.
**[subtract](/docs/designing/shapes/boolean-operations/) **
A type of boolean operation. The result is a vector where the area of the top shape is removed from the one under it.
**[suffix](/docs/designing/importing-and-exporting/#using-export-presets)**
Something that can be applied to an exportable layer. This will append whatever has been entered onto the end of a file name to make it unique.
**SVG**
A vector file format that is commonly found on the web. Images are made up from XML markup.
**[Symbol](/docs/symbols-and-styles/symbols/) **
A component that contains content that can be re-used and updated. A Symbol will have both a Source and instances.
**[Symbol instance](/docs/symbols-and-styles/symbols/#symbol-sources-and-instances)**
A flattened representation of a layer. These will update whenever a change has been made to a Symbol Source. Can independently contain overrides.
**[Symbol Source](/docs/symbols-and-styles/symbols/#symbol-sources-and-instances)**
A frame that contains layers used to make up a Symbol. Contents can be edited and changes will be reflected throughout Symbol instances.
**[Symbol tool](/docs/symbols-and-styles/symbols/)**
A tool used for inserting defined Symbols directly onto the Canvas.
**sync style**
An option that will allow you to propagate changes made to a Layer Style or Text Style that will apply to other layers with the same style.
### T {#letter-t}
**[target](/docs/prototyping/adding-links/#editing-links)**
The destination frame you will go to in a prototype.
**[template](/docs/symbols-and-styles/templates/) **
A predefined Sketch file that can be opened as a new, unsaved document.
**[text alignment](/docs/designing/text/#formatting-text-in-the-inspector)**
Allows you to define what edge text should be aligned and typed from. Examples being left, center, right, and *justify*.
**[text decoration](/docs/designing/text/#formatting-text-in-the-inspector)**
An effect that can be applied to a subrange of text. Effects include underline, and strikethrough.
**[Text Style](/docs/symbols-and-styles/text-and-layer-styles/text-styles/)**
A saved set of a text layer’s style and attributes that can be re-used and updated across your document.
**[Text tool](/docs/designing/text/#adding-text) **
A tool that allows you insert a text layer on the Canvas. You can select the Text tool by pressing the T key.
**[text transform](/docs/designing/text/#formatting-text-in-the-inspector)**
An effect that can be applied to a range of text that dictates how it should appear. Can be *uppercase*, *lowercase*, or none.
**[Thread](/docs/sharing-and-collaborating/commenting/#comment-threads)**
A feature that allows you to reply to any comment on a Workspace document. It helps you have conversations for any document or frame and keep track of them.
**TIFF**
A bitmap file format common with some operating systems that supports transparency. Files are uncompressed and can contain multiple resolutions.
**[Toolbar](/docs/interface-and-settings/the-mac-app-interface/the-toolbar/)**
The Toolbar is a collection of tools and menus located along the top of the Mac app window.
**[Tools](/docs/interface-and-settings/the-mac-app-interface/the-toolbar/)**
A toolbar item that allows you to choose a range of editing tools from a pop-up menu.
**[Transform tool](/docs/designing/shapes/editing-shapes/#using-the-transform-tool) **
A tool used for contorting the appearance of a vector shape.
**[Trash](/docs/getting-started/saving-and-managing-documents/#deleting-documents) **
A space in your Workspace for documents you have deleted. We’ll automatically delete any documents that have been in the Trash for 90 days, but up until that point you can restore them.
**[Triangle tool](/docs/designing/shapes/adding-shapes/) **
A tool that allows you to draw a triangle shape on the Canvas. Can choose between equilateral and isosceles.
**typeface**
A name given to a font family.
### U {#letter-u}
**undo**
A command that will let you revert your most-recent action.
**[union](/docs/designing/shapes/boolean-operations/) **
A type of boolean operation. The result is a vector that is the sum of both vectors' areas.
**[unlink](/docs/libraries/library-styles/#how-to-edit-library-styles)**
Used to convert a *Library Symbol* to a *local Symbol* by detaching it from a Library document.
**Unmanaged**
The default Color Profile setting in the Mac app. If selected, the Mac app will use the system color profile.
**[uppercase](/docs/designing/text/#formatting-text-in-the-inspector) **
A type of text transform. Will convert a range of text into capital letters.
### V {#letter-v}
**value slider**
A value slider is a type of numerical slider control that appears as a number, often to the right of a basic slider. There are two ways to adjust a value slider: by dragging over the number to decrease or increase the parameter value, or by double-clicking the number and entering a new value.
**[vector](/docs/designing/vector-editing/)**
A type of image or layer that is made up of points connected by paths. Can scale to any size without losing quality.
**[vector point](/docs/designing/vector-editing/)**
A point that can connect up to two paths on a vector shape.
**[Vector tool](/docs/designing/vector-editing/) **
A tool used for creating custom shape layers. Allows you to place vector points and adjust paths.
**[vertical alignment](/docs/designing/text/#formatting-text-in-the-inspector)**
Allows you to define whether text sits at the top, middle, or bottom of a text field.
**View**
A toolbar item that allows you to toggle the visibility of Canvas overlays, such as Rulers, pixels, and grids.
### W {#letter-w}
**[weight](/docs/designing/text/#formatting-text-in-the-inspector)**
Refers to a certain font from a typeface. Can be regular, bold, italic, etc…
**[Workspace](/docs/interface-and-settings/workspace-and-account-settings/)**
A space to store your Sketch documents and share them to view, comment inspect or download with others.
**[Workspace window](/docs/getting-started/creating-opening-and-viewing-documents/#opening-workspace-documents-in-the-mac-app)**
The window that appears when you open your Mac app. You can browse projects, Workspace documents and local documents, and open them in the Mac app. You can also see who’s editing the document, what project it belongs to and its sharing settings.
### X {#letter-x}
**X**
Refers to an object’s x-axis. Measured horizontally.
### Y {#letter-y}
**Y**
Refers to an object’s y-axis. Measured vertically.
### Z {#letter-z}
**[zoom blur](/docs/symbols-and-styles/styling/blurs/)**
A blur effect that will blur a layer from a defined point out.
**[Zoom tool](/docs/interface-and-settings/the-mac-app-interface/the-canvas/#zooming-and-navigating-the-canvas)**
A tool that allows you to zoom in or out of the Canvas. You can select the Zoom tool by pressing the Z key.
# Support
--------------------------------------------------------------------------------
title: "General questions"
description: "Find out how to get started with Sketch, and system requirements, create a trial or switch to a subscription from a Mac-only license."
last_modified: "2026-05-06"
url: "https://www.sketch.com/support/general/"
--------------------------------------------------------------------------------
## General questions
Find out how to get started with Sketch, and system requirements, create a trial or switch to a subscription from a Mac-only license.
--------------------------------------------------------------------------------
title: "How do I know if I have a Mac-only license or a subscription?"
last_modified: "2024-11-28"
url: "https://www.sketch.com/support/general/license-or-subscription/"
--------------------------------------------------------------------------------
## How do I know if I have a Mac-only license or a subscription?
## Mac-only license
To find out if you are using a Mac-only license, from the Mac app, you can head to **Sketch > Settings > Account**. If you are currently using a Mac-only license, you’ll see a screen similar to this one in the Account window:
It is important to note that to register your device with a Mac-only license, you would have to enter your license key, starting with SK3. You can also access the [License Manager](/license/admin/) using your Admin email address to view your license details.
## Subscription
To find out if you are using a subscription, from the Mac app, you can head to **Sketch > Settings > Account**. If you are already using Sketch with a subscription, you’ll see a screen similar to this one in the Account window:
Our subscription-based model uses an email and password combination to complete the sign-in to the Mac app and the [web app](/signin/).
--------------------------------------------------------------------------------
title: "Is Sketch only available as a subscription?"
last_modified: "2026-01-23"
url: "https://www.sketch.com/support/general/subscription-only/"
--------------------------------------------------------------------------------
## Is Sketch only available as a subscription?
No. You can still get a Mac-only license if you don’t need the web app and only want to use the Mac app to design. However, you’d need to save all your work locally and would miss out on loads of handy collaborative features.
[Get a license](/store/)
A subscription on a yearly plan gets you a whole lot more: [real-time collaboration](/collaborate/) in the Mac app, [commenting](/docs/sharing-and-collaborating/commenting/), [handoff](/handoff/), and a shared [Workspace](/docs/sharing-and-collaborating/using-your-workspace/) to bring all your people and documents together. That’s because we’ve evolved Sketch to be more than the Mac app. It’s now a complete platform for design and collaboration, combining the best native Mac editor with tools that work in any web browser.
--------------------------------------------------------------------------------
title: "I have a Personal Workspace — what is this?"
last_modified: "2023-08-28"
url: "https://www.sketch.com/support/general/personal-workspace/"
--------------------------------------------------------------------------------
## I have a Personal Workspace — what is this?
Customers who bought a Mac-only license before 5 May 2021 have a Personal Workspace. This feature, formally called Sketch Cloud, came with your Mac-only license account. It is a space where you could store and share documents.
It is possible to upgrade a Personal Workspace to a fully-featured Sketch subscription. To proceed with an upgrade, please follow the below steps:
1. Go to **[Sketch](/signin/)**, log in with your email and password combination and switch to ‘My Workspace’ in the top-left corner.
1. On the top of the left sidebar, click on **Upgrade** to open the Upgrade Personal Workspace page.
1. Select a billing plan and insert your billing details.
**Note:** You will get a free 30-day trial period once the upgrade is done, and your billing cycle will start when the trial ends.
--------------------------------------------------------------------------------
title: "What's the difference between the Mac App Store and the version from the Sketch website?"
description: "When choosing which version of Sketch is best for you, it's important to know the differences between the [Mac App Store](https://skt.ch/MacAppStore) version and the version you can download from [sketch.com](/releases/mac/)."
last_modified: "2026-02-16"
url: "https://www.sketch.com/support/general/mac-app-store/"
--------------------------------------------------------------------------------
## What's the difference between the Mac App Store and the version from the Sketch website?
When choosing which version of Sketch is best for you, it's important to know the differences between the [Mac App Store](https://skt.ch/MacAppStore) version and the version you can download from [sketch.com](/releases/mac/).
## Functionality
The Mac App Store version of Sketch has a few limitations due to Apple's guidelines:
1. **Plugins.** You won't be able to extend Sketch's functionality through third-party plugins or tools. The plugins menu won't be available in the Mac App Store version.
1. **Importing .fig files.** The Mac App Store version doesn't include the Figma file converter, so importing .fig files isn't possible.
1. **MCP Server.** The Mac App Store version doesn't support the [MCP Server](/docs/mcp-server/), so you won't be able to connect AI tools to Sketch.
1. **`sketchtool`**. Because there are restrictions in place that prevent adding extra binaries to apps on the Mac App Store, we can't provide `sketchtool` in the Mac App Store version. This is the tool we use from the command line to automate different tasks. Tools like Zeplin or Abstract need this tool to check Sketch documents and make previews.
1. **License keys.** You can sign in to the Mac App Store version using a subscription. If you have a Mac-only license, you'll need to download Sketch directly from [our website](/).
If you need any of the features above, download Sketch from [sketch.com](/releases/mac/) and sign in using the same credentials as your Mac App Store version.
## Billing
When you download Sketch through the Mac App Store and start a subscription within the app, Apple will handle all billing and payment details. Please see [Apple's support article](https://support.apple.com/billing) for more information on how to manage your billing and subscription details.
## Workspaces
If you start a subscription via the Mac App Store version of the app, there can only be one Editor per Workspace and you won't be able to add more Editor seats.
## Collaboration
Even with a single editor in a Workspace, you can still use real-time collaboration. **[Invite other people as 'Guests'](/docs/sharing-and-collaborating/document-permissions/#workspace-guests)** (referred to as 'Guest Editors') to join your Workspace's projects or documents using the email address associated with their active Sketch subscription.
Take these limitations into account before deciding whether to download Sketch directly from [sketch.com](/releases/mac/) or via the Mac App Store. If you have any questions, please **[contact us](/support/contact/)**.
--------------------------------------------------------------------------------
title: "Do you offer refunds?"
last_modified: "2024-11-28"
url: "https://www.sketch.com/support/general/refunds/"
--------------------------------------------------------------------------------
## Do you offer refunds?
Our refund policy varies based on the type of purchase:
- **Subscription**
- **Mac-only license**
For subscription purchases, we offer a [30-day free trial](/pricing/) that begins upon sign-up. If you cancel within the trial period, you won’t be charged.
## Refunds for subscriptions
Our subscriptions refunds policy depends on the billing option you selected during the sign-up process.
For **annual billing**, we offer a full refund within 30 days of your initial purchase. Subsequent purchases, such as additional seats and renewals, are not refundable. **We do not offer refunds for monthly billing**, but you can cancel anytime and not be billed again.
To request a refund for an initial charge with annual billing, please [get in touch with us](/support/contact/) using your **Workspace Owner email** and the following information:
- The invoice number of the purchase you wish to be refunded, located in the top-left corner of your invoice.
- The last four numbers on the credit card you used for purchasing your annual subscription.
If you fail to prove your identity as the Workspace Owner within 30 days of your purchase, the refund request may be rejected at Sketch’s sole discretion.
## Refunds for Mac-only licenses
We fully refund Mac-only licenses within 30 days of your initial purchase. Subsequent purchases, such as additional seats and renewals, are not refundable.
To request a refund for a license purchase, [contact us](/support/contact/) with:
- The invoice number of the purchase you wish to be refunded, located in the top-left corner of your invoice.
- The last four digits of the credit card used to purchase your Mac-only license.
If you fail to prove your identity as the original purchaser within 30 days of your purchase, the refund request may be rejected at Sketch’s sole discretion.
**Note**: Our refund policy is designed to help with accidental purchases, incompatibility, and unsuitability. It is not intended as a way to use our product for free — we reserve the right to reject a refund if our policy is abused.
--------------------------------------------------------------------------------
title: "Subscriptions"
last_modified: "2026-05-22"
url: "https://www.sketch.com/support/subscriptions/"
--------------------------------------------------------------------------------
## Subscriptions
--------------------------------------------------------------------------------
title: "Managing your subscription"
url: "https://www.sketch.com/support/subscriptions/manage/"
--------------------------------------------------------------------------------
## Managing your subscription
--------------------------------------------------------------------------------
title: "How do I manage my Workspace storage?"
description: "Every Editor who joins a Workspace also gets online storage space for their Sketch documents. Here’s everything you need to know about how much storage you get, how to manage your storage and what to do if your Workspace exceed the storage limit."
last_modified: "2025-12-03"
url: "https://www.sketch.com/support/subscriptions/manage/storage/"
--------------------------------------------------------------------------------
## How do I manage my Workspace storage?
Every Editor who joins a Workspace also gets online storage space for their Sketch documents. Here’s everything you need to know about how much storage you get, how to manage your storage and what to do if your Workspace exceed the storage limit.
## How much storage do I get?
From 29 February 2024 onwards, each of your Workspaces will have 50 GB of shared storage per Editor with a standard subscription.
For example, paying for two Editor Seats gives you a total of 100 GB Workspace storage — regardless of how it’s used individually between the two Editors.
## Where can I view my storage details?
Workspace **Admins** can view the current storage details by following these steps:
1. Go to [Sketch](/signin/), sign in as an Admin and click on the **Switch Workspace** icon in the top left corner of the sidebar — Make sure your Workspace name is showing.
1. Click on the **Settings** icon at the top of the left sidebar, then click on **Billing**.
1. You’ll find storage details under **Workspace Storage**.
## What happens if my Workspace goes over the storage limit?
If you’re an Admin, we’ll send an email to let you know if your Workspace is close to its storage limit and outline a few ways to free up some space. We’ll send you another email when the Workspace exceeds the storage limit.
**Even if you’re over the Workspace storage limit, Editors can still create and save documents as usual. We won’t delete any documents or limit Workspace access in any way.**
## How do I stay under the storage limit?
There are a few ways you can free up storage space in your Workspace:
### Delete documents in the Trash
The quickest way to free up some space is to take a look at what’s in the Trash, either in the web or Mac app. If you find documents and projects that you won’t need again, you can [permanently delete them now](/docs/getting-started/saving-and-managing-documents/#permanently-deleting-documents) instead of waiting 90 days for documents to be deleted automatically.
Keep in mind that only Admins can permanently delete documents from the Trash.
### Search for and delete old documents
Another way to find documents you may no longer need is by heading to **All Documents**, sorting by **Last Updated** and selecting the option to **Show Older** documents first. Trash any unneeded documents, after which you can permanently delete them instead of waiting the usual 90 days.
> **Note:** Did another Editor create or work on an old document? If yes, be sure to check with them first before you permanently delete it.
### Back up old documents
You can always [download](/docs/getting-started/saving-and-managing-documents/#downloading-documents) old documents and archive them locally on your Mac. If you ever want to bring them back into your Workspace again, simply drag and drop them into the Workspace window in the Mac app.
### Resize images and delete versions
Some documents can become very large if they contain high-resolution images, or if you create lots of [versions](/docs/getting-started/saving-and-managing-documents/#using-document-versions) of the same document.
To find a document’s size, open the web app, choose a document, click the on the thumbnail and select **Settings**. You’ll find the document’s size in the **Document Info** section.
> **Note:** While deleting document versions will help save space, versions may also include their own comments, notes or other important data that you may want to keep. Any shareable URLs that link deleted versions will no longer work either.
If you find you have an especially large document that you want to keep, try the following to reduce its size:
1. [Download](/docs/getting-started/saving-and-managing-documents/#downloading-documents) the latest version of the large document to your Mac to create a local copy
1. [Delete the document and its versions from your Workspace](/docs/getting-started/saving-and-managing-documents/#permanently-deleting-documents) and **empty the Trash** (you still have a local copy saved on your Mac to upload again later)
1. **Open the local copy** of the document in the Mac app and [reduce the size of large images](/docs/designing/images/#reducing-image-size) in your downloaded document
1. **Save** the downloaded document, then **upload** it to the Workspace again
Your document should now be much smaller because you reduced image sizes and removed all earlier versions.
> **Note:** Avoid deleting Libraries — even old ones — because they affect how other documents look.
## How is Workspace storage calculated?
We measure storage based on the total file size of all Sketch documents in a Workspace, along with their version history, embedded images and fonts. Workspace documents include those you keep in projects, My Drafts, and in the Trash.
## What types of data don’t count toward the storage limit?
We don’t count assets that Sketch needs render the document in the web app — such as canvas presentation files, PNG representations of components, or Member avatars. We also don’t factor in asset exports for handoff, because these are automatically deleted after Sketch creates them.
## I need more storage. What are my options?
If you work solo or are part of a small team, your best option is to delete documents that you don’t need anymore. And if you really want to hang on to lots of documents you can always save and back them up locally, if you prefer.
If you’re in a medium to large team, you may also wish to consider some of our other subscription plans. [View pricing](/pricing/)
--------------------------------------------------------------------------------
title: "Can I sign in on multiple devices?"
last_modified: "2022-08-25"
url: "https://www.sketch.com/support/subscriptions/manage/multiple-devices/"
--------------------------------------------------------------------------------
## Can I sign in on multiple devices?
Each Editor in a Workspace can use their own Sketch account to log into the Sketch platform on any device they own – but sharing credentials to access and use Sketch is a violation of our [Terms of Service](/tos/) agreement and may result in the suspension of your account.
--------------------------------------------------------------------------------
title: "How can I cancel my trial or subscription?"
last_modified: "2026-01-23"
url: "https://www.sketch.com/support/subscriptions/manage/cancel-trial-or-subscription/"
--------------------------------------------------------------------------------
## How can I cancel my trial or subscription?
As an Admin, you can cancel your subscription at any time from the web app. Here’s how to:
1. Go to [Sketch](/signin/), log in as an Admin and click on the **Switch Workspace** icon in the top left corner of the sidebar. Make sure your Workspace name is showing.
1. Click on the **Settings** icon at the top of the left sidebar, then click on **Billing**.
1. If you added your billing details at sign up, click **Cancel Subscription** and confirm your choice in the window that will appear on your screen.
**Note**: If you did not add billing details at sign up, you can either let the trial period automatically cancel on the end date or delete the Workspace. If you want to delete the trial Workspace and your user account, please follow [our guide to deleting your account](/docs/interface-and-settings/workspace-and-account-settings/managing-your-account/#deleting-your-account).
If you no longer have access to the Admin email address or need help with the cancelation, please [contact our support team](/support/contact/) so we can help.
## What happens when I cancel my subscription?
When you cancel your subscription, you’ll continue to have access to Sketch until the end of your billing period. The confirmation prompt will provide the exact end date. After cancellation, your documents will be in read-only mode, and you’ll still be able to download them for up to 90 days. Editors within your Workspace will no longer be able to open, edit, or upload documents. Additionally, you won’t be able to add or edit members during this period.
## Will my documents stay in my Workspace forever?
We’ll permanently delete your Workspace and all documents 90 days after the cancellation or expiration of your subscription; these actions cannot be undone. For more information, please refer to our [Terms of Service](/tos/) and [the article about expired subscriptions](/support/subscriptions/manage/expired-subscription/). If you delete your Workspace manually in the meantime, the documents cannot be restored.
## What if I change my mind?
You can reactivate a cancelled or expired subscription within 90 days from the cancellation or expiration date, as long as you have not manually deleted your Workspace in the meantime. [Contact our support team](/support/contact/) and we’ll help you with the next steps.
--------------------------------------------------------------------------------
title: "Fixing Two Factor Authentication (2FA)"
description: "Add an extra layer of security to your Sketch account with Two Factor Authentication (2FA)."
last_modified: "2023-08-23"
url: "https://www.sketch.com/support/subscriptions/manage/two-factor-auth/"
--------------------------------------------------------------------------------
## Fixing Two Factor Authentication (2FA)
If you’re having any issues with your 2FA, please refer to the Troubleshooting sections below.
To set up 2FA for your Sketch account, please follow [these steps](/docs/interface-and-settings/workspace-and-account-settings/managing-your-account/#how-to-set-up-2fa-in-your-sketch-account) in our documentation.
## I lost my phone and I have 2FA enabled, how can I access Sketch?
Don’t worry, you can use your **[recovery codes](/docs/interface-and-settings/workspace-and-account-settings/managing-your-account/#step-4-save-your-recovery-codes)** in this case. **[Sign in](/signin/)** with your email and password and use one of the recovery codes as your second factor. You can generate new recovery codes after using one or more, making it easy to keep your account safe.
## I lost my phone and my recovery codes, how can I sign in?
No worries! **[Get in touch with our Customer Support team](/support/contact/)** for help. Our Customer Support team will disable 2FA for you. To enable it again, log in with your email and password and follow the **[instructions on enabling 2FA](/docs/interface-and-settings/workspace-and-account-settings/managing-your-account/#how-to-set-up-2fa-in-your-sketch-account)**.
## I’m using an older version than 82, can I still use 2FA?
Yes! You can still enable 2FA even if you are working on a version that is earlier than 82. However, we won‘t show you the verification code window when you log in. Instead, you‘ll need to concatenate the 2FA code to your password.
For example, let‘s imagine your Sketch Account password is **graphic-design-is-my-passion** and your verification code is **123456**. When you add your details your password should look something like this: **graphic-design-is-my-passion123456**.
## I can’t find my 2FA recovery codes (but I’m logged in)
You can always [generate new recovery codes](/docs/interface-and-settings/workspace-and-account-settings/managing-your-account/#step-4-save-your-recovery-codes) in your Sketch Account page. We’ll automatically deactivate your old recovery codes.
--------------------------------------------------------------------------------
title: "What happens when my subscription expires?"
description: "If you have an expired or nearly expired Workspace subscription, there are some important things to keep in mind. No worries, we’ll remind you important dates and you’ll have plenty of time to access your documents or reactivate your subscription."
last_modified: "2026-04-08"
url: "https://www.sketch.com/support/subscriptions/manage/expired-subscription/"
--------------------------------------------------------------------------------
## What happens when my subscription expires?
If you have an expired trial or a cancelled subscription, there are some important things to keep in mind. No worries, we’ll remind you important dates and you’ll have plenty of time to access your documents or reactivate your subscription.
## How does the deletion process work?
Two important things happen when your subscription expires or get cancelled. First, your Workspace goes into read-only mode — you can access and view all your documents, but you can‘t make changes, save new documents, add new Guests or Workspace Viewers.
At the same time, when you cancel your subscription or it expires, a 90-day waiting period will automatically begin for that Workspace. If the subscription is still expired after that period, we’ll delete the Workspace.
As always, we‘ll do our best to keep you informed about important events that can affect your subscription and documents. Just like we send reminder emails for Workspaces nearing expiration and confirmation emails after you cancel a subscription, **we will send you a reminder email two months after your subscription has expired**. Once you receive this email, you’ll have another 30 days to download your documents or reactivate your subscription. If your subscription is still expired /cancelled 30 days after you receive the final reminder email, the Workspace will be deleted.
### Here’s a recap of the deletion timeline:
1. A 90-day waiting time period begins when your subscription expires or gets cancelled
2. All documents in the Workspace go into read-only mode
3. You’ll receive a reminder two months after your subscription has expired or gets cancelled
4. This reminder warns you that you have 30 days to reactivate your subscription
5. If your subscription is still inactive after these 30 days, we‘ll delete the Workspace
## Which Workspaces are eligible for deletion?
### Trial subscriptions
Our trial period is fully featured, so you can create and save documents in your Workspace. Once the trial expires and if you haven’t added the credit card details, your trial will go into the 90-day waiting period [as described in clause 4.2 of our Terms of Service](/tos/#sketch-platform-subscription).
### Standard and Professional subscriptions
Standard and Professional subscriptions are those that were paid at some point but the subscription was later canceled or payment could no longer be processed.
### Legacy Personal Workspaces not linked to a paid account
Legacy Personal Workspaces were granted to customers who purchased license keys before 05 May 2021 and have access to some collaboration tools and features. If you own a Personal Workspace and your license key has expired or your subscription is canceled, the Personal Workspace will be marked for deletion.
## How can I reactivate my subscription?
If your expired or cancelled subscription is still within the 90-day grace period, [contact our support team](/support/contact/) and we’ll help you reactivate it.
## What if my subscription has been expired for a long time?
If your subscription has been expired/cancelled for some time now we‘ll send you an email to let you know your Workspace is on its final 30 days. If you don‘t take any action after this, we‘ll delete that Workspace.
## Can I access my documents before the Workspace is deleted?
Absolutely! You’ll have access to all of them in read-only mode and available to download during the waiting period (90 days).
We’d love it if you chose to keep using Sketch, but if the time has come to say goodbye, please remember to download all your documents — we‘ll delete them if the Workspace is still inactive after the waiting time period.
[Please contact us](/support/contact/) if you run into any issues or have any questions about this process.
--------------------------------------------------------------------------------
title: "Where can I find my invoices and receipts?"
last_modified: "2024-04-09 15:49:00 +0200"
url: "https://www.sketch.com/support/subscriptions/manage/invoices-and-receipts/"
--------------------------------------------------------------------------------
## Where can I find my invoices and receipts?
Invoices are automatically emailed to the designated billing contact specified in the **Billing Details** section located within **Settings > Billing**.
Additionally, any Workspace members with an Admin or Finance role can also download invoices by following these steps:
1. Go to [Sketch](/signin/), sign in as an Admin or Finance and click on the **Switch Workspace** icon in the top left corner of the sidebar — Make sure your Workspace name is showing.
1. Click on the **Settings** icon at the top of the left sidebar, then click on **Billing**.
1. You will be able to download your invoices under **Billing History**.
Receipts can be downloaded by clicking on the **Pay Online** link on any invoice, and then clicking on the **Download receipt** button.
If you purchased your subscription from the Mac App Store, you can find details on how to access your purchase history for the App Store on [Apple Support](https://support.apple.com/en-us/HT204088).
--------------------------------------------------------------------------------
title: "Can I switch my subscription’s billing plan?"
last_modified: "2023-08-22"
url: "https://www.sketch.com/support/subscriptions/manage/switch-plan/"
--------------------------------------------------------------------------------
## Can I switch my subscription’s billing plan?
You can choose to switch your billing plan. The switch depends on the billing plan you’ve subscribed to and the billing cycle.
**Monthly subscriptions:**
You may switch at any time. We recommend choosing our **yearly billing plan** as it will save you money over a 12-month period. Here’s how to:
1. Go to [Sketch](/signin/), sign in as an Admin or Finance and click on the **Switch Workspace** icon in the top left corner of the sidebar — Make sure your Workspace name is showing.
1. Click on the **Settings** icon at the top of the left sidebar, then click on **Billing**.
1. Next to the **Current Plan** click on the **Edit…** button where you will be able to change to a **yearly billing plan**.
Please note that the credit card on file will be charged automatically once the plan is updated, which will initiate a new invoice and a new billing date.
**Yearly subscriptions:**
You may change to the Monthly plan near the end of the billing cycle. Please [contact our support team](/support/contact/), and we’ll be happy to help you with your requirements.
If you are using a subscription purchased from the Mac App Store, you can change your subscription directly in the Mac App Store on your device. For more information, visit [Apple Support](https://support.apple.com/billing).
--------------------------------------------------------------------------------
title: "How can I apply a discount code?"
last_modified: "2025-05-21"
url: "https://www.sketch.com/support/subscriptions/manage/discount-codes/"
--------------------------------------------------------------------------------
## How can I apply a discount code?
## Applying a discount code for subscriptions
If you’re signing up for a subscription, you’ll need to:
1. Go to our [sign up page](/signup/) and [create your Workspace](/docs/getting-started/setting-up-sketch/).
1. Click on the **Settings** icon at the top of the left sidebar, then click on **Billing**. From there, click on the **Set Up a Subscription** button.
1. Enter your code in the **Discount code** field and click **Apply** — the discount will be applied.
1. Proceed to complete the payment process.
If you’re reactivating your expired or cancelled subscription: [sign in to your web app](/signin/), go to **Settings > Billing** and click **Subscribe**. Enter your code in the **Discount code** field, click **Apply** and proceed with the payment — this will reactivate your subscription with the discount applied.
## Applying a discount code for Mac-only licenses
When purchasing a Mac-only license with a discount code:
1. [Go to the Pricing page](/pricing/), and click on the **Buy now** button under the **Mac-only license** banner.
1. Enter your email address and select **Continue**.
1. Under **Licenses**, change the quantity to the number of seats you need (one seat per device).
1. Click on **Enter promotion code** and enter the discount code.
1. Add your shipping information and credit card details to complete the checkout.
You can also apply the discount if you’re renewing your license. Enter your **SK3 key** on the [License page](/license/) and click the **Renew** button in the **Manage license** section to continue.
If you’re having trouble or need help don’t hesitate to [reach out to our support team](mailto:mail@sketch.com).
--------------------------------------------------------------------------------
title: "Fixing payment issues"
description: "If you’re experiencing a problem with payments, here are some common issues and their resolutions."
last_modified: "2026-05-26"
url: "https://www.sketch.com/support/subscriptions/manage/payment-issues/"
--------------------------------------------------------------------------------
## Fixing payment issues
If you’re experiencing a problem with payments, here are some common issues and their resolutions.
## Why has my payment method failed?
There are several reasons why your payment might be failing:
* The card has expired
* The card details have been entered incorrectly
* The card has insufficient funds to complete the purchase
* The card was declined as the transaction requires authentication
* The card was declined for an unknown reason.
The first step is to check that we have the correct card details, that they are valid and you have sufficient funds.
If the card details are correct and you still have issues we strongly advise you to reach out to your bank or your credit card issuer to see what might be the reason for the failed payment.
If you are still experiencing issues with the payment, please **[get in touch with our support team](/support/contact/).**
## How can I update my credit card on file?
Any Workspace **Admin** can update the credit card on file using the following steps:
1. Go to [Sketch](/signin/), sign in as an Admin, and click on the **Switch Workspace** icon in the top left corner of the sidebar — Make sure your Workspace name is showing.
1. Click on the **Settings** icon at the top of the left sidebar, then click on **Billing**.
1. Next to the **Payment method** click on the **Edit** button where you will be able to add a new credit card to the account.
## How do I update my billing information?
If your Workspace is currently in a 30-day trial period, you can add a credit card and billing information by following these steps:
1. Go to [Sketch](/signin/), sign in as an Admin or Finance and click on the **Switch Workspace** icon in the top left corner of the sidebar — Make sure your Workspace name is showing.
1. Click on the **Settings** icon at the top of the left sidebar, then click on **Billing**.
1. Click on the **Set up a Subscription** button, select the billing period (monthly or yearly), and add a credit or debit card. We won’t create an invoice until your trial ends.
If you need to update existing credit card and billing details in your Workspace:
1. Go to [Sketch](/signin/), sign in as an Admin or Finance and click on the **Switch Workspace** icon in the top left corner of the sidebar — Make sure your Workspace name is showing.
1. Click on the **Settings** icon at the top of the left sidebar, then click on **Billing**.
1. Next to **Billing Details**, click **Edit** to update the billing information.
## I’m seeing a 3D authentication error, what should I do?
If you are experiencing issues with 3D authentication during the subscription purchase, please reach out to your bank or your credit card issuer immediately to report the issue. They will be able to see how your 3D authentication is set up.
Alternatively, please try to use another credit card for your purchase. If you are still experiencing issues, please **[get in touch with our support team](/support/contact/).**
## I might be affected by the RBI recurring payment guidelines, what can I do?
We are aware of the possible payment troubles for our customers based in India. We are actively investigating the situation and looking for a permanent solution.
Please **[get in touch with our support team](/support/contact/)** — we can provide assistance that has helped clients facing the same situation.
--------------------------------------------------------------------------------
title: "Why is there no free plan?"
last_modified: "2026-04-08"
url: "https://www.sketch.com/support/subscriptions/manage/free-plan/"
--------------------------------------------------------------------------------
## Why is there no free plan?
With our subscription plans, you can invite unlimited Viewers to your Workspace for free. Viewers can browse and comment on designs in their web browser, and even inspect files and download assets for developer handoff.
We also offer students and teachers a free Workspace with 1 Editor seat, and institutions a free Workspace with multiple seats – depending on requirements. You can find out more and request your free workspace on our [Sketch for Education](/education/) page.
Beyond free Viewers, and besides our Education offer, we have no plans to offer an entirely free plan.
Our business model is simple — we sell our product at a fair price — and we’ve been profitable since day one. We believe this commitment to long-term sustainability is a responsibility to our customers, who can trust that we’ll continue to be here and support their work, as we have for more than 10 years.
Offering a free plan inevitably leads to unpaid costs (these plans still require storage, bandwidth, support and more). Most products with a free plan will gradually remove features or apply limitations in an effort to force customers to move to a paid tier. Or they’ll seek investment to support that plan and make decisions that don’t align with the needs of their customers. That doesn’t feel right to us.
Our focus is on adding value to our product with consistent improvements and new features, not finding ways to remove it for customers who we’ve enticed with a free plan.
[Read more about our history and values](/about-us/)
--------------------------------------------------------------------------------
title: "What do I need to know before starting my free Sketch trial?"
description: "Before you get started with your 30-day free trial, below are some common questions that you might be wondering about."
last_modified: "2026-01-23"
url: "https://www.sketch.com/support/subscriptions/free-trial/"
--------------------------------------------------------------------------------
## What do I need to know before starting my free Sketch trial?
Before you get started with your 30-day free trial, below are some common questions that you might be wondering about.
## What happens when the trial ends?
At the end of the trial, you'll need to add billing and credit card details in order to activate the subscription and continue using Sketch.
You can choose to be billed [[price] per editor yearly or [price] per editor monthly](/pricing/).
## Can I extend or skip the trial?
We don't generally offer trial extensions, but please [get in touch with us](/support/contact/) so we can review your request. Once the trial period ends, you will need to add valid billing and credit card details in order to keep your subscription active.
We can however offer to skip the trial period upon your [request](/support/contact/). Before we skip the trial period, please note:
- The credit card on file will be charged immediately after the trial is ended.
- You will need to keep a valid card on file at all times.
- The trial can't be reinstated.
## How many trials can I create?
You can try Sketch for free for 30 consecutive days, giving you a one-time opportunity to explore and evaluate everything Sketch has to offer.
The only limitation in your trial is that you cannot invite more than three members to your Workspace unless you add payment details. If you add your payment details during your trial, you will be able to invite up to 20 (twenty) members to your Workspace. We won't charge you for Sketch during your trial.
To invite more than 20 members during a trial, or if you feel you should be excluded from our maximum trial limits, [get in touch with us](/support/contact/) to explain your circumstances.
Please note that we can terminate any subscriptions, including trials, with immediate effect and without prior notice in the event you do not comply with our terms of service, or applicable laws and regulations.
## Will I lose my documents if I don't subscribe?
If you don't subscribe to Sketch once your 30-day trial period is over, documents saved within the Workspace will become read-only for a period of 90 days after trial expires.
Please note that **Workspace and all stored documents will be permanently deleted 90 days after the expiration date**. We strongly suggest to [sign in](/signin/) and [download your documents to your device](/docs/getting-started/saving-and-managing-documents/#downloading-documents).
If you delete your Workspace in the meantime, any documents within it will also be deleted.
## I don't want to subscribe after the trial, do I need to do anything?
If you don't want to subscribe to Sketch once the trial is over, and credit card details were not added — your Workspace will automatically expire.
You will be able to reactivate your Workspace within 90 days of expiration by adding valid billing and credit card details.
If you don't reactivate your trial within this grace period, the **Workspace and all stored documents will be permanently deleted 90 days after the expiration date**.
## I have a Mac-only license, will I lose it if I subscribe to Sketch?
You will no longer need to use your Mac-only license once you subscribe to Sketch; your subscription includes the Mac app.
If you still have an active Mac-only license, please [get in touch with our support team](/support/contact/) — we'll help you make the switch to a subscription.
## My device is registered with my license, how do I register it with the trial?
> **Note:** If you used Sketch with a Mac-only license before, you must unlink it. Launch the Mac app, head to **Sketch > Settings** from the menu bar, navigate to the **Account** tab, and select **Unlink Device**. Alternatively, access the [License Manager](/license/admin/) and remove all devices using the **Unlink** option.
You can then sign in to the Mac app as an Editor using your email and password combination with the below steps:
1. You can find and download a specific version of the Mac app on our [**releases page**](/releases/mac/). Or, [**download the latest version automatically**](/downloads/mac/).
1. Once the download is completed, drag the Sketch icon into the **Applications** folder to install the app.
1. To sign in, open the Mac app, enter your email address in the **Email** field, and click **Continue**.
1. Enter your password and click **Sign In**.
If you decide not to subscribe after your 30-day trial and remain with your license account, it is possible to re-register your device by inserting your license key number.
--------------------------------------------------------------------------------
title: "I used to have a license. Do I need to renew it?"
last_modified: "2024-11-28"
url: "https://www.sketch.com/support/subscriptions/expired-license/"
--------------------------------------------------------------------------------
## I used to have a license. Do I need to renew it?
No, there's no need to renew or use your Mac-only license if you're switching to a subscription. A Mac-only license and a subscription are separate pricing plans and operate independently. This means, you'll need to sign up for a new account when purchasing a subscription, even if you choose to register with the same email associated with your license.
Please [contact our support team](/support/contact/) if you need help or have any questions.
--------------------------------------------------------------------------------
title: "App Store subscription"
description: "If you have or are looking to purchase an App Store variant of our subscription, here are some common questions you might be wondering about."
last_modified: "2026-01-23"
url: "https://www.sketch.com/support/subscriptions/app-store/"
--------------------------------------------------------------------------------
## App Store subscription
If you have or are looking to purchase an App Store variant of our subscription, here are some common questions you might be wondering about.
## What is an App Store subscription?
An App Store subscription is a variant purchased via the App Store directly. It comes with a limit of one Editor per Workspace, but you can still use real-time collaboration by [inviting other people as ‘Guests’](/docs/sharing-and-collaborating/document-permissions/#workspace-guests) (referred to as ‘Guest Editors’) to join your Workspace’s projects or documents using the email address associated with their active Sketch subscription.
Please note that you don’t get a license key when you purchase an App Store subscription, but you’d need to use your Apple Account and password to sign in.
For more information, [please review our article](/support/general/mac-app-store/#functionality) about the difference between an App Store variant and the one purchased from the Sketch website directly.
## How can I purchase an App Store subscription?
To purchase Sketch through the App Store, please follow the below steps:
1. Open your **App Store**, search for **Sketch**, hover the mouse over **Get**, and click on the **Install** button.
1. Open the Mac app, enter your email address in the Email field and click **Continue**.
1. Enter your **name** and **password** and click **Create an Account**.
1. Once your account is created and your email address verified, you can sign in to the Mac app. Then, click on **Subscribe** button on the top right and **select your preferred plan** (Yearly or Monthly).
1. Sign in prompt will ask you to fill in **your Apple Account** and **password**. Enter your details and click on **Buy** button.
## Where can I see purchase history tied to my App Store subscription?
All App Store payments are handled directly by Apple. To see your purchase history, please follow the steps below:
1. Go to [reportaproblem.apple.com](https://reportaproblem.apple.com/).
1. Sign in with your Apple Account and password.
1. A list of your recent purchases will appear.
1. If you’re not sure what you were charged for but you know the amount of the charge, search for the amount.
1. If you’re looking for information about older purchases, [find your purchase history in Settings or Account Settings on your device](https://support.apple.com/en-us/HT204088#device).
## Do you offer refunds for App Store subscriptions?
Please contact [Apple Support](https://support.apple.com/apps) directly. They will be able to help further with your refund request.
## How can I cancel my App Store subscription?
To cancel the subscription you purchased from the App Store, please follow the steps below:
1. Open the **App Store**.
2. Click your name on the bottom left (if you can’t find your name, click on **Sign In**) and then click **Account Settings**.
3. Scroll to **Subscriptions**, then click **Manage**.
4. Next to the Sketch subscription, click **Edit**.
5. Click **Cancel Subscription**.
For more information, [visit Apple Support](https://support.apple.com/en-us/HT202039).
Please note that Workspace and all stored documents will be permanently deleted 90 days after the cancellation date. We strongly suggest downloading all documents locally on your device.
--------------------------------------------------------------------------------
title: "Professional plan"
description: "This article answers the most common questions about our Professional plan."
last_modified: "2026-04-23"
url: "https://www.sketch.com/support/subscriptions/professional/"
--------------------------------------------------------------------------------
## Professional plan
## What is the Professional plan?
The Professional plan gives you access to advanced features not available on the Standard plan, including:
- [Single Sign-On](/docs/getting-started/single-sign-on/) (SSO)
- Powerful [permissions directory](/docs/sharing-and-collaborating/document-permissions/#using-the-permissions-directory)
- [Permissions groups](/docs/sharing-and-collaborating/document-permissions/#creating-and-managing-permissions-groups) where Admins can create groups of Members and instantly give them access to documents and projects
- [Archiving](/docs/getting-started/folders/#archiving-folders), which gives you a handy space to file away inactive folders so everyone can stay focused on what’s in flight
## How can I sign up for it?
Please [contact our Support Team](/support/contact/?topic=professional), and we’ll be happy to help with the next steps.
## How does billing work?
Professional plans are billed yearly and paid by credit card.
## Why should I get the Professional plan?
Anyone can upgrade to a Professional plan, but it’s especially useful if you need more advanced Workspace management features.
The Professional plan includes Single Sign-On (SSO), which strengthens account security for your Editors and makes user management easier.
In addition, you’ll get more features that help you look after your team and their projects, such as project archiving, easier document sharing, and better visibility into who has access to what across your Workspace.
If you need dedicated support, a Customer Success Manager, custom reviews or terms, or priority support, take a look at our [Enterprise plan](/support/subscriptions/enterprise/).
## Where can I find out more about Single Sign-On (SSO)?
Single Sign-On (SSO) gives a quick and safe way for your members to sign in, both on the Mac app and web app. Here’s everything you need to know about the benefits of SSO, along with detailed instructions on setting it up for your Workspace:
- [The benefits of SSO](/docs/getting-started/single-sign-on/sso-and-provisioning/#the-benefits-of-sso)
- [Provisioning](/docs/getting-started/single-sign-on/sso-and-provisioning/#provisioning)
- [Setting up SAML SSO](/docs/getting-started/single-sign-on/setting-up-saml-sso/)
- [Other](/docs/getting-started/single-sign-on/sso-and-provisioning/#other)
--------------------------------------------------------------------------------
title: "Enterprise plan"
description: "This article answers the most common questions about our Enterprise plan."
last_modified: "2026-05-22"
url: "https://www.sketch.com/support/subscriptions/enterprise/"
--------------------------------------------------------------------------------
## Enterprise plan
The Enterprise plan is designed for large organizations that need advanced security, centralized user management, and added support options. This article covers what’s included, how to get started, how billing works, and how to tell if it’s the best option for your team.
## What is the Enterprise plan?
The Enterprise plan is our most comprehensive subscription tier. It includes everything in the [Professional plan](/support/subscriptions/professional/), plus features designed for organizations with more complex security, compliance, and management needs.
With Enterprise, you get:
- Advanced security and compliance options, including [SCIM provisioning](/docs/getting-started/single-sign-on/scim-provisioning) and **BYOK** (Bring Your Own Key)
- Centralized user and seat management
- Invoice-based billing
- Dedicated support for teams with 15 or more Editors
- A dedicated Customer Success Manager (CSM) for teams with 15 or more Editors
- Procurement-friendly billing
- Priority onboarding and ongoing support for teams with 15 or more Editors
- Custom reviews and terms for teams with 15 or more Editors.
The Enterprise plan helps your organization stay secure, aligned, and efficient — especially when multiple teams or hundreds of users rely on Sketch for their day-to-day work.
## How do I sign up?
To get started:
1. Visit our [pricing page](/pricing)
1. Choose the **Enterprise** option
1. Complete the request form with your organization’s details.
Someone from our team will then get in touch to discuss your requirements, help set up your Workspace, and guide you through onboarding.
## How does billing work?
Enterprise billing runs on an annual invoice cycle. Here’s how it works:
- Enterprise is a yearly commitment, billed annually.
- You can add seats at any time. We’ll invoice you for the prorated amount as soon as they’re added.
- Enterprise subscriptions cannot go below 25 seats.
- We invoice you for every Editor seat in your contract, even if some seats remain unassigned.
For teams with 15 or more Editors, your Customer Success Manager will help make sure your billing and procurement setup aligns with your internal processes.
## Why should I consider the Enterprise plan?
### Centralized management
Enterprise gives your organization a single subscription that covers your entire team. Admins can assign or remove seats as needed, manage who has access to the Mac app, and keep everything organized from one place. This makes it easier to stay in control of users and gives Workspace owners and admins clear visibility across your organization.
### Better collaboration at scale
Enterprise is built for large, distributed teams that need space to collaborate freely and securely. Access permissions are simple to manage, and the tools included in the plan are designed to support organizations where many people need to review, comment, or stay aligned on design work.
### SCIM provisioning
Automate user management through your identity provider (e.g. Okta, Google, Microsoft Entra ID). Add or remove users centrally and keep your Workspace in sync automatically. [Learn more](/docs/getting-started/single-sign-on/scim-provisioning/).
### BYOK Encryption
BYOK lets you secure your Workspace data using your own encryption key managed in Amazon Web Services (AWS). Enabling it is completely optional. [Learn more](/support/subscriptions/byok-encryption/).
--------------------------------------------------------------------------------
title: "Private Cloud"
description: "This article answers the most common questions about our Private Cloud"
last_modified: "2026-05-22"
url: "https://www.sketch.com/support/subscriptions/private-cloud/"
--------------------------------------------------------------------------------
## Private Cloud
Private Cloud is our most advanced offering — built for organizations that require maximum security, dedicated infrastructure, and complete isolation from other customer data. This article explains what the Private Cloud solution includes, how it works, and why it may be the right choice for your organization.
## What is Private Cloud?
Private Cloud provides everything included in our [Professional plan](/support/subscriptions/professional/), along with a fully isolated cloud environment managed exclusively for your organization. It’s designed for teams that need higher levels of security, compliance, and control over where and how their data is stored.
With Private Cloud, you get:
- A dedicated, isolated AWS environment that isn’t shared with other customers
- Your choice of data hosting location
- Unlimited Workspaces
- Advanced user management with SCIM provisioning
- Enhanced security through BYOK (Bring Your Own Key) encryption.
## Key features
### Dedicated private cloud environment
Your organization receives its own fully isolated AWS environment, separate from all other Sketch customers. This gives you full control over your data’s security, isolation, and compliance posture — while still benefiting from the reliability and scalability of Sketch’s cloud architecture.
### Choice of hosting location
You can choose where your data is hosted amongst select AWS regions in the United States and Europe, helping you meet specific regional regulations or internal data residency requirements.
### Unlimited Workspaces
Create as many Workspaces as you need, so teams and departments can structure their work freely. You’re billed once per unique Editor, meaning an Editor can belong to multiple Workspaces at no extra cost.
### SCIM provisioning
Private Cloud supports SCIM user provisioning, allowing you to automate account creation, updates, and deactivation through your identity provider (such as Okta or Microsoft Entra ID). This keeps your Sketch access aligned with your internal user directory automatically. [Learn more](/docs/getting-started/single-sign-on/scim-provisioning/)
### BYOK Encryption
BYOK lets you secure your Workspace data using your own encryption key managed in Amazon Web Services (AWS). Enabling it is completely optional. [Learn more](/support/subscriptions/byok-encryption/).
## Why choose Private Cloud?
Private Cloud is built for organizations with strict security needs or compliance requirements. It’s ideal if your team needs:
- Dedicated infrastructure with complete data isolation
- Control over data residency
- Automated and secure user lifecycle management
- Enterprise-level encryption with customer-managed keys
- Flexibility to support multiple teams and Workspaces under a single bill.
If your company operates in highly regulated sectors, such as finance, government, healthcare, or large enterprise environments, Private Cloud provides the highest level of assurance and control Sketch offers.
## How do I get started with Private Cloud?
1. Visit our [pricing page](/pricing)
1. Choose the **Private Cloud** option
1. Complete the request form with your organization’s details.
Someone from our team will then get in touch to discuss your requirements, help set up your Workspace, and guide you through onboarding. Your dedicated CSM will support you throughout the entire process.
--------------------------------------------------------------------------------
title: "How does BYOK Encryption work?"
last_modified: "2026-05-22"
url: "https://www.sketch.com/support/subscriptions/byok-encryption/"
--------------------------------------------------------------------------------
## How does BYOK Encryption work?
BYOK (Bring Your Own Key) lets you secure your Workspace data using an encryption key you manage in Amazon Web Services (AWS). Your organization keeps full control over how data is encrypted and who can access the keys, while Sketch manages the cloud infrastructure powering your Workspace.
BYOK is available on our [Enterprise](/support/subscriptions/enterprise/) and [Private Cloud](/support/subscriptions/private-cloud/) plans. Enabling it is completely optional.
## How it works
When you enable BYOK, we encrypt your Workspace using:
- An **AWS KMS (Key Management Service) key**
- An **AWS IAM Role** that grants Sketch permission to use that key
You create both the key and the IAM role in your own AWS account. Once they’re set up, enter the corresponding ARNs (Amazon Resource Names) in Sketch to activate encryption for your Workspace.
## What to know before enabling BYOK
- **We support multiple keys per Workspace.** You can use more than one AWS KMS key if your organization needs it.
- **You can’t turn off encryption.** Once enabled, the only way to disable it is to delete every document in that Workspace.
- **Files can only move between encrypted Workspaces.** To transfer files between encrypted and non-encrypted Workspaces, download the documents and upload them to the destination Workspace.
--------------------------------------------------------------------------------
title: "Mac-only licenses"
url: "https://www.sketch.com/support/mac-only-licenses/"
--------------------------------------------------------------------------------
## Mac-only licenses
--------------------------------------------------------------------------------
title: "What happens when my Mac-only license expires?"
last_modified: "2023-11-09 11:29:45 +0100"
url: "https://www.sketch.com/support/mac-only-licenses/expired-license/"
--------------------------------------------------------------------------------
## What happens when my Mac-only license expires?
After your Mac-only license expires, you can:
- [Switch to a subscription](/support/general/account/switch-to-subscription/) which comes with the native Mac app, web app, and Workspace, along with [Real-time collaboration](/collaborate/), [Developer Handoff](/handoff/), [Sketch’s native prototyping](/prototype/), and [many other features](/features/).
- [Renew your license](/license/) to get another year’s worth of Sketch updates.
- Keep using the last supported version of Sketch you downloaded for as long as you like — but keep in mind that you’ll no longer get future updates. You can access the [License Manager](/license/admin/) to instantly verify your last supported Sketch version.
--------------------------------------------------------------------------------
title: "How can I find a copy of my invoice?"
last_modified: "2024-10-28"
url: "https://www.sketch.com/support/mac-only-licenses/invoices/"
--------------------------------------------------------------------------------
## How can I find a copy of my invoice?
Only the license Admin can download invoices by accessing the [License Manager](/license/admin/) and using their Admin email address. To do so, scroll down to the Invoices section on the right side of the License Manager.
Need to download older invoices? You can:
- [Contact our Support Team](/support/contact/), and we’ll be happy to help.
- [Open a support ticket](https://fastspring.com/consumer-support-form/) with the FastSpring team directly, and their team will be able to help.
--------------------------------------------------------------------------------
title: "How can I find my Mac-only license key?"
last_modified: "2024-11-28"
url: "https://www.sketch.com/support/mac-only-licenses/license-key/"
--------------------------------------------------------------------------------
## How can I find my Mac-only license key?
You will receive your license key (starts with SK3) via email once a purchase is completed. If you can’t find your license key, you can use one of the following methods:
- Search your inbox for the term `SK3` to retrieve the initial email with license information.
- Access your [License Manager](/license/admin/) using the Admin email address. From there, you’ll be able to see the full license key.
- If you haven’t purchased the license with your email address, please reach out to the current license Admin. The current Admin will be able to provide you with the license key by accessing the [License Manager](/license/admin/).
**Note:** There can only be one Admin email address per account. This is the email address entered when purchasing the license(s). To update the Admin email address linked to your Mac-only license, please [contact our support team](/support/contact/).
--------------------------------------------------------------------------------
title: "How can I register my device with a license key?"
last_modified: "2025-05-21"
url: "https://www.sketch.com/support/mac-only-licenses/register-a-device/"
--------------------------------------------------------------------------------
## How can I register my device with a license key?
> **Note:** Please note that you cannot use your Mac-only license key to register the Mac app’s App Store version.
The steps to register the Mac app with a license key are:
1. If your license is active, visit our [release page](/releases/mac/) and download your preferred version of our Mac app onto the device.
- If your license has expired, start by accessing the [License Manager](/license/admin/) and check the version under **Download Sketch**.
1. Once the download is complete, install the app by dragging the Sketch icon to the **Applications** folder.
1. Once installed, the next step will depend on the version you choose, begin by launching the Mac App and then:
- **Sketch Athens (2025.1) or newer**. Click on the License Key button in the top-right corner. Type in your license key (starts with SK3) and click the Register License button.
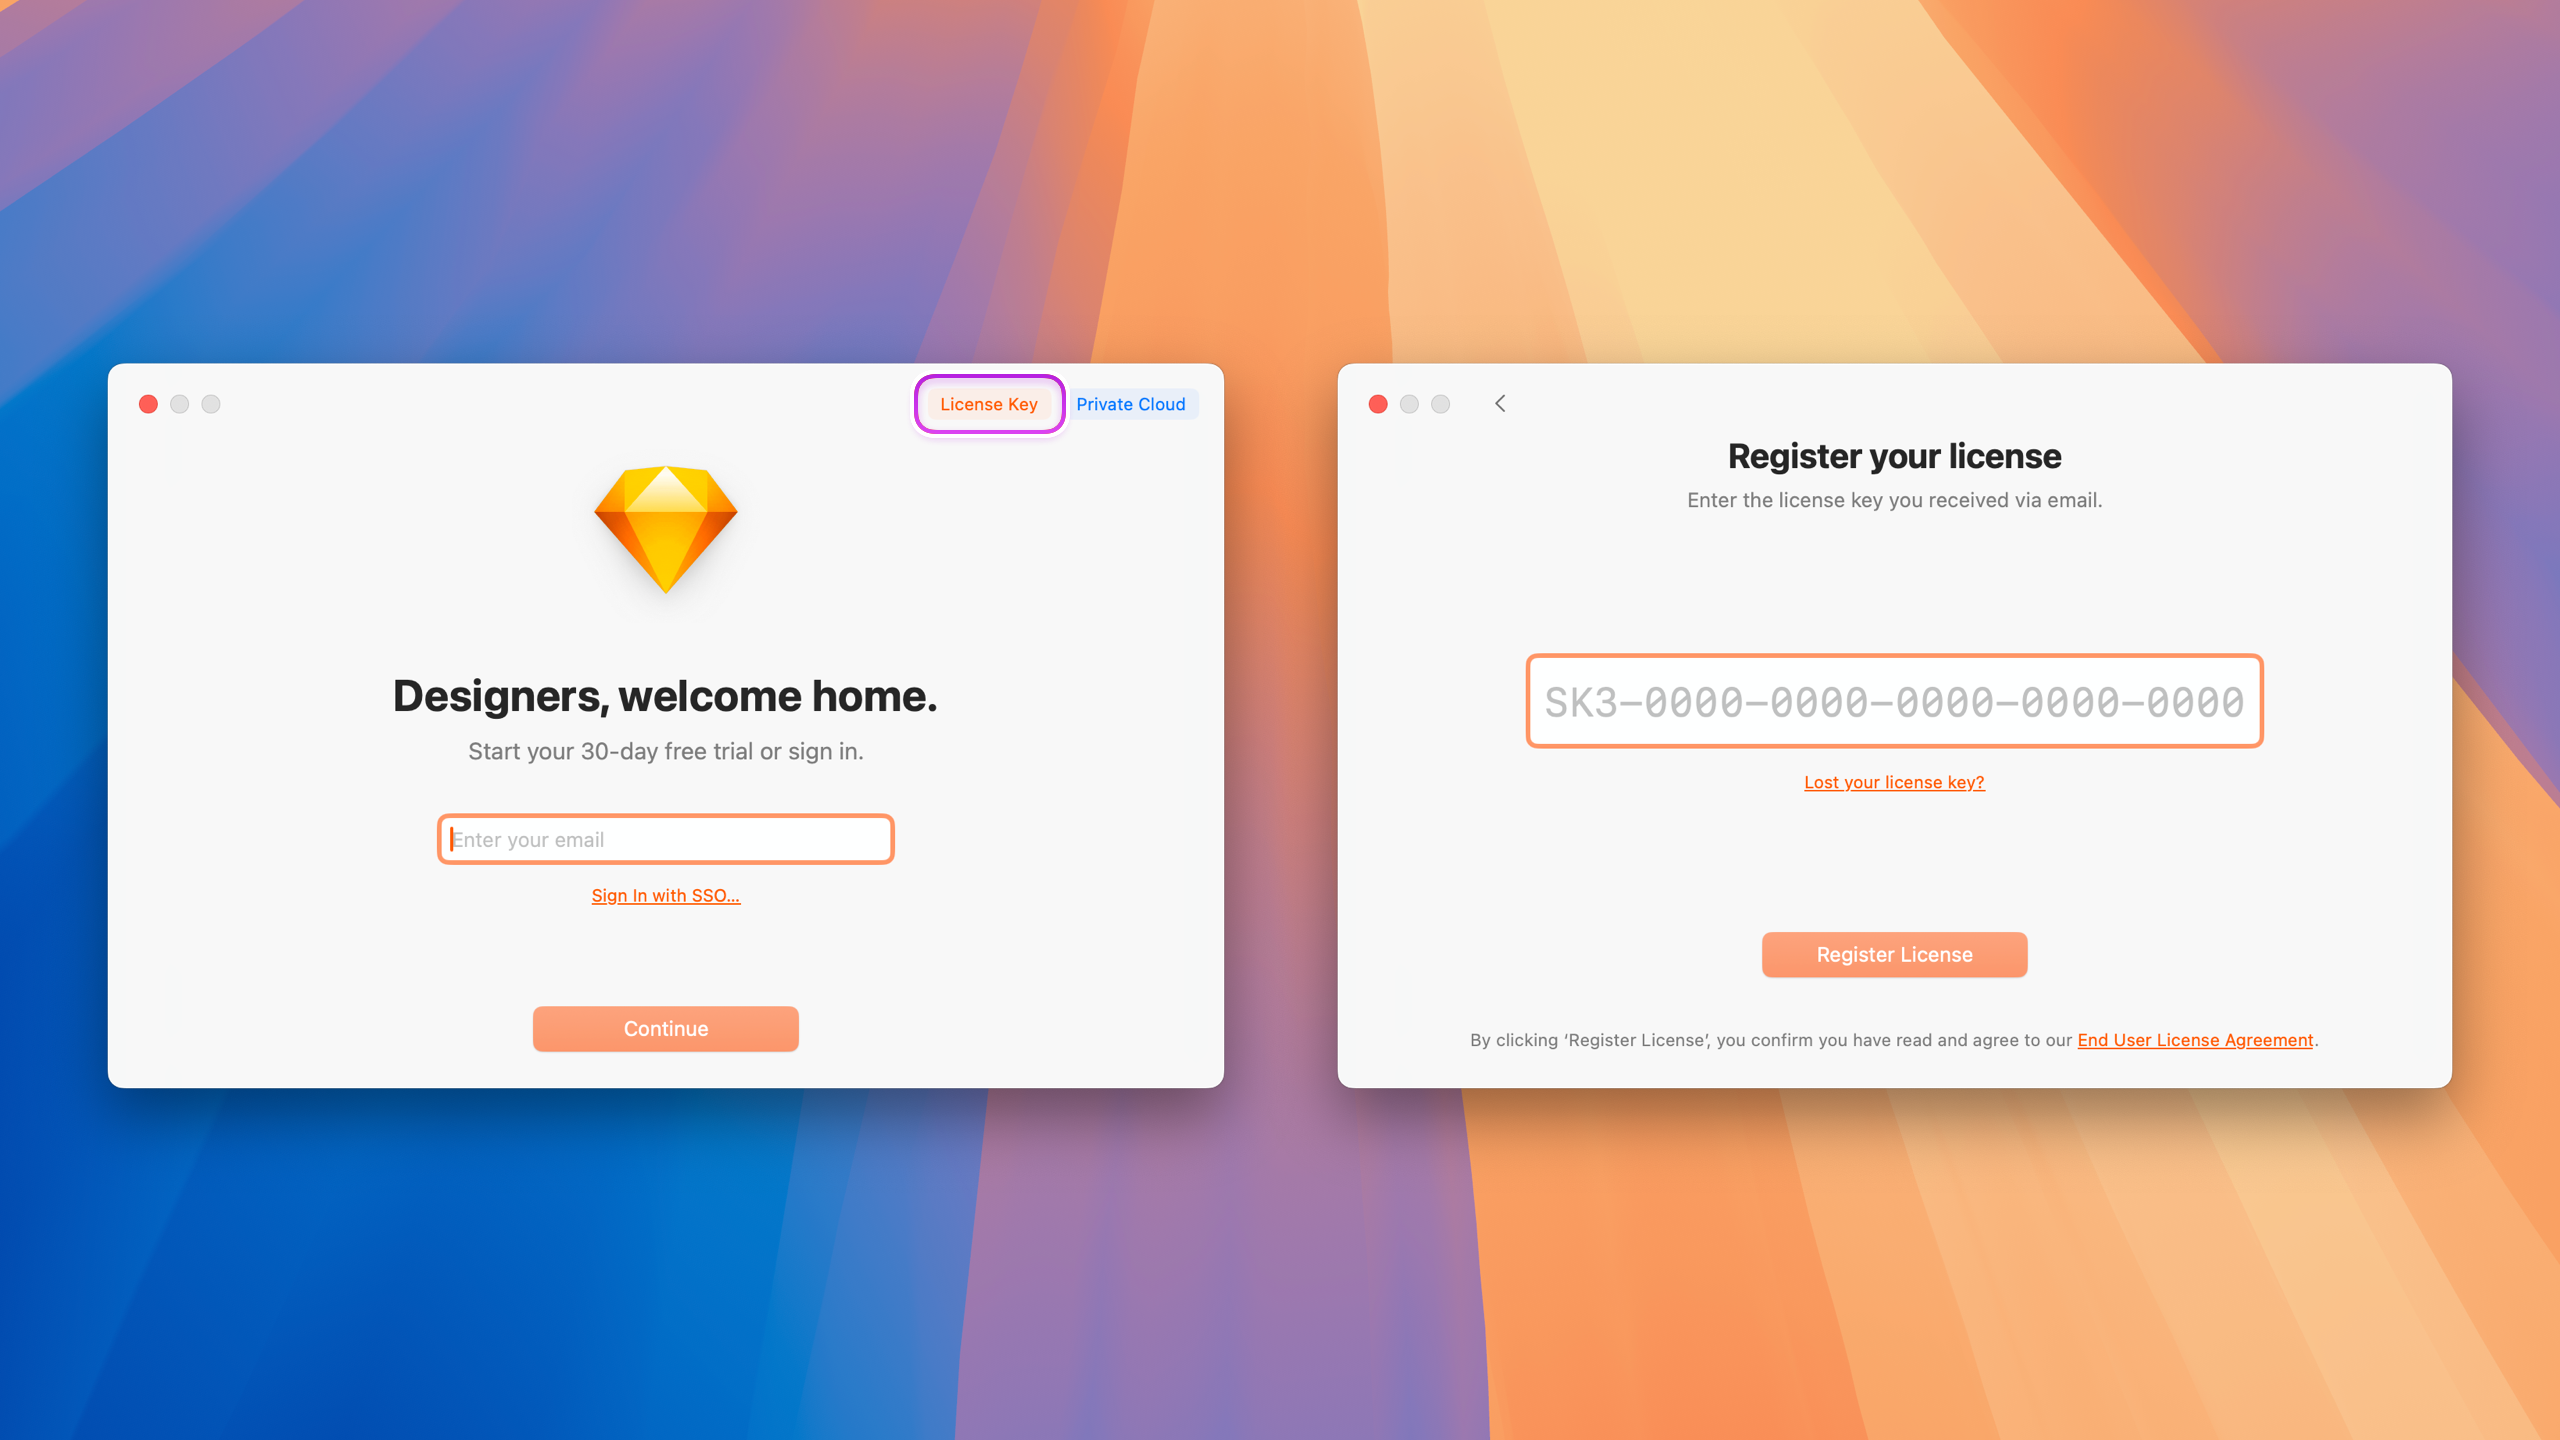
- **Sketch versions 100 and 101**. Click on **Enter Your License Key** option at the bottom. Type in your license key (starts with SK3) and click on the **Continue** button.
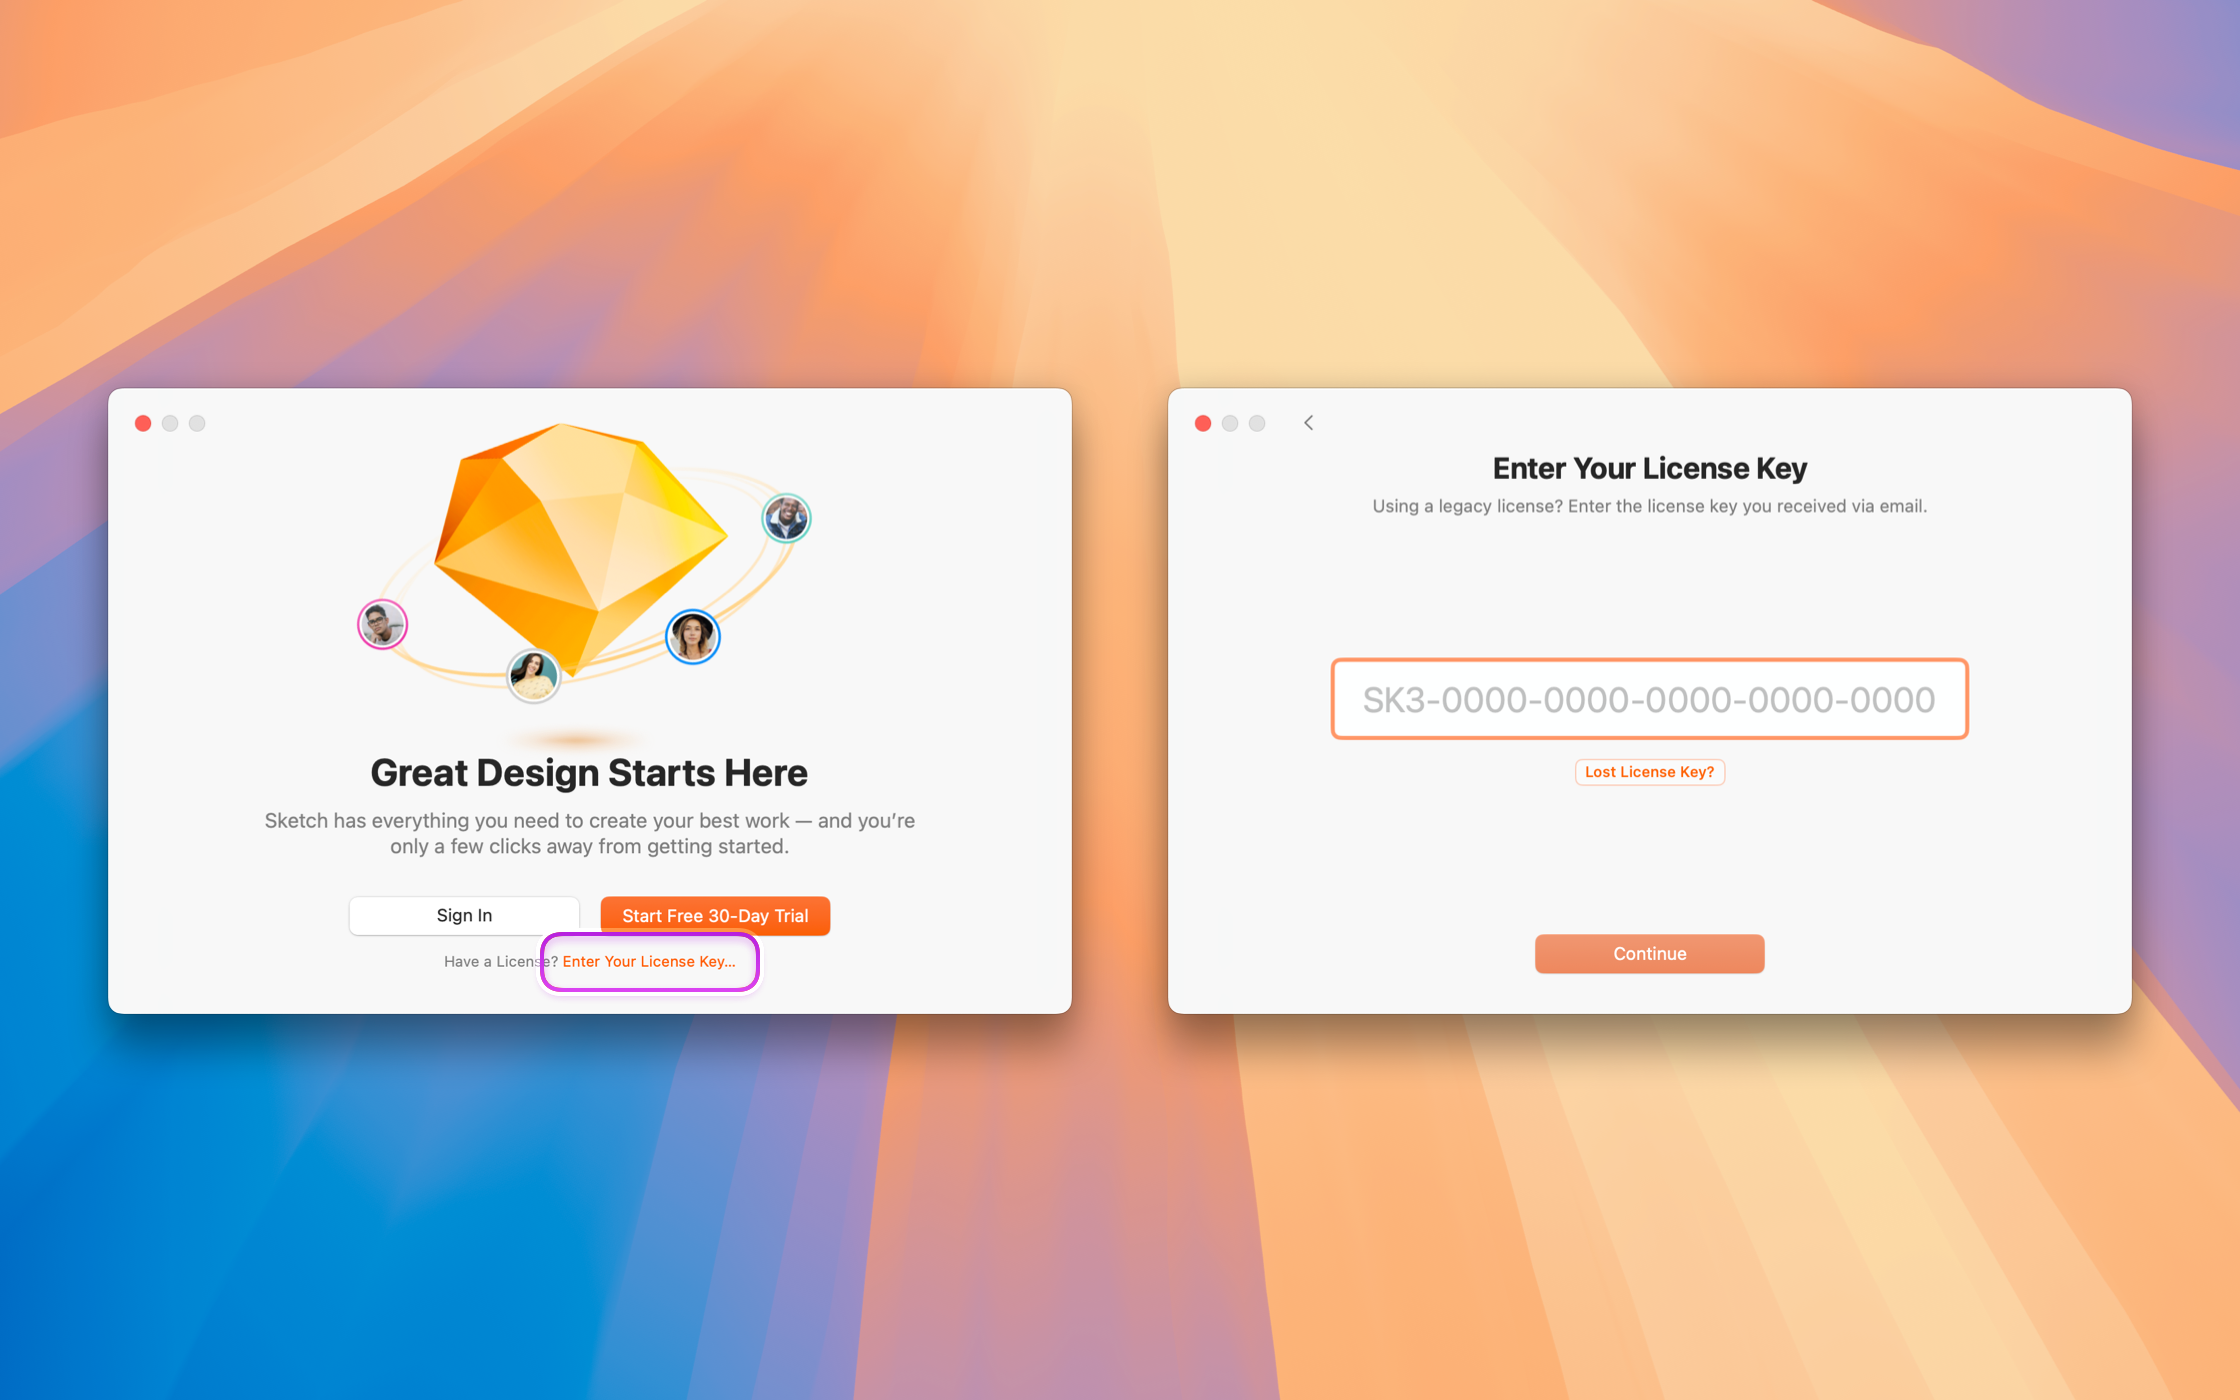
- **Sketch versions 72 to 99**. Click on the **Have a License?** button located in the top right corner. Type in your license key (starts with SK3) and click on the **Register** button.
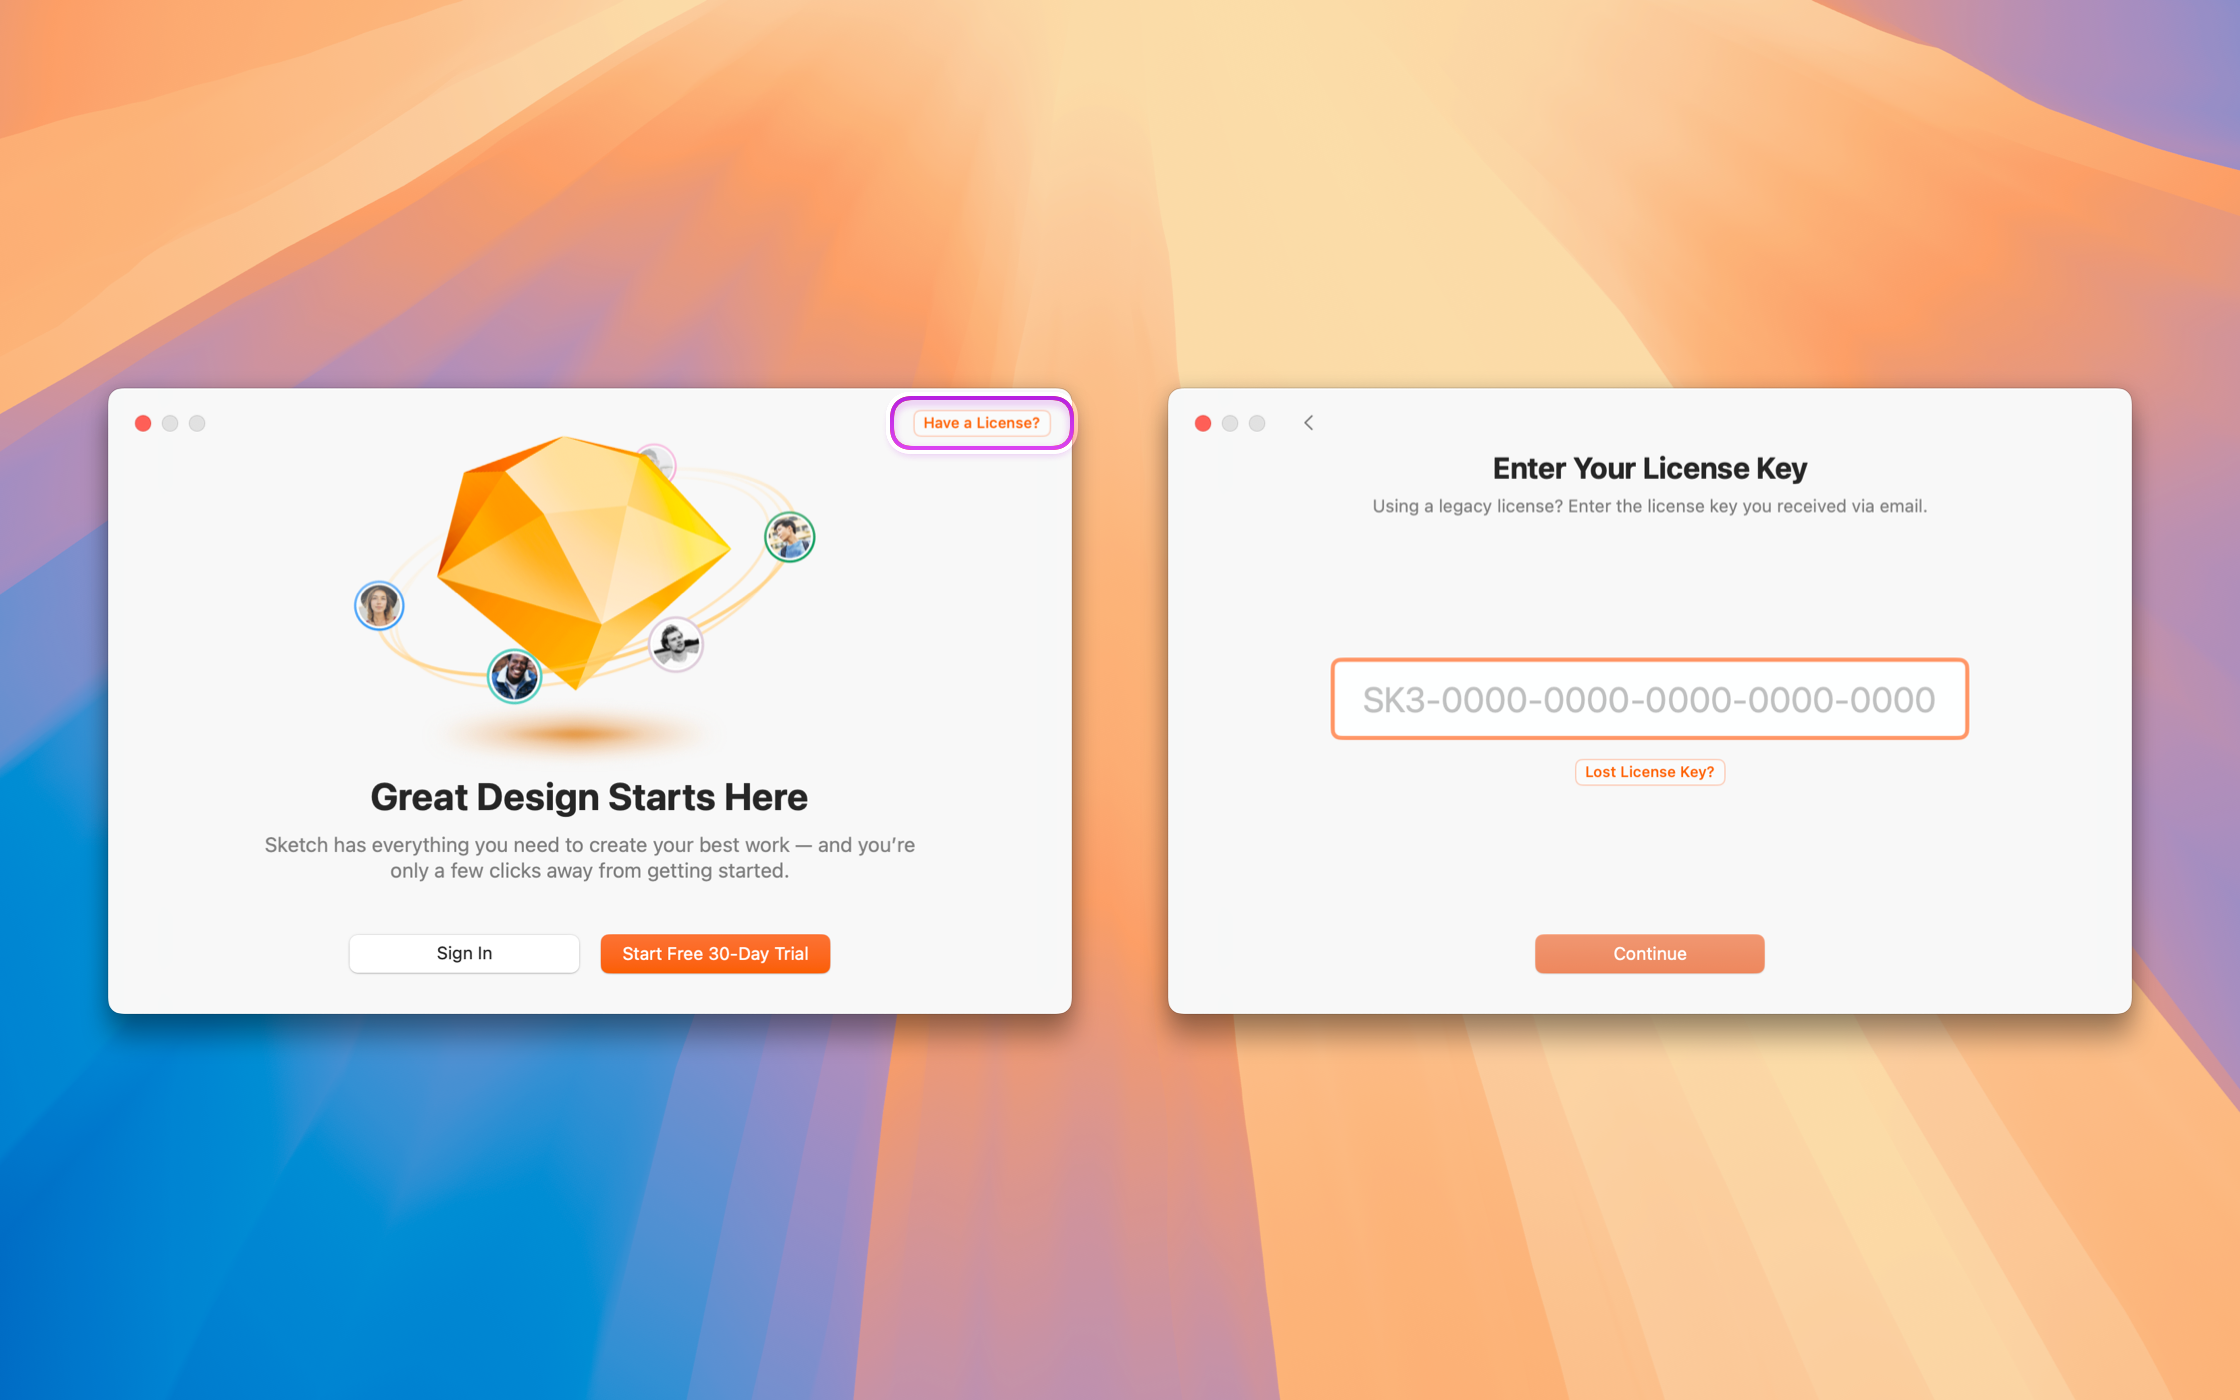
- **Sketch versions 56 to 71**. Choose the **Personal License** tab, type in your License Key number into the pop-up, and select **Register**. Alternatively, you can launch the Mac app and link it to your license by selecting **Sketch > Preferences > Account > Register** from the menu bar and inserting your license key.
- **Sketch version 55 or earlier**. Type in your License Key number, and select **Register**. Alternatively, you can choose **Sketch > About & Registration > Register** from the menu bar and insert your license key.
> **Note:** If you used Sketch with an active subscription (or trial), you must Sign Out of the Mac app before entering your license key. Open the Mac app, click on **Sketch** > **Settings** > **Account**, and then click on **Sign** **Out**.
--------------------------------------------------------------------------------
title: "How can I move my Mac-only license to another device?"
last_modified: "2024-11-28"
url: "https://www.sketch.com/support/mac-only-licenses/move-to-another-device/"
--------------------------------------------------------------------------------
## How can I move my Mac-only license to another device?
Please use the following steps to move your license to another device:
1. **Unregister your license on your old device**: Launch the Mac app, head to **Sketch > Settings** from the menu bar, navigate to the **Account** tab, and select **Unlink Device**.
Alternatively, you can unregister your device remotely by clicking the **Unlink** option in the [License Manager](/license/admin/).
1. Go to our [release page](/releases/mac/) and download your preferred version onto your new device.
**Note:** Depending on when you last renewed your license, your license key may not be valid for the latest version. Make sure you download a version that your license is valid for.
1. Install the Mac app by dragging the Sketch icon to your **Applications** folder.
1. Follow our guide to [register the Mac app](/support/mac-only-licenses/register-a-device/) on the new device.
--------------------------------------------------------------------------------
title: "I’m connected to the internet but I can’t register my Mac-only license"
last_modified: "2022-08-30"
url: "https://www.sketch.com/support/mac-only-licenses/restrictive-network/"
--------------------------------------------------------------------------------
## I’m connected to the internet but I can’t register my Mac-only license
Although Sketch doesn’t always require you to connect to the internet, the Mac app sometimes needs to connect to our servers if you have a Mac-only license account. For example, when you register your copy of the Mac app or when it needs to validate your license for an update.
If the Mac app tries to register/validate your Mac-only license and can’t connect to our server, you’ll probably see the following message:

To register, the Mac app needs to be able to connect to the following address and port:
If you have a firewall implemented, you will need to change your settings to allow traffic to this host. If you’re using a proxy server, you will need to add our domain to your allowlist, as we don’t allow re-signing of certificates.
**Note:** These issues are typically caused by local network issues. If you have an IT team/department, ask them to review the information in [Can my VPN connection affect Sketch?](/support/troubleshooting/mac-app/network-settings/) and ensure the network is configured correctly.
If the above-mentioned solutions do not help, please don’t hesitate to [contact us](/support/contact/). In your email, please
include a screenshot of the error message, the email address used to purchase Sketch, and Sketch logs. To learn how to collect these logs, please follow the instructions on this page: How do I collect the data requested by the Support Team?
--------------------------------------------------------------------------------
title: "Troubleshooting"
description: "Step-by-step guides for solving common documents, libraries, components, or troubleshooting issues on the Mac and web apps."
last_modified: "2026-05-20"
url: "https://www.sketch.com/support/troubleshooting/"
--------------------------------------------------------------------------------
## Troubleshooting
Step-by-step guides for solving common documents, libraries, components, or troubleshooting issues on the Mac and web apps.
--------------------------------------------------------------------------------
title: "Contacting Customer Support"
url: "https://www.sketch.com/support/troubleshooting/contacting-customer-support/"
--------------------------------------------------------------------------------
## Contacting Customer Support
--------------------------------------------------------------------------------
title: "How do I collect the data requested by the Support Team?"
description: "When you contact us we may need to ask for additional information such as log files, screenshots, or screen recordings to help us find the best solution. This article contains instructions on collecting the information we might need."
last_modified: "2025-07-04"
url: "https://www.sketch.com/support/troubleshooting/contacting-customer-support/data-for-support-team/"
--------------------------------------------------------------------------------
## How do I collect the data requested by the Support Team?
When you contact us we may need to ask for additional information such as log files, screenshots, or screen recordings to help us find the best solution. This article contains instructions on collecting the information we might need.
**Note:** Information shared with us is 100% confidential, and we’ll delete any files you share as soon as we’ve finished our investigations.
> **Note:** If you’re troubleshooting an issue that’s difficult to describe or reproduce, you may find it useful to give our Support Team [temporary access](/support/troubleshooting/contacting-customer-support/support-access/) to your Workspace. Support access expires after seven days automatically, but you can disable it earlier.
## How to take screenshots on your Mac
You can quickly and easily take a screenshot by pressing **⌘⇧5** (CMD+Shift+5). This will reveal a frame highlighting the current
screenshot area, which you can resize as needed. There are also options that allow you to capture your entire screen, a specific window etc.
Once you have selected the area you want, click on the **Capture** option; your screenshot will display in the bottom right corner for a few seconds. It will save to your Desktop, where you can open and edit it if necessary. You can find more [detailed instructions on Apple’s website](https://support.apple.com/en-gb/HT201361).

## How to create a screen recording
Open your QuickTime Player app and choose **File > New Screen Recording** from the menu to create a simple recording. Click on **Options** and then click **Show Mouse Clicks**, as this helps us diagnose the issue. Click the **Record** option, and the recording will begin. Once you have captured what you need, click on the **stop icon** on the top right side of the menu bar.
After you select **stop** , the recording will save to your Desktop, and it will open in a new window for you to view.
Additionally, you can also enable recording via your Mac’s microphone if you are comfortable doing so. Use the same options menu and talk through your issue as you make your screen recording.
## How to send a crash report
Crash logs are useful to determine what happened to cause the crash. There are two ways to share a crash report with us:
### Option 1: Use the crash report window
If the Mac app crashes, try opening it again — you’ll see a window titled **Problem Report for Sketch**. Please enter your email address and, if possible, add a brief comment describing what you were doing before the crash. Including your email helps us locate your report and follow up if needed.
Please let us know if you submitted a crash report via this window, and include the email address you used so we can locate it on our end.

### Option 2: Collect the crash report from your Mac
If the Mac app crashes and the crash report window doesn’t appear when you relaunch it, you can get the crash report manually by following these steps:
1. In Finder, go to your **Applications** folder, then **Utilities,** and launch **Console**.
2. Select **Diagnostic Reports** on the sidebar and locate the most recent crash.
3. Optionally, you can type “sketch” on the search bar of the console to quickly locate the report.
4. When found, control-click it, and then select **Reveal in Finder** from the shortcut menu.
5. Copy, or drag and drop the selected file from the Finder window to attach it to your message to us.
## How to record a sample process file
If the Mac app becomes slow or unresponsive we recommend recording a sampled log file. The sampling process will gather a report that contains helpful information to debug the problem.
The sampling process log must be captured while the Mac app is slow. You’ll need to trigger the slowness in the document while recording the sample process log.
1. Open the **Terminal** application from your **Applications/Utilities** folder and run the following command:
1. **sample Sketch 120 -wait -mayDie -file ~/Desktop/SketchSample.txt** .
1. The “120” parameter sets the duration of the recording in seconds. Adjust it to give yourself enough time to reproduce the slowdown, so the recording captures the issue.
1. Open the problematic document immediately and try to reproduce the steps that cause the slowdown.
1. Within about 2 minutes, a file called SketchSample.txt will be created on your Desktop. Attach it to your reply and send it over.
## How to record Sketch logs
If the problem occurs while working with Workspace files or collaborating in real-time, we’ll ask you to collect a Sketch log.
To successfully collect this log, you need first to reproduce the issue, i.e., slowness, and then collect the log file. Please follow the below steps:
1. Open a Workspace file and reproduce the problem.
* If the problem happens while collaborating with someone else, have at least one colleague connect with you on the same file.
1. Open a new Finder window and select **Applications > Utilities > Terminal**.
1. Open the **Terminal** and paste the command:
```bash
bash <(curl -fsSL https://git.io/sketchlogs) 60m
```
**Note:** The `60m` parameter needs to be set to the length (in minutes) that is needed to record the issue. This doesn’t mean the log will run for an hour, but rather that it will collect events from the last hour, the capture actually takes just a few moments to complete.
Once the log has been collected, a zip file will be on your desktop, titled: “Sketch _Logs_ (date).zip”. This is the file you’ll share with the Support Team.
## How to collect browser details
If you’re experiencing issues with the web app, it is best to know which browser you’re using.
While answering “Safari”, or “Chrome” is correct, that’s only part of the information needed. [This handy link](https://www.whatsmybrowser.org) will detect the exact details of your browser. Select the page, click on “Copy,” and paste the URL in your reply to us.
## How to reinstall the Mac app
Sometimes after reviewing a case, we may advise reinstalling Sketch. [Please read this article](/support/troubleshooting/mac-app/crash-troubleshooting/#4-reinstall-sketch) on how to reinstall and ensure your plugins, libraries, and gradient presets are restored.
--------------------------------------------------------------------------------
title: "How do I enable Support Access for my Workspace?"
last_modified: "2025-07-10"
url: "https://www.sketch.com/support/troubleshooting/contacting-customer-support/support-access/"
--------------------------------------------------------------------------------
## How do I enable Support Access for my Workspace?
## Why does Support Access exist?
Support Access lets our team temporarily view your Workspace to help troubleshoot complex issues. It lets us view documents and related information to better understand and resolve the issue. We’ll only use it when necessary, and always with your privacy in mind.
### What happens when I enable Support Access?
While Support Access gives us temporary permission to view your Workspace, documents and backlog information:
- We can’t edit your documents in any way.
- We can’t change any permissions or settings within your Workspace.
- You remain in control. We don’t override your designs or claim ownership of your content.
Support Access is disabled by default, and we can only view your documents if you give us permission. Access automatically expires after seven days — but you can turn it off at any time.
### How to enable Support Access
> **Note:** Only Admins can enable Support Access.
To enable Support Access:
1. Open your Workspace in the web app.
2. Click **Help** in the bottom-left corner.
3. Choose **Support Access**, then switch it on.
--------------------------------------------------------------------------------
title: "Mac app"
url: "https://www.sketch.com/support/troubleshooting/mac-app/"
--------------------------------------------------------------------------------
## Mac app
--------------------------------------------------------------------------------
title: "How can I recover a lost file?"
description: "Lost data is a sensitive issue that we take very seriously. We put special care into safeguarding your Sketch documents and keeping the Mac app stable, so your work is safe."
last_modified: "2022-08-30"
url: "https://www.sketch.com/support/troubleshooting/mac-app/recover-lost-files/"
--------------------------------------------------------------------------------
## How can I recover a lost file?
Lost data is a sensitive issue that we take very seriously. We put special care into safeguarding your Sketch documents and keeping the Mac app stable, so your work is safe.
However, there are occasions when files appear to be misplaced, this can be caused by different things. We’ve gathered a list of common causes and solutions to locate and recover your files.
After trying the following solutions, [please contact us](/support/contact/) if your document is still missing. Provide as many details as possible about how this happened.
## I can’t find my file after updating Sketch
Sketch updates are unable to alter or touch your documents. You can safely update Sketch, your local or workspace files are left untouched throughout the update process.
Sometimes a Sketch update can run parallel to a macOS update or after scheduled maintenance by your organization. In this context, your files might be moved unintentionally by someone else, or shortcuts like the Recent Documents section may appear empty after the maintenance.
Check with your organization if a file backup was made. Also, see the question below about how to search for Sketch files on your computer.
## I can’t find my file after Sketch crashed
A crash cannot delete your file, and most likely, all your changes will still be there when you reopen the file.
If Sketch crashed before you were able to save your file, please follow these steps:
* Open Finder and select **Go > Go to Folder…** from the menu bar
* Paste in the following path: ~/Library/Mobile Documents/Sketch
* This is where unsaved files are temporarily kept. Please note that due to the nature of this folder, the file may not contain the latest changes.
You can also take a look at the following question that covers how to search for Sketch files on your Mac.
## I can’t find a Workspace file, what can I do?
### Check your Trash Folder
If you saved a file to your Workspace and now cannot find it, try looking for it in the trash folder of the Workspace. Go to Documents
and click on the **Trash** folder option on the left panel.

### Check if the file was moved to a restricted project
Check with your Workspace Admin to see if the file is now in a **restricted project.**
If this is the case, it is normal that you can no longer see the file. To regain access, you’ll need the Admin or the Editor that created the project to grant you access.
## I can’t find a local file, what can I do?
There are several methods we can try to find a local file.
### Method 1: searching with Finder
1. Open a new Finder window
1. Go to the top right corner and type .sketch in the **Search** box
1. Press enter (or select **Filenames: Contains “Sketch”** from the Search dropdown menu and then change the **NAME** field to **Everything** ).

1. Once the search is complete, you can sort the Date Modified column so you can see the most recent files first

### Method 2: searching with the Terminal application
If the previous method does not yield results, you can use the Terminal
application on your Mac to look for the file:
1. Open Terminal **(Finder > Applications > Utilities)**
1. Enter the following command and press “enter” **sudo find / -name "*.sketch" -print**
1. Enter your password (you will not see it in the terminal window as you are typing it) and press “enter”
1. Wait until the search finishes, and don’t worry if at the beginning you get some errors that read “Operation not permitted” this is normal.
1. Once the search has finished you’ll see quite a lot of information. To narrow it down, press ⌘F on your keyboard to activate the search field and enter your file’s name.
Tip: you can use partial match searches, this will yield more results.
Once you enter the search term, click the arrows **<** or **>** and macOS will highlight the files that have the matching name and the path to the files location:

### Method 3 - Using iCloud to recover a file
If you have iCloud sync enabled you can look for a backup of your file in your
iCloud account:
1. First, check if iCloud Sync is enabled. Go to the Apple Menu ** > System Preferences > Apple Account** and select **iCloud** in the left panel and then click the **Options** button next to iCloud Drive:

A list will pop up. Check if Sketch appears on that list:

1. If Sketch is on the list, log into your iCloud account, go to the Settings section and click on the option at the bottom of the page:

**Note:** If you use a file storage service that supports file versioning you can also look for a backup of your file. Google Drive is one example of these services but it requires you to set it up to sync your files so it can track changes.
--------------------------------------------------------------------------------
title: "Why can’t I import EPS files to Sketch?"
description: "macOS Sonoma dropped built in support for Postscript (.ps) and encapsulated Postscript (.eps) files"
last_modified: "2024-03-12"
url: "https://www.sketch.com/support/troubleshooting/mac-app/import-eps-files/"
--------------------------------------------------------------------------------
## Why can’t I import EPS files to Sketch?
Apple dropped built-in support for PostScript files in macOS Sonoma, which includes EPS files. Sketch is fully integrated with macOS, so these changes affected how Sketch handles EPS files. Luckily, there are several workarounds you can try.
## How to import EPS files into Sketch
If you’re running macOS Sonoma or newer (version 14.x) you’ll need to convert the EPS file into a supported format to import it to Sketch. Since EPS is vectorial, we recommend converting to PDF or SVG.
There are different tools to do the conversion, here are some examples:
1. A third party app like [**Ghostscript**](https://www.ghostscript.com/). **Ghostscript** is a command-line tool that you can run in your Mac’s Terminal app if you’re comfortable with this type of solution.
- We reference Ghostscript here because it’s a robust and widely used tool for handling EPS conversions. It’s also free for non-commercial use under the General Public License. However, we advise you to review [Ghostscript’s license and conditions](https://www.ghostscript.com/licensing/index.html#open-source) before using it to ensure it aligns with you.
2. An online converter. There’s a good amount of options available, both paid and free and these do not require the use of a command line tool. Try a web search for *eps online converter* and you’ll get a good amount of options to evaluate.
The tool you choose will carry out the conversion into PDF or SVG, which you can then import into Sketch. Which format yields better results will depend on the contents of your EPS file. Both SVG and PDF will retain the editing capabilities when you make the import.
If you cannot find your answer or the problem persists, [**contact us**](/support/contact/) with as much detail as possible about your situation.
--------------------------------------------------------------------------------
title: "Why do I need to update Sketch for macOS Tahoe?"
description: "Apple’s macOS Tahoe update introduces system-level changes that impact how apps behave. Versions of Sketch prior to Athens (2025.1) do not work reliably with Tahoe and you may run into issues. Updating Sketch gives you smooth performance and compatibility with Apple’s latest operating system."
last_modified: "2025-10-01"
url: "https://www.sketch.com/support/troubleshooting/mac-app/tahoe-update/"
--------------------------------------------------------------------------------
## Why do I need to update Sketch for macOS Tahoe?
Apple’s macOS Tahoe update introduces system-level changes that impact how apps behave. Versions of Sketch prior to Athens (2025.1) do not work reliably with Tahoe and you may run into issues. Updating Sketch gives you smooth performance and compatibility with Apple’s latest operating system.
> **Note:** To ensure the Mac app works properly on macOS Tahoe, [update to Athens (2025.1) or later](/releases/mac/).
### What happens if I don’t update?
If you continue using a version older than 2025.1 on macOS Tahoe, you might run into:
- Intermittent failures when you make a selection
- Selection boxes not behaving consistently
- General instability or inconsistent behavior.
These issues are specific to the interaction between older builds and Tahoe, and they won’t improve without updating.
### Do I need to update right away?
Yes. If you plan to use macOS Tahoe, you’ll need to [update](https://www.sketch.com/releases/mac/) to version 2025.1 or later to avoid these issues. Staying on older builds will likely result in you experiencing the issues above.
--------------------------------------------------------------------------------
title: "Why can’t I update the Mac App?"
description: "This article addresses common issues that might prevent you from updating the Sketch Mac app and provides clear solutions to ensure a smooth update process."
last_modified: "2026-01-23"
url: "https://www.sketch.com/support/troubleshooting/mac-app/update-issues/"
--------------------------------------------------------------------------------
## Why can’t I update the Mac App?
This article covers common issues you might encounter when updating Sketch, along with possible solutions.
- **App Store Download:** If you downloaded Sketch from the Mac App Store, you must update it through the App Store. The in-app update option is disabled for versions downloaded this way. You can follow [this Apple’s guide](https://support.apple.com/en-gb/guide/app-store/fir9b01adda3/mac) for more instructions.
- **Sketch isn’t in the Applications folder.** Make sure Sketch is installed in the Applications folder. If you’re having trouble updating the app and it’s located elsewhere, moving it to the Applications folder may fix the issue.
- **macOS Limitations:** Check that your Mac meets the minimum system requirements for the latest Sketch version. You can find the best version compatible with your macOS on our [Mac app releases page](/releases/mac/).
- **Network Restrictions:** Some networks, especially corporate ones, may have restrictions that block access to Sketch’s update servers. Try switching to a different network, such as your home Wi-Fi, and disconnect from any VPNs before attempting the update.
- **Insufficient disk space:** Make sure you have enough disk space available for the update — each version of Sketch typically requires around 100 MB. If needed, free up space to complete the installation. You can [follow these instructions from Apple Support](https://support.apple.com/en-us/102624) to learn how.
- **Expired License:** If your Sketch Mac-only license has expired, you won’t be able to update the app. Renewing your license will help you to regain access to updates. More details in [here](/support/mac-only-licenses/billing/expired-license/).
- **Company Policy Restrictions**: If your company uses Mobile Device Management (MDM), there may be policies in place that restrict app updates. Consult your IT department to determine if such policies are affecting your ability to update.
- **If none of the above options above helped:** Try restarting your Mac and attempting the update again. Sometimes a simple restart resolves background issues that may be preventing the update.
If you’re still unable to update the app after following these steps, feel free to [contact Sketch support](/support/contact/) for further assistance. **Remember**, keeping your Sketch app updated ensures access to the latest features, performance enhancements, and security updates.
--------------------------------------------------------------------------------
title: "Can my network connection settings affect Sketch?"
description: "If you connect to the internet through a VPN, proxy or your network includes a firewall, you may need to make some adjustments for Sketch to work properly"
last_modified: "2025-07-04"
url: "https://www.sketch.com/support/troubleshooting/mac-app/network-settings/"
--------------------------------------------------------------------------------
## Can my network connection settings affect Sketch?
If you connect to the internet through a VPN, proxy or your network includes a firewall, you may need to make some adjustments for Sketch to work properly.
VPNs, proxies or firewalls are commonly used to allow access to corporate networks or to protect privacy. This means they control access to broader networks such as the wider internet.
Typically when working remotely you might be required to use a VPN to access company resources, some companies even pre-configure laptops to only connect to the internet via a VPN. Usually you will connect to a network (e.g. your home wifi) and then start a VPN client which effectively filters the traffic between your computer and the internet.
Sometimes a VPN or corporate networks can have specific rules that affect the communication between the Mac app and our servers, causing unexpected results.
Other times, there could be a proxy server involved in your connection. Proxy servers act as an intermediary between your computer and the webpage or service you are trying to access.
For other teams, a firewall may be set up to add an extra layer of protection. Firewalls monitor incoming and outgoing network traffic based on predefined security rules.
If any of these network tools are in place (VPN, proxy or firewall) you may see that you cannot log in or register the Mac App, upload files or collaborate in real-time with others.
You can quickly check if this is the case by disconnecting from the VPN or corporate network (if possible) and connecting to the internet via a public network. If this resolves the issue, it’s likely that a VPN or corporate network (with a firewall or proxy) is blocking some of the connections Sketch needs to work properly.
If you cannot switch connections, you’ll need to contact your network administrator or IT specialist in your organization and ask them to check if traffic is allowed in both directions (inbound and outbound) for the following list of endpoints:
* capacitor.prod.sketch.com
* capacitor-incoming-prod.s3.amazonaws.com
* resources-live.sketch.cloud
* graphql.sketch.cloud
* sketch-resources-incoming-live.s3-accelerate.amazonaws.com
* api.sketchapp.com
* api.prod.sketch.com
* download.sketch.com
* download.sketchapp.com
* events.sketch.cloud
* presence.prod.sketch.com
* metrics-collector.prod.sketch.com
* payments.prod.sketch.com
--------------------------------------------------------------------------------
title: "What is Safe Mode and how do I enable it?"
description: "Safe Mode is a quick and easy way to see if a plugin is causing unexpected behavior in Sketch"
last_modified: "2025-07-04"
url: "https://www.sketch.com/support/troubleshooting/mac-app/safe-mode/"
--------------------------------------------------------------------------------
## What is Safe Mode and how do I enable it?
Safe Mode is a quick and easy way to see if a plugin is causing unexpected behavior in Sketch
Safe Mode allows you to run Sketch with all your installed plugins disabled. Sometimes an incompatible plugin can cause the Mac app to work unexpectedly or crash and you can use Safe Mode to see if plugins are the cause.
## How to enable Safe Mode
Quit the Mac app and then launch it again while **holding down the Shift key ⇧**. This opens Sketch in Safe Mode and if everything works as expected, a plugin may have been causing the issue.
To find out which plugin(s) are the cause of your problem, choose **Plugins › Manage Plugins**. This will open the Preferences panel on the Plugins tab and here you can add plugins back one by one until you find which plugin is causing you issues.
To exit Safe Mode, simply quit and relaunch the Mac app without holding down the Shift key.
## How to manually disable plugins
If a plugin is crashing the Mac app on launch, you can uninstall all of them by moving the **Plugins** folder to your Desktop:
1. Quit the Mac app
2. Open Finder
3. Select **Go** › **Go to Folder…** or press ⇧⌘G
4. Enter the following path in the dialog that appears: **~/Library/Application Support/com.bohemiancoding.sketch3** and click **Go**, or press **↵**if you’re running later versions of macOS
5. Drag the **Plugins** folder to your Desktop and relaunch Sketch
6. Next, drag the Plugins folder back to its original location. Then, enable each plugin one at a time to identify which one is causing the issue.
## What can I do about plugin issues?
If a plugin is causing issues, check if there are any updates available. This can often resolve things, just remember to quit and relaunch Sketch after a plugin update to make sure changes take effect.
If the issue persists, [check our article on how to handle plugin-related problems](/support/troubleshooting/contacting-customer-support/plugin-issues/).
--------------------------------------------------------------------------------
title: "Why can’t I login to the Mac app?"
description: "There are some common areas to check if you are experiencing trouble logging into the Mac app. This article could help resolve your situation"
last_modified: "2026-04-21"
url: "https://www.sketch.com/support/troubleshooting/mac-app/sign-in-issues-mac-app/"
--------------------------------------------------------------------------------
## Why can’t I login to the Mac app?
There are some common areas to check if you are experiencing trouble logging into the Mac app. This article could help
## Do you have an active subscription account?
With an active subscription account, you can log into the Mac app with your email and password if you are an Editor in a Workspace.
However, if you use Sketch with a Mac-only license you need to enter your license key number to complete the registration. A license key begins with _SK3_ to use the Mac app and can be inserted within the login window when choosing **Have a license?**. Information on how to locate your license key [can be found here](/support/mac-only-licenses/manage/license-key/).
If you are unsure which type of account you have, check with your System Administrator if you have a Mac-only license or a subscription.
## Check your email and password
Ensure that you’re entering your email and password correctly. When either of these are entered incorrectly you’ll see the following message:

## Check if your subscription account is active with SSO
Our Professional plan subscriptions use Single Sign-On (SSO) to access all the internal systems and applications, but sometimes Sketch is not tied to that SSO login. You may have different credentials to access Sketch. Reach out to your System Administrator to check if this is the case.
## Is your VPN connection causing the trouble?
If you have a subscription account, your access is validated over an internet connection when you log in. It is possible that a VPN or corporate network is blocking the communication and you may have trouble signing in. To know more about how to troubleshoot VPN connections, [please read this article](/support/troubleshooting/mac-app/network-settings/).
## Delete the saved password in the Keychain Access app on your device
If the above solutions have not worked or do not apply, the problem may be related to an Apple Keychain issue. Native Mac apps use Apple’s Keychain to encrypt and safely store passwords, so you don’t have to keep typing them each time you launch an app. Sometimes deleting these passwords can help solve login issues.
Follow these steps to delete your saved Sketch password on your Keychain:
1. Quit the Mac app
1. Open **Keychain Access**. On macOS Sequoia and later, you’ll find it at `/System/Library/CoreServices/Applications/`. The quickest way to open it is with Spotlight (⌘Space), then typing “Keychain Access”. macOS will prompt you to switch to the Passwords app — click **Open Keychain Access** to continue. On macOS Sonoma and earlier, you can also find it in Finder under **Applications** > **Utilities**.
1. Once Keychain Access has launched, make sure to enable the **Show invisible items** option from the “View” menu in the Menubar.
1. Type Sketch in the Search bar on the top right side
1. Keychain will display the stored items that matched your search, select the result, then right-click it and choose **Delete**
1. If you have used a beta version of the Mac app you’ll see a saved password for the beta version. This is an independent login, no need to delete this one too
1. Once you have deleted the item, relaunch Sketch, and try signing in again
If the problem persists or your problem is not addressed in this article, [please contact us](/support/contact/) for further
assistance. If possible share screenshots of the error you are seeing when entering your credentials.
--------------------------------------------------------------------------------
title: "Why is the Mac app slow?"
description: "Sketch is great at dealing with complex designs, but if you are experiencing performance issues in the Mac app, the following information may help improve performance."
last_modified: "2025-07-04"
url: "https://www.sketch.com/support/troubleshooting/mac-app/performance-issues/"
--------------------------------------------------------------------------------
## Why is the Mac app slow?
Sketch is great at dealing with complex designs, but if you are experiencing performance issues in the Mac app, the following information may help improve performance.
> **Note:** If Sketch is freezing or crashing, [try these solutions first](/support/troubleshooting/mac-app/crash-troubleshooting/).
## Incompatible Plugins
Sketch supports third-party plugins that extend its functionality, but incompatible plugins can sometimes affect performance. To check if a plugin is causing an issue, try running Sketch in [Safe Mode](/support/troubleshooting/mac-app/safe-mode/), which temporarily disables all plugins.
If performance improves in Safe Mode, it’s likely that one or more plugins are causing the issue. You can find out which one by disabling all plugins, then re-enabling them one at a time in **Sketch** > **Settings** >**Plugins**, and monitoring performance.
## Complex files
Sketch doesn’t limit file size, but large documents with lots of layers, Symbols, or detailed elements can slow things down — especially on older Macs. Here are some tips to optimize your documents:
- Use Symbols. Converting repeating elements — like dot patterns or halftones — into a [Symbol](/docs/symbols-and-styles/symbols/) reduces the number of individual vector layers Sketch needs to render, helping improve performance.
- If you notice the Mac app lagging when opening the Insert menu or the Command Bar, try enabling only the Libraries you need. Some Libraries include a large number of Symbols, which can affect performance. Learn how to [manage Libraries](/docs/interface-and-settings/mac-app-settings/libraries/#removing-and-disabling-libraries) at both the app and document level.
- Use Document Libraries. These let you control which Libraries are active for each document, helping boost performance when only specific assets are needed.
## Large Bitmaps (photos, screenshots)
Using high-resolution images can slow down Sketch, especially if you have many in a single document. To optimize images:
- Reduce image resolution with **File** > **Reduce File Size…** This adjusts image quality to match its displayed size without affecting its visual appearance — unless you later enlarge the image.
- Use Symbols for images: Placing an image inside a Symbol and reusing that Symbol throughout your document can help reduce the number of image layers.
## Layering multiple blurs and shadows
Blurs and shadows require extra processing power. If you’re experiencing slow performance, try reducing the number of overlapping [blurs](/docs/symbols-and-styles/styling/blurs/) and [shadows](/docs/symbols-and-styles/styling/shadows/) in your design.
## Too many frames per page
Having many [**frames**](/docs/interface-and-settings/the-mac-app-interface/the-canvas/#using-frames) on the same page can slow down Sketch, as it needs to load and render all frames at once.
To improve performance:
- Use [**Pages**](/docs/interface-and-settings/the-mac-app-interface/the-canvas/#using-pages) to distribute frames across different sections of your document.
- Keep only essential frames on a single page to reduce the workload on your Mac.
## Get in touch
If you’re still experiencing performance issues, [**contact us**](/support/contact/)— we’ll be happy to help!
Include the following details to help us give you better support:
- What version of the Mac app are you using? (**Sketch** > **About Sketch**)
- What macOS version are you running? ( > **About This Mac**)
- Do you experience the issue with all files or only specific ones?
- Does the issue happen with Workspace and local files?
- Does performance slow down when collaborating in real-time?
- How many people have the document open at once?
- Has this file always been slow, or did the issue start recently?
If a specific file is causing problems, attaching a copy or sharing a link will help us find and understand the issue faster.
--------------------------------------------------------------------------------
title: "How to roll back to a previous Mac app version?"
description: "We take great care to ensure that every new release of Sketch runs smoothly. However, we understand that, in some rare cases, new versions can introduce unexpected issues. In these situations, rolling back to a previous version of the Sketch Mac App may be necessary, but it should only be considered a last resort."
last_modified: "2026-01-23"
url: "https://www.sketch.com/support/troubleshooting/mac-app/rollback-version/"
--------------------------------------------------------------------------------
## How to roll back to a previous Mac app version?
We take great care to ensure that every new release of Sketch runs smoothly. However, we understand that, in some rare cases, new versions can introduce unexpected issues. In these situations, rolling back to a previous version of the Sketch Mac App may be necessary, but it should only be considered a last resort.
### Considerations before rolling back
Before deciding to roll back, we recommend trying to troubleshoot the issue you’re experiencing with our **Product Support team**. You can reach them through this [contact form](/support/contact/?topic=bug). If you’re unable to resolve the problem, and no other solutions are available, then rolling back might be the appropriate step.
### How to roll back to a previous version
If you’ve discarded other options and need to roll back, follow these steps:
1. **Quit the Sketch Mac app**: Ensure that the current version of Sketch is closed.
2. **Download and install**:
1. Visit our [releases page](/releases/mac/) and download the version you need.
2. Unzip the downloaded file and move the app to the `/Applications` folder.
3. If you see a message saying the app “Sketch” already exists, you can either replace it or rename the old version to keep both versions.
**Note**: You can have multiple versions of Sketch installed at the same time, and they will all share the same preferences.
Rolling back to a previous version should only be done when absolutely necessary. While this can help resolve certain issues, it may also cause compatibility problems with your documents. If you need assistance during the rollback process, don’t hesitate to contact [our support team](/support/contact/?topic=bug).
--------------------------------------------------------------------------------
title: "Why is the Mac app crashing? Try these solutions"
description: "If you’re running into issues and experiencing crashes, there are a few things you can try to fix it."
last_modified: "2025-07-04"
url: "https://www.sketch.com/support/troubleshooting/mac-app/crash-troubleshooting/"
--------------------------------------------------------------------------------
## Why is the Mac app crashing? Try these solutions
If you’re running into issues and experiencing crashes, there are a few things you can try to fix it.
If none of the solutions below work for you, please [get in touch](/support/contact/) with us for more help. If you get in touch, it is can be useful to supply any document that is causing a specific issues.
> **Note:** If Sketch crashes, please [send the crash report logs](/support/troubleshooting/contacting-customer-support/data-for-support-team/#how-to-send-a-crash-report) using the window that appears when you relaunch the app — they help us identify what caused the crash.
## 1. Check your plugins
Sometimes an incompatible or outdated plugin may be causing the Mac app to crash. So, it’s a good idea to try using the Mac app without any plugins running, to see if that could be causing your problem.
To disable your plugins temporarily, quit the Mac app and then launch it again while **holding down the ⇧ Shift key**. This opens the Mac app in Safe Mode and if everything works as expected, a plugin may have been causing the crash.
To find out which plugin(s) are the cause of your problem, close the Mac app and launch without holding ⇧ to enable plugins again. Choose **Sketch > Settings > Plugins** and disable or uninstall all of them. Then add them back one by one until you find which plugin is causing you issues.
**Note:** Some plugins may still load even if you disable them. To ensure they don’t interfere with the Mac app, it’s best to uninstall them completely.
If a plugin is crashing Sketch on launch, you can uninstall all of them by moving the **Plugins** folder to your Desktop:
1. Quit the Mac app
2. Open Finder
3. Select **Go > Go to Folder…** or press ⇧⌘G
4. Enter the following path in the dialog that appears: `~/Library/Application Support/com.bohemiancoding.sketch3` and click **Go**
5. Drag the **Plugins** folder to your Desktop and relaunch Sketch
Now you can proceed to install your plugins one by one until you find the one that’s causing the crash.
Plugins are created by third-party developers, so you’d need to get in touch with them for further support and assistance. But before you do, try checking to see if there’s an update available for the plugin that’s causing you issues. That can often resolve issues.
If disabling your plugins doesn’t help, move on to the next suggestion.
## 2. Restart your Mac
We know this sounds a lot like _“Have you tried turning it off and on again?”_ but sometimes a simple restart can be a fool-proof way to fix a problem in Sketch.
If possible, save your work, then quit the Mac app and restart your Mac. If a full reboot doesn’t resolve your issue, try the next solution.
## 3. Create a new preferences file
The Mac app stores your preferences in a file, and sometimes this file can get corrupted with bad data. Removing this file forces the Mac app to create a fresh preferences file that won’t cause the same issues.
Don’t worry, we won’t delete the file completely — we’ll just move the file out of the way, so we can restore it later if needed. Follow these steps to remove the file and have Sketch create a new one.:
1. Close the Mac app
2. Open Finder
3. Select **Go > Go to Folder…** or press ⇧⌘G
4. Enter the following path in the dialog that appears: `~/Library/Preferences/com.bohemiancoding.sketch3.plist` and click **Go**
5. The preferences file will be located. Drag it to your Desktop and relaunch the Mac app.
If everything is now working as expected, you can delete the preferences file from your Desktop.
**Note:** When you delete the preferences file you may need to set some preferences in the app and plugins again.
If your issue still isn’t resolved, you can close the Mac app and drag your original preferences file back to its place (overwriting the new version) to restore your user defaults.
## 4. Reinstall Sketch
A clean reinstall of the Mac app may well fix things if the above steps haven’t helped. We recommend you use an uninstaller like **[AppCleaner (free)](https://freemacsoft.net/appcleaner/)** to make sure you remove all files related before you install a new copy.
We recommend you backup your libraries and plugins so you can add them back and keep working as usual after the reinstall.
1. Open Finder and click on the menu bar **Go > Go to Folder…** or press ⇧⌘G (Shift-Command-G)
1. Paste in: `~/Library/Application Support/com.bohemiancoding.sketch3` and click **Go**
1. Move the _Libraries_ and the _Plugins_ folder to your Desktop
1. If you have added any custom Gradient Presets to Sketch, then you will also want to backup the `assets-v##.sketchpreset` file with the highest number from the same folder as your Libraries and Plugins
After you have completed uninstalling the Mac app, please **[download the latest version](/releases/mac/)** and sign in using your email and password. Once Sketch has been reinstalled, repeat steps 2 and 3 from the plugin backup process and add back your libraries, plugins, and presets.
**Note:** If you’re experiencing issues with the Mac app being slow, there are a few other solutions to try, you can find more details in our [Why is the Mac app slow?](/support/troubleshooting/mac-app/performance-issues/) article.
--------------------------------------------------------------------------------
title: "iOS app"
last_modified: "2026-05-20"
url: "https://www.sketch.com/support/troubleshooting/ios-app/"
--------------------------------------------------------------------------------
## iOS app
To use the [iPhone app](https://apps.apple.com/app/sketch-view-and-mirror/id1609224699), you need a Sketch account and to be a Member of a Workspace or a Guest on a document. If these things are in place and you’re still running into trouble, take a look at our [documentation pages](/docs/getting-started/sketch-for-ios/) and read the list below; it contains the common answers to questions sent by our user community.
## Why can’t I mirror local files?
The [iPhone app](https://apps.apple.com/app/sketch-view-and-mirror/id1609224699) is all about mobility: being able to see and share your designs anywhere and on the go, and Workspaces make this possible. To mirror a file, you must first save it to your Workspace.
Once the file has been saved on your Workspace, leave it open in the Mac app, launch the iPhone app and open the same file. You’ll see the mirror icon appear in the top right corner of the iPhone screen. Tap it to start mirroring. Any updates you make in the Mac app will now be reflected on your iPhone.
## Why can’t I see the Prototype section of my document?
The [iPhone app](https://apps.apple.com/app/sketch-view-and-mirror/id1609224699) needs at least one Artboard of the prototype to be set as a starting point. If you can’t see the prototype section of a document, open the file in the Mac app and add a [starting point](/docs/prototyping/using-starting-points/) to one of the artboards. Go back to the iPhone app, and you should now see the prototype section of your document.
## Why do I see "No Workspace" when I log in to the app?
The [iPhone app](https://apps.apple.com/app/sketch-view-and-mirror/id1609224699) lets you browse through the files you have permission to within any Workspaces you can access. The app has no files to display if you are not part of a Workspace.
Check with your Workspace Admin to ensure you have the proper permissions within the Workspace, and if you’re still experiencing difficulties, [contact us](/support/contact/).
## I can’t sign in with SSO, what can I do?
If you are a member of an active SSO account, you can sign in to the [iPhone app](https://apps.apple.com/app/sketch-view-and-mirror/id1609224699) in the same way you would sign in to the Mac app.
If you’re running into trouble while signing in, ensure you have entered your credentials correctly: your SSO shortname and the account you use to sign into Sketch.
Check with your Workspace Admin that you have been added to the Workspace with the proper permissions. [Contact us](/support/contact/)
if you still have trouble signing in with SSO to the iPhone app.
--------------------------------------------------------------------------------
title: "Mirror app (legacy)"
description: "We’ve listed here common issues you may run into while using the legacy Mirror app, but please note that this app is no longer supported"
last_modified: "2024-03-12"
url: "https://www.sketch.com/support/troubleshooting/mirror-app-legacy/"
--------------------------------------------------------------------------------
## Mirror app (legacy)
> **Note:** Mirror support has ended. You can still use the legacy app, but we no longer develop or maintain it, and it may become less reliable over time as Sketch, macOS, and iOS continue to change. If your designs are in a Sketch Workspace, you may want to try our [new iOS app](https://apps.apple.com/app/sketch-view-and-mirror/id1609224699).
## Why can’t I connect Mirror to the Mac app?
If you’re having issues with your connection, here are a few things to check:
### Common solutions
1. Check that both devices, iOS phone and macOS computer, are connected to the same WiFi network.
1. Quit both Sketch and Mirror. Then relaunch Sketch first and Mirror second.
1. Restart your Mac and repeat step 2.
1. Check that you’re running the latest versions of the Mac app and Mirror. If you updated Sketch or Mirror, quit, relaunch and retry.
Alternatively, you can connect to Mirror through USB; you’ll need a USB cable that matches your device and computer physical ports or an adapter.
### If the problem persists
If you can’t connect to Mirror over your WiFi or USB, here are some steps you can take:
* Make sure that it’s not a local network issue; for example, your device may be connected to a router but without access to the internet. To do so, you can reboot your network devices (routers and/or APs) and your iOS and macOS devices.
* Ensure your network is not configured to block devices from connecting to each other. This is usually the case with public WiFi.
* Check that you are running the latest versions of iOS, macOS, the Mac app, and Mirror.
* If you’re still seeing the same issue after updating your software and devices, see the question below.
After you’ve tried all of the above solutions but still can’t connect, some settings in your network may need some adjustment.
If you’re in an office environment, you may need to ask your network administrator to check the following:
1. Is Bonjour (sometimes called MDNS or Multi Cast) enabled on your router and Mac?
1. Is UPnP enabled on your router?
1. Is TCP Port **58005** allowing a connection between your iOS device and Mac?
1. Is your Mac blocking or disabling your Websocket connection? Mirror needs this to work.
## How can I make sure my firewall allows Mirror traffic?
If you’re using a corporate or campus network, they are usually firewalled, and the required traffic for Mirror is sometimes blocked by default. You may have to ask your network admin to add a rule to allow **_sketchmirror._tcp.local** traffic in the network.
## Can I change the connection port for Mirror?
By default, Mirror connects to a random port each time you open it, but you can change this to a fixed port with the following Terminal command. To set the connection port to port 8080, for example, type the following in Terminal:
```
defaults write com.bohemiancoding.sketch4.plist mirrorWebPort -int 8080
```
## Why can’t I see any Artboards visible in Mirror when connected via USB?
If you’re having trouble connecting to Mirror via USB, here are some steps you should take:
* Update to the latest version of Mirror on your iOS device.
* If, after updating, the Artboards are still not visible in Mirror, you may need to delete the app from your iOS device and install it again.
* If the problem persists after reinstalling Mirror, a restart of your iOS device can help. Follow [these instructions](https://support.apple.com/en-us/HT201559) on the Apple Support website. This action won’t delete any information or apps on your device.
## Is Mirror available for Android?
There is no official Android version of Mirror, but other people have built apps for Android that work well with our Mac app such as [Crystal](https://play.google.com/store/apps/details?id=com.smithyproductions.crystal).
Crystal works very similarly to Mirror: You need to put your Mac and your Android device on the same WiFi network, launch Sketch, launch Crystal and accept the notification in the Mac app to connect to Crystal.
Once you’ve accepted the connection request, you’ll need to select an Artboard for it to display in the Crystal app.
--------------------------------------------------------------------------------
title: "Partners"
description: "The Sketch Partner program allows third-party companies to pay for Sketch on behalf of their clients."
url: "https://www.sketch.com/support/partners/"
--------------------------------------------------------------------------------
## Partners
The Sketch Partner program allows third-party companies to pay for Sketch on behalf of their clients.
--------------------------------------------------------------------------------
title: "I need a quote, where can I request one?"
last_modified: "2026-04-08"
url: "https://www.sketch.com/support/partners/how-to-request-a-quote/"
--------------------------------------------------------------------------------
## I need a quote, where can I request one?
## Quote for a subscription (Workspace)
For a [Standard or Professional subscription](/pricing/) quote, please [get in touch with our support team](/support/contact/), and provide us with the information below:
1. Plan of choice (Standard or Professional)
1. Number of Editors
1. End-user company name
1. Contact first and last name
1. Contact email address
Once we receive the above details, our team will share a quote with you.
**Note:** Only Yearly billing cycles are available.
## Quote for a Mac-only license
If you need a quote for a new Mac-only license, please [get in touch with our support team](/support/contact/), and provide us with the information below:
1. Mac-only license key (applicable for renewals and seat add-ons)
1. Number of seats
1. End-user company name
1. Contact first and last name
1. Contact email address
**Note:** Mac-only licenses do not have access to web app features. If your clients want all Sketch features, they should switch to a subscription (Workspace).
--------------------------------------------------------------------------------
title: "How can I see my current client’s accounts?"
last_modified: "2025-07-04"
url: "https://www.sketch.com/support/partners/how-to-get-a-list-of-clients-accounts/"
--------------------------------------------------------------------------------
## How can I see my current client’s accounts?
If you’re a Partner, you can manage multiple clients’ Workspaces from your [partner page](/signin/). To view or access a specific Workspace, just [sign in](/signin/) and use the dropdown in the top-left corner to select its name. Once you select a Workspace, all the information on the page will update to reflect it.
--------------------------------------------------------------------------------
title: "How do I transfer Sketch to the customer?"
last_modified: "2023-04-28"
url: "https://www.sketch.com/support/partners/how-to-transfer-sketch-to-a-customer/"
--------------------------------------------------------------------------------
## How do I transfer Sketch to the customer?
Partners don’t need to transfer Sketch. The client will have complete management control over existing users in their Workspace. You, as a partner, will be in charge of all payments and purchases they want to make.
--------------------------------------------------------------------------------
title: "What are the available payment methods?"
last_modified: "2025-07-04"
url: "https://www.sketch.com/support/partners/payment-methods/"
--------------------------------------------------------------------------------
## What are the available payment methods?
Once you become an official Partner of Sketch and the agreement is approved, our invoice-based payment method will be made available to you. Payments can then be completed with a bank transfer or credit card.
For Mac-only licenses, the standard payment method will be a credit card.
--------------------------------------------------------------------------------
title: "How can I remove myself from a Workspace?"
last_modified: "2022-11-07"
url: "https://www.sketch.com/support/partners/how-to-remove-yourself-from-a-workspace/"
--------------------------------------------------------------------------------
## How can I remove myself from a Workspace?
Admin users are responsible for the Partner management within their Workspace. An Admin can always add a Sketch Partner; however, to remove a Partner, [please get in touch with us](/support/contact/) for assistance with this action.
If the Partner is removed, it will be mandatory that the Admin provides a valid payment method, given that a Workspace can’t exist without a valid payment method.
--------------------------------------------------------------------------------
title: "My client cannot use a network connection at all times. Can they still use Sketch?"
last_modified: "2024-11-28"
url: "https://www.sketch.com/support/partners/offline/"
--------------------------------------------------------------------------------
## My client cannot use a network connection at all times. Can they still use Sketch?
While you can use the Mac app offline with either a subscription or a Mac-only license, we’ll occasionally ask you to sign in or re-register your license, which requires an internet connection. Please contact partners@sketch.com and we’ll help you find the best option for your customer.
--------------------------------------------------------------------------------
title: "What product does my customer have?"
last_modified: "2023-08-23"
url: "https://www.sketch.com/support/partners/account-models/"
--------------------------------------------------------------------------------
## What product does my customer have?
We currently have two different account models: **Mac-only licenses** and **subscriptions (Workspaces)**.
Mac-only licenses are the ones that have a license key number, starting with SK3. Subscriptions (Workspaces) are registered using the customer’s email address and password combination.
The customer can check what account model they’re under by accessing the following menu on the Mac app: Sketch > Settings > Account:
* If it shows **Unlink device**, they are registered with a Mac-only license;
* In case it appears **Sign out**, that means they’re registered using a Workspace subscription.
--------------------------------------------------------------------------------
title: "Where can I find the billing cycle for an account?"
last_modified: "2023-08-23"
url: "https://www.sketch.com/support/partners/billing/"
--------------------------------------------------------------------------------
## Where can I find the billing cycle for an account?
As a Partner, you will be able to view and manage billing details in the web app using the following steps:
1. Go to [Sketch](/signin/), sign in as a Partner, and click on the **Switch Workspace** icon in the top left corner of the sidebar — Make sure the correct Workspace name is showing.
1. Click on the **Settings** icon at the top of the left sidebar, then click on **Billing**.
--------------------------------------------------------------------------------
title: "Non-partners"
description: "If you are a Reseller and are managing your client’s Mac-only license accounts, here are some common questions you might be wondering about."
last_modified: "2026-04-08"
url: "https://www.sketch.com/support/partners/non-partners/"
--------------------------------------------------------------------------------
## Non-partners
If you are a Reseller and are managing your client’s Mac-only license accounts, here are some common questions you might be wondering about:
## I need a quote for a Mac-only license, how can I get one?
If you need a quote for a new Mac-only license, please [get in touch with our support team](/support/contact/), and provide us with the information below:
1. Mac-only license key (applicable for renewals and seat add-ons)
1. Number of seats
1. End-user company name
1. Contact first and last name
1. Contact email address
**Note:** Mac-only licenses do not have access to web app features. If your clients want all Sketch features, they should switch to a subscription (Workspace).
## How do I purchase a Mac-only license?
### New Mac-only license purchase
1. Go to the [Pricing page](/pricing/), and click on the **Buy now** button under the **Mac-only license** banner.
1. Click on the checkbox next to **I am purchasing on behalf of someone else** and:
1. Enter the end user email address on the **License owner email address** field;
1. Enter your email address in the **Buyer email address** field;
1. Select **Continue**.
1. Under **Licenses**, change the quantity to the number of seats your customer requires (one seat per device).
1. Add your shipping information and credit card details to complete the checkout.
**Note**: To ensure you receive the license details and receipt, please make sure to enter your email address in the **Buyer email address** field.
### Mac-only license renewal
1. Go to the [License Overview page](/license/), enter your customer’s license key (starting with SK3), and scroll down until you see **Manage your license**.
1. In the **Renew** section, adjust the number of seats you wish to renew using the panel on the right to view their price.
1. Once ready, click on the checkbox next to **I am purchasing on behalf of someone else** and:
1. Enter your email address in the **Buyer email address** field;
1. Click on the **Renew** button.
1. Add your shipping information and credit card details to complete the checkout.
### Mac-only license seat add-on
1. Go to the [License Overview page](/license/), enter your customer’s license key (starting with SK3), and scroll down to the **Manage Your License** section.
1. In the **Add Seats** section, adjust the number of seats you wish to add using the panel on the right to view the updated pricing.
1. Once ready, click on the checkbox next to **I am purchasing on behalf of someone else** and:
1. Enter your email address in the **Buyer email address** field;
1. Click on the **Buy extra seats** button.
1. Add your shipping information and credit card details to complete the checkout.
## How can I update the Admin email for my client’s Mac-only license?
Our support team can help you with updating the Admin email. Please [get in touch with us](/support/contact/) with the following information:
1. The email associated with the account you need to update.
1. The new email address where the License Key will be linked.
1. The invoice of the initial purchase (code starting with ‘BOH’ or 12-digit code — format: XXXXXXXX-XXXX)
1. The last four digits of the Credit Card you used for the initial purchase.
## My client would like a Standard or Professional plan subscription, how can I purchase one?
If the client would like to purchase a Standard or Professional plan subscription, please contact us directly at mail@sketch.com.