You can align layers using the six alignment buttons in the top row of the Design tab in the Inspector.

From left to right: align left, align to horizontal center, align right, align top, align to vertical center, align bottom (v91 August 2022)
The following video shows the basic alignment options for a single layer on an Artboard. You won’t be able to use the alignment tools if you have selected a single layer outside of an Artboard.
The effects of aligning a single layer on an Artboard in the Mac app (v91 August 2022).
Hovering over any of the alignment buttons previews how your selected layers will align. This can be particularly useful if you have selected multiple layers.
Layers will always align to their parent. An example of a parent is an Artboard containing a single layer - in this case, the Artboard is the parent. However, if you have an Artboard with a group that contains the layer you want to align, the group is the parent.
In the example below, the Artboard is the parent of all of the layers within it, so selecting the green circle and aligning it to the top left will align it to the top left of the Artboard.

A layer will left align to the edge of its parent Artboard (v91 August 2022
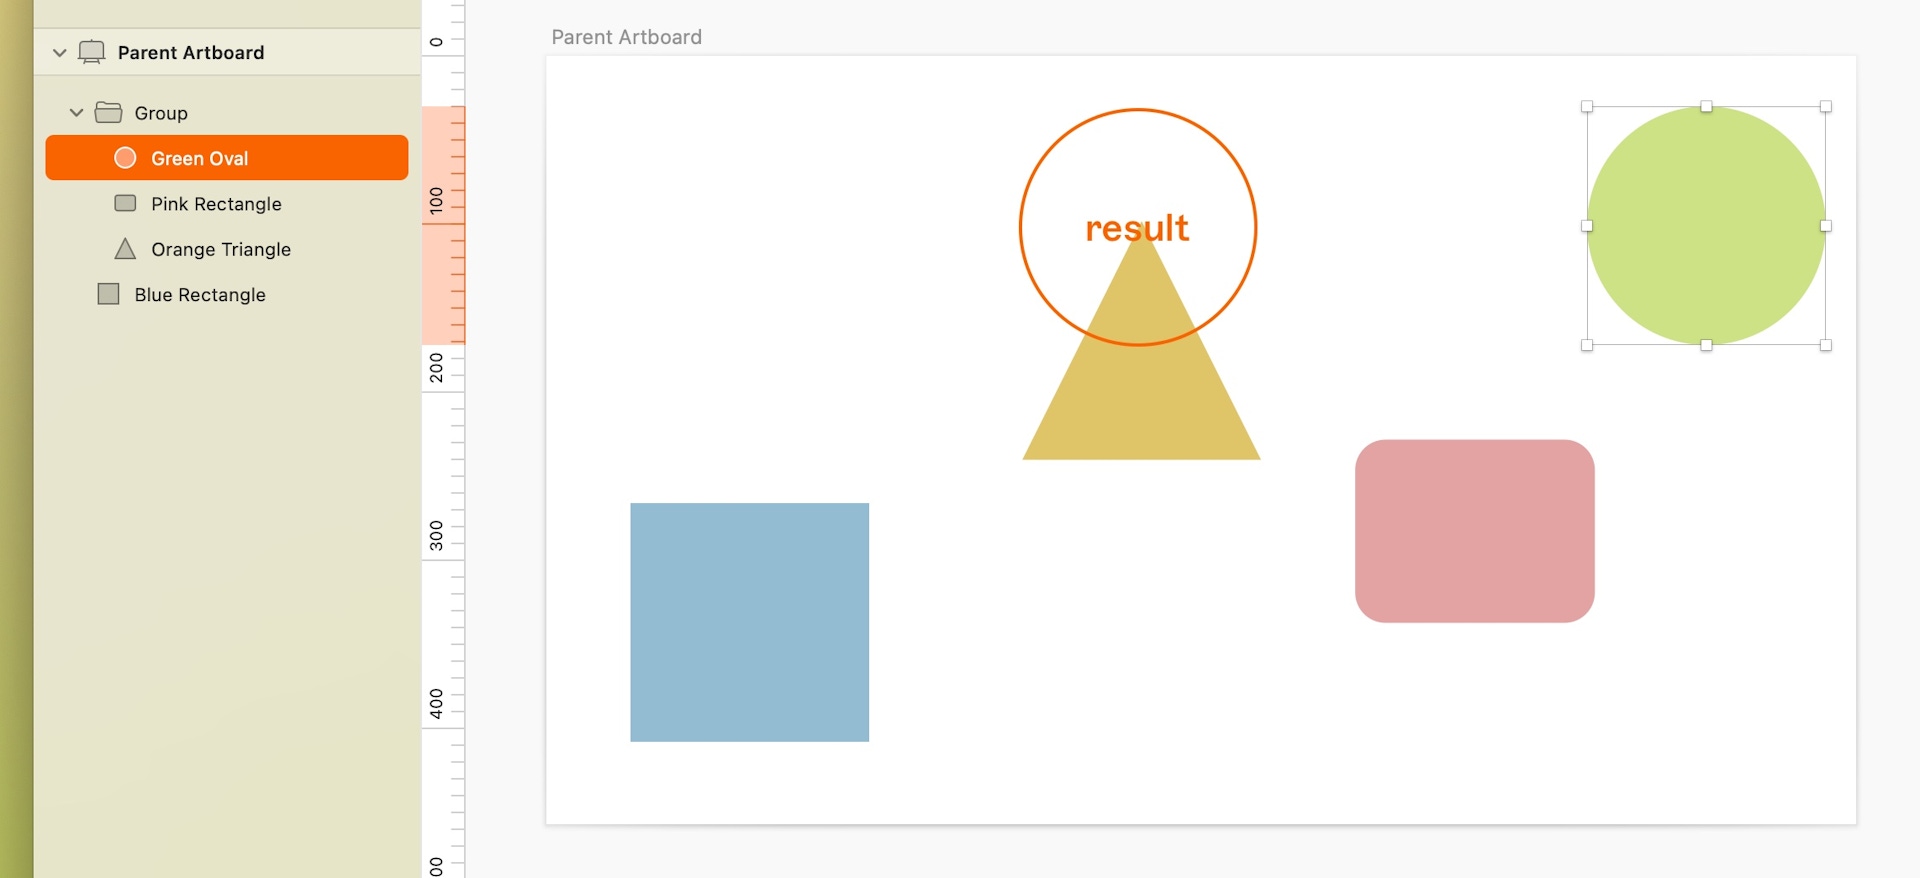
In this next example, the green circle, pink rectangle and orange triangle are part of a group within the Artboard, so aligning the green circle will align it within the group’s bounds, rather than to the edge of the Artboard.

A single layer aligning to its parent group (v91 August 2022)
Artboards, groups and combined shapes are all parents to any layer they contain.
To align a single layer to an Artboard rather than its parent group or combined shape, select the layer and hold down ⌥ and click the alignment button you want to use.
How to align multiple layers
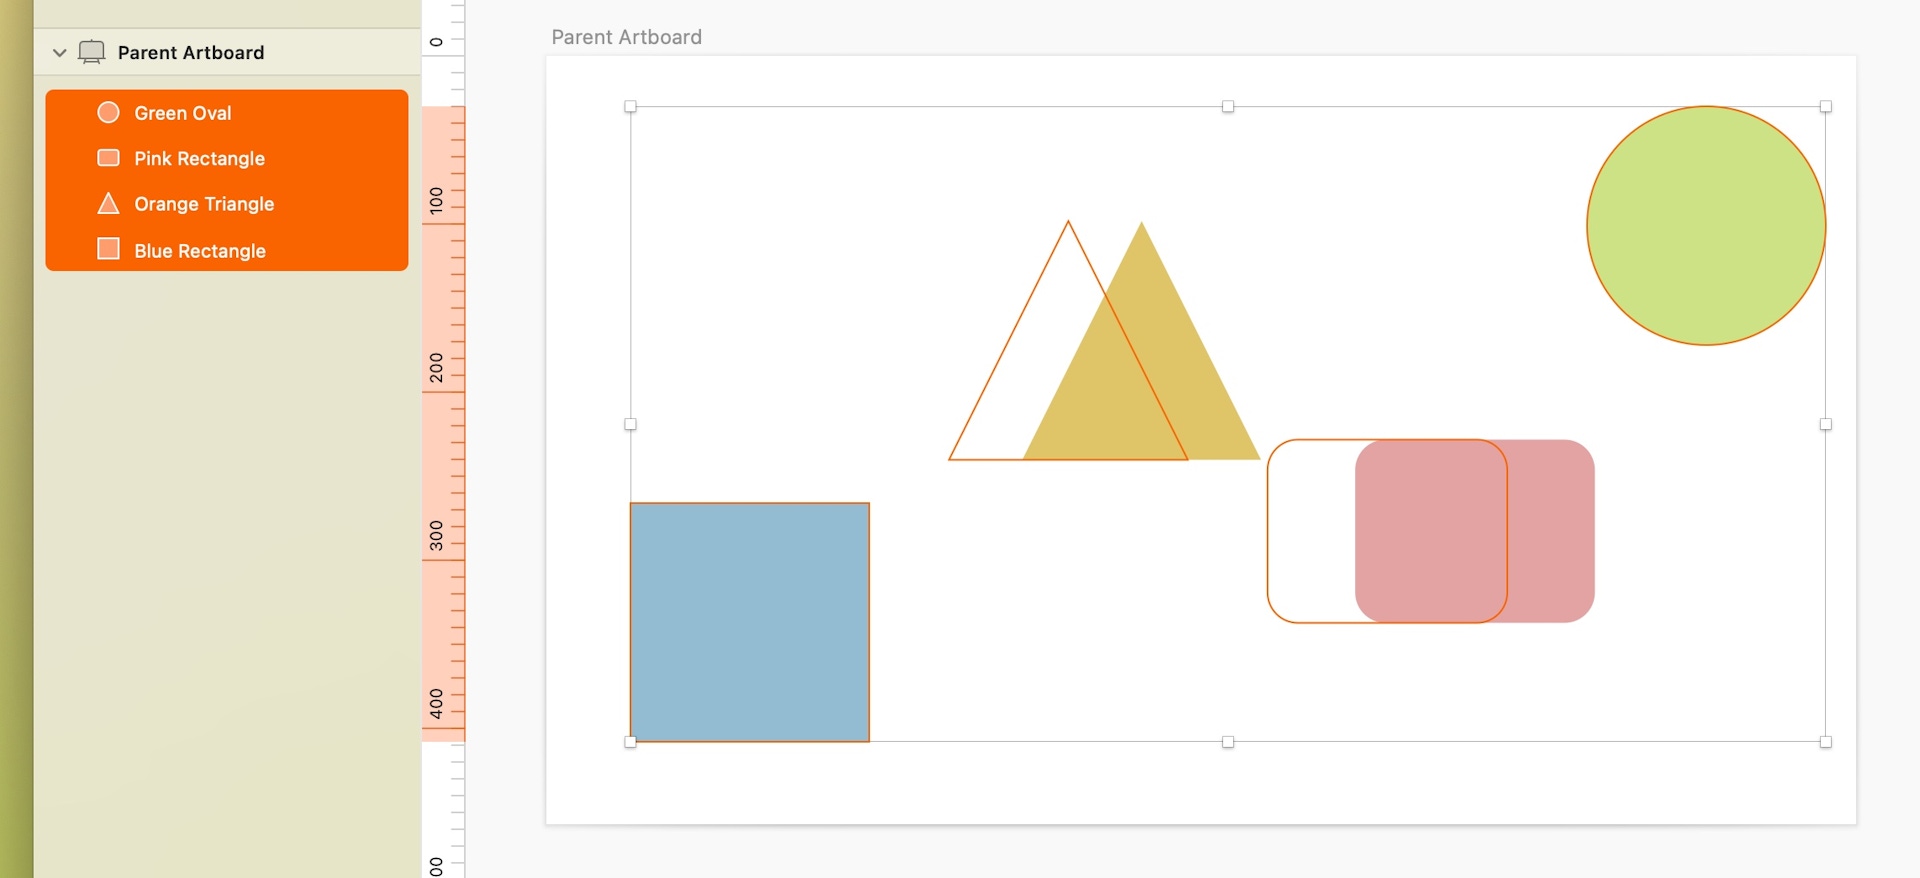
If you select two or more layers and apply alignment options, their alignment will be based on the edges of your selection’s bounds. For example, if you choose to align layers to the left, all layers will be aligned to the leftmost edge of the layer that is furthest to the left, and vice versa for right alignment. Using the Center option will calculate the central point of all the layers combined and align them along it.
In the example below, all of the layers are selected and then aligned top left. This aligns all the layers to the top and left extent of the original selection, not the Artboard:

An example of multiple aligned layers (v91 August 2022)
To override this behavior and align multiple selected layers to the Artboard they are on, select your layers, hold down ⌥ and click the alignment button you want to use.
Aligning to a reference layer
To align objects to a specific reference layer, select all the layers you want to align (including the reference layer). Click again on the reference layer — which will show thicker outline — then use the align option you want.
You can also use Artboards as a reference object.
How to use a specific layer as a reference for aligning multiple layers (v91 August 2022)
Before Version 91 you could achieve the same outcome by selecting a reference layer and locking it with ⌘⇧L. Hold ⇧ to keep your locked layer selected, and then select the objects you want to align to the locked layer.
Distributing layers horizontally and vertically
You can evenly distribute layers horizontally or vertically
using the first two buttons in the top row of the Design tab in the Inspector. To do so, select more than three layers then select a distribute layers option.
When you distribute layers and you’re using Pixel Fitting there will be occasions when Sketch cannot place the layers evenly while still adhering to the pixel level alignment. In these cases, you’ll have the choice to:
- Distribute Unevenly: maintain alignment at the pixel level, which may cause slight variations in how the layers are distributed
- Place on Sub-pixels: make the distribution exact, which means placing the layers with sub-pixel level alignment
The following example shows a preview of four horizontally distributed layers.

An example of horizontal distribution applied to multiple layers (v91 August 2022)
Using Tidy to align layers
You can quickly align multiple layers into a neat grid of evenly distributed rows and columns using the Tidy button, which you’ll find on the top right of the Inspector, in the Design tab.
Select the layers you want to align and click on the Tidy button — or first hover over the button for a preview of how the changes will look. Your grid will fill the space of your selection and Sketch will attempt to arrange layers evenly in rows and columns. Tidy works on both the horizontal and vertical axis.
If the layers are roughly in a single column or row you can also enter your preferred vertical or horizontal spacing in the fields next to the Tidy button without having to use Tidy first.
Make Grid
To make a grid, select a layer and head to Arrange > Make Grid — or drag the handle in the bottom-right corner — to edit the number of columns and rows in your grid. Use the handles to edit the spacing between layers. You can also use the controls in the Inspector to edit the number of cells and spacing in your grid.
How to make a grid from a single layer using the Make Grid option on the Arrange menu (v91 August 2022)
You can make grids out of several layers. Make sure your layers are evenly aligned, select them and drag the bottom-right handle to make your Grid.
How to make a grid from multiple layers
The Mac app will use the last layer of your selection to create the grid.
Moving multiple layers with Smart Distribute
With Smart Distribute you can quickly adjust even spacing between multiple layers, horizontally or vertically. To do this, select two or more layers, then click and drag on the handle that appears between them. If you have layers arranged in a grid, you can adjust the spacing between each layer in a horizontal row, as well as the vertical spacing between rows themselves.
Smart Distribute won’t appear if your layers aren’t evenly distributed. To fix this, you can either evenly distribute your layers manually or use the Tidy button.
Layers being selected, arranged and distributed using the Tidy and Smart Distribute features (v92 August 2022)
For very small selections, or when you’re zoomed far out from your selection, Smart Distribute handles will be hidden, making it easier to see the layers. Try zooming in if you can’t see a set of Smart Distribute layers for your selection.
From version 67 onwards, Smart Distribute and Tidy work with layer selections that are inside and outside of different groups.
Reordering layers within a Smart Distribute selection
When you’ve selected a set of layers with even spacing between them, you can click and drag on the circular handle that appears in the centre of any layer to move it within that selection. The layers around it will automatically reorder to accommodate the one you move.
Layers being swapped within a single-column Smart Distribute selection (v92 August 2022)
This also works for entire Artboards, making it handy for rearranging entire flows on the Canvas.
Reordering layers in grid-like layouts
You can reorder layers in your grid layouts without changing the number of rows or columns in your grid. Select all the layers in your grid, then drag on the circular handle that appears in the centre of any layer to swap it with another.
Swapping layers in a grid-like layout, using multi-layer selection and grouped (v92 August 2022)
When you select a single layer which is part of a group with even spacing, you can move it with the Smart Distribute controls and adjust the spacing.
Positioning layers relative to the Artboard’s edge
You can precisely position a layer relative to an Artboard’s edge by using operators in the X or Y field. Add a l, r, t, b, or c/m operator in the X or Y fields to position them at the exact number of pixels from the left, right, top, bottom, and center/middle of the Artboard they’re in.
How to position layers relative to Artboards
